Address CSO Architects 8831 Keystone Crossing, Indianapolis, IN 46240 P: (317) 848-7800
Photoshop Workflows Photoshop Setup and Visual Standards
Uptam eossum que aut que volor simentur, consed quis des venim ipienis et eatusantus se con consequ iatur? Optatur rernatus ad etur as ent ut quis quatem fugitinctur?
velesero beratiorum abo. Uptam eossum que aut que volor simentur, consed quis des venim ipienis et eatusantus se con consequ iatur?
Quia que digendi doluptatae dolorio. Agnisci ligenih iliquasped essi asseditae voluptat ut voluptiur am aut facepuda nobitas ium ut laborepuda dolore dolum sundandandi odia doluptat.
Verio consed ut aut as vendam, tem enda simoles ciatum exereruptur, sinvellab ipsam eum ra volupta ecatur, con culparciet ut esequid emquis adistem fugia es sitature quo maximol oreperupta quibusa ecaecto cus, comnis etum volori qui dus, impor a ium qui dolorit estiuntis eum num dolectur, tem doluptatur aliquae nonseri busamus as mollanisquo vel ipsam eaquid quia et lique in ne volor sinum sequam eiciis deritia
Optatur rernatus ad etur as ent ut quis quatem fugitinctur? Quia que digendi doluptatae dolorio. Agnisci ligenih iliquasped essi asseditae voluptat ut voluptiur am aut facepuda nobitas ium ut laborepuda dolore dolum sundandandi odia doluptat.
Verio consed ut aut as vendam, tem enda simoles ciatum exereruptur, sinvellab ipsam eum ra volupta ecatur, con culparciet ut esequid emquis adistem fugia es sitature quo maximol oreperupta quibusa ecaecto cus, comnis etum volori qui dus, impo.
Quia que digendi doluptatae dolorio. Agnisci ligenih iliquasped essi asseditae voluptat ut voluptiur am aut facepuda nobitas ium ut laborepuda dolore dolum sundandandi odia doluptat.
Verio consed ut aut as vendam, tem enda simoles ciatum exereruptur, sinvellab ipsam eum ra volupta

ecatur, con culparciet ut esequid
emquis adistem fugia es sitature quo maximol oreperupta quibusa ecaecto cus, comnis dolectur, tem doluptatur aliquae nonseri busamus as mollanisquo vel ipsam eaquid quia et lique
Trust in your abilities.
This is a specific text call-out, highlighting a key concept.
The following guide has been created to allow for the rapid learning and consistent application of schematic design workflow standards.
This guide contains material pertaining to Photoshop file drawing creation, print-setup standards, and more.
The following guide has been created to allow for the rapid learning and consistent application of schematic design workflow standards.
This guide contains material pertaining to CAD file drawing creation, print-setup standards, and more. Segoe SemiLight
This guide contains material pertaining to CAD file drawing creation, print-setup standards, and more. Segoe SemiLight
1 2 3
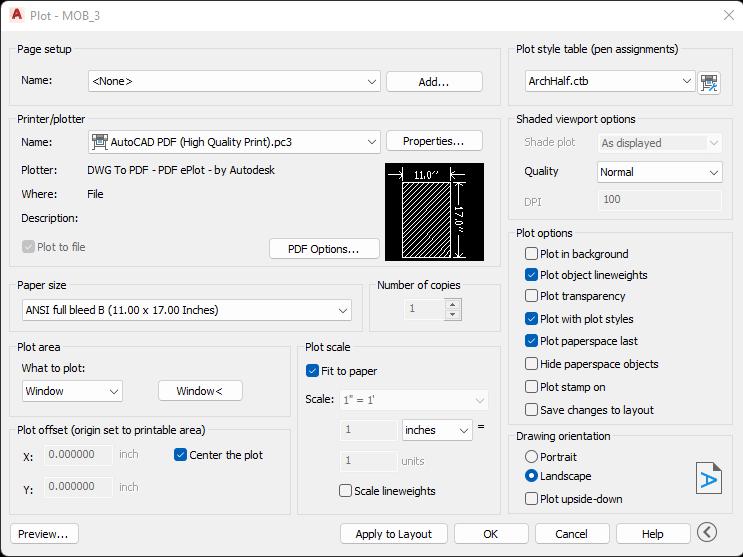
In Autocad. Select the print option and begin to complete the printing prompt.
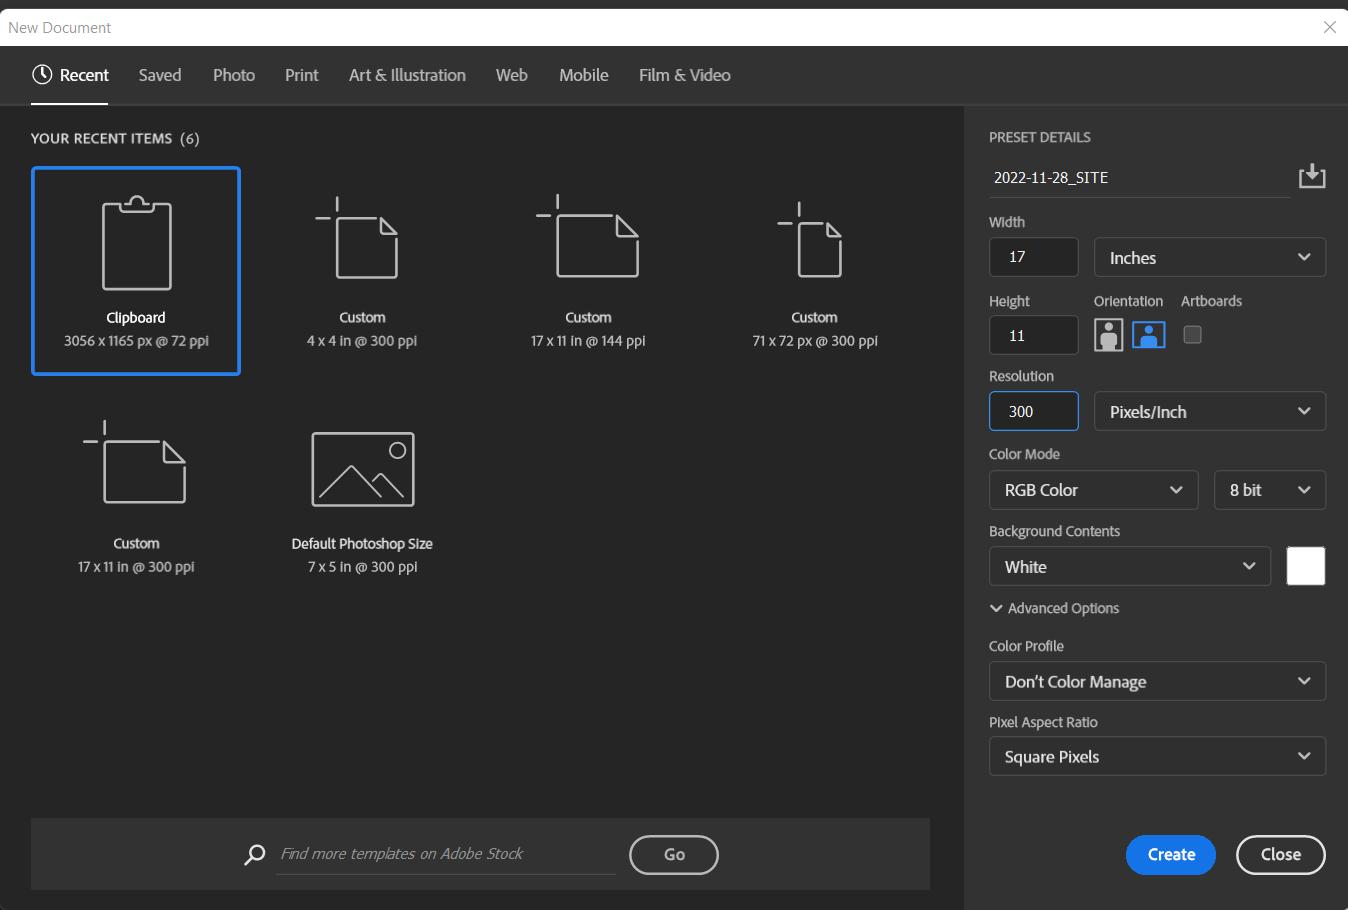
Start a new file in Photoshop and size the specificiations to your project’s needs
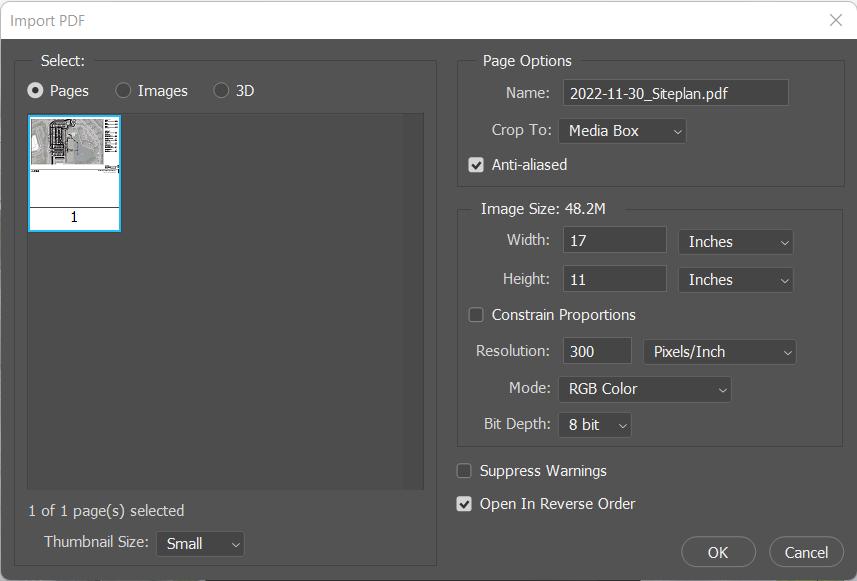
Once the file is created, Select file > Open and open/import your newly created PDF. Complete the following prompt.
Paper Dimensions
Resolution
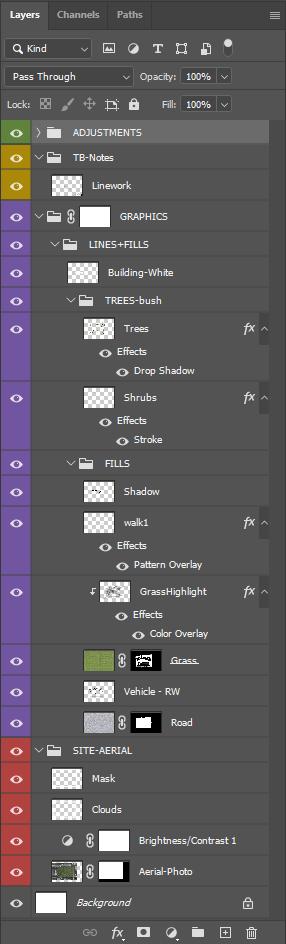
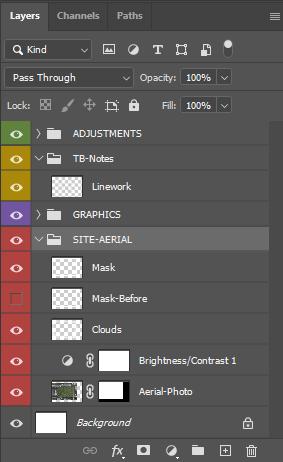
ADJUSTMENTS:
Document wide color adjustments
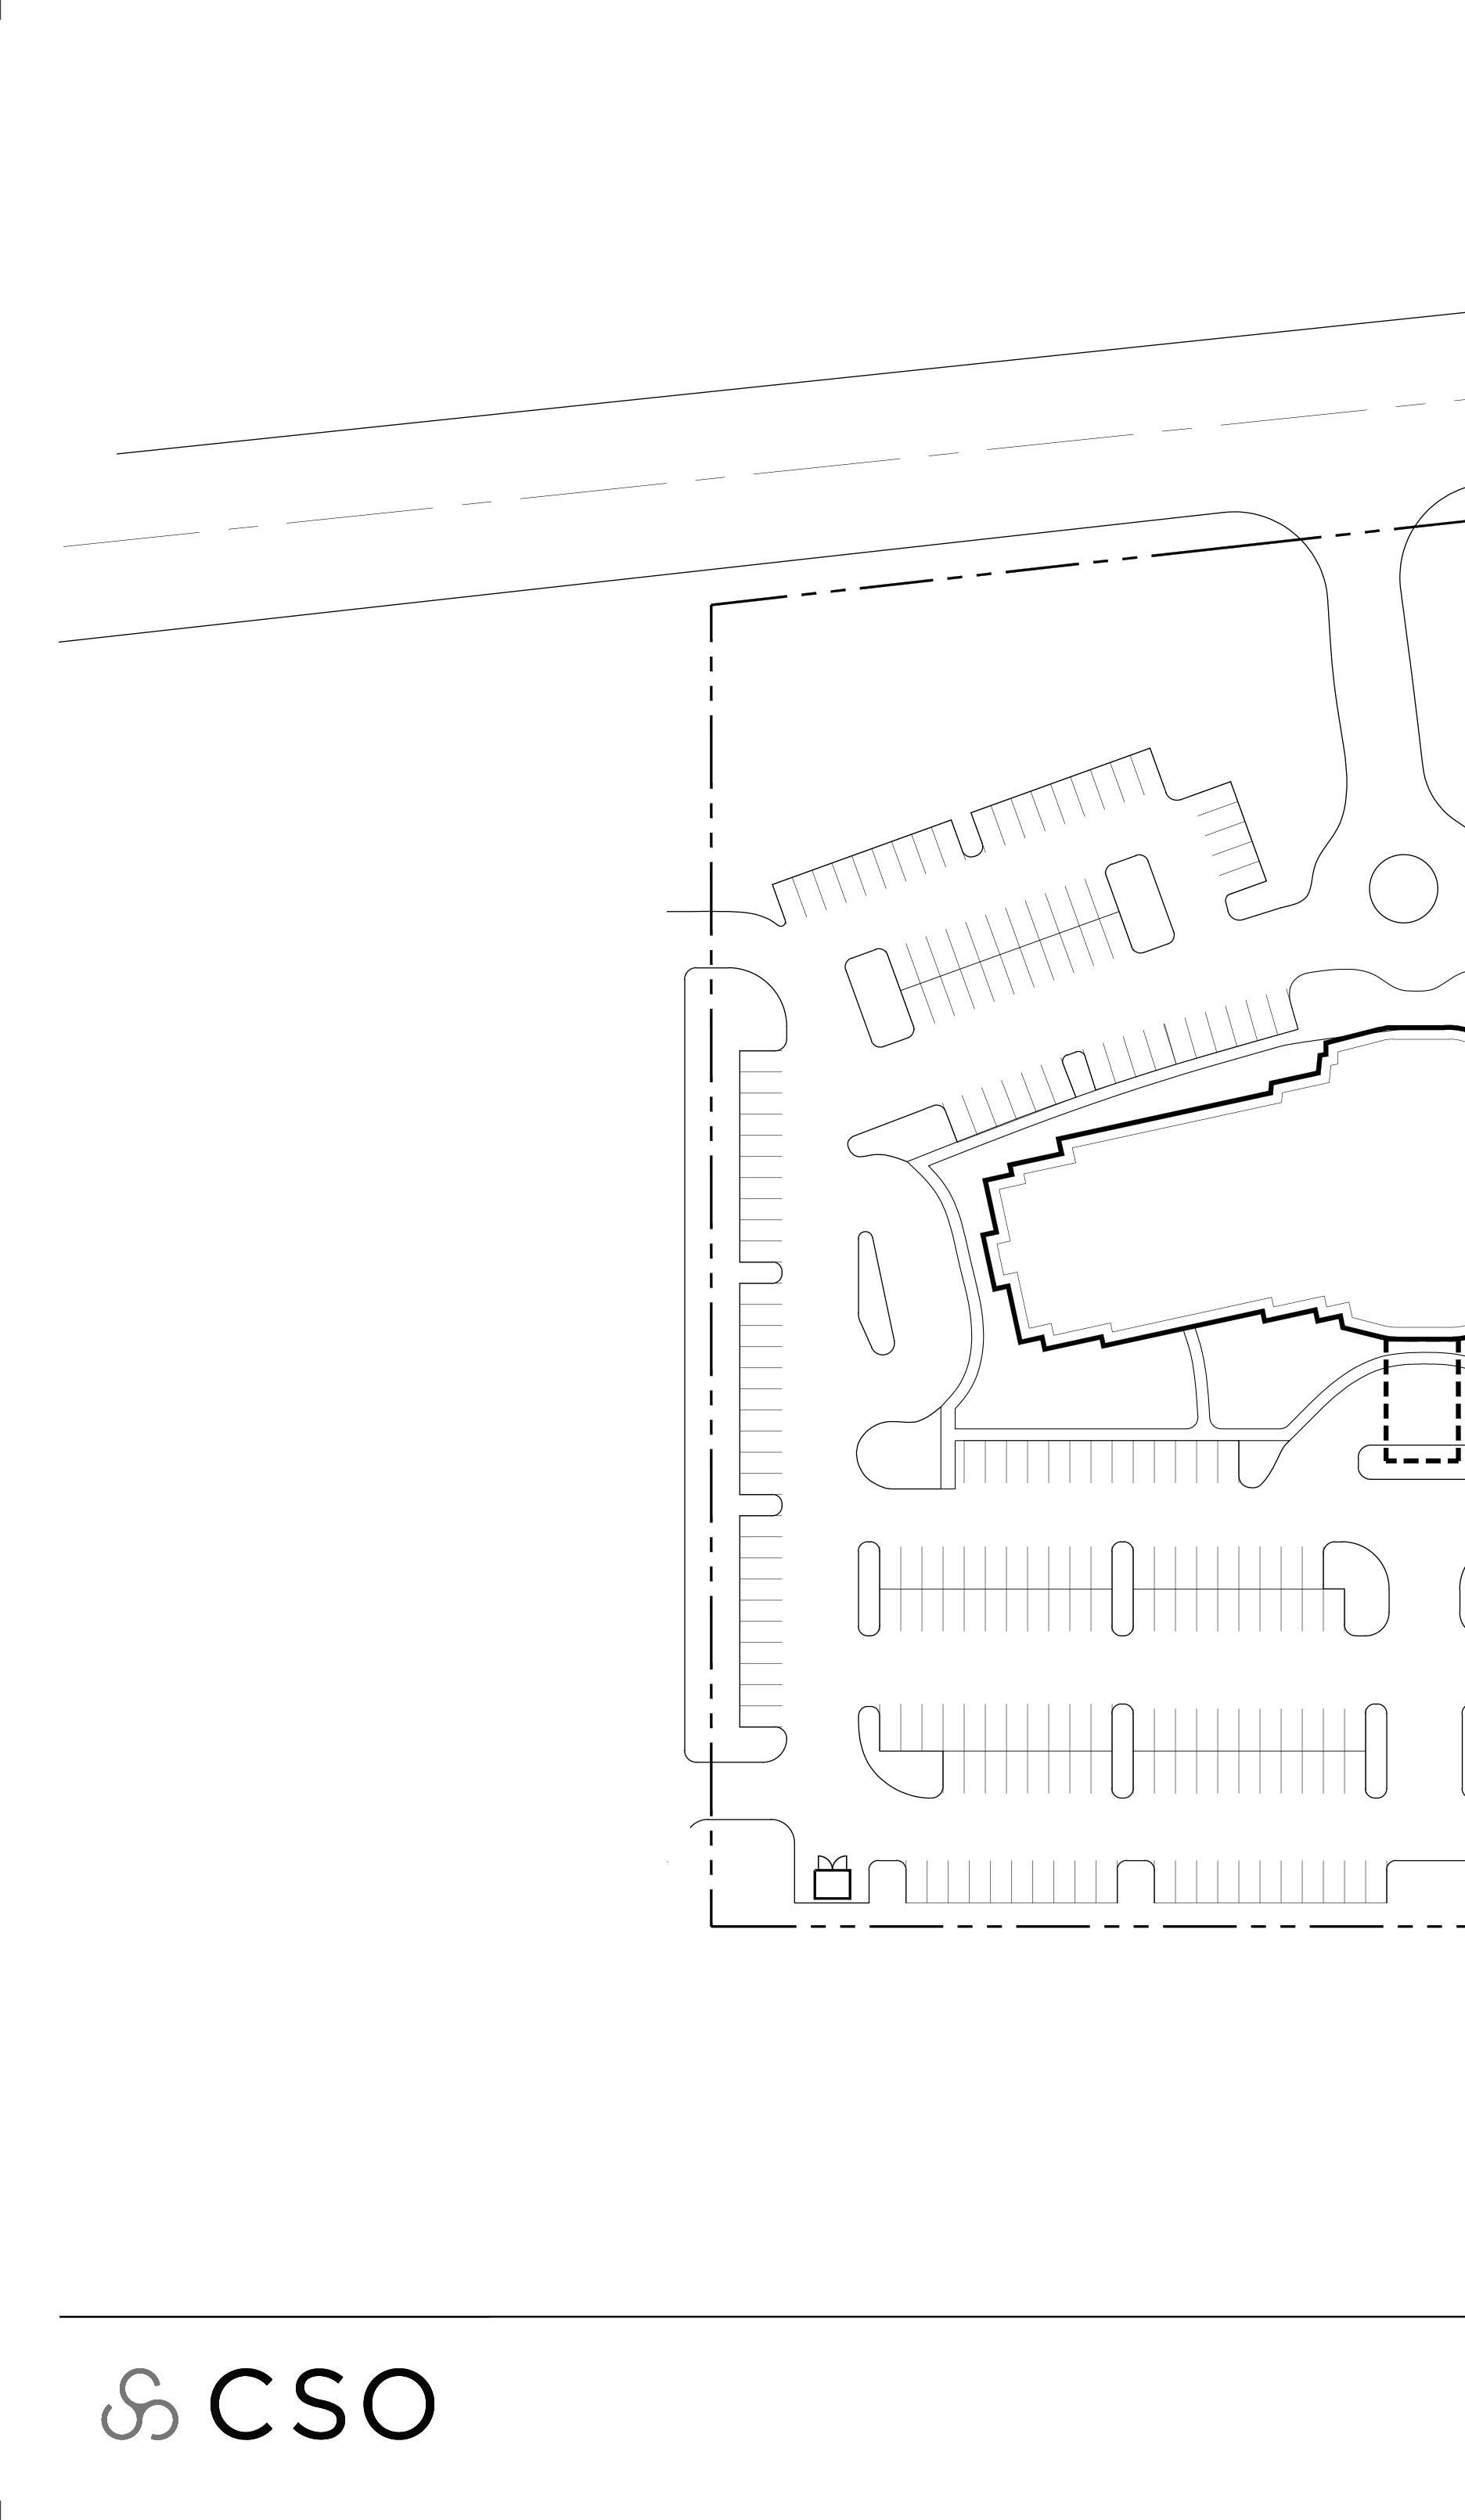
TB-Notes:
This Includes:
- Site Linework, - Titleblock, - Site Notes/Data
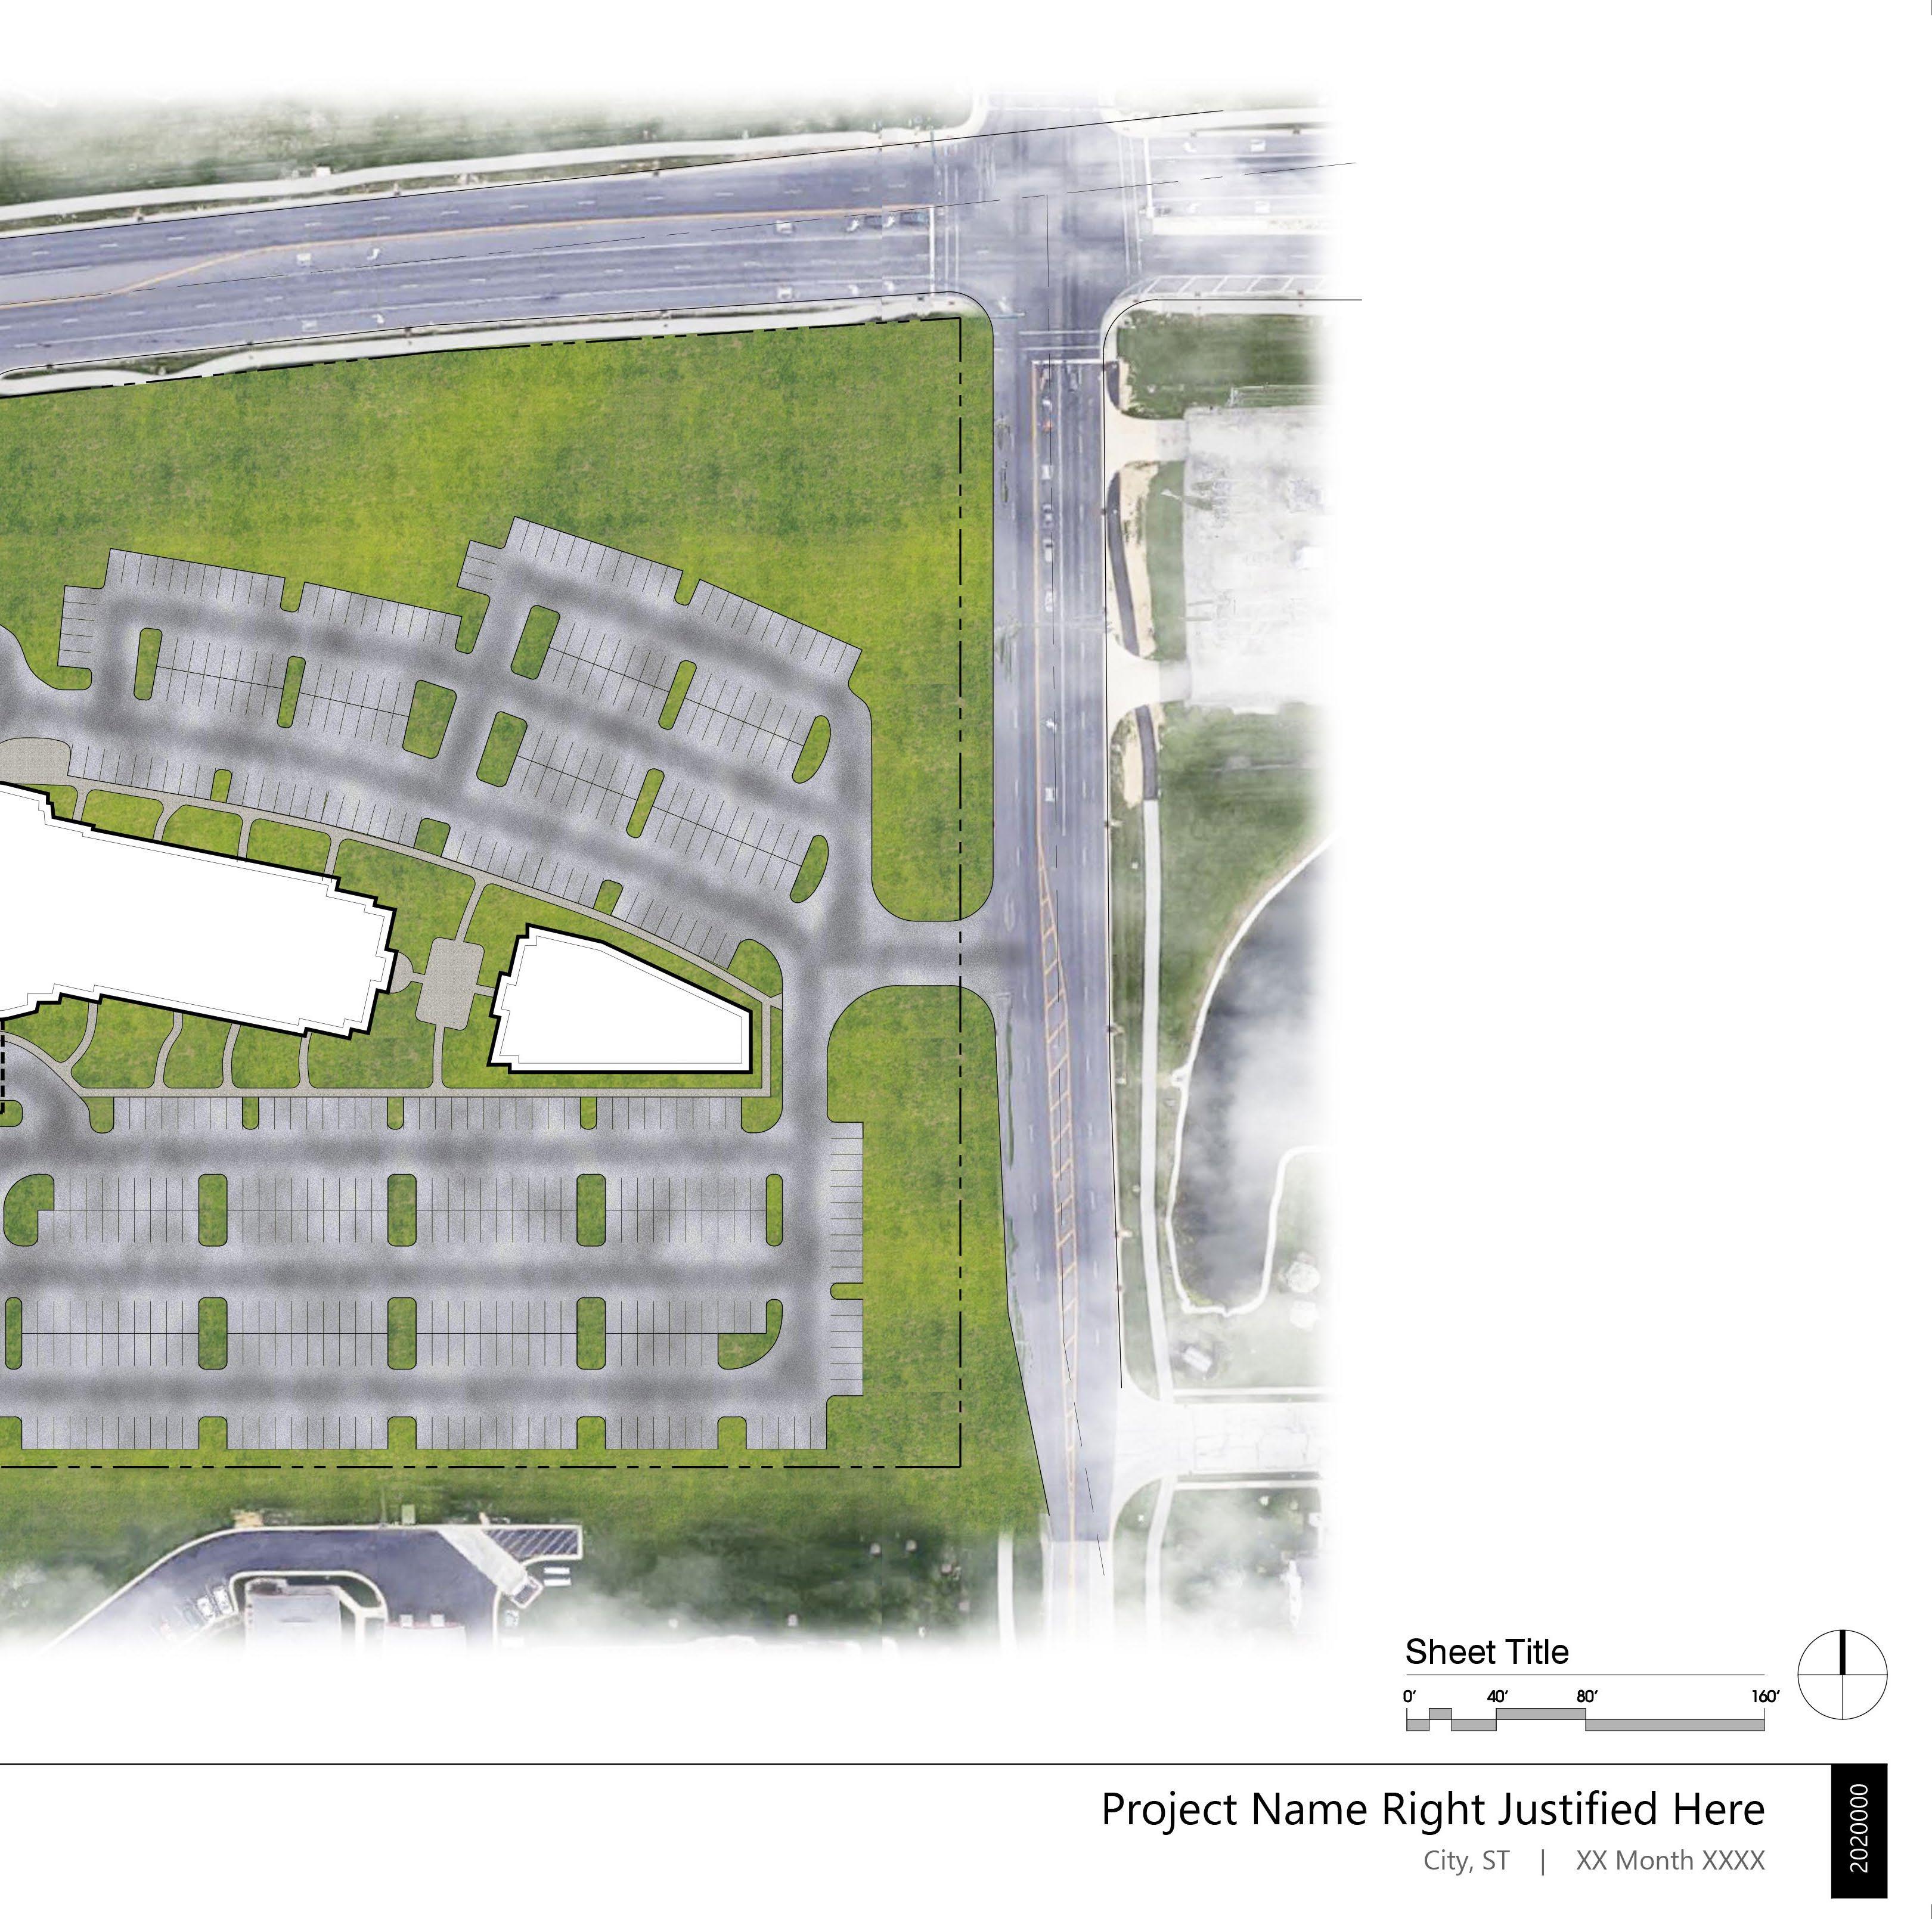
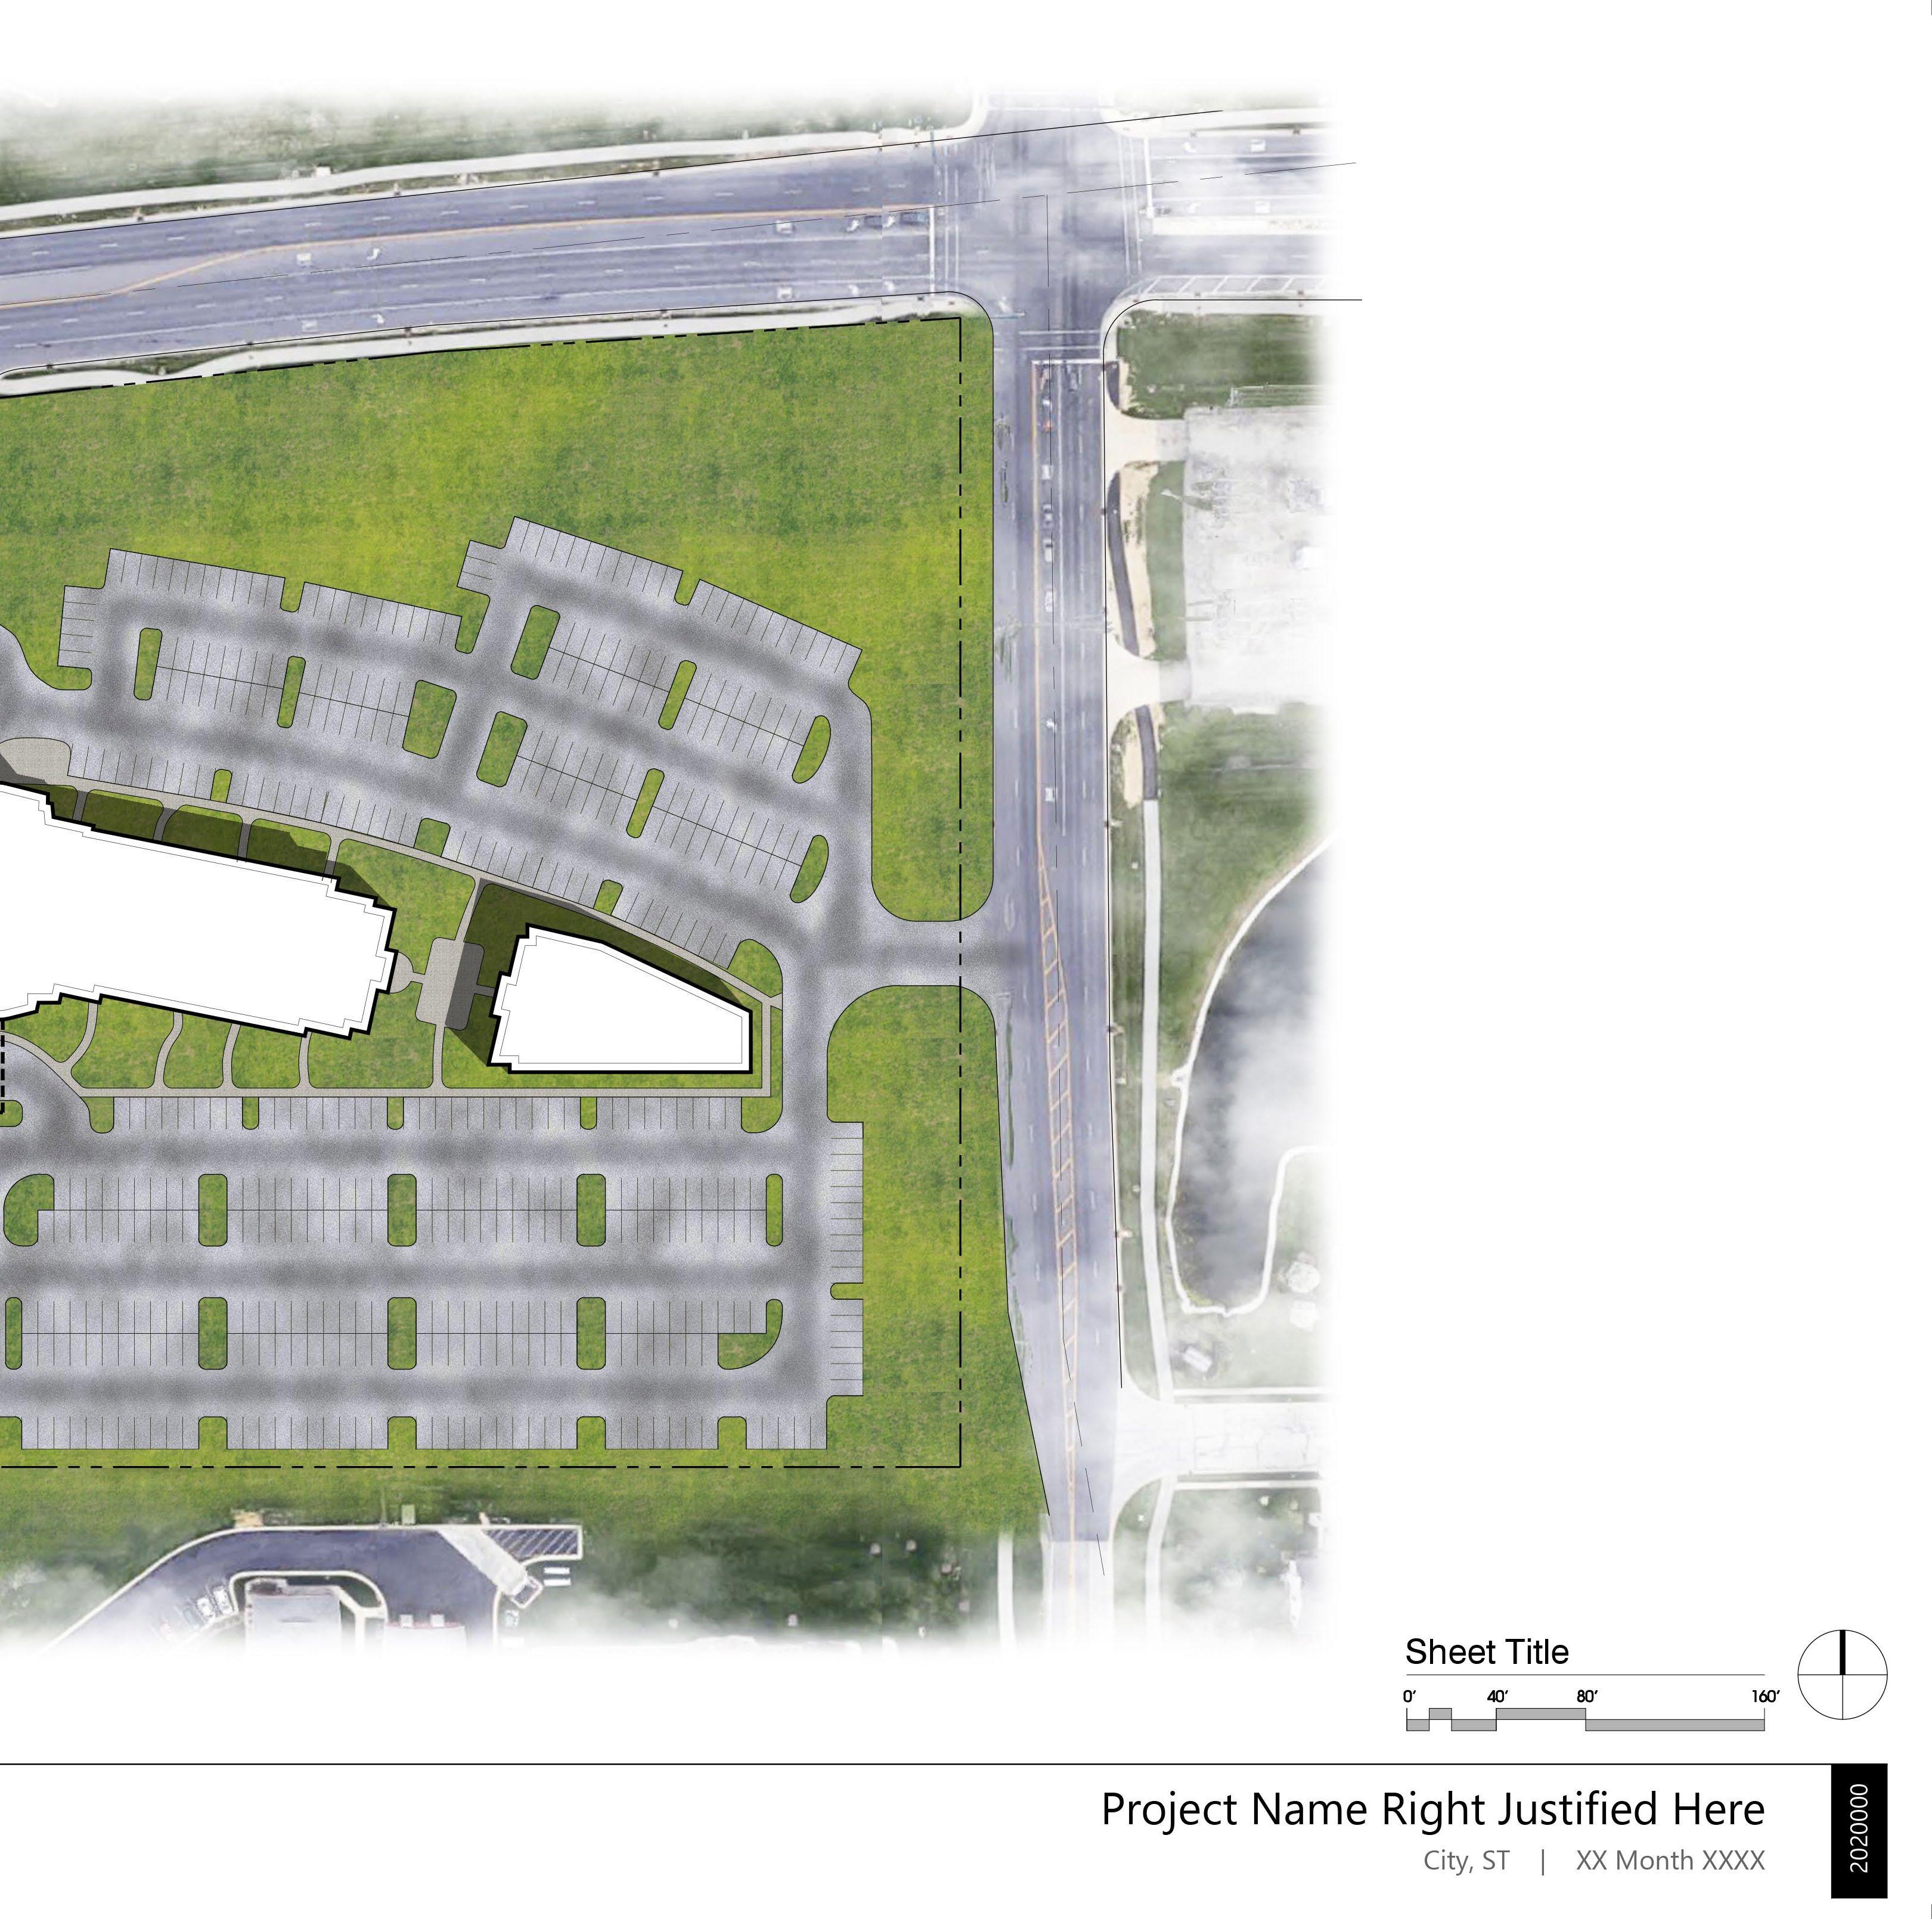
GRAPHICS:
This Includes:
- Building Fills, - Trees, Shrubs, - Building and Tree
Shadows, - Asphalt Textures, - Grass Textures,
- Side Walk Textures, - Road Wear effects
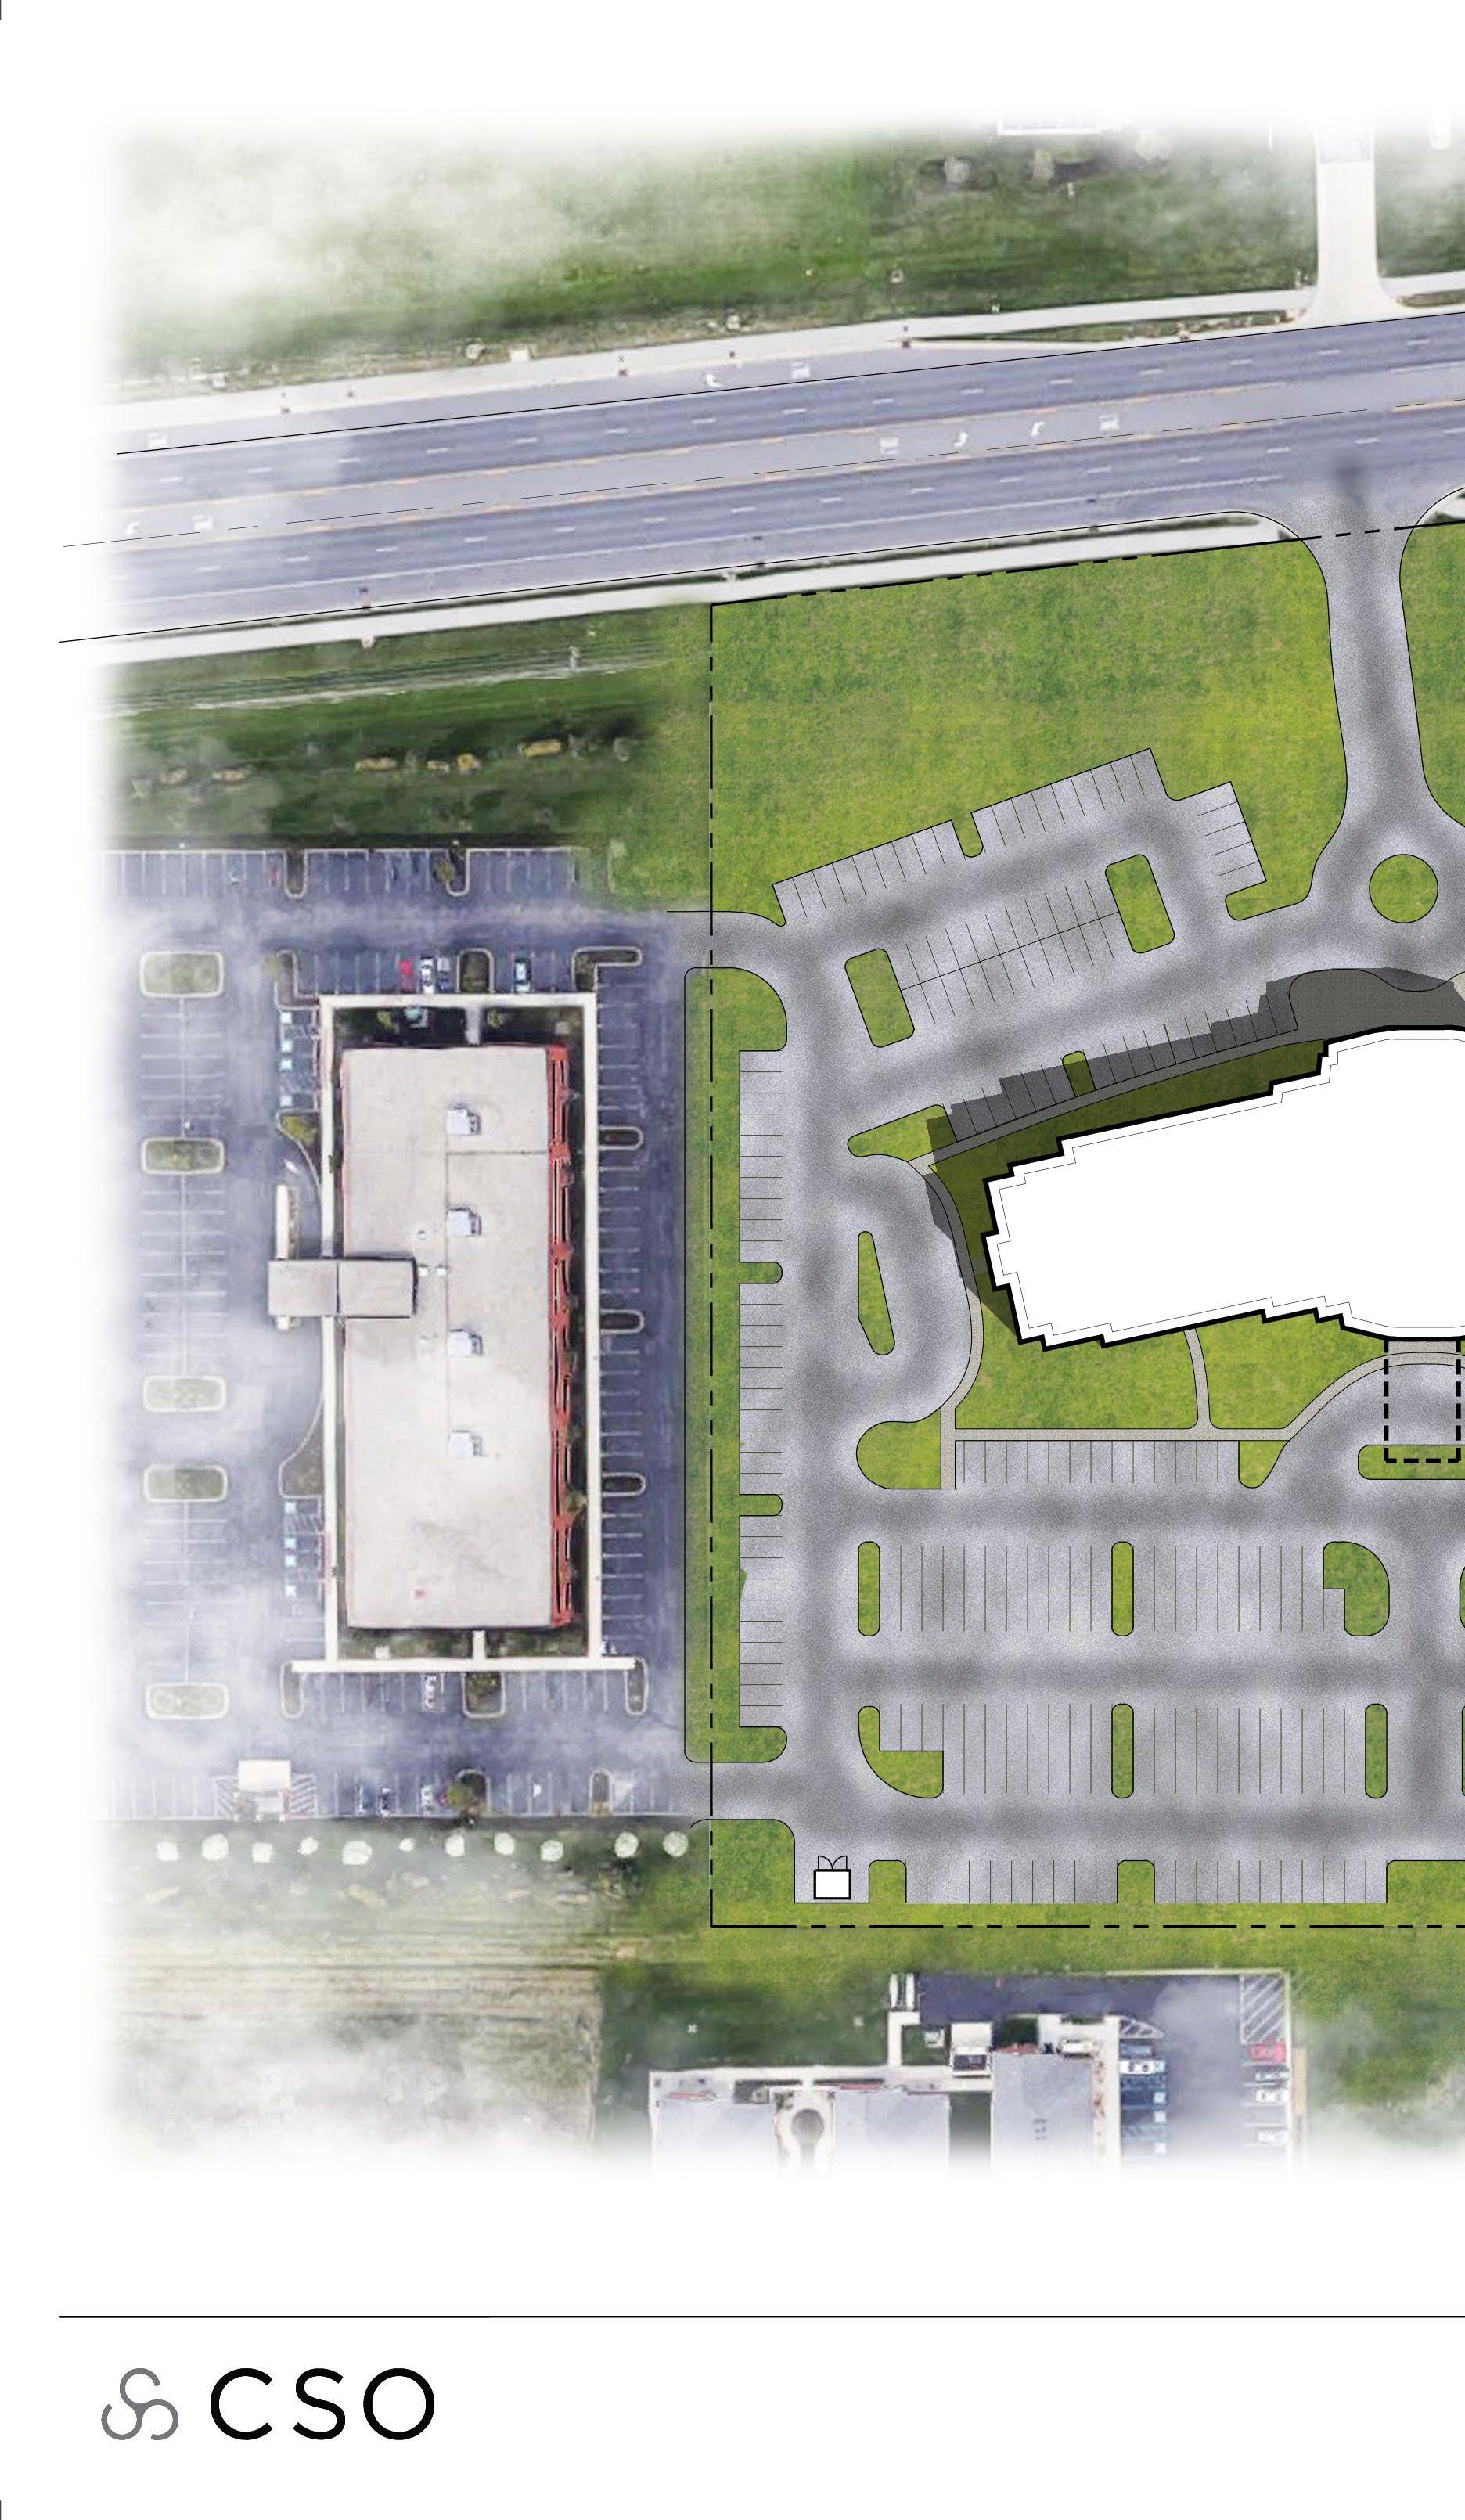
SITE-AERIAL:
This includes:
- The Site Aerial Image, - Masking Frame,
- Cloud Dither effects, - Site Image adjustments
1 2 3
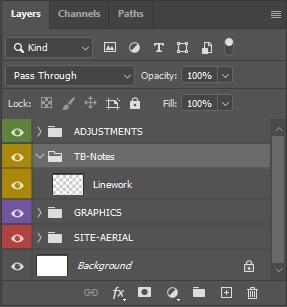
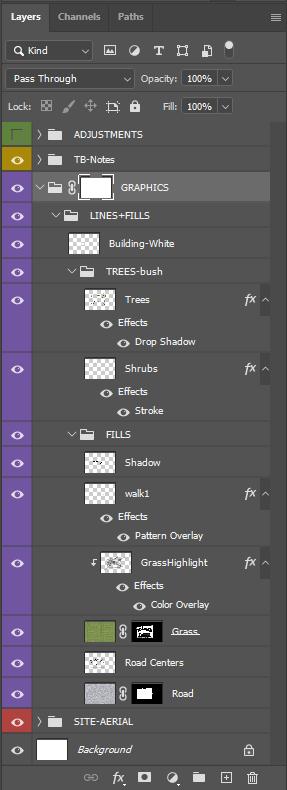
Begin by creating a series of 4 separate groups in the ‘Layers Tab’
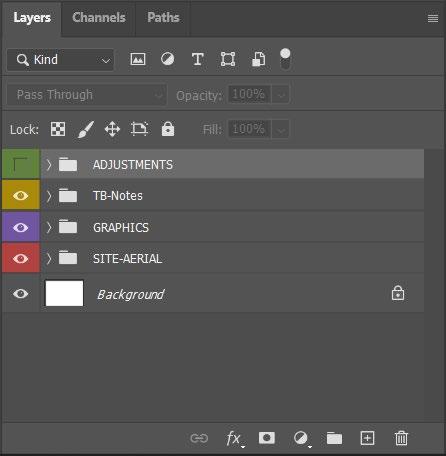
You will name the groups the following: Adjustments, TB-Notes, Graphics, and Site-Aerial. Right Click on the ‘Eye Icon’ besides each group and select the appropriate color
It is important to situate the groups in the order listed in the ‘Layer Standards’ column. Additionally, this is visualized in the graphic below.
Direct your mouse to:
• File > Open... Complete the ‘Import PDF’ prompt. This will open the PDF file into another window.
Select the Image and simply ctrl+C, Copy & ctrl+P, paste the PDF into your initial 11”x17” template file.
 Layer Opacity Slider

Direct your mouse to:
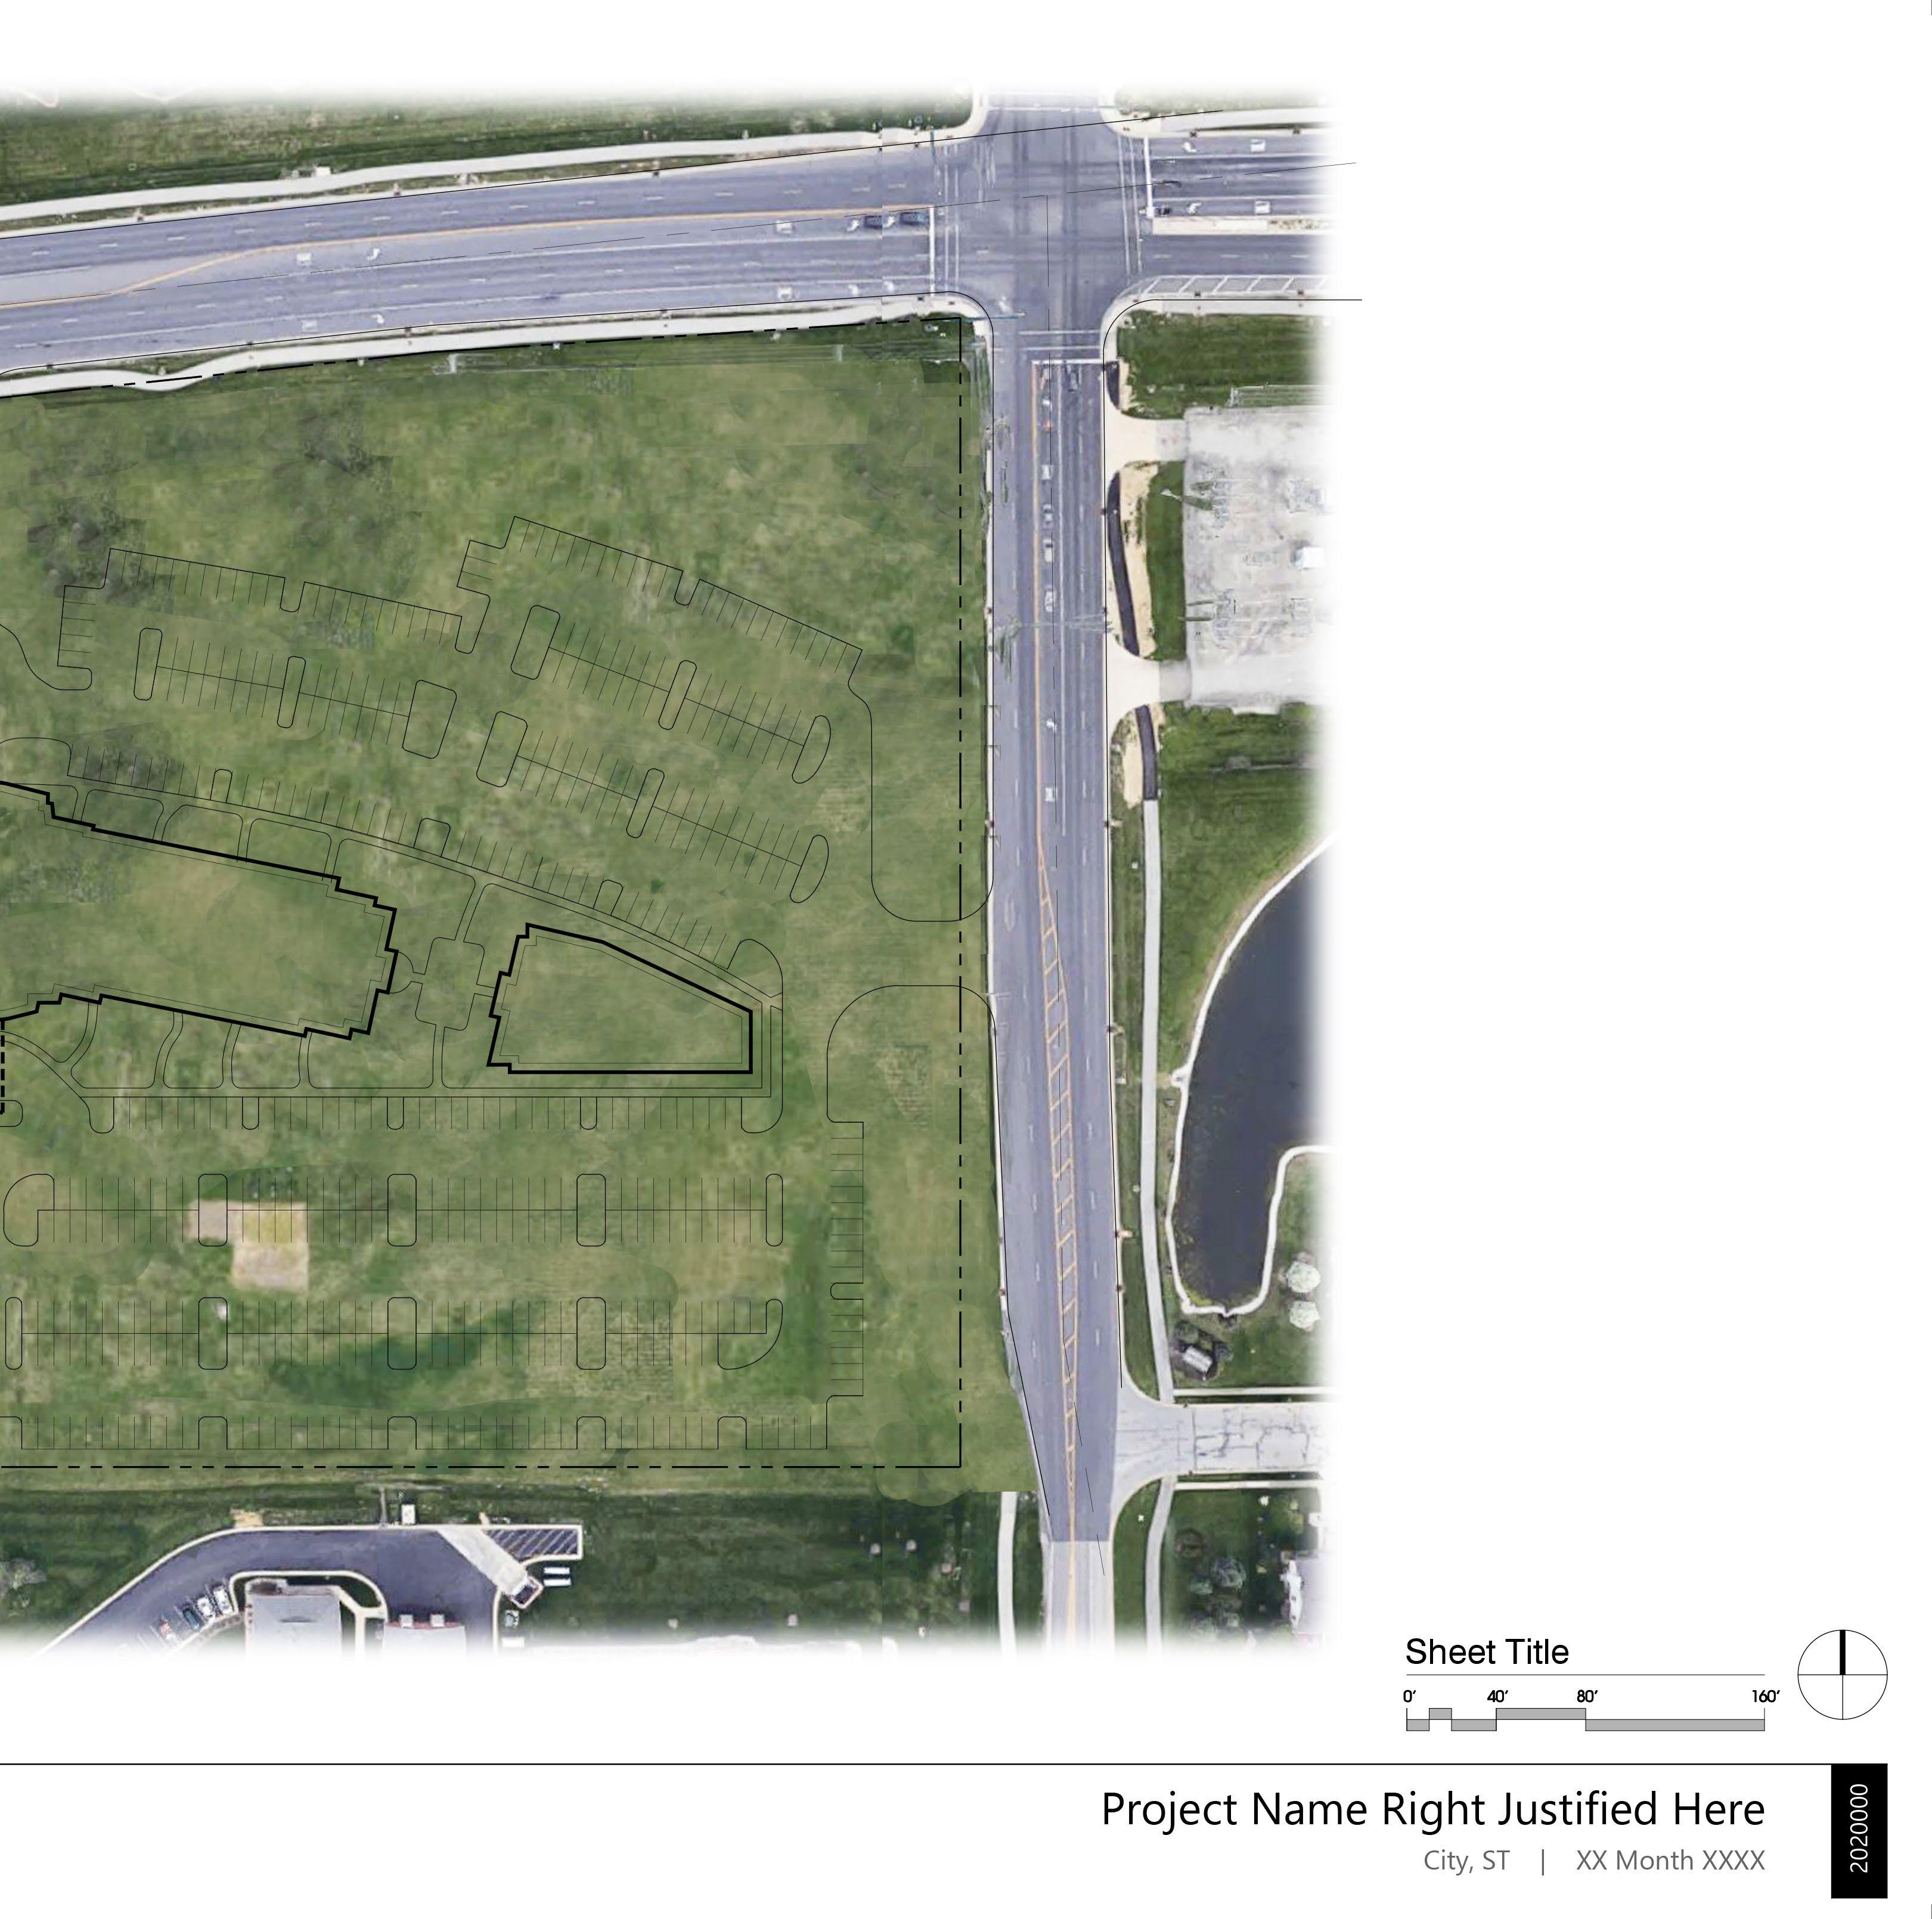
• File > Place Embedded... Locate your Aerial Photo. We will always save Google Earth Aerial Photo in this File Path:
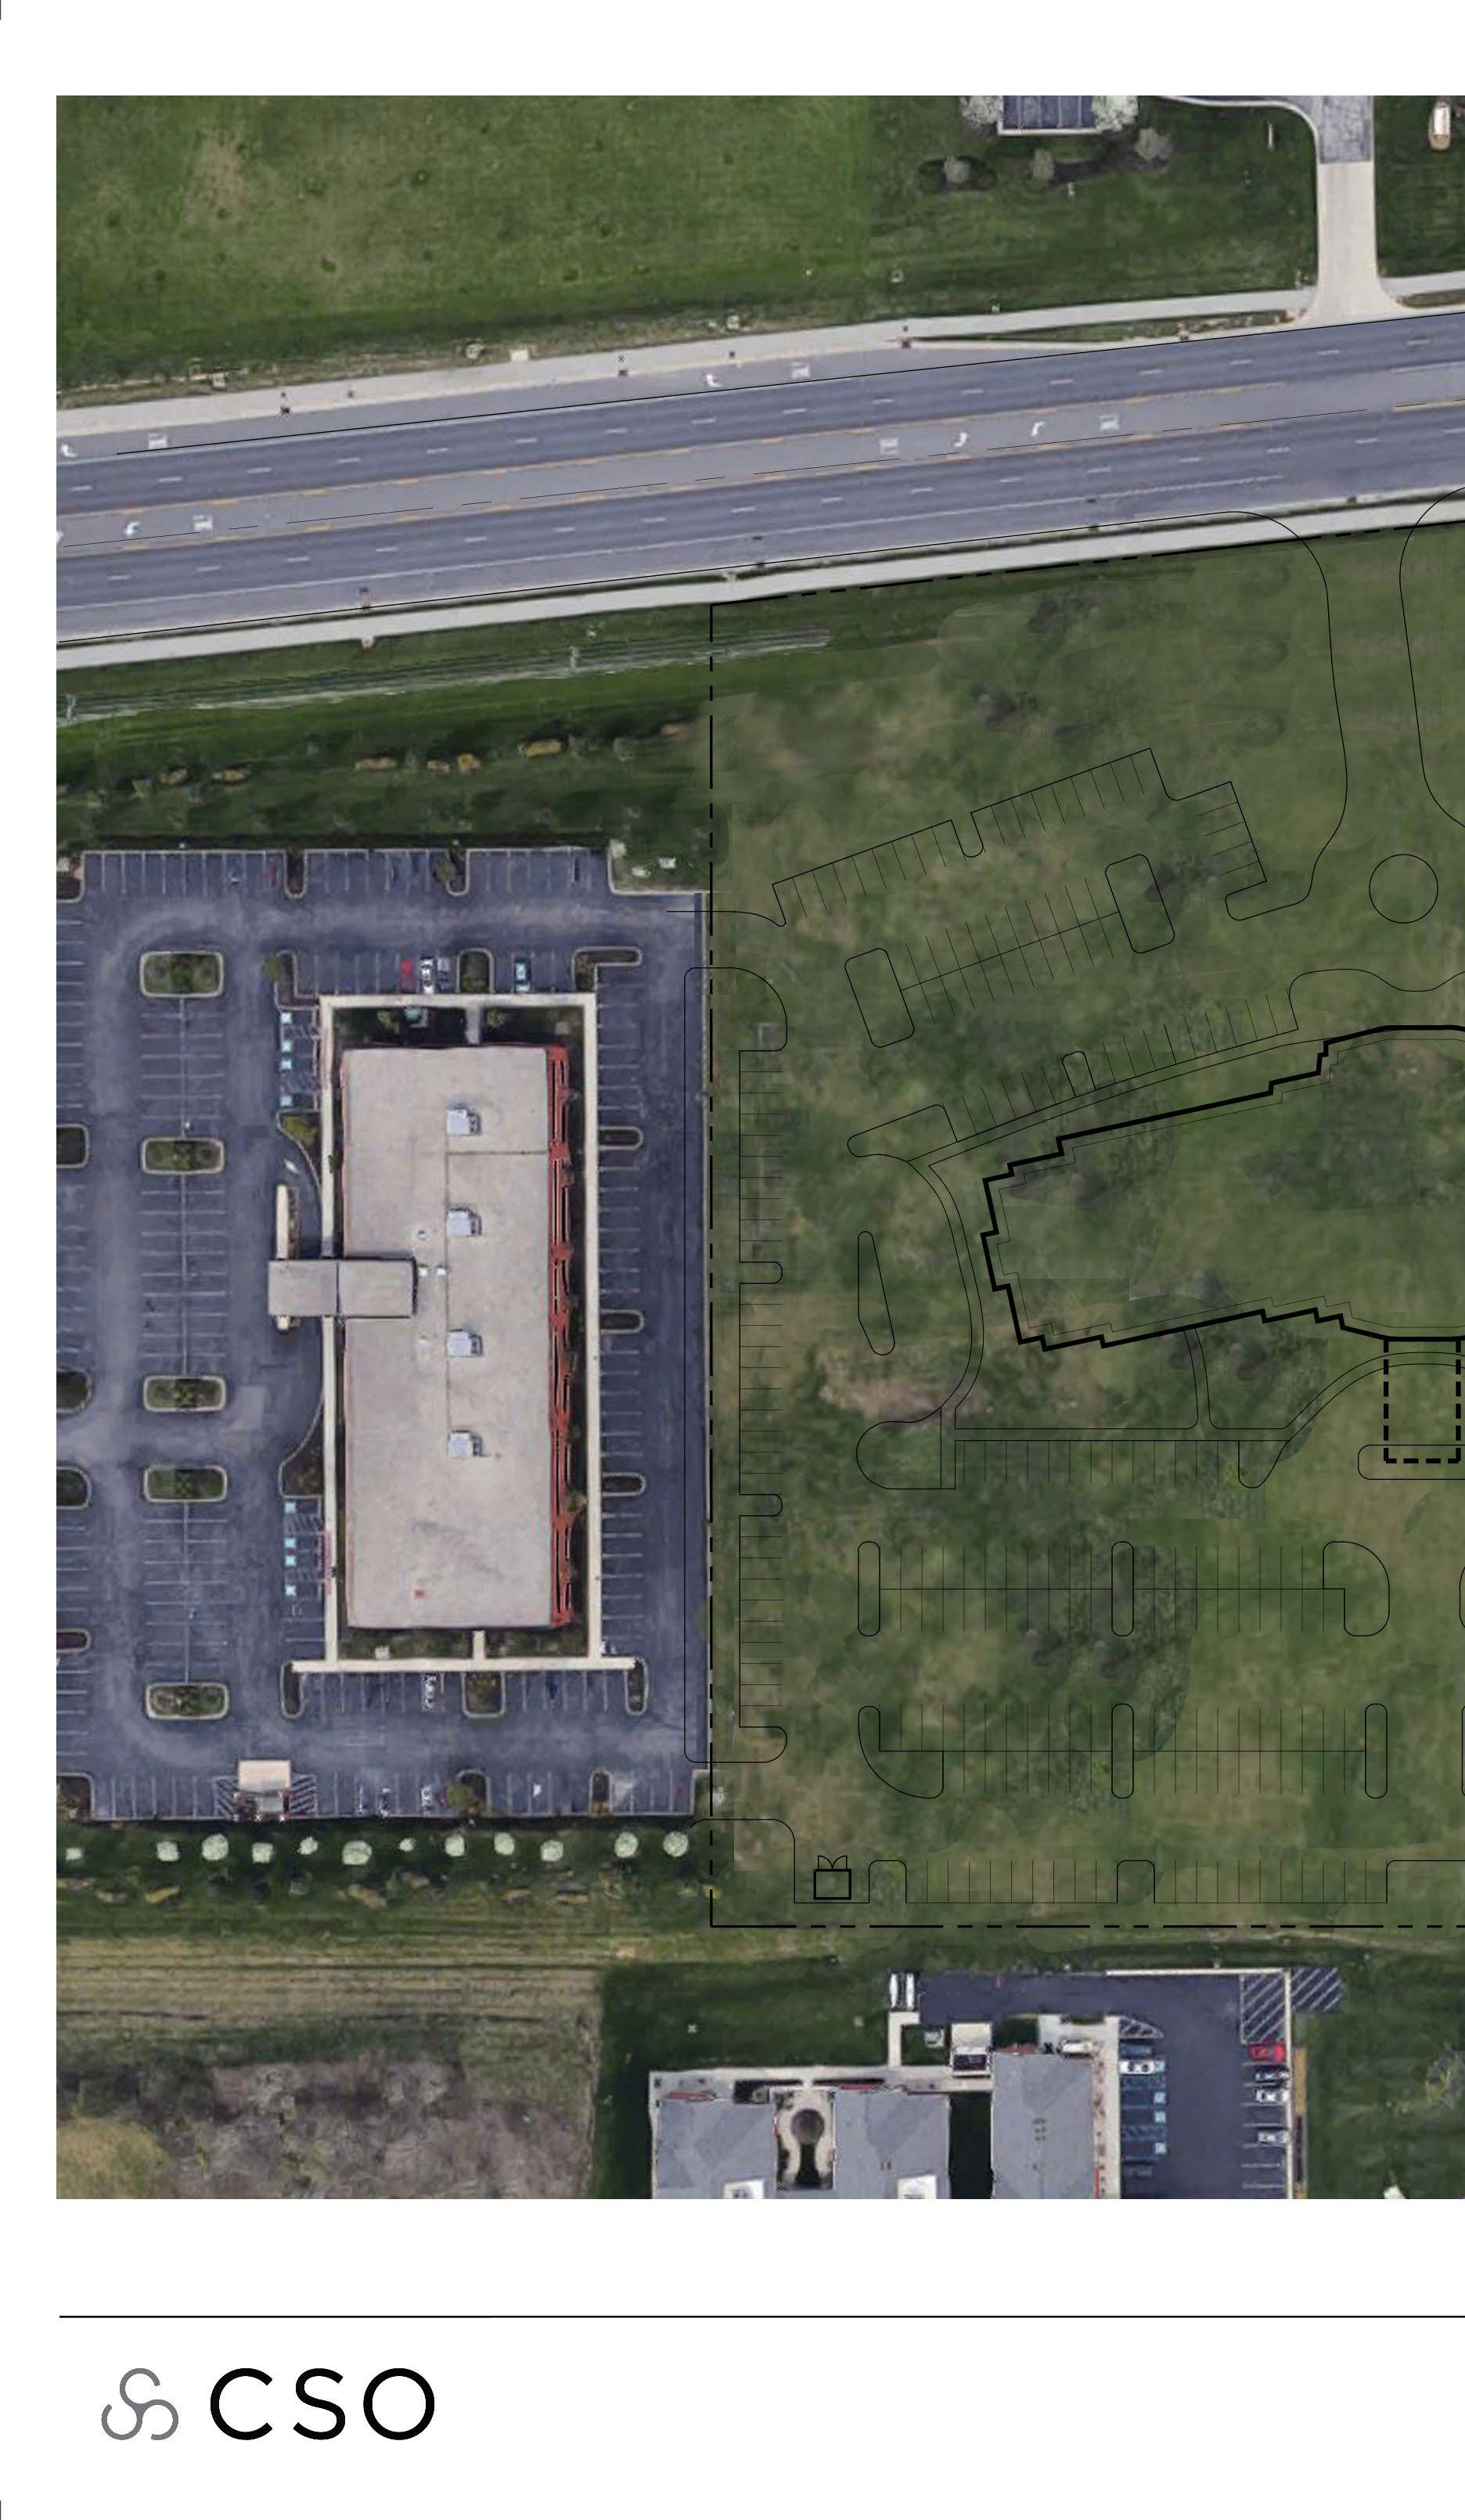
• \\csos2\Projects\”Job#”\Management\Photos\Google Aerial Add a ‘Brightness Adjustment’ layer and position it directly above your Aerial Photo Layer
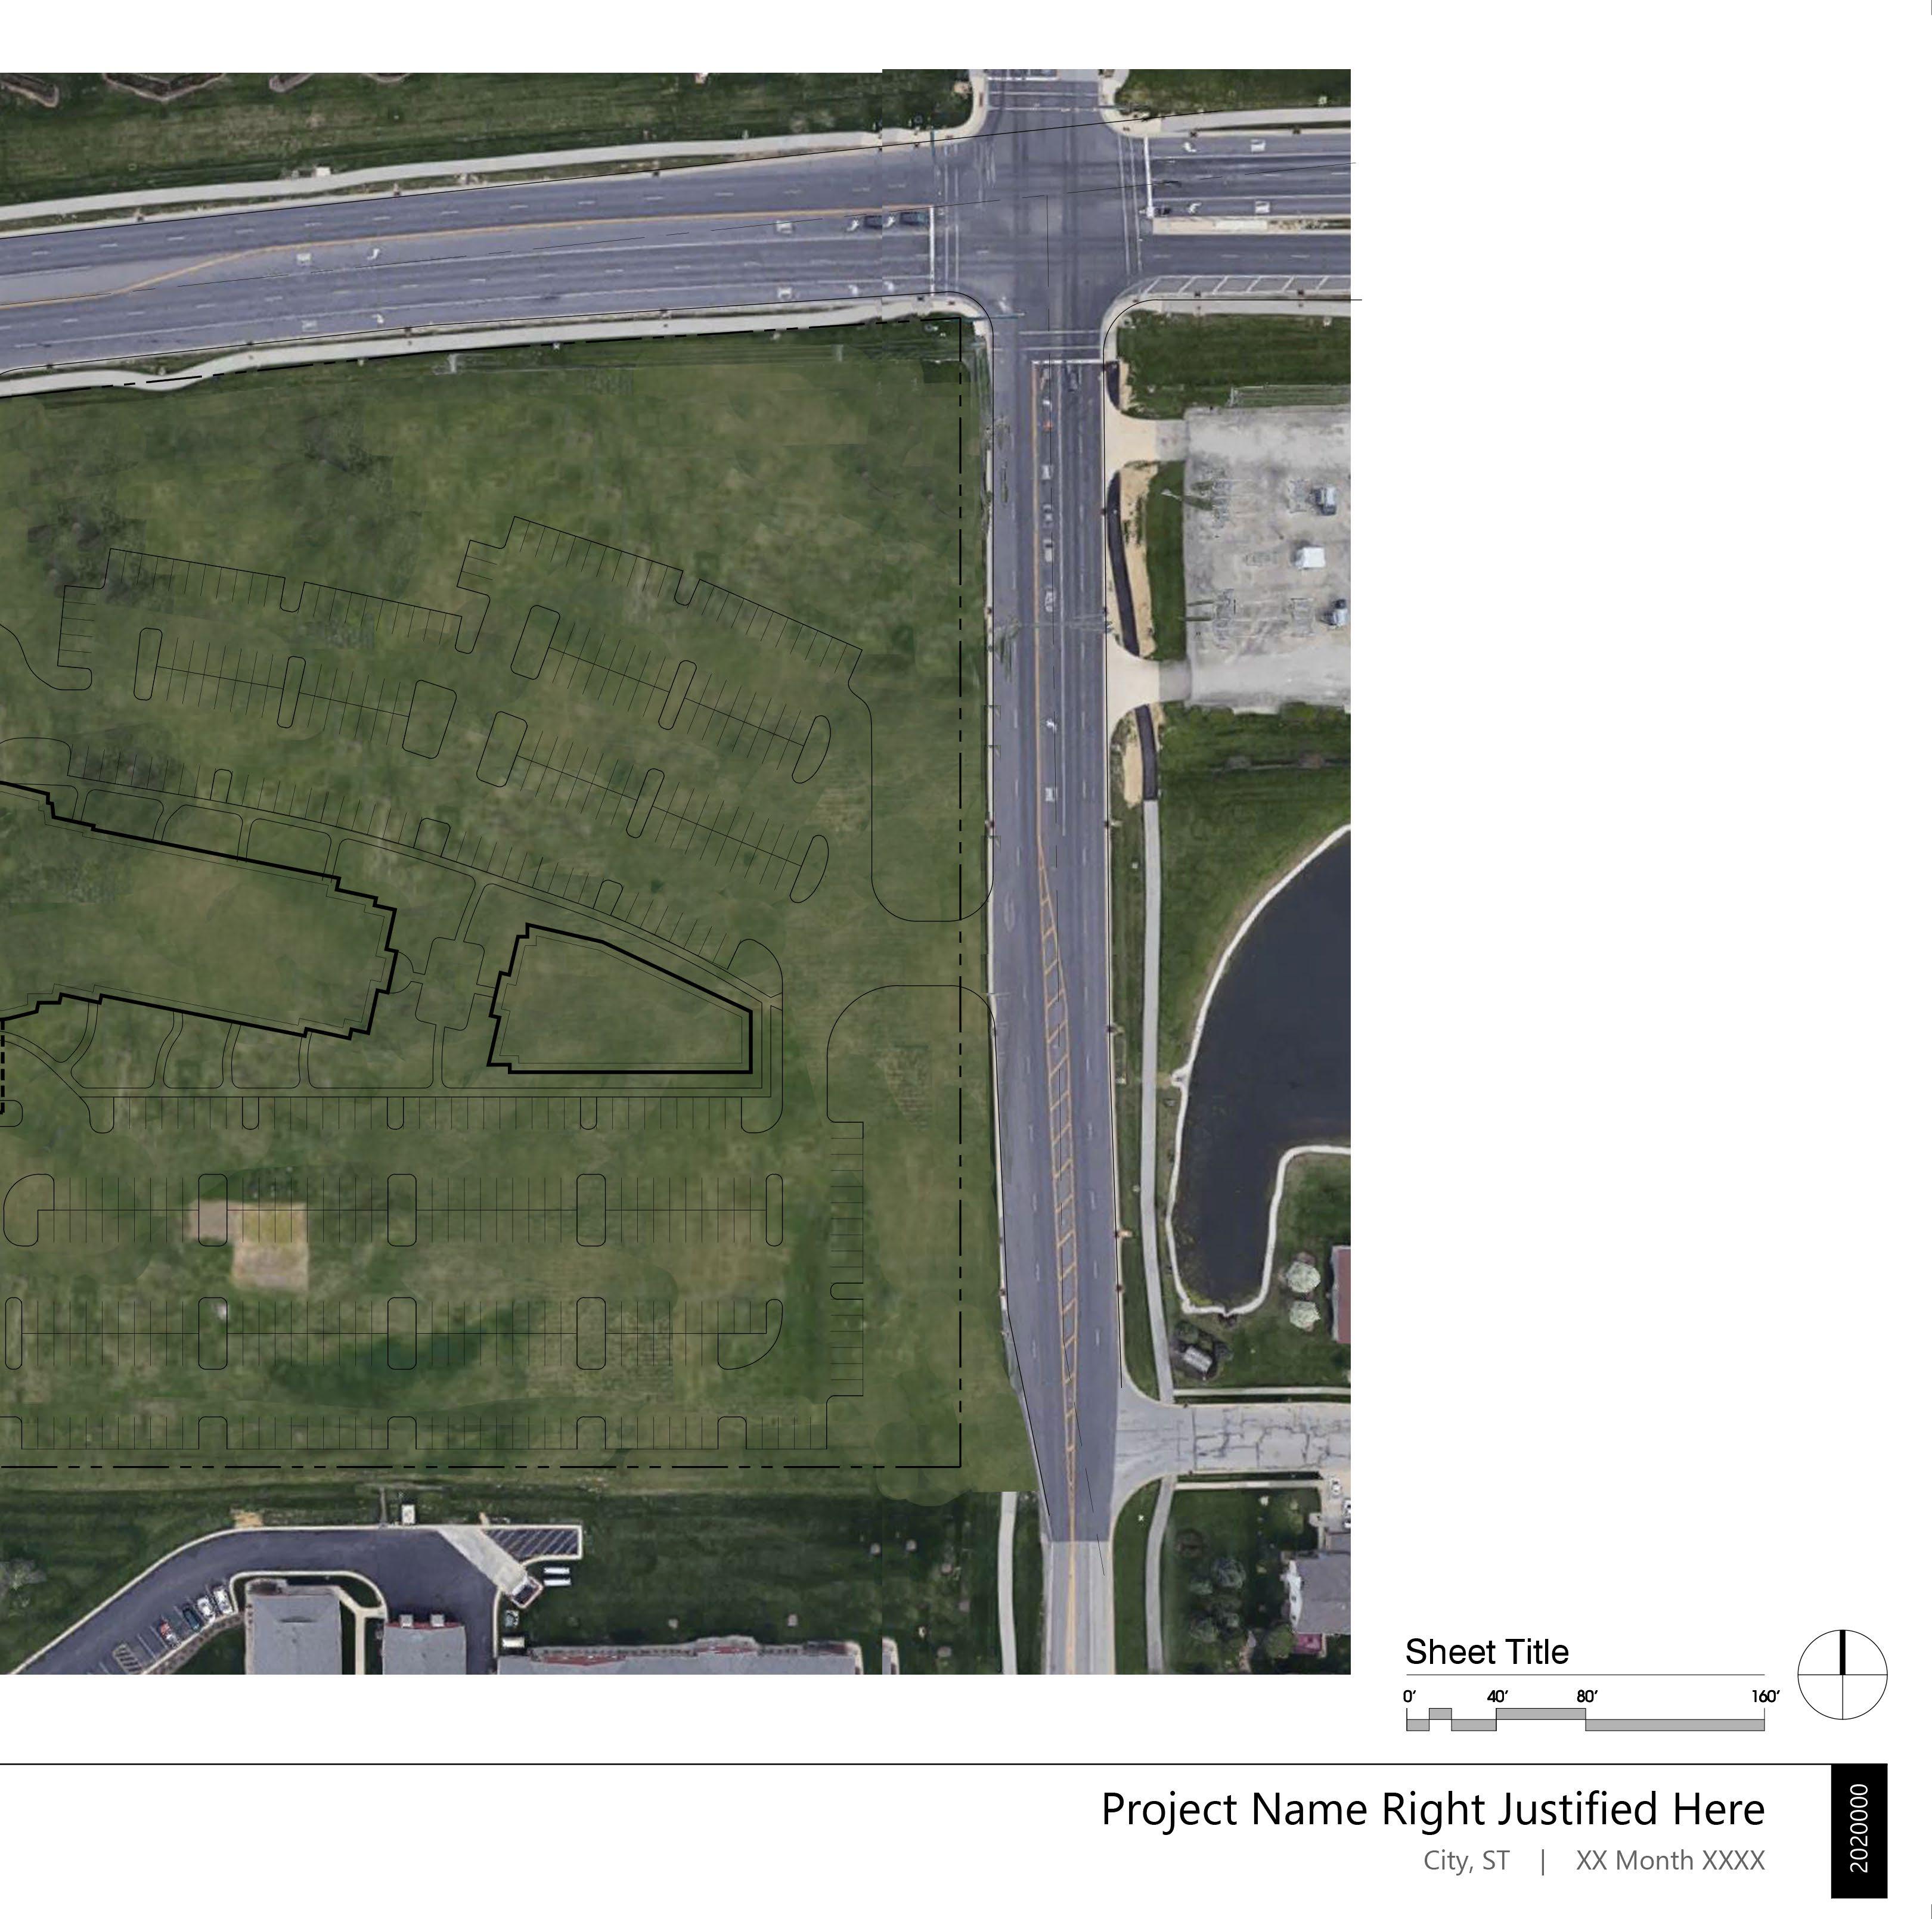
Adjust the bounds of your Aerial Photo with the ‘Crop Tool’
Limit / Viewport: Edge of Coloration
pt. 2 of 2
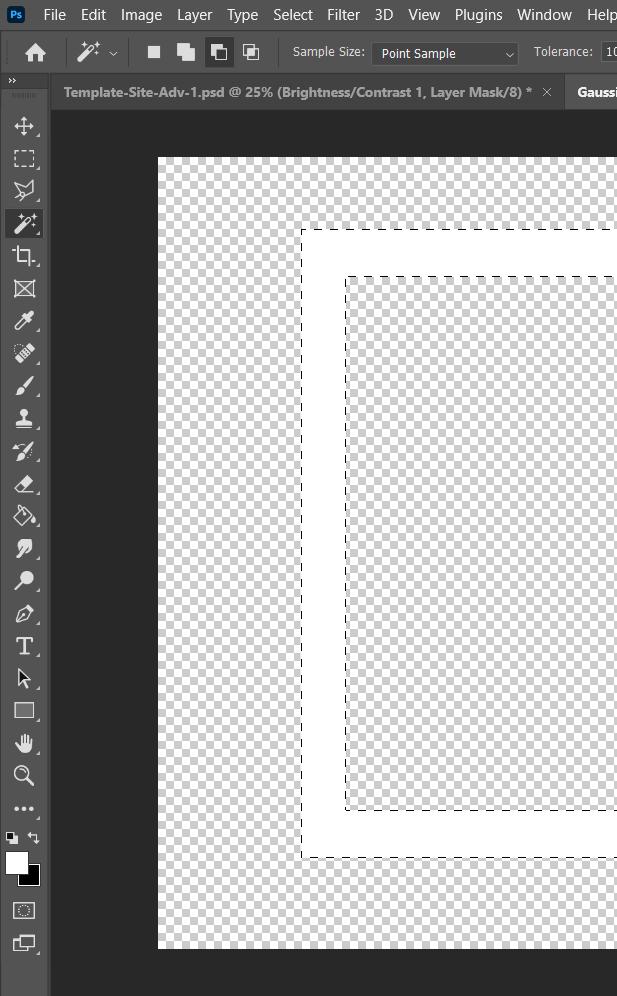
Create a layer and name it:
• Mask
- With the ‘Rectangular Marquee Tool’ Select the ‘Subtract from selection’ selection option
Select the bounds of your white mask.
Fill with white after selection
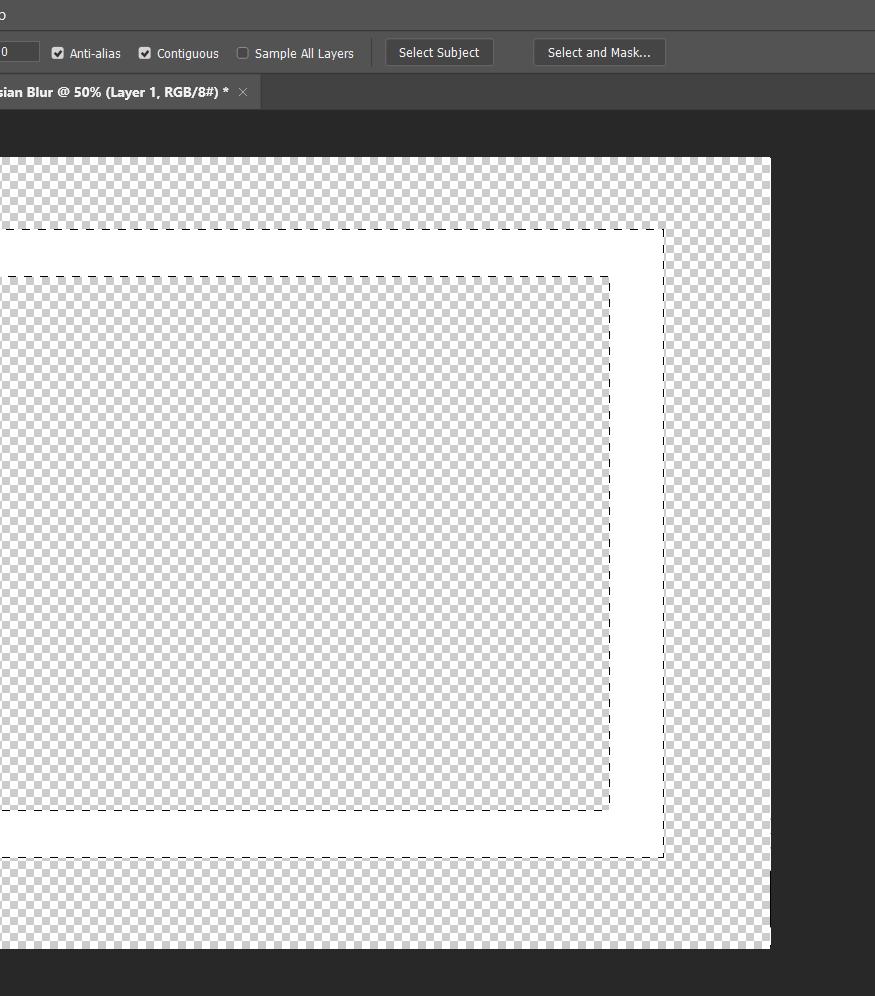
Select the inner bounds of your white mask... This will create a donut selection, similar to what you see on the example. With this donut selection made, select the paint bucket tool and set your paint swatch foreground color to white.
Paint inside the donut selection.
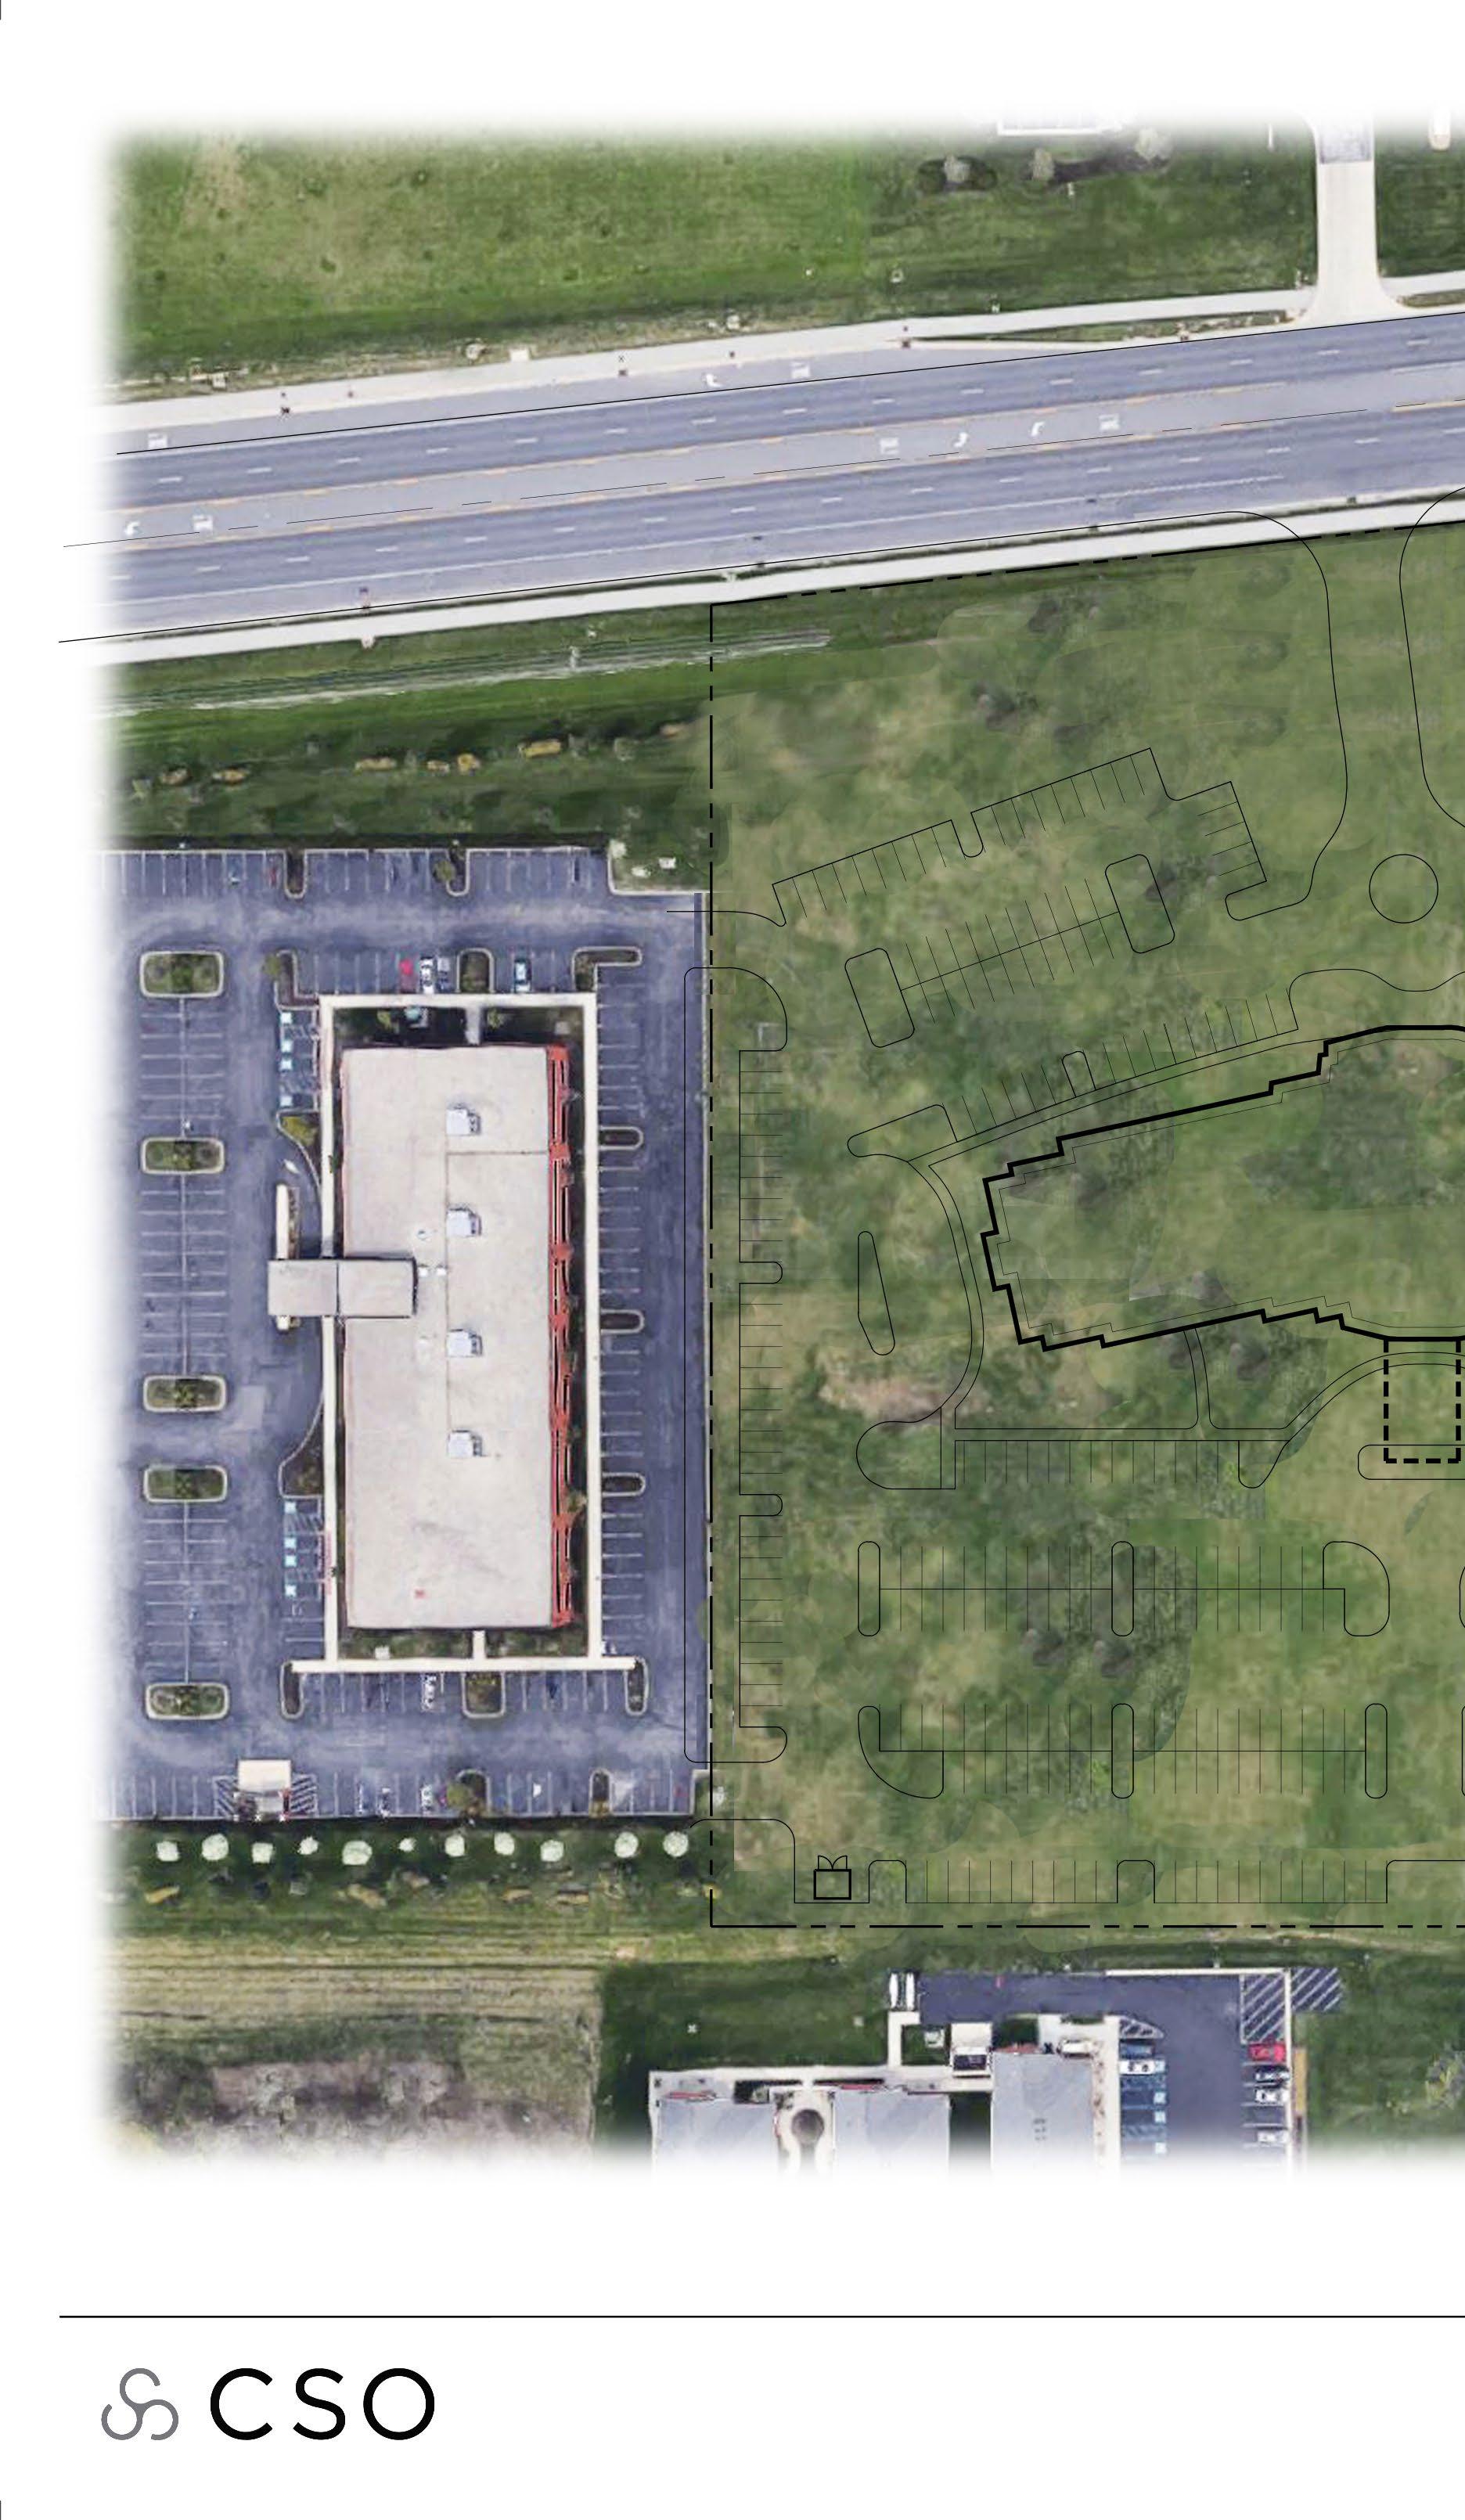
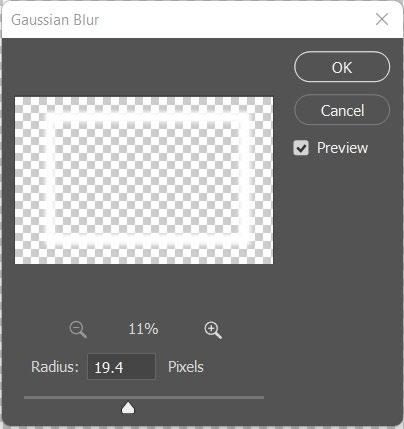
Direct your mouse to:
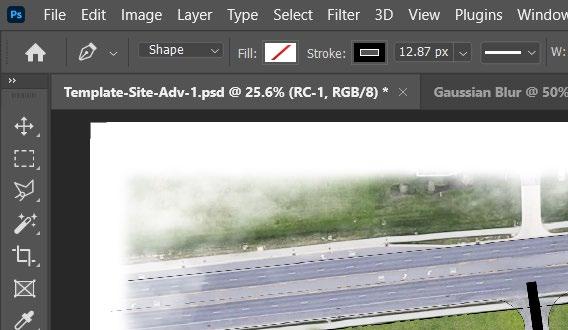
• Filter > Blur > Gaussian Blur
Adjust your mask to fit the bounds of your Aerial photo
Create a layer and name it:
• Clouds
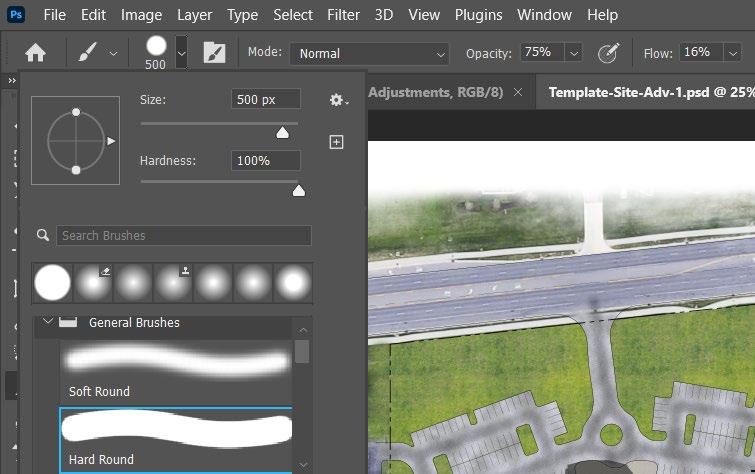
Select the ‘Brush Tool’ and locate the cloud brush texture. Lightly line the outside of your Aerial Photo with your stroke. Select the color white for this application.
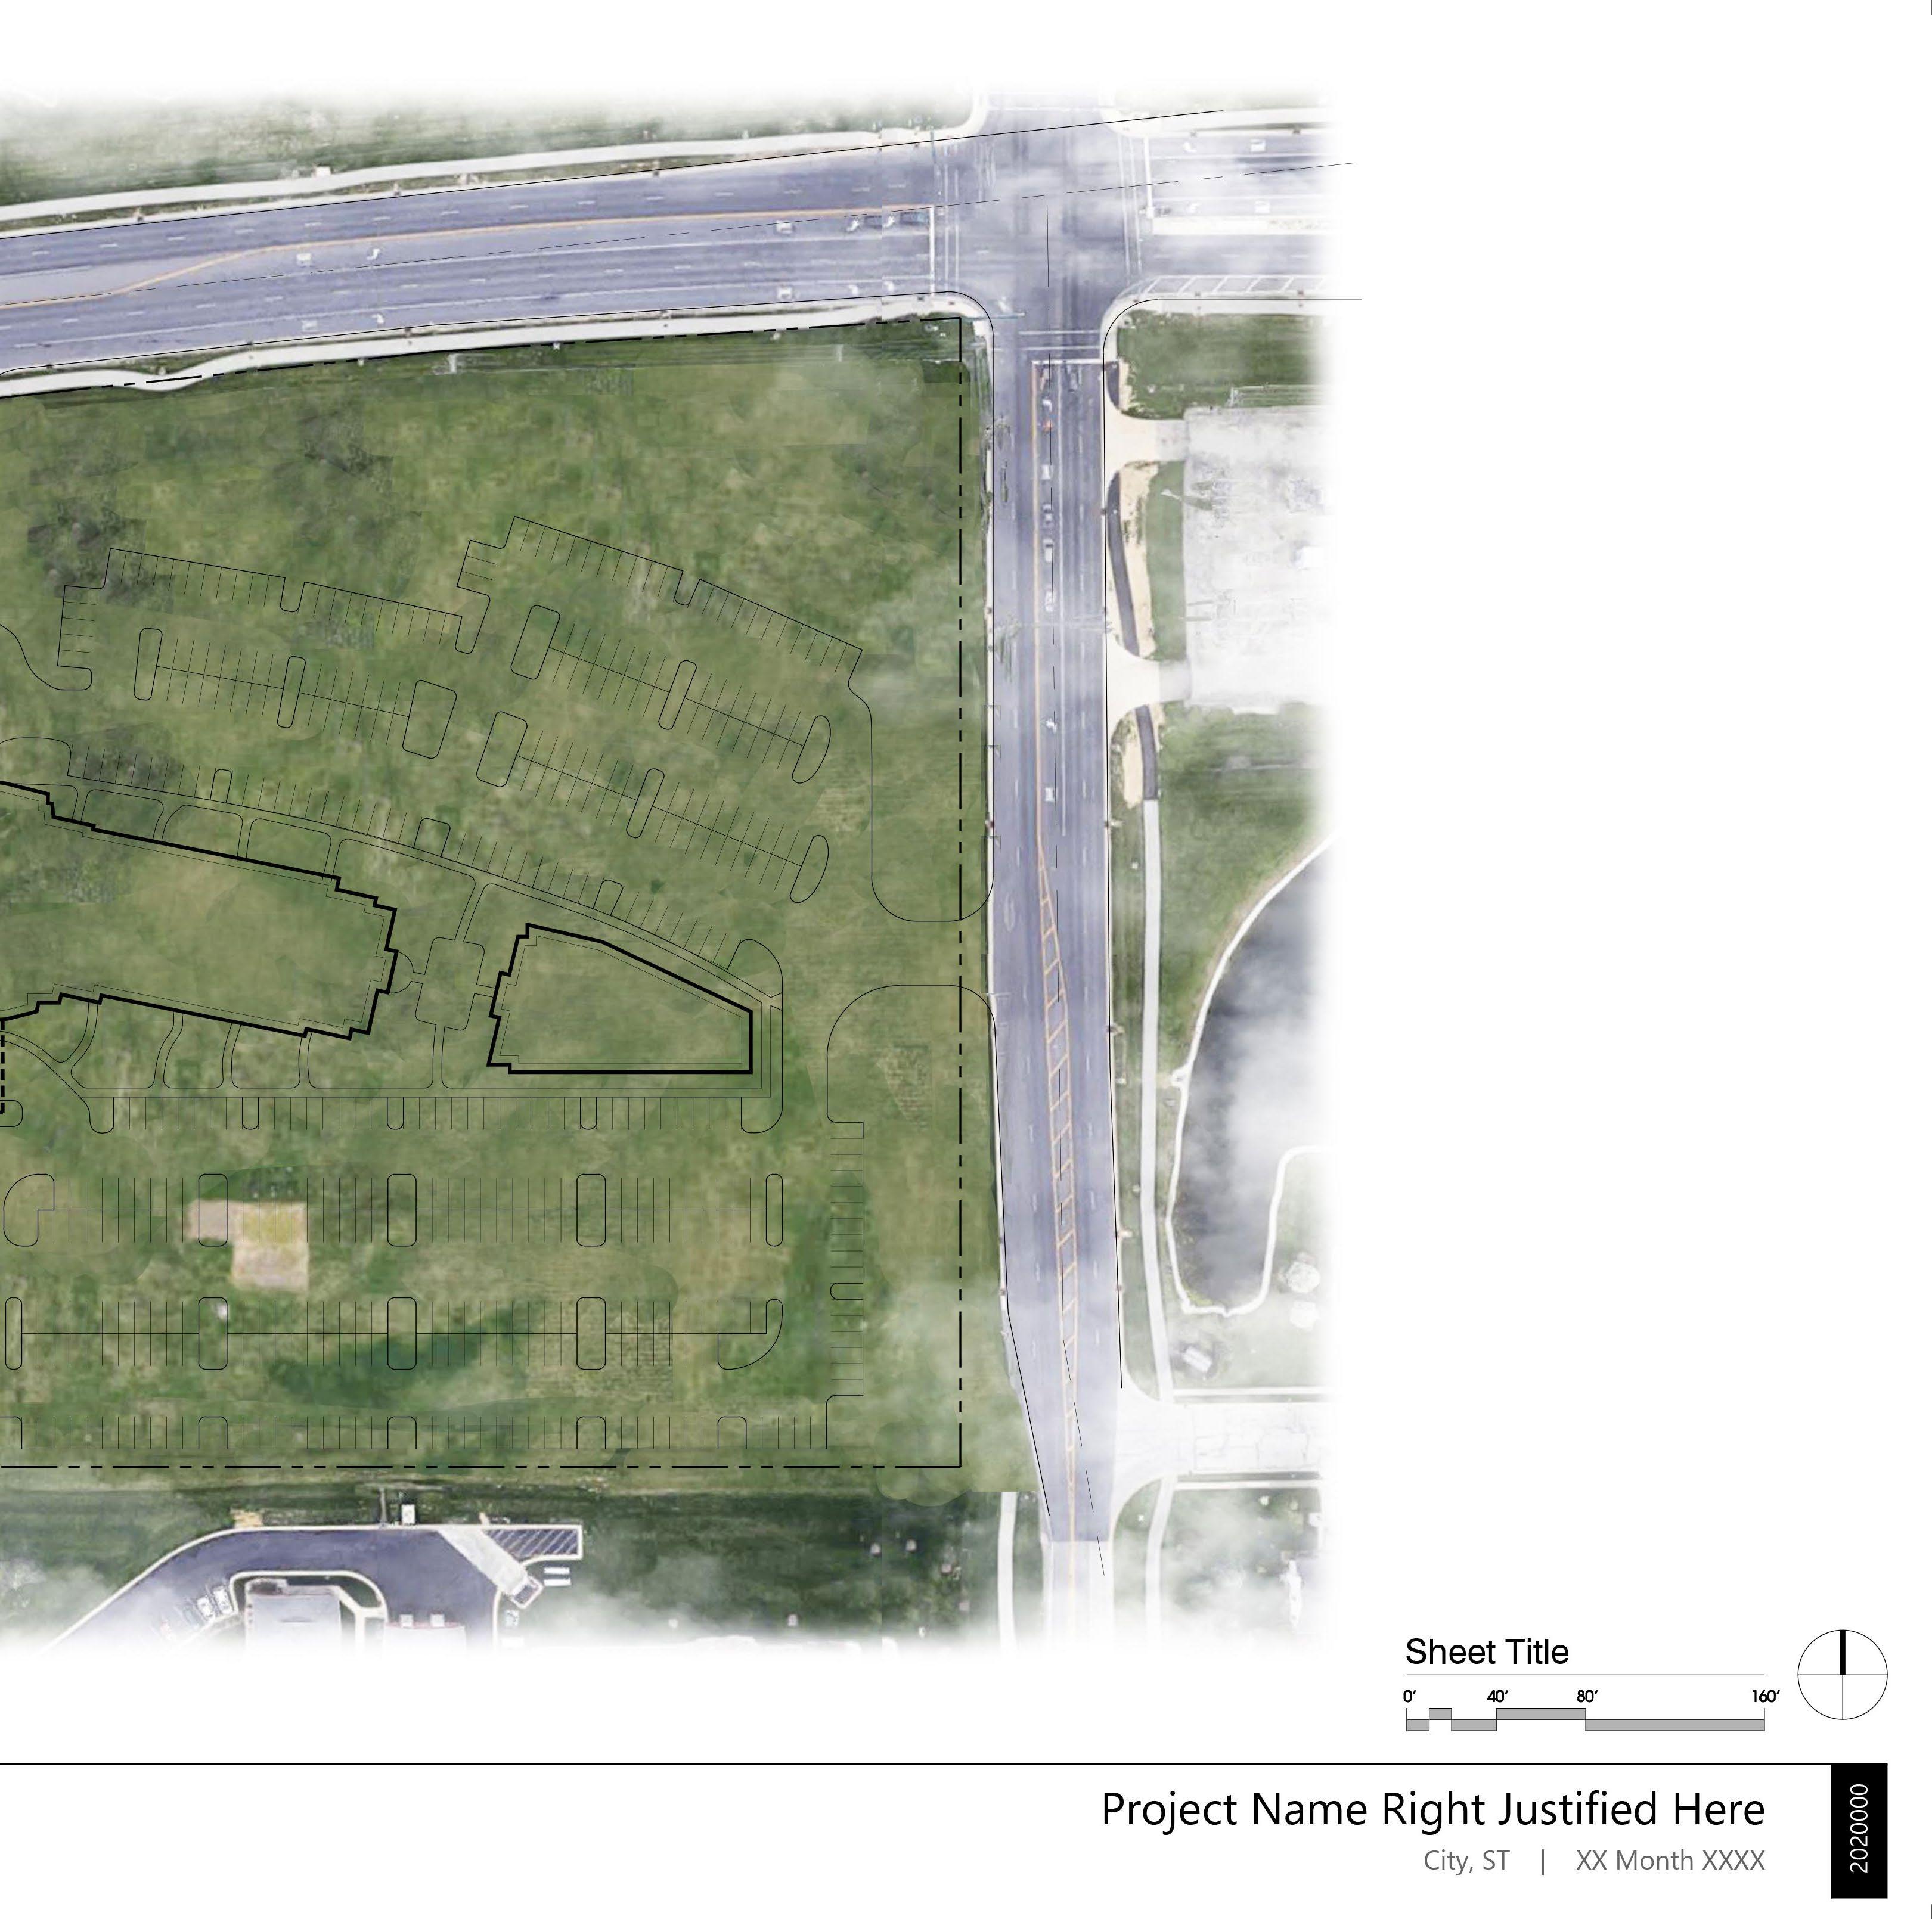
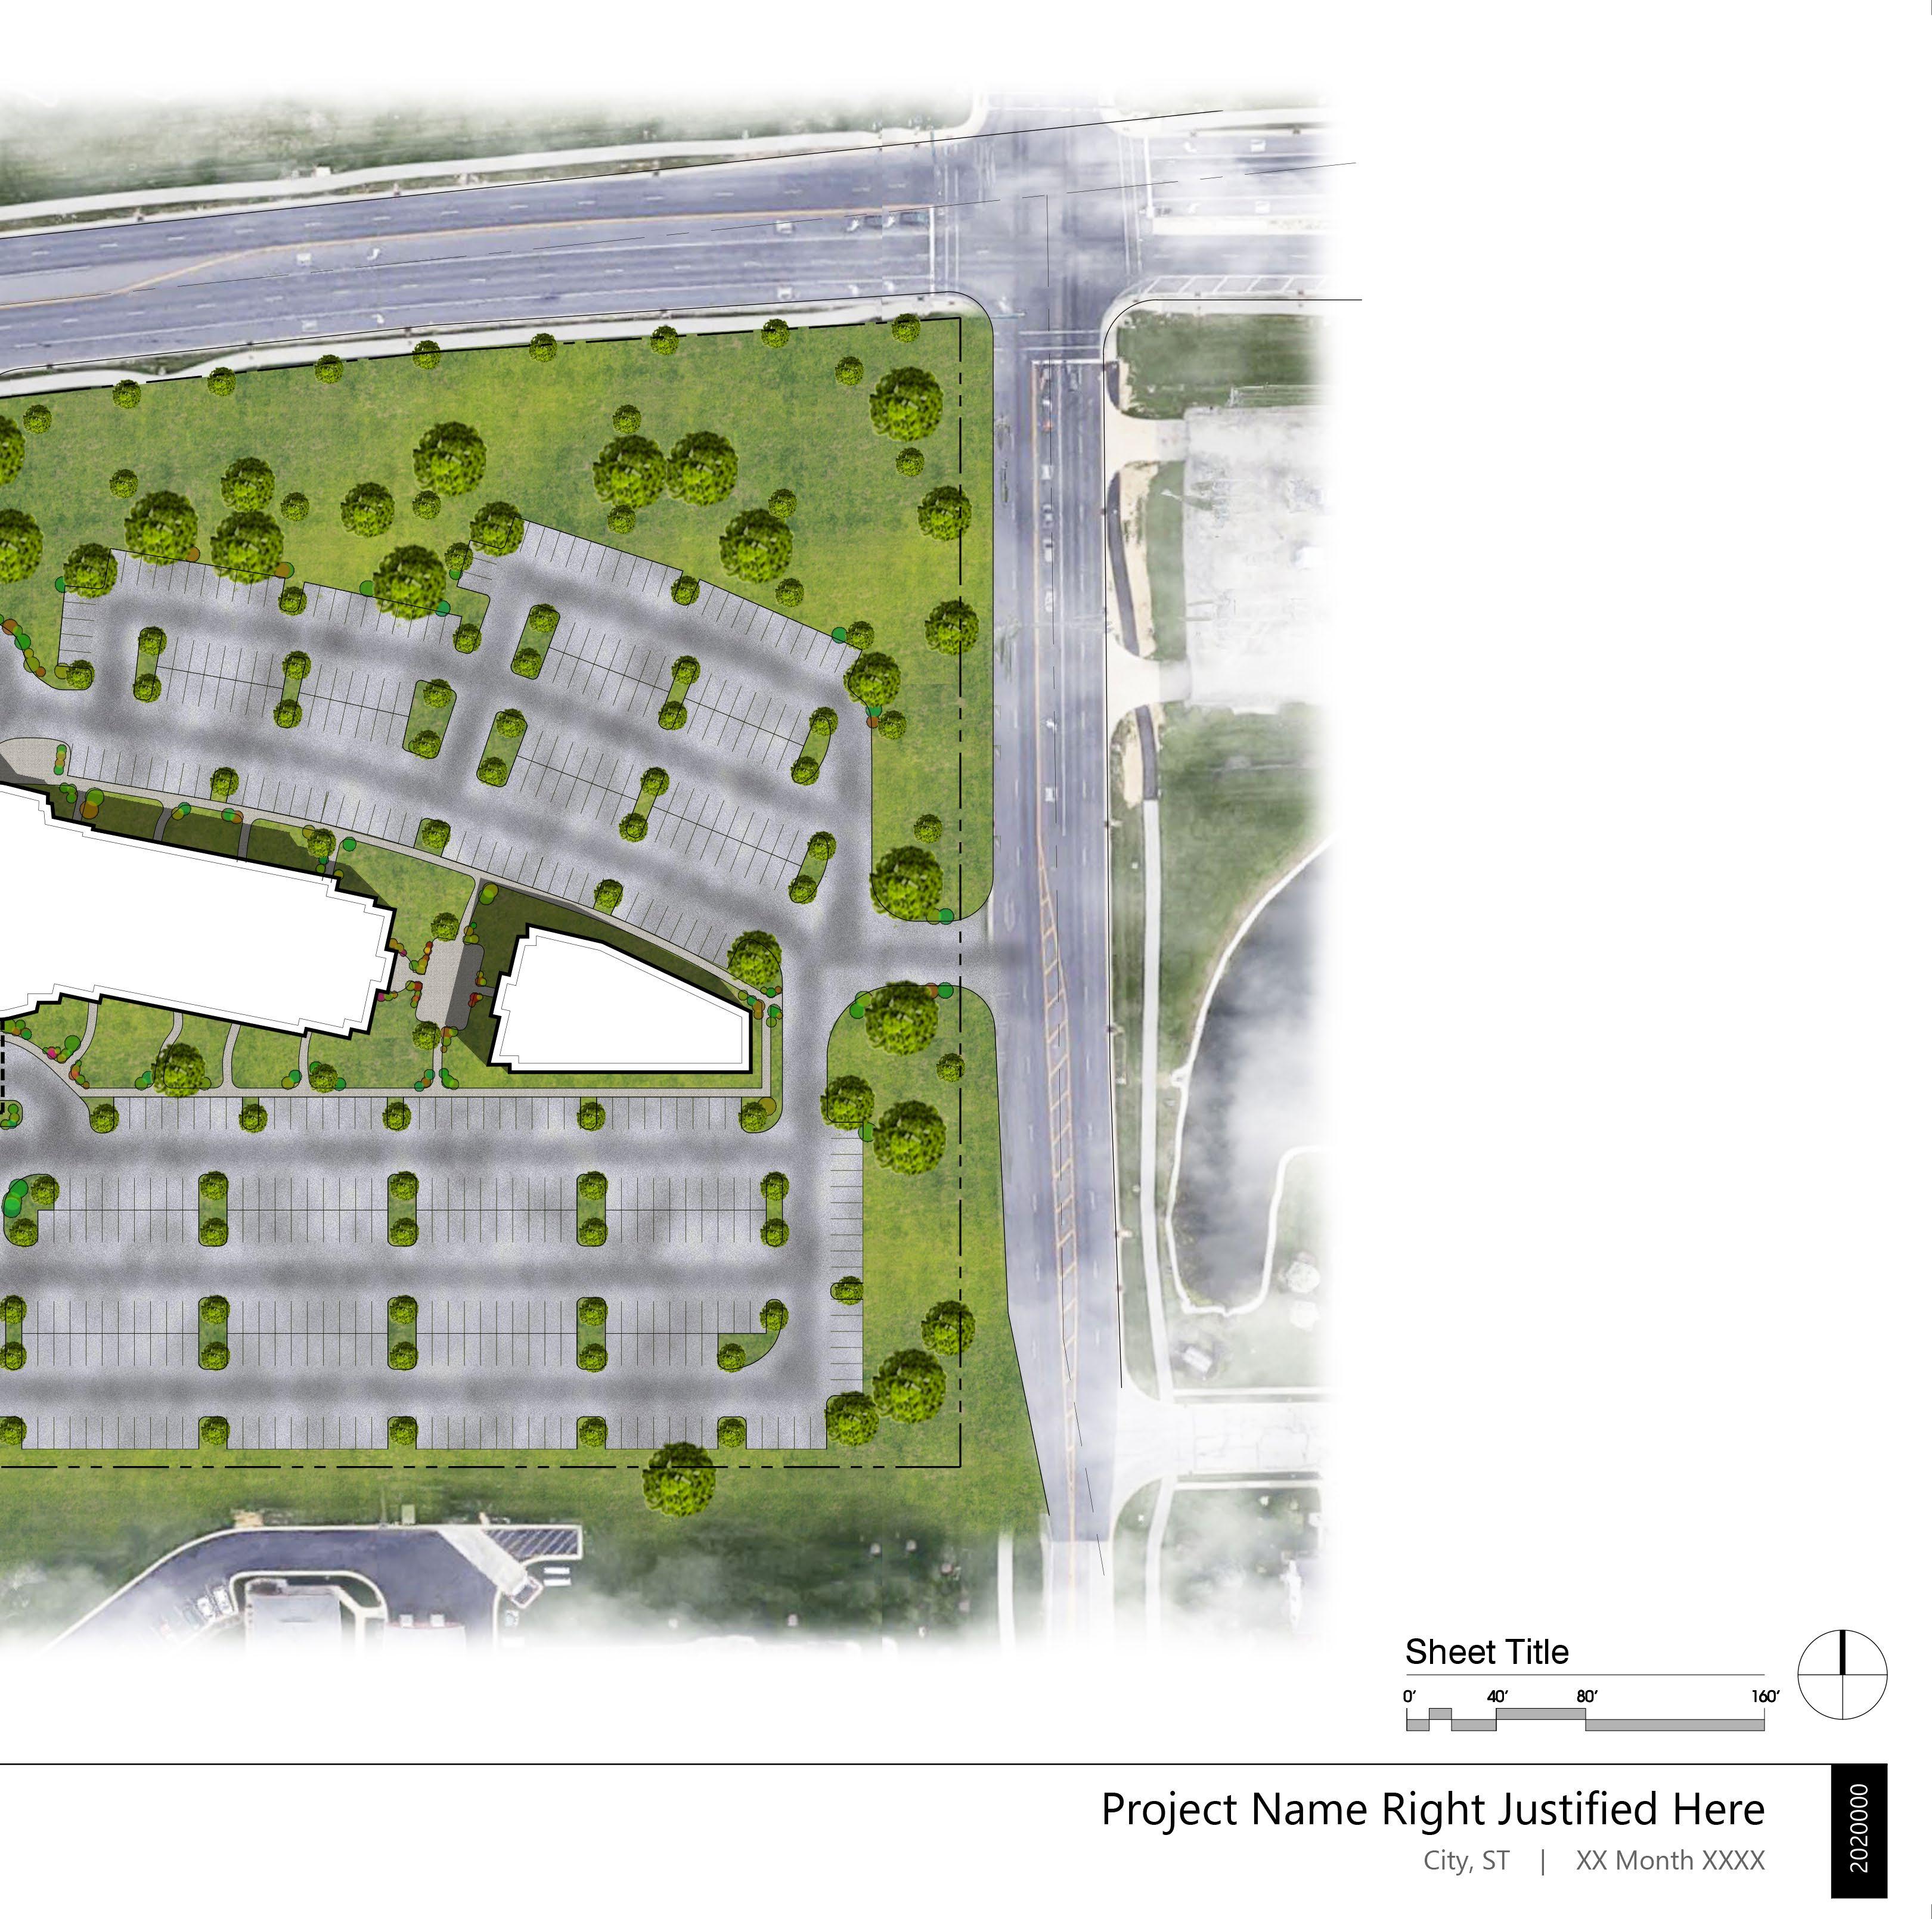
Cover the extents of your Site Linework
Create a layer and name it:
• Grass
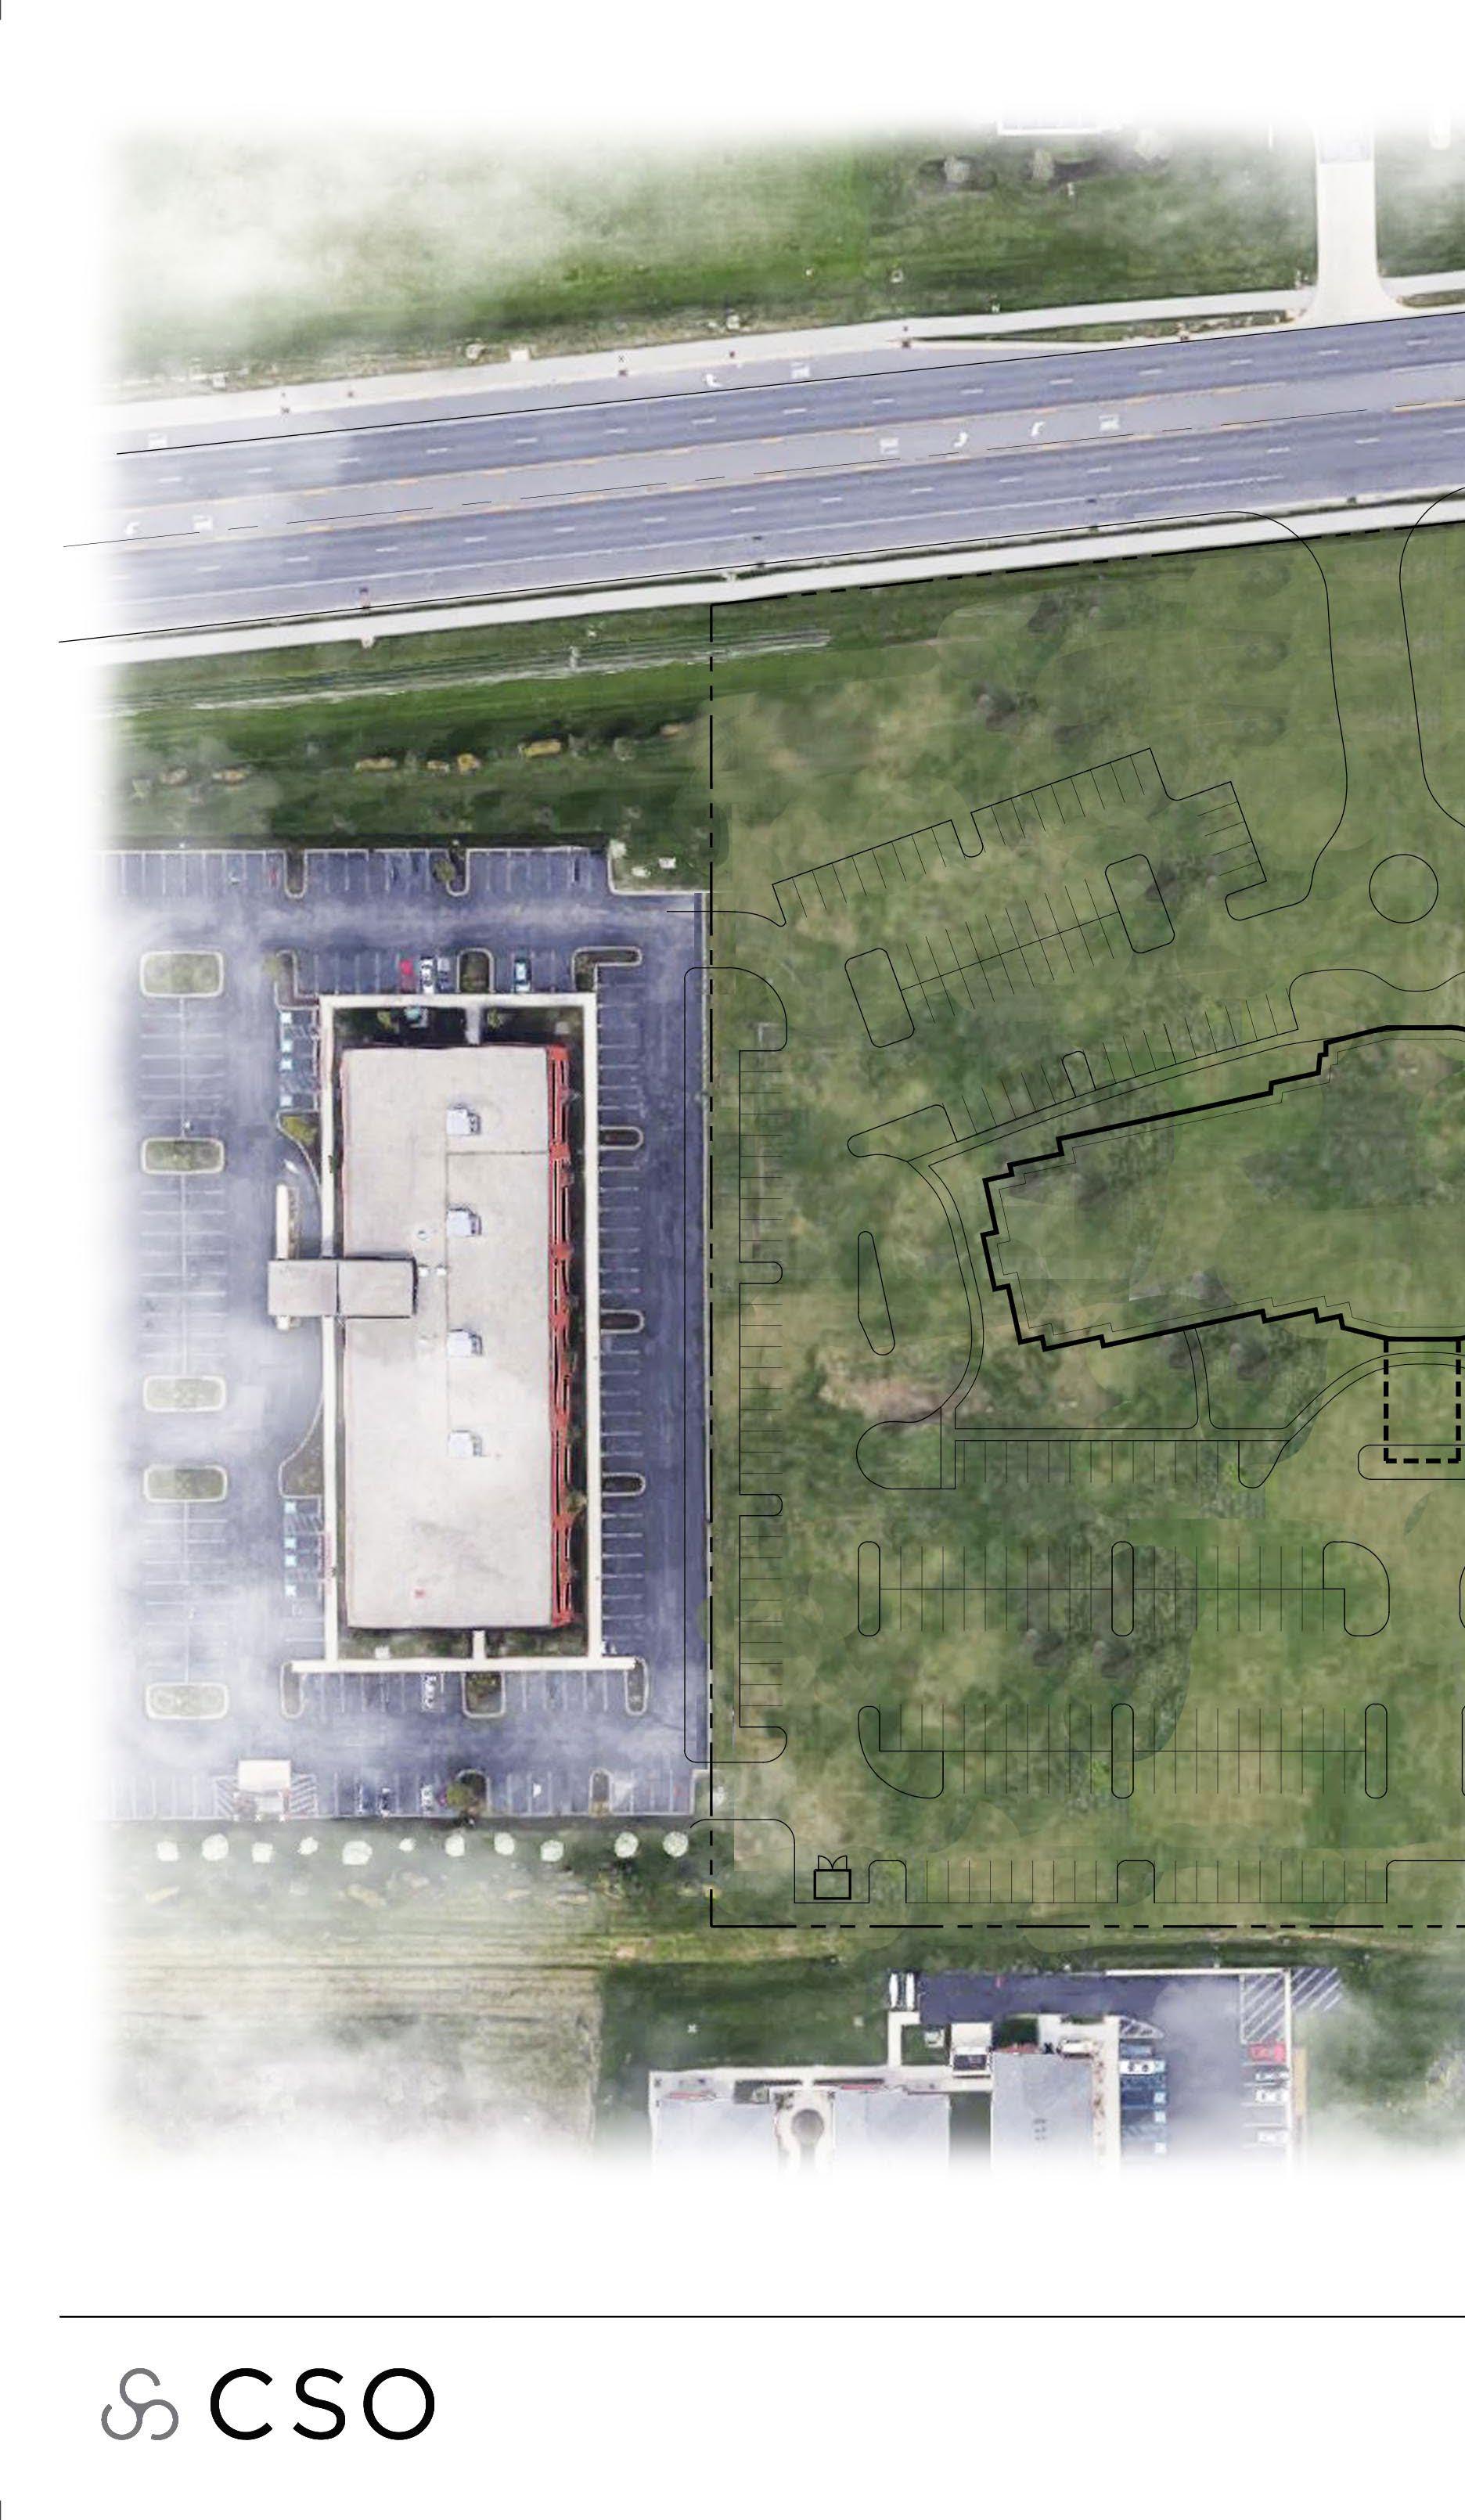
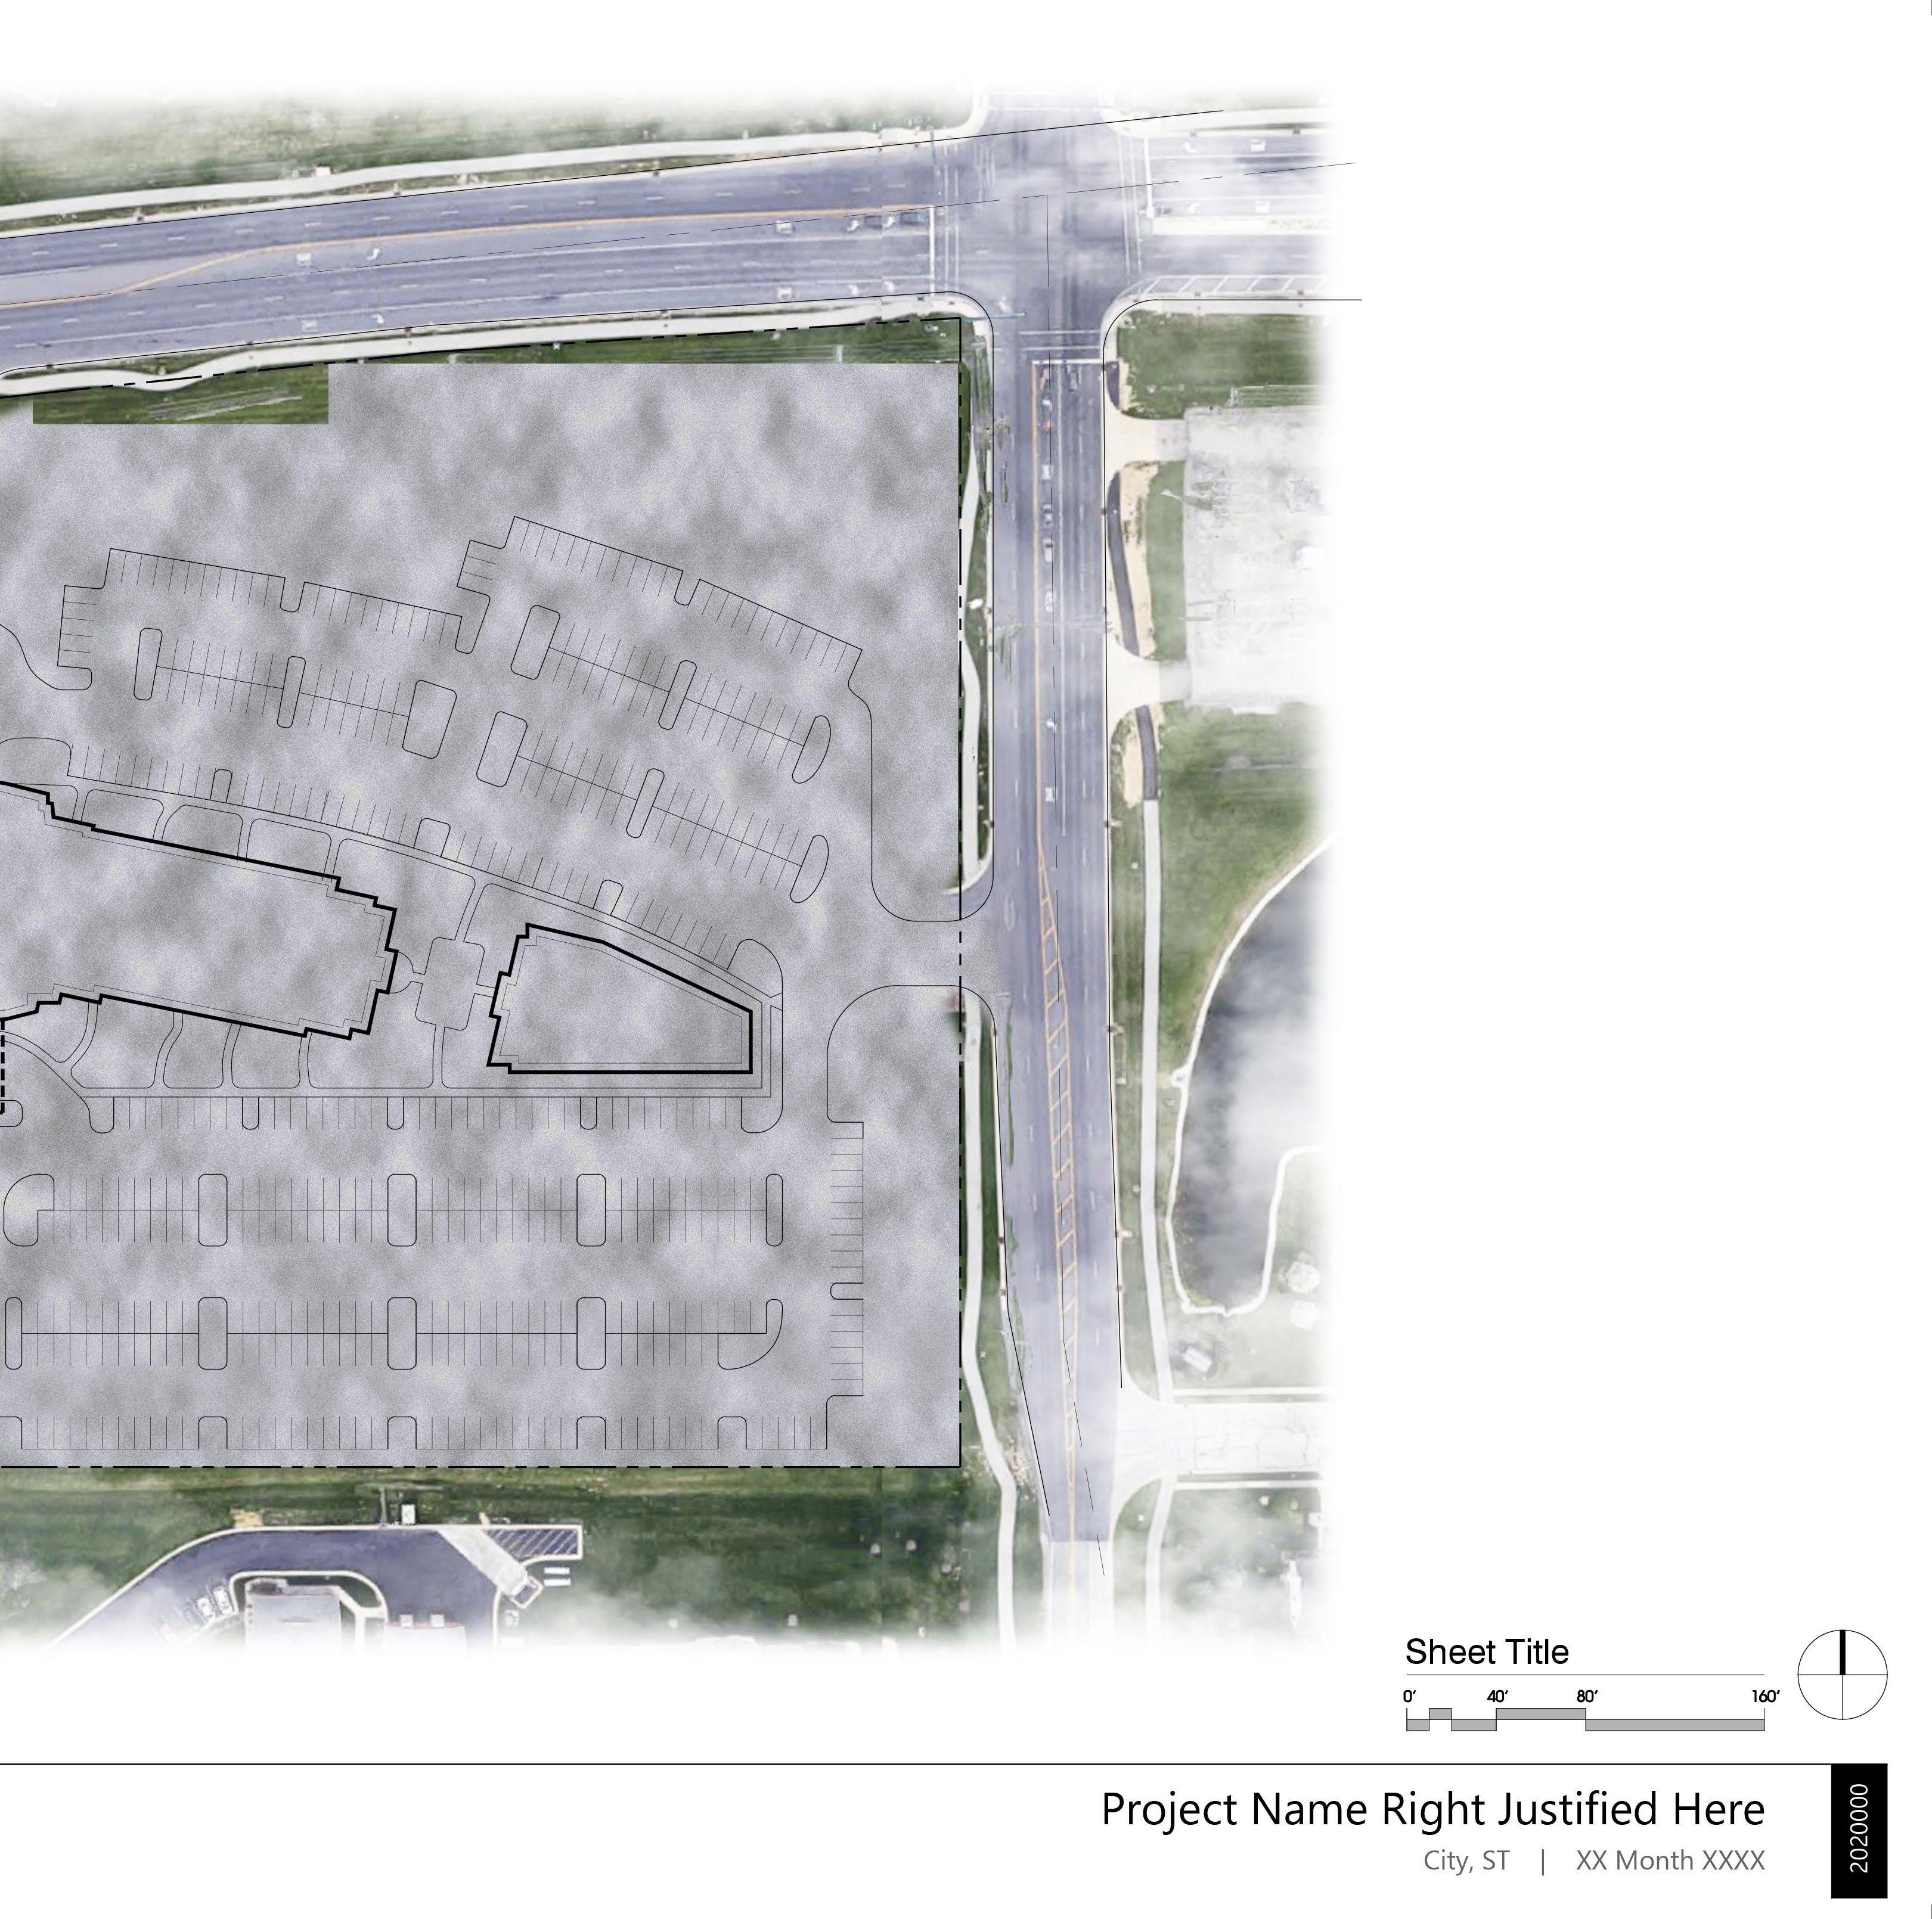
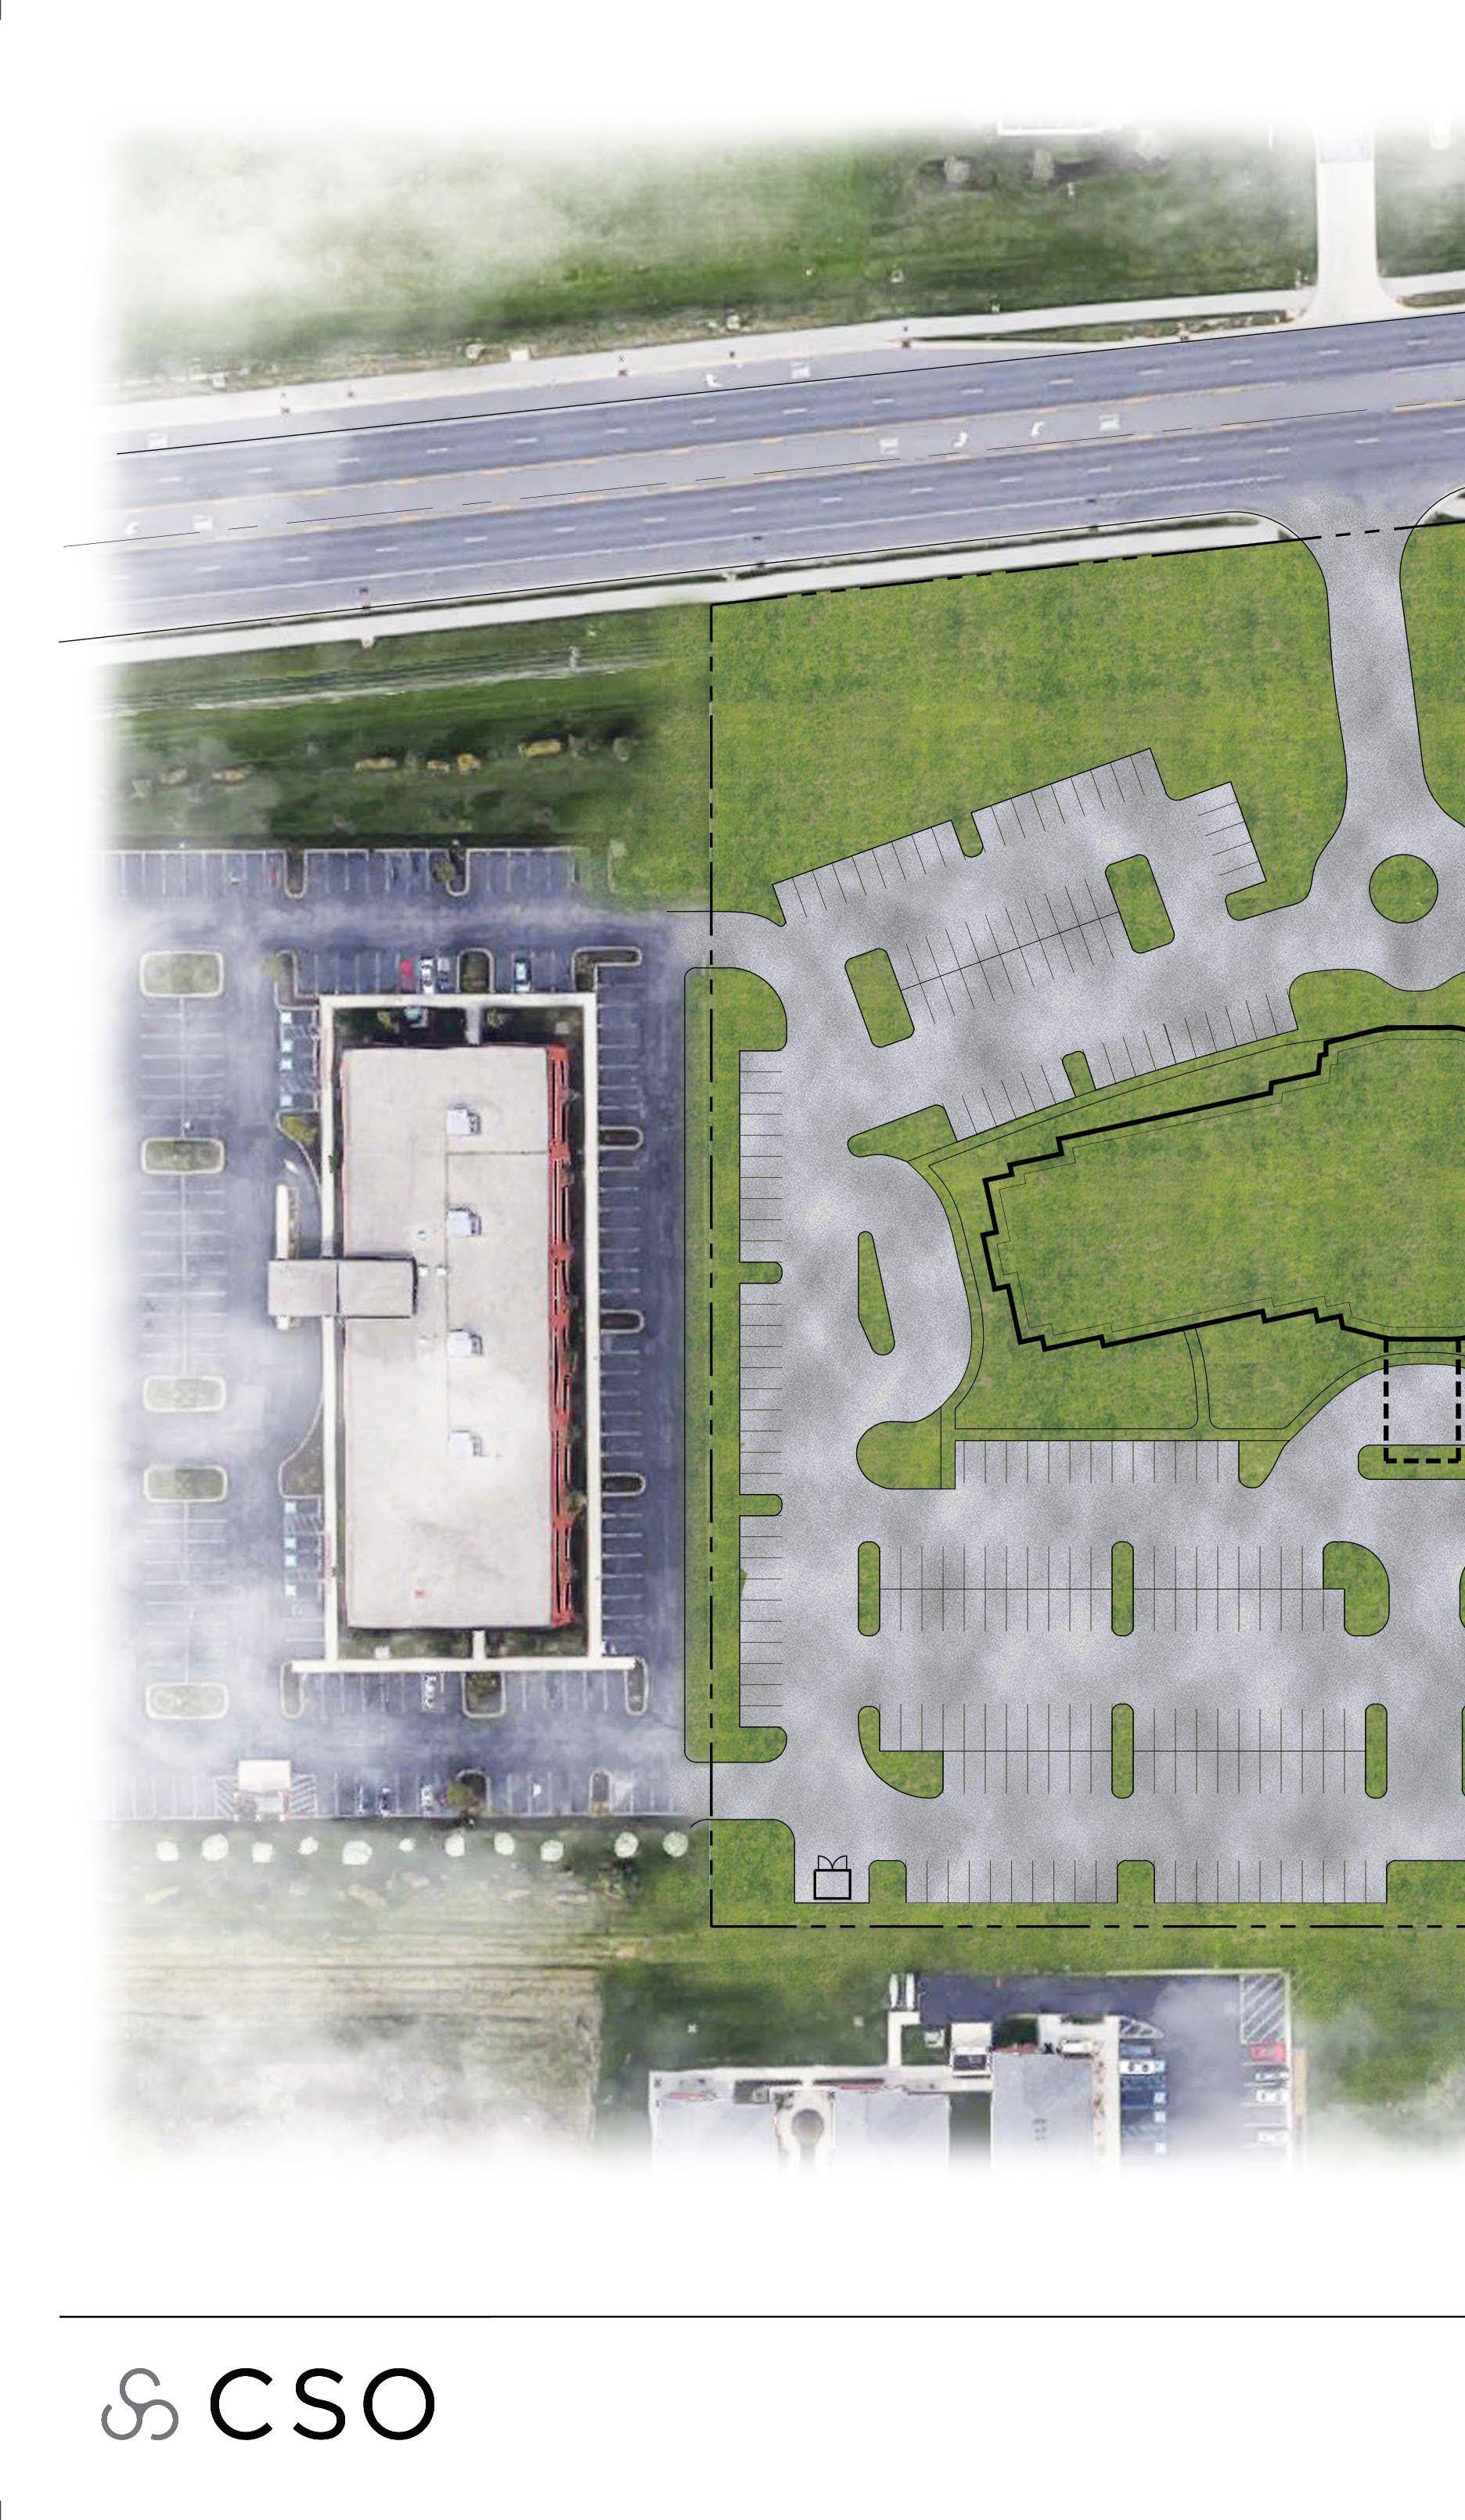
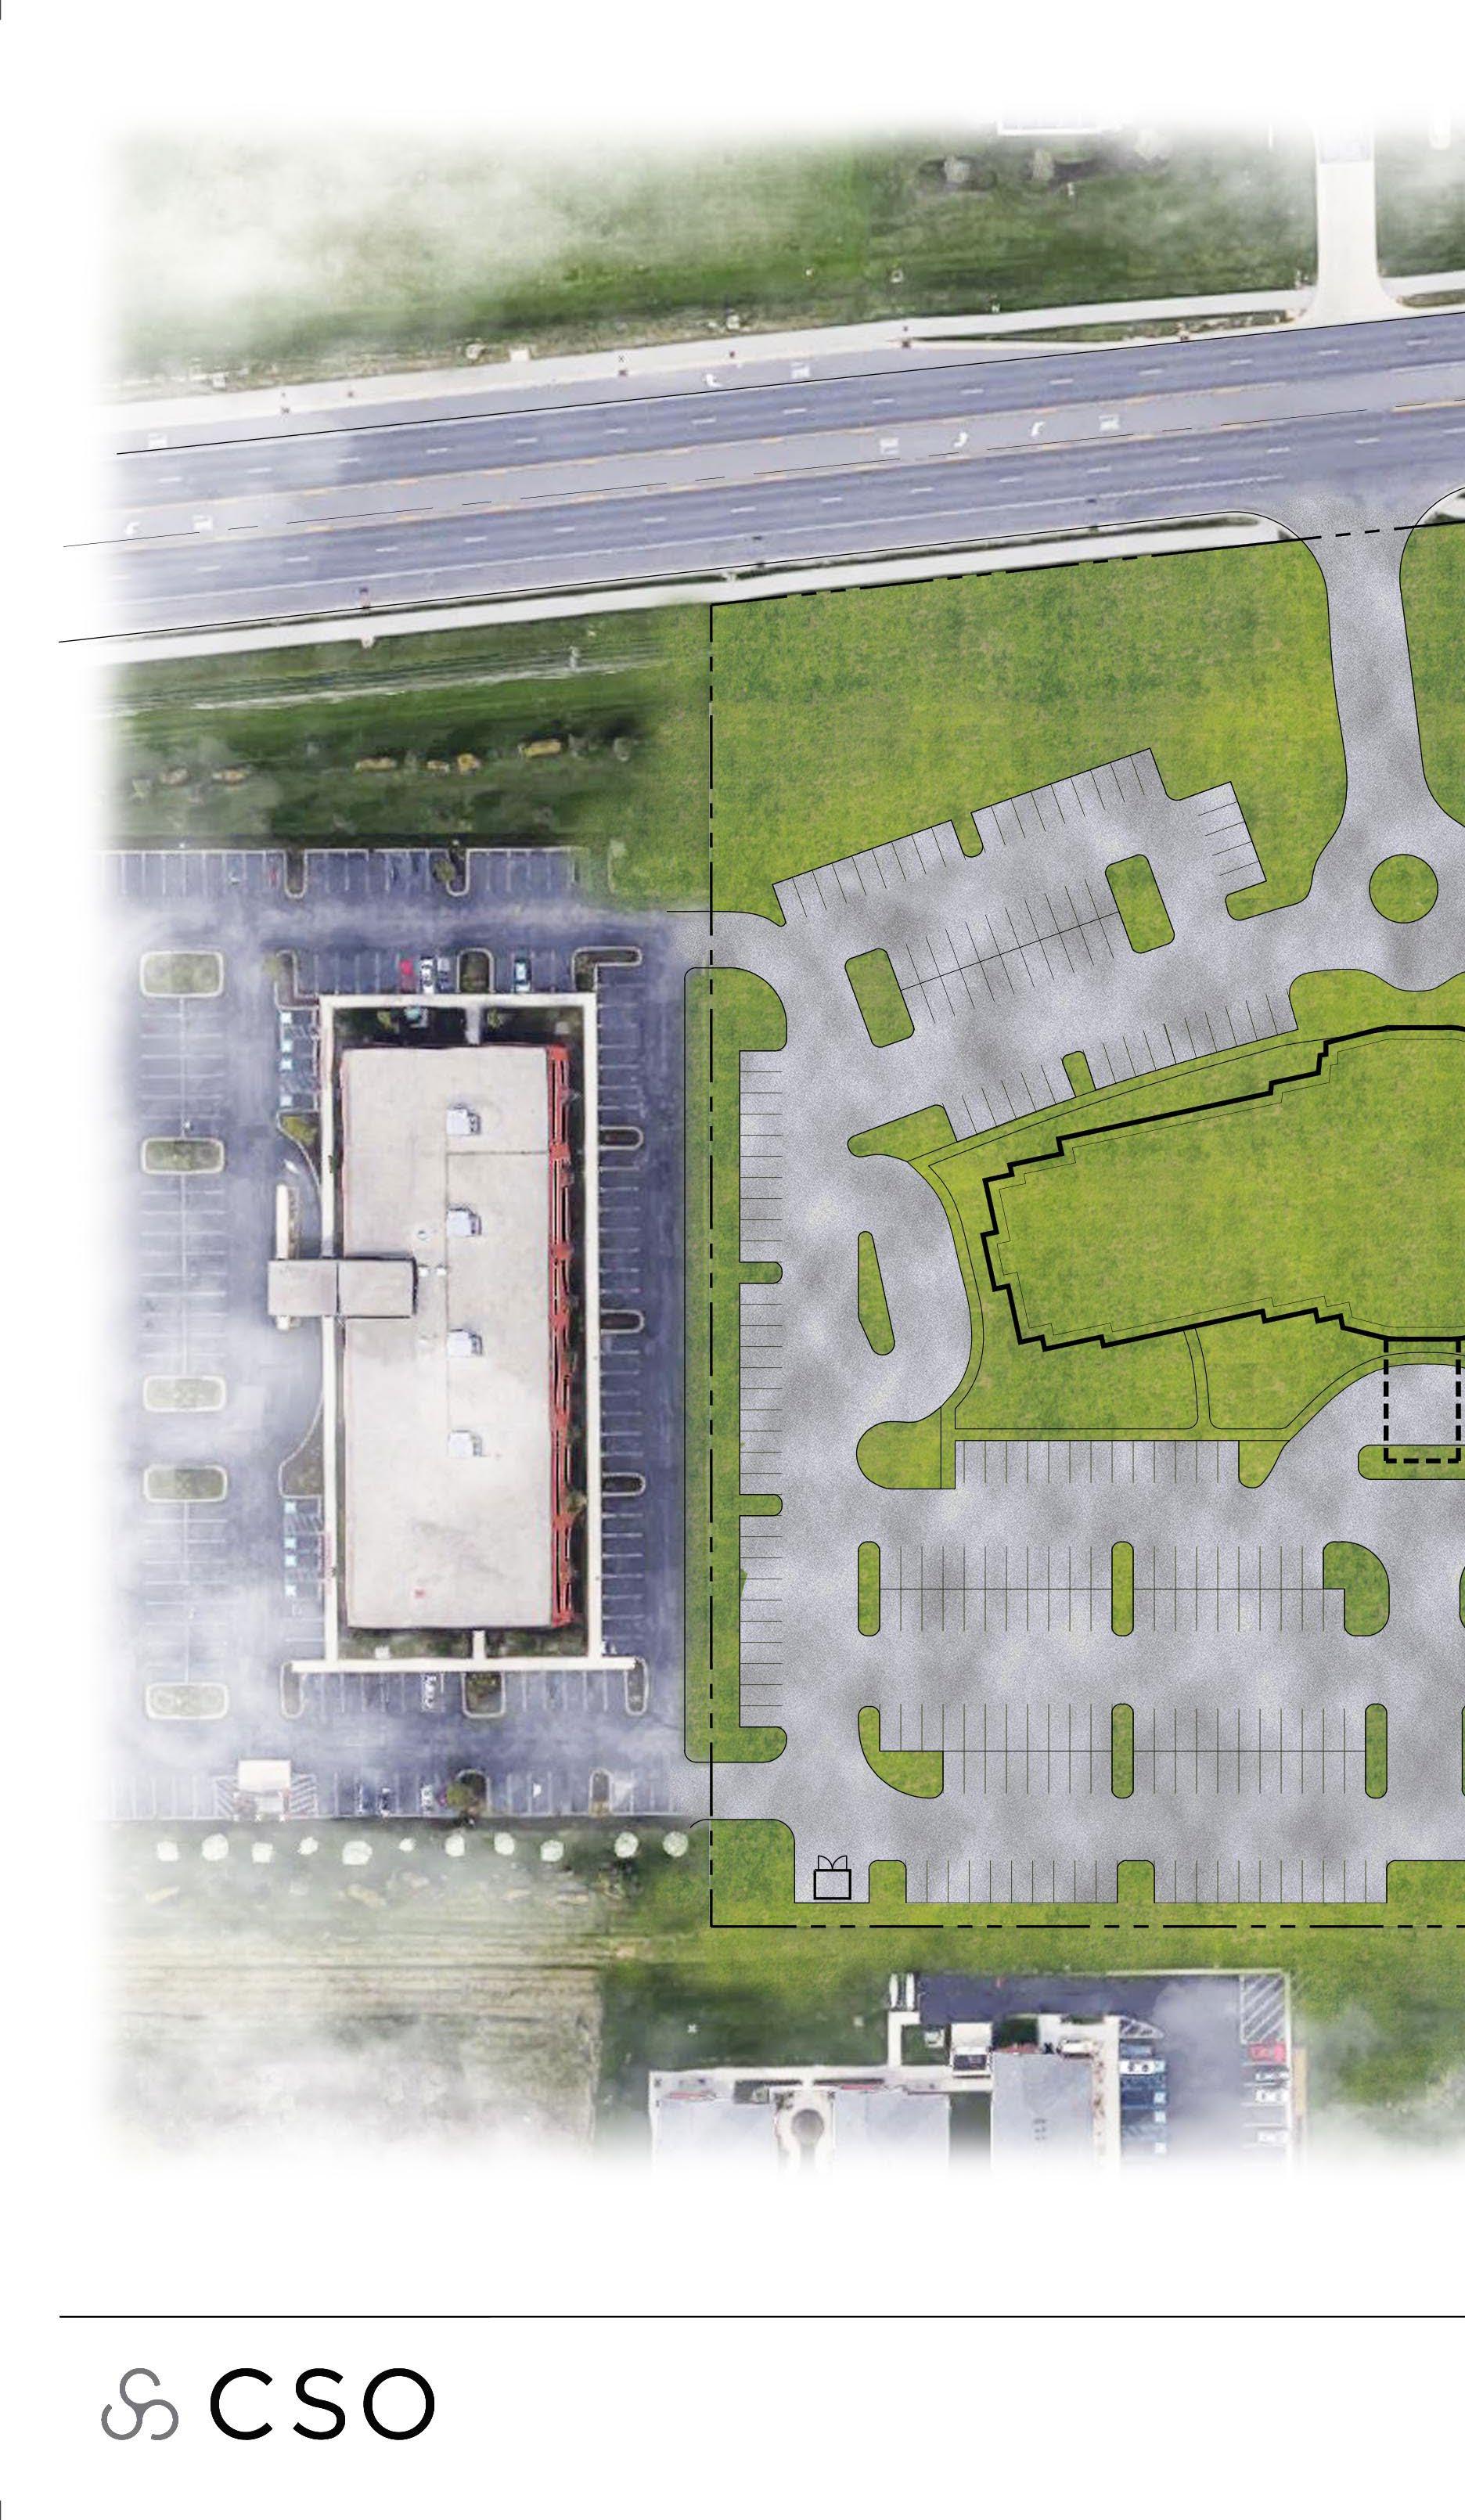
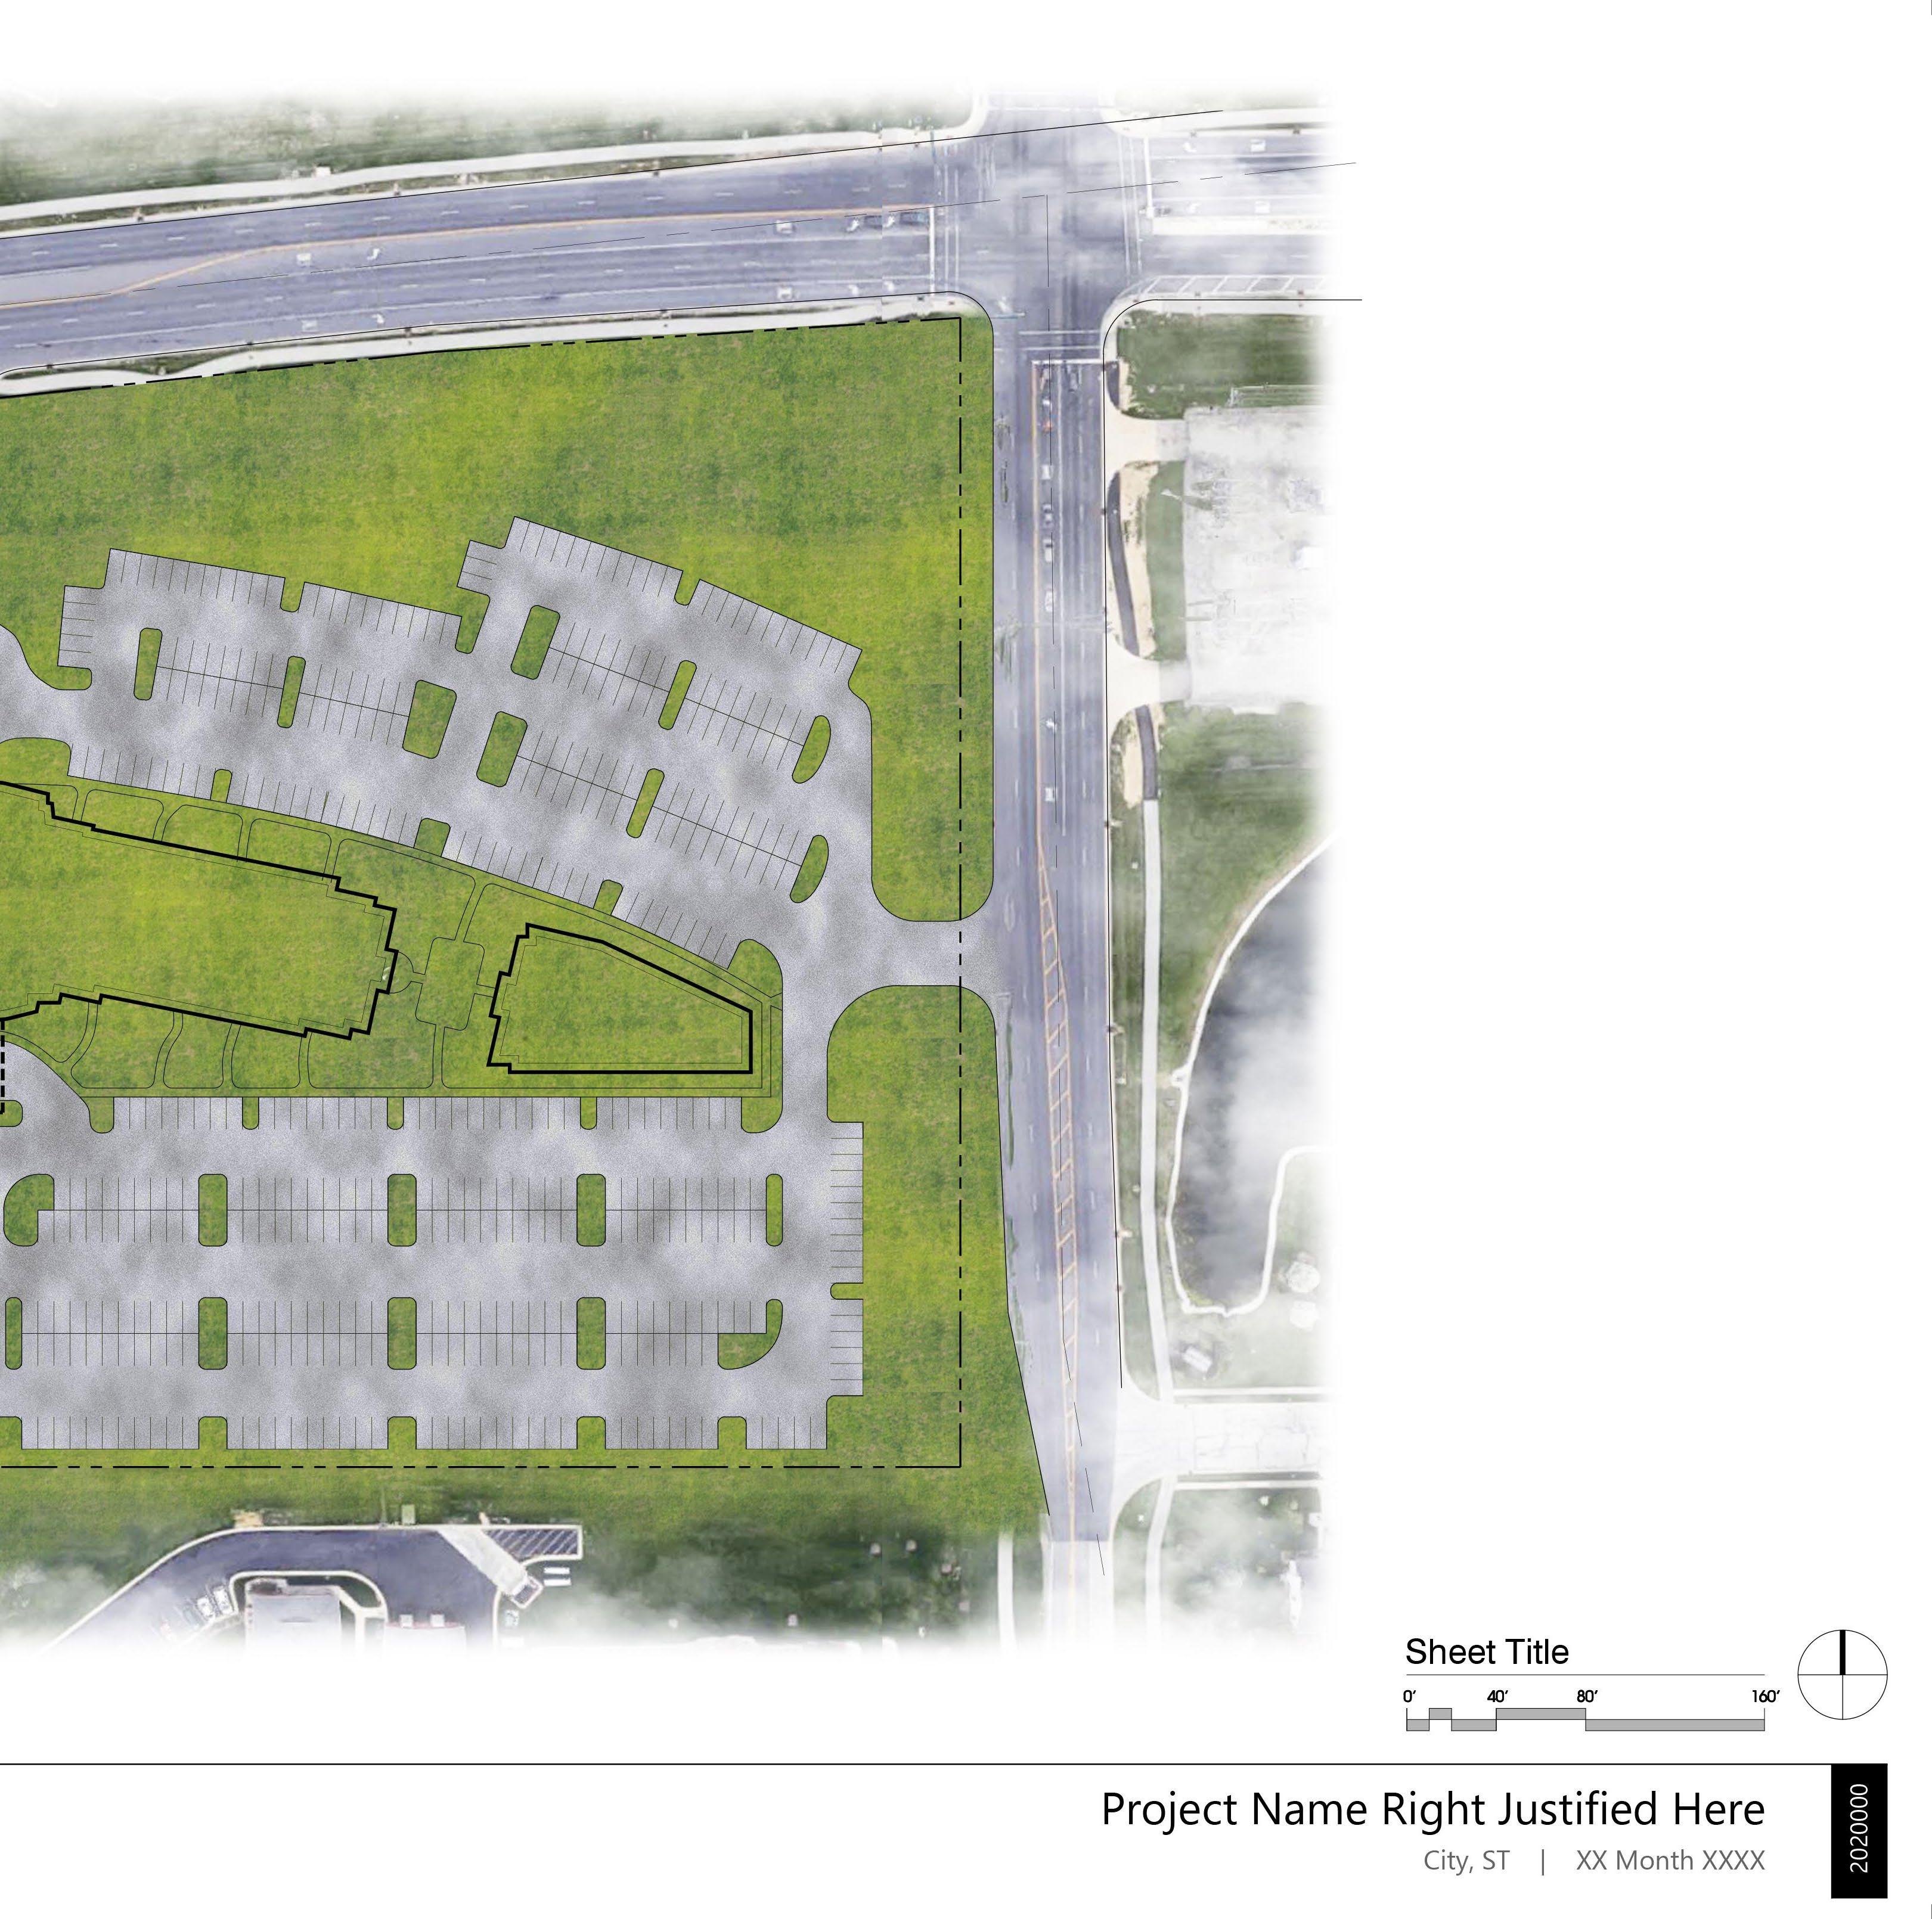
Position this layer above your ‘Asphalt’ layer. Select the ‘Magic Wand Tool’ and begin selecting the areas of your site that would feature grass.

Select the mask button once you are finished with this selection.
Remember, when it comes to the ‘Layer Mask’:
• White = Visible
• Black = Not Visible
Return to your mask with a black brush to erase any Grass / Asphalt conflictions
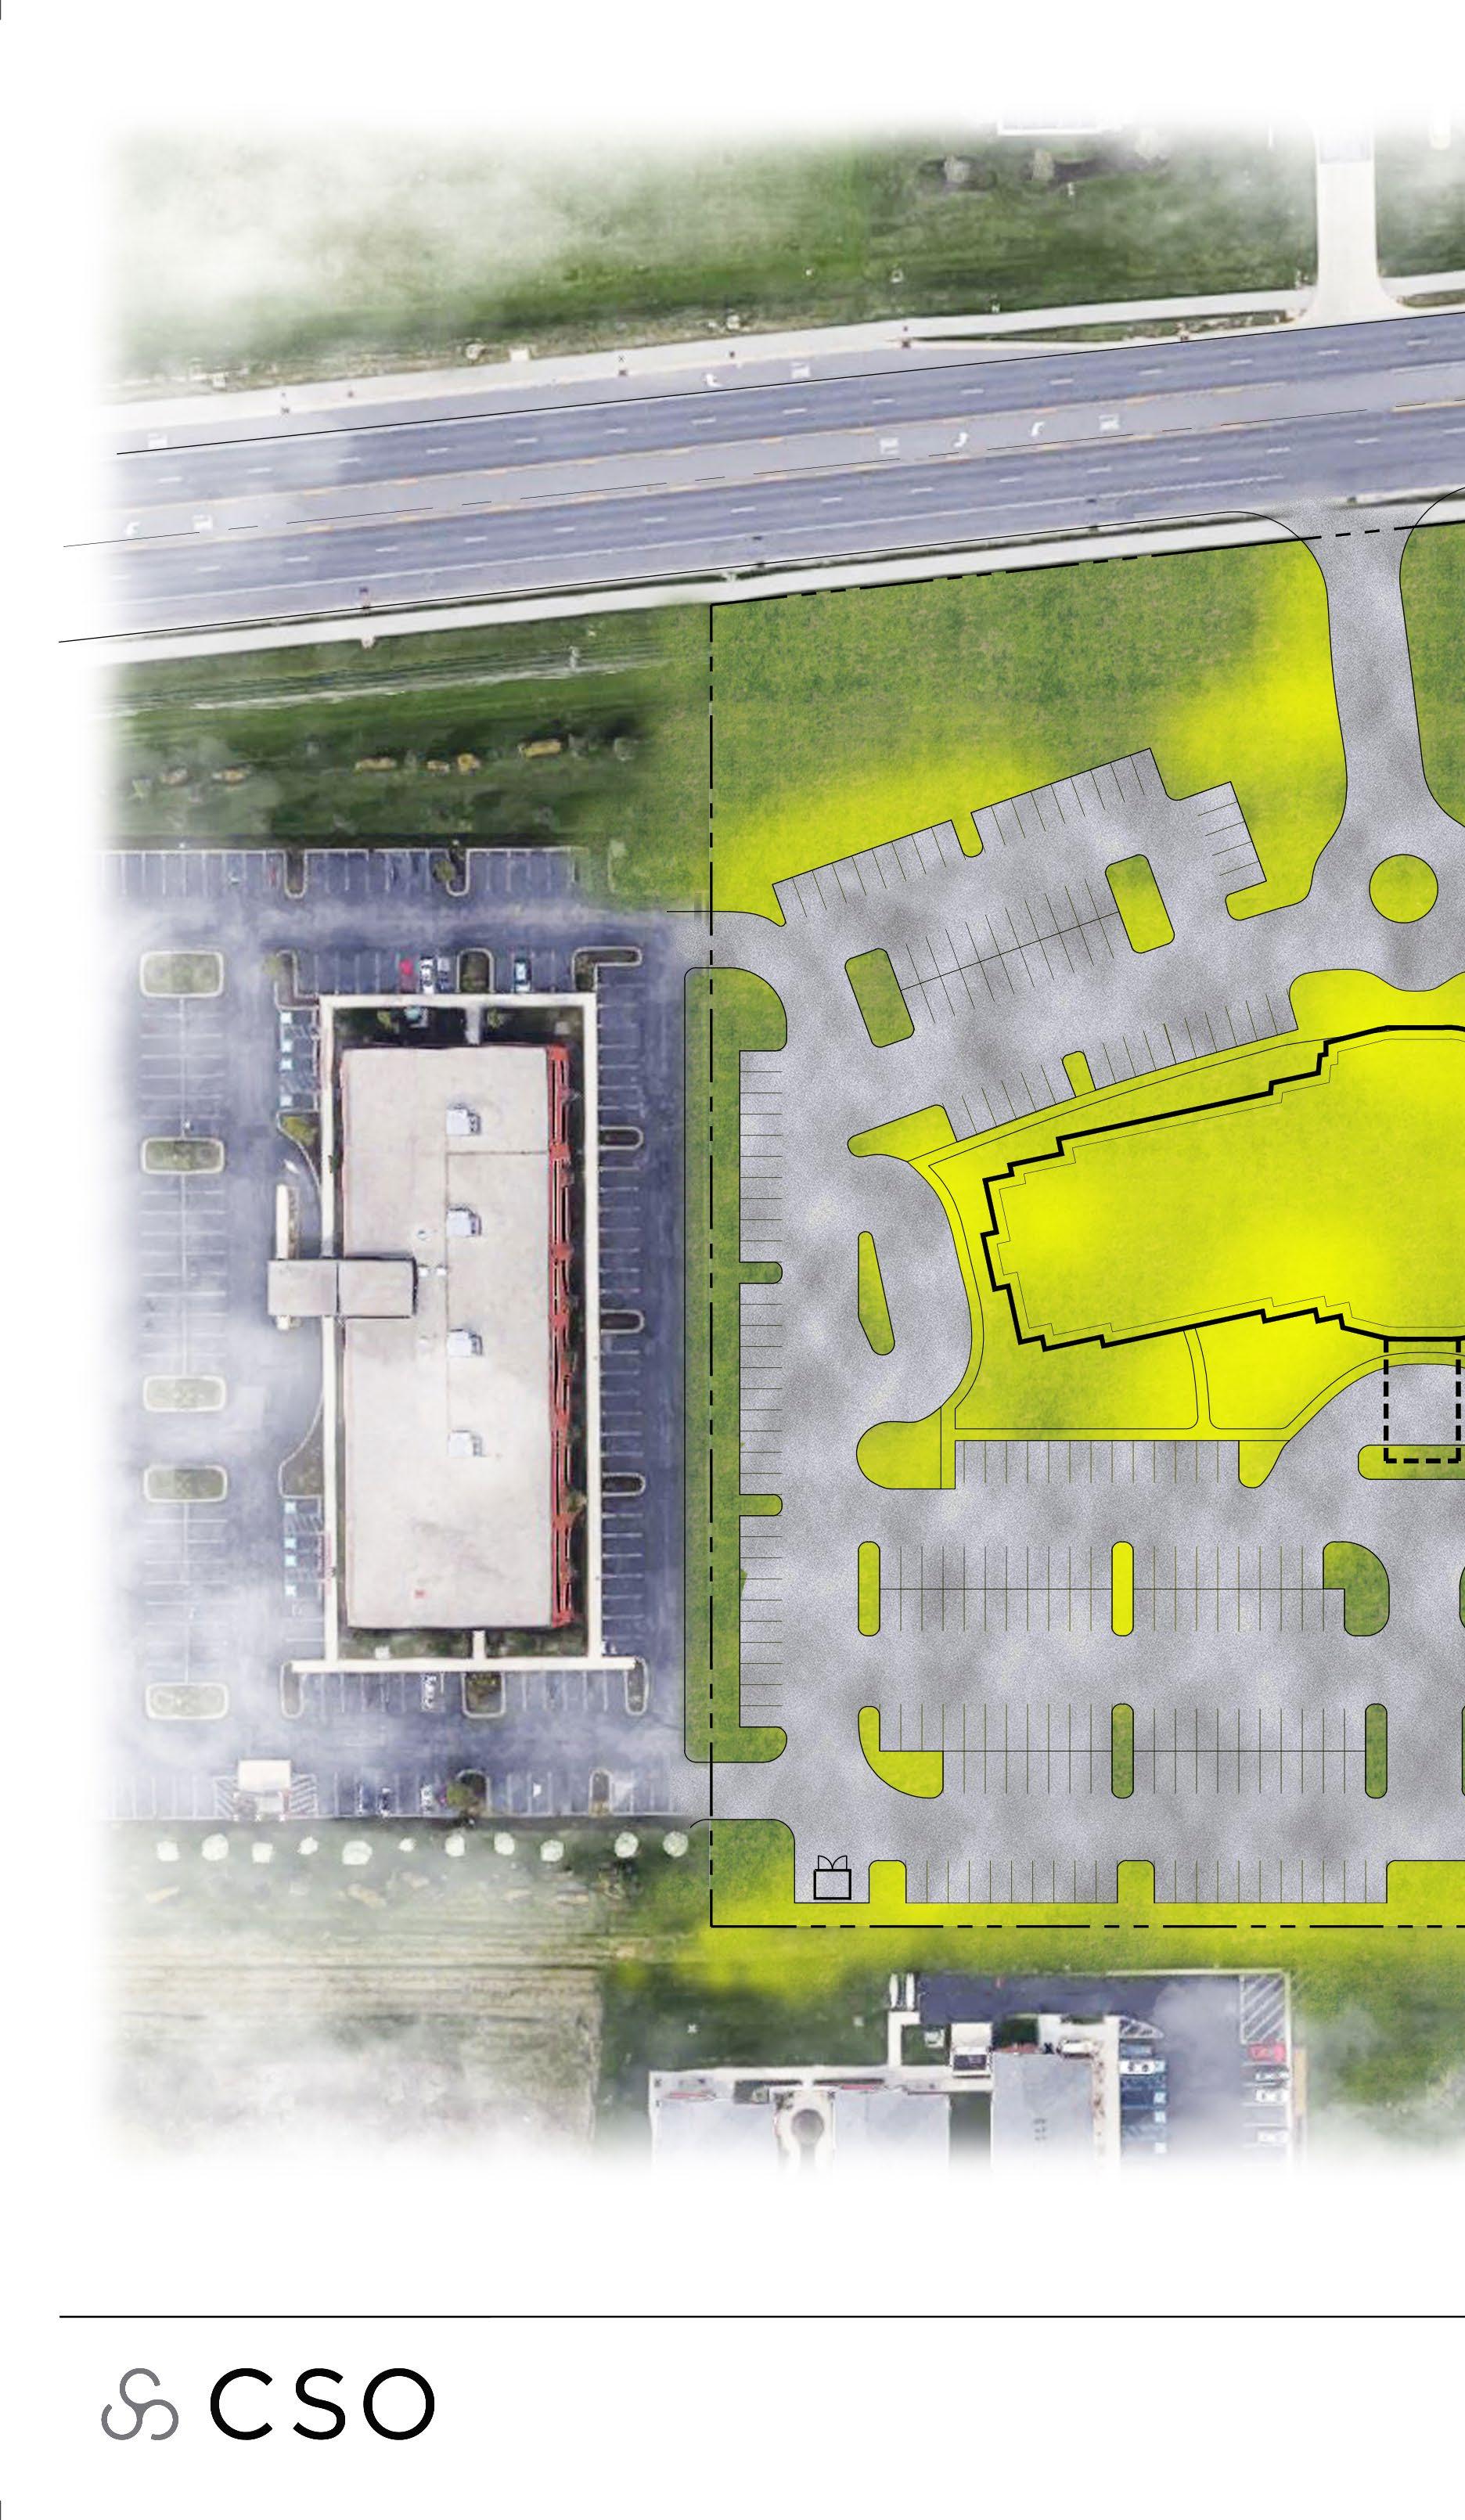
Generous brush application...
Try to highlight points of interest with your brushstrokes
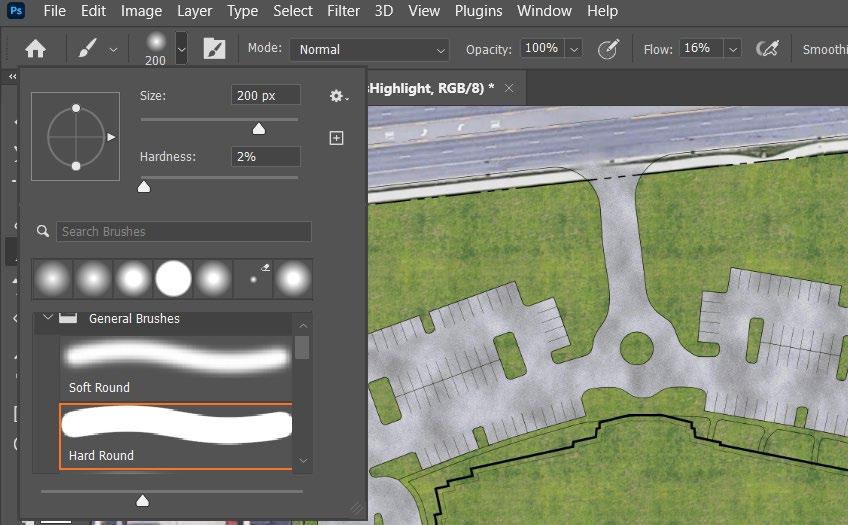
Select a larger brush size and a lower “Hardness” size.
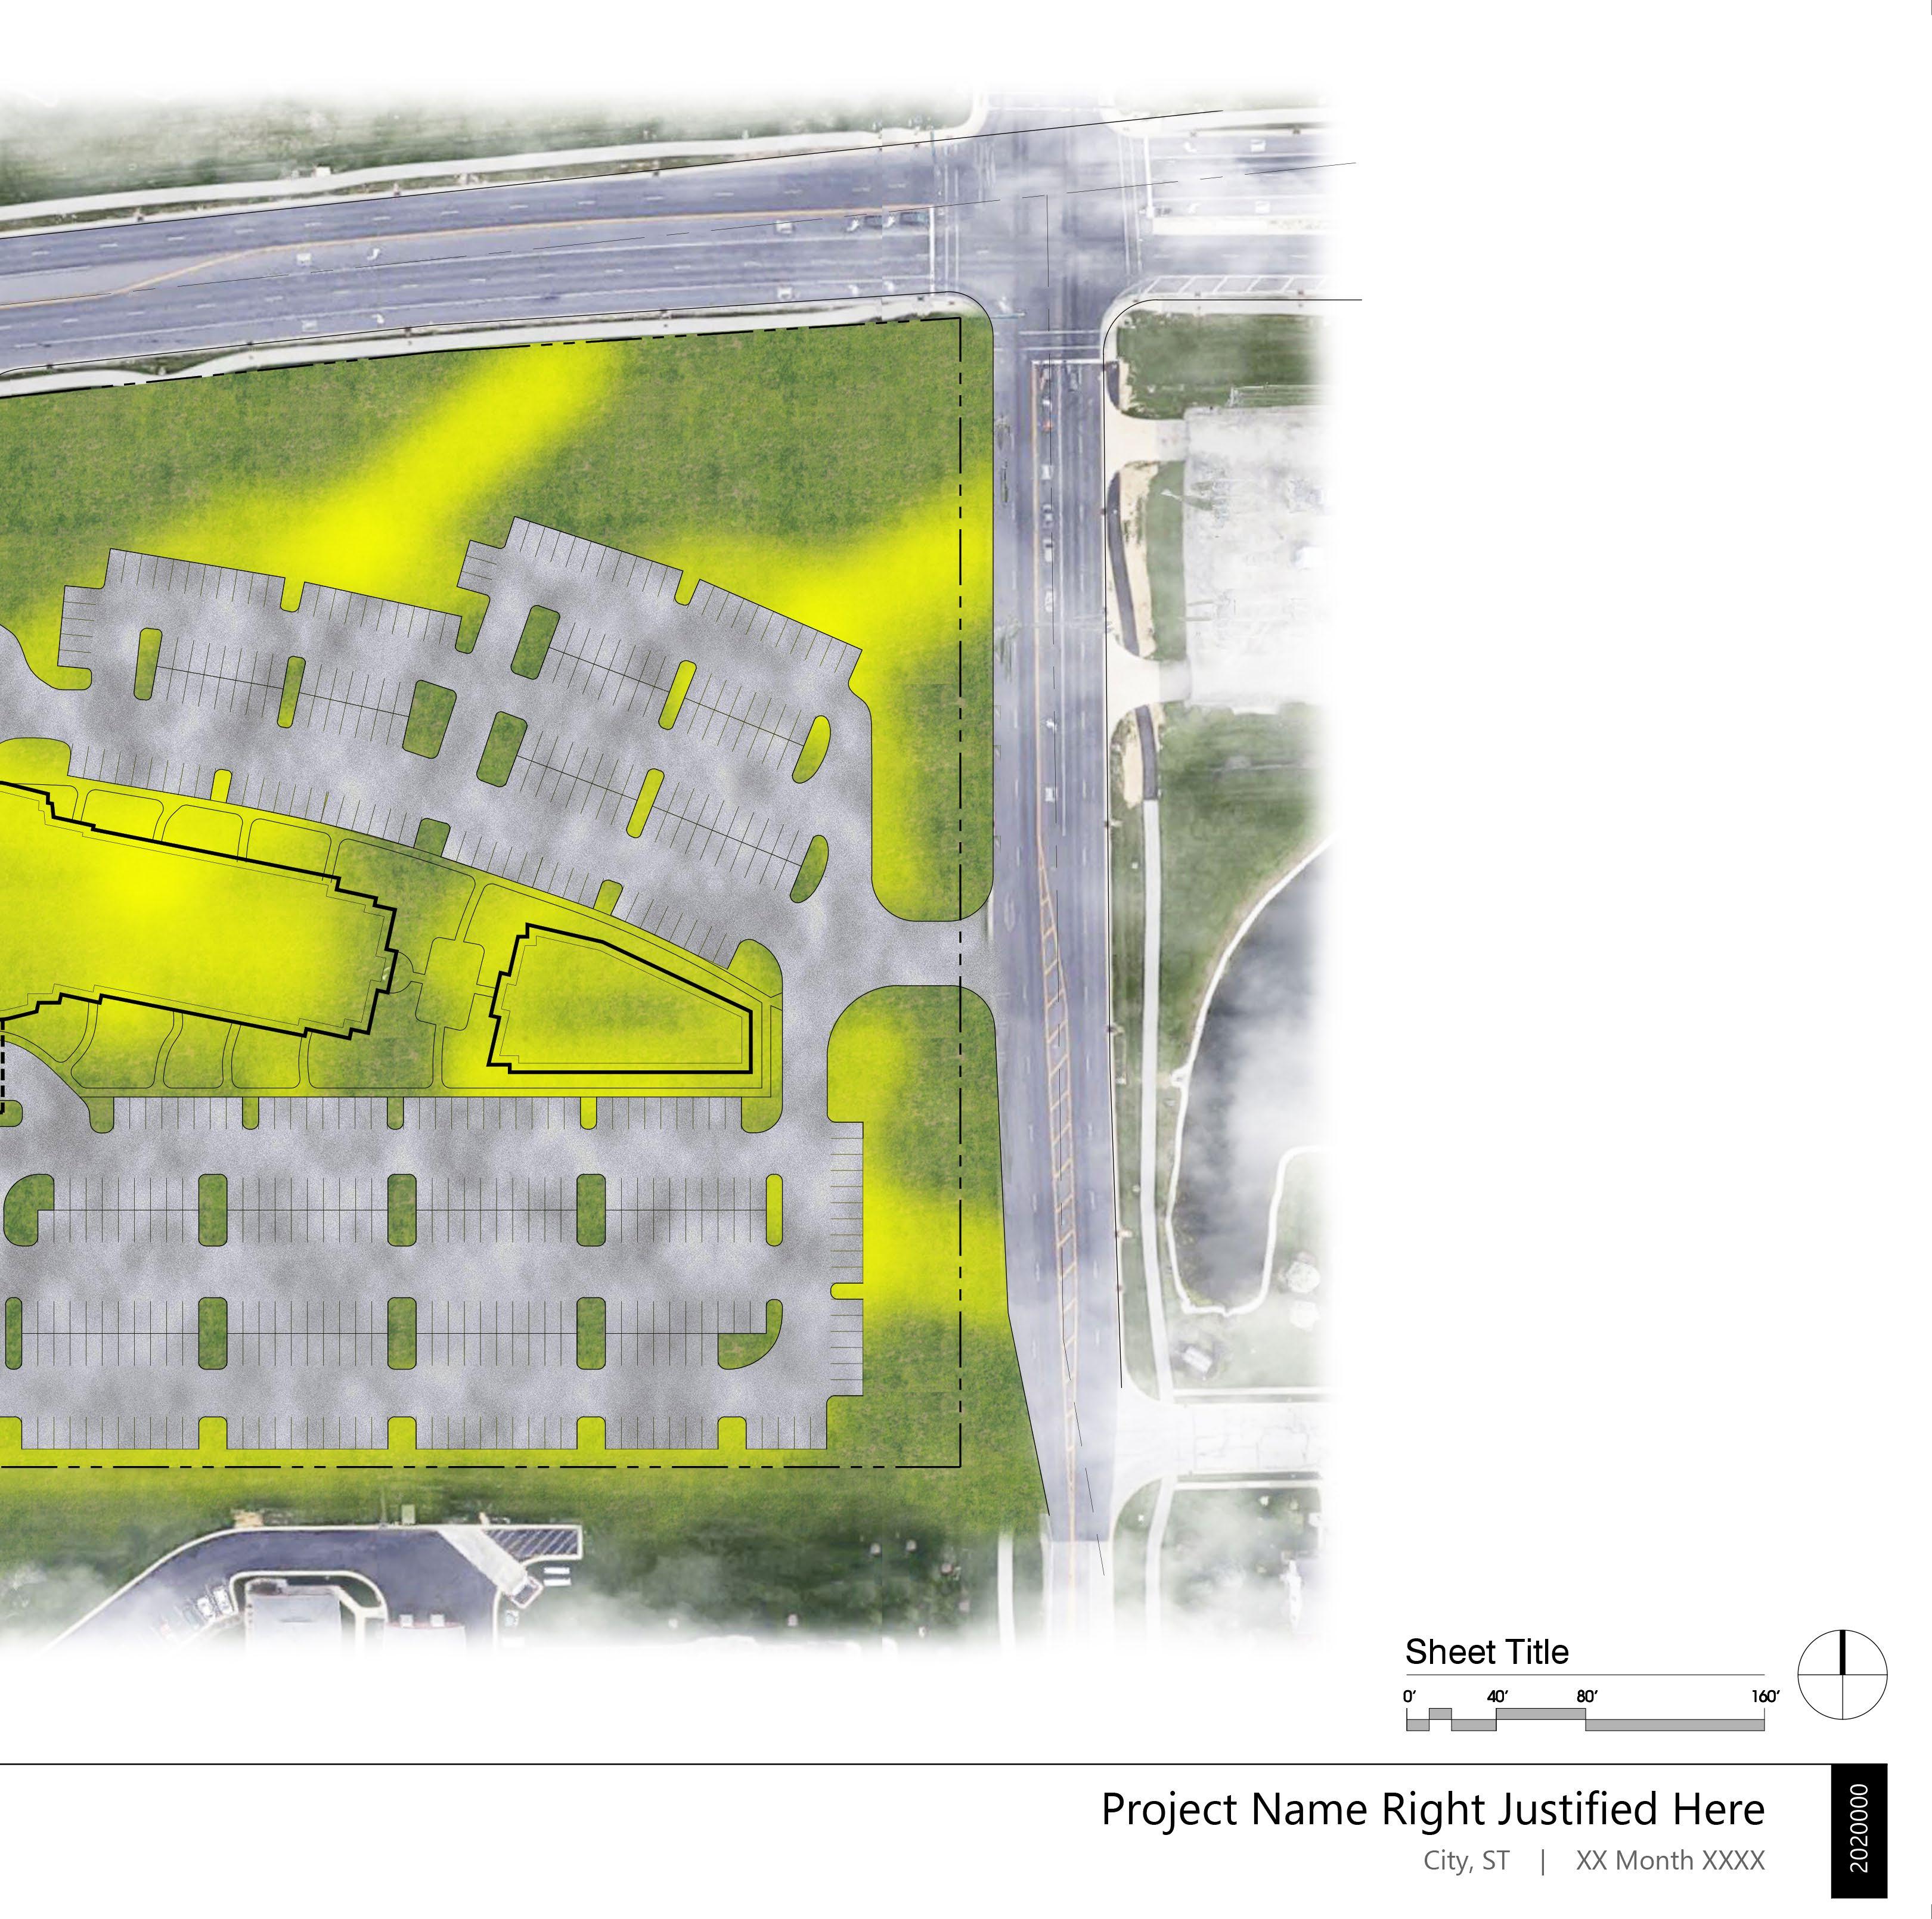


Generous stroke application... Line the centermost part of each of your drive aisles.

Gaussian Blur... Reference previous guide for this effect

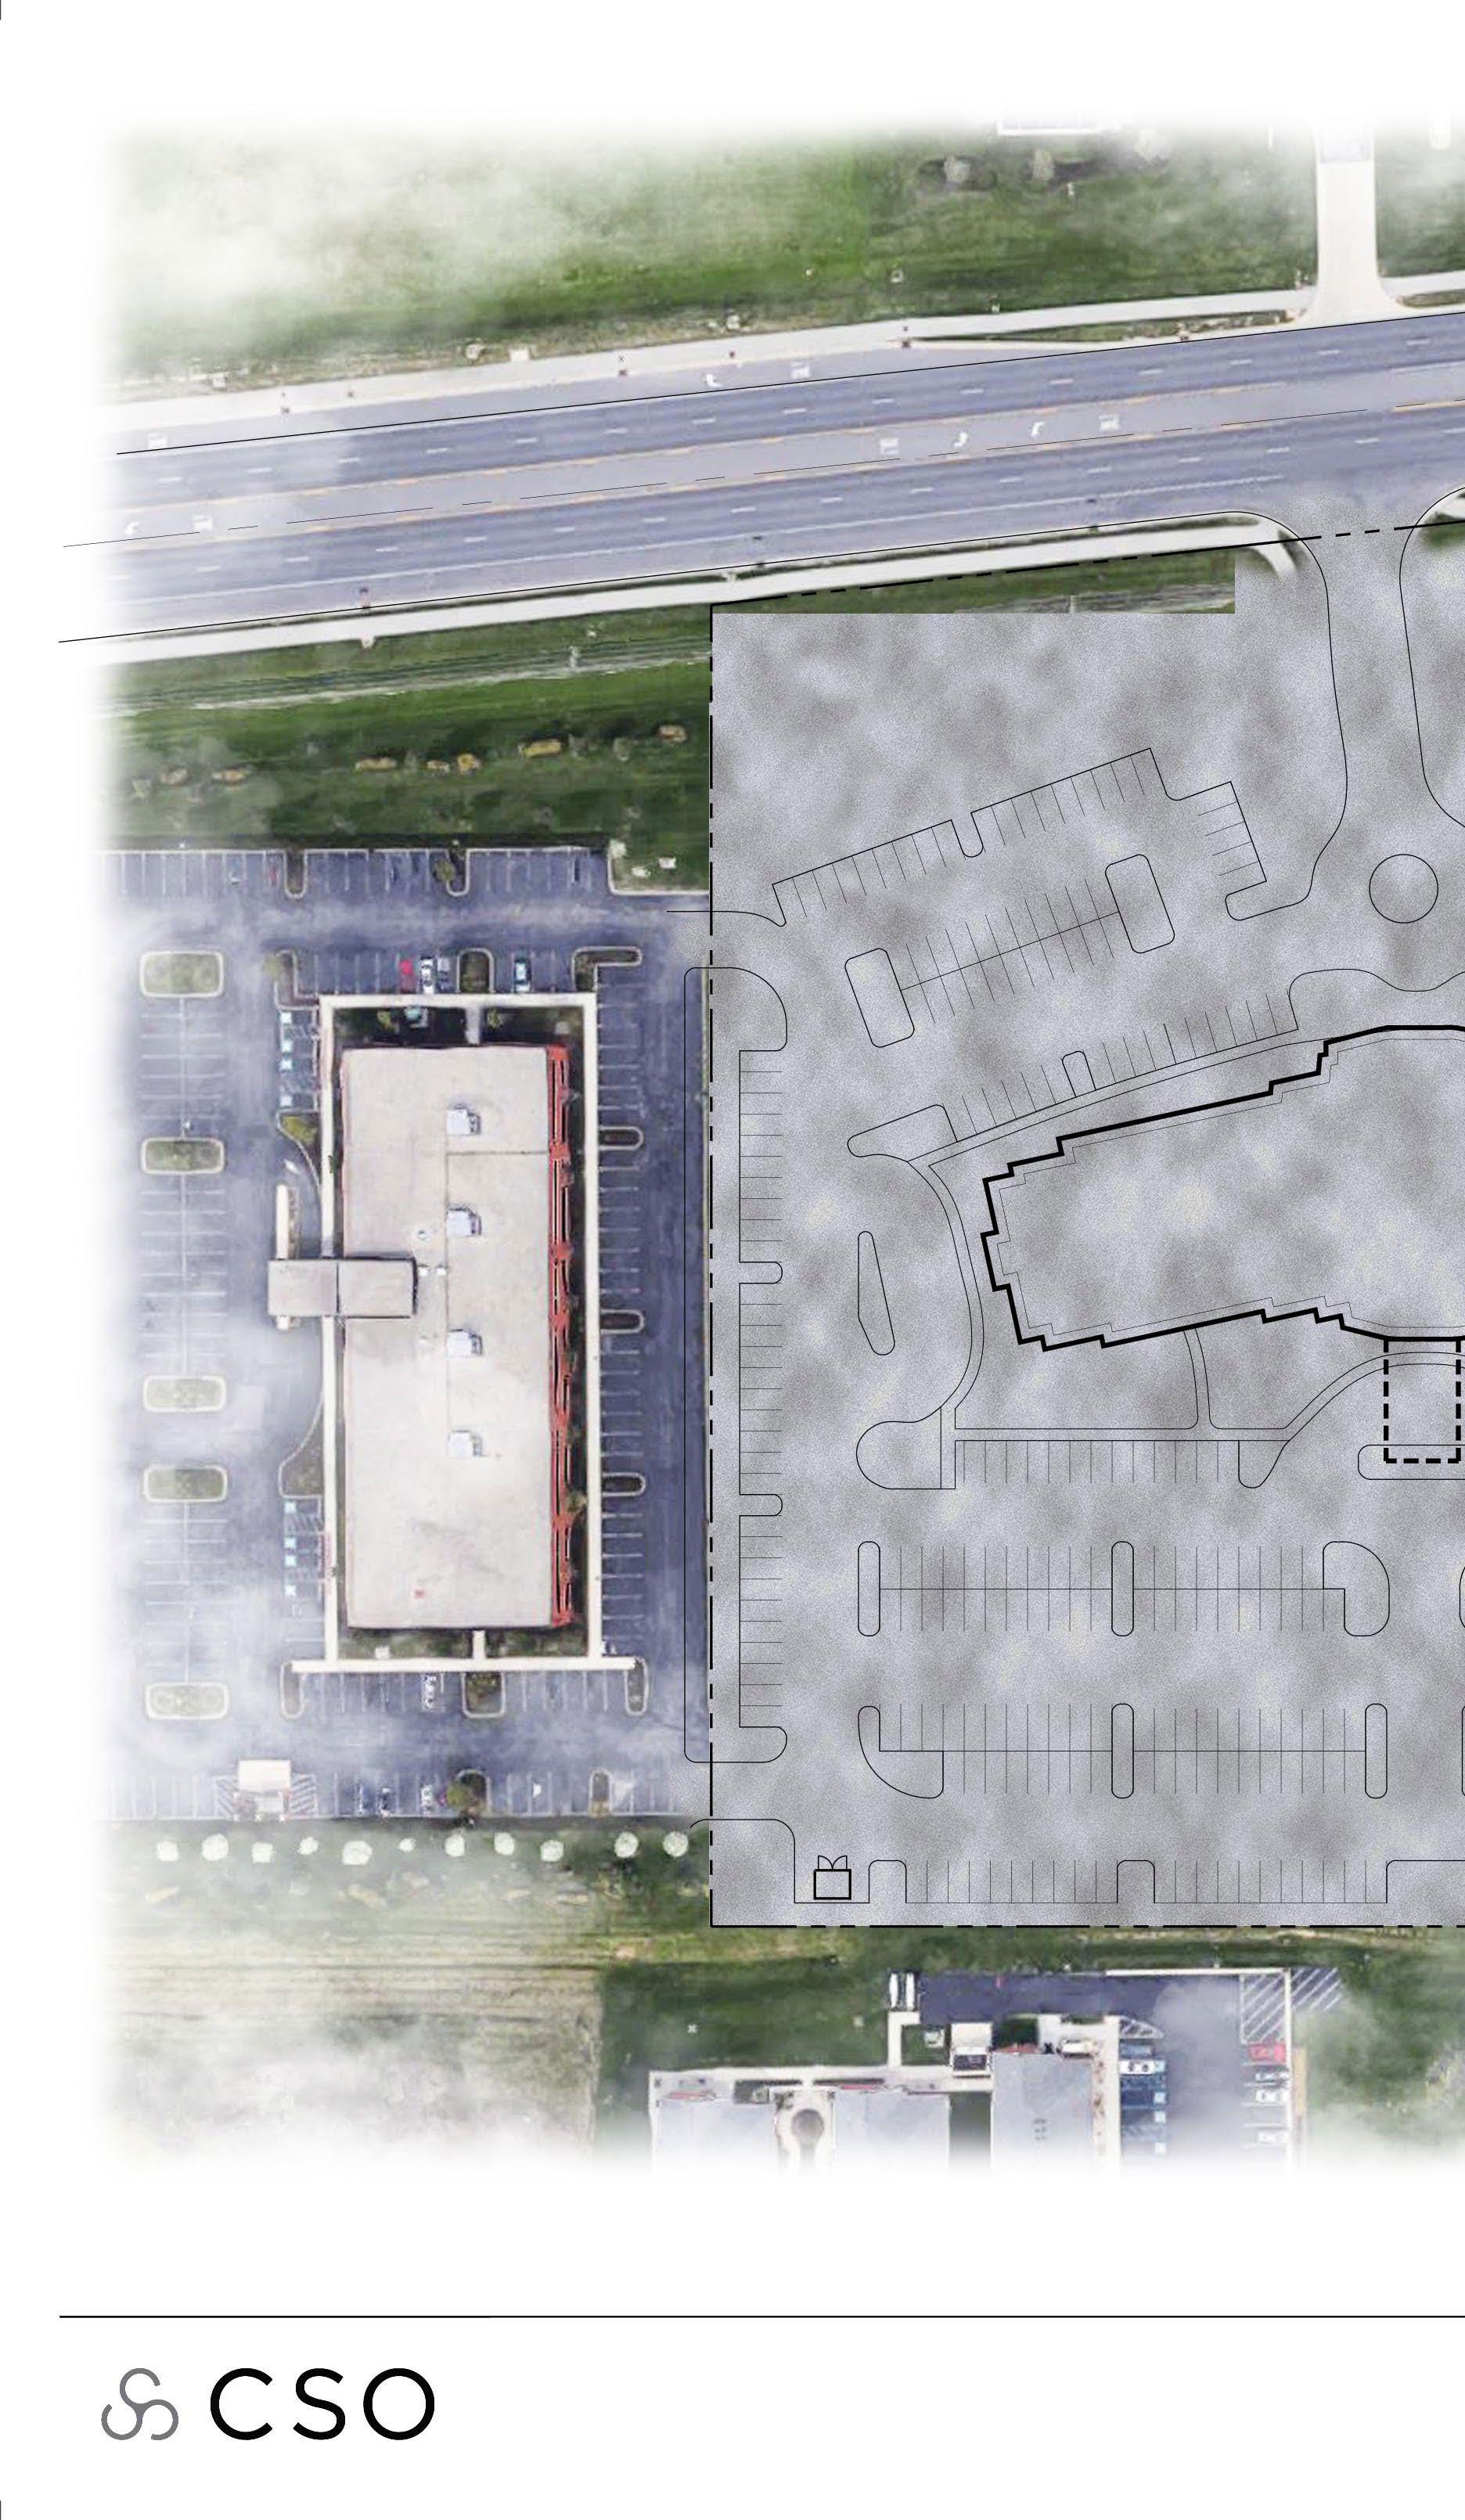
Sidewalk Masking... Follow the previous ‘Grass Masking’ Technique
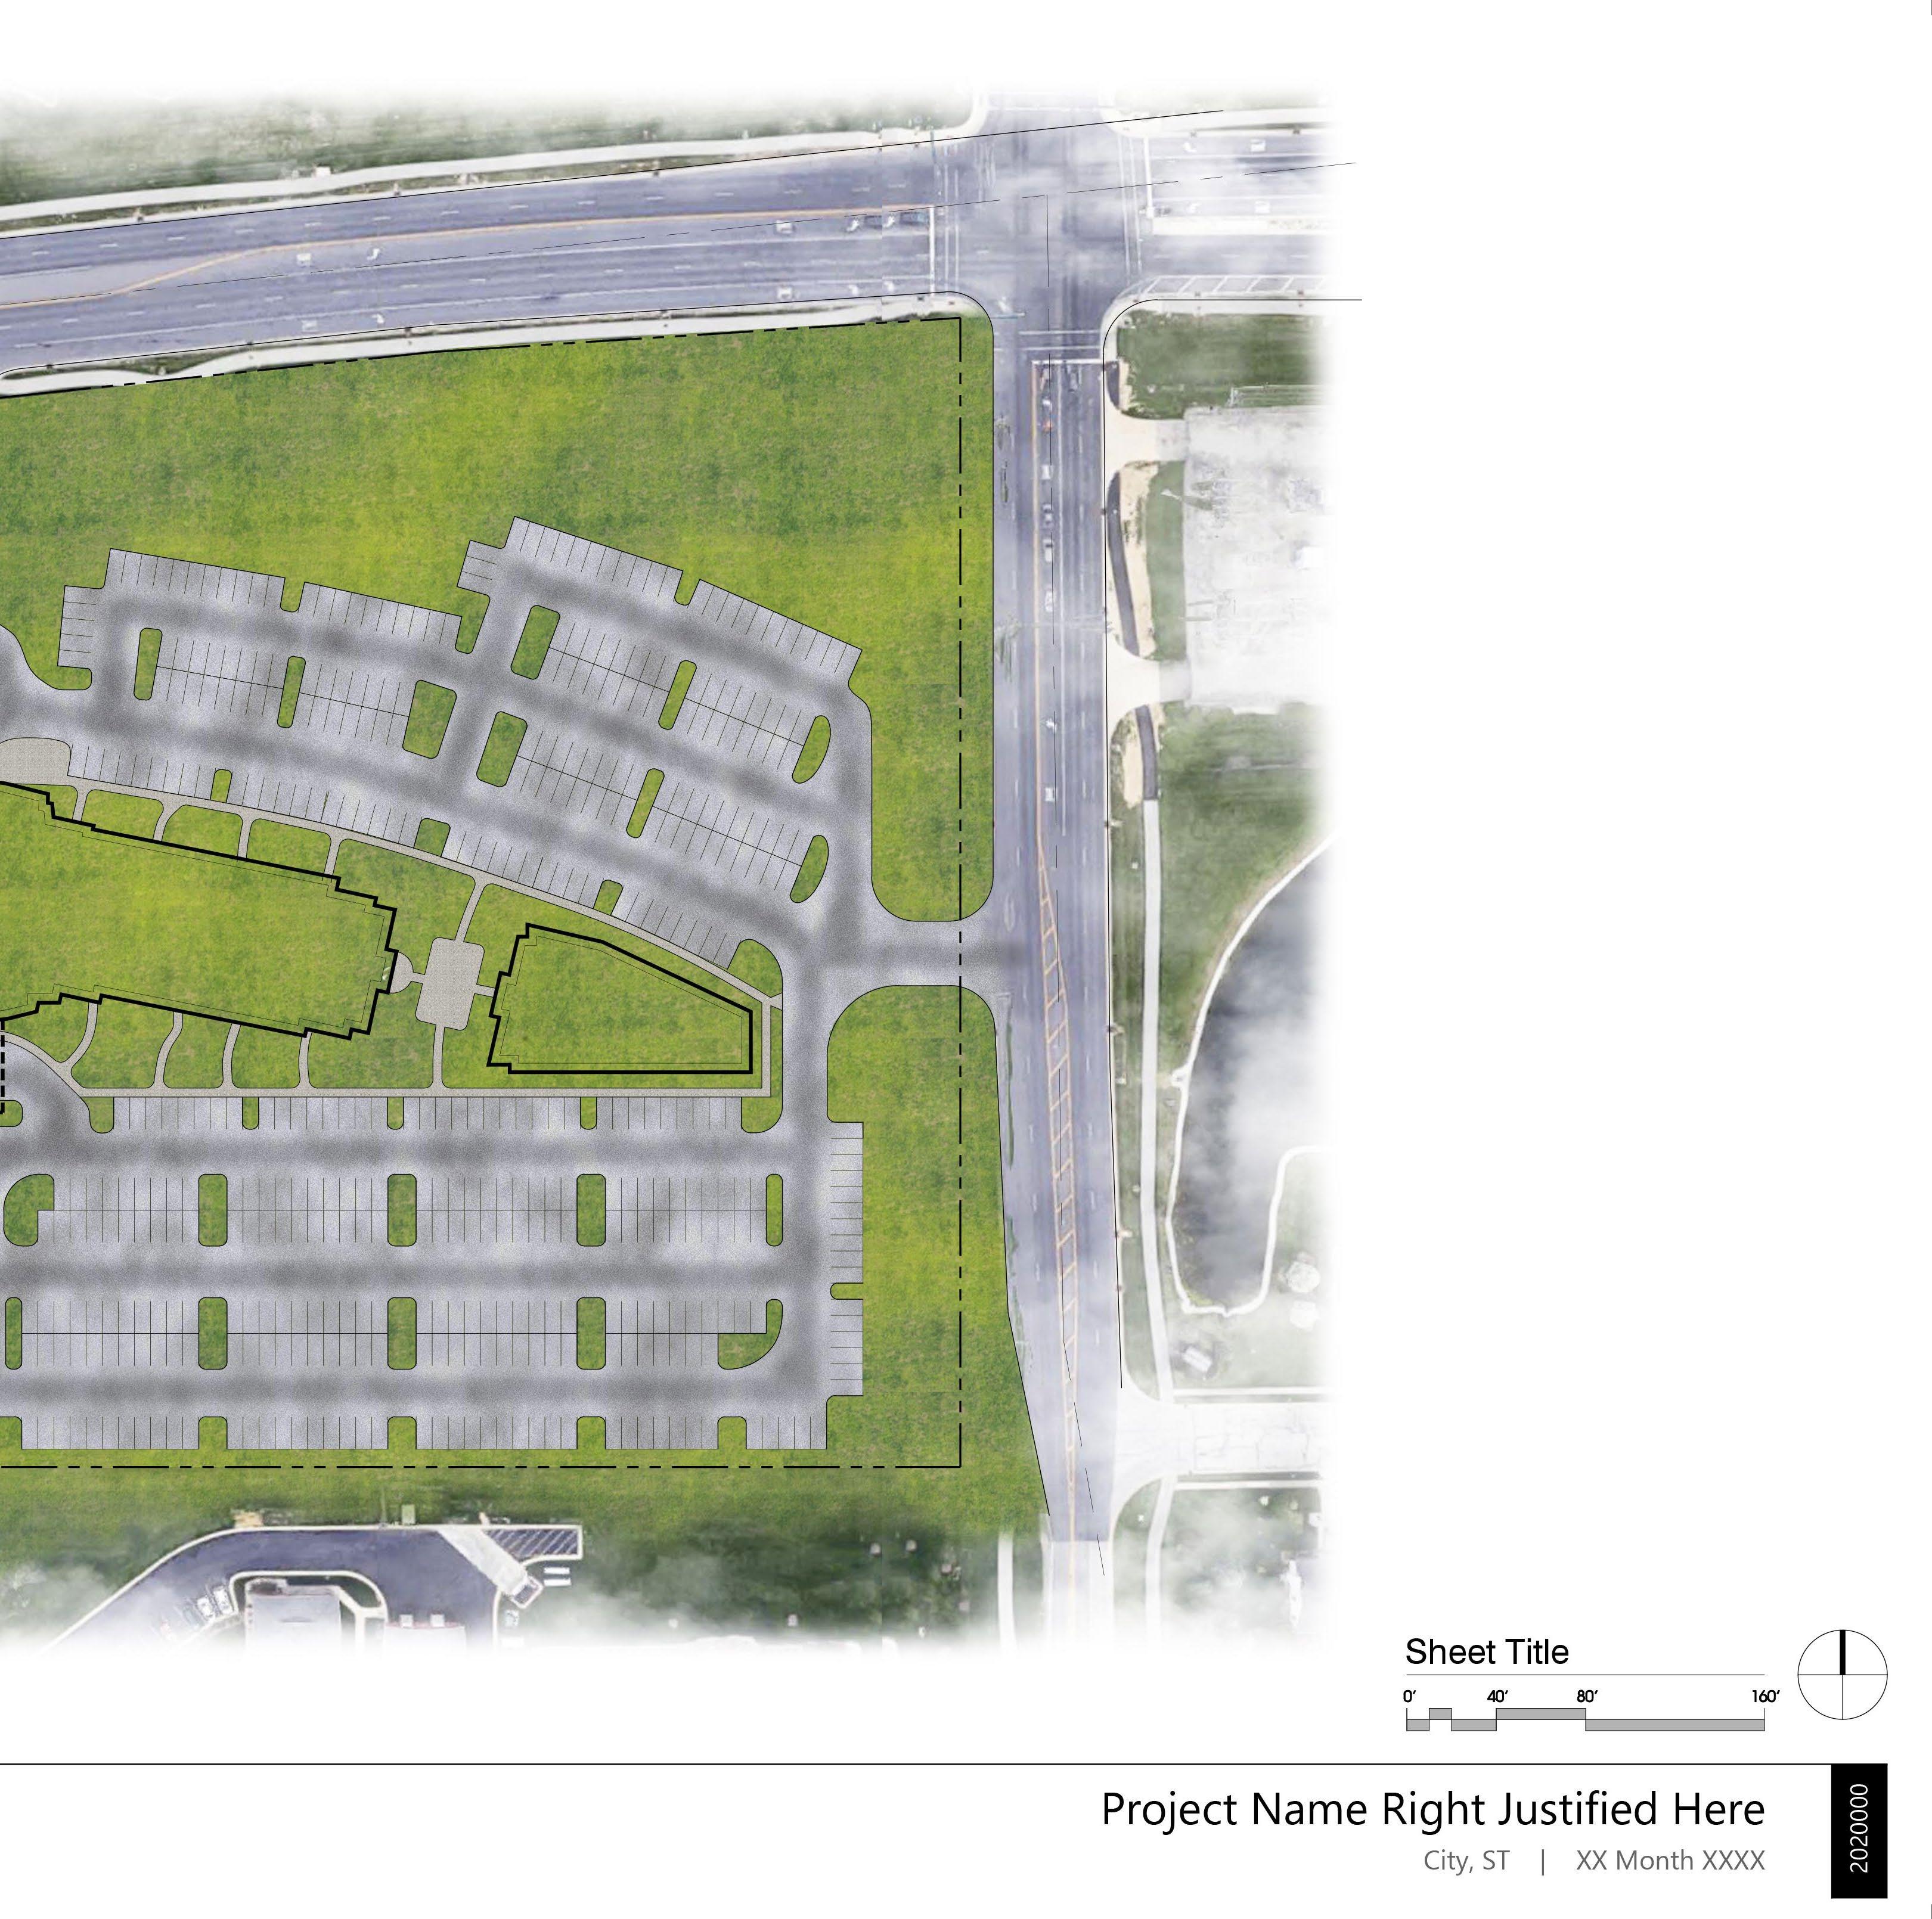
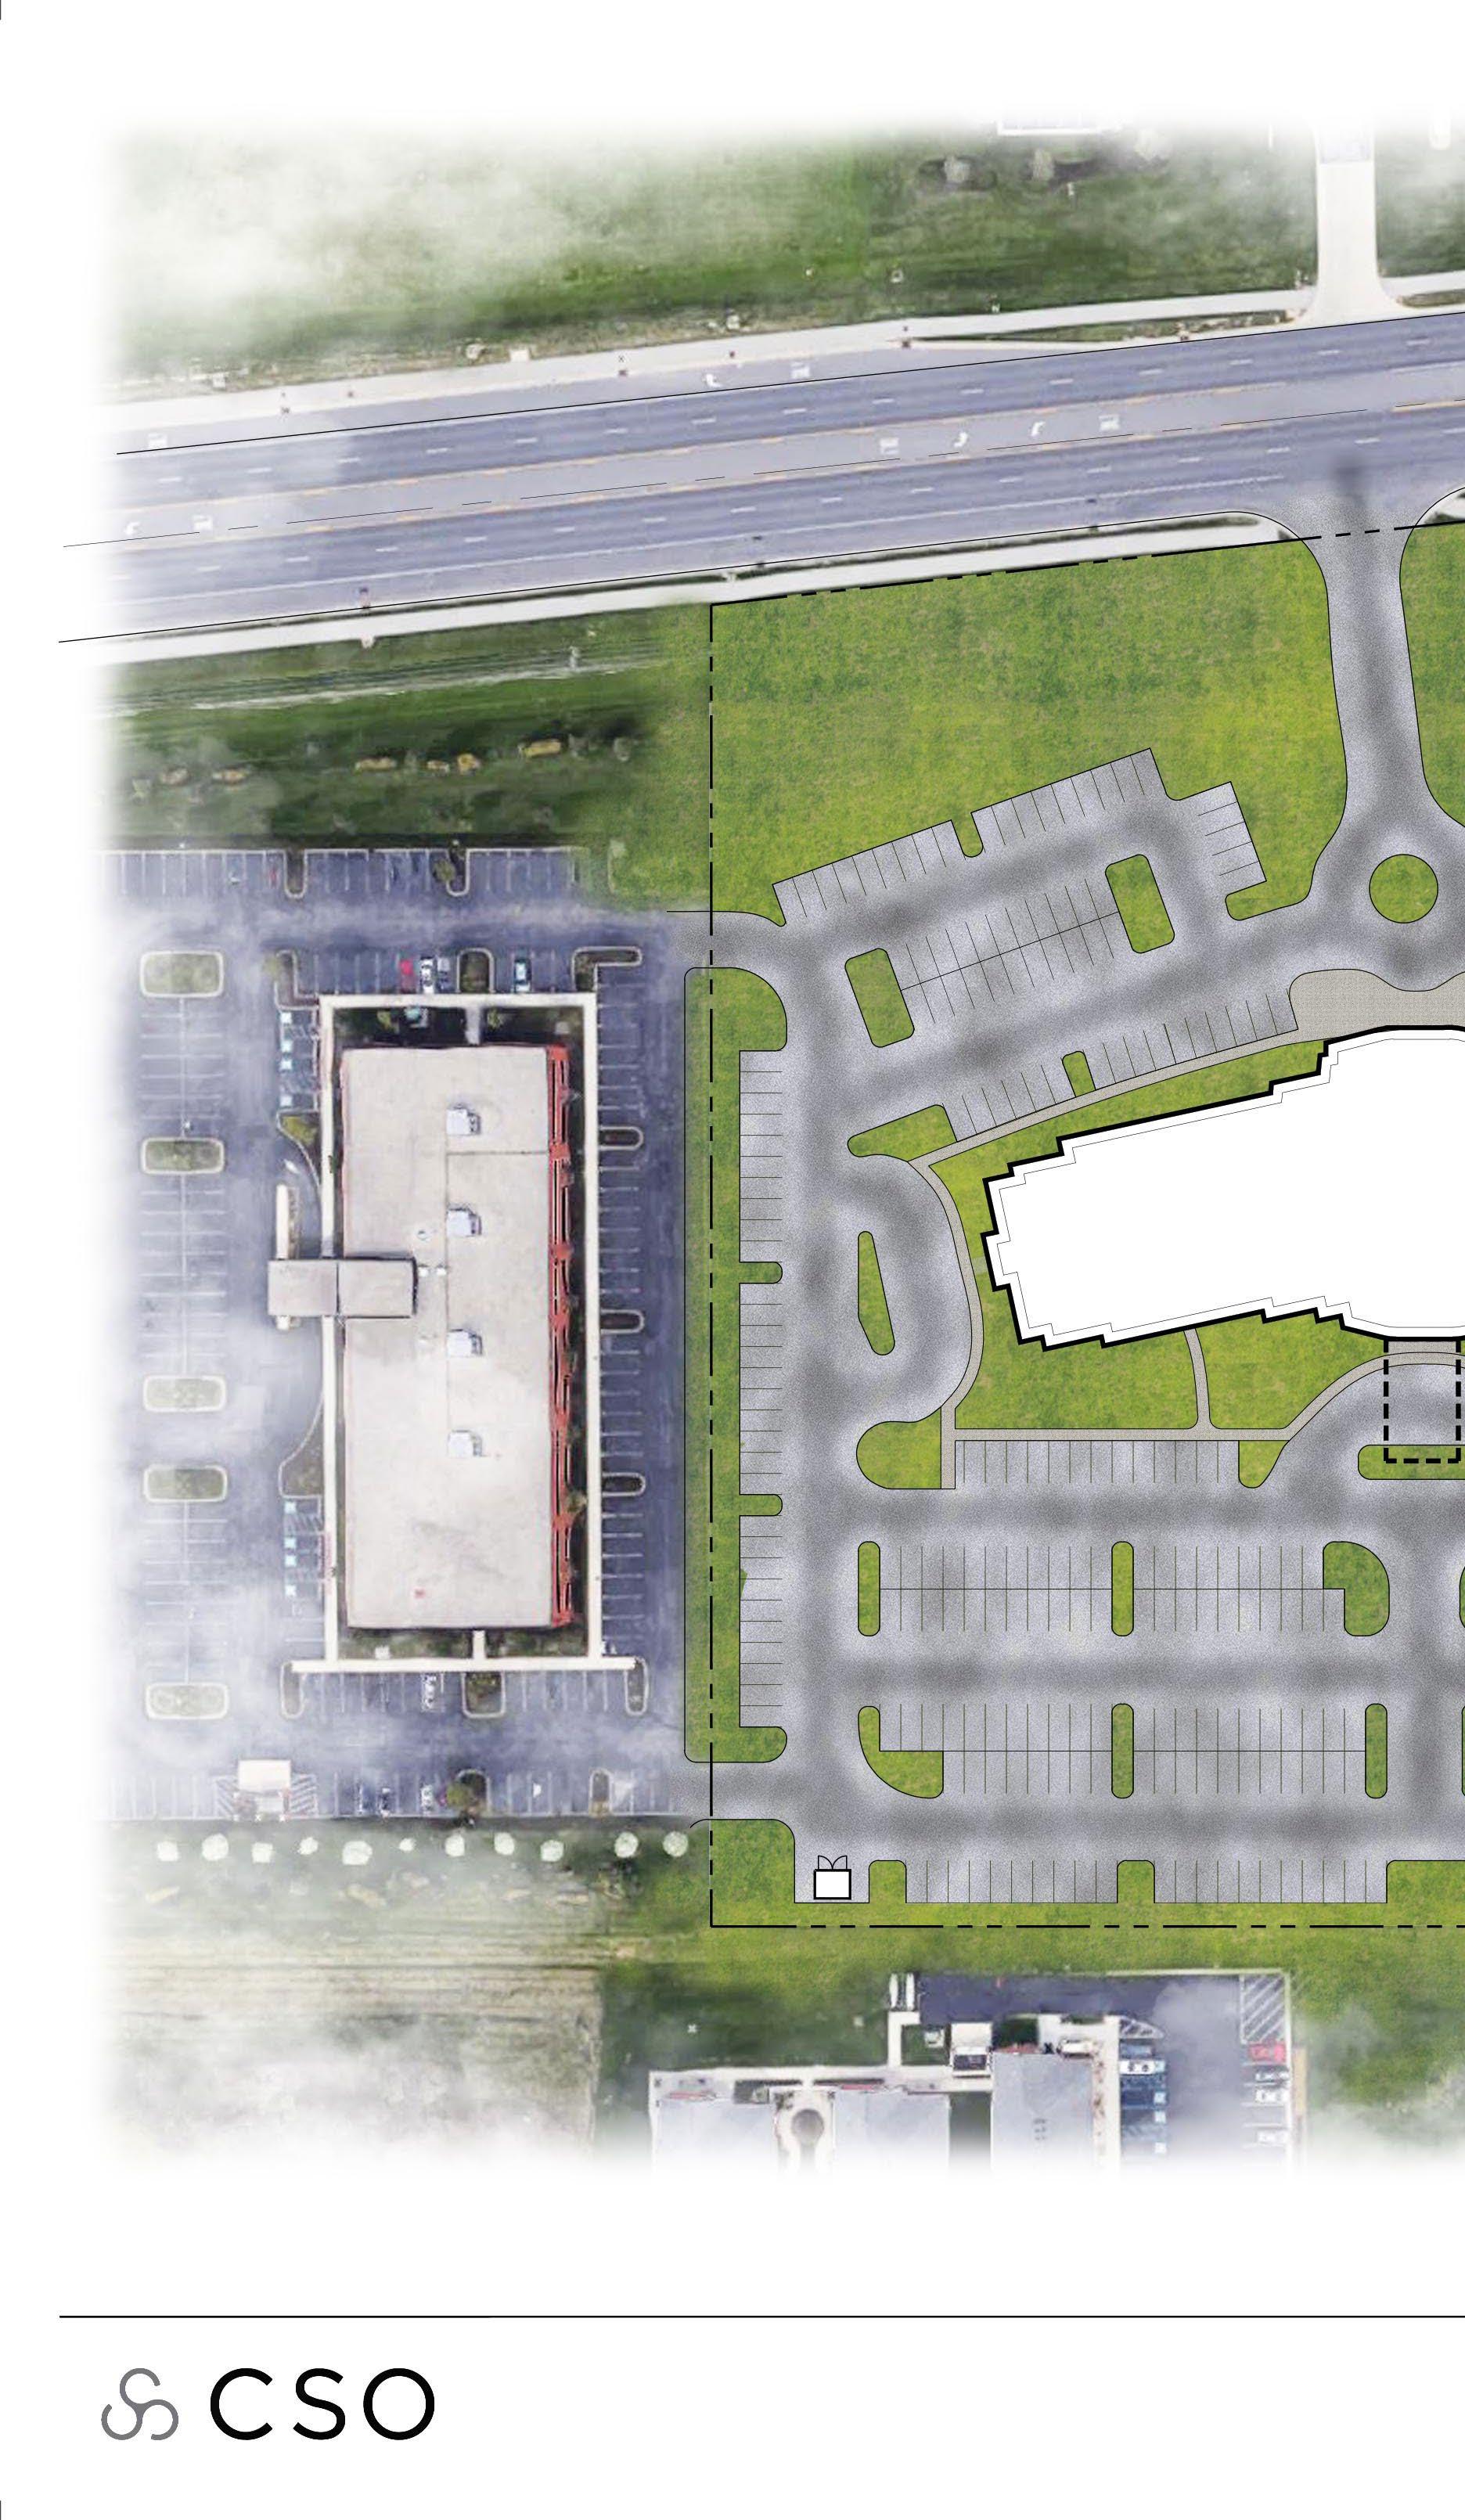
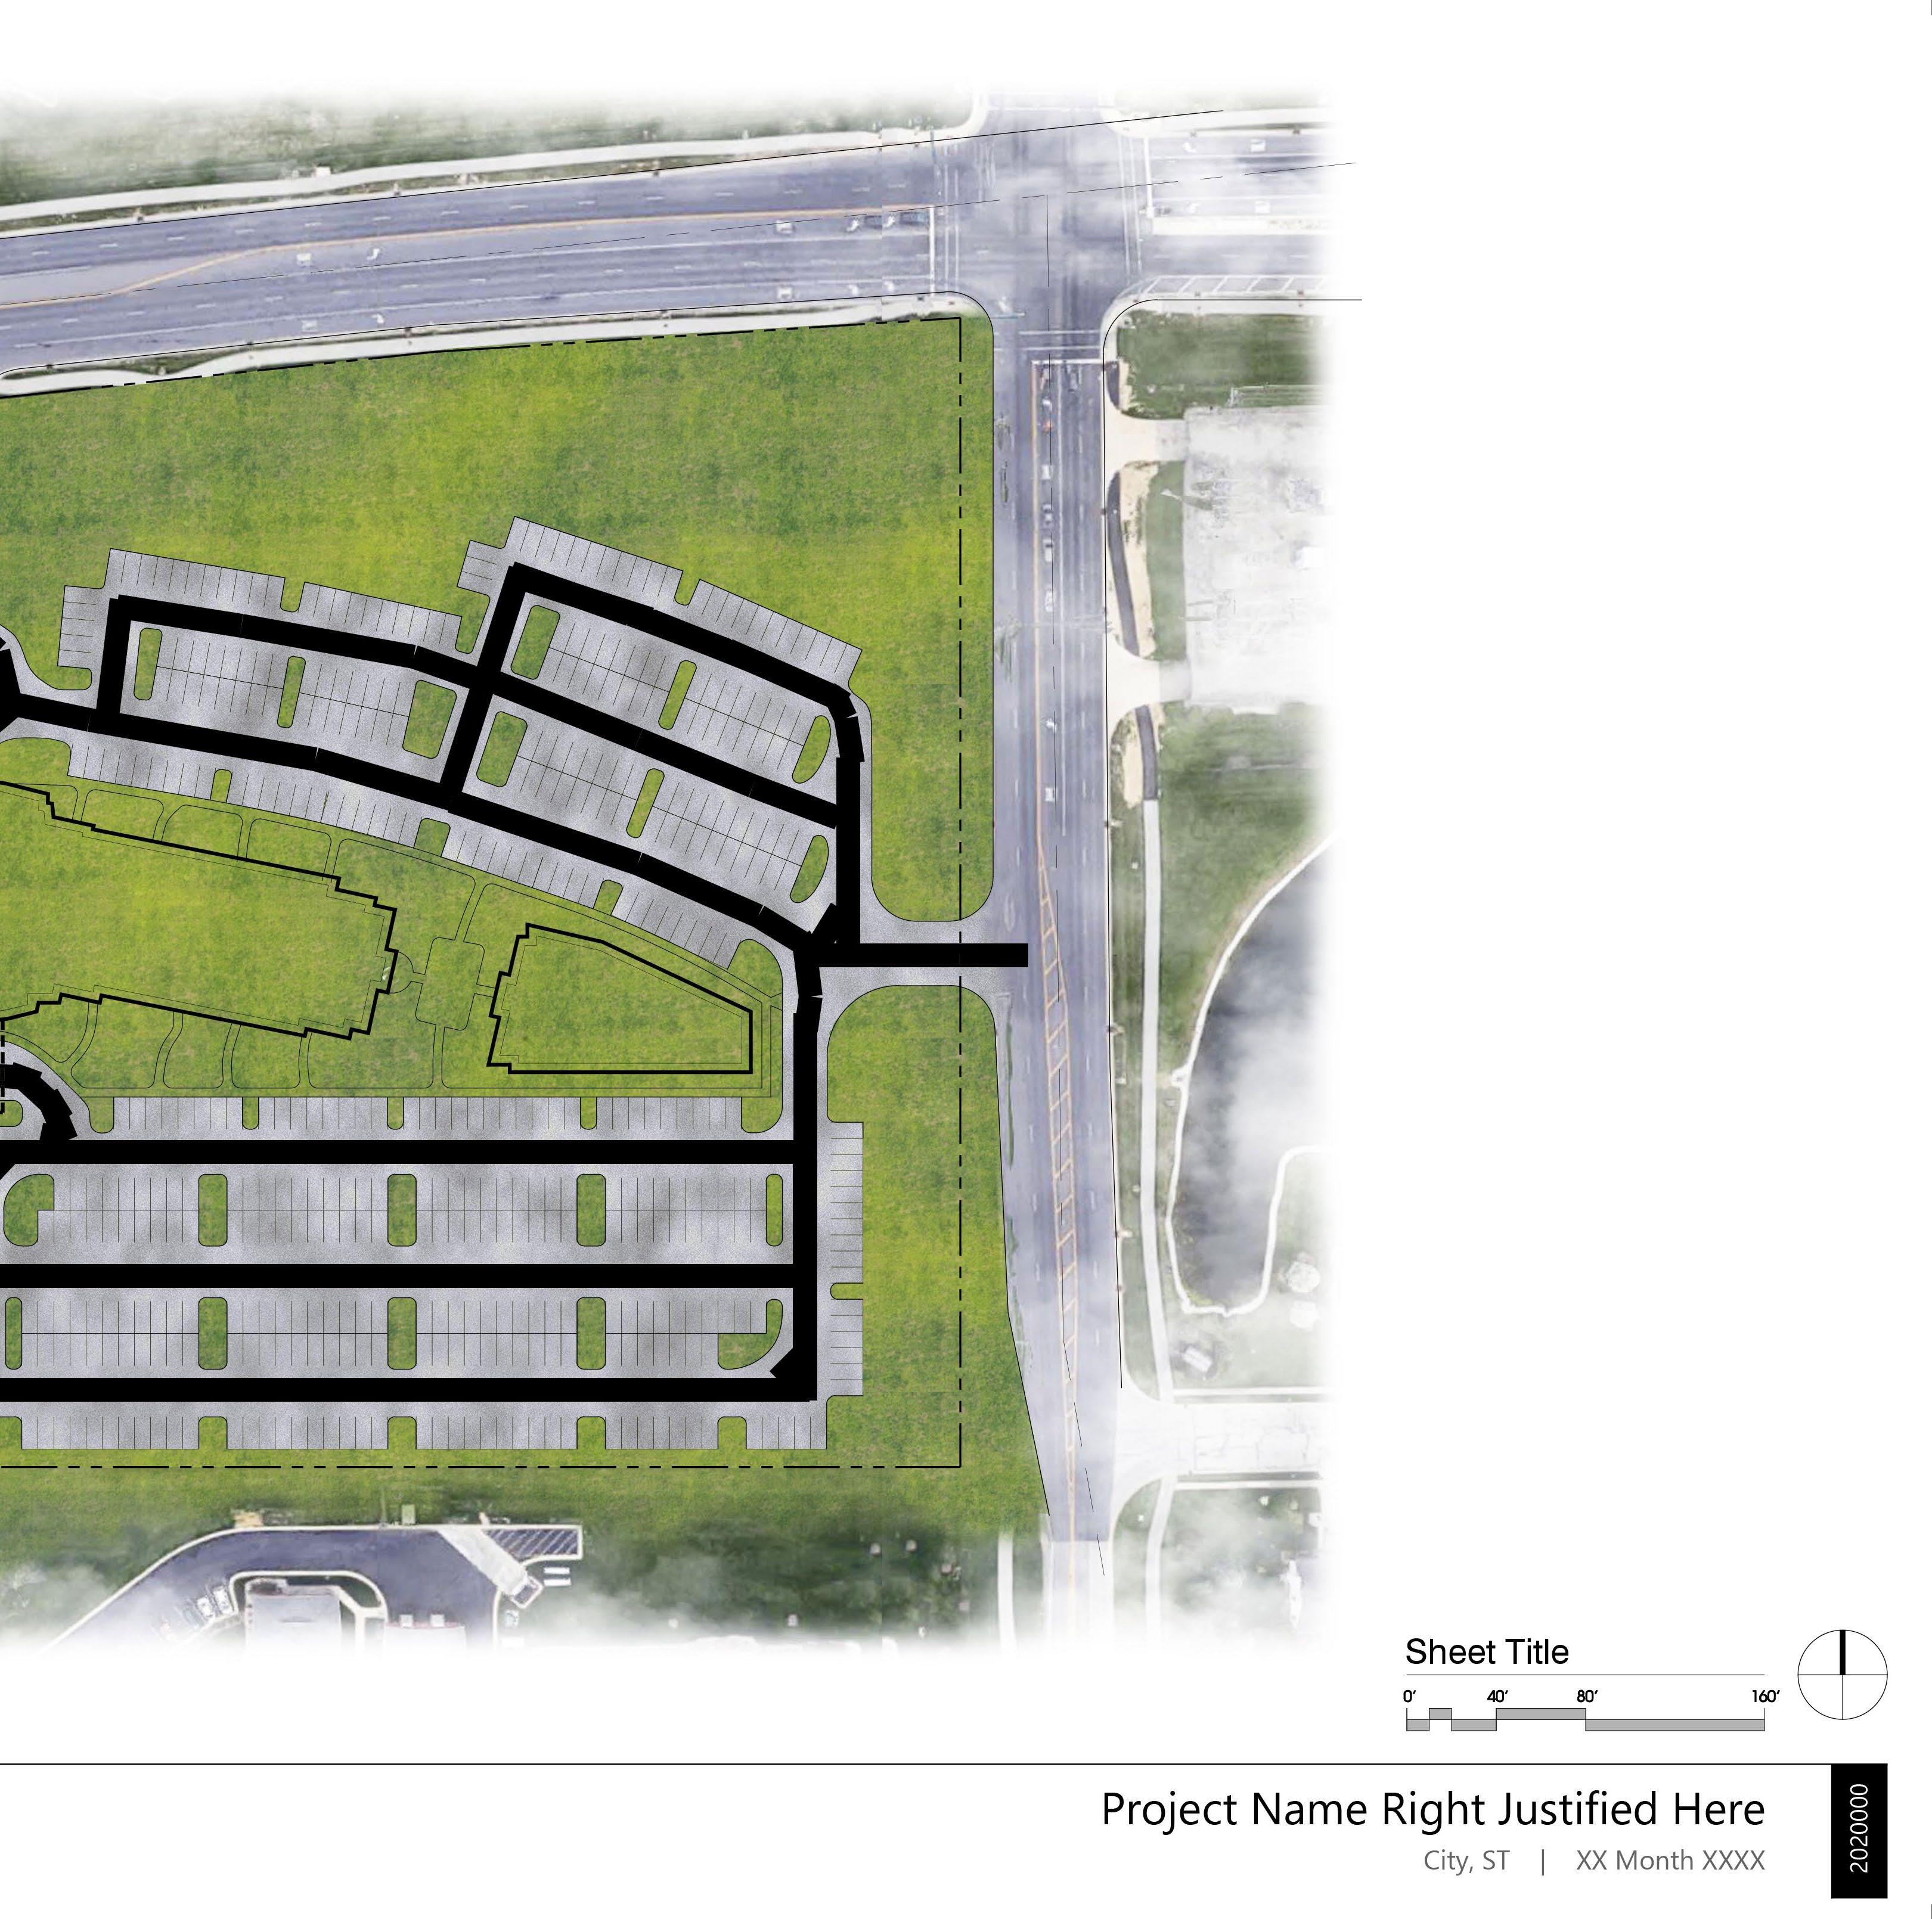
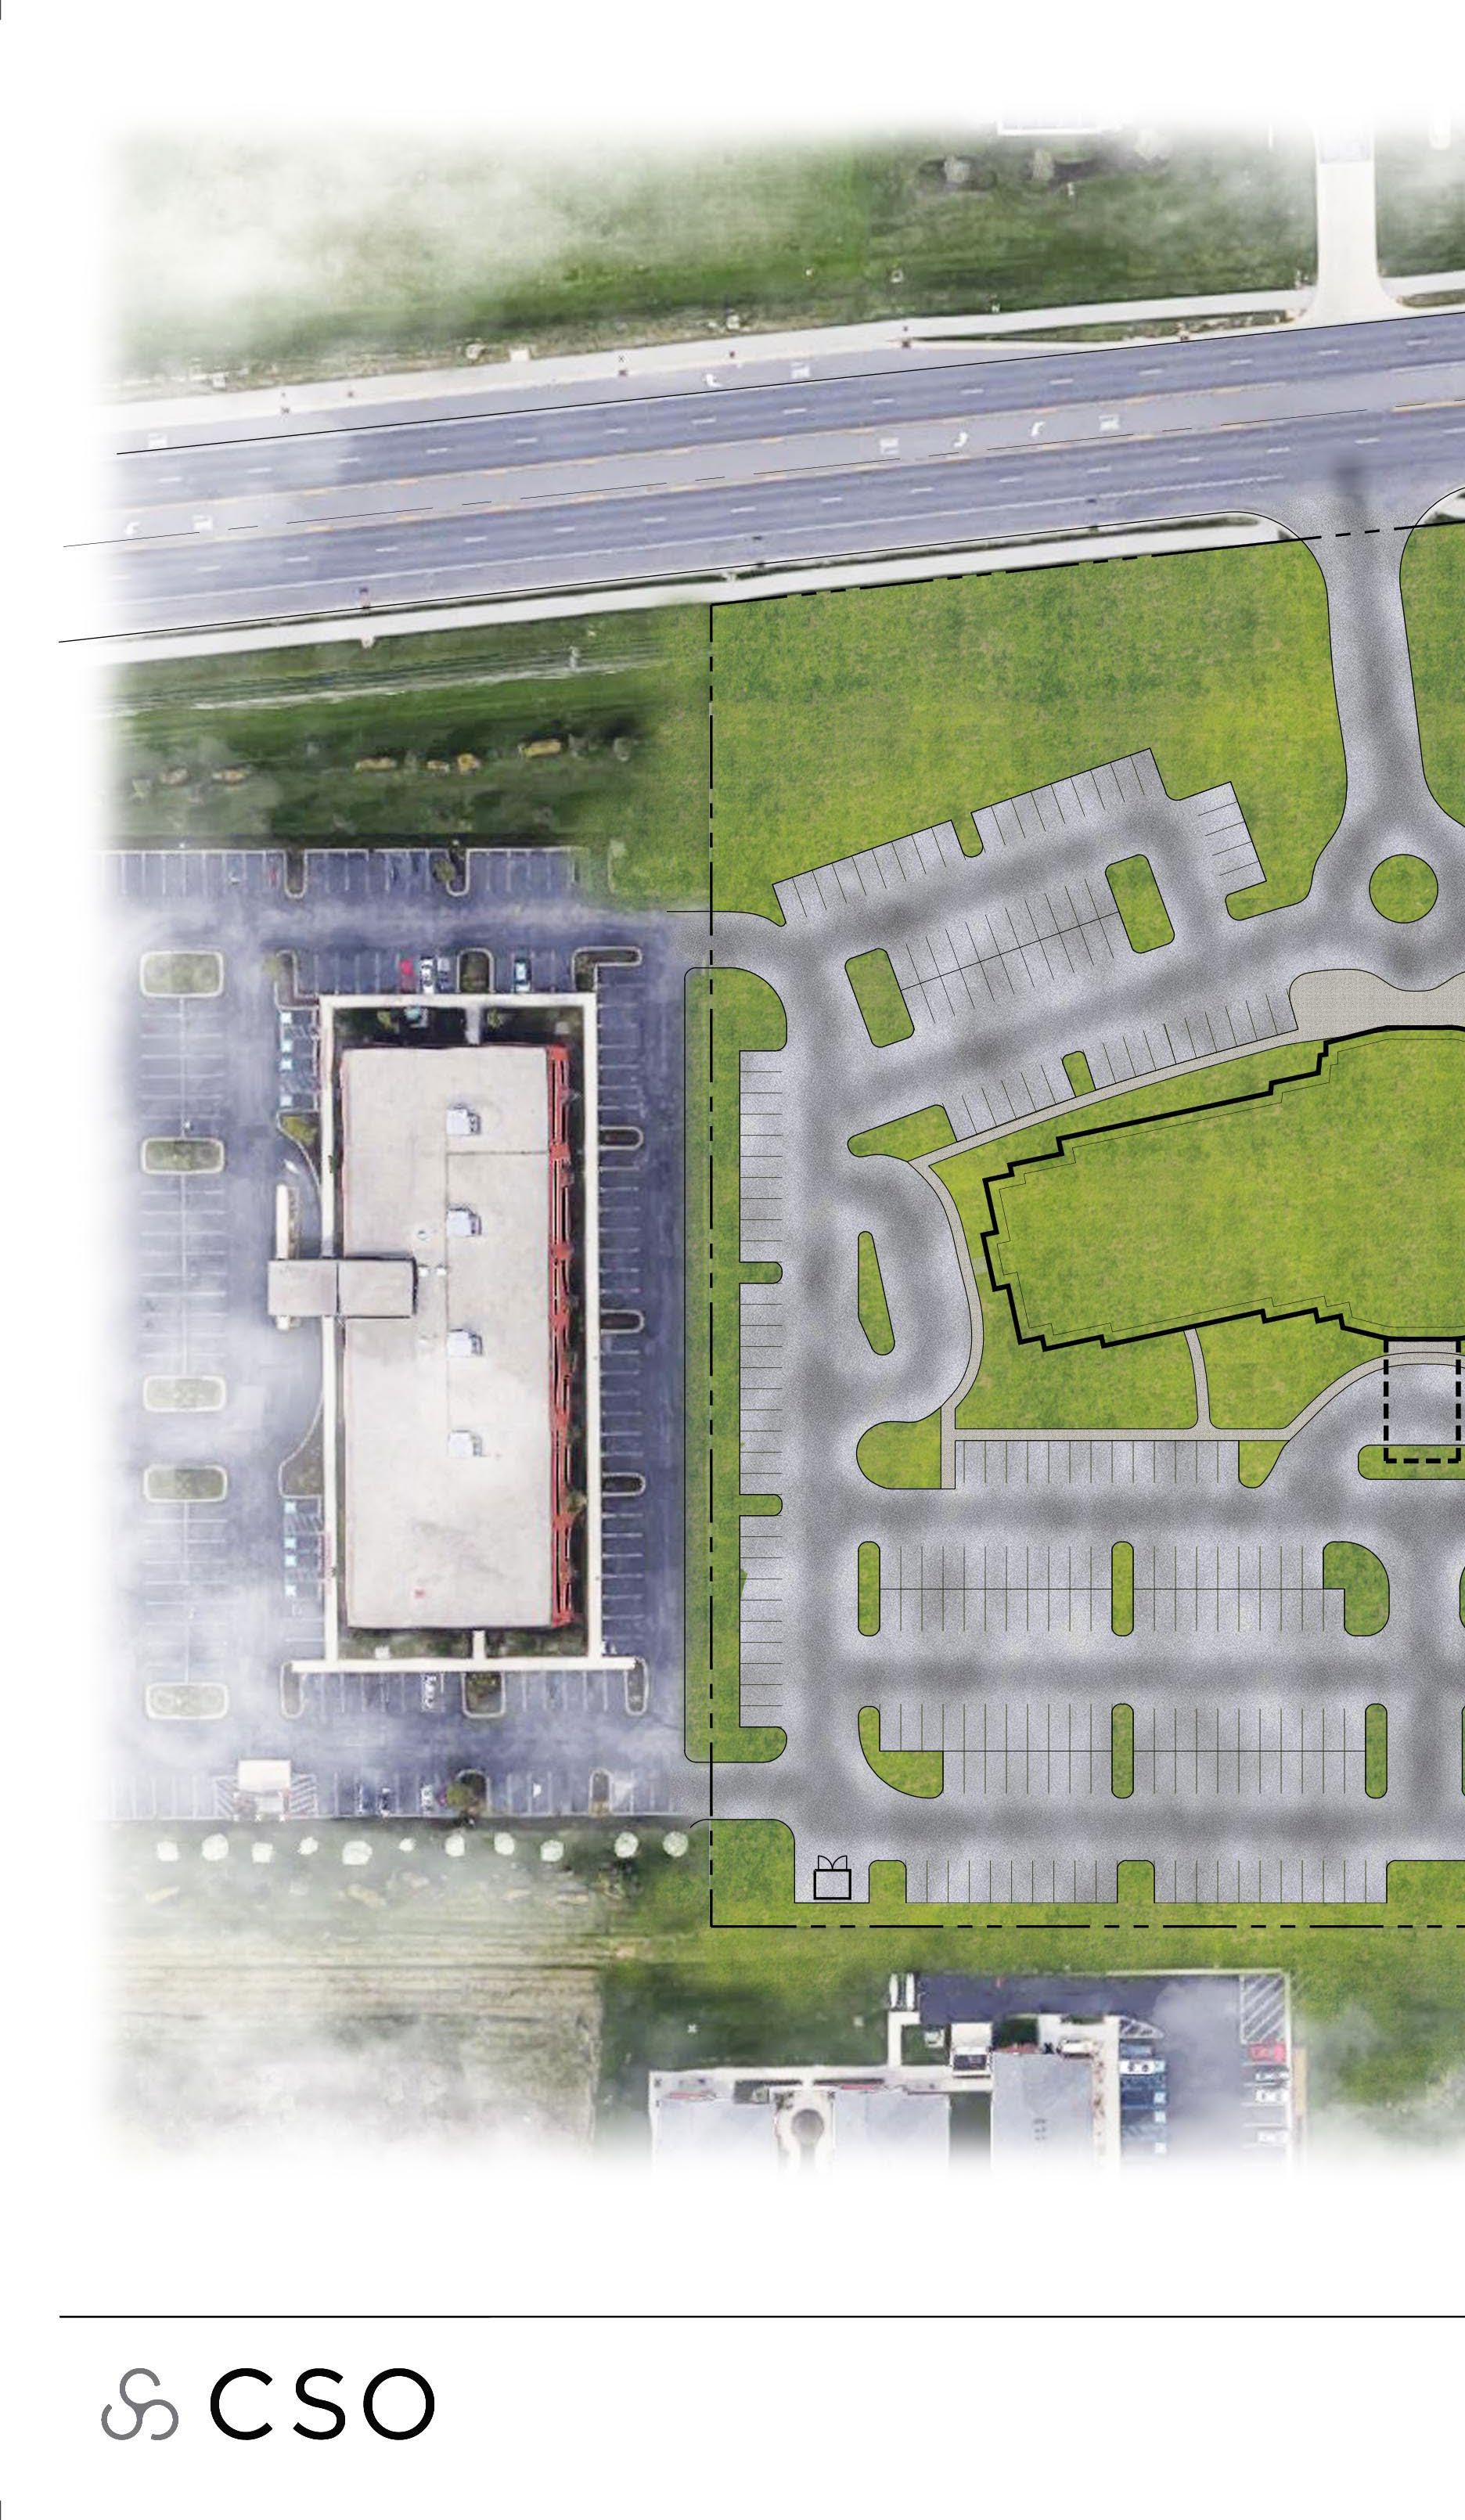
Select building footprint Linework with the ‘Magic wand tool’ and fill the selection with pure white.
To emulate a building’s shadow, Connect the shadow to the building fill. Attach corner to corner with your Brush tool and fill in the excess.
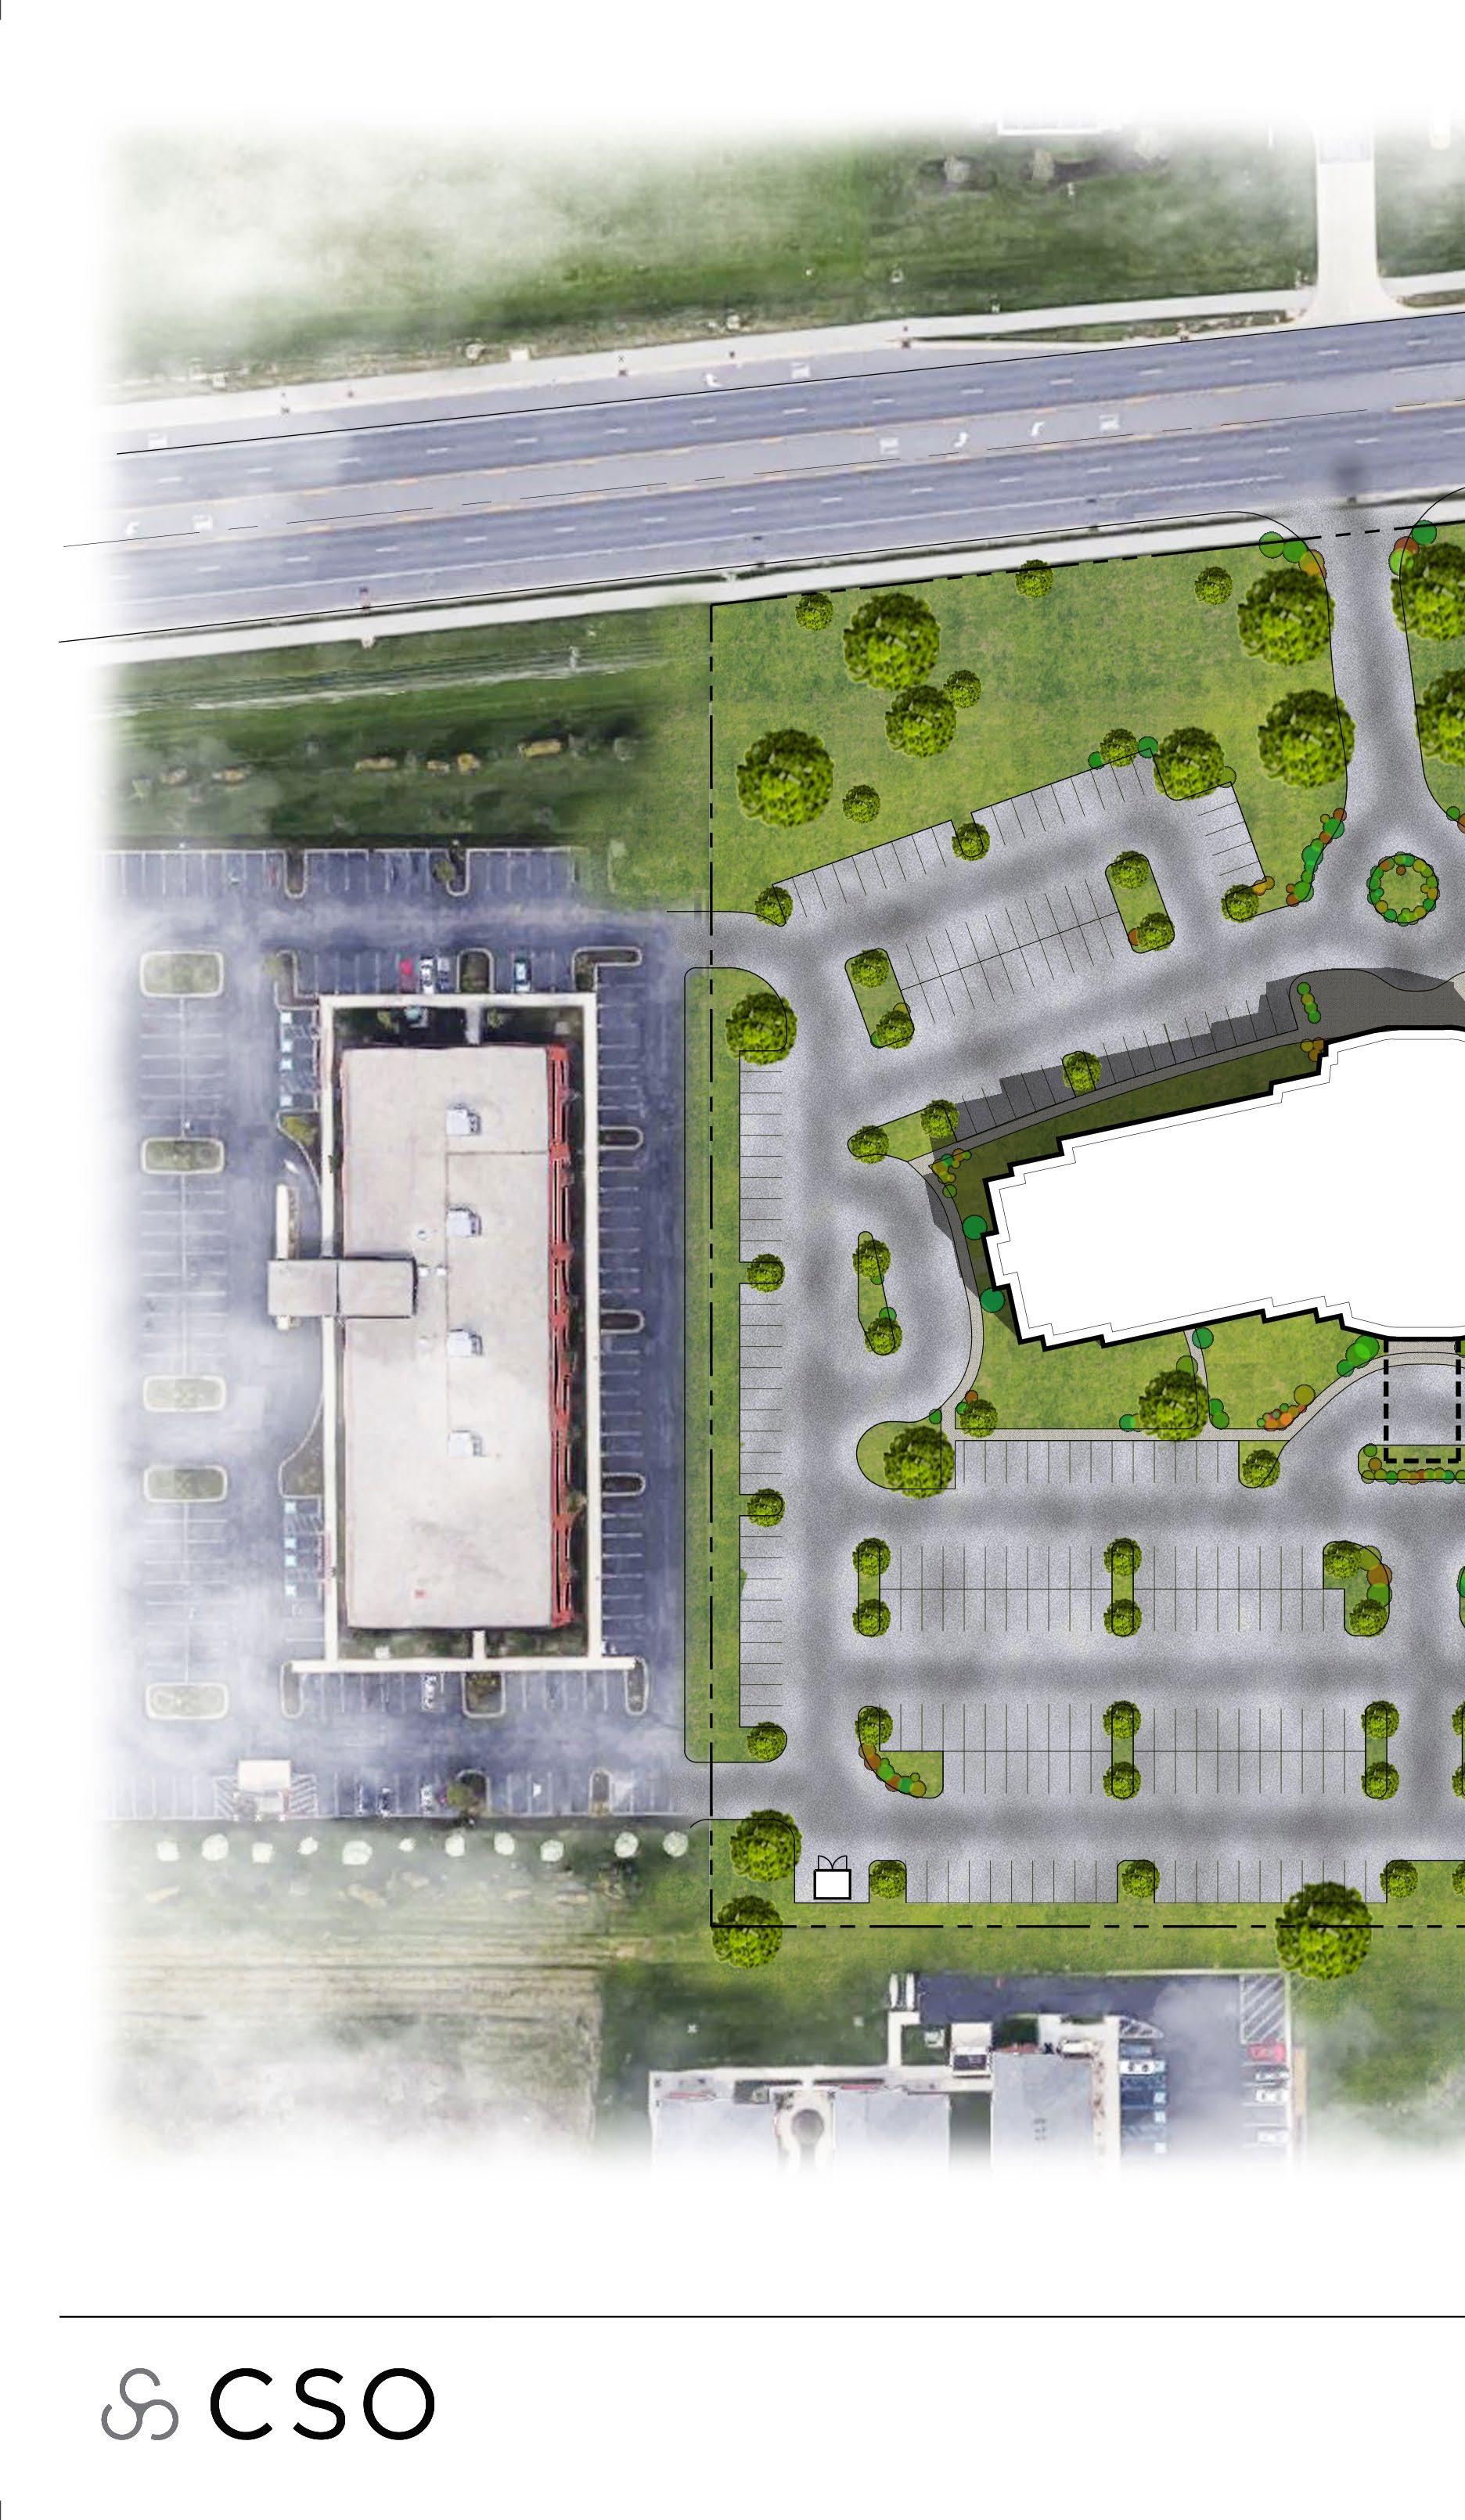
Apply subtle blending overlays to mimic tree diversity. Rotate, Resize, Brighten/Darken trees to achieve graphical ambitions
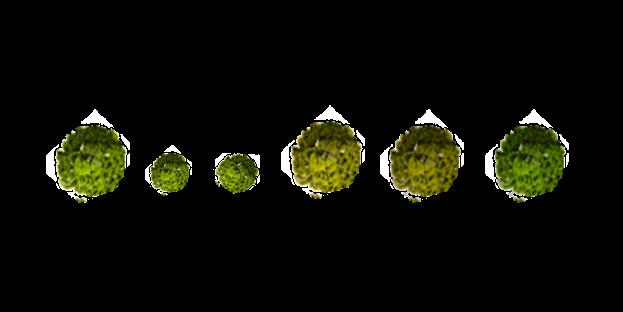
75% Opacity, Multicolored Brush, Blending OptionsStroke, 4px.

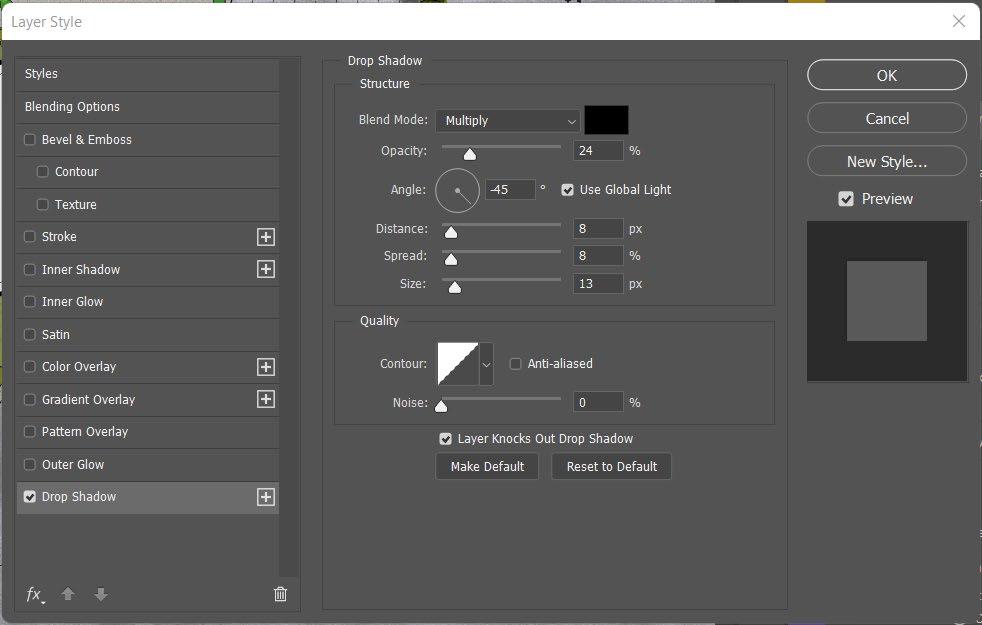
DISTANCE:
How far offset the shadow will be from the source image.
SPREAD:
Similar to increasing stroke size; This is how ‘thick’ the shadow will grow in relation to the image.
SIZE:
Similar to applying a Gaussian Blur; this will increase the projection size of the shadow. As a result, the larger the size, the more blurred it will appear.
Right Click on your ‘Trees’ layer and select blending options.
‘Multiply’
Shadow casting angle

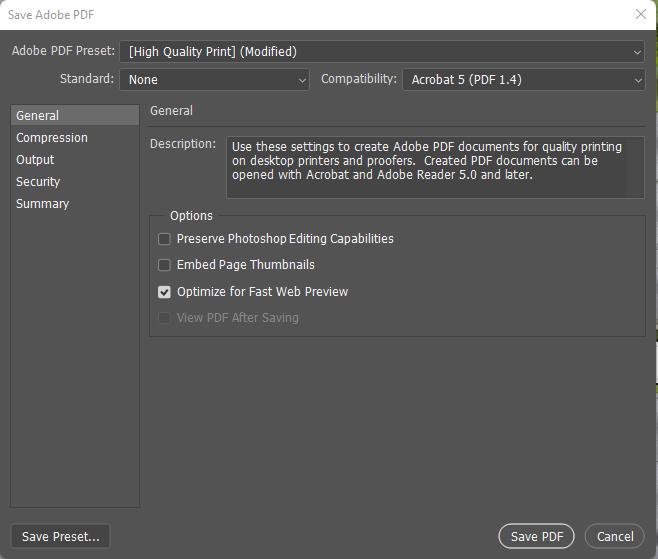
Disable Preserve Photoshop Editing Capabilities Option
1 2 3
Select: File > Save As... and save as a Photoshop (PDF). The following prompt will open up. On this first page, uncheck ‘Preserve Photoshop Editing Capabilities. This will reduce your file size drastically
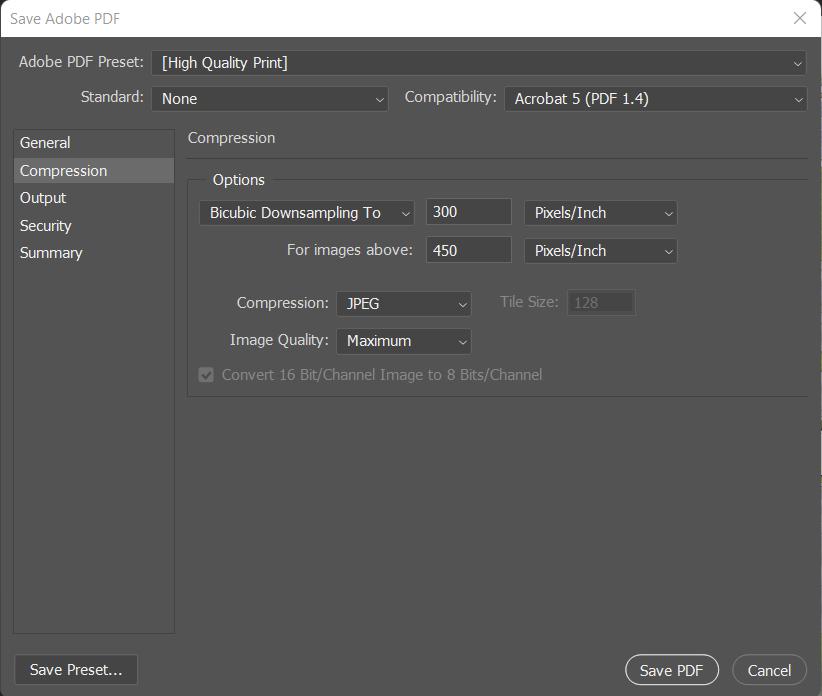
Select the ‘Compression’ Tab and fill out the prompt as visualized below. We want to maintain a high resolution to ensure quality PDF images for our cohorts and clients.
Select: File > Export > Export As... and begin to fill out the Export JPG prompt. Select the JPG export file type option. Adjust the slider to a image quality value of 5-7.

1 2 3
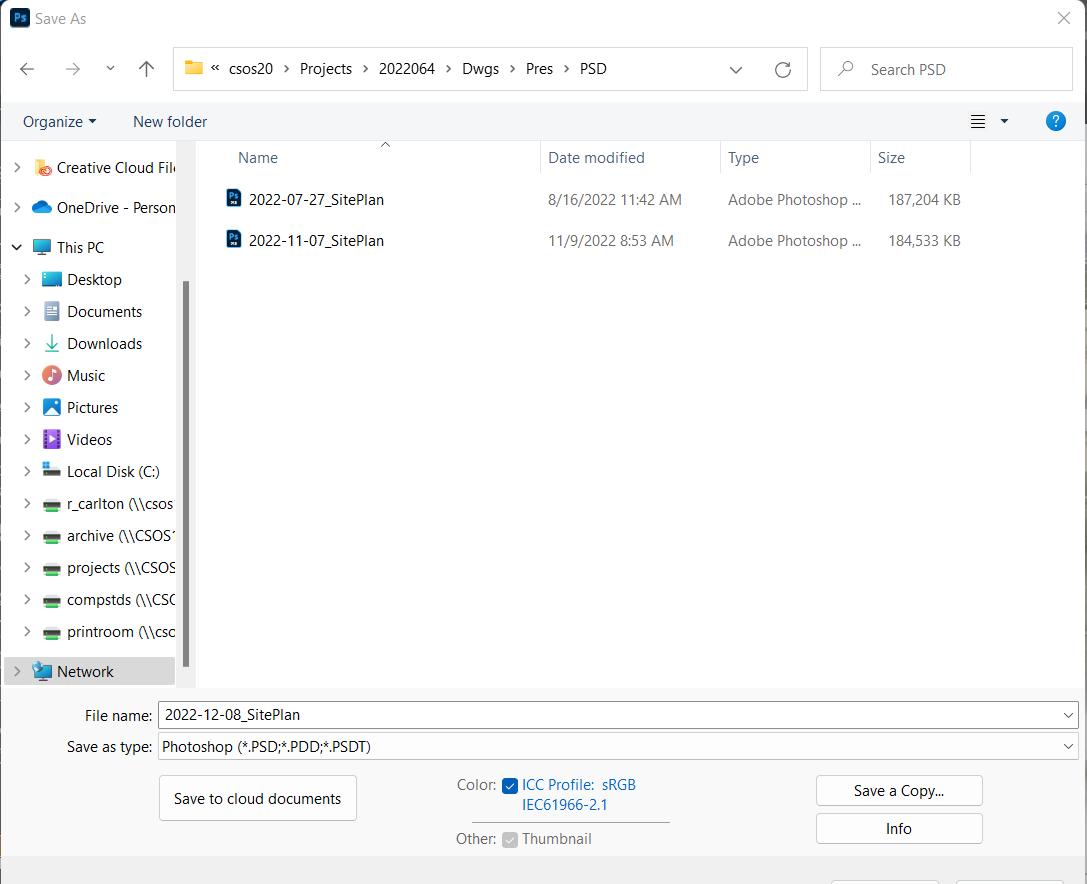
Select: File > Save As... and begin to fill out the prompt for a Photoshop (PSD) file. Each job number will have a designated PSD folder inside Dwgs\Pres\. Save your file here
Select: File > Save As... and begin to fill out the prompt for a Photoshop (PDF) file. You will need to create your designated PDF folder inside Dwgs\Pres\Images. Save your file here
Select: File > Export > Export As... and begin to fill out the prompt for a Photoshop (JPG) file. You will need to create your designated Image folder inside Dwgs\Pres\Images. Save your file here
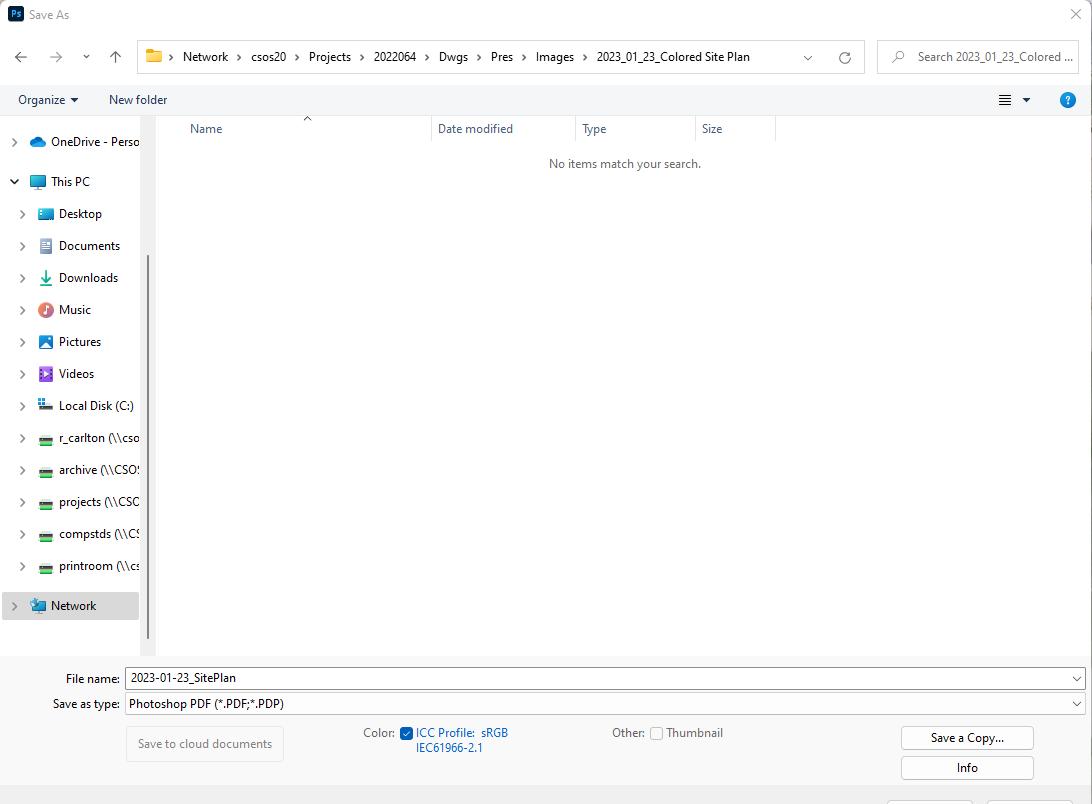
“Today’s date_ Siteplan”
CSO Standards/Quality Control
Version 2019.1.17
Quality Control: Check each item below after completion of every file.
Image Size:
1
-11"x17" (or smaller physical size) at 300 dpi, 22"x34" (or larger physical size) at 150 dpi.
-Avoid uneven sizes, 10.988” x 16.994”, etc.
2


Layer Naming:
-Every single layer used in the file shall have a short, logical name.
-Avoid “Layer 1”, “Layer 76”, “bbbbbbb”, etc.
3
Special Layers:
-CAD Linework shall always be on a layer named “Linework”, at the top of the layer stack.
--Shadows shall be on (1) Layer, named “Shadows”, 50% Opacity, Black.
-Adjustment Layers, if used, shall be below the “Linework” layer to avoid graying out the title block.
PSD File Naming and Saving : 4
Naming:
-Format: “Year-Month-Day_Subject.psd”
-Examples: 2018-2-21_SitePlan.psd 2018-6-12_Elevations.psd
Saving:
-Do NOT need “Paper” or “Color” in name
-Location: Dwgs/Pres/PSD Dwgs/Pres/PSD/Scans for scans of manually produced work.
-Do NOT make subfolders in the PSD folder. Keep everything out in the open.
-Do NOT save .PSD files anywhere else in the job service. ALL PSD files in an entire job are stored here.
-Do NOT save anything BUT .PSD Files here. No .jpgs, no .pdfs, etc.
PDF Naming and Saving: 5
Naming:
-Format: PDF’s saved from .PSD’s should have exact same name as the .PSD.
-Examples: 2018-2-21_SitePlan.pdf

Saving:
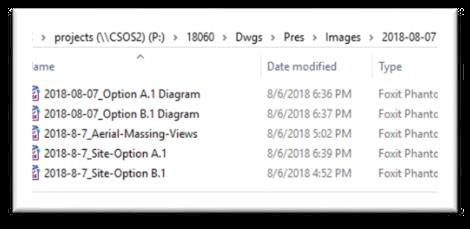
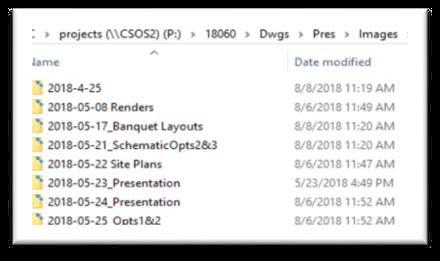
-Location: Dwgs/Pres/Images Dwgs/Pres/Images/Dated-Subfolder
-All Subfolder Names should following the naming format.
-All Items in Subfolder should follow the naming format.
-In theory, every file could be removed from the subfolders and placed directly back in Dwgs/Pres/Images, in the open, and still be sorted correctly.
END OF CHECKLIST
PDF Prep
PSD Setup - Export PDF / Starting Template / Import PDF / Layers Standards
Aerial Layers - Importing Aerial / Feathered Edges / Clouds
Graphics Layers
Graphics Layers - Asphalt / Grass
Graphics Layers - Vehicle Roadwear
Graphics Layers - Sidewalk
Graphics Layers - Building Fill
Graphics Layers - Building Shadow
Graphics Layers - Trees / Shrubbery
Graphics Layers - Trees / Shrubbery Shadows
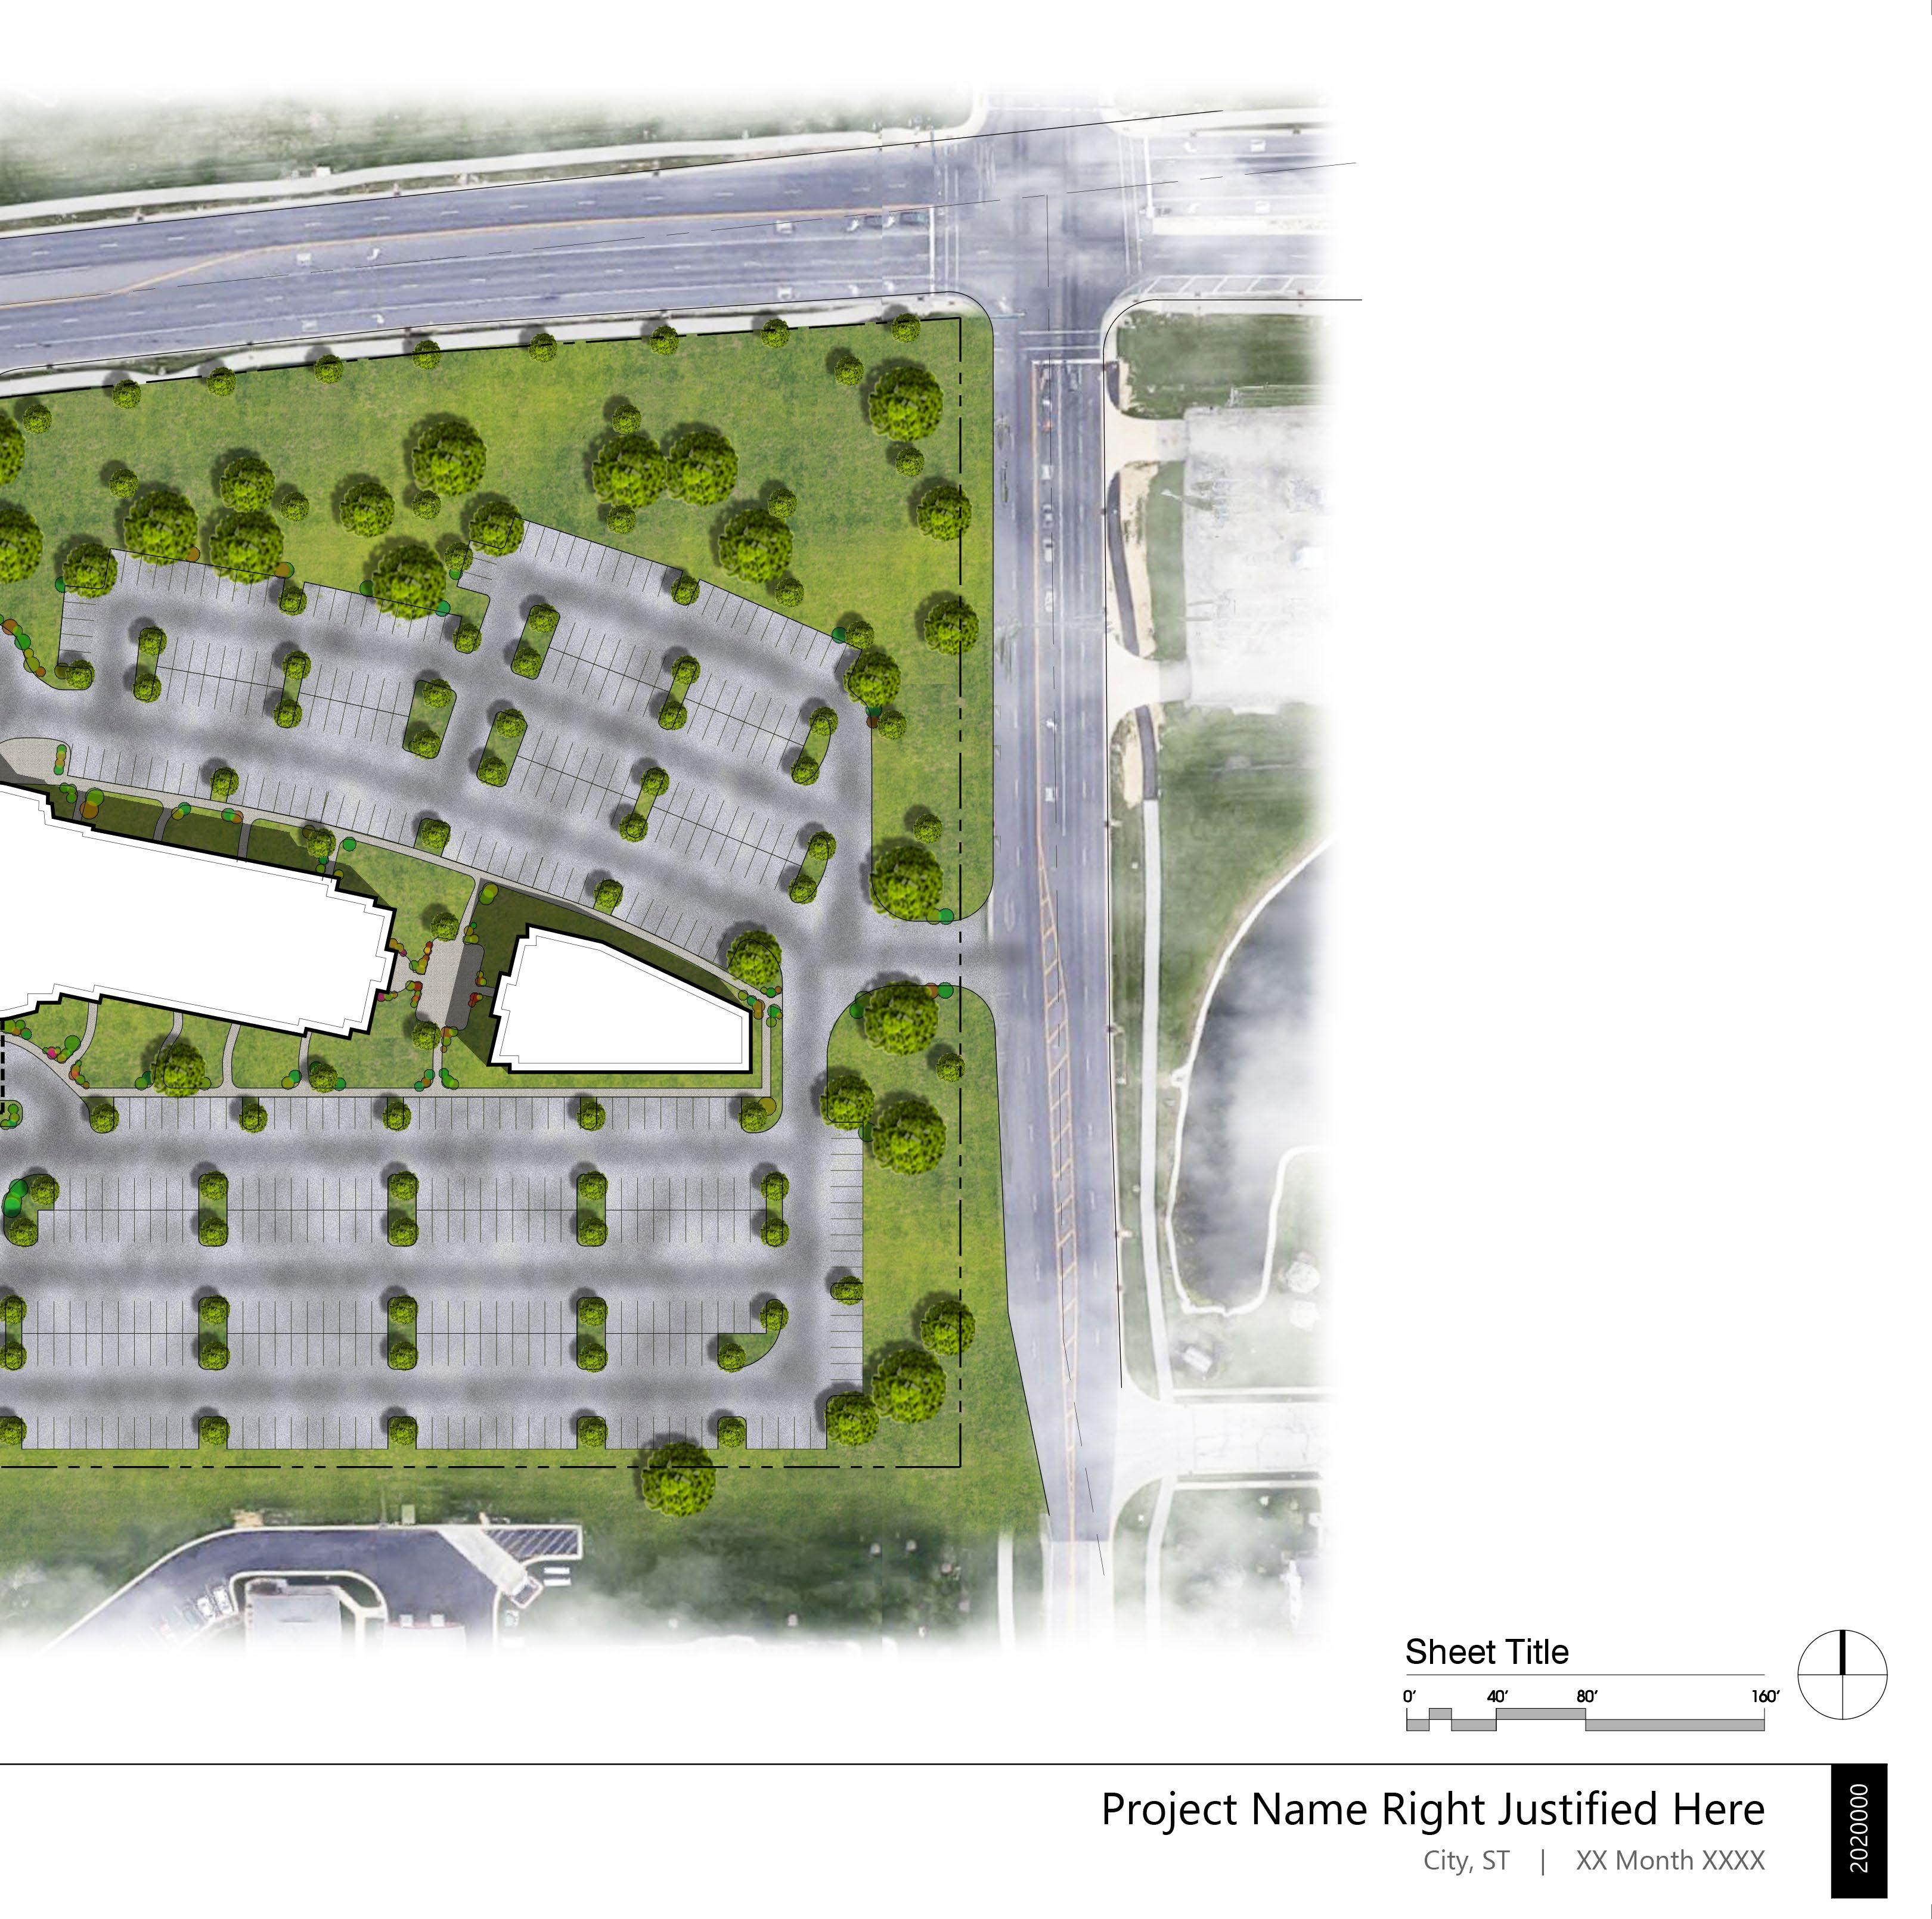
Graphics Layers - Final Overview
File Export
File Export - PDF / JPG
Save Locations - PSD/PDF