www.hornby.com/family-fun-project | 1 www.hornby.com/family-fun-project LAYOUT BUILDING GUIDE
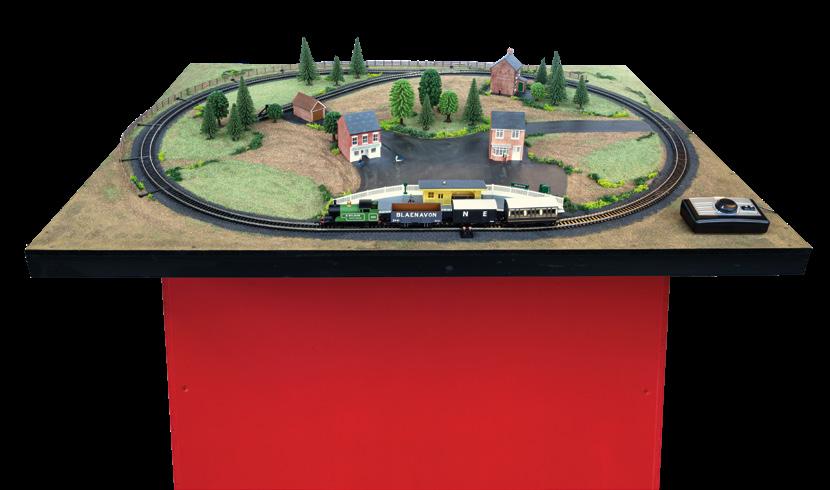
The Hornby Family Fun Project has been designed to make as straightforward as possible the building of a handy size model railway; one that is easy to store either under a bed or behind a wardrobe. Just follow the simple step-by-step instructions, making note of any Top Tips provided and you will soon have in the space of a day or two a model railway. Remember this is a Family Fun Project so everyone can be involved in creating a model railway that is as simple to operate as it is to store.
Take your time, don’t rush and you will soon be having fun operating a model railway.
For extra assistance check out the Hornby YouTube Channel and look for Family Fun Project www.hornby.com/family-fun-project/how-to-build
TOP TIP

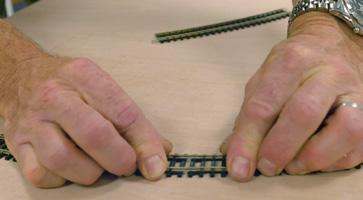
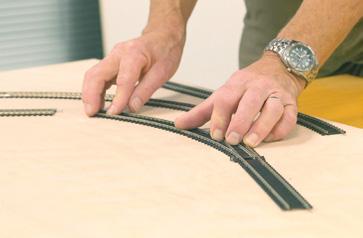
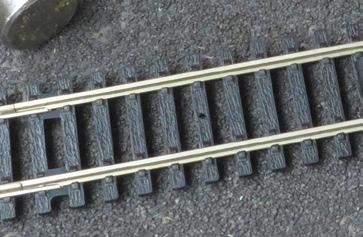
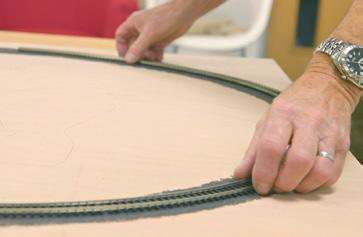
When joining two pieces of track together lay them both on a flat surface and slide the track together, lining up the rail ends with the track joiners and once aligned carefully push them together. When you have fully pushed the track together, run your finger over the join to make sure that the track ends are correctly located in the rail joiners.
If you look under each piece of track you will see a number: R600, R601 etc. These numbers refer to the track piece. Use these numbers as a guide.
2 | LAYOUT BUILDING GUIDE 00 GAUGE MODEL RAILWAY STARTER PACK 70mm 32mm
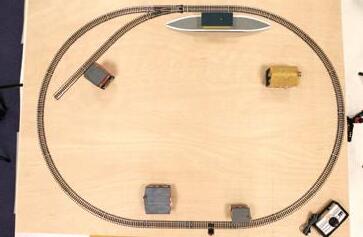
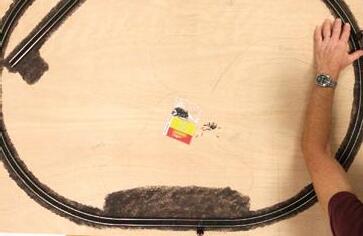
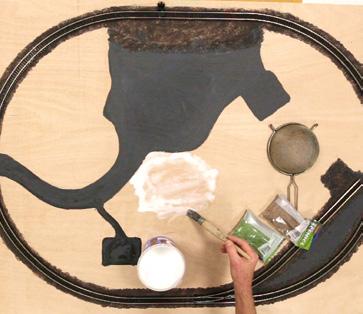
Lay your 52" x 40" (1320mm x 1020mm) baseboard onto a flat surface. You will now need to mark out on the baseboard where the track and the buildings will be positioned. Use the red illustration shown as a guide.
1 2
You will first need to assemble the track circuit and then position the buildings. The trees, hedges and bushes can be positioned once the scenic material has been applied.
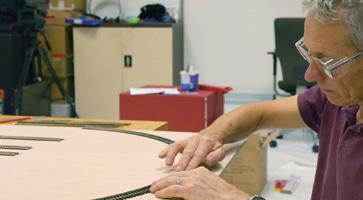
To assemble the track pieces follow these simple step-by-step instructions. See Top Tip below.
3 4
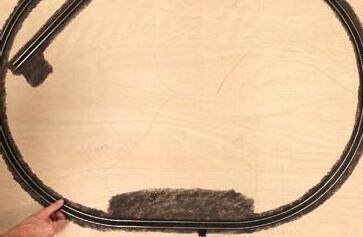
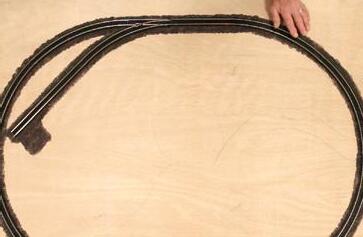
Assembling the oval of track: Working from left to right connect the track pieces in the following order: R600, R8206 Power Track with the terminal facing out, R607, R607, R607, R607, R600, R8072 (Left Hand point). Ensure the curved section of the point is facing into the oval and continue with R607, R607, R607, R607.
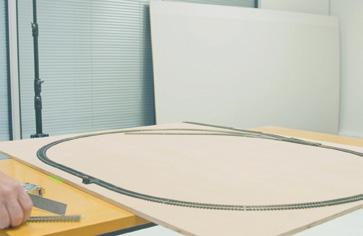
Assembling the siding : Connect the R606 to the curved section of the point, ensuring the curve faces into the oval and then connect the R601 straight.
www.hornby.com/family-fun-project | 3
5 6
7 STAR T R1266 EXTENSION PACK (N OT INCLUDED ) R1267 EXTENSION PA CK (N OT INCLUDED )
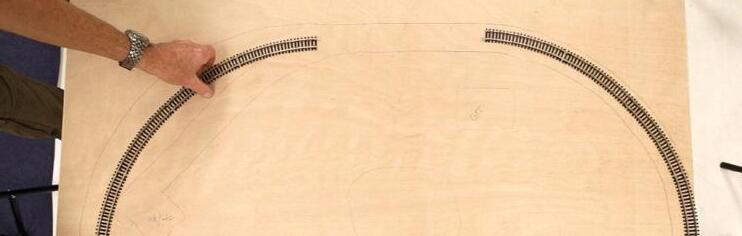
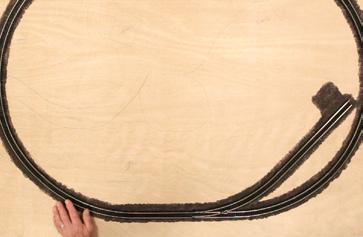
Position the assembled circuit on the board as shown in step 2.
Using the illustration as a guide draw in paths, roads and field areas. No need to be too precise.
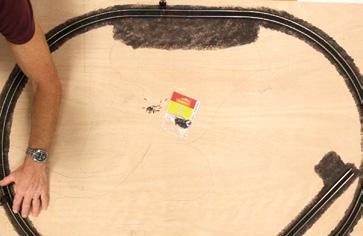
Once completed remove all buildings and track. There is no need to completely disassemble the track. You may find it easier to just separate the circuit into manageable sections.

4 | LAYOUT BUILDING GUIDE 00 GAUGE MODEL RAILWAY STARTER PACK
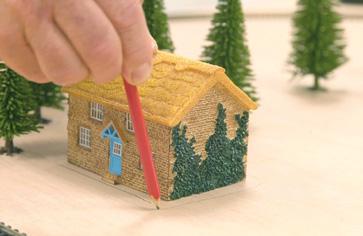
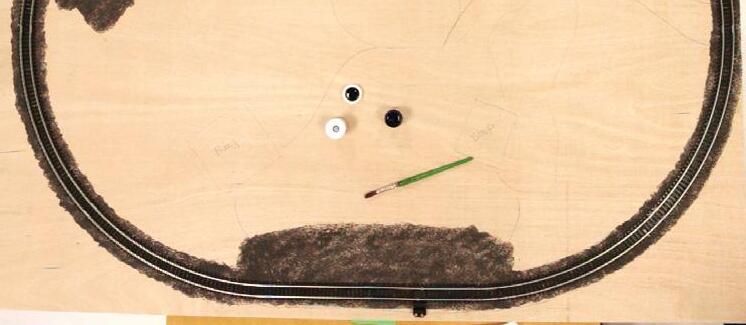
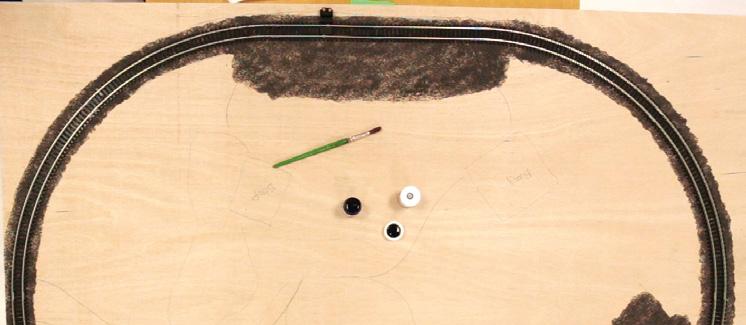
Draw around the buildings and write in the centre the name of the building.
Roughly draw around both edges of the track. In between the lines is where you will apply the ballast material.
11 12 8 10 9
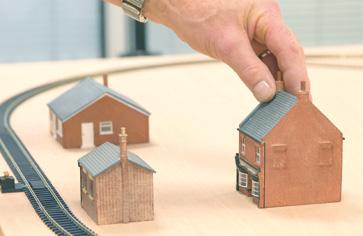
Place the buildings onto the board as shown in Fig 10.
TOP TIP
Add a little No.32 paint to tint PVA mix.
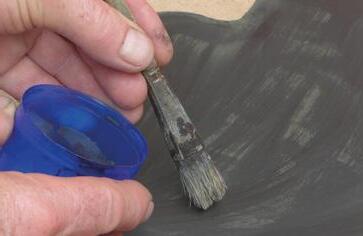
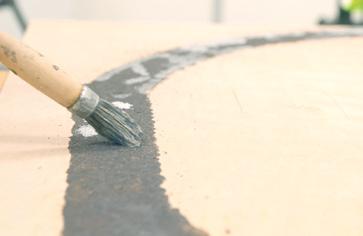
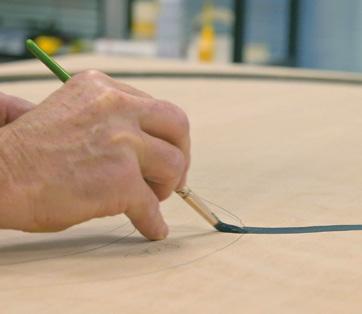
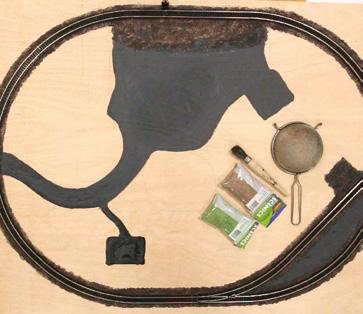
Laying the track ballast . Mix some PVA (Wood glue) with water so it has a smooth consistency. Approximately 50/50.
Using a 1" (300mm) paintbrush, apply the glue in between the lines you drew either side of the track. Do not worry if you go over the lines. Apply the glue in small sections, approximately 18" at a time.
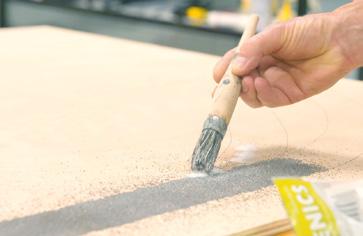
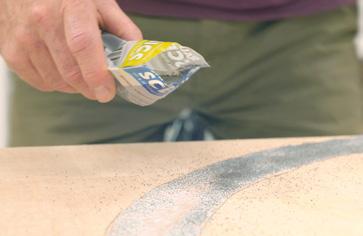
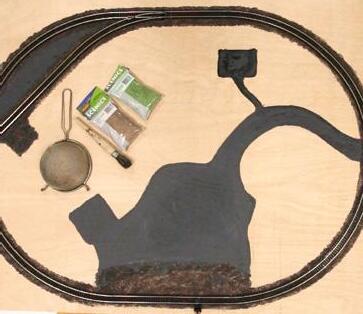
Open the bag of R7165 Grey Ballast and carefully sprinkle it over the wet glue. You may find it easier if you use a small sieve to help sprinkle the ballast evenly.
Once you have applied the ballast to the first section move onto the next and repeat the process.
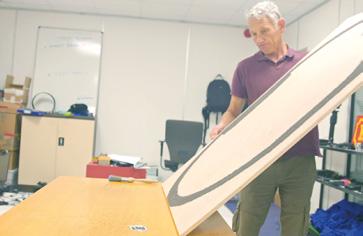
After applying the ballast to all of the track area wait for the glue to dry thoroughly and then tip the board up so that any loose ballast falls away. It is advisable to tip the board onto a piece of newspaper so that the excess ballast can be collected up for further use.
Any ‘thin’ areas of ballast can be simply filled by painting glue over the area again and sprinkling more ballast onto the missing or ‘thin’ areas. Allow to dry and then tip the board up once again and collect any loose ballast for future use.
www.hornby.com/family-fun-project | 5
16 18 17
15
14
13
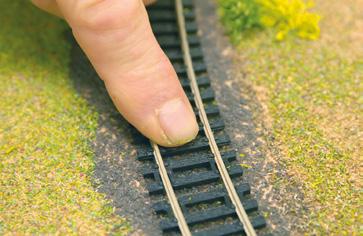
LAYING THE TRACK
Once all the ballast has been applied and allowed to dry reassemble the track and place the whole circuit over the ballasted area.
Once in position, making sure the ballasted area corresponds with the track, you are now ready to pin the track into position.
TOP TIP
Take your time as you progress in pinning down the track.
Tools required:
Small hammer, small pair of long nose pliers (not essential).
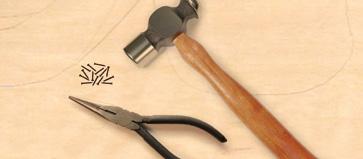
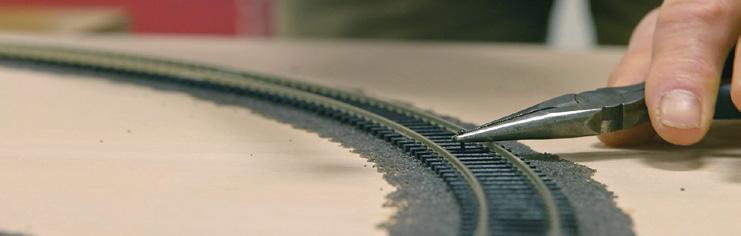
You will notice that on each piece of track there are small holes in the middle of one or two sleepers. These are for the track pins to hold the track in position.
Having positioned the layout make sure that each track piece is correctly connected by running your fingers over each joint. Having done that you are now ready to start pinning the track down.
6 | LAYOUT BUILDING GUIDE 00 GAUGE MODEL RAILWAY STARTER PACK
1
2
4 3
5
TOP TIP
Remember to take your time. Locate and carefully open the packet of R207 Track Pins. Starting with the R8072 Point locate the pin hole situated in the middle of one of the sleepers on the straight section of the point and place a pin in the hole. (Please note some track pieces have more than one hole. It is not necessary to use every hole. One pin per track will be plenty).
For extra assistance check out the Hornby YouTube Channel and look for Family Fun Project www.hornby.com/family-fun-project/how-to-build
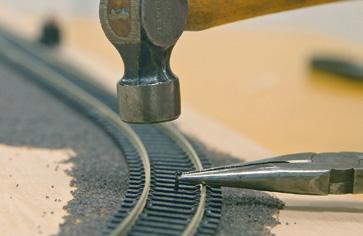
Gradually moving in an anticlockwise direction pin each piece of track down in turn. Having completed the oval you can now pin down the track in the siding. Remember not to knock the pin in too far. Allow the head of the pin to not quite touch the sleeper.
www.hornby.com/family-fun-project | 7
Having fixed the point and moving to your right, making sure that the whole circuit is still in position you can then pin the next piece of track down.
Holding the pin carefully with either the thin nosed pliers or by fingertips, gently tap the nail into the baseboard so that the head of the pin is not quite touching the sleeper.
7 6 8
ADDING SCENIC MATERIALS TO YOUR FAMILY FUN LAYOUT
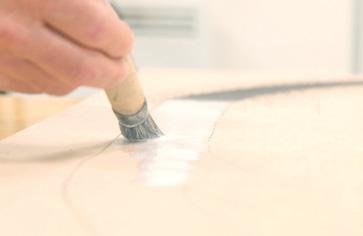
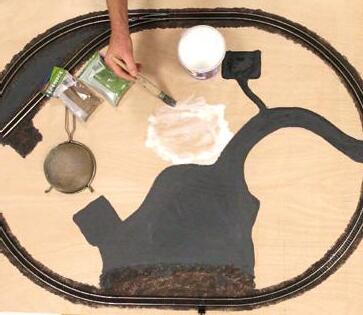
To paint the roadways and paths that you marked out earlier, use Humbrol No.32 dark grey paint or a suitable alternative available from any DIY store. No.2 size Humbrol tin or an equivalent size should be sufficient. You can use the 1" paintbrush to apply the ‘roadway’ but remember to clean the brush once you have finished.
For extra assistance check out the Hornby YouTube Channel and look for Family Fun Project www.hornby.com/family-fun-project/how-to-build
8 | LAYOUT BUILDING GUIDE 00 GAUGE MODEL RAILWAY STARTER PACK
Having carefully pinned the track into position, you can now start to add the fields and roadways.
Allow the paint to dry and then look at applying the scenic scatter material to the rest of the baseboard.
1
3 2
Using
Once you have completed laying the scatter, allow the glue to dry and just like the track ballast tip the layout onto a piece of newspaper and collect up the residual material. Again, just like the ballast, if you find areas where the scatter material has not stuck or you wish to increase the density, go over the area again with the glue and sprinkle the scatter onto the glued area once more.

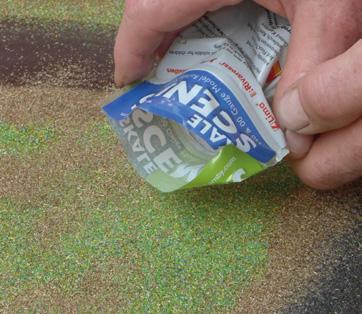
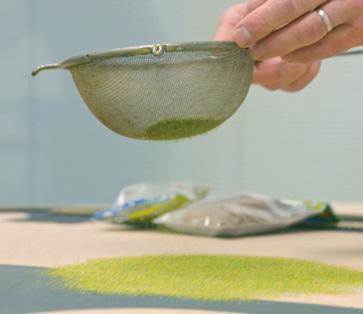
For a more pleasing effect you can, if you wish paint and sprinkle the scatter material a few millimeters over the building outlines. This will give the impression, when the buildings are added to the layout that the ‘grass’ etc. grows right up to the walls of the buildings. You may find using a domestic cooking sieve useful to obtain an even coverage but if one is not available carefully sprinkle the material over the glued area. Remember not to try and cover too large an area in one go as the glue may dry before you have applied the scatter.
The Family Fun Project Pack includes two packs of scatter material, R7171 Flower Meadow and R7174 Brown. There are areas where you would only use Brown scatter and others that are more suited to Flower Meadow, however there is no reason why in certain parts of the layout you cannot mix the two scatter materials together to give you a different colour and texture. Why not try it? You cannot do any harm.
www.hornby.com/family-fun-project | 9
5 7 6 4
the images featured in these instructions, paint the area that you wish to scenic with the PVA wood glue mix ensuring to leave areas over which the houses and buildings will be positioned free from the material and apply the R7171 Meadow Mix to your chosen area.
PLACING THE BUILDINGS & PEOPLE
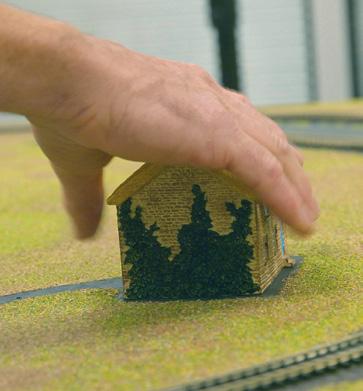
Once all the glue has dried and you are happy with the overall scenic finish you can now add the buildings and people to the layout. All you have to do is position the buildings in the areas marked and you are nearly there.
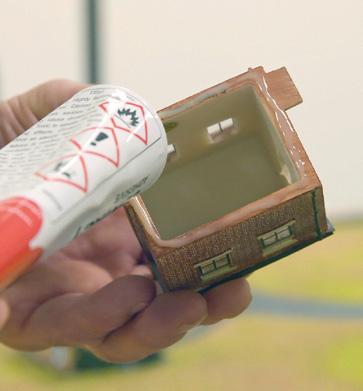
You can lightly glue the buildings in place if you wish them to be permanent, however if you are storing your layout under a bed with restricted height you may need to have the buildings removable so they can be stored elsewhere ready for your next railway operating session.
As for the R7115 City People, you can position them wherever you wish. They can be glued in place using the PVA Wood Glue or for a more permanent fix, a contact adhesive.
10 | LAYOUT BUILDING GUIDE 00 GAUGE MODEL RAILWAY STARTER PACK
1
2 3
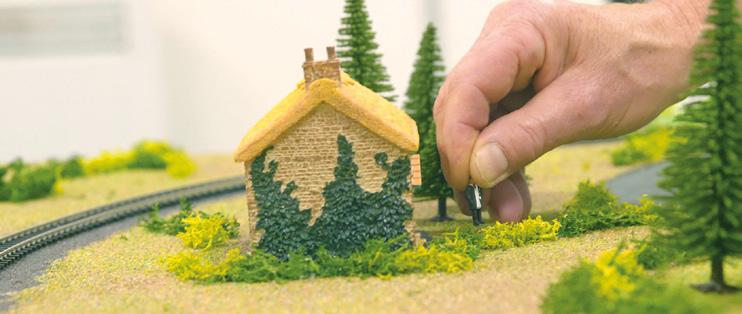
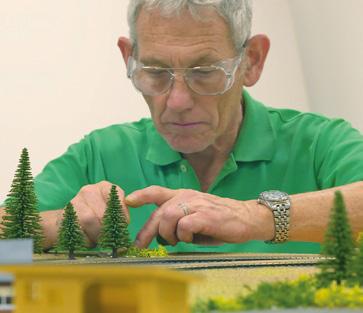
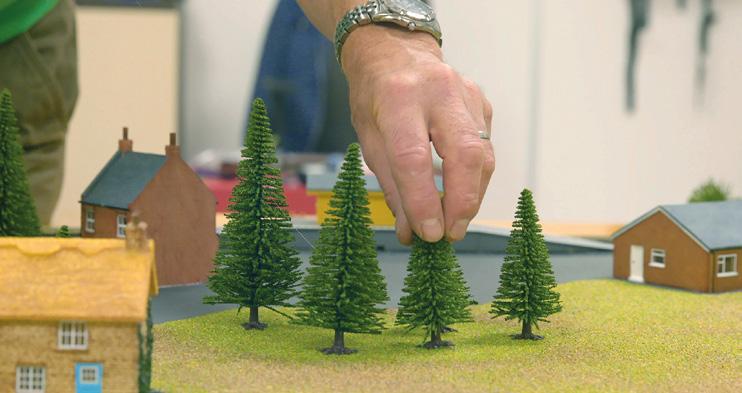
ADDING THE TREES AND FOLIAGE
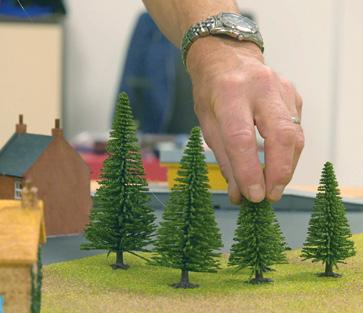
Should you wish the trees to be removable, for example when storing the layout under a bed where height is limited, it is recommended that you carefully cut the bases off the trees, drill suitable sized holes in the baseboard and push the trunks of the trees into their respective holes.
To create the bushes and hedgerows open the R7194 Green Mixed Lichen pack and carefully, using scissors cut the lichen into varied sized pieces, pull gently apart to separate and then glue them into position on your layout using the PVA wood glue and allow to dry.
www.hornby.com/family-fun-project | 11
Using the completed layout pictures as a guide, position the trees on the layout and glue them in place using the wood glue or a suitable contact adhesive.
1
2 3
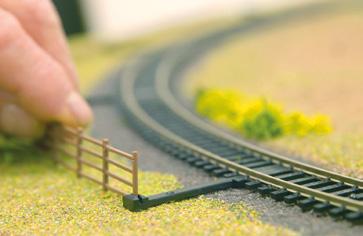
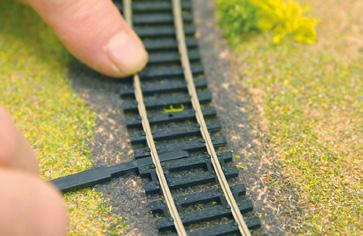
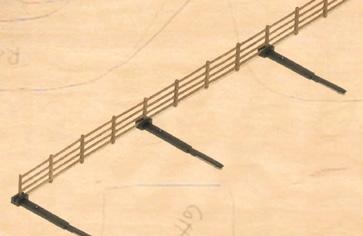
FITTING THE FENCING
An important feature of the Hornby track are the two slots between the underside of the rails and the sleeper base. These slots are used to accommodate the small black anchor points supplied with the fencing.
1 3
2 4
TOP TIP
To help you find the slots on the tracks, place a light at ‘ground level’ and on the opposite side of the track and move it slowly along the track’s length. The light will clearly highlight where the slots are. Once located you can then insert the anchor points.
12 | LAYOUT BUILDING GUIDE 00 GAUGE MODEL RAILWAY STARTER PACK
There are six lengths of fencing and 12 clips.
Using the image shown as a guide, locate the slots on the track and insert an anchor point. You will require two anchor points per length of fencing.
The fencing can be fitted along a curve or straight track using the anchor points supplied.
Having inserted the anchor points in the slots, the fencing can now be pushed into the groove that is on the top of each anchor point. See illustration.
OPERATING YOUR LAYOUT
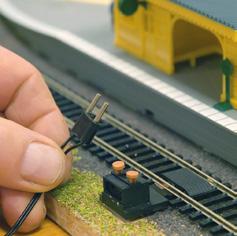
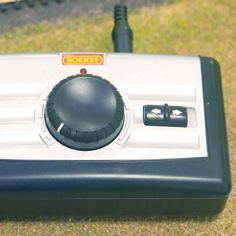
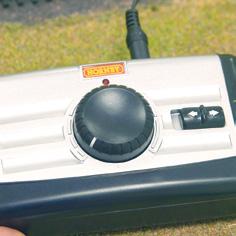
The controller has a wire on the end of which is a two pronged plug. This requires to be plugged into the Power Connecting track’s two holed socket. To insert the plug into the track, press down on the orange buttons situated on the top of the connection block while at the same time inserting the plug into the corresponding holes of the block.
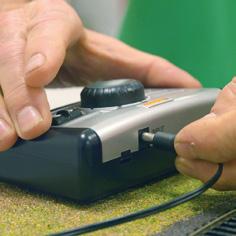
The wall transformer has a lead that is fitted with a jack plug. This plug is pushed into the plug socket on the reverse of the controller which is marked ‘Input 19V’. Once you have connected the jack plug to the controller plug the wall transformer into a standard domestic wall socket and switch on.
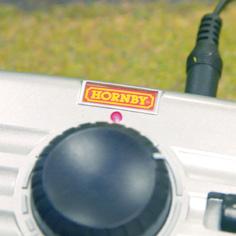
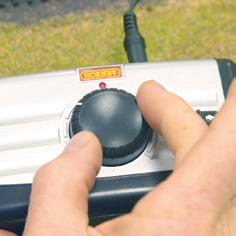
The small red light just below the Hornby badge on the controller will glow once the knob is turned. This confirms that there is power being fed to the controller.

For extra assistance check out the Hornby YouTube Channel and look for Family Fun Project www.hornby.com/family-fun-project/how-to-build
www.hornby.com/family-fun-project | 13
1 2 3
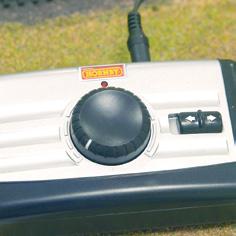
Continually turning the control knob anticlockwise so that it cannot be turned any further will bring the locomotive to a halt and the red LED will go out.
It is important that before the direction switch is operated the control knob is turned fully anticlockwise. Failure to do this simple task may cause damage to the controller.

14 | LAYOUT BUILDING GUIDE 00 GAUGE MODEL RAILWAY STARTER PACK
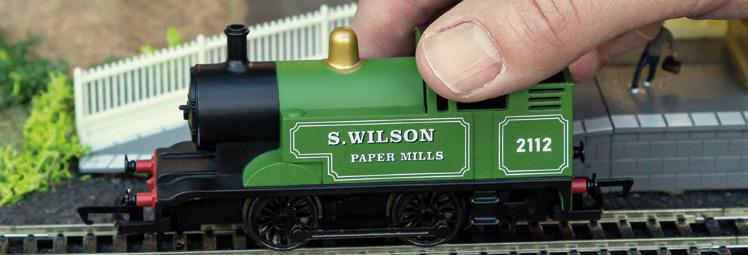
Place the locomotive and the wagons on the track.
Turning the controller in the opposite direction will slow the locomotive down.
The controller controls the speed and the direction of the locomotive.
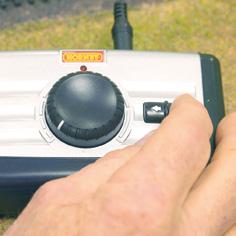
Turn the controller clockwise and the locomotive will start to move. As you keep turning the control knob, the locomotive will travel faster.
The controller is fitted with a Reversing Switch. This switch changes the direction of the locomotive.
4 7 5 8 6 9 10
FINALLY…
As you become more familiar with your layout you may wish to include additional houses, shops, fields and even some extra hedgerows. You will certainly have the space to do so. There is even space for you to add another siding or two, one of which for example would branch off the siding already there.
To do this you would have to lift several pieces of track, which is why you do not hammer the track pins all the way in. Using a snub nosed pair of pliers carefully grip the pinhead and gently pull. The pin should come out quite easily. Once the track is free lifting the track is straightforward and ready for you to add the additional point and straight or curved track pieces.
There are currently two additional Family Fun Project Extension Packs available R1266 and R1267 that can be used to extend your layout and includes track for additional sidings, plus buildings as well as extra locomotives and rolling stock.
Remember, this is a Family Fun Project with the emphasis on Fun, so take your time and enjoy some Family Fun together.
Contents may change from those described or illustrated.
R1265 STARTER PACK CONTENTS
1 x R3752 S. Wilson Paper Mills
1 x R6422 NE Box Van
No.2112
1 x R4673 RailRoad GWR 4 Wheel Coach 1 x R590 Station Halt Kit
1 x R537 Trackside Fencing
1 x R9863 Right-hand Mid Terraced House
1 x R9801 Modern Terraced House
1 x R9826 Detached Brick Garage
1 x R9831 The Wild Bunch Florist
1 x R7115 City People
1 x R8250 Analogue Train Controller
2 x R600 Single Straight 1 x R8206 Power Track 1 x R083 Buffer Stop 1 x R601 Double Straight 1 x R606 2nd Radius Curve 1 x R8072 L/H Point 1 x R207 Track Pins 1 x R537 Trackside Fencing 1 x R7171 Flower Meadow 1 x R7174 Brown Scatter 1 x R7165 Grey Ballast 1 x R7194 Green Mix Lichen 1 x R7201 Hobby Mixed Trees
1
ADDITIONAL ITEMS REQUIRED
Baseboard: Plywood 52" x 40" x ½" (1320mm x 1020mm x 10mm)
PVA (Wood glue)
Small hammer
Humbrol No.32 dark grey paint (or similar)
1" paintbrush
USEFUL BUT NOT ESSENTIAL
Cooking sieve
www.hornby.com/family-fun-project | 15
Impact adhesive 0-4-T
1 x R6842 Blaenavon 21 Ton Mineral wagon
x R8156 Track
1 x P9000 Std. Wall mounted transformer 8 x R607 2nd Radius Double Curves
Plans Book
Small long nosed pliers (not essential)
For more information regarding the Hornby Family Fun Project please visit www.hornby.com or contact your local Hornby stockist.
00 GAUGE MODEL RAILWAY STARTER PACK Hornby Hobbies Limited Westwood Margate Kent CT9 4JX United Kingdom www.hornby.com/family-fun-project 4/1630
