 Michael Feltham Product Design Portfolio

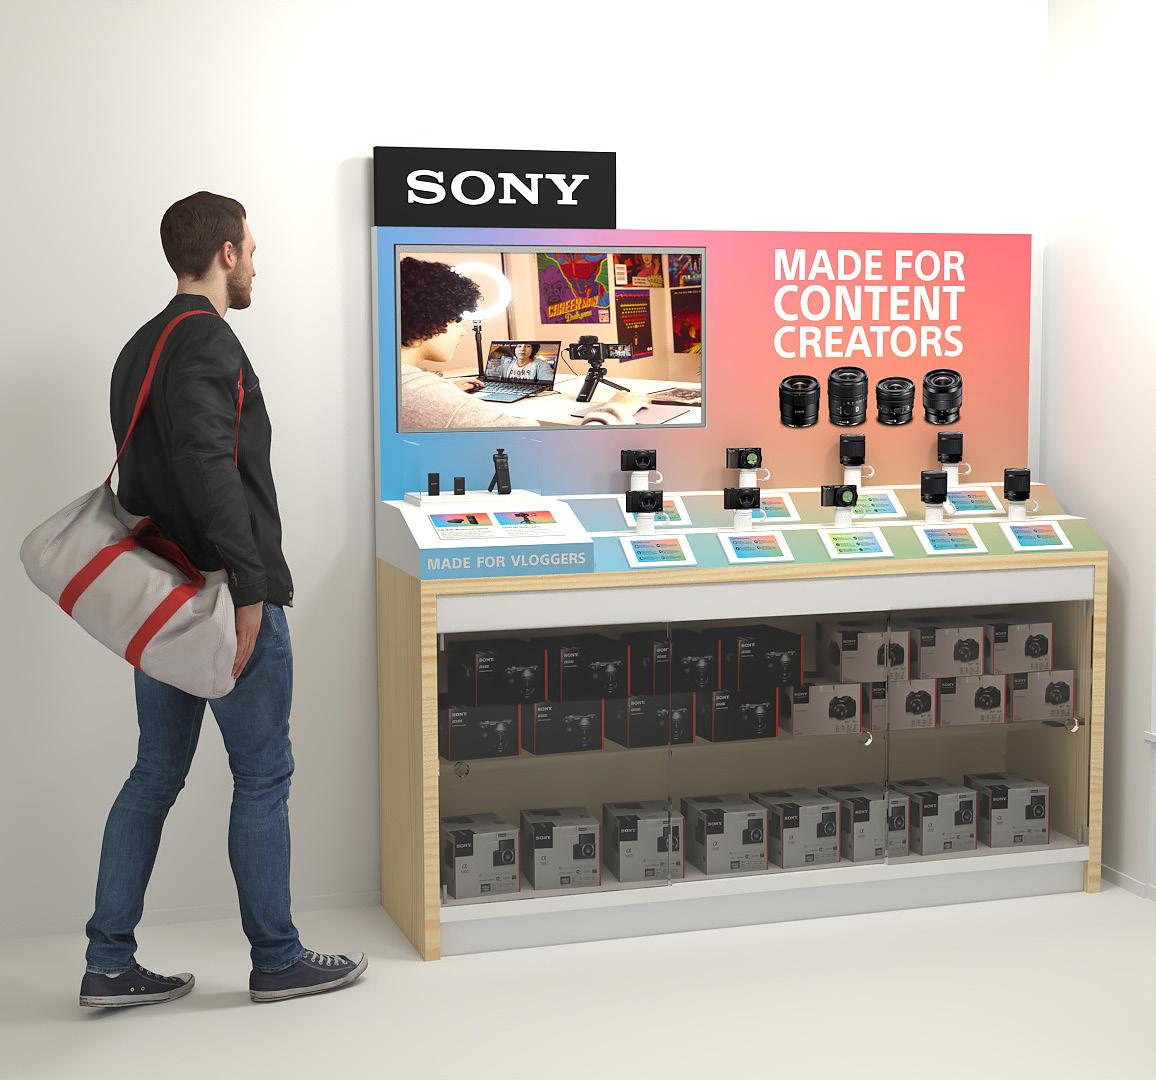
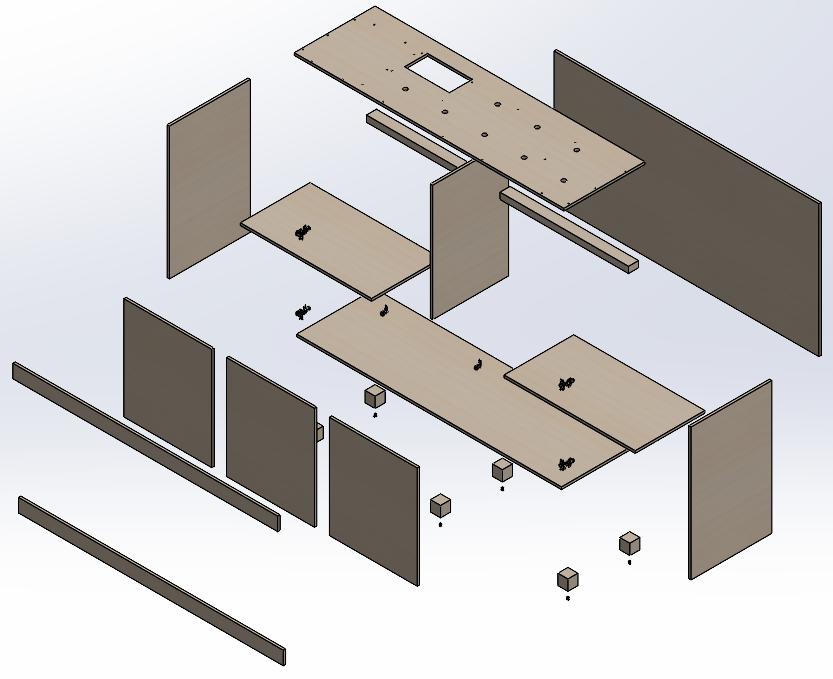
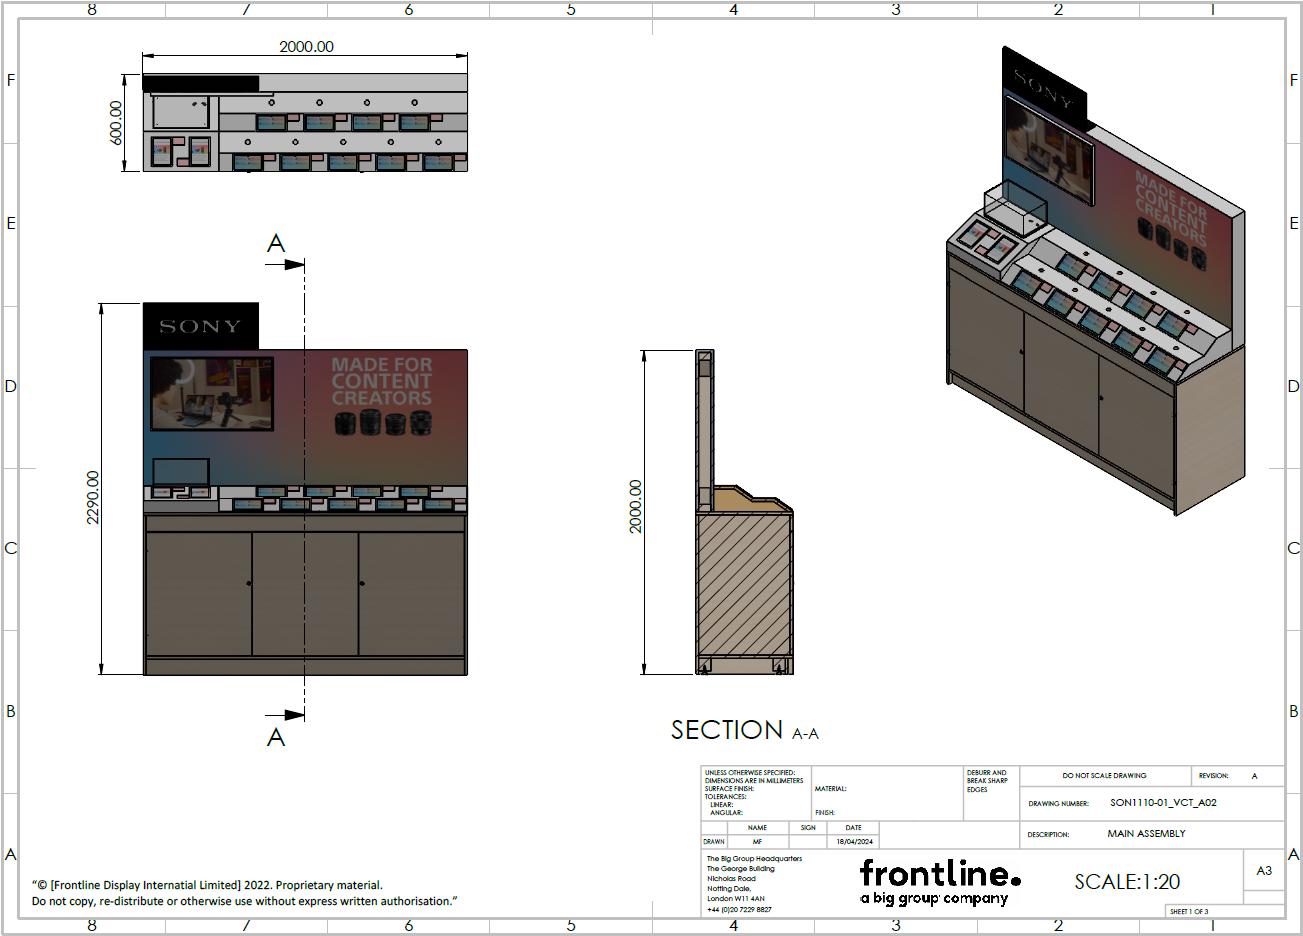
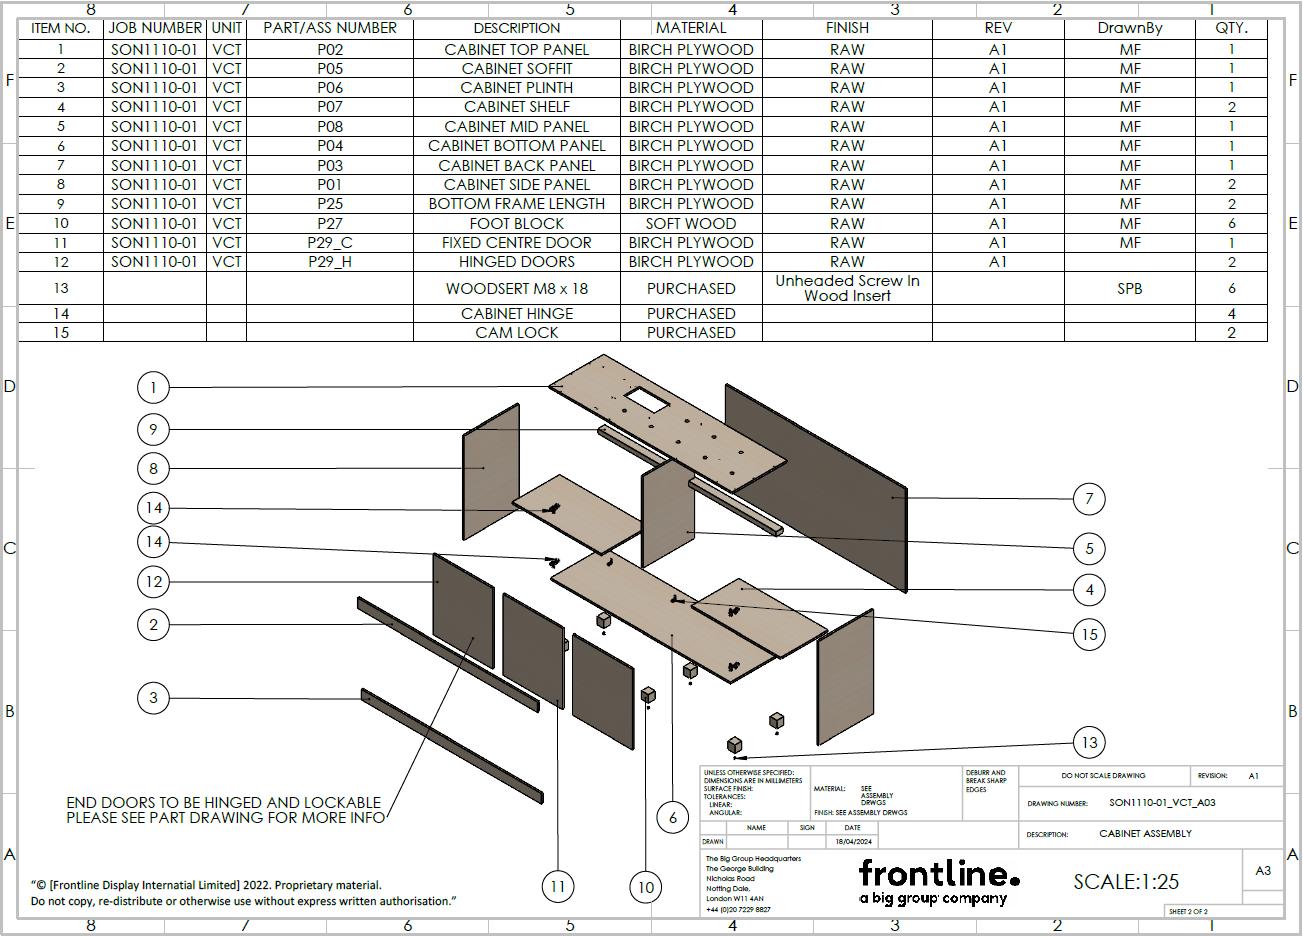
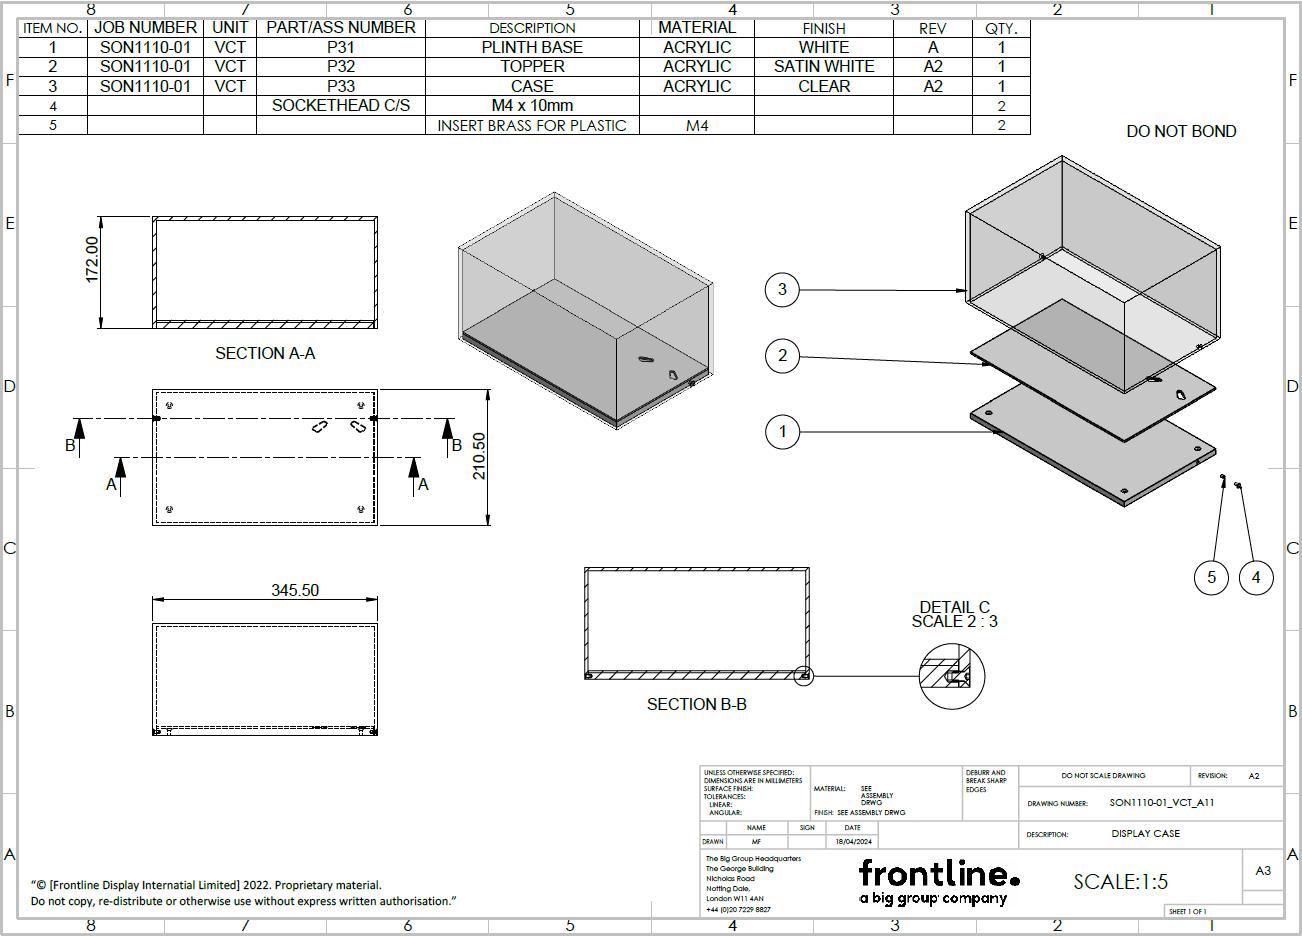
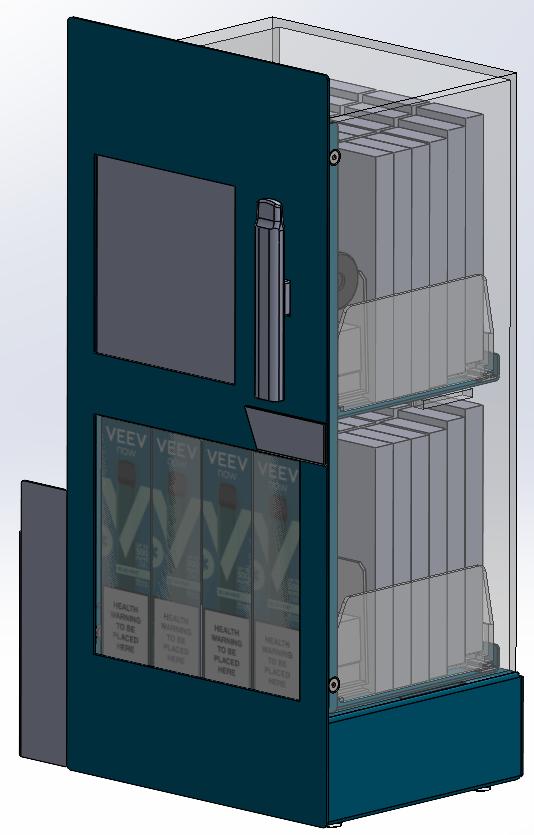
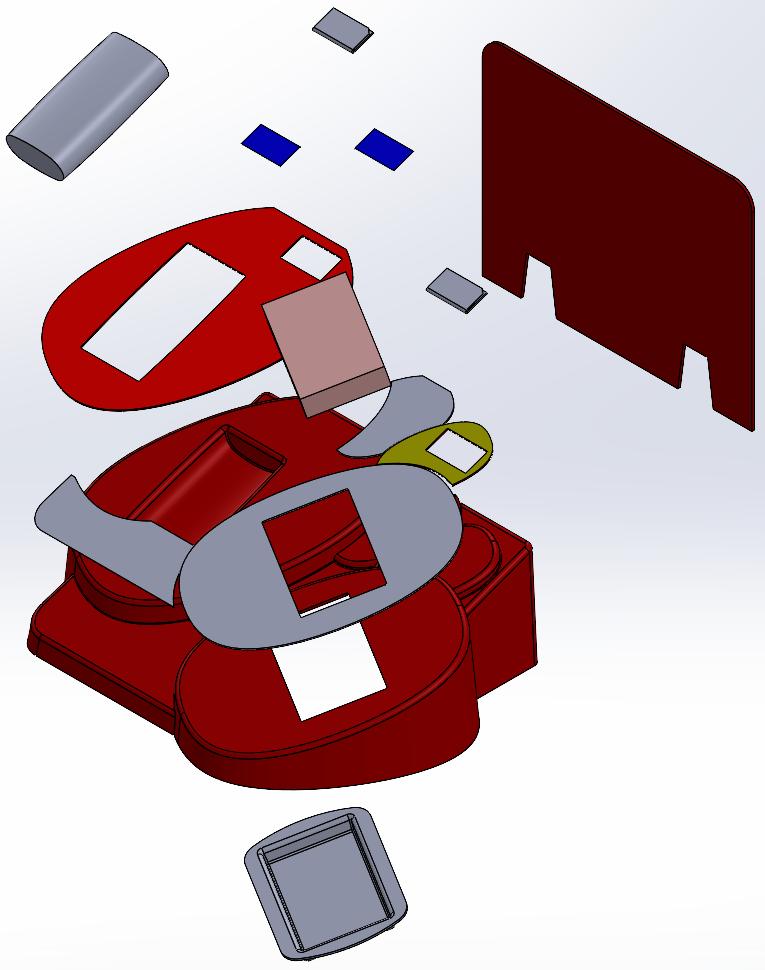
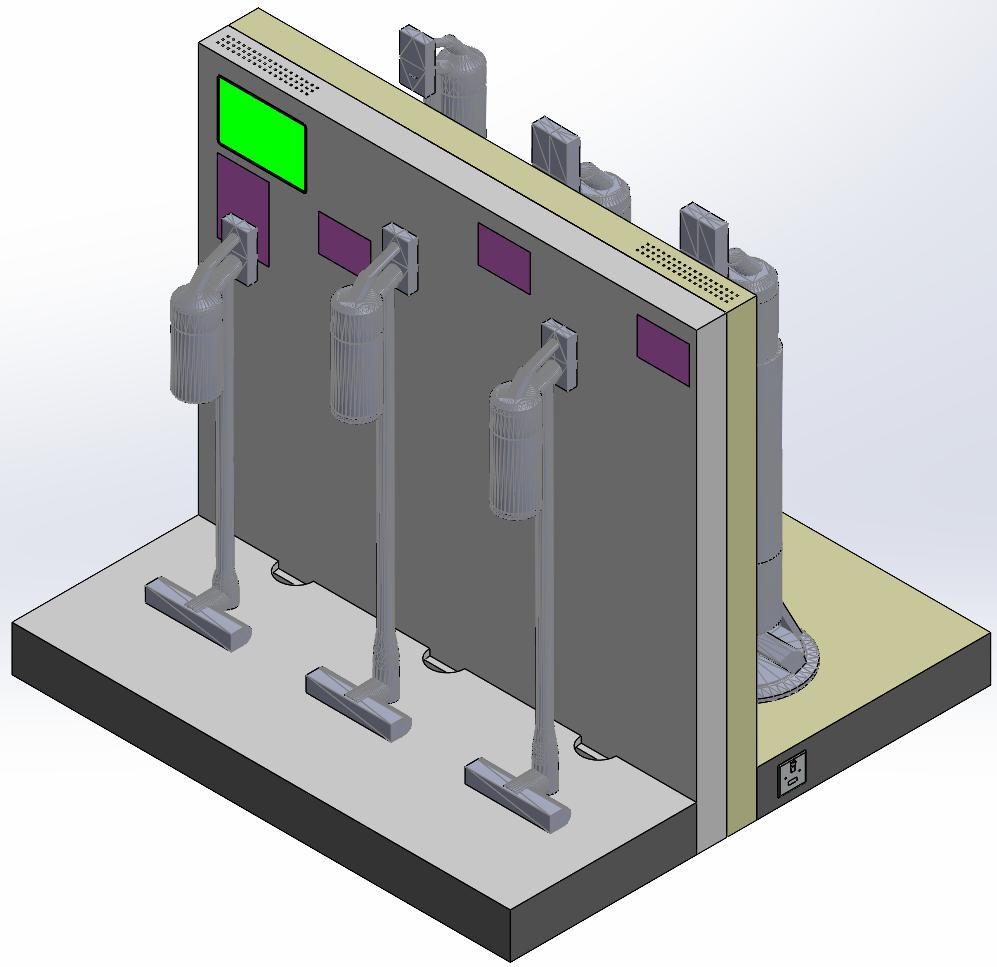
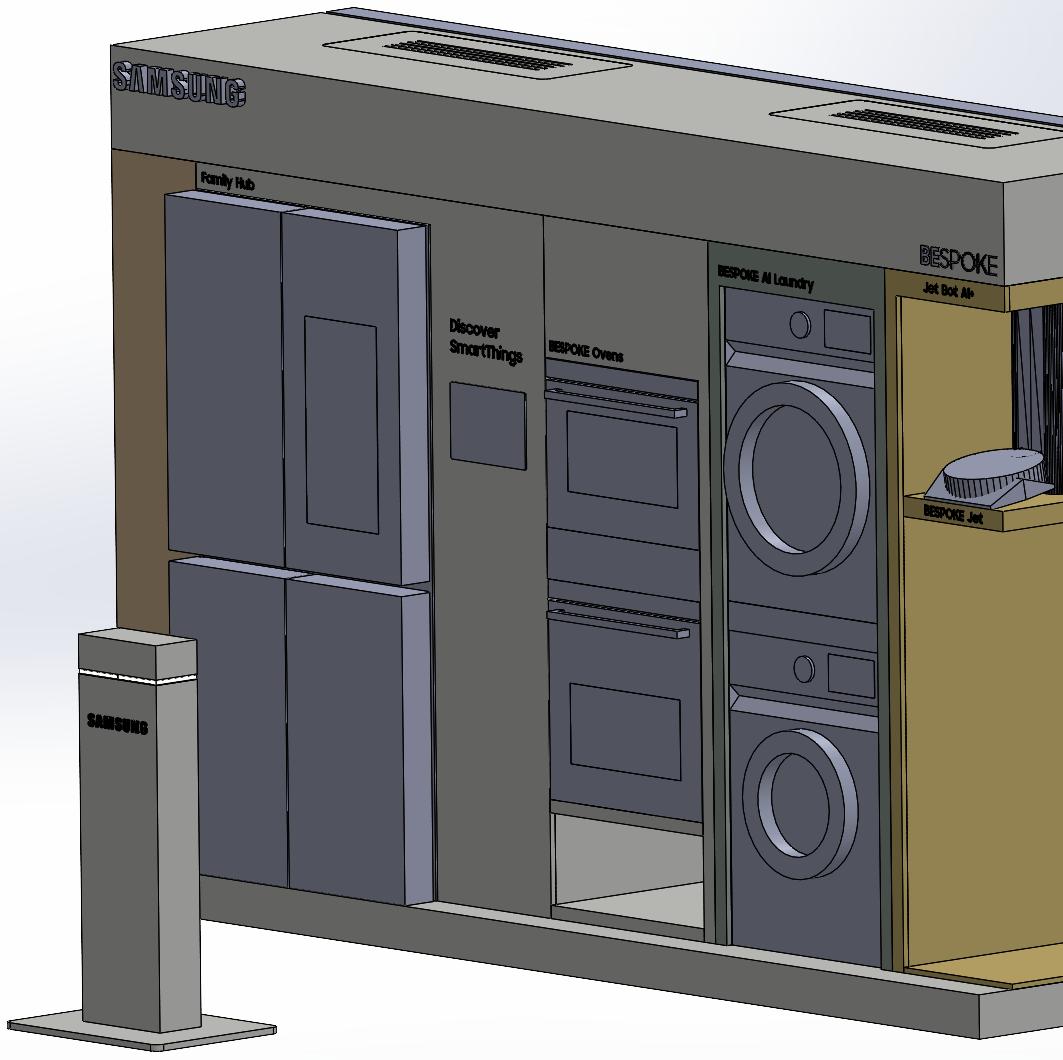
The client requested a display piece which clearly explained the benefits of different products, whilst also making them look like a part of a collective group. The stock was to be made visible and easily accessible for the staff, whilst also being locked securely away. Finally, the addition of a screen which would play content, supplied via USB.
The materials chosen were:
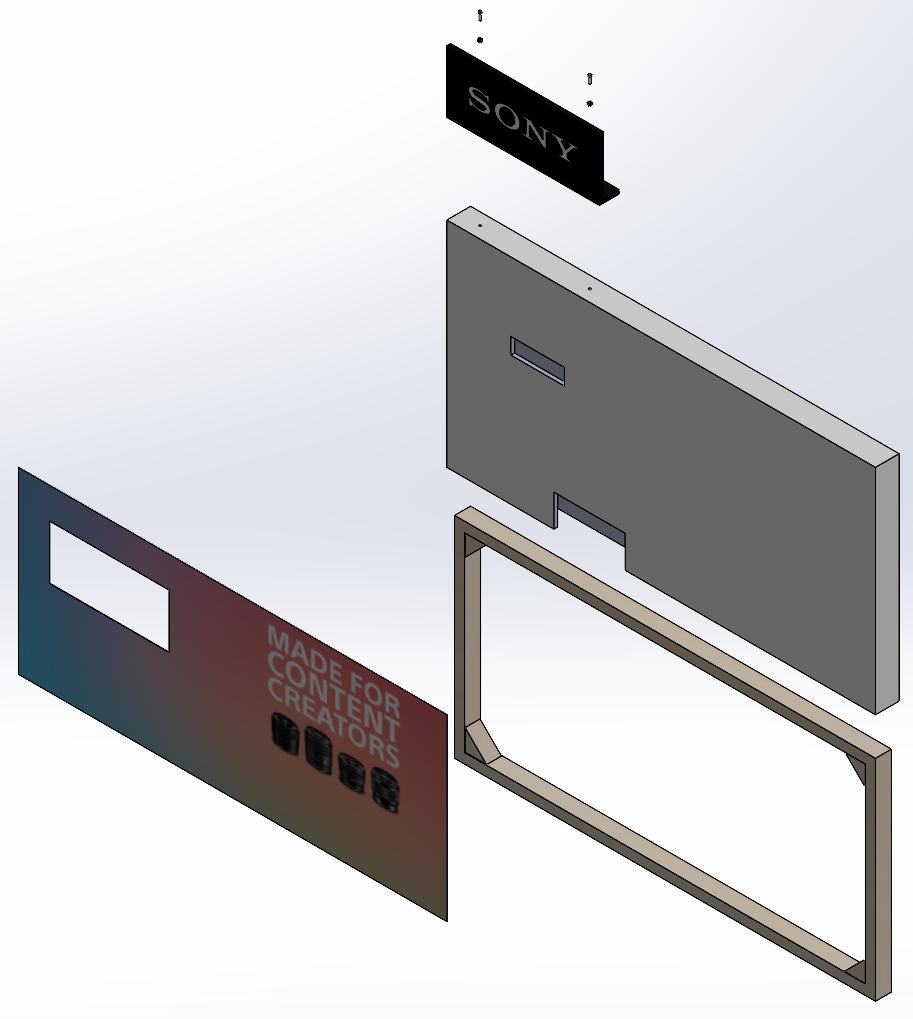
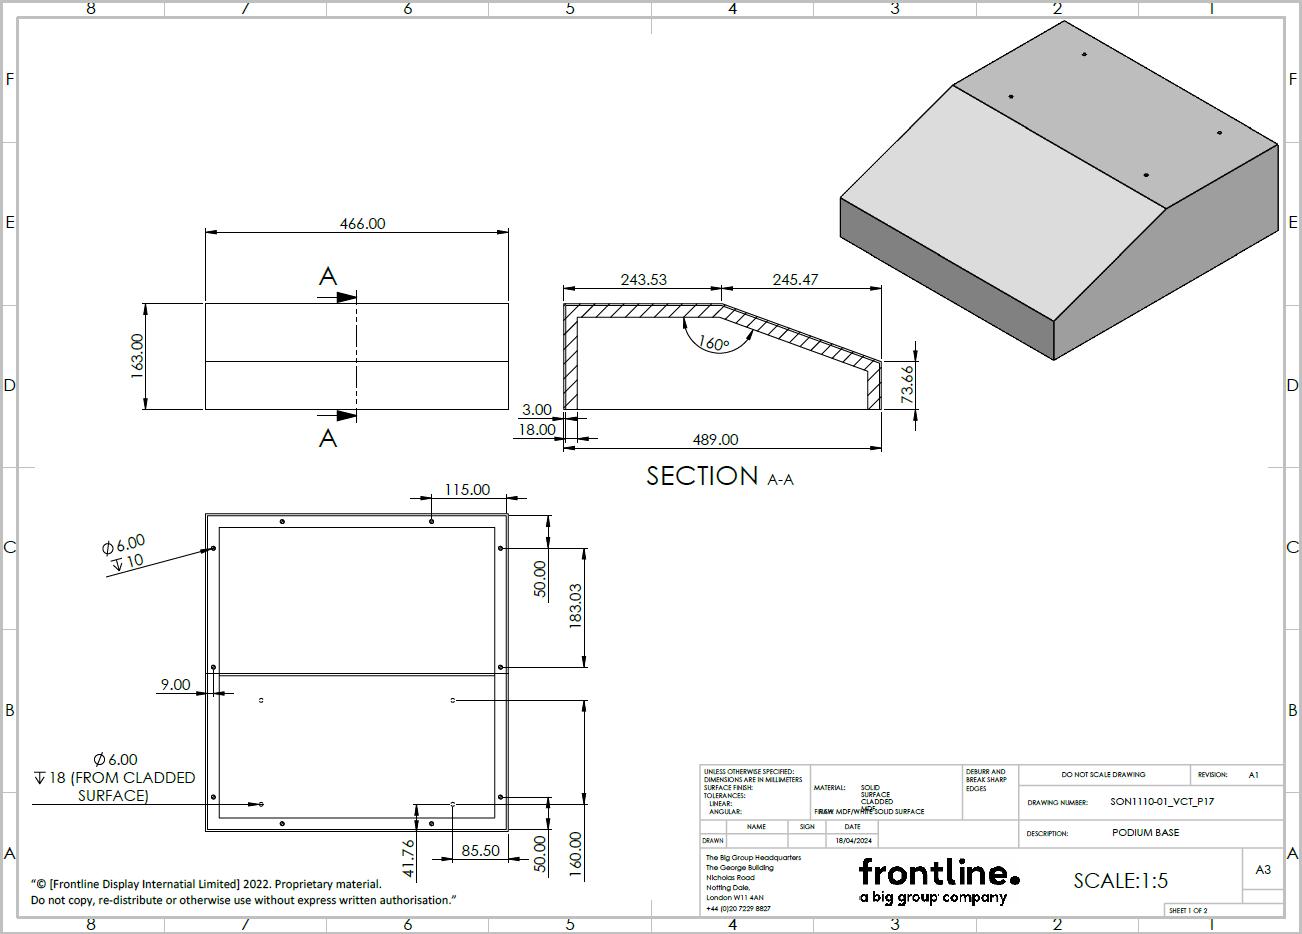
- Plywood for the furniture element to match the rest of the store. The header was supported by a timber sub-frame.
- A timber sub-frame for the angled merchandising area to be clad in a solid surface, which itself was laid over with a low-tack vinyl. I wanted to avoid using the vinyl however the client was insistent on having graphics which required digital printing.
Security for this unit was provided by a mixture of Invue security devices, Cam locked acrylic sliding doors and a clear acrylic box which was mechanically fixed into its plinth.
My role in this project was to travel to site so that I could measure up the intended location, as well as restrictions in terms of store entrances. I then assisted the designer with the concept and finally took over development. This involved sourcing the screen and security, building the Solidworks model, producing technical drawings and then liasing with our suppliers with any queries that they had.


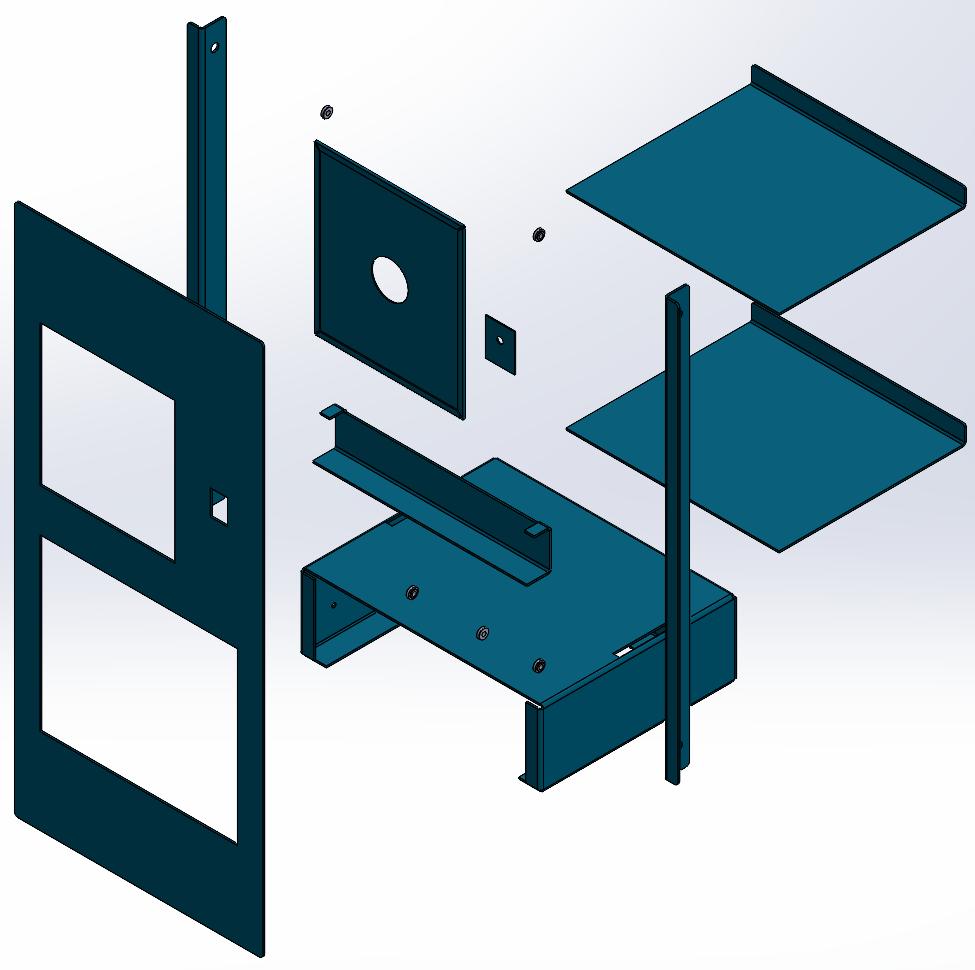
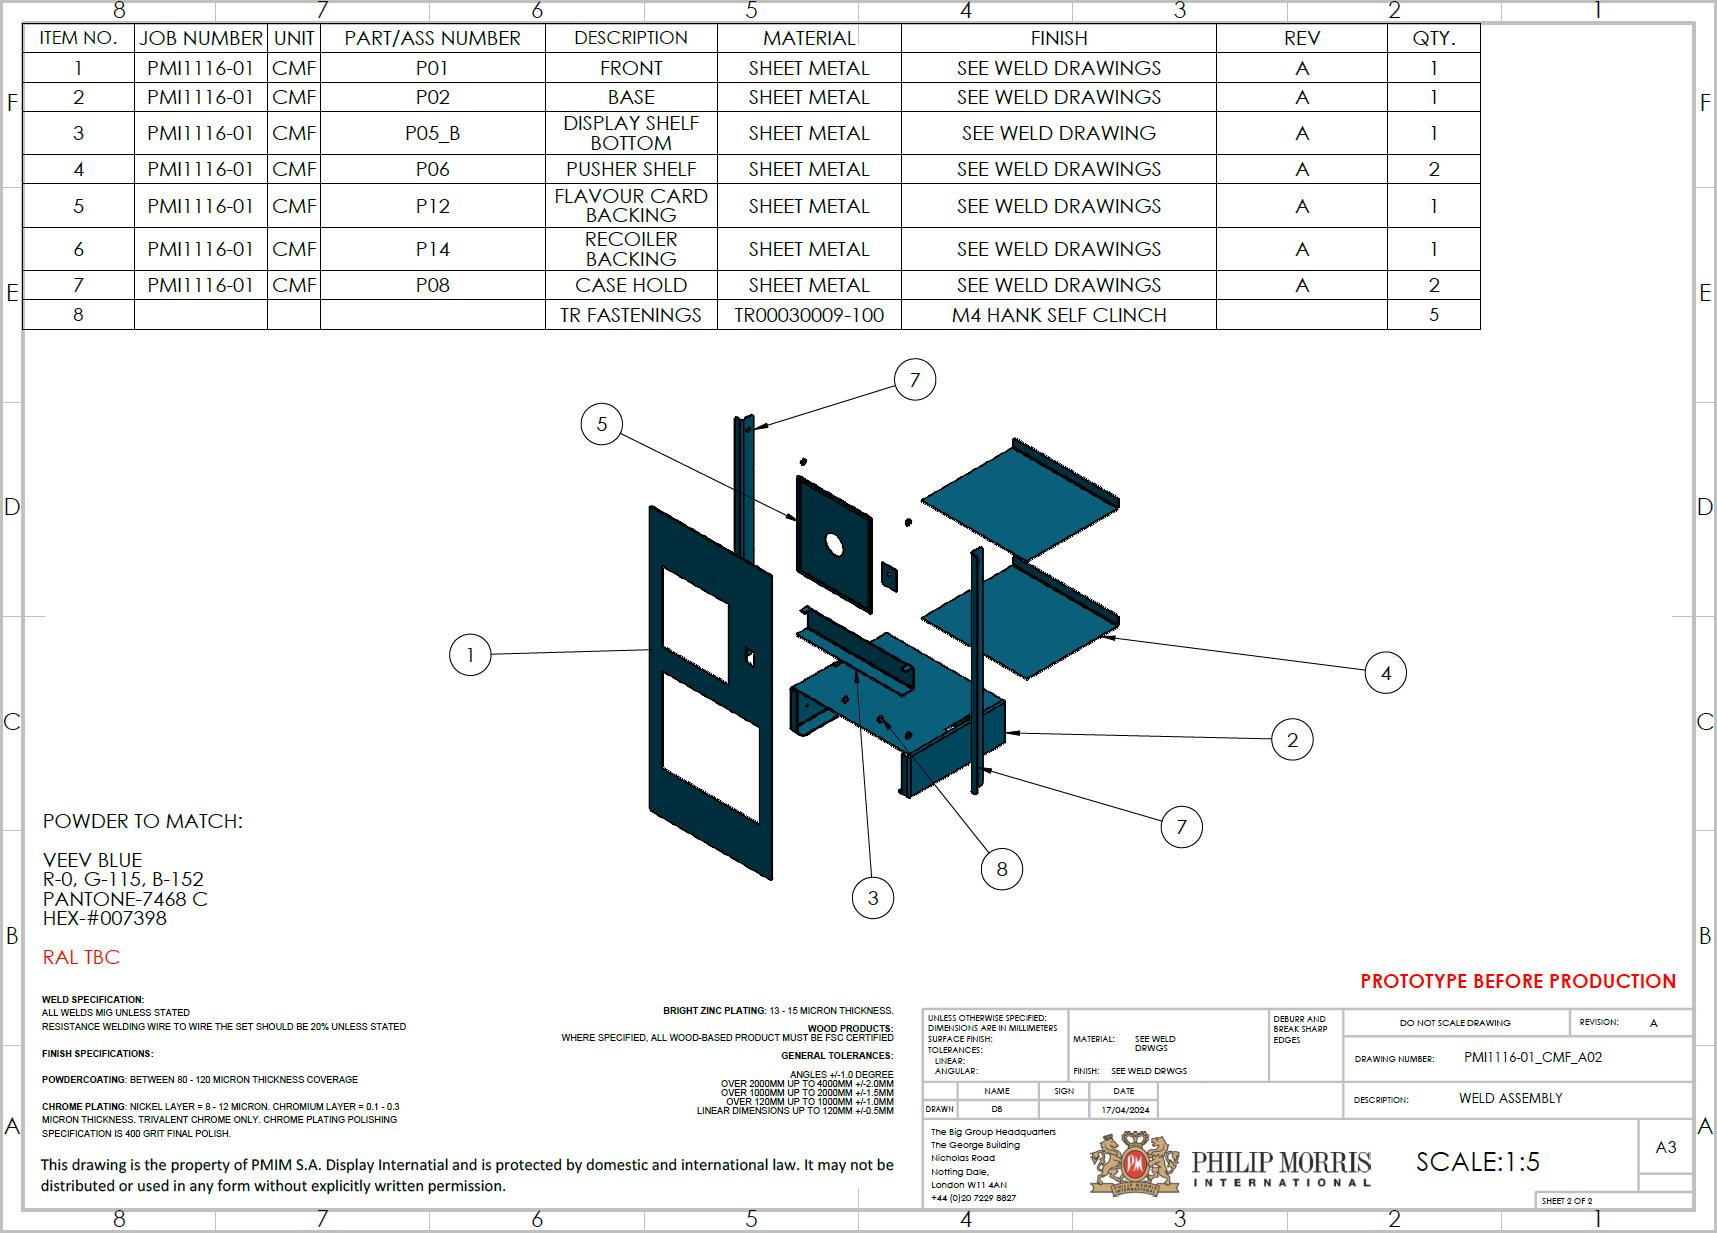
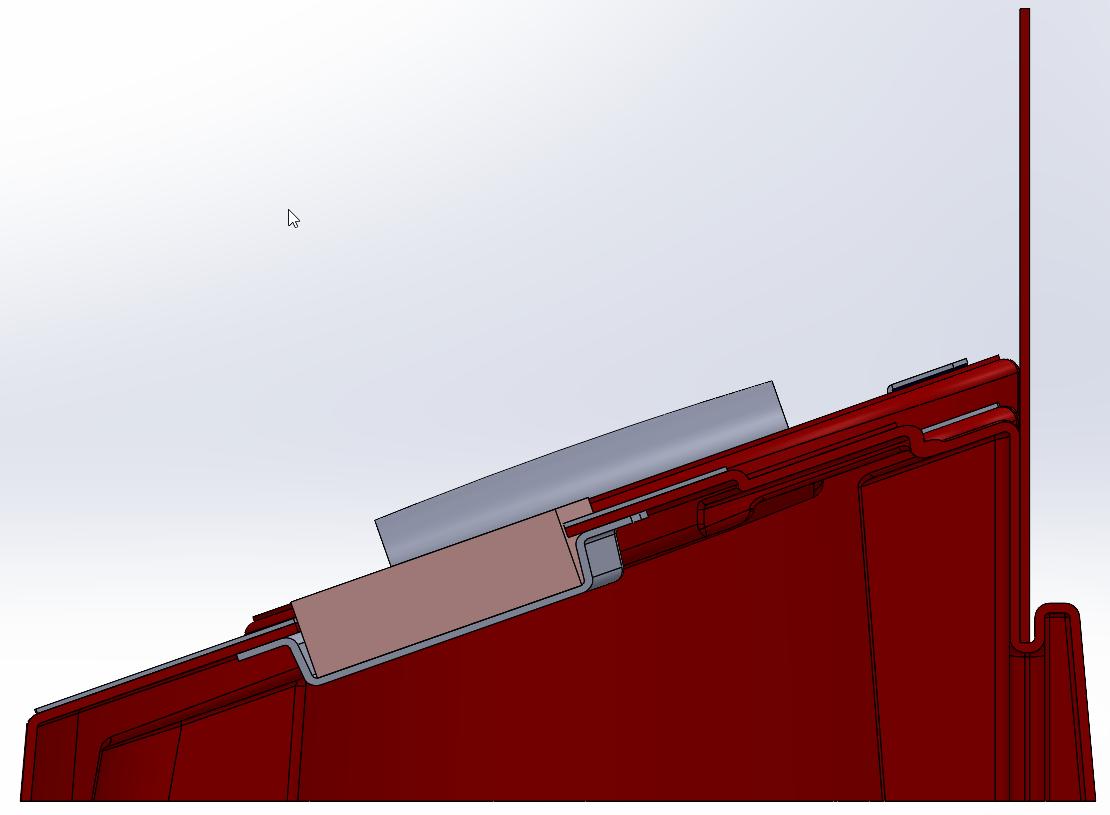
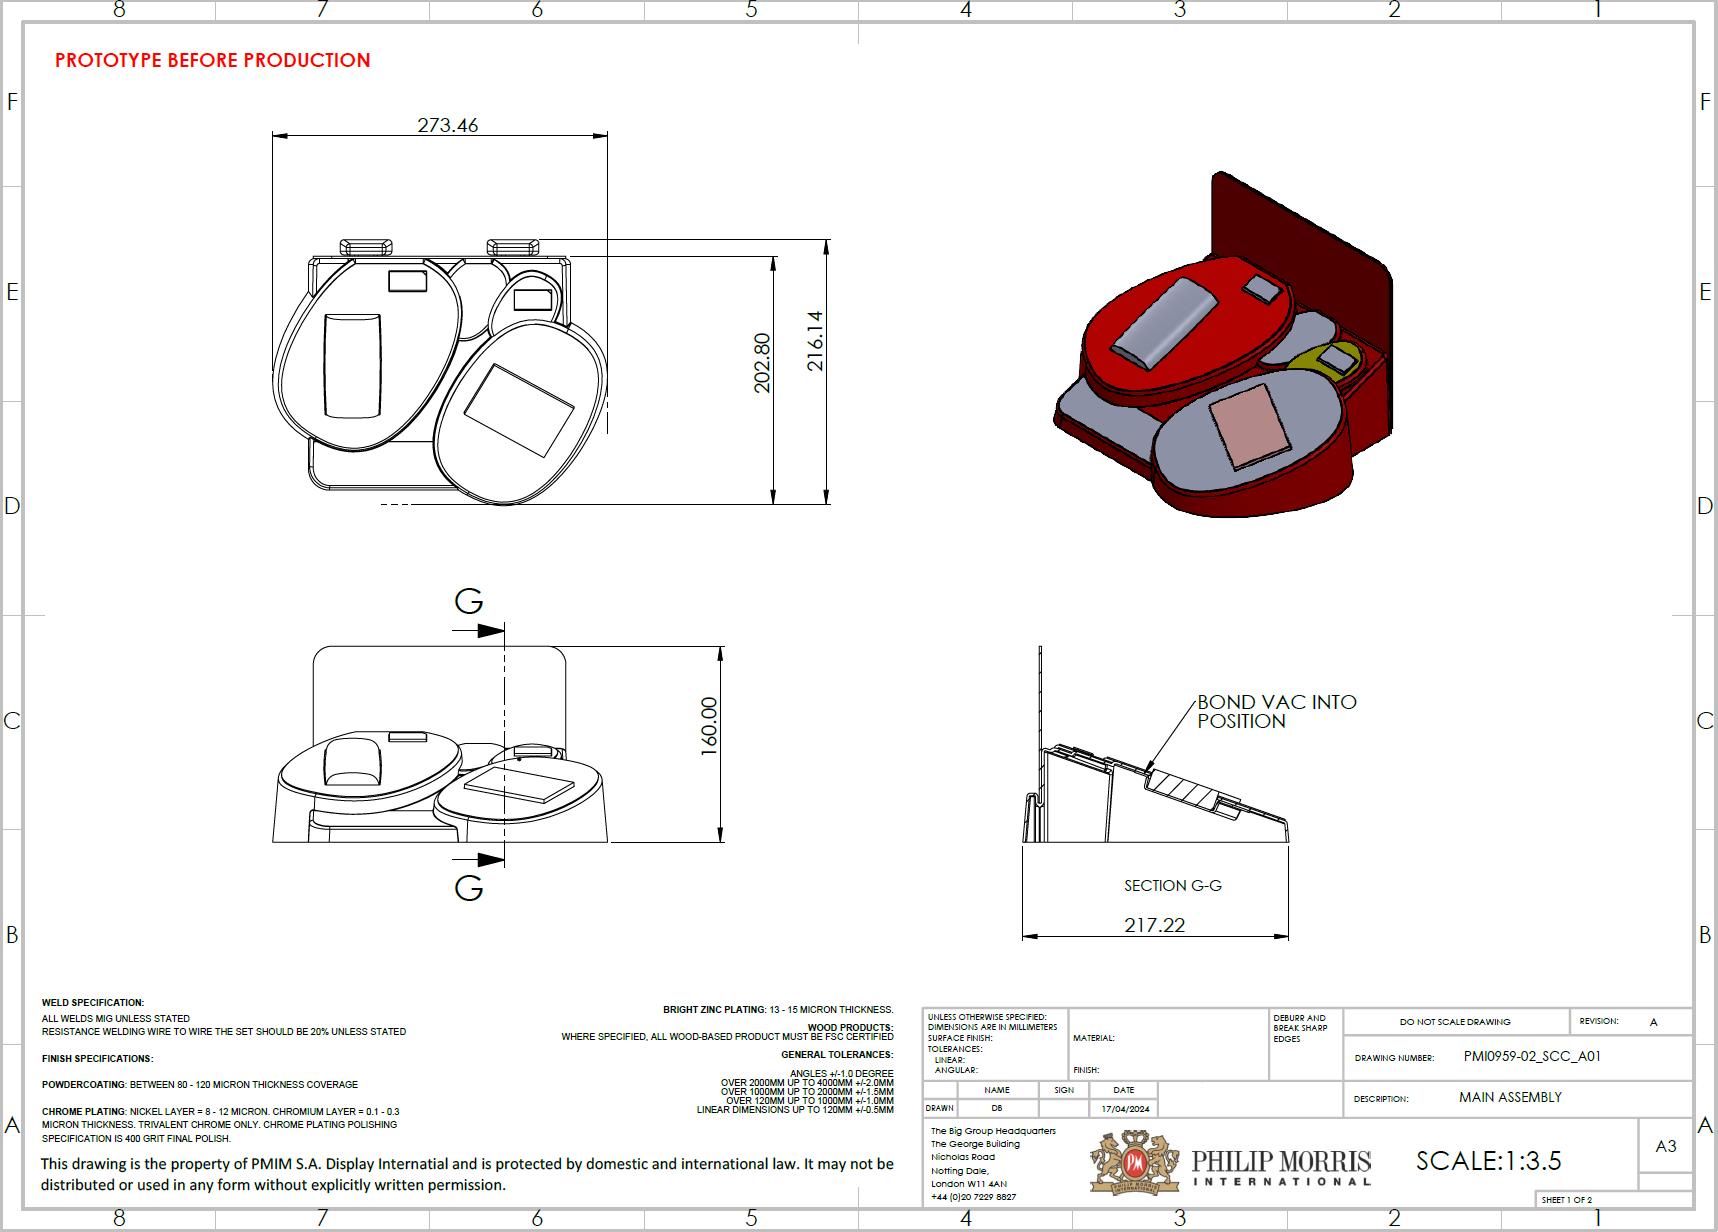
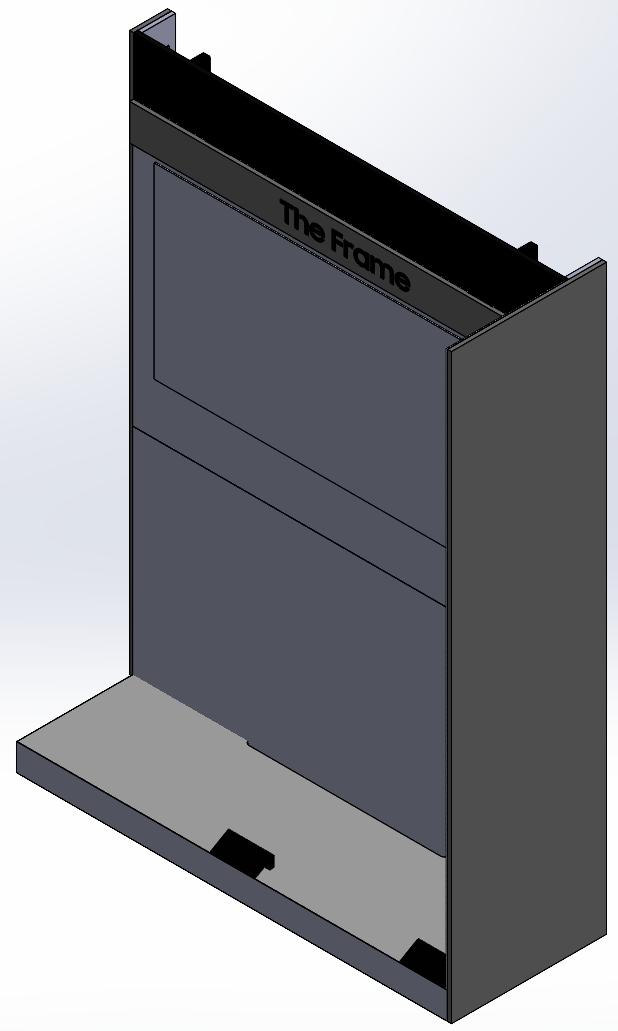
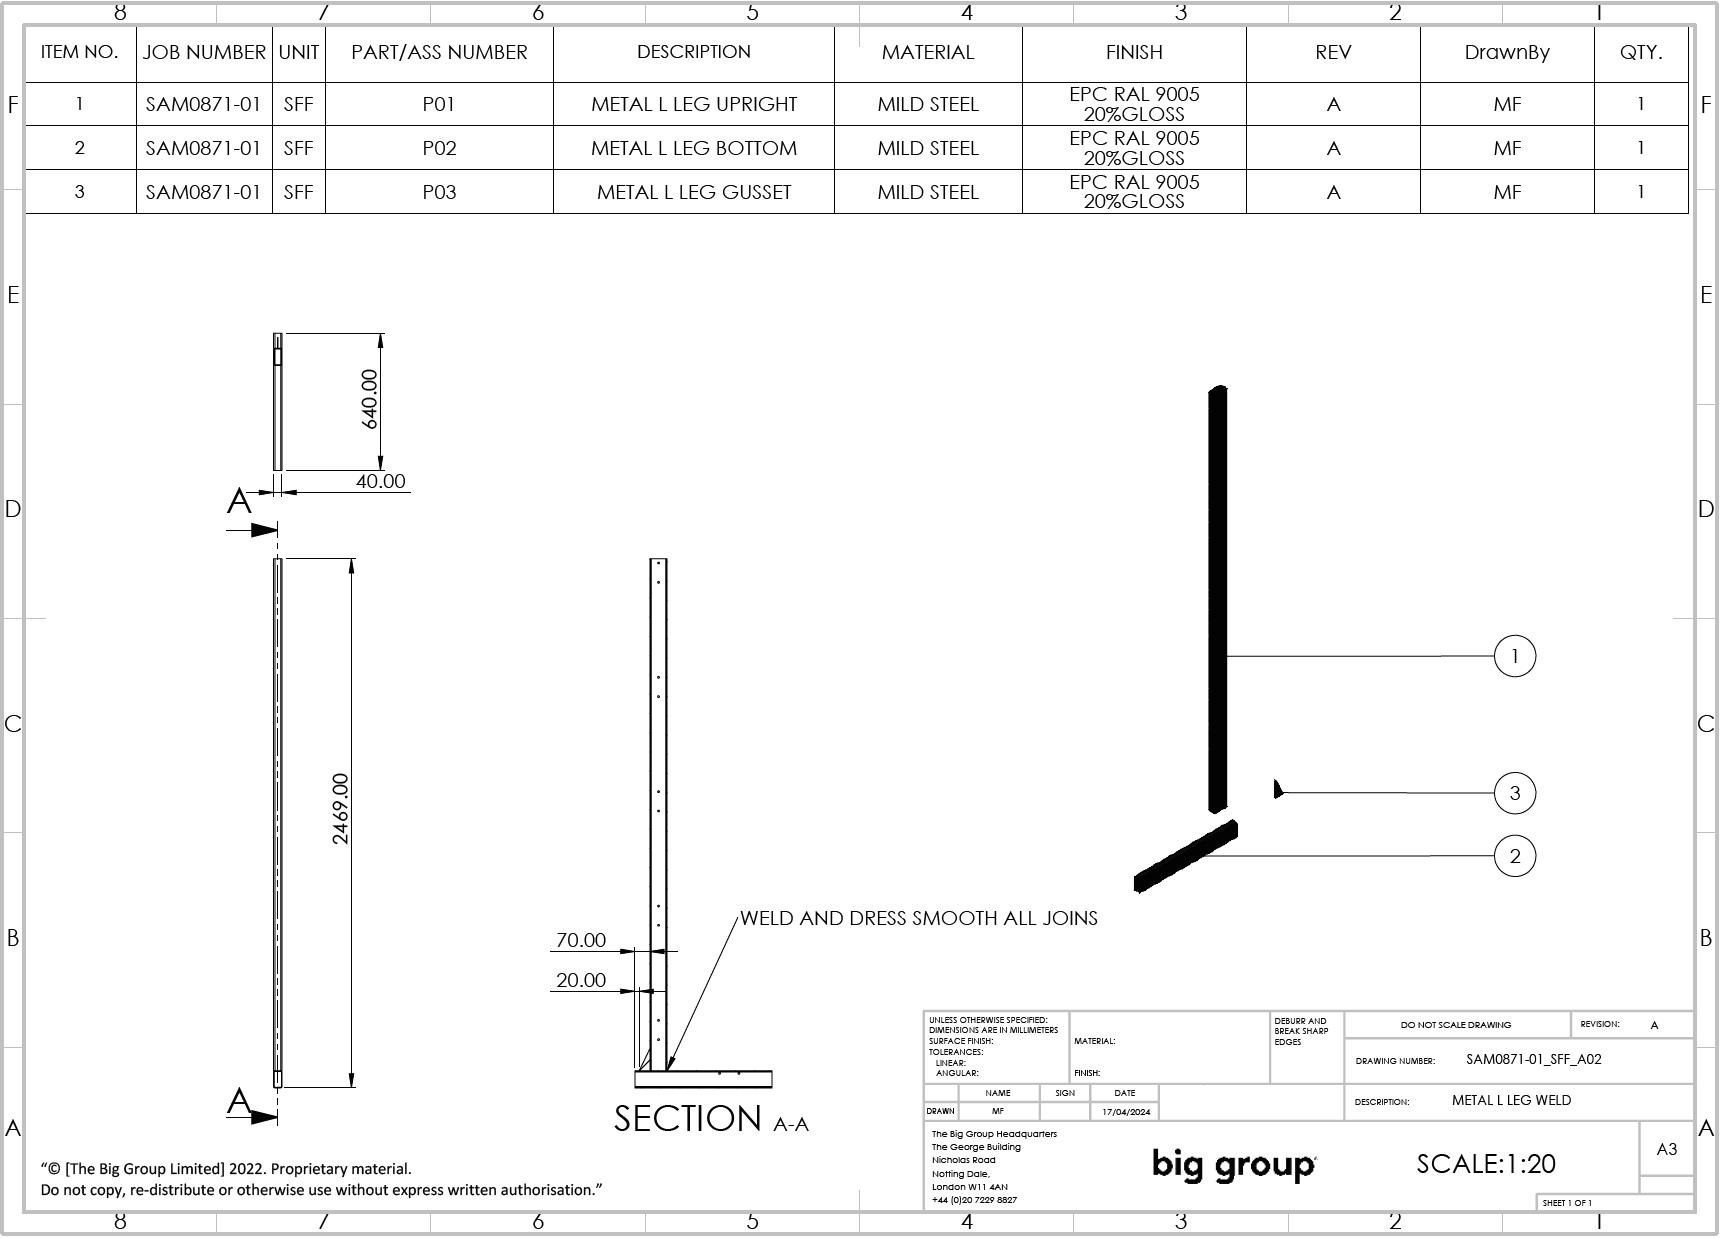
This unit was a part of a much larger toolkit for the client which I worked on. They expected a counter-top solution which advertised the poduct from the front, whilst feeding stock out of the back. A device was also to be securely mounted to the front alongside a removeable graphic.
The materials chosen were:
- Sheet steel which is durable and versatile, it also allowed for tight and neat mechanical fixings. The entire metal weld could also be EPC sprayed to match the clients specified colour.
- Clear acrylic was used to house the stock at the rear. This provides the staff with a visual on how many are left before the unit requires replenishment of stock. This also prevents the customer from easily accessing the stock over the counter.
My role in this project was to take the visual provided to me (see left) by the design team and make it a reality. The strongest challenge with this project was securely fixing the device to the front of the unit. This was achieved by a rather simple method of attaching a recoiler to the rear face.


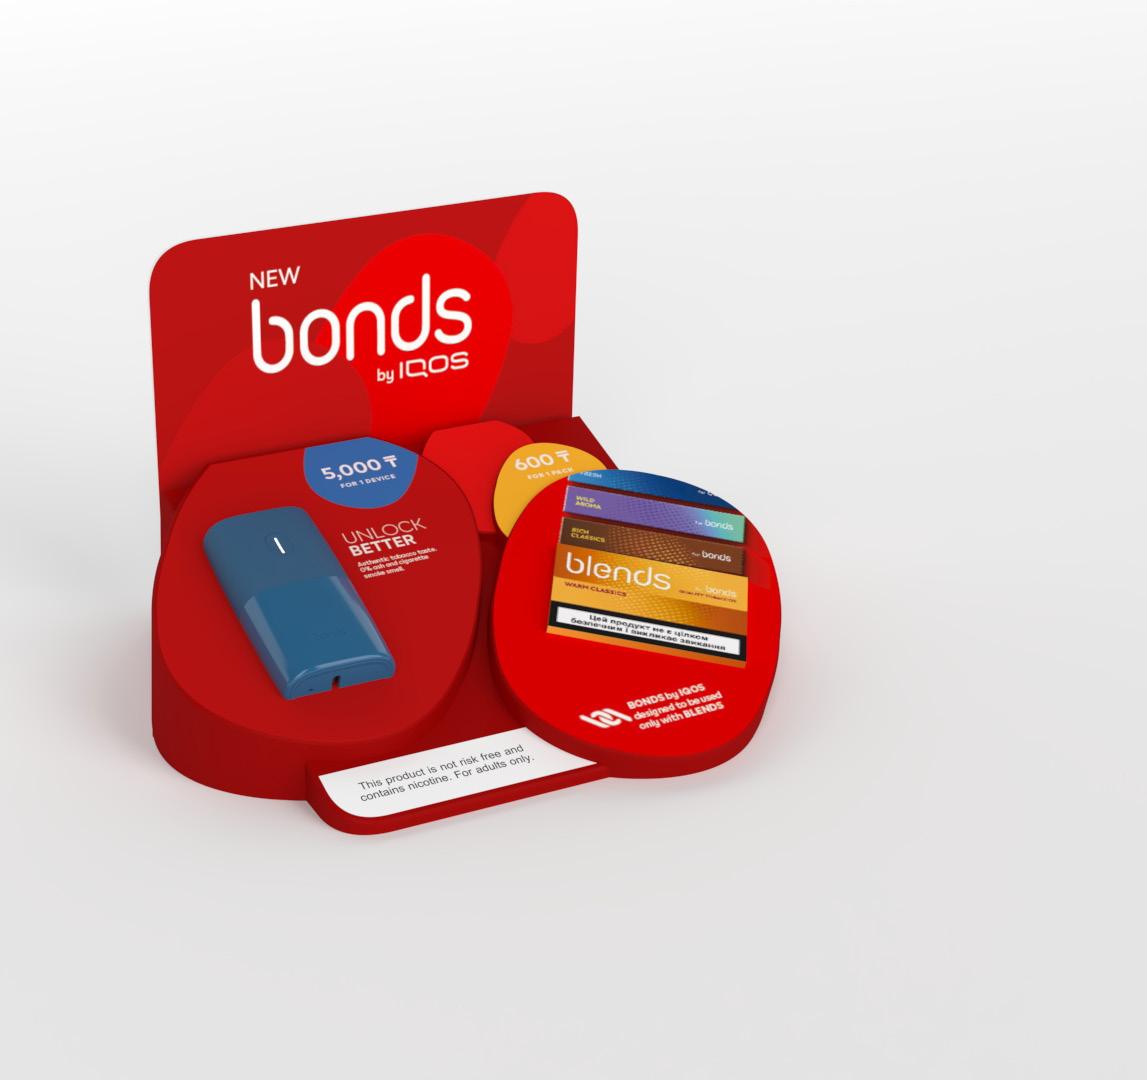
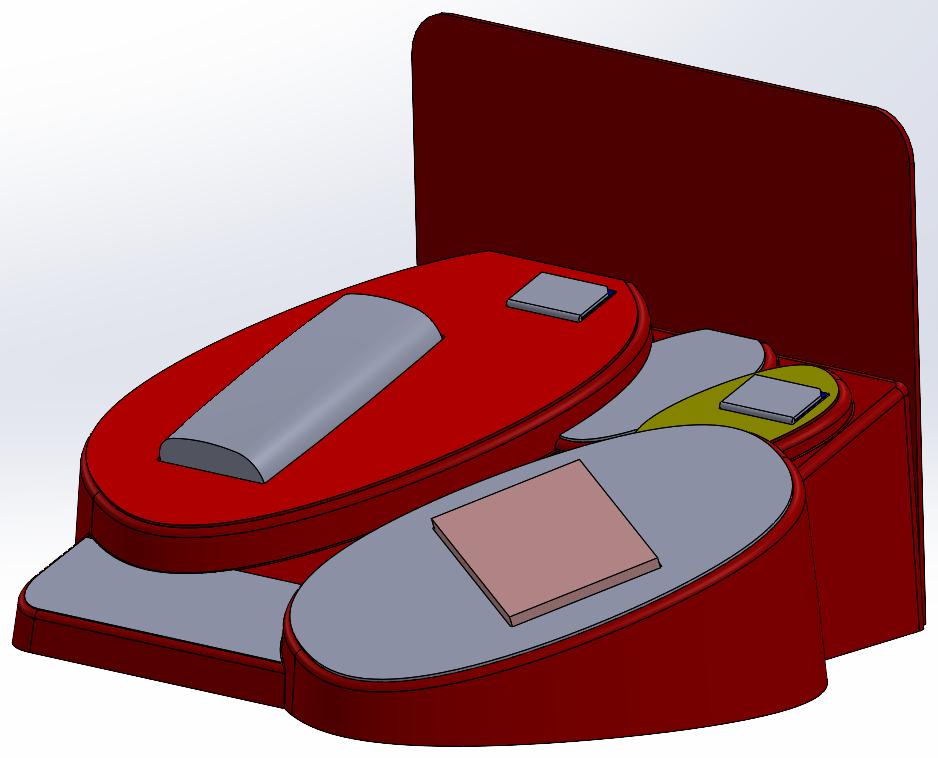
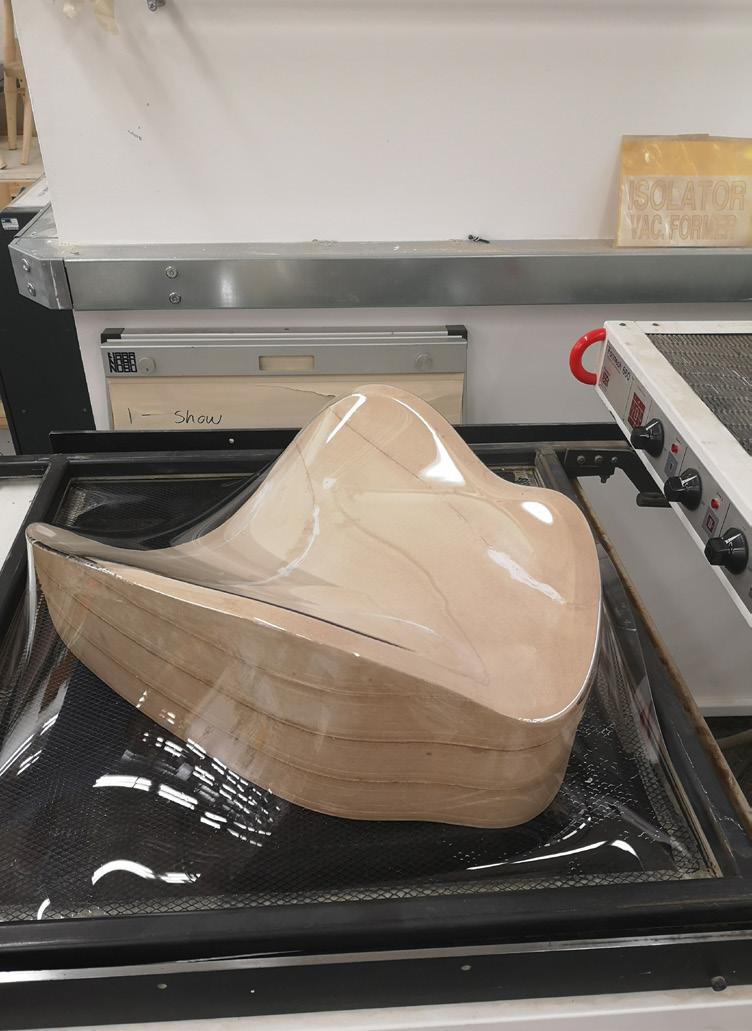
This unit was also a part of a much larger toolkit for the client which I worked on. They requested a counter-top solution which advertised the poduct from the front and didn’t deviate whatsoever from the supplied render (see left). It was to be sent out to a wide range of markets and thus had to be easy to manufacture locally.
The materials chosen were:
- Vacuum formed plastic. Due to the complexity of the desired shape I decided that a vacuum form would meet both the desired appearance, as well as being simple enough for the many different markets to handle their own production.
- Printed HIPS was used to cover the top of each “pebble” to provide an easy substrate for printing.
My role in this project was to take the visual provided to me (see left) by the design team and make it a reality. The strongest challenge with this project was the modelling, there were many configurations of “pebble” layouts and they all had to work within the same model with no conflicts.


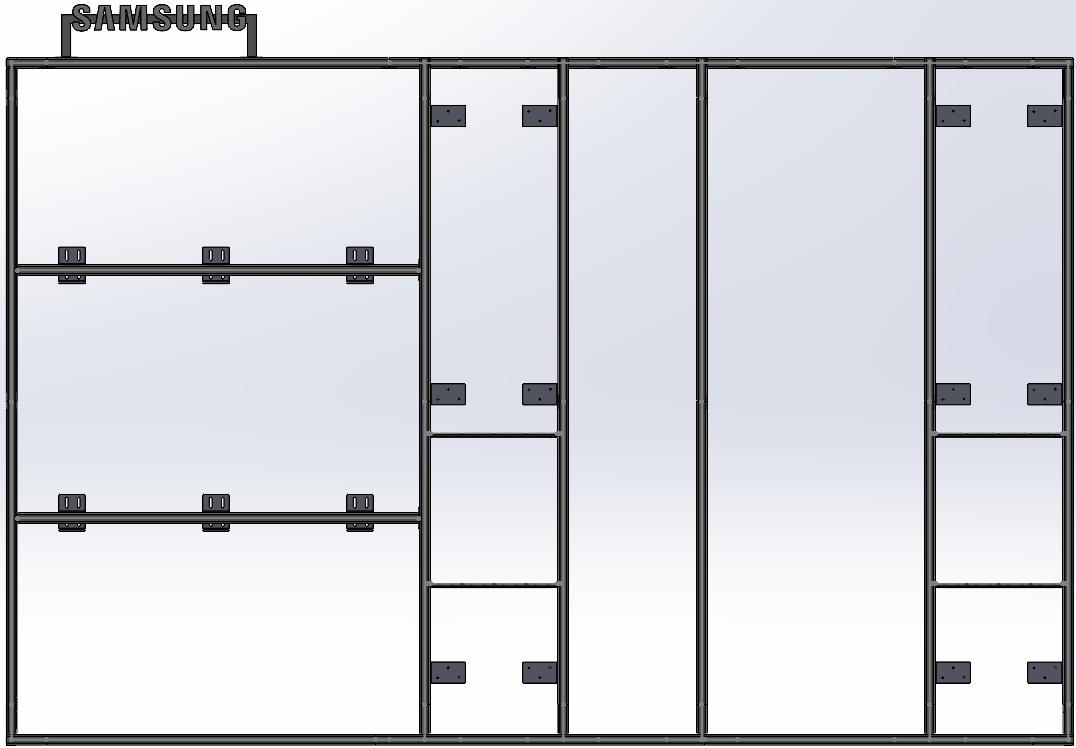
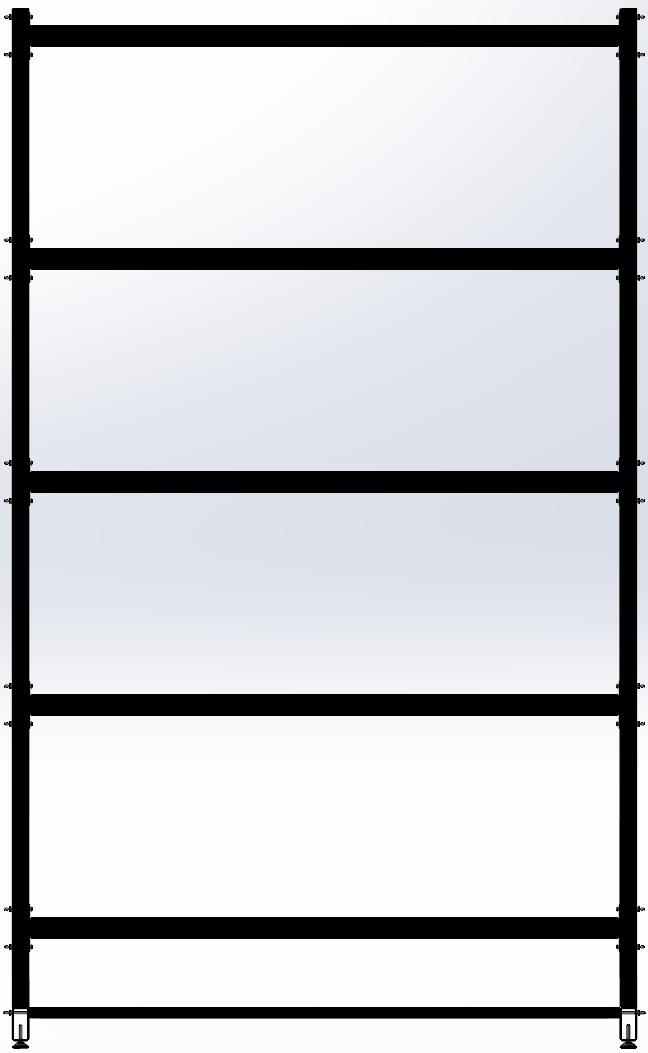
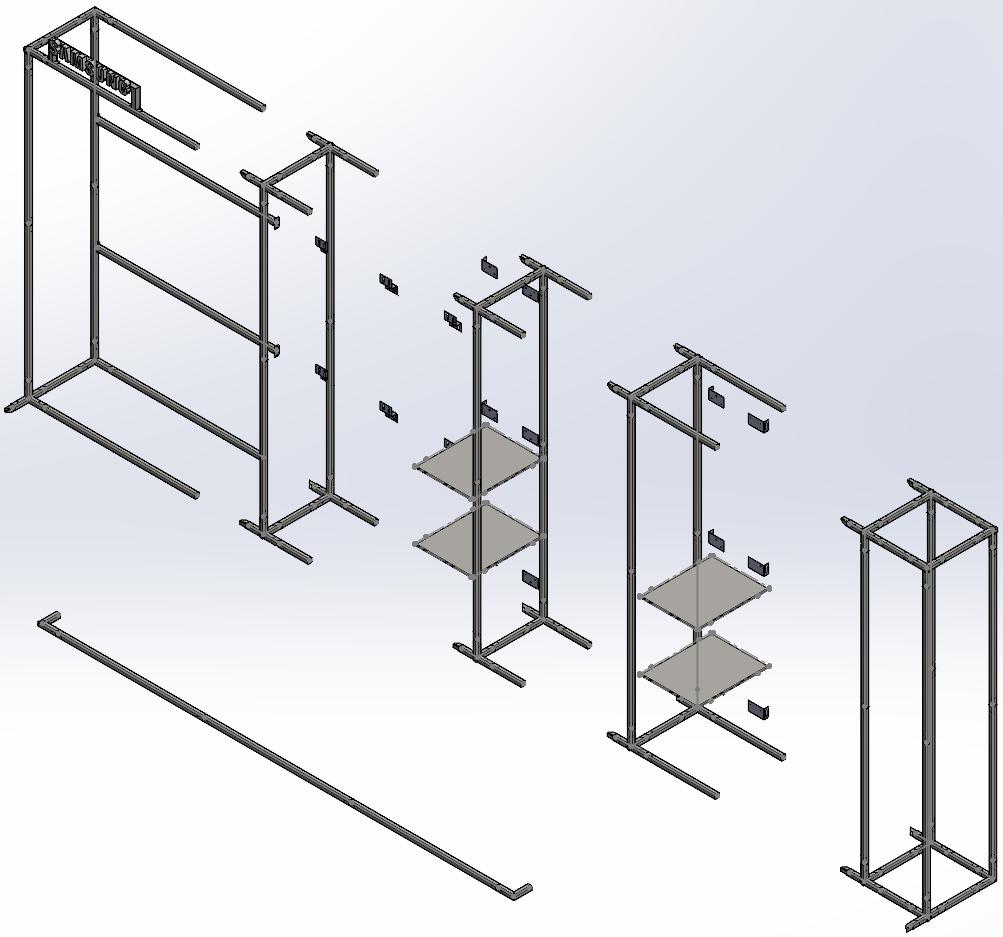
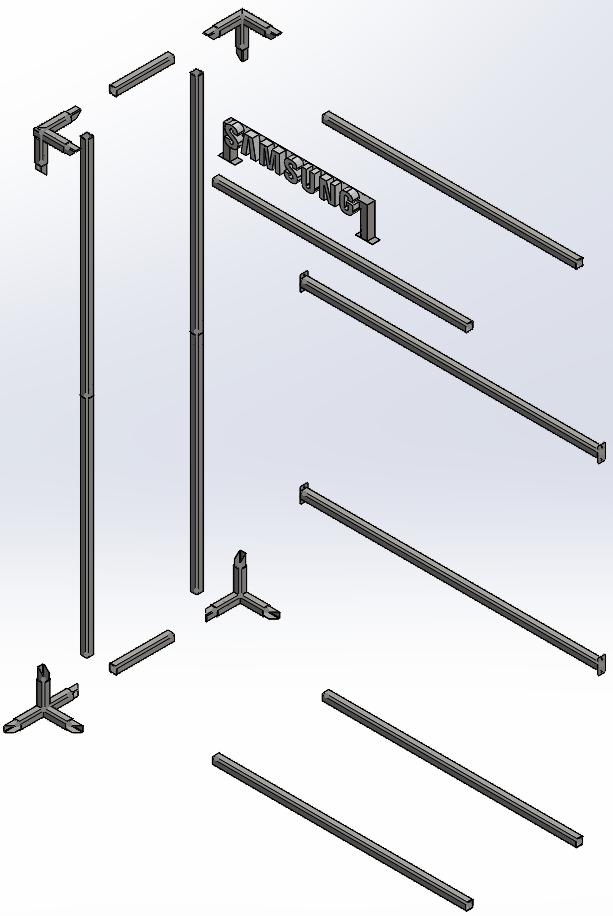
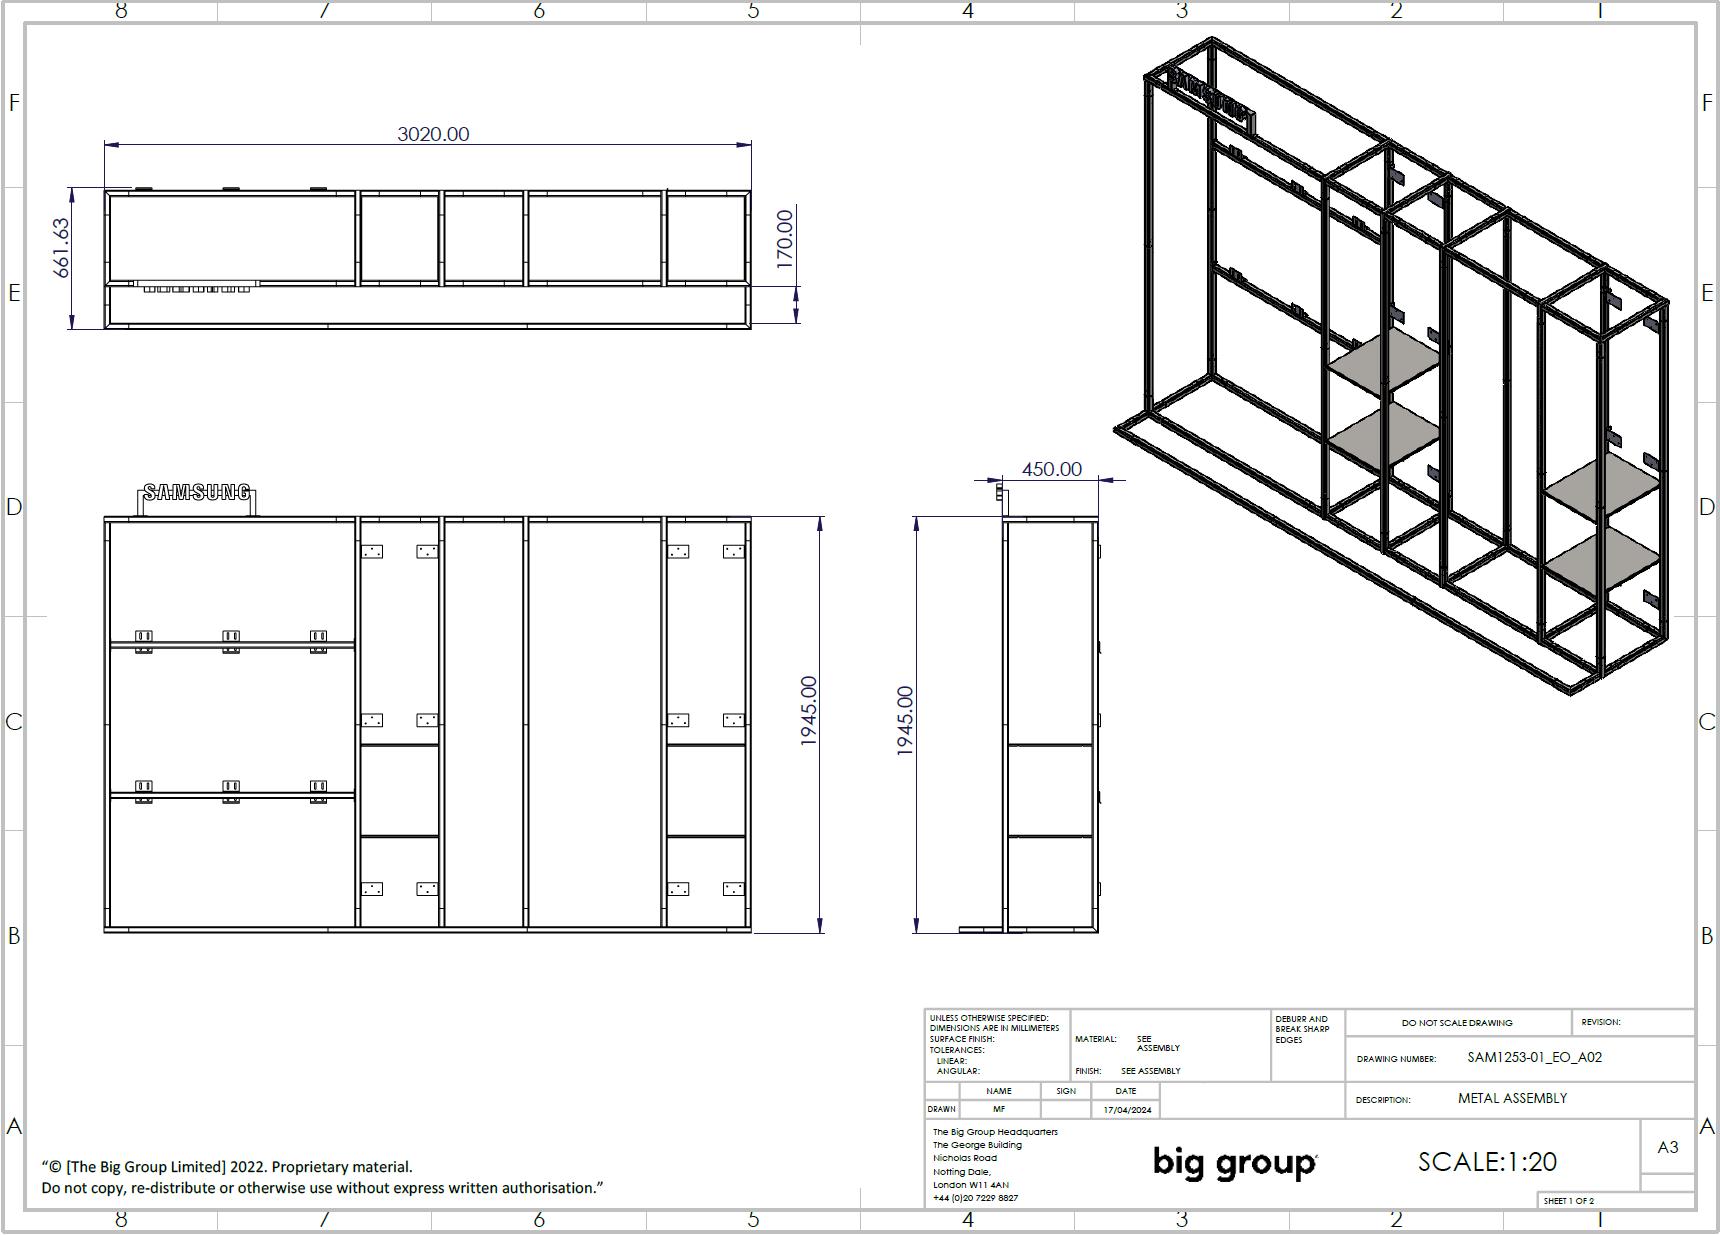
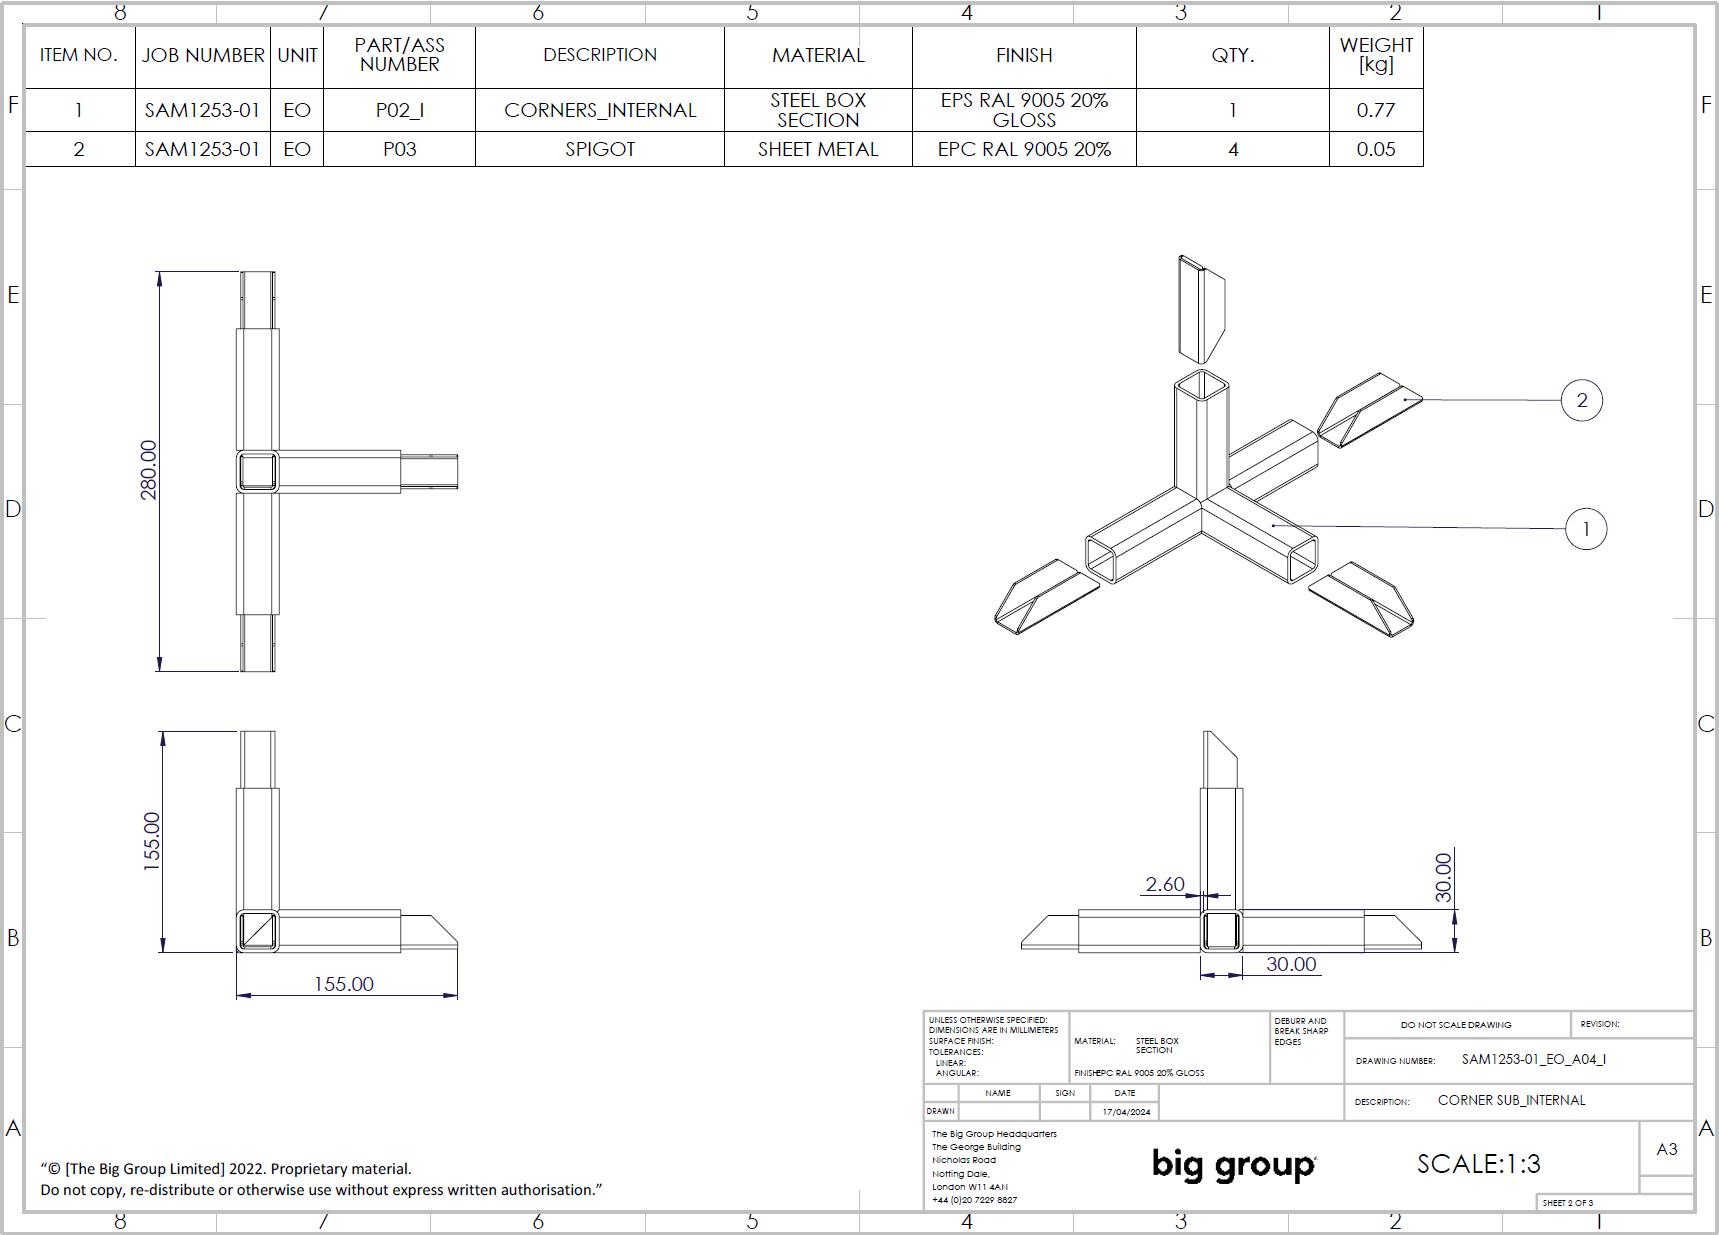
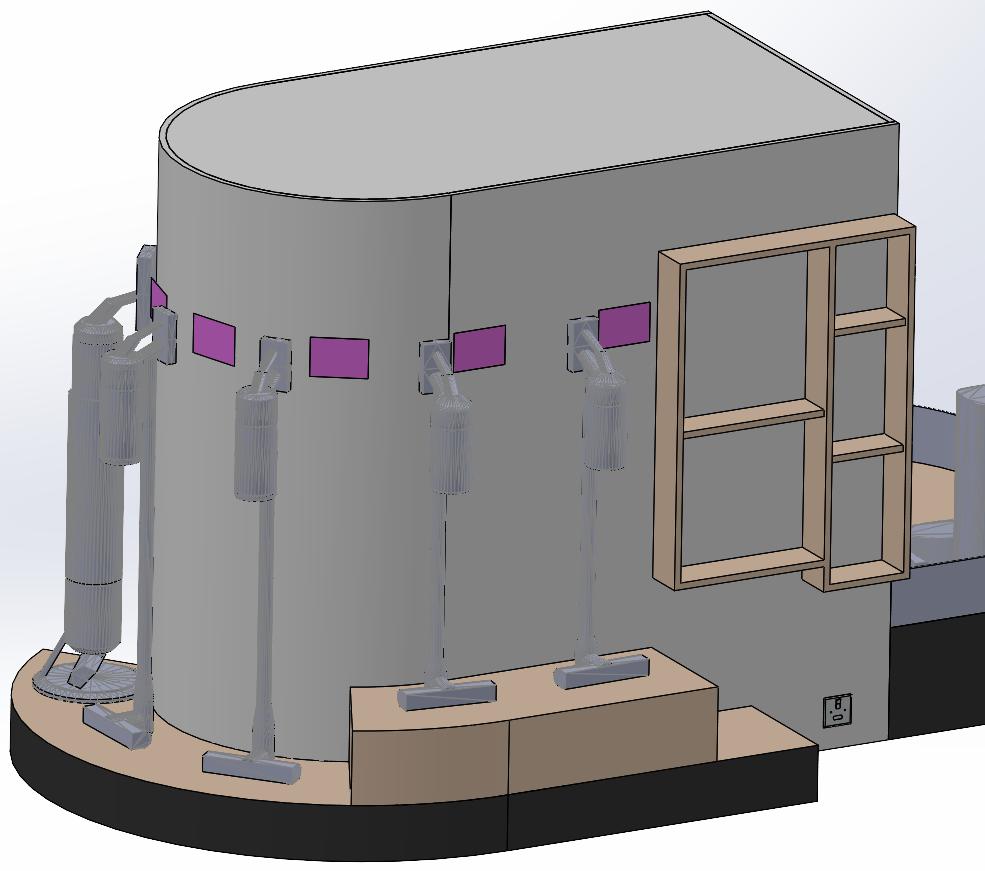
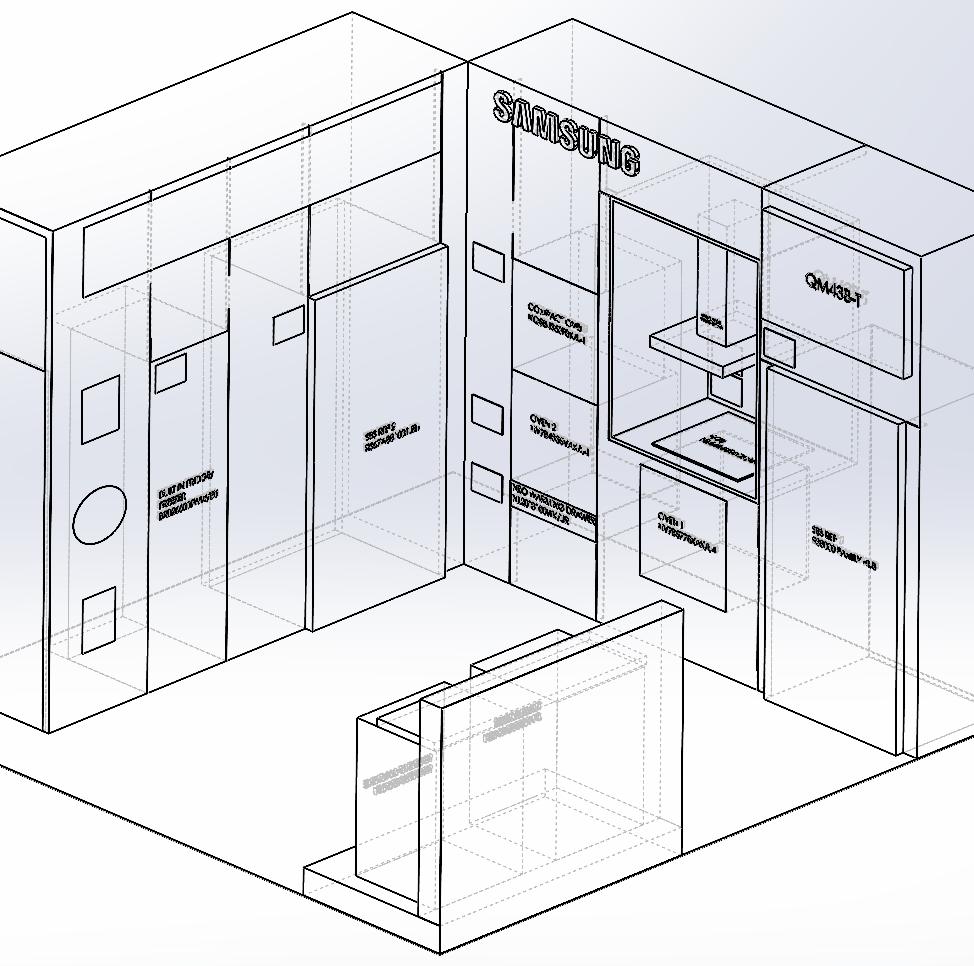
These two units were required to display domestic appliances in a store setting.
The materials chosen were:
- Steel profiles. These units were to be shipped on small pallets and so the entire structure had to be completely collapsable. Using steel profiles which connected with spigots was the easiest way to do this. It also made assembly for the fitters a simple process as everything was lablled for them and only an electric screwdriver was required as far as tools were concerned.
- Sheet steel. This was chosen for the brackets as it was easy to mechanically fix them to both the steel profiles and the board material. It also possesed the necessary strength to hold those panels for an indefinite duration.
- MDF. This was chosen due to its relative cost and weight. Additionally, it is a simple material to fabric wrap which is what happened in these instances.
My role in this project was to take a hand drawn sketch, some basic dimensions and create two full fixtures. I also went on a site visit to observe the installation process,and to better understand the method of contructing these fixtures. Also to learn some of the issues that arise, which are not apparent in a polished CAD model.


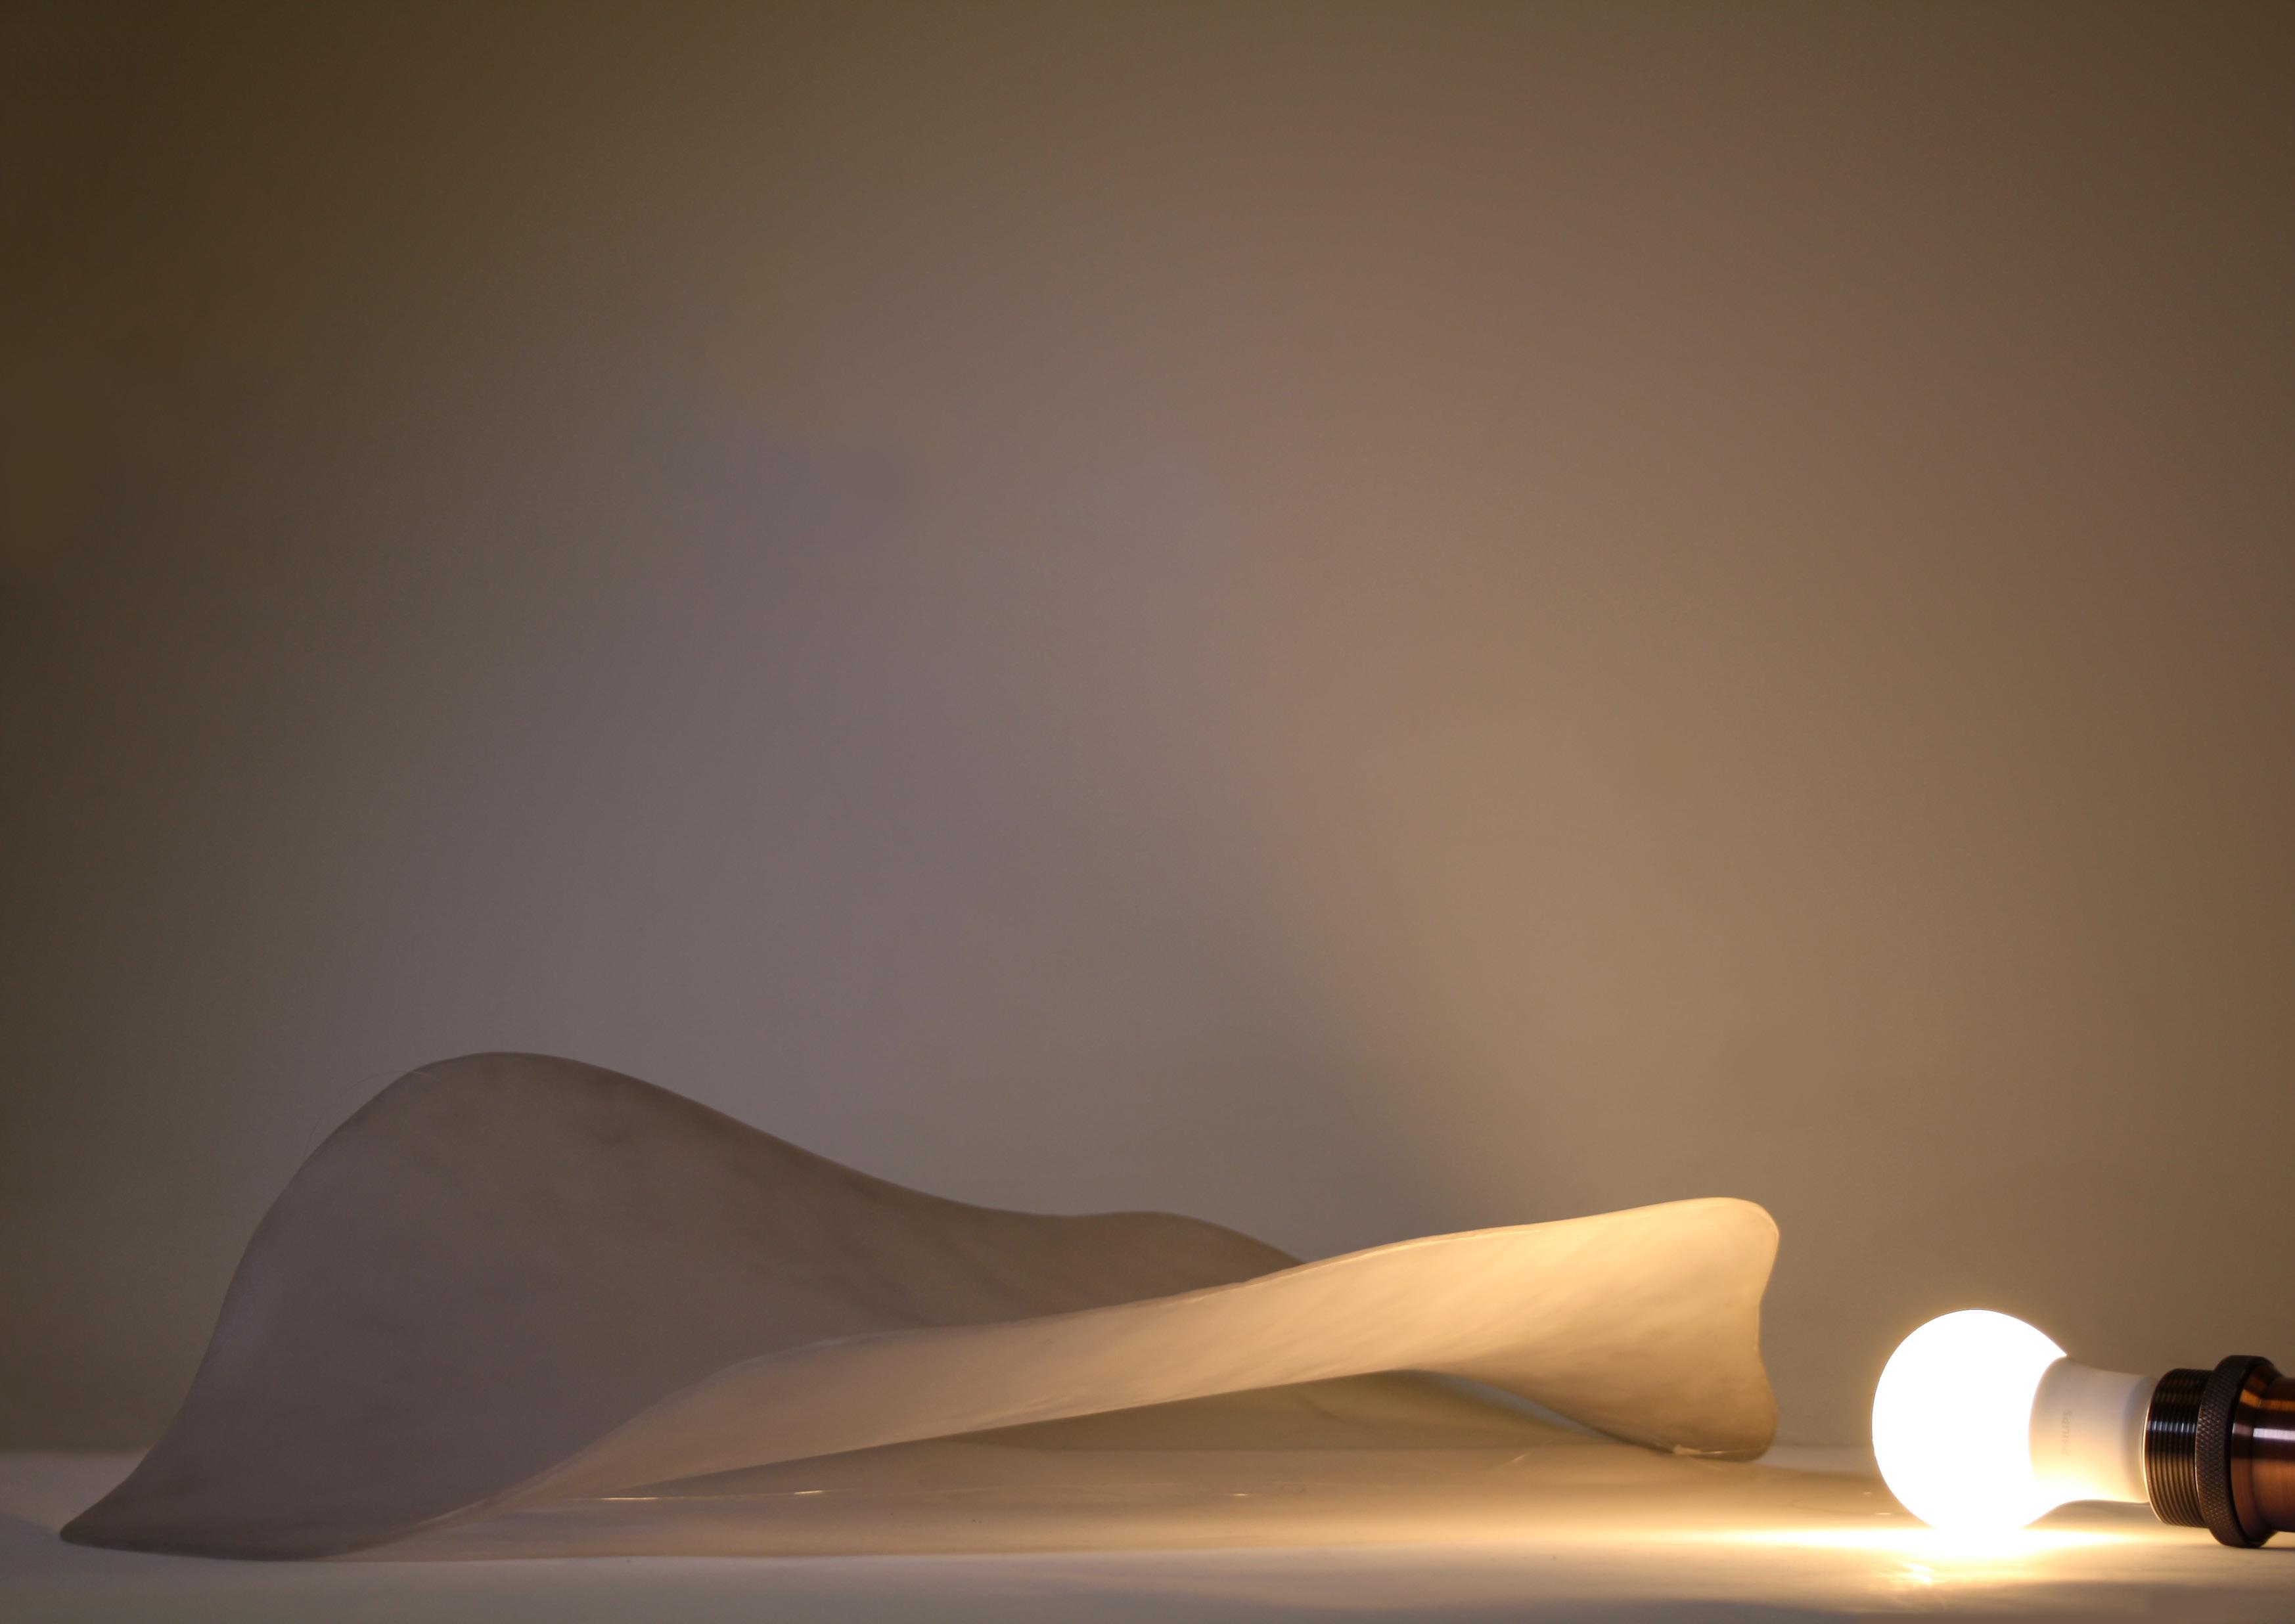


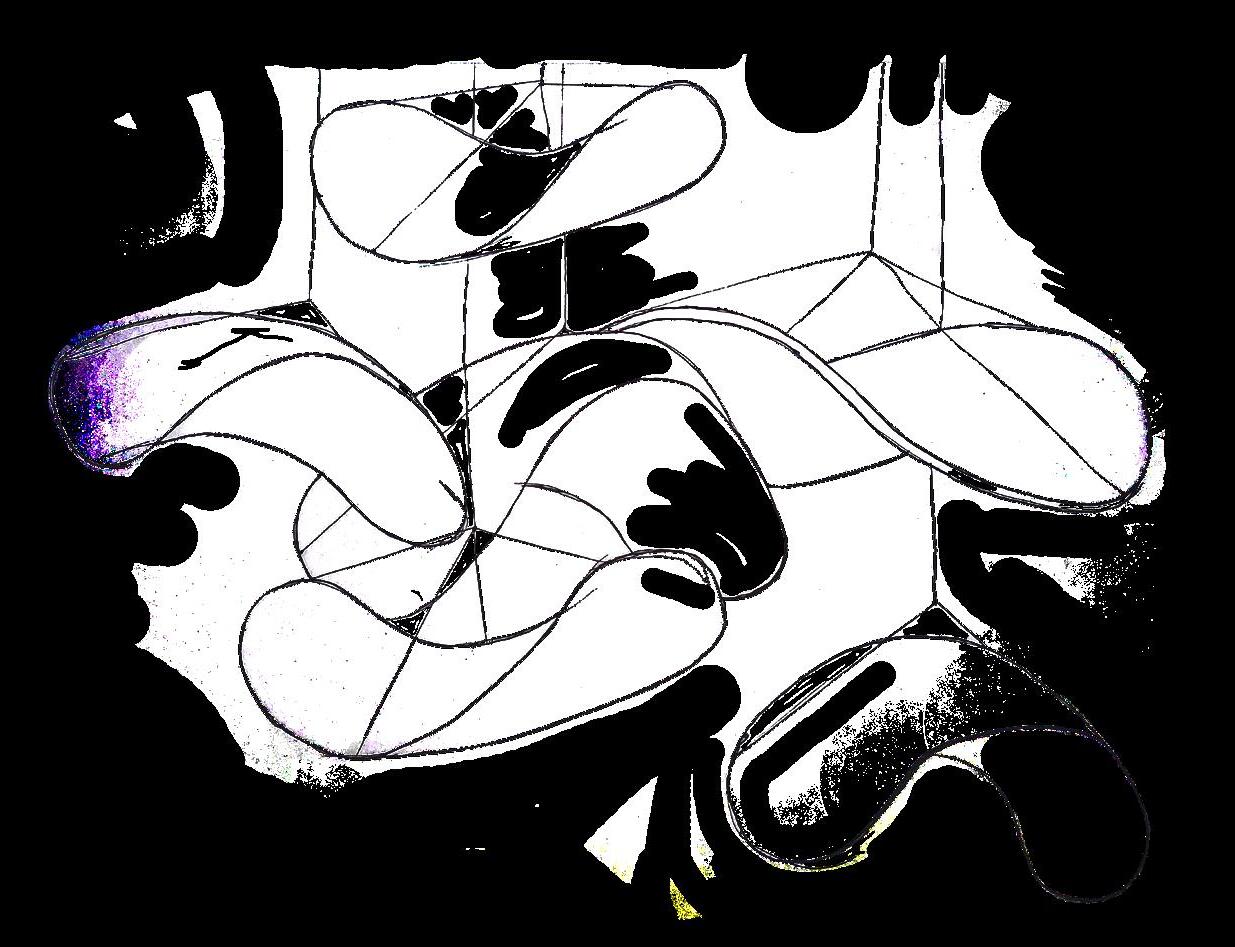

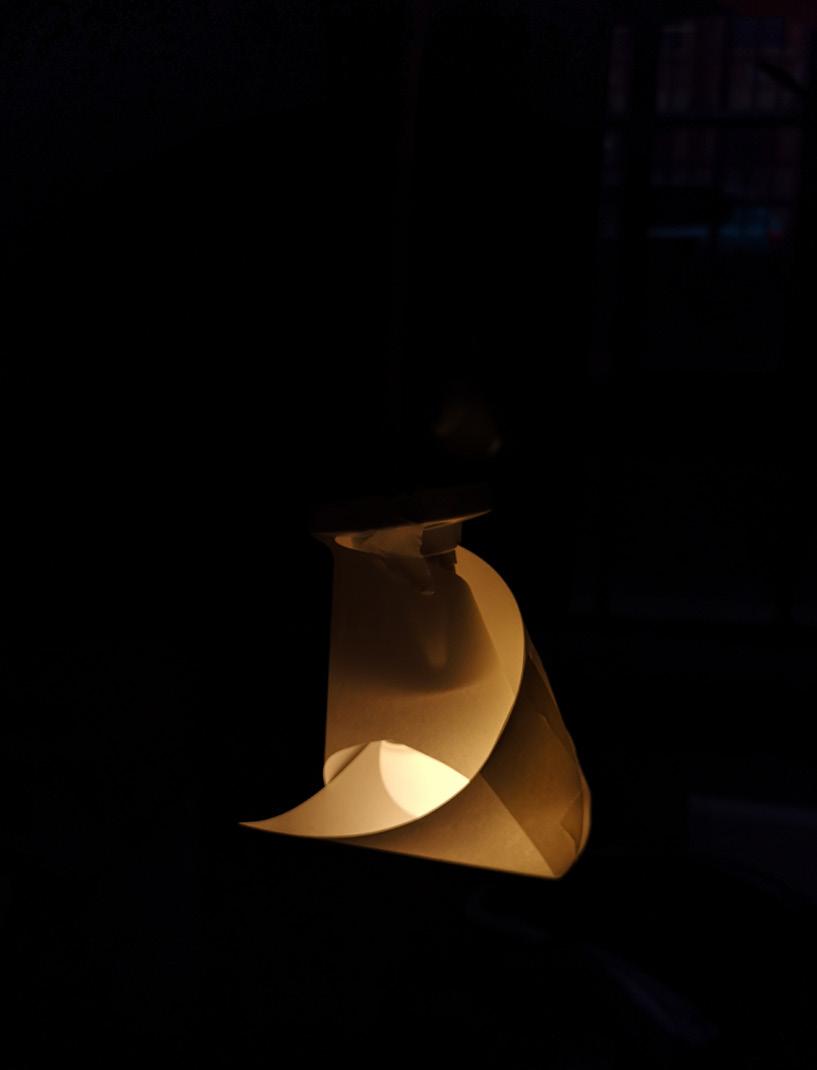
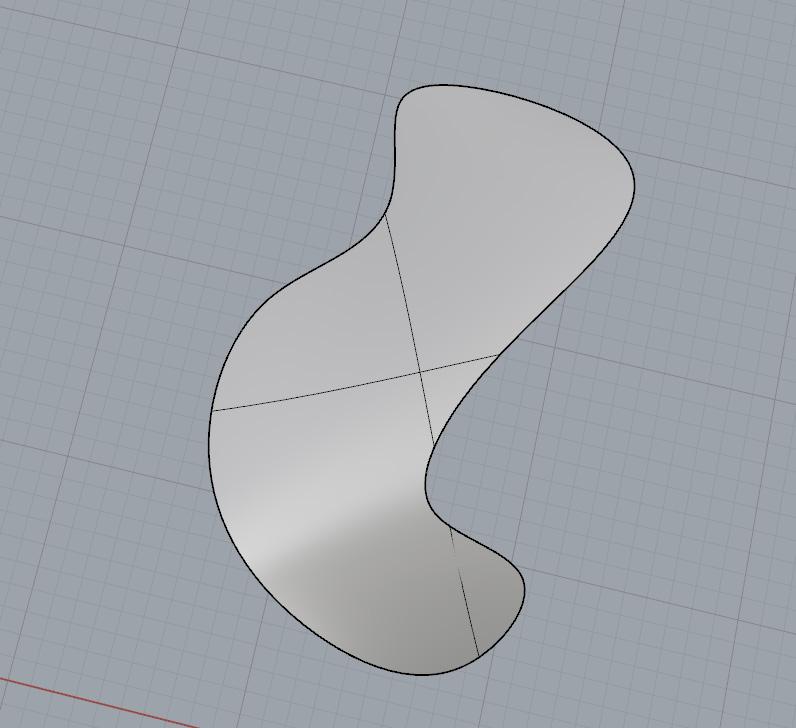
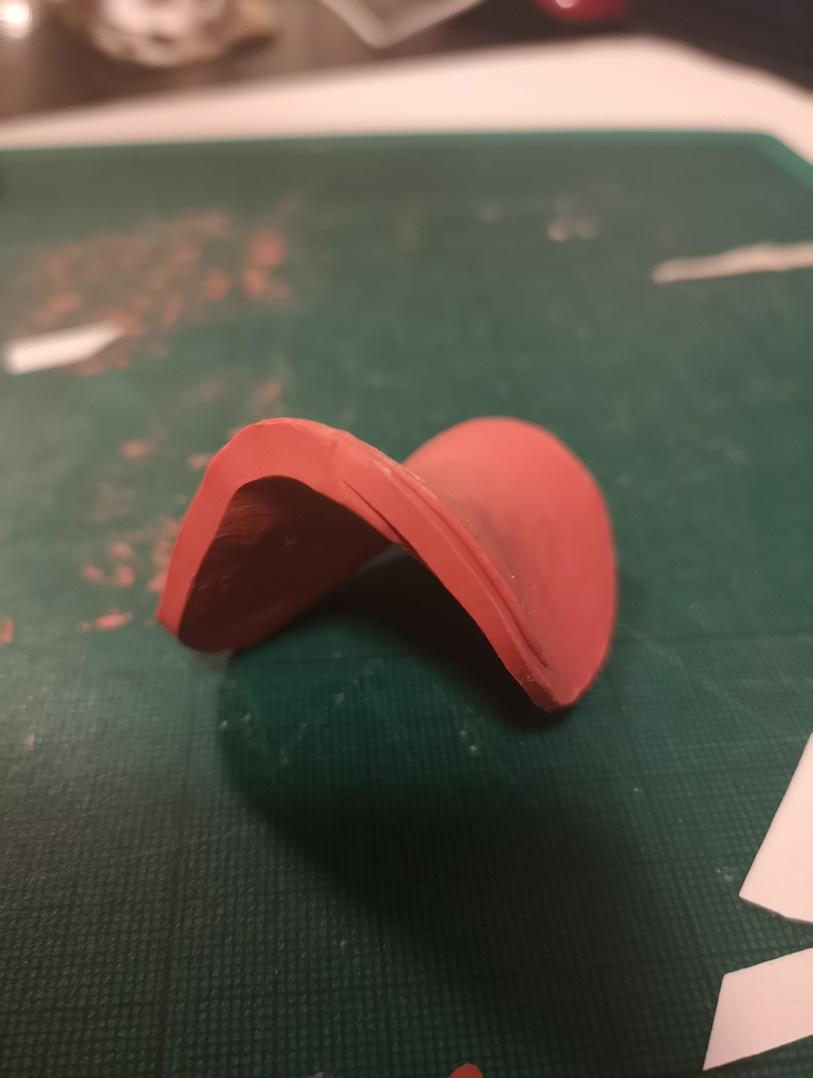

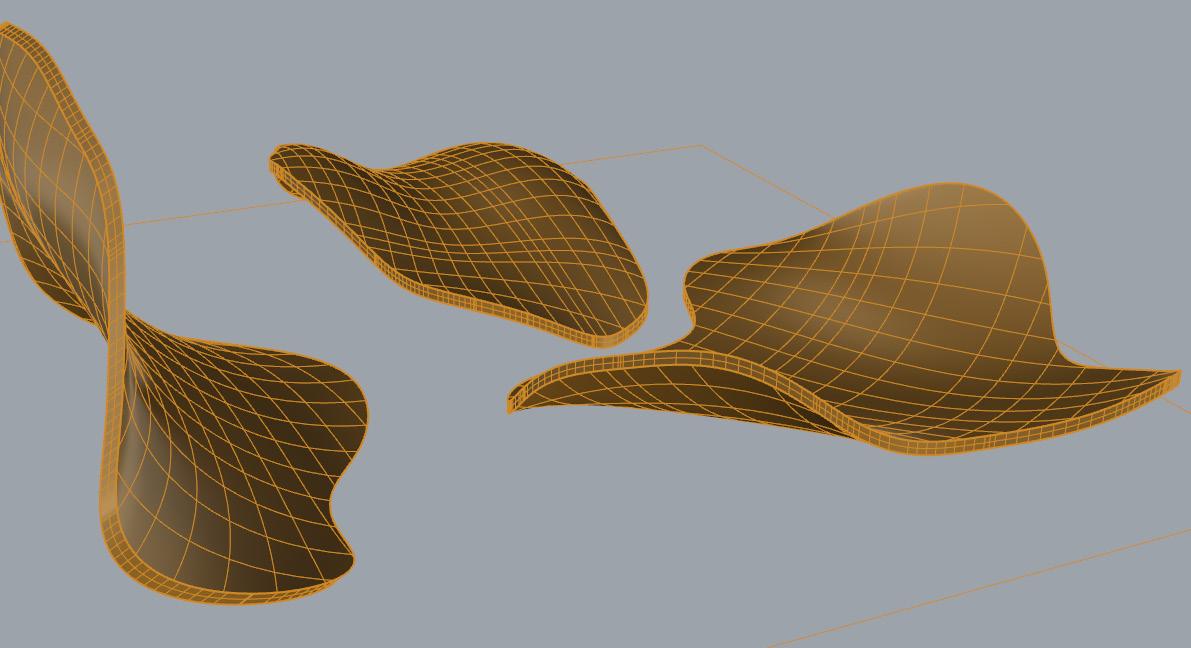
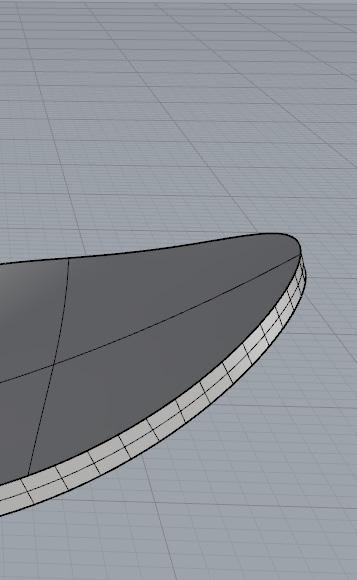
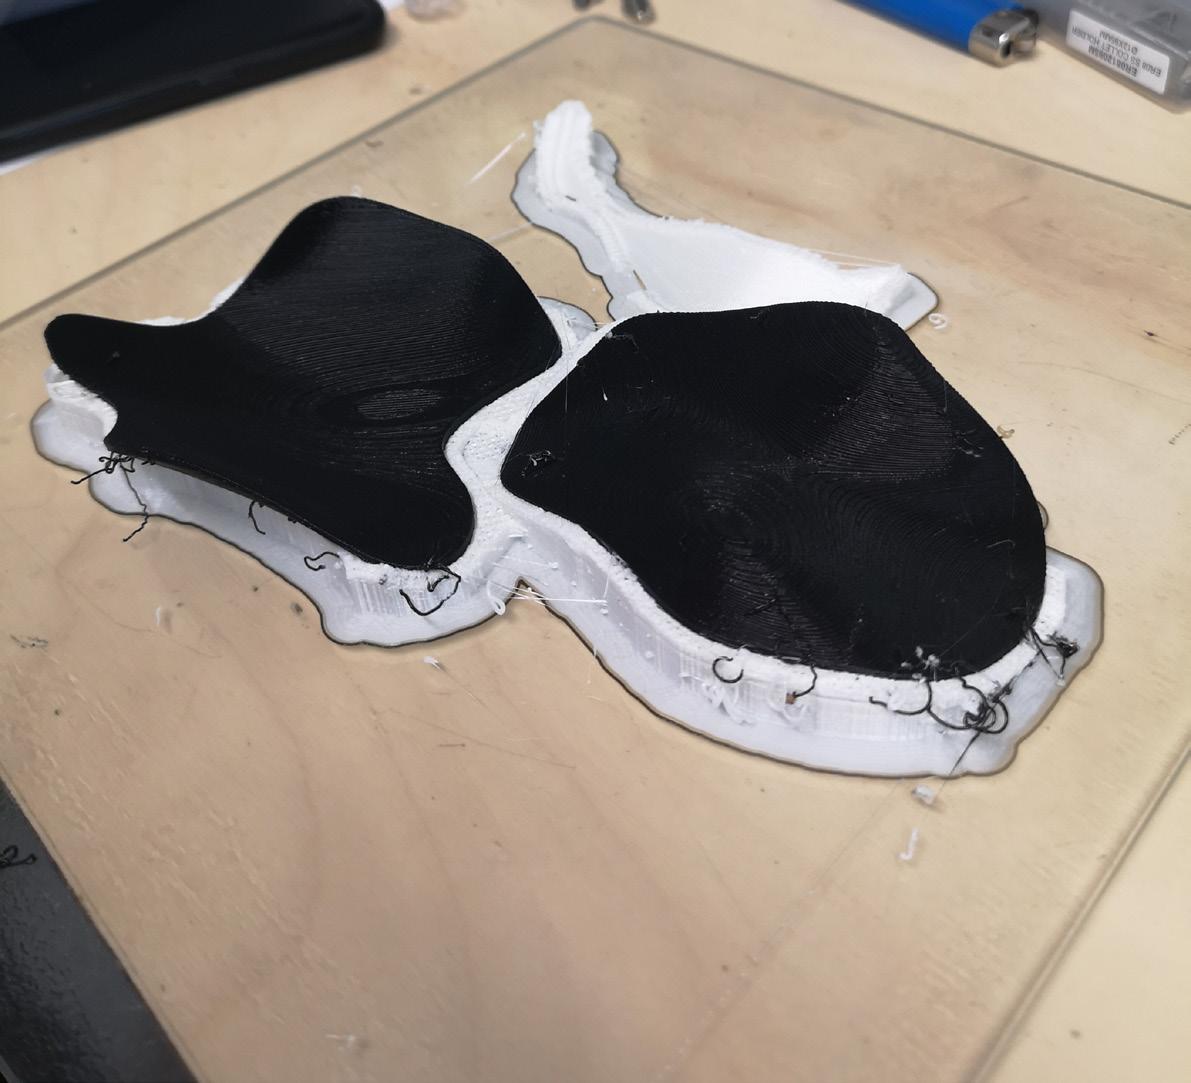
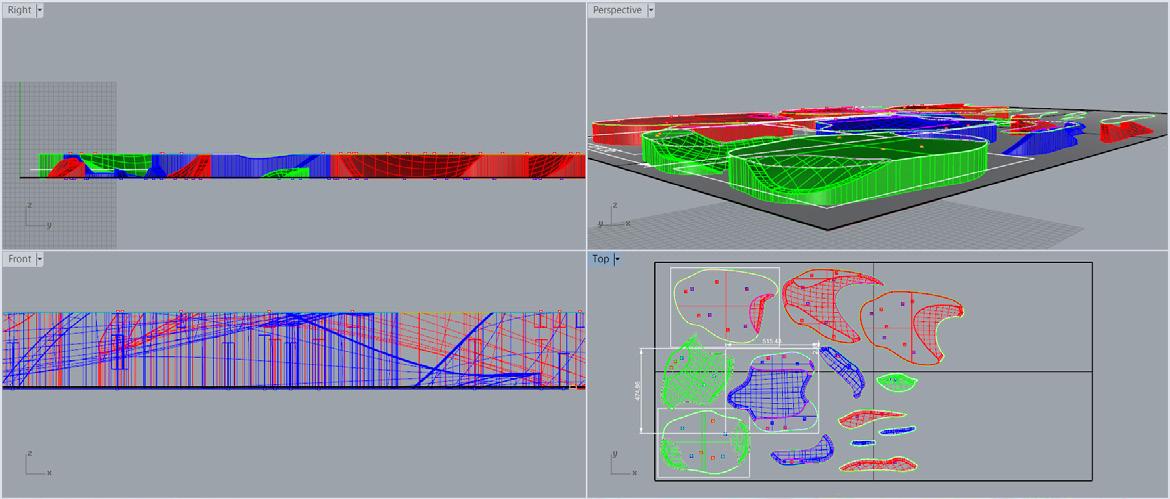
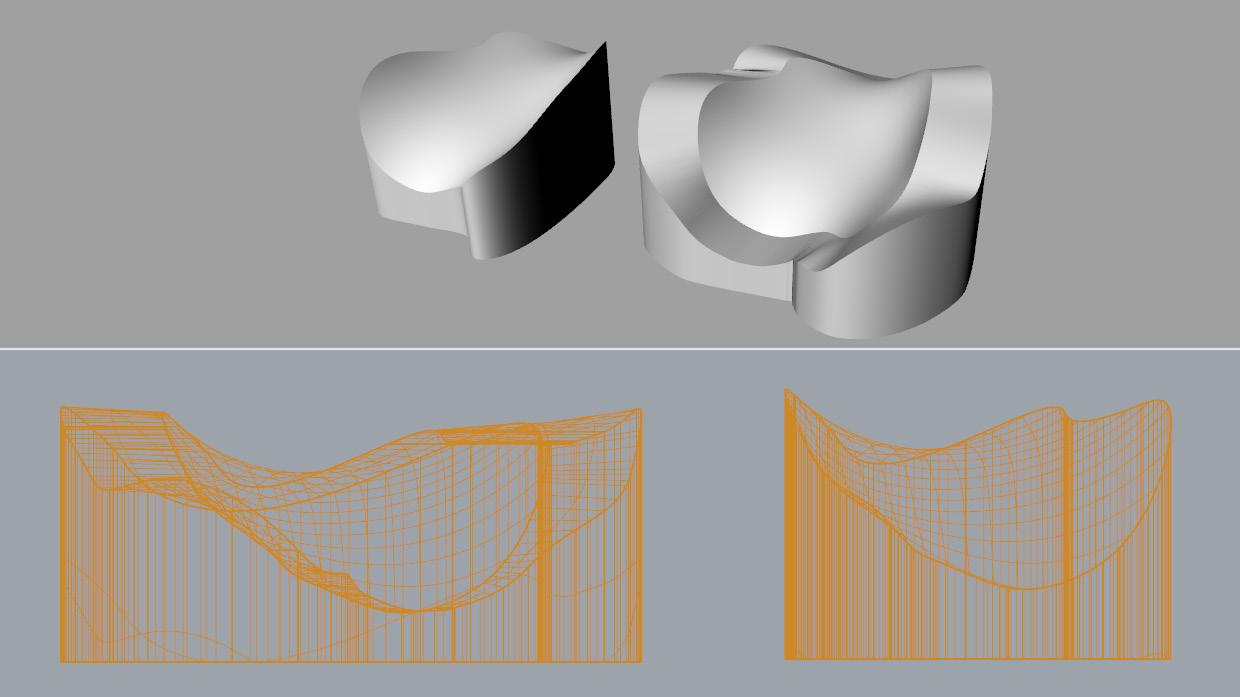

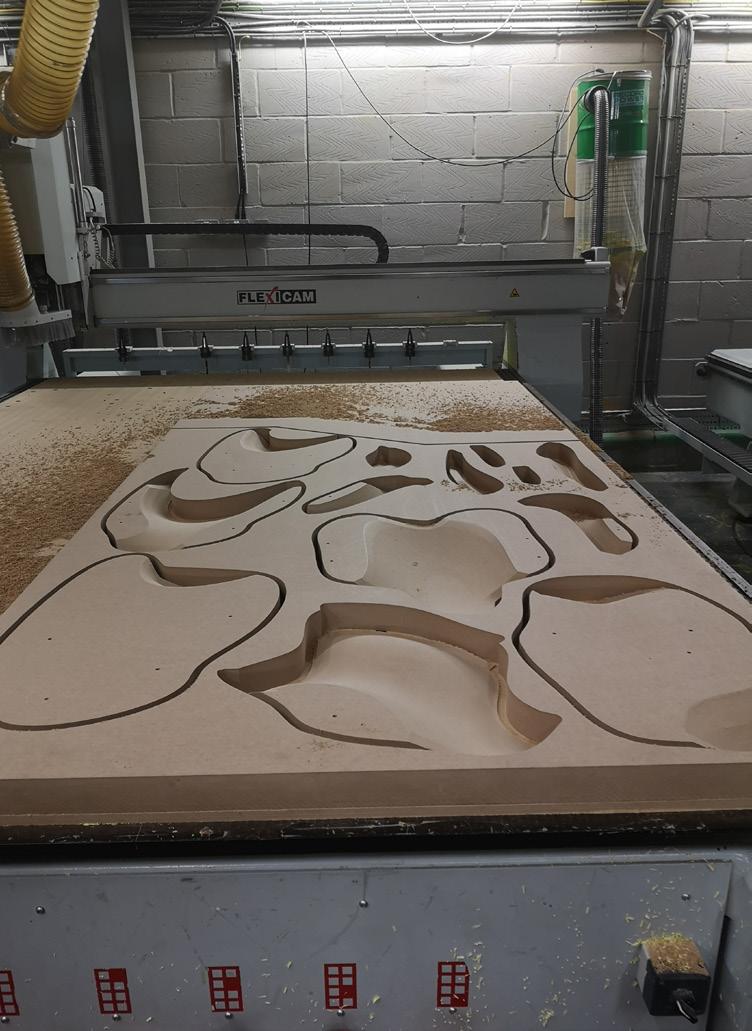
My University minor project “Avian” was heavily CAD based. I switched between Solidworks and Rhino at multiple stages, as I found it easier to teach myself surface modelling in the former with reference models from the latter. I heavily encorporated 3D printing into the prototyping process as I was able to rapidly explore different forms without the cost of CNC routing.

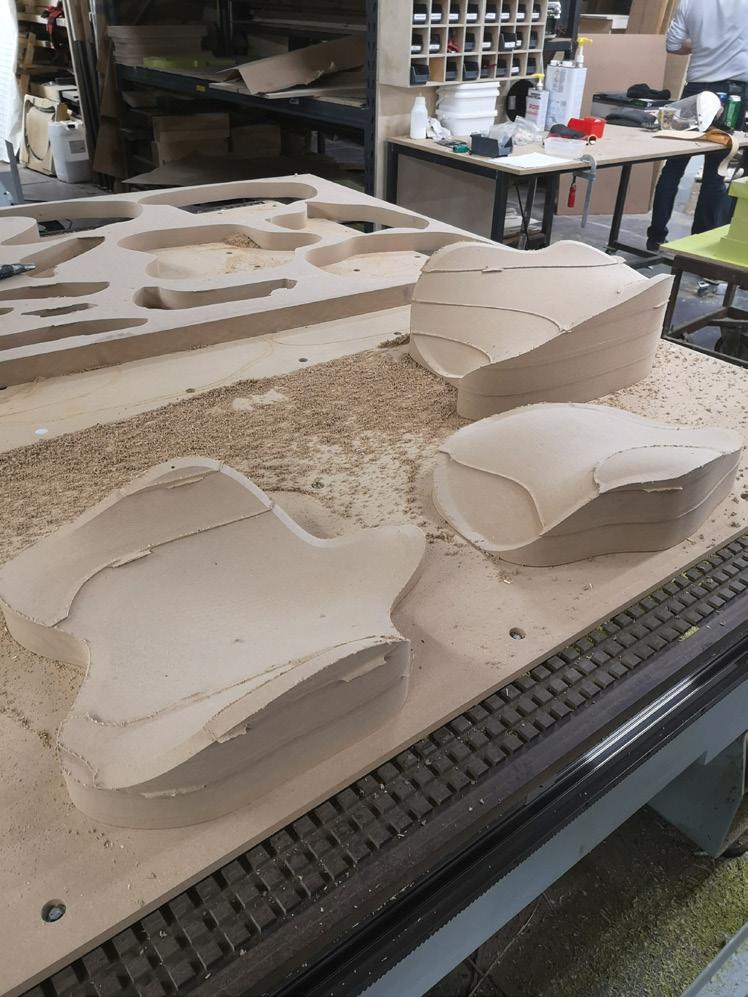
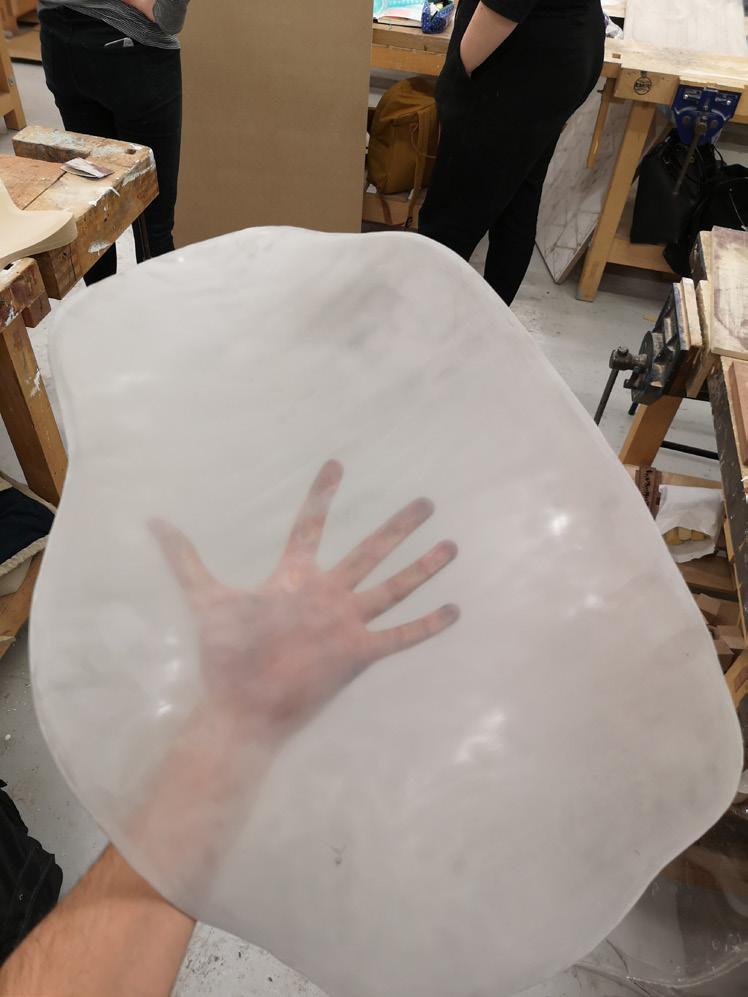
Avian is a three part statement lighting piece. Its form was inspired by the path a bird takes when “swooping” in flight and was broken down into three parts; the dive, the glide and the rise. The three forms were created by vacuum forming a sheet of PET-G over an MDF CNC-routed mold, where it was then sandblasted to give a cloud-like effect. To be suspended by nylon wire into the above light fittings.


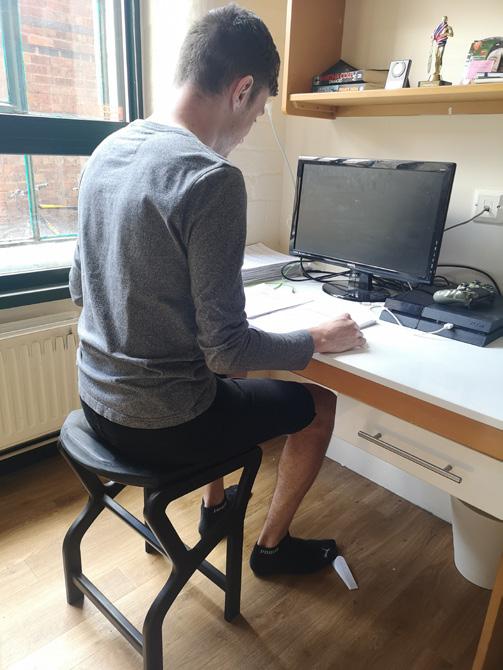
The gap in the market which Tilt targets is the growing number of professionals who work from home either full time or part time (Pre-covid, so the relevance of this design has increased since it’s conception).
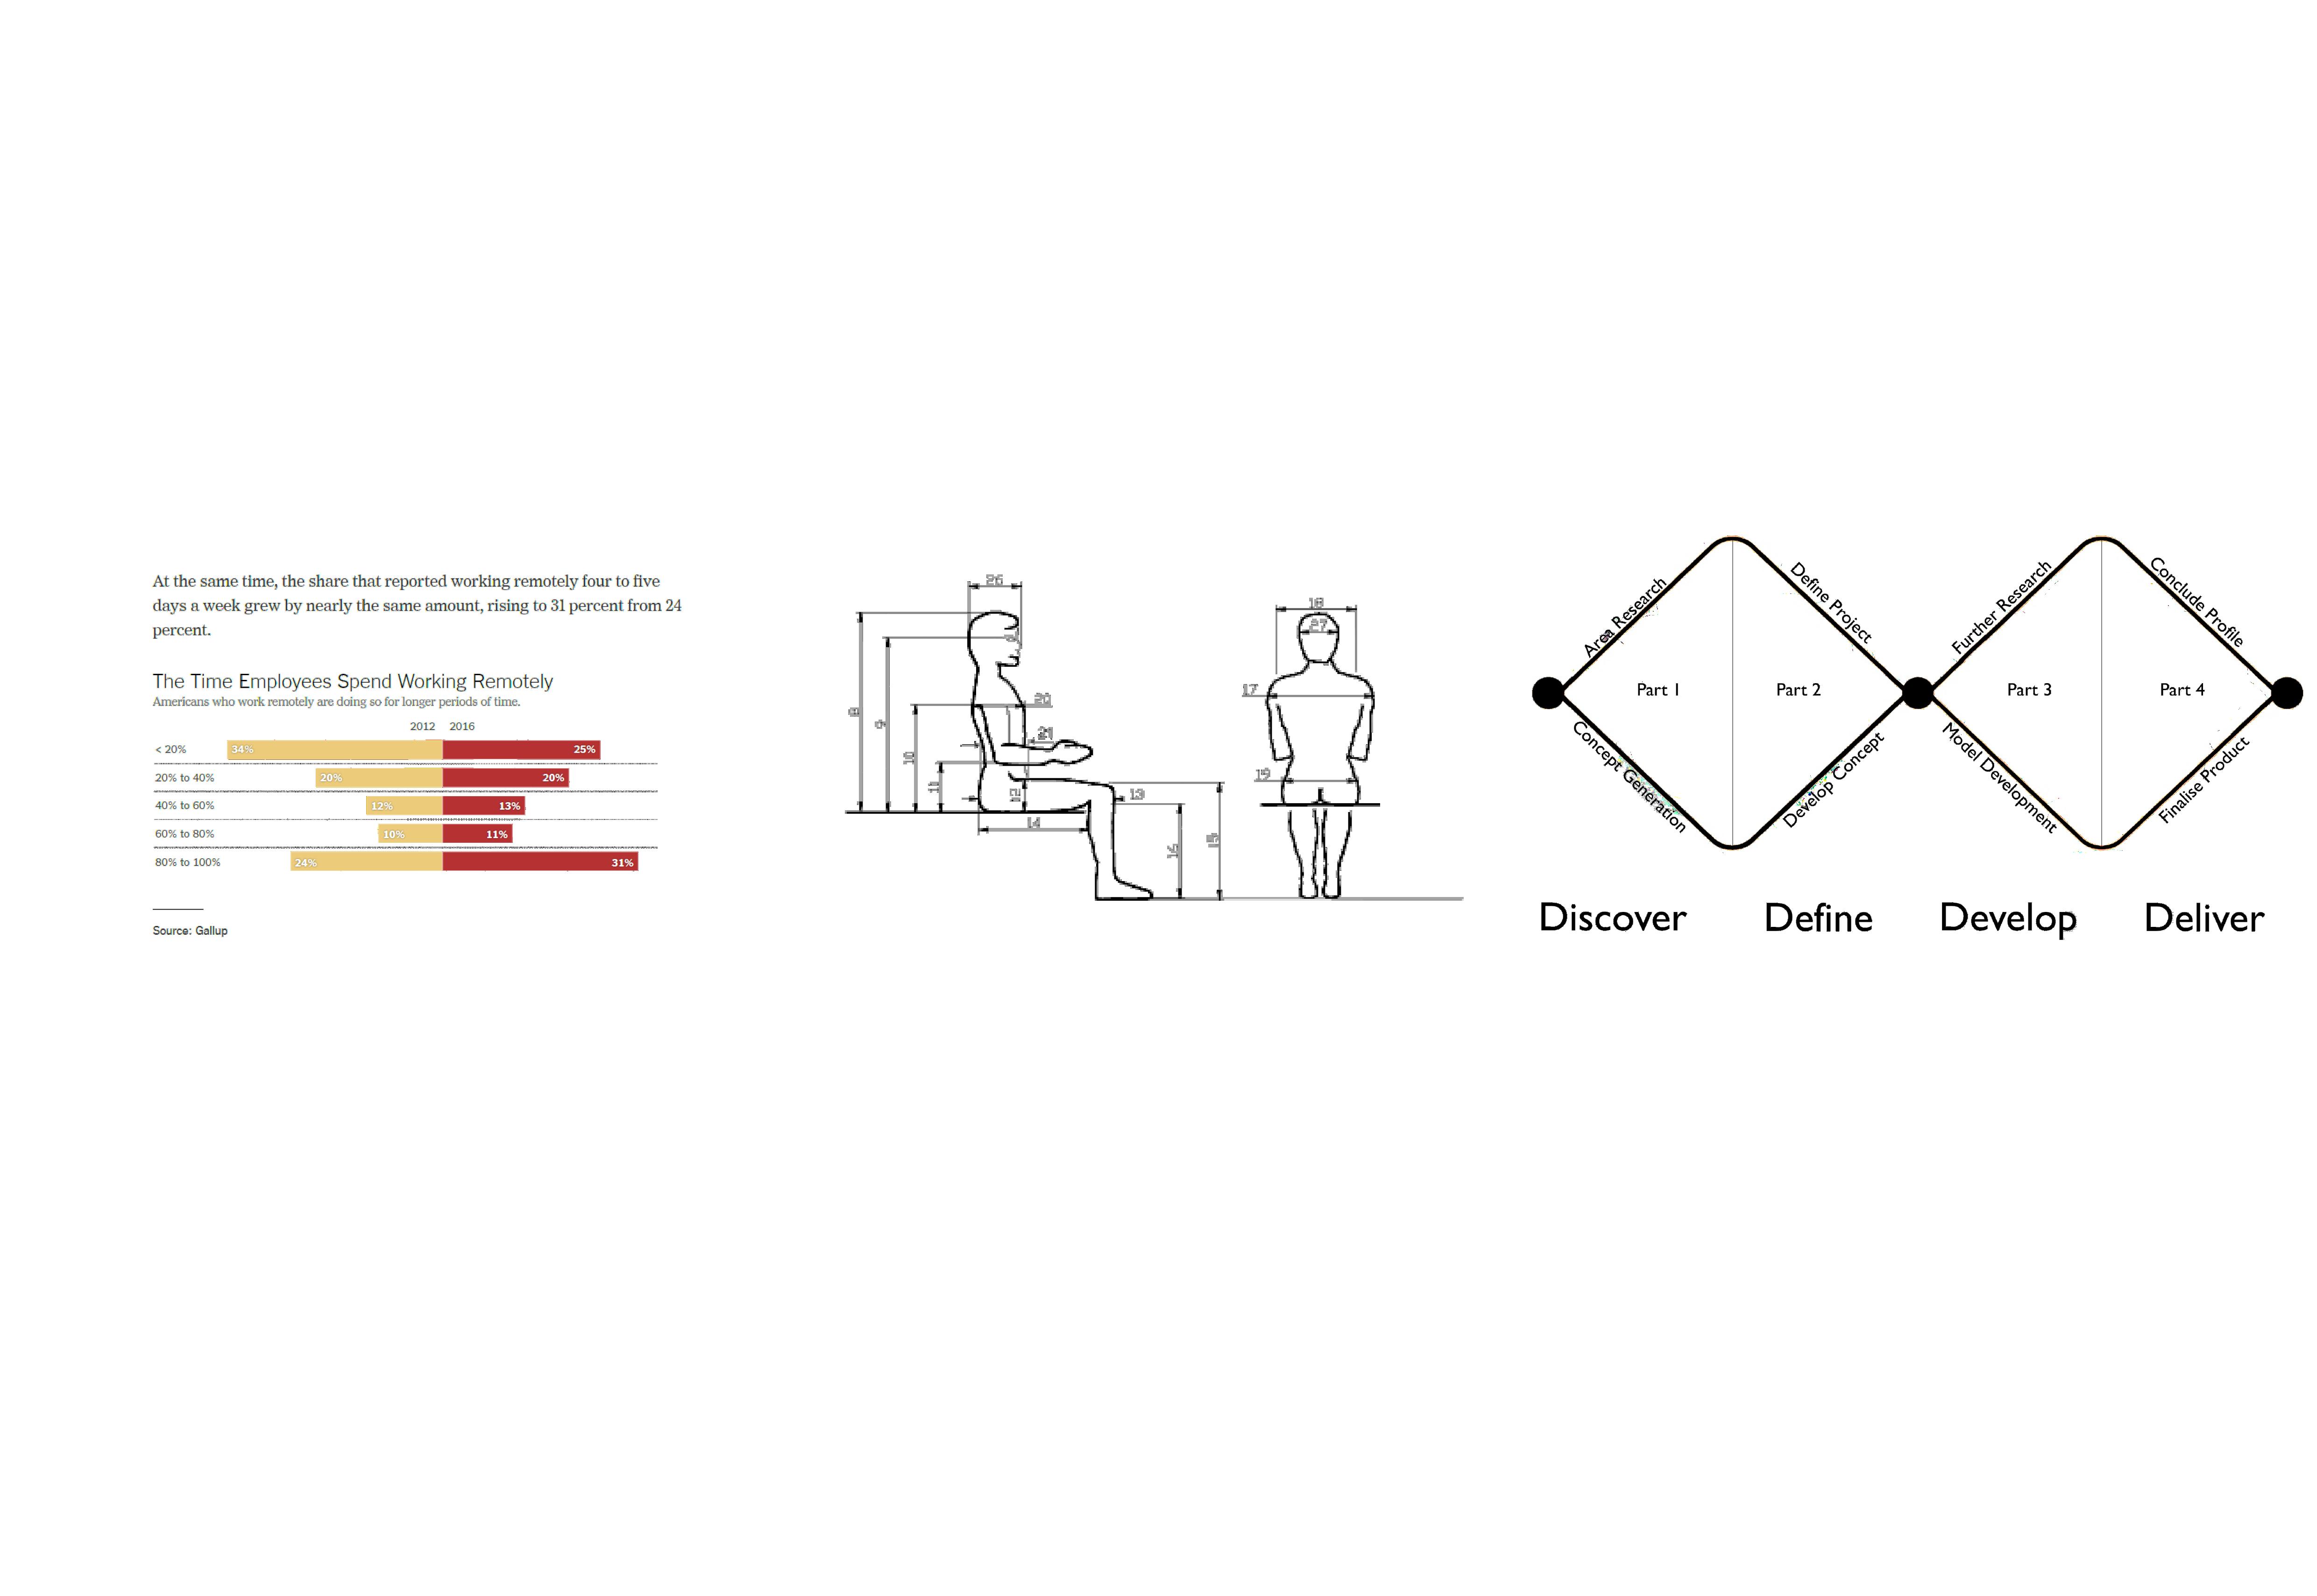
Telecommuting (working from home) is fast becoming a more popular form of business. In the UK alone, 4 out of 5 employees work in the service sector and many of these jobs are desk based with similar statistics in America. However, many homes aren’t suited to desk style working. The average living space is also diminishing, so trends such as multifunctional furniture and furniture which can be either folded down, or hung onto walls to save floor space is becoming more popular.
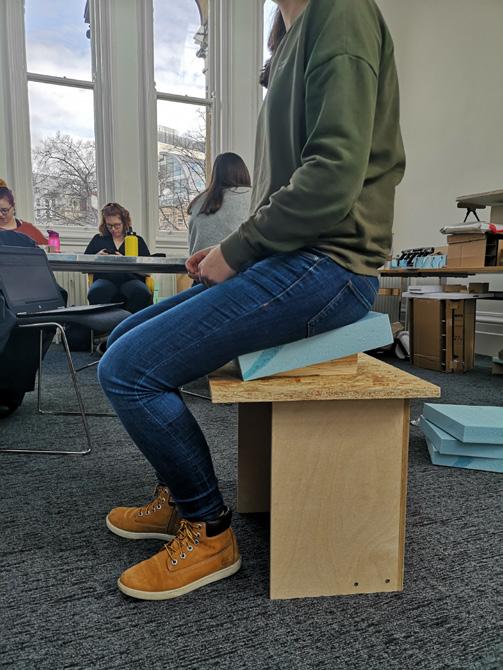
The main focus of Tilt was the ergonomic factor. From gathered research it was clear that the main issue was that most people working from home were ill equipped and often suffered from posture related issues.
Ergonomics in relation to seating posture was a new field for me so Tilt was designed following the well known “double diamond” technique.
The focus for practicality was aimed at achieving a natural lower spine position whilst dissuading the user from slouching. Another challenge would be the height of Tilt, as it wasn’t adjustable the design would have to try and find the closest position to “one size fits all”.
Adopting this approach allowed me to get down everything in my head before taking a step back and making more informed decisions. As ergonomics was such a large part of the design there were many models and design changes throughout.

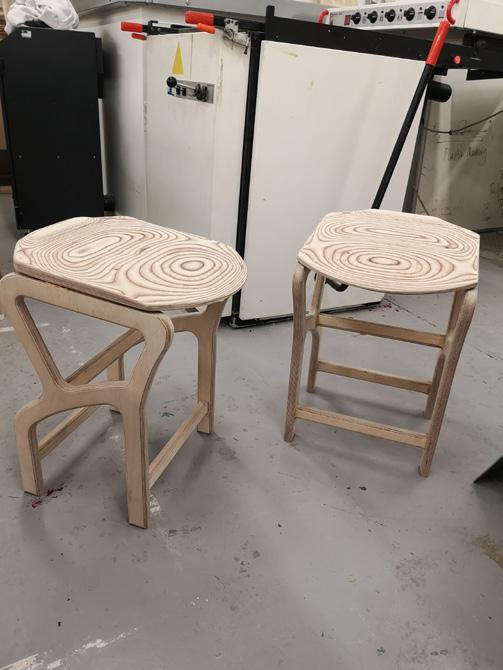


The development processs of my Major University project “Tilt” was heavily focused on testing models and acting on feedback. Working out a way to promote a healthy posture was the biggest design challenge, the form followed function with this particular project.

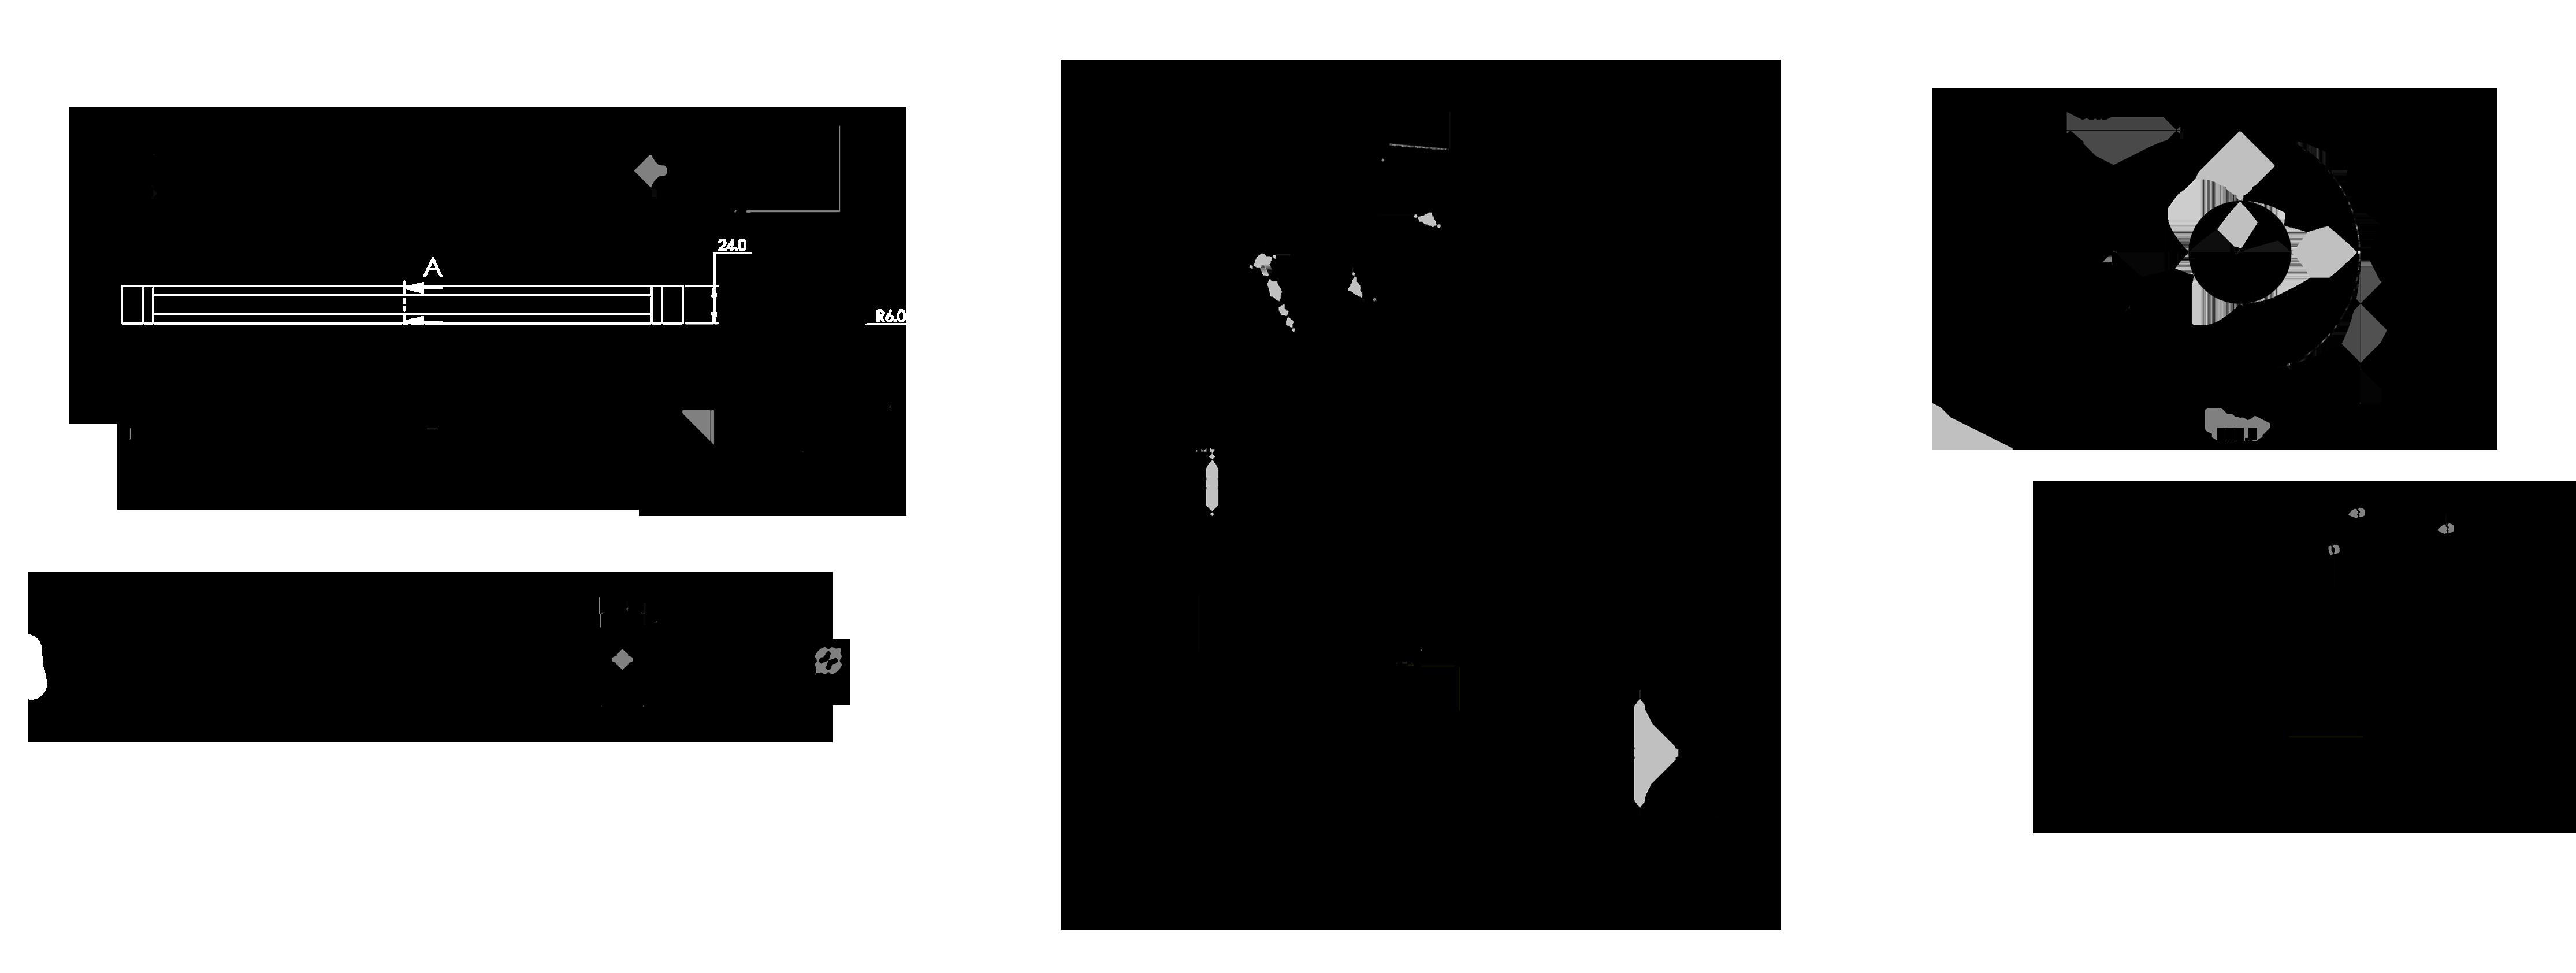
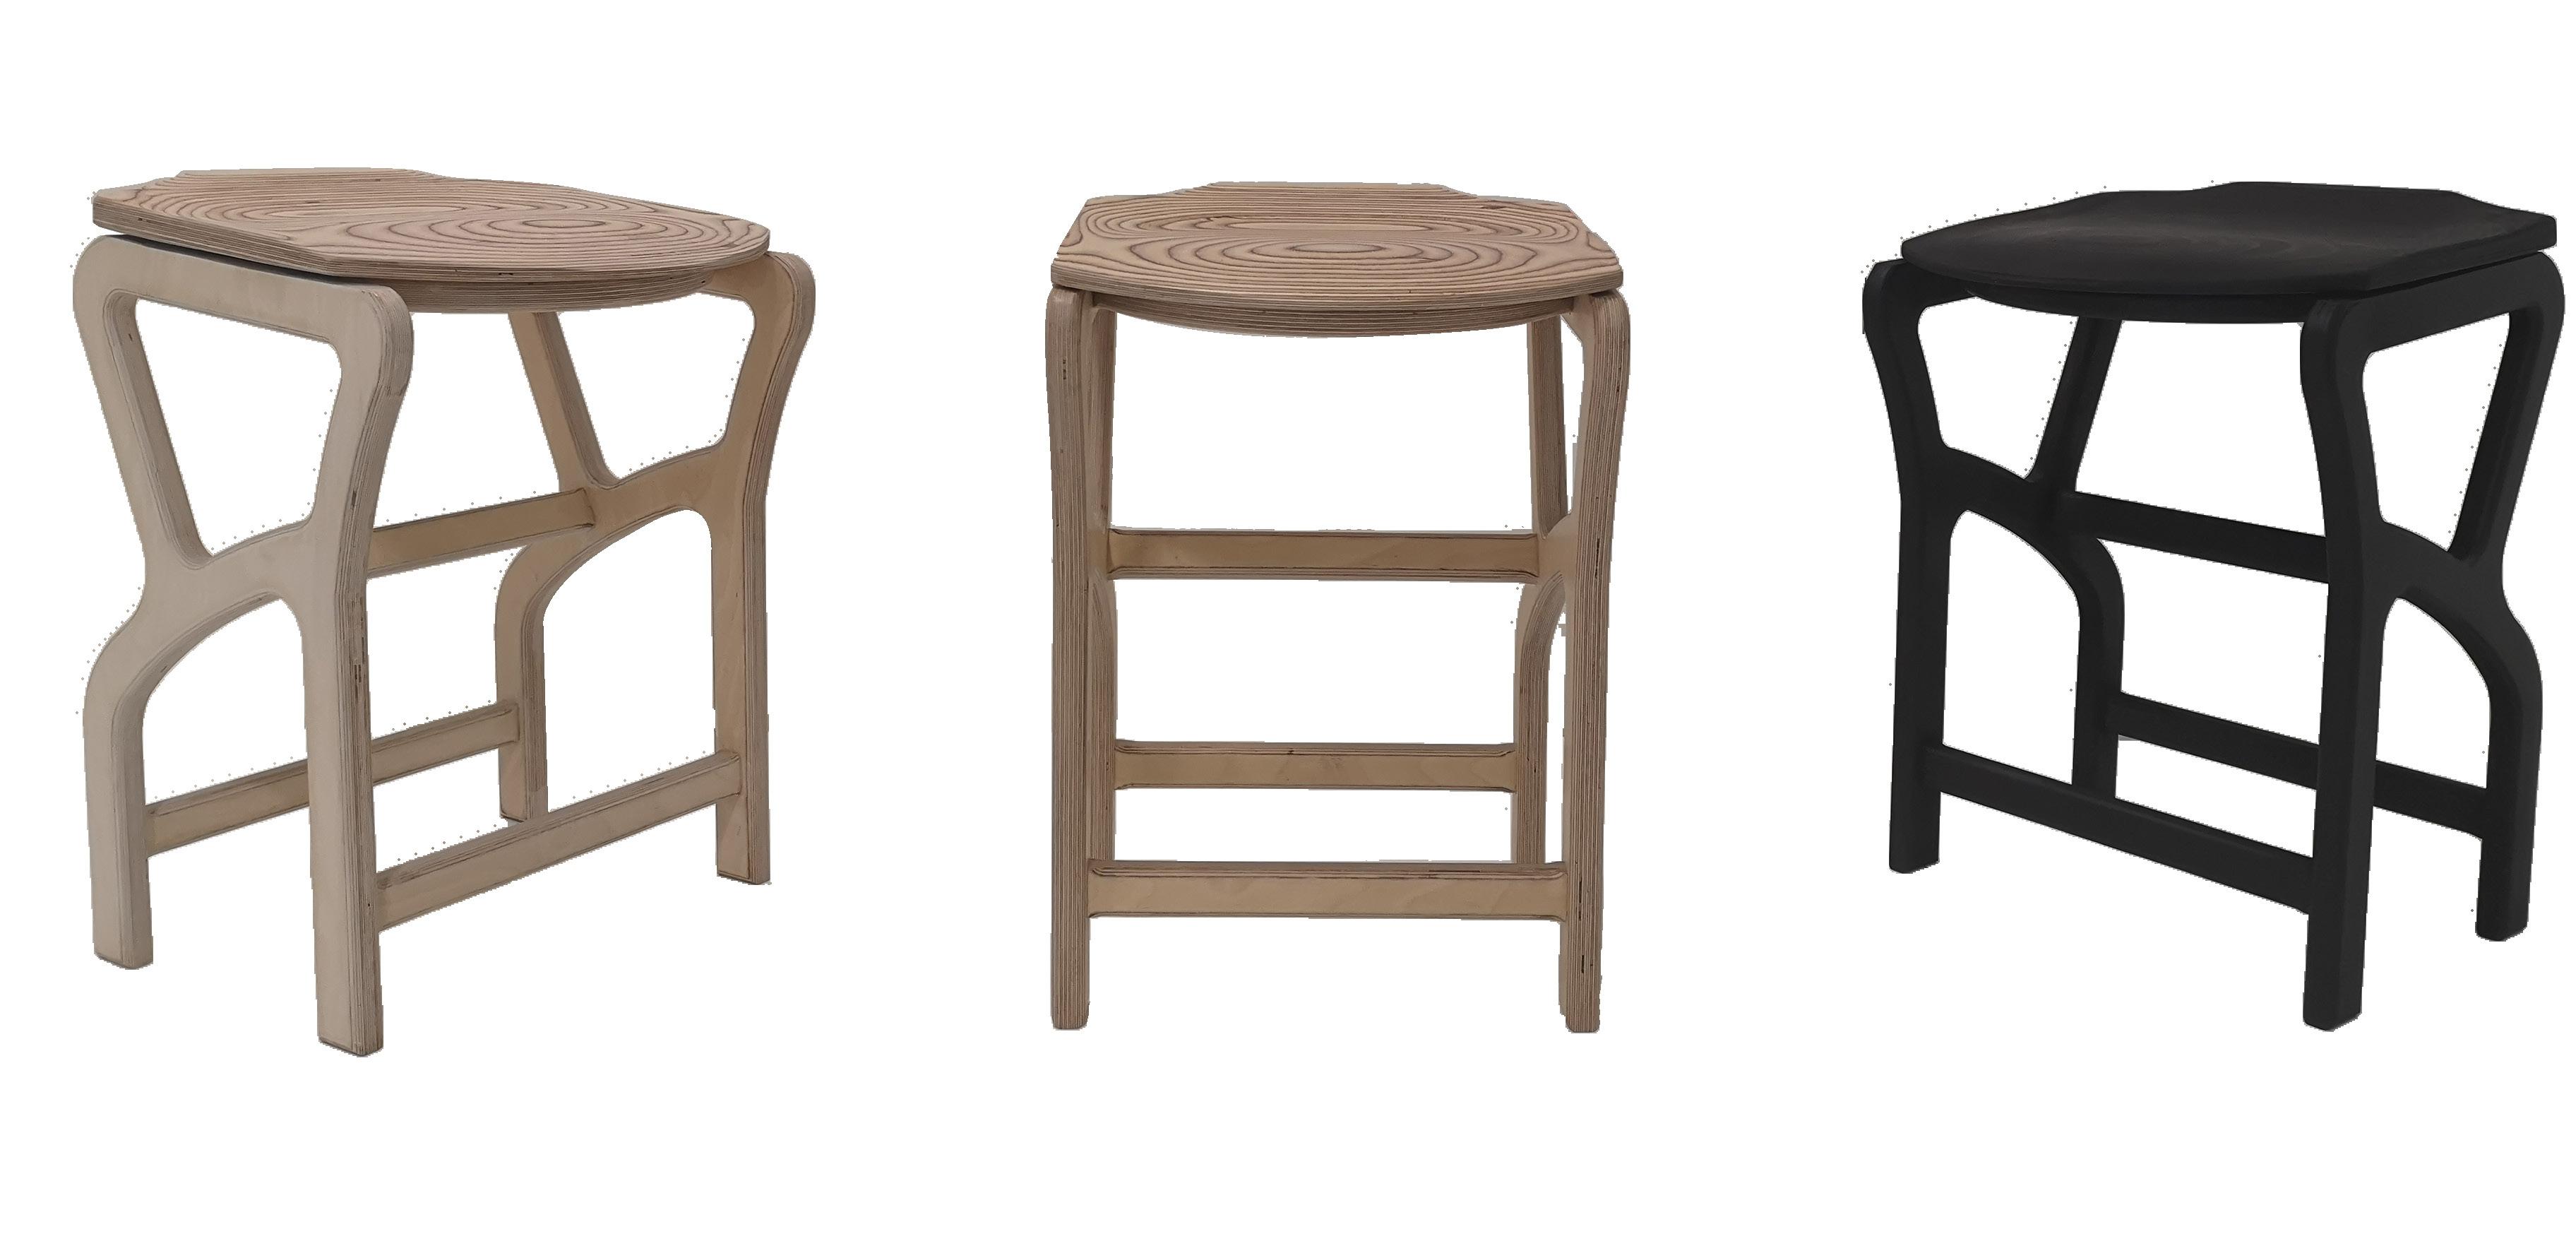
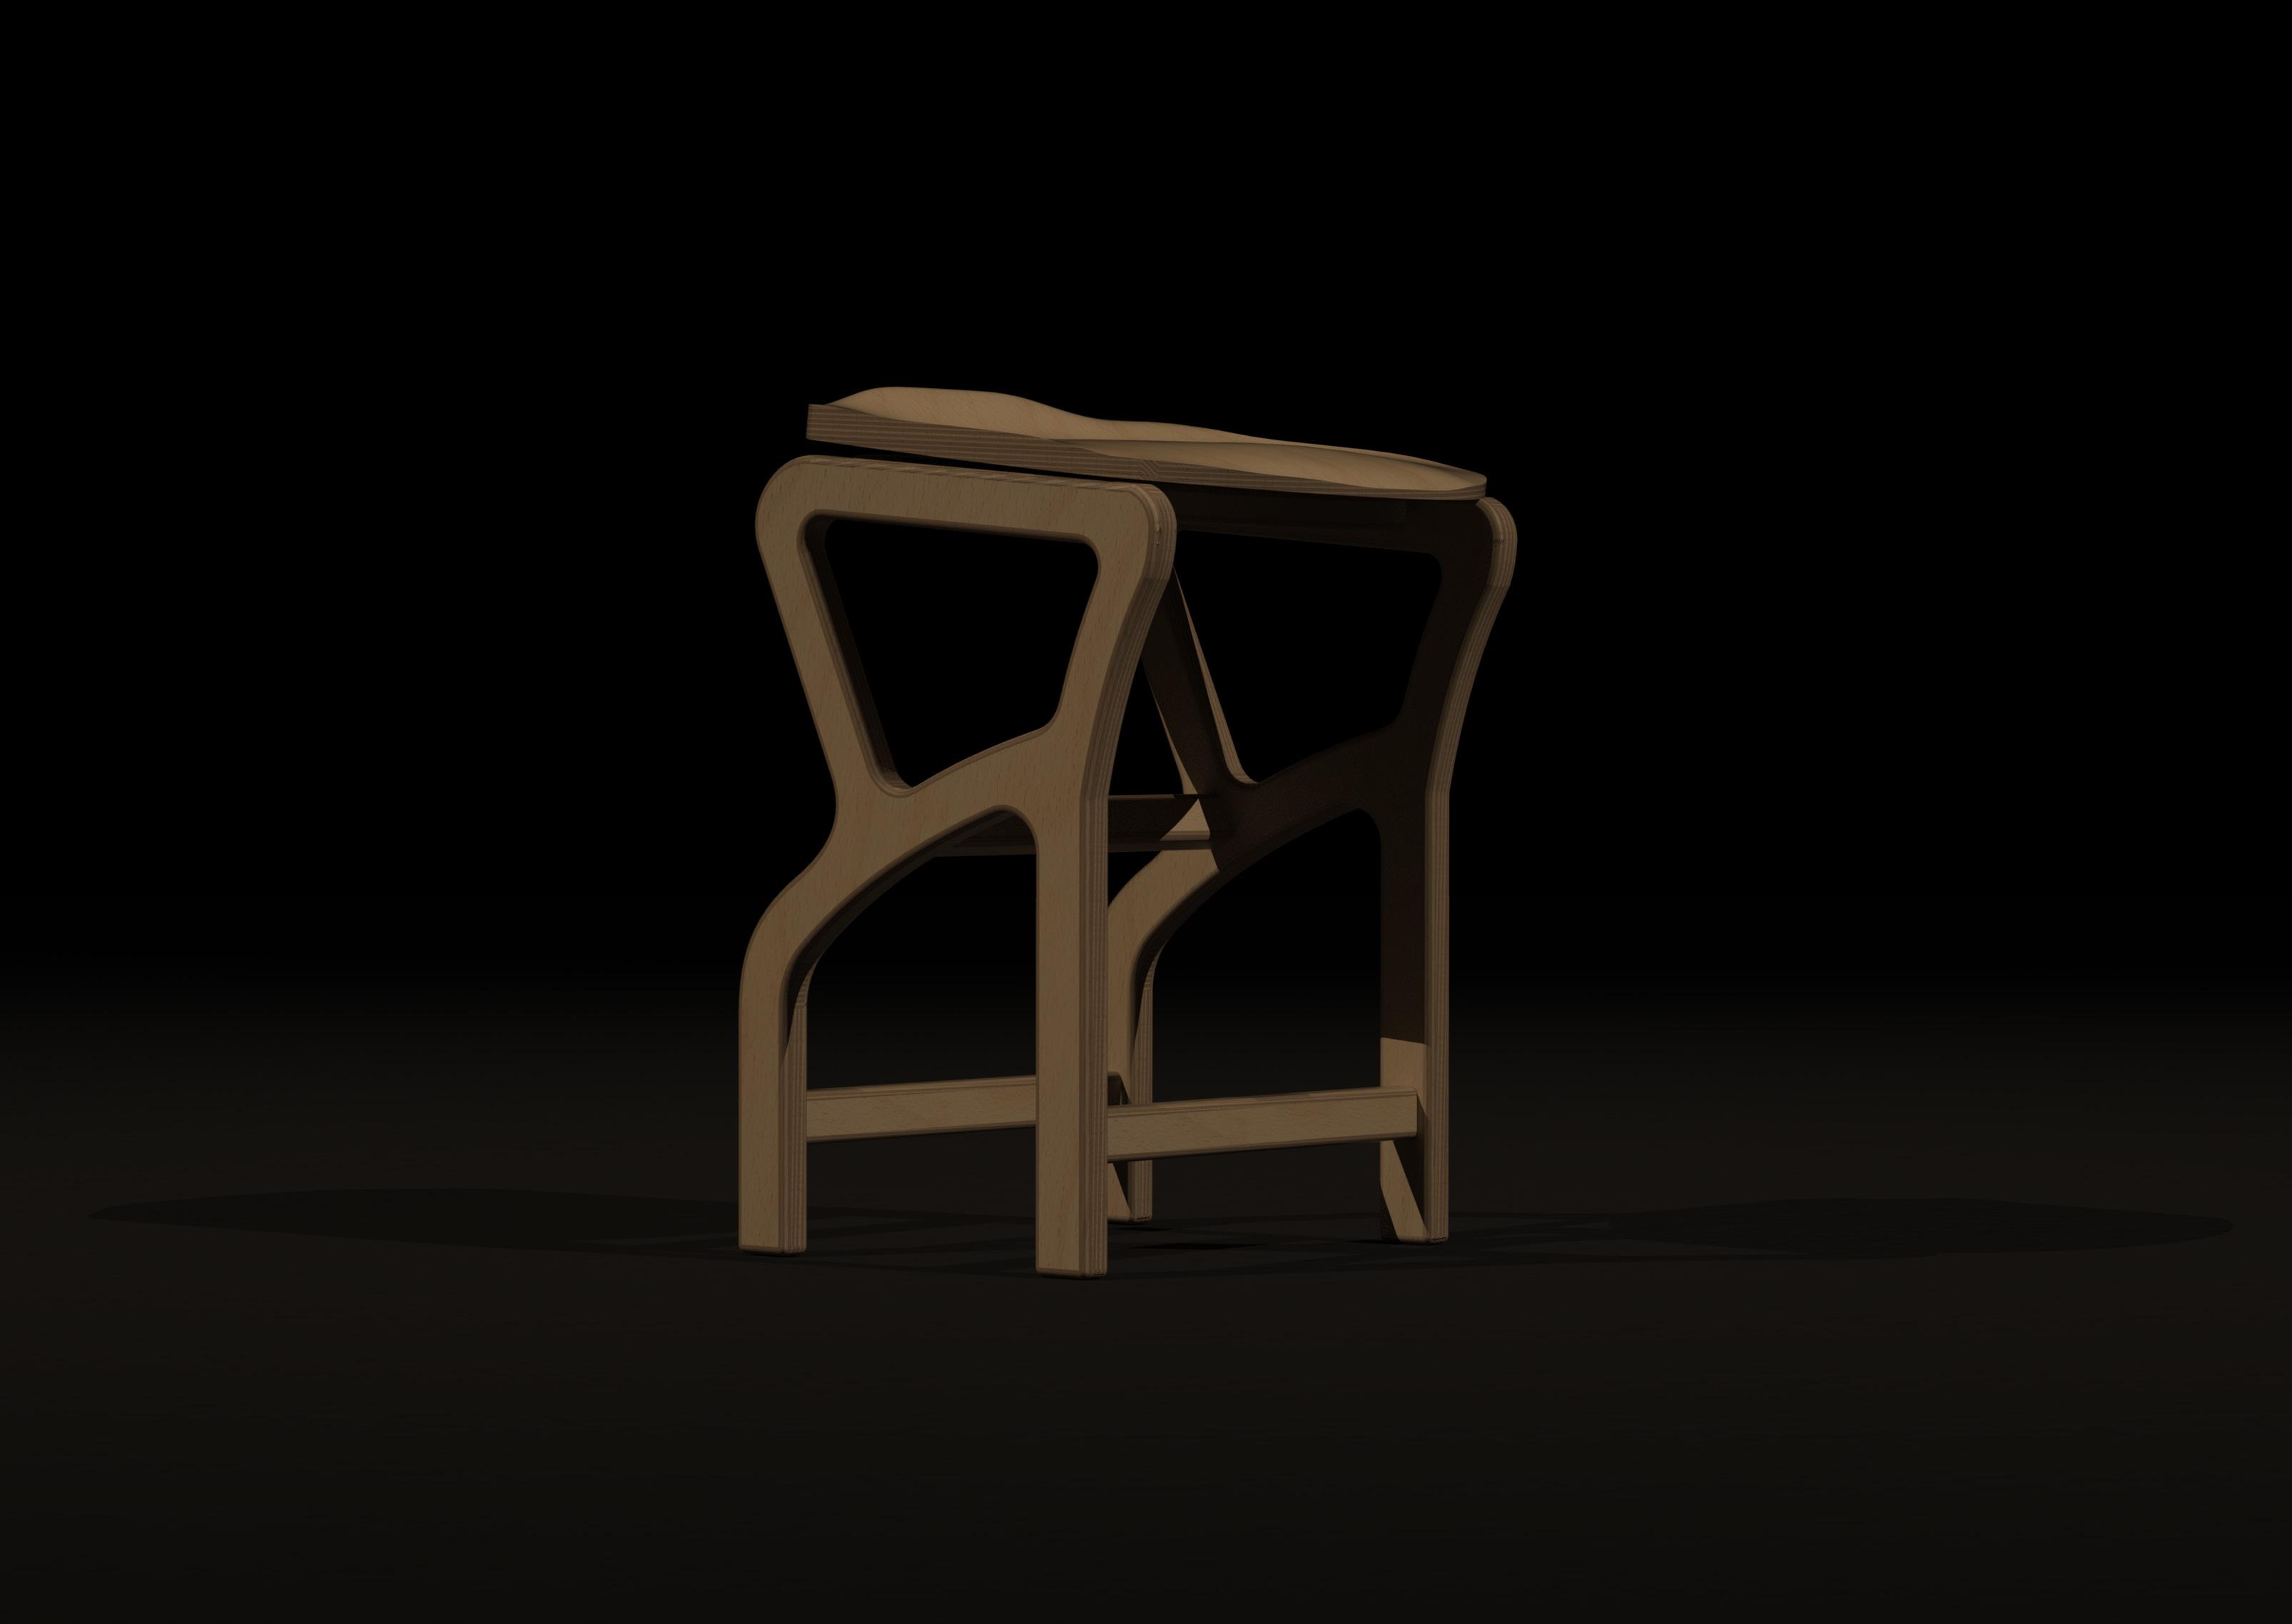
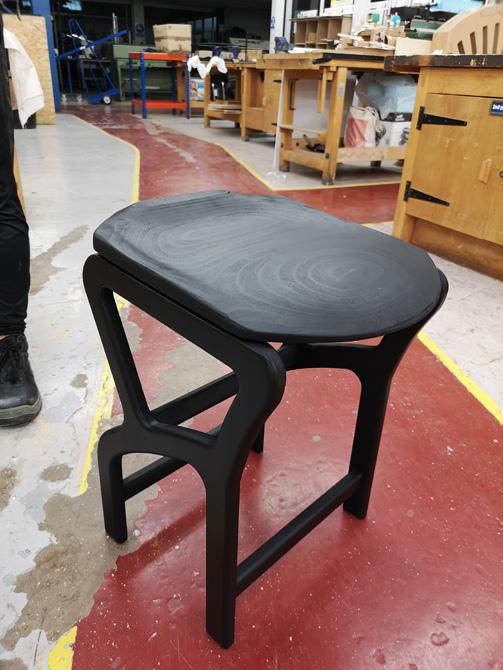
The Tilt stool is designed so that 3x units can be manufactured from a 1x 1220mm x 2440mm sheet on a 3-axis CNC routing machine. Due to the nature of the joins no extra hardware is needed apart from glue and clamps. 18mm Birch ply is one of the most common and less expensive sheet materials to have access to and the material is strong enough to support heavier loads.
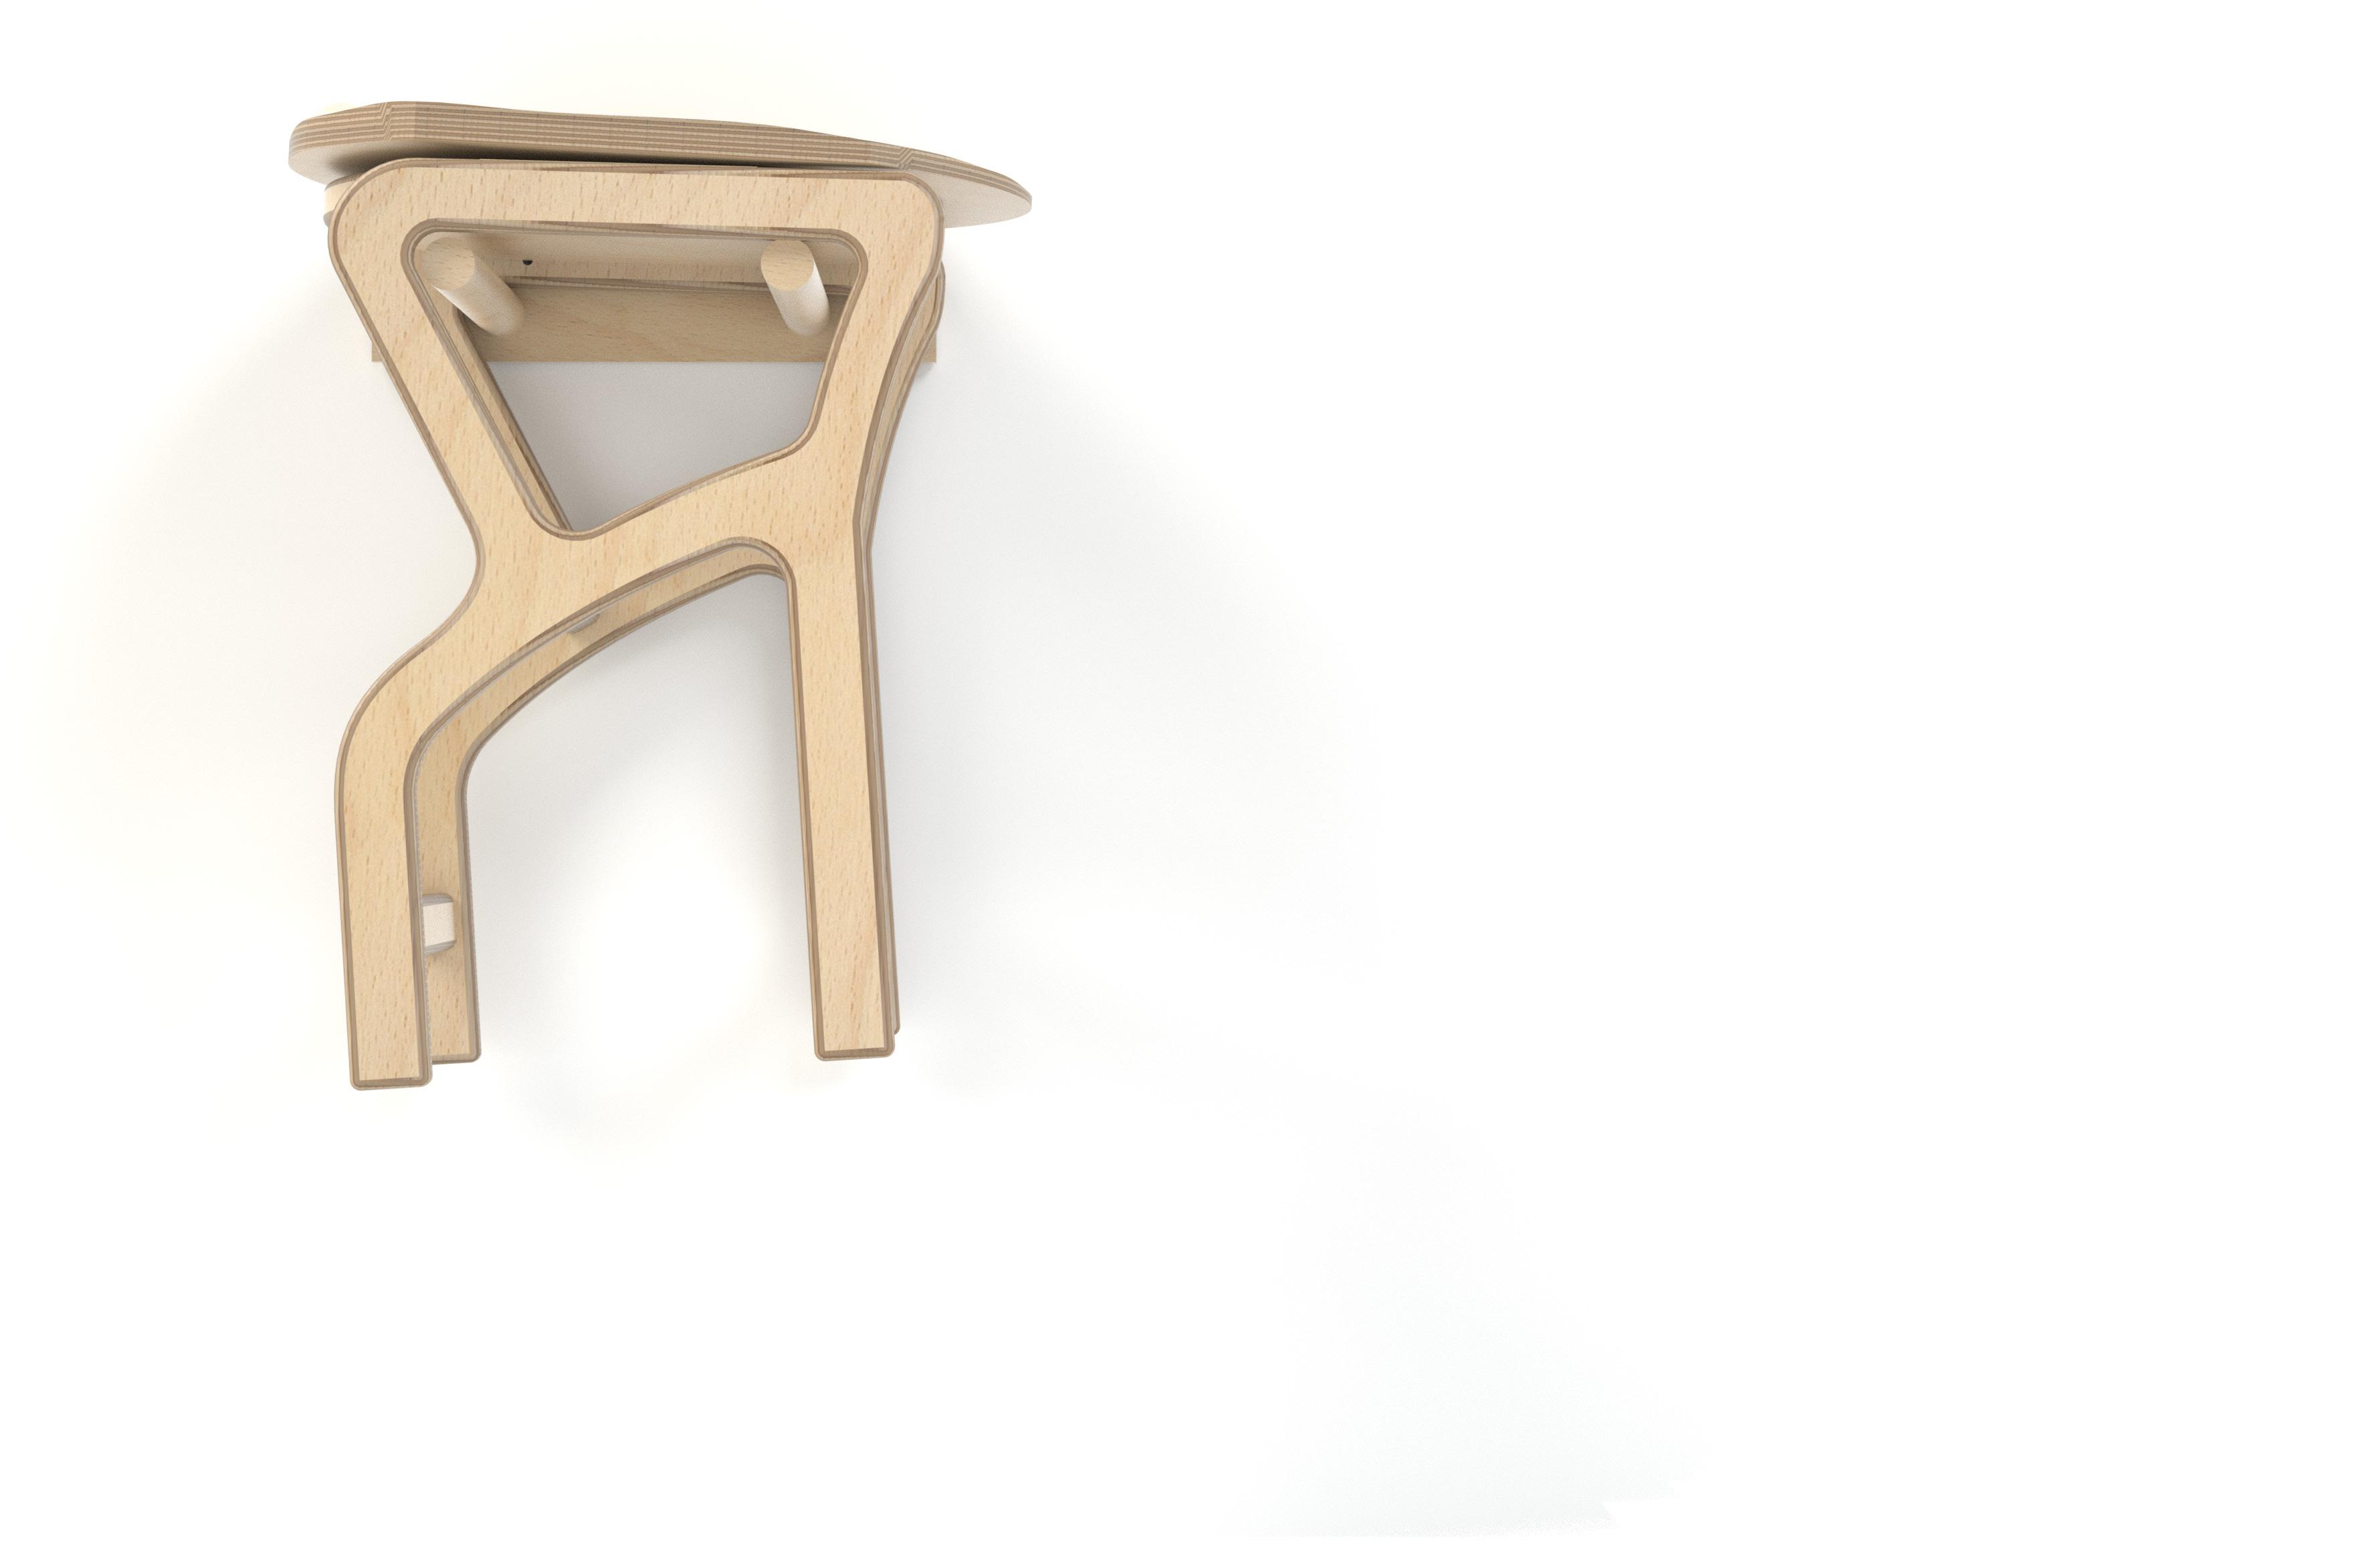
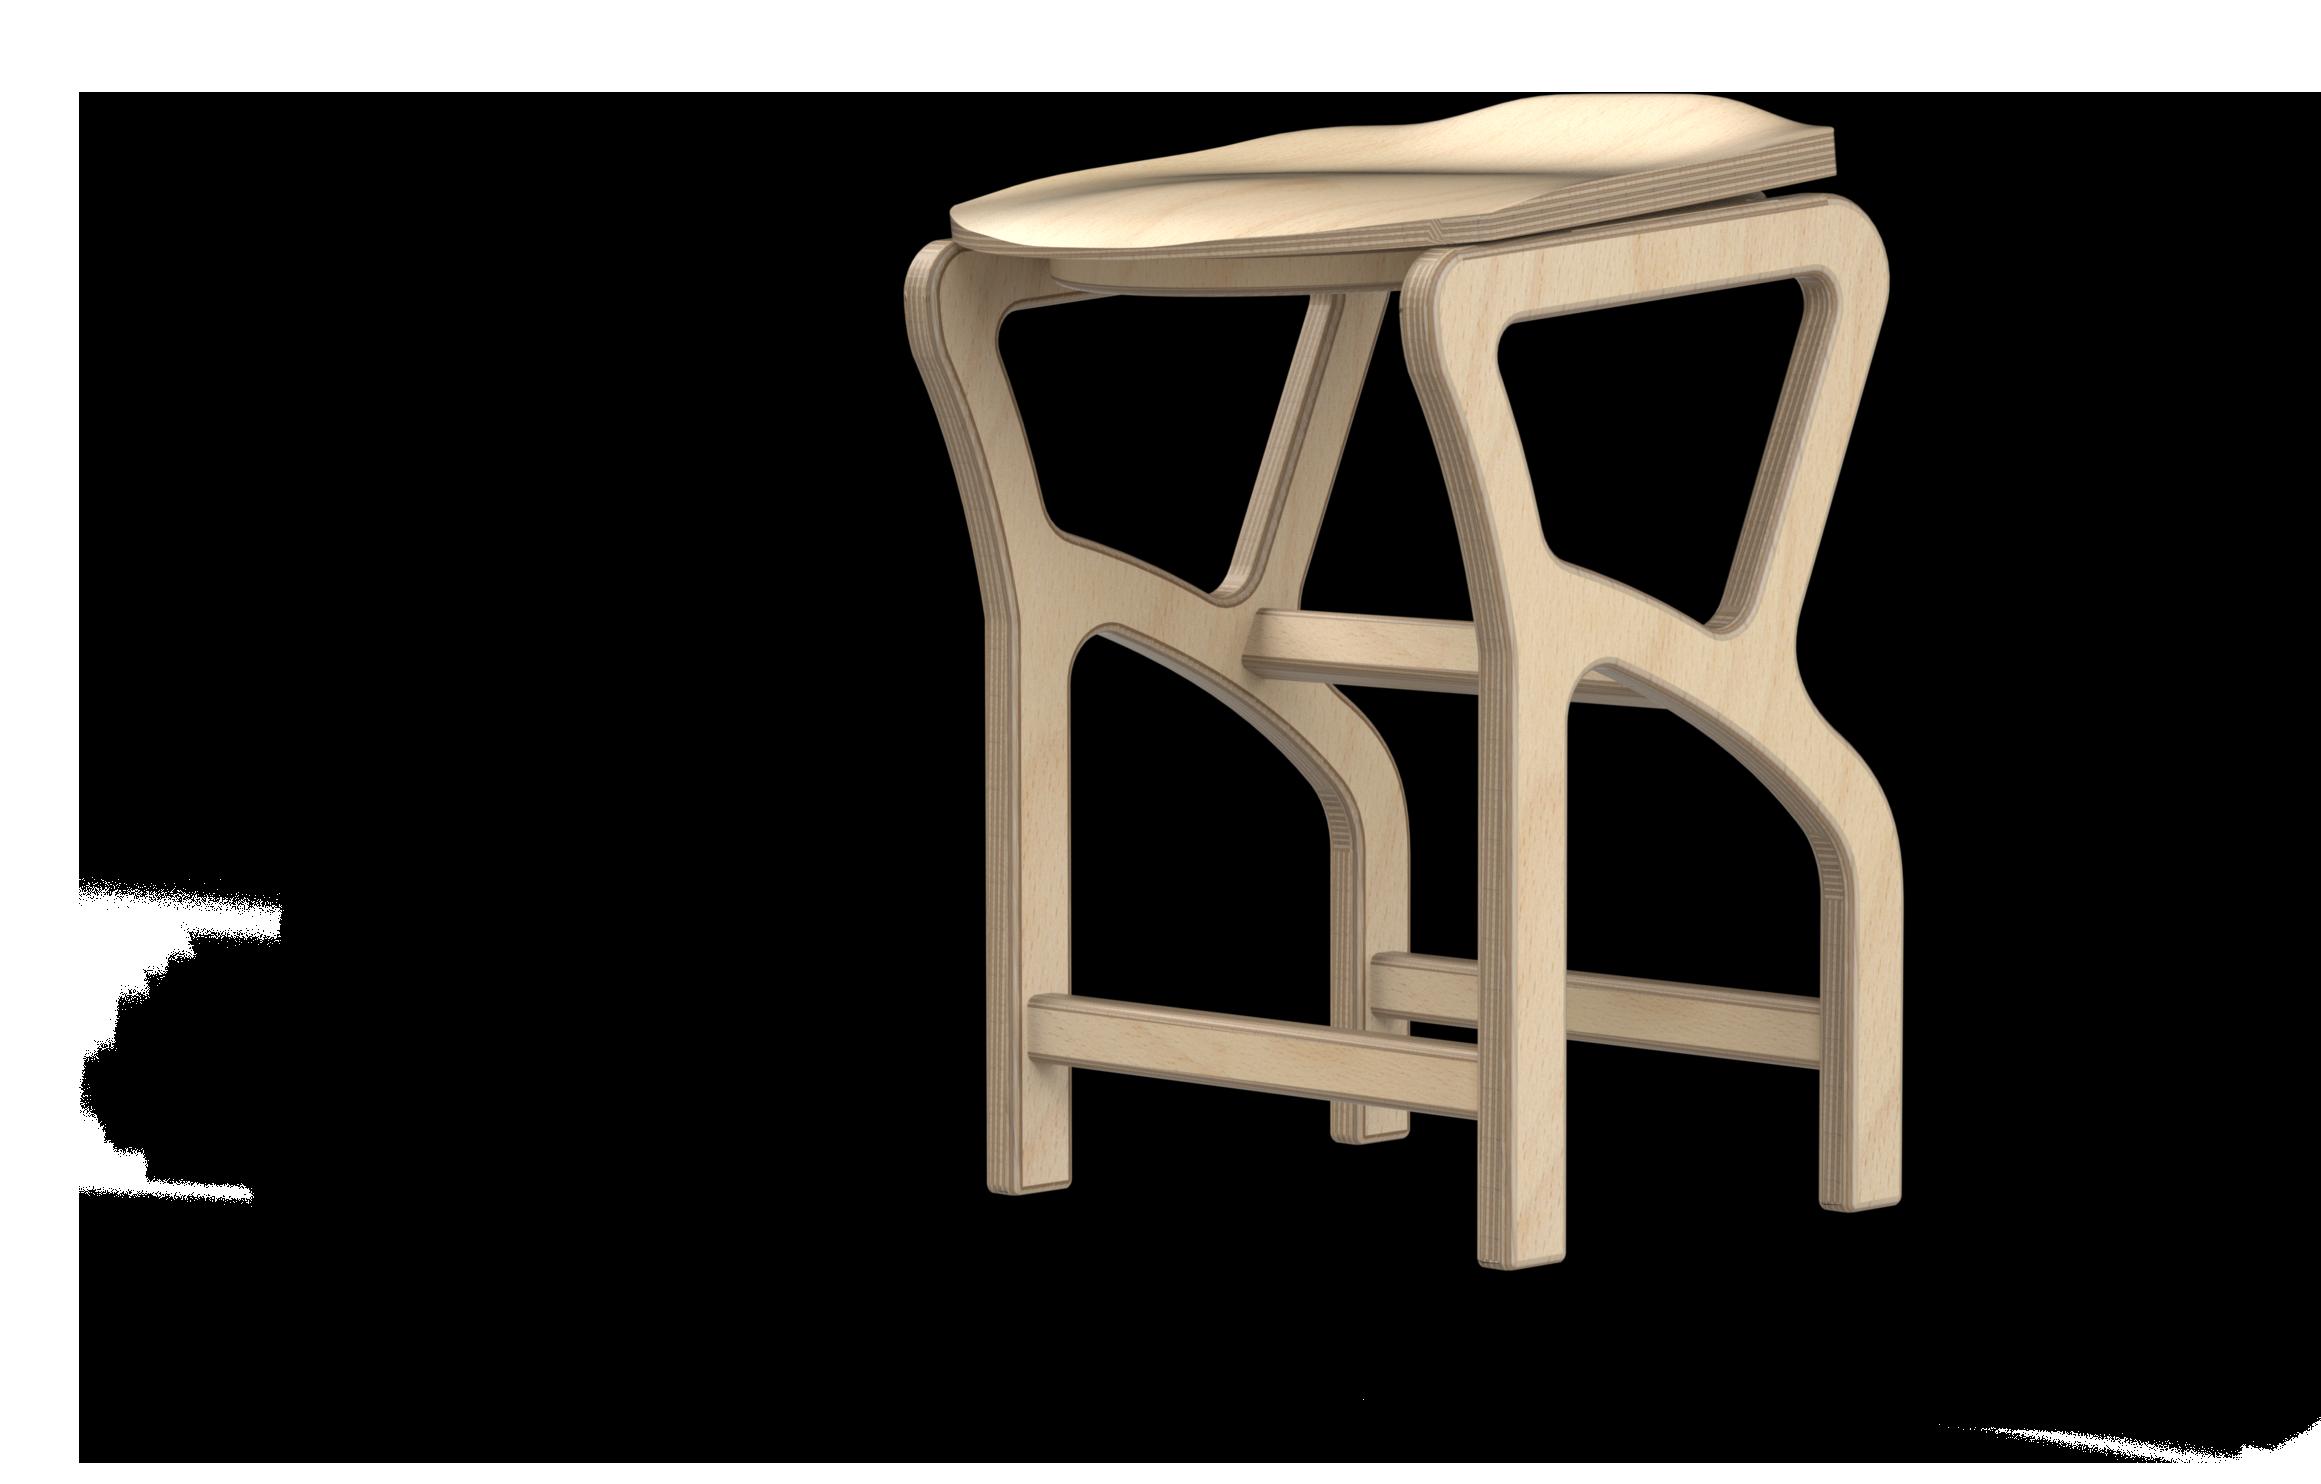
The seats form promotes a more natural position for the lower spine which is complimented by the angle which the seat sits at. The seat is also detached from the main body to allow for a small amount of movement. This requires the user to adjust their posture, engaging the core, discouraging slouching and reducing spinal shrinkage. Tilt was also designed with space in mind, so it comes with a wall mounted hanger so that it can be hung up and put out of the way when not in use.

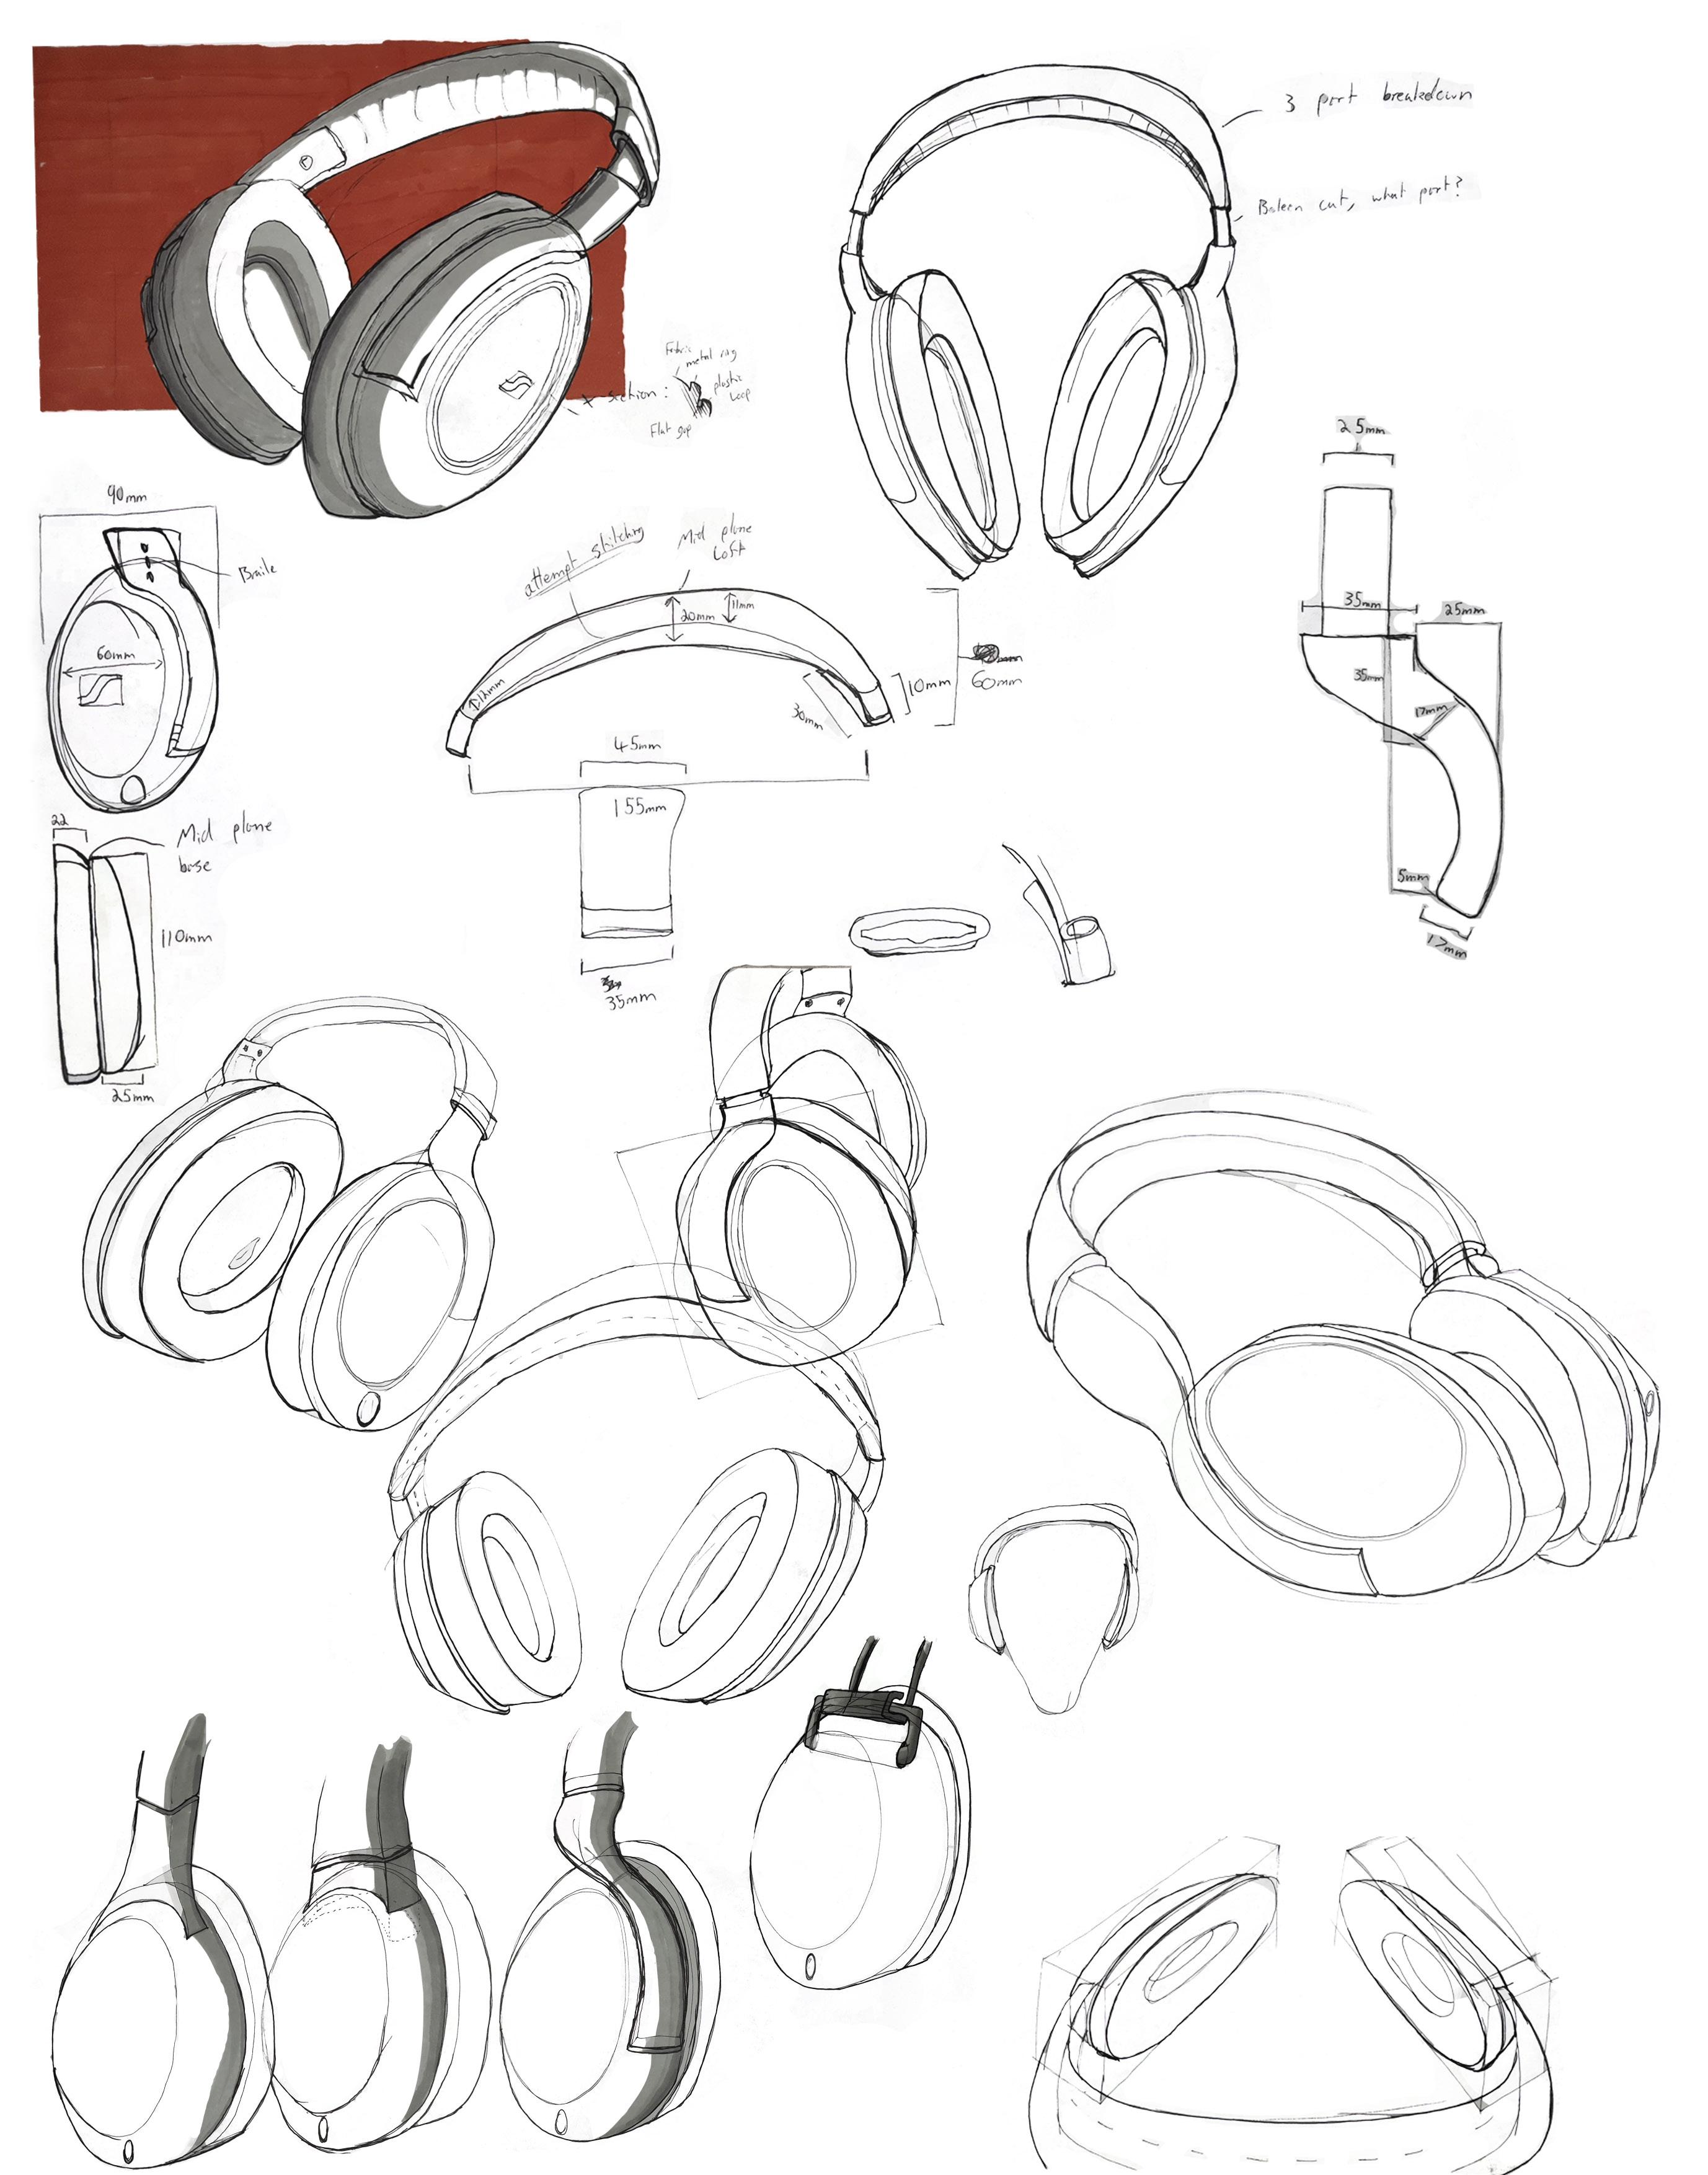
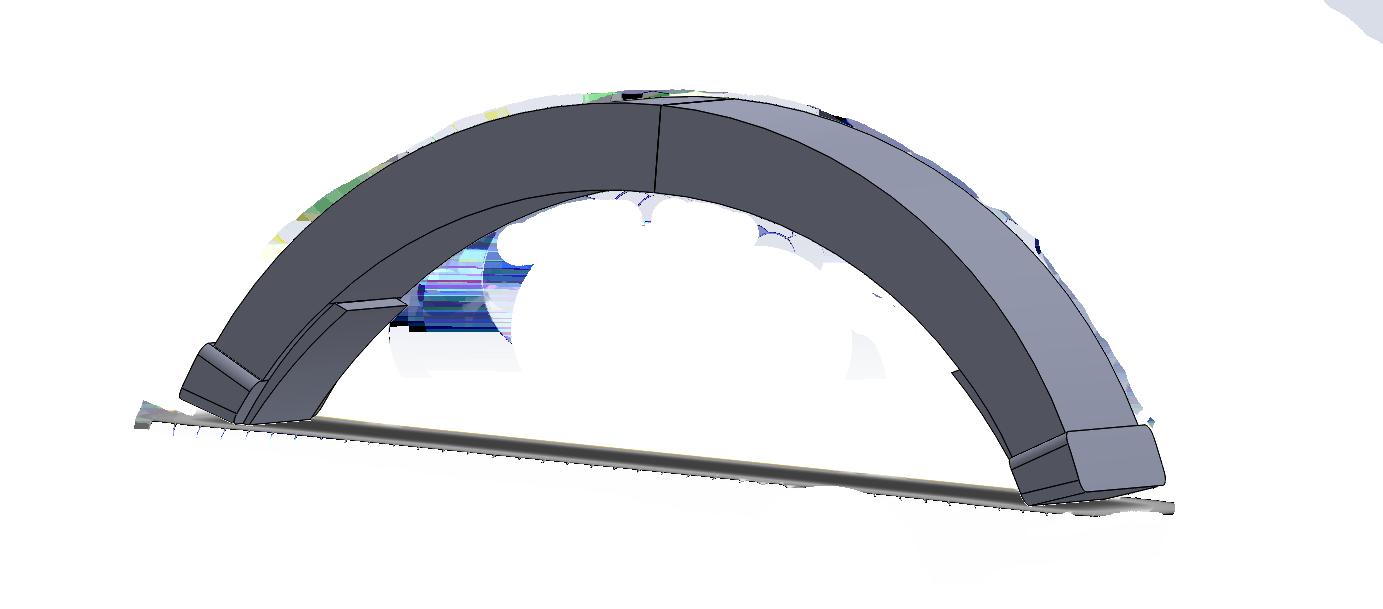
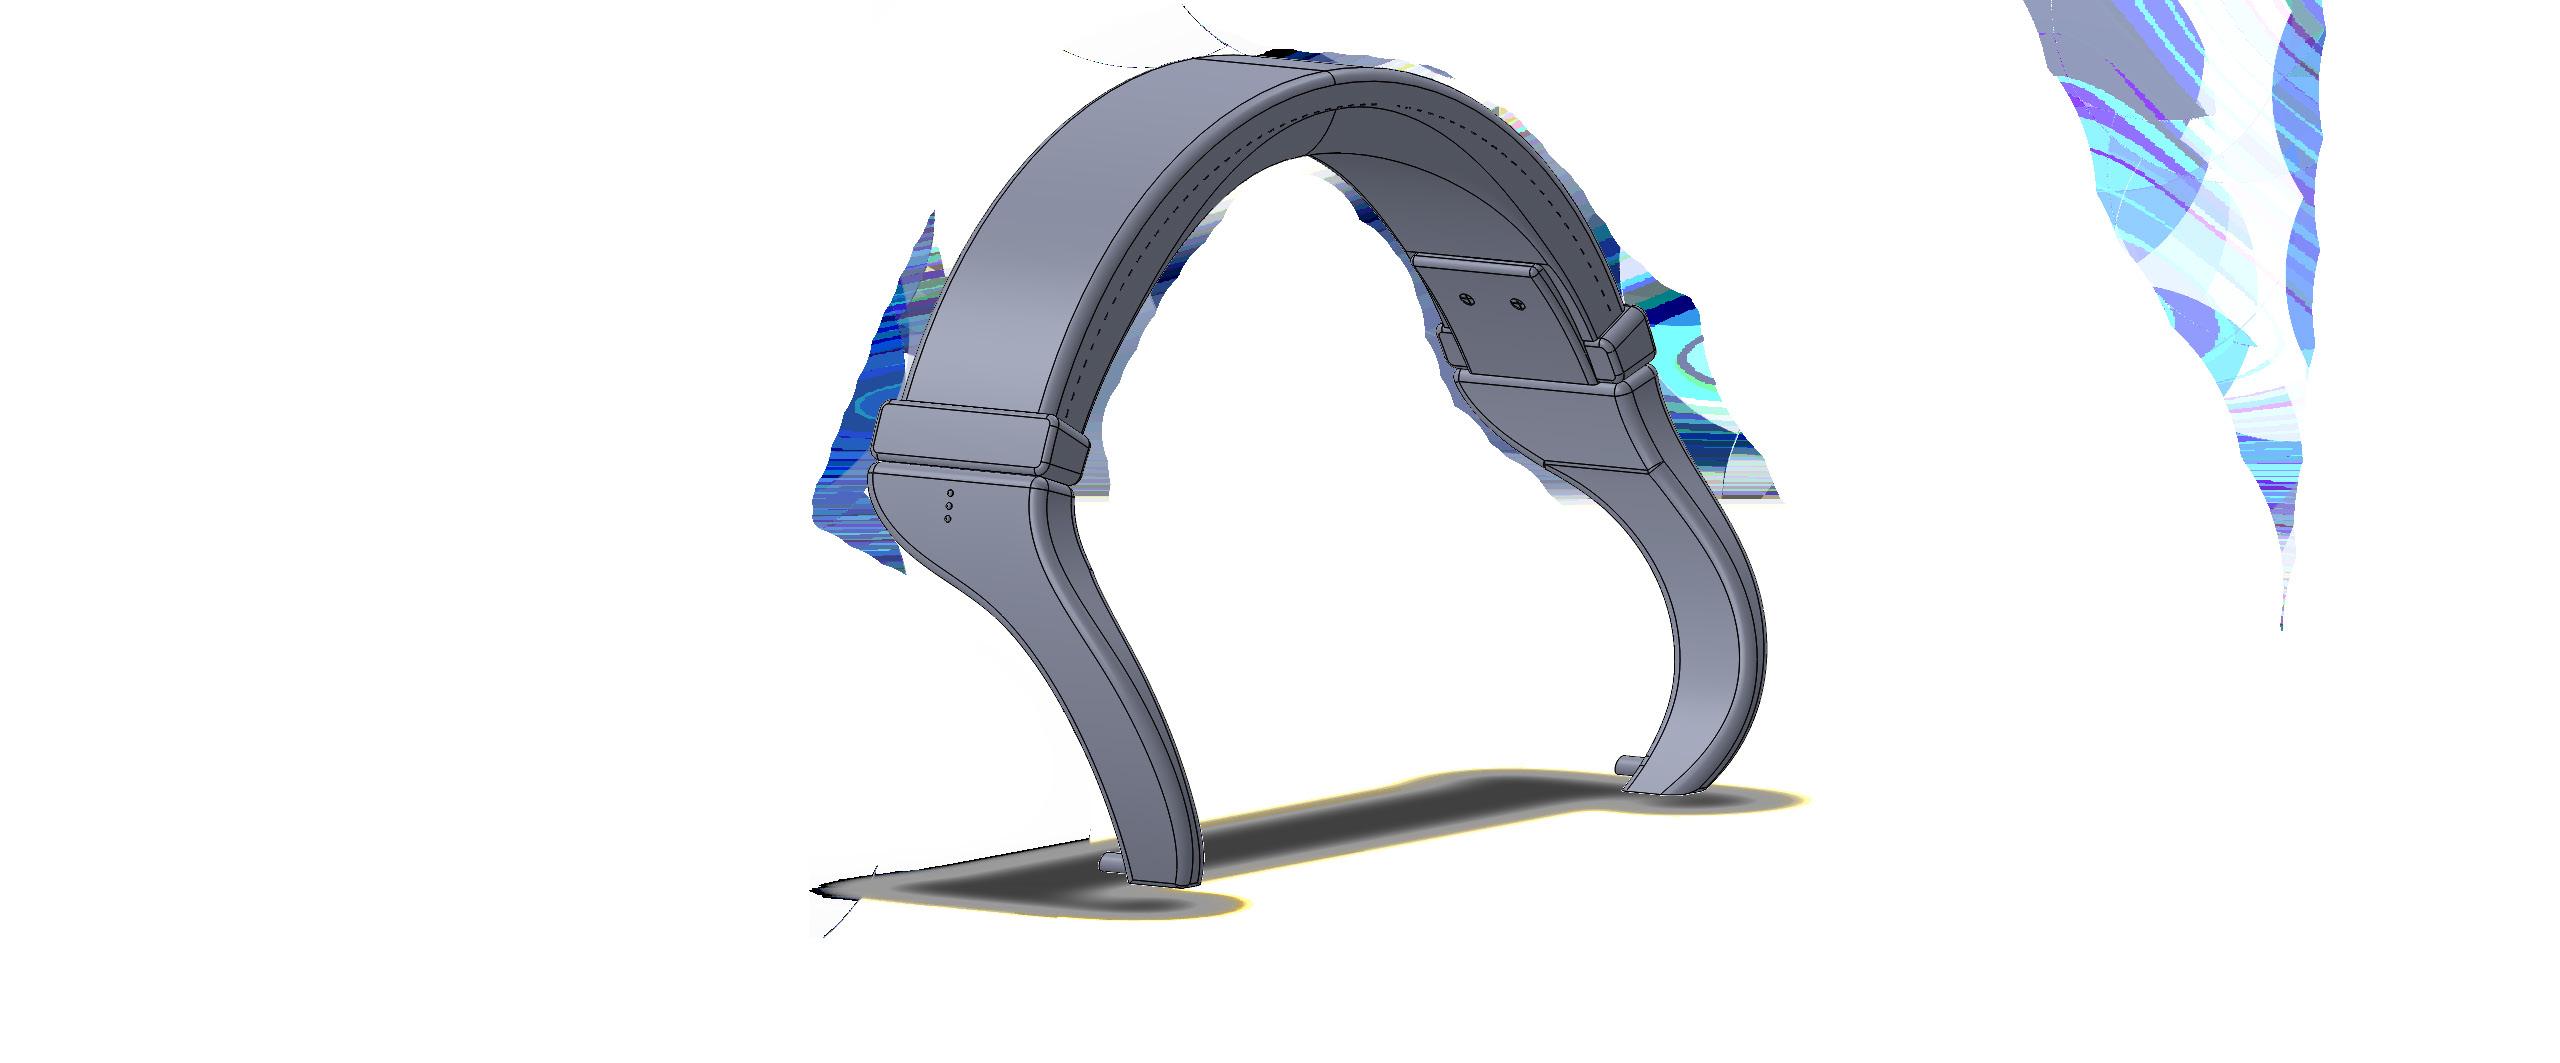
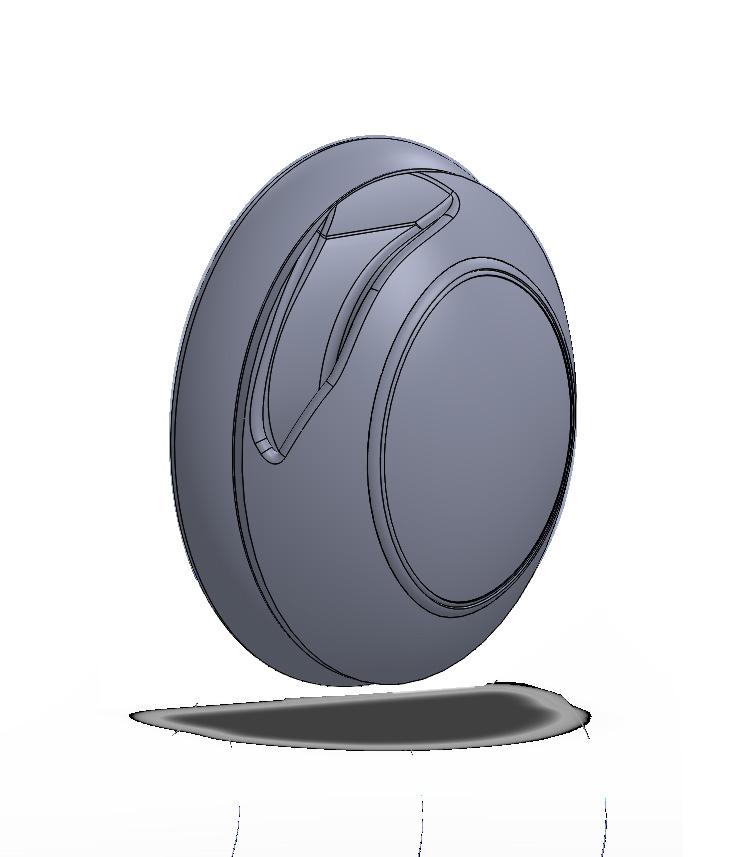


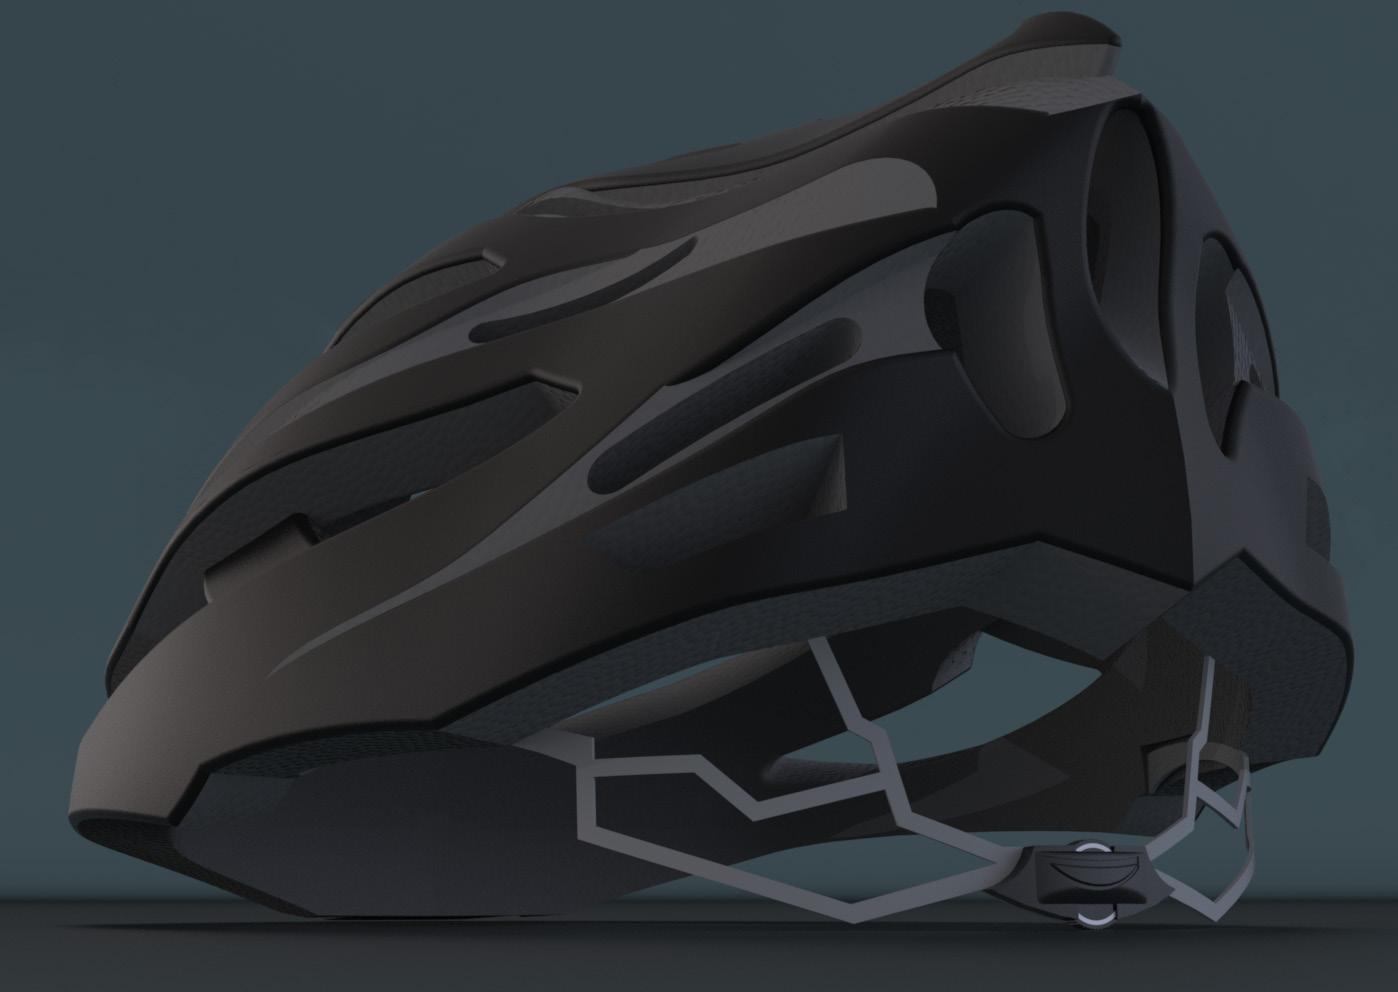
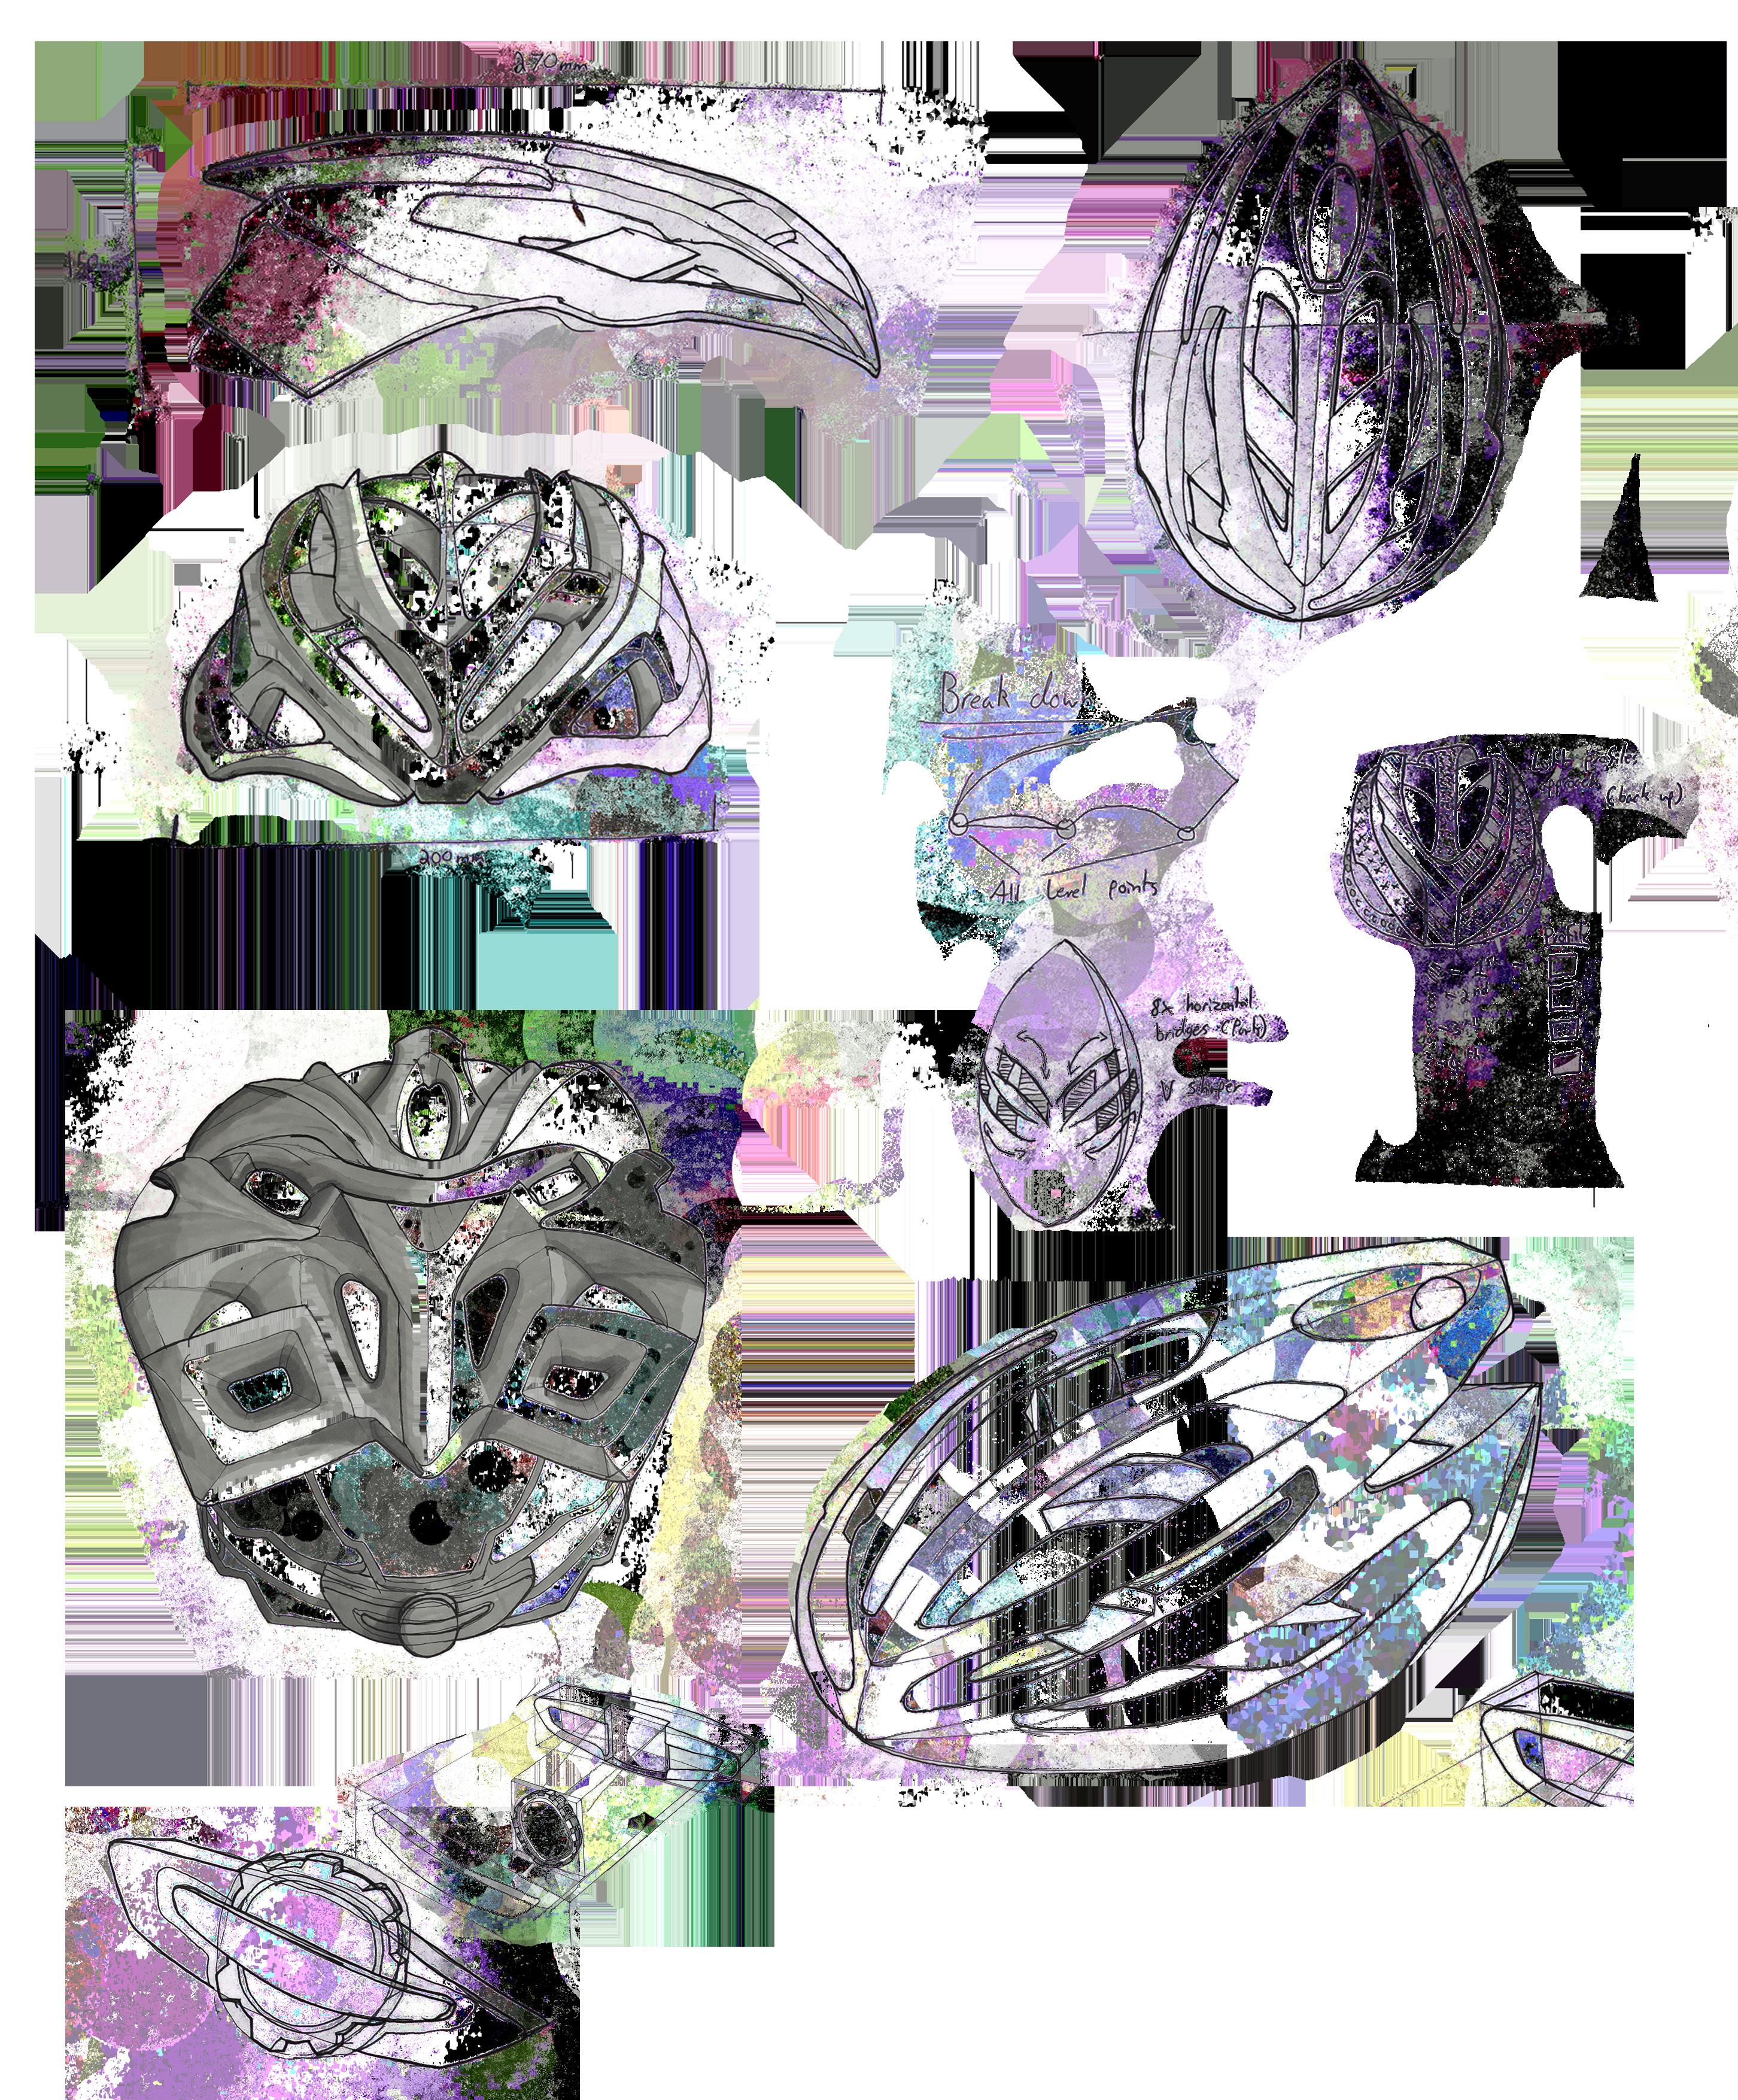
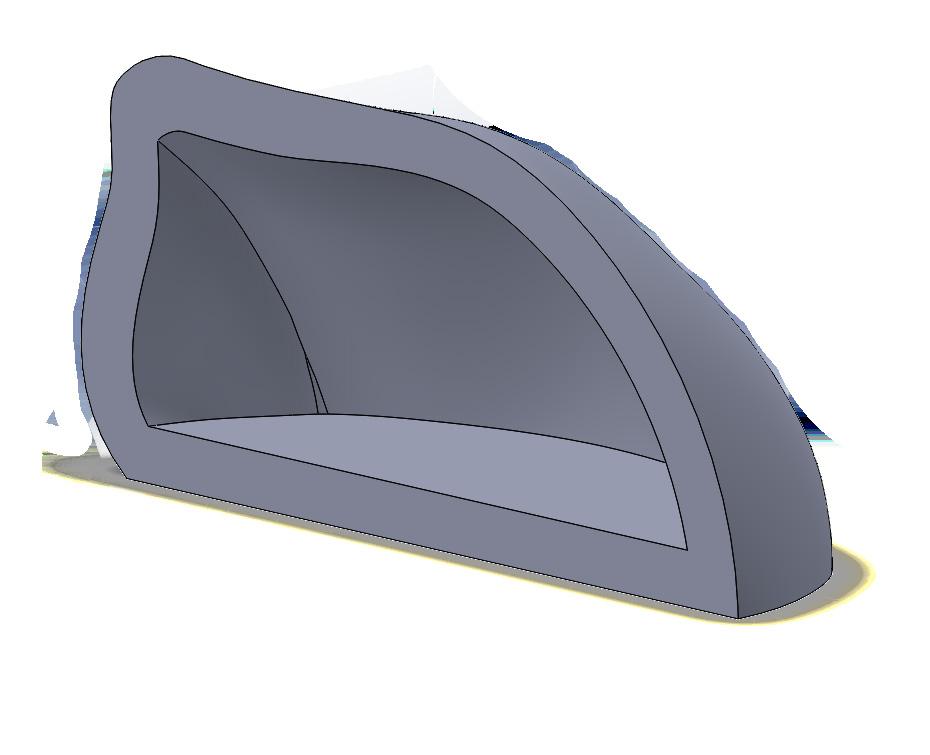
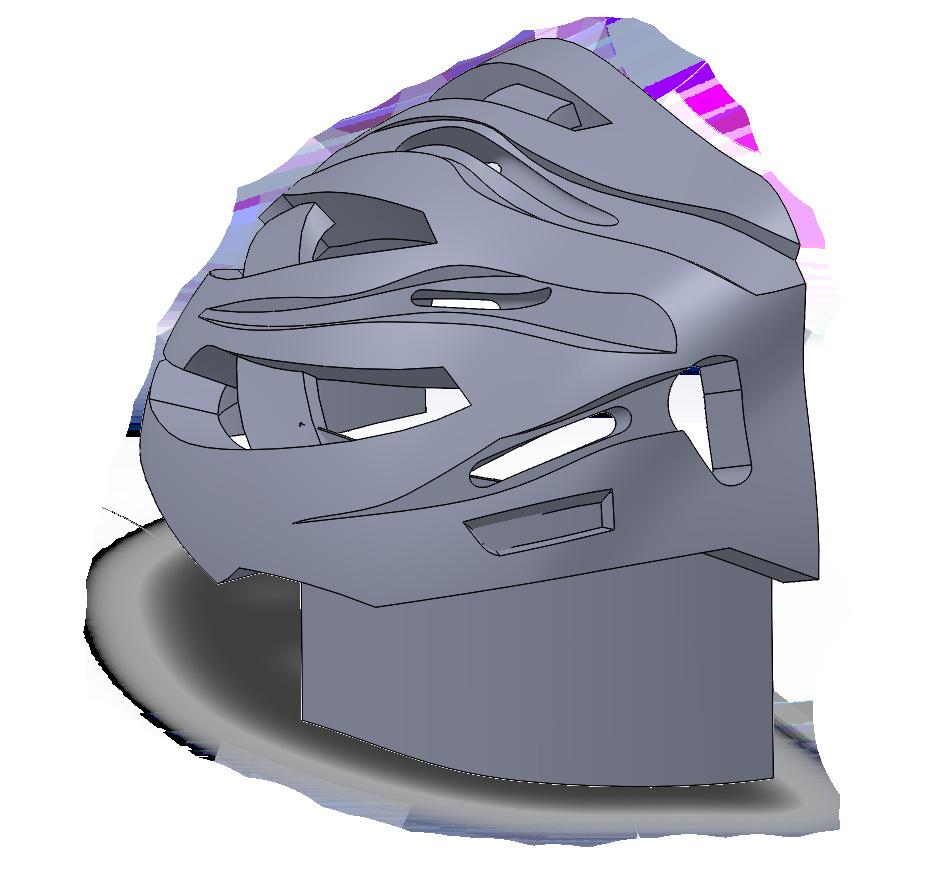
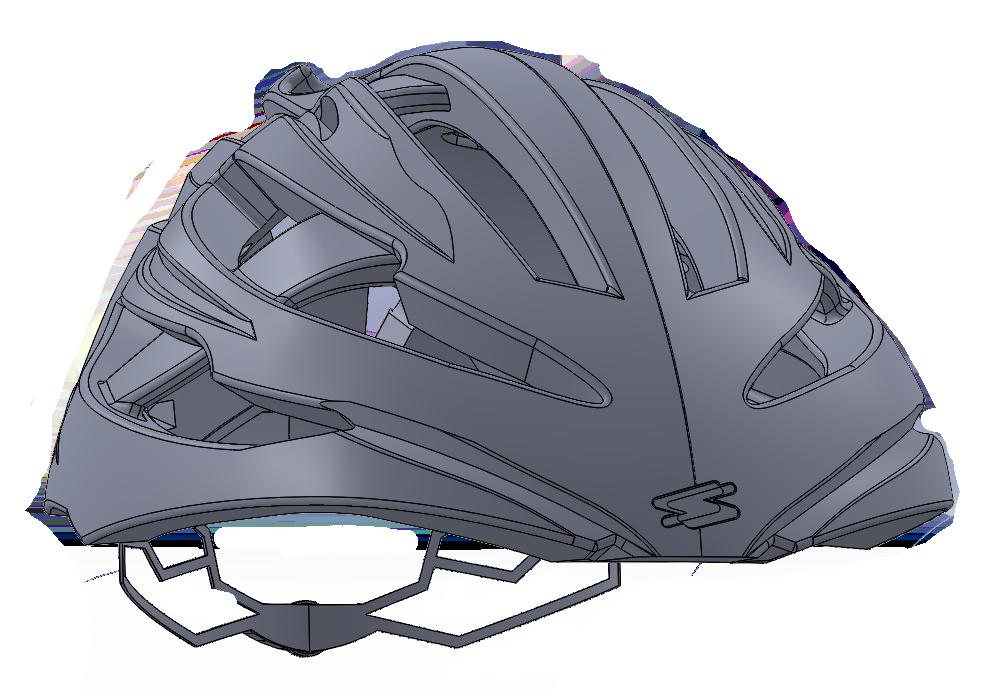
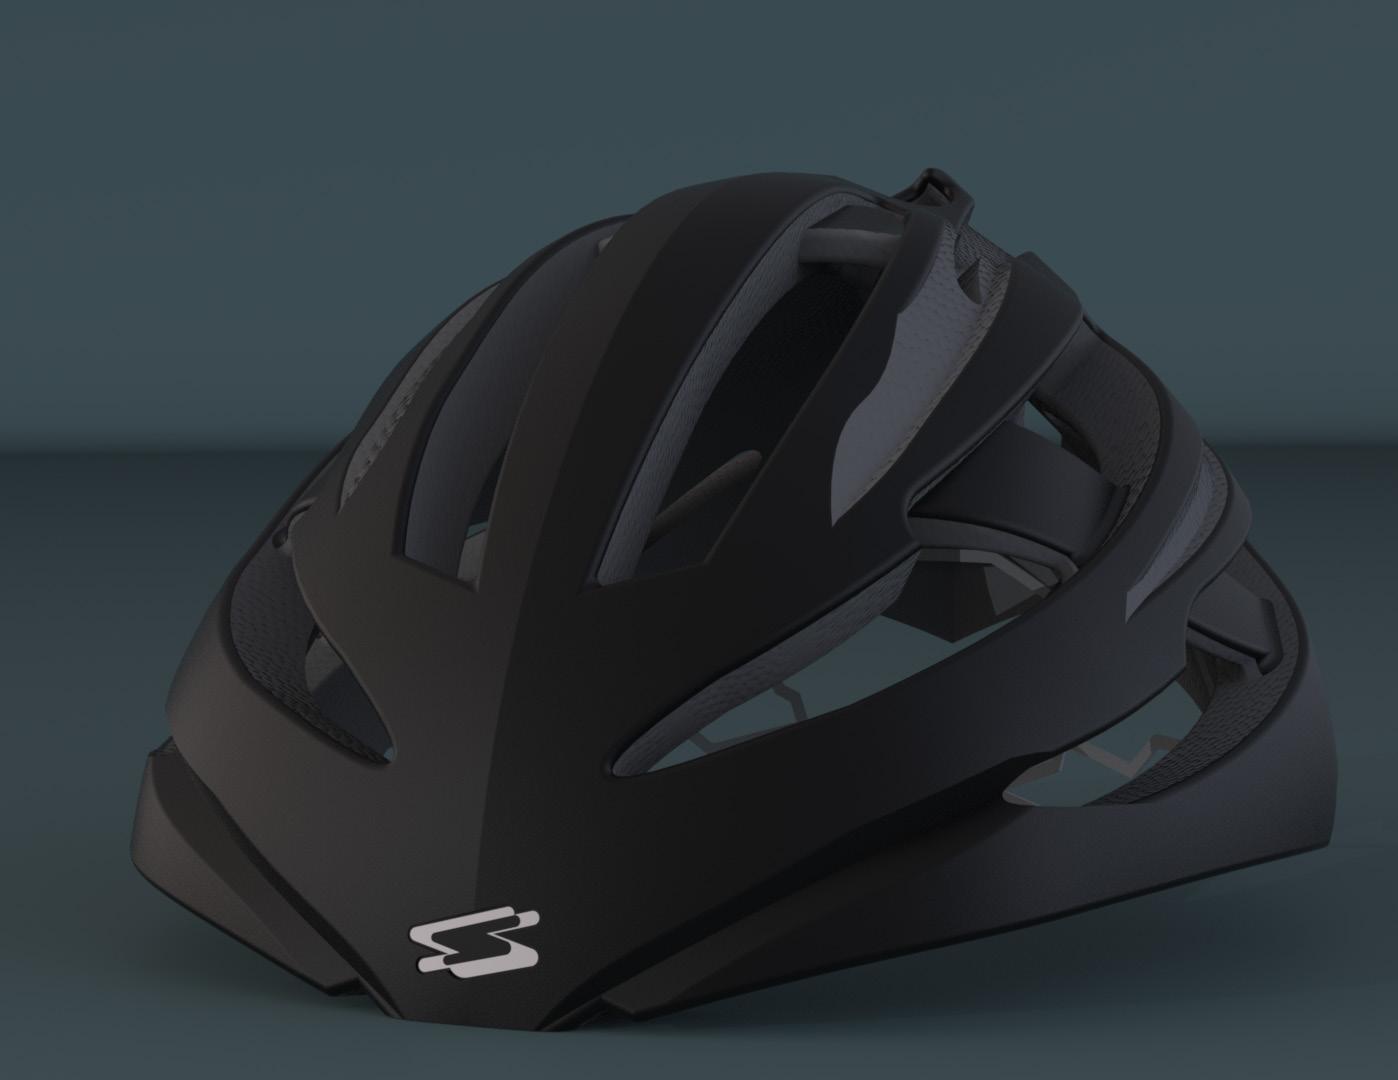
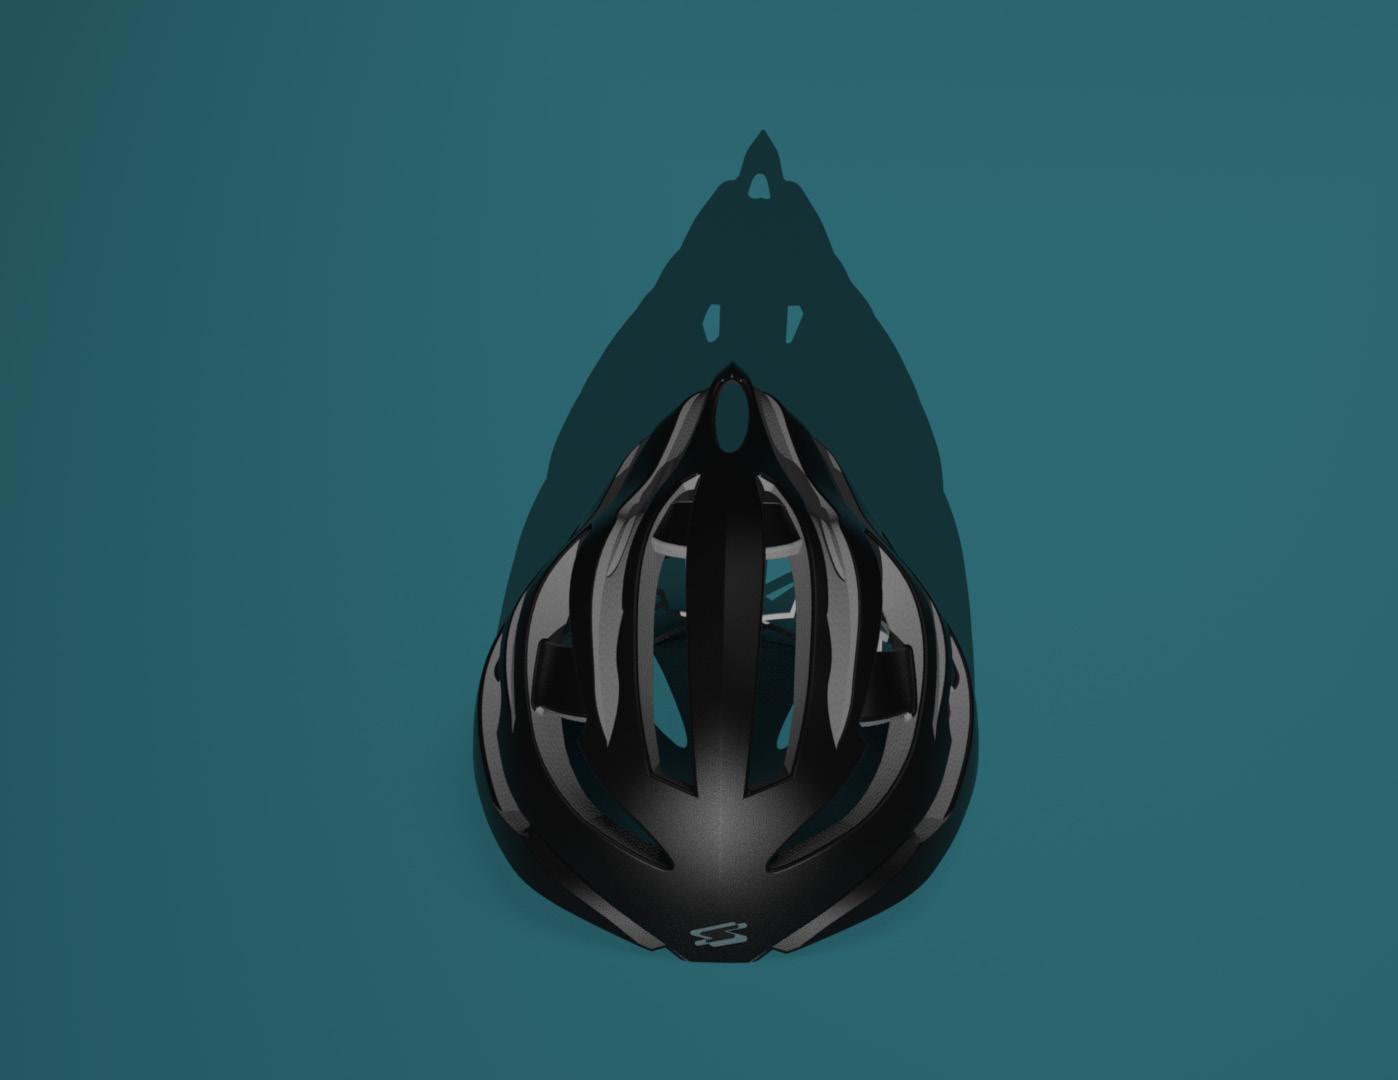
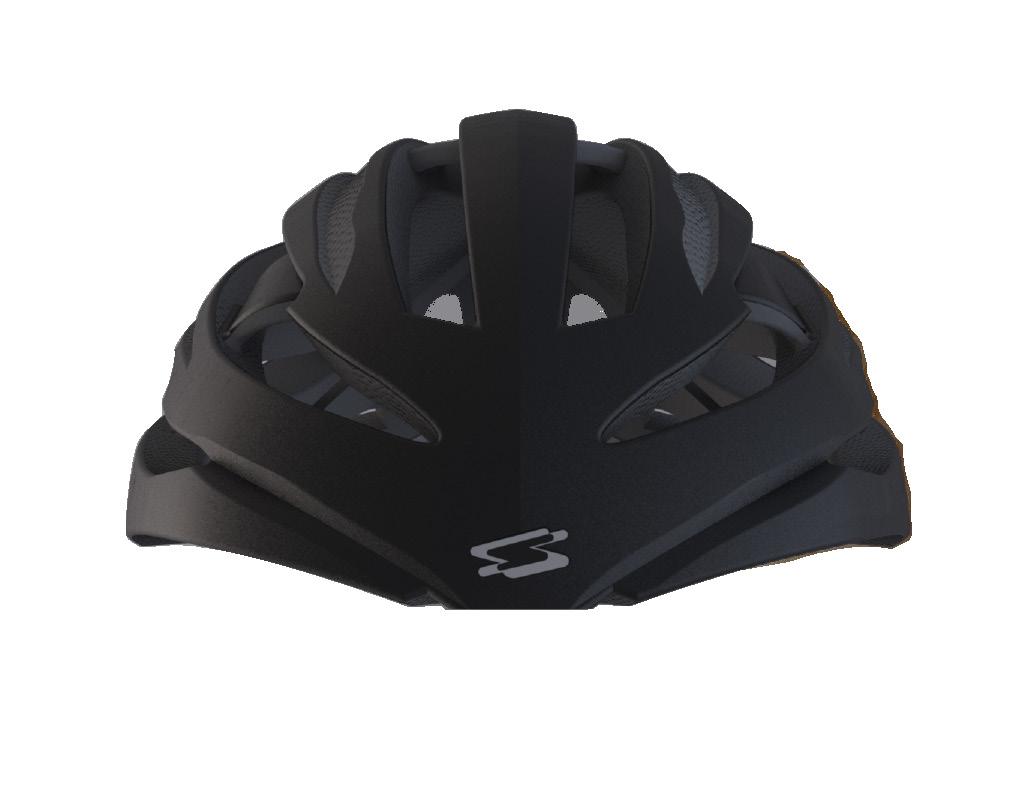
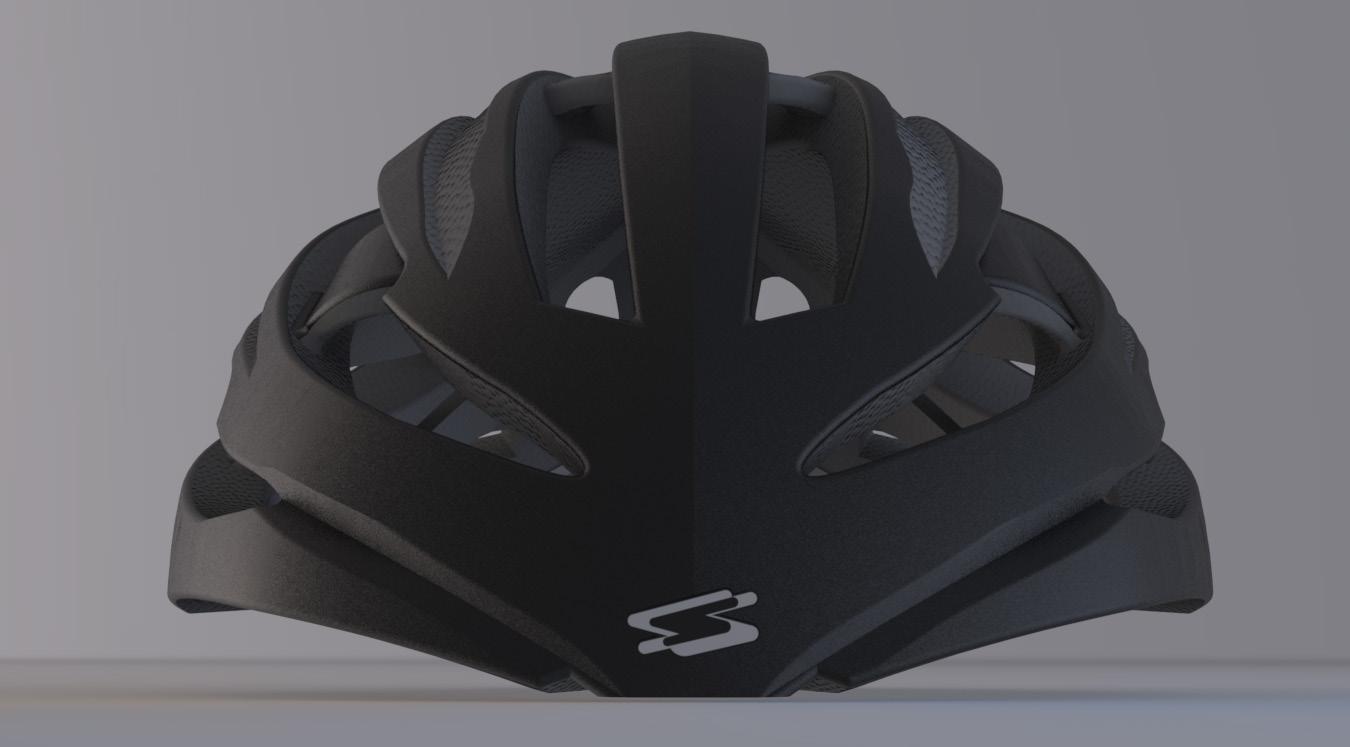
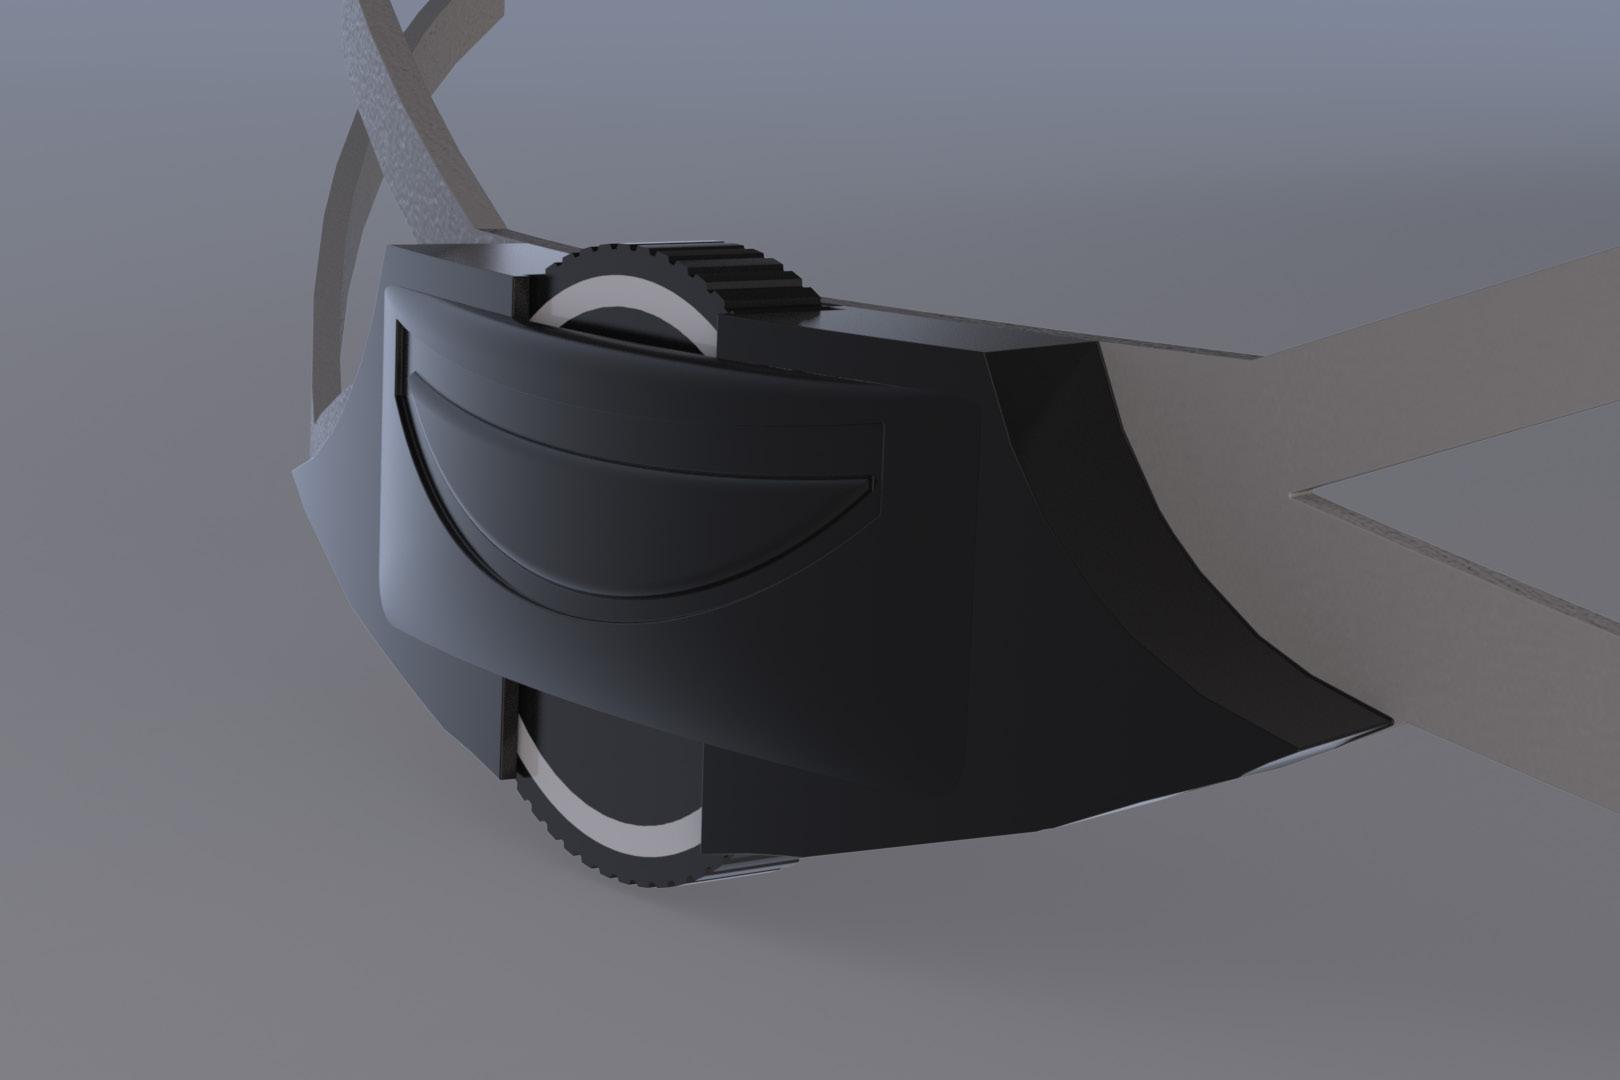
Object study - Bicycle Helmet