One of the most important steps to take while house hunting is to create an intentional budget that accounts for both upfront costs and recurring expenses. Doing so will help you find a home that meets both your lifestyle needs and financial situation. Here’s how:
1. Assess What You Can Afford: A common way to generally estimate the price range of a home you can afford is to multiply your annual gross income (what you earn before taxes) by three to five, according to Fidelity. Understand that mortgage rates will have a big impact too. Lower rates can substantially increase your purchasing power. Lenders set an interest rate for each person based on several factors, such as credit score. A higher credit score could mean a lower interest rate or better loan term.
2. Account for Upfront Costs: When budgeting, account for these onetime upfront costs you’ll pay after your offer is accepted:
The down payment: This is typically between 5% and 20% of the home’s purchase price. However, qualified borrowers can put down as little as 3% with options such as Freddie Mac's Home Possible or
HomeOne mortgages. Both require private mortgage insurance, which is an additional expense to consider.
Earnest money deposit: Earnest money, also known as a good faith deposit, amounts to approximately 1%-2% of the purchase price of the home and is a sum you submit with your offer to show the seller you’re serious. During closing, the amount you pay in earnest money can be applied toward your down payment or closing costs.
Home inspection: The home inspection, which will be your responsibility, typically costs between $300 and $450, according to recent estimates from Rocket Mortgage, and will tell you about the home and its potential issues. Your realtor should be able to recommend several well-qualified inspectors.
Closing costs: Closing costs are what you will pay to the people representing your purchase, such as your lender and real estate agent. Also known as settlement fees, closing costs typically amount to 2% to 5% of the purchase price, and you may be able to roll them into your loan. Work with your lender to find the approach that best fits your financial situation.

With techniques refined over 81 years since its founding in 1943,

Moving expenses: Whether you hire professional movers or DIY your move, online resources such as Realtor.com’s moving cost calculator can help you estimate potential costs. When hiring movers, get quotes to ensure you are getting a fair price and to avoid moving fraud.
3. Plan for Ongoing Expenses:
Once you’re in the home, you’ll be responsible for making monthly payments. These may include your mortgage principal, interest, property taxes, homeowners insurance, private mortgage insurance, escrow payments and homeowners asso-
ciation fees. Most lenders agree that you should spend no more than 30% of your gross monthly income on these expenses, though this number will depend on your financial situation. You’ll also need to save for regular maintenance expenses, such as appliance upkeep.
4. Leave Room for Flexibility: Be sure to factor in savings for repairs or replacements of big-ticket items, such as your roof or HVAC system. Such flexibility in your budget can also help you weather financial emergencies, such as job loss, illness and other unexpected circumstances.
5. Use Tools to Guide Your Decision: To help you answer the critical question of how much home you can afford, use Freddie Mac’s home affordability calculator found at myhome.freddiemac.com. This free online resource also offers a wealth of essential information to guide you at every stage of your home journey. As you hunt for the home of your dreams, stay prepared and informed. One essential aspect of doing so is to set a realistic budget that accounts for the true costs of homeownership.
– StatePoint


For those with compact kitchens, a common dilemma is the ideal placement of the microwave oven.
“In the quest for both functionality and style, the game-changing world of drawer style microwave ovens can transform your compact cooking haven into a sleek and efficient space.” says Peter Weedfald, senior vice president of sales and marketing for Sharp Home Electronics Company of America
Here are some of the major benefits of this style of microwave:
1. Undercounter Elegance: Drawer style microwaves are designed to fit seamlessly under your countertops, providing a streamlined and sophisticated look.
2. Ergonomic Accessibility: One of the standout features of this style microwave is the ergonomic design. Positioned at a convenient height, they reduce the need to reach or bend over, making them more accessible for users of all ages.
3. Multi-Functional Marvels: Drawer style microwave ovens often come with additional features. For example, select Sharp Microwave Drawer Ovens offer touchless operation, a concealed control
panel and even integrated convection capabilities.
4. Seamless Integration: Available in various finishes and styles, these microwaves can complement your existing cabinetry.
Sharp Home Electronics Co. of America, the original inventor, designer and manufacturer of drawer style microwave ovens, suggests these guidelines:
• Adjacent to cooking zones: Strategically installing your drawer style microwave close to your range or oven encourages a smoother workflow.
• Island installation: Incorporating a drawer style microwave into a kitchen island is a popular choice. This central location ensures accessibility from all sides, making it a convenient and accessible choice for various kitchen activities.
• Integrated design: If you’re undergoing a kitchen remodel, consult with your designer to integrate the drawer style microwave seamlessly into your cabinetry. This could not only maximize space but also enhance the overall aesthetics of your kitchen. – StatePoint


When planning your yard or garden, you likely focus on the what and the where.
You may pay less attention though to understanding how your location, or plant hardiness zone, impacts your garden’s success. To help ensure your plants don’t just survive, but thrive, the experts at lawn care equipment manufacturer Exmark are sharing the following insights about plant hardiness:
What is plant hardiness?
Plant hardiness is the secret sauce of any healthy outdoor space. Plant hardiness is the ability of a plant to survive adverse growing conditions such as drought, flooding, heat and cold. Plant hardiness zones were developed to help landscapers, gardeners and lawn care enthusiasts avoid this heartache.
American farming contributes billions of dollars to the gross national product annually, which is one reason why the USDA has long monitored weather data. Choosing plants with hardiness levels appropriate to specific planting zones gives you the best chance of cultivating healthy, beautiful plants.
What is my growing zone?
The United States is divided into 13 zones. Zones 1-6 being the coldest, and 7-


13 the warmest. Essex County is in Zone 7. A general guideline is to plant anything designated for your zone or lower, but never higher. Checking the tag on the back of the plant or seed pack before planting.
Perennials versus annuals When it comes to perennials, it’s not about when the first frost is, but how cold it gets, and whether that plant can survive and thrive through winter.
Plant hardiness zones are less important however when it comes to annuals. Because these plants are only meant to last one growing season; waiting until after the average first frost date will save you from having to re-plant.
For more insights, check out the USDA Plant Hardiness Zone Map. – StatePoint


Dethatching your lawn has numerous benefits. But if you’re not sure what dethatching is or how to do it, you may be wondering if it’s really worth all the effort.
To shed light on dethatching, lawn care equipment manufacturer, Exmark is answering some frequently asked questions.
What is Thatch? Thatch is a compacted layer of grass and plant stems, leaves, roots, and other organic debris that builds up faster than it can decompose. It accumulates right below the surface of your lawn and right on top of the soil, at the base of your grasses’ blades. Overly thick thatch blocks water and fertilizer from reaching the grasses’ roots, causing them to be trapped and vulnerable to heat, drought and stress – further stunting your lawn’s health and growth.
However, thatch isn’t always a bad thing – a layer that’s less than a quarter-inch thick is normal and isn’t cause for alarm. It actually helps reduce soil compaction and water loss through evaporation, and it increases tolerance for cold and heat by protecting the growing blades.
When Should You Dethatch Your Lawn? For warmseason grasses, it’s best to dethatch in the late spring or early summer, and for cool-season grasses it’s best to do it in early spring or fall. But before you start dethatching, mow your lawn to half its normal height to avoid tearing up any live grass in the process. Then, take out your rake or dethatcher and remove the thatch.

How Do You Dethatch? The process of dethatching is simple. You can purchase a specialized rake, but in a pinch, a regular rake will do. You can also rent a dethatcher to make the job even easier. Your lawn might look a bit ragged afterwards, so you’ll need to go over it
again—this time just barely skimming the top of your lawn to remove all the loose debris that you just dug up. But before you start, call up your local utility company and have them mark any buried lines to avoid unwanted surprises.
What are the Benefits of Dethatching Your Lawn? The time and effort that it takes to remove thatch pays huge dividends. Primarily, it exposes your soil to warmth and sunlight, helping carbon dioxide and key nutrients reach your grasses’ roots, resulting in deeper growth. It also encourages the effectiveness of fertilizers and reduces water pooling on the surface of your yard by facilitating drainage. And, it helps fight back against invasive weeds that thrive in conditions created by a heavy thatch layer. Best of all, it promotes an overall healthier, greener lawn.
For more insights, watch “The Benefits of Dethatching,” an episode of “Backyard Smart,” an original series from lawn care equipment manufacturer, Exmark. To watch the video, visit Backyard Life, which is part of a unique multimedia destination with a focus on helping homeowners improve their outdoor living spaces. There you can also download additional tips and view other Exmark Original Series videos.
Now that you have the lowdown on dethatching, it’s time to get outside and free up your soil. Your lawn will thank you later.


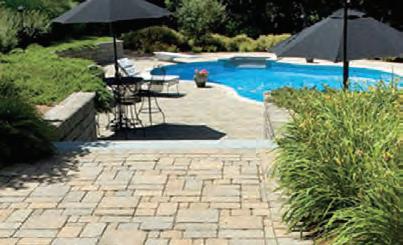
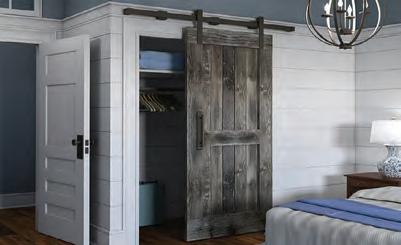
When choosing doors for your home, remember that careful selections can improve not only your home’s beauty and value, but also your quality of life. Here are a few door types to consider, along with their benefits:
Elevate with exterior French doors: French doors double the design impact, and elevate the front entryway and curb appeal of any home. Manufacturers like ProVia offer customizations on every element of French doors so you can make a truly unique statement. Start by choosing from various styles, materials and finishes. Then, consider the addition of sidelites, transoms and decorative or privacy glass. Given how many factors you have control over, it’s helpful to use a design tool to configure the door of your dreams. Visit provia.com/design-center to get started. Rest assured, no matter what your end results look like, there are a few factors you won’t have to worry about with ProVia doors: durability and energy efficiency. Virtually every possible combination of door style, glass, sidelite and transom is built to last a lifetime and is Energy Star certified.
Protect with storm doors: Storm doors provide doors and homes with an
extra layer of protection from moisture, heat, wind, rain and other elements. While storm doors are often thought about more in terms of their functionality, it’s important to keep in mind that varying hardware options, styles and paint finishes allow you to seamlessly blend yours in with the aesthetic of your home.
Bring the outside in with sliding glass patio doors: Want to bathe your home interiors with light and the beauty of your natural surroundings? One of the most effective, low-maintenance ways to do just that is with vinyl sliding glass patio doors. Those from ProVia are tested against the most stringent industry standards for air and water infiltration, wind load resistance, ease of operation and more. This means you’ll have lower heating and cooling costs and increased comfort all while offering your household full, unparalleled views of your outdoor spaces.
For more design tips, visit provia.com.
For a true return on your home improvement project, consider how a door replacement can elevate your home’s style while protecting it from the elements.
– StatePoint


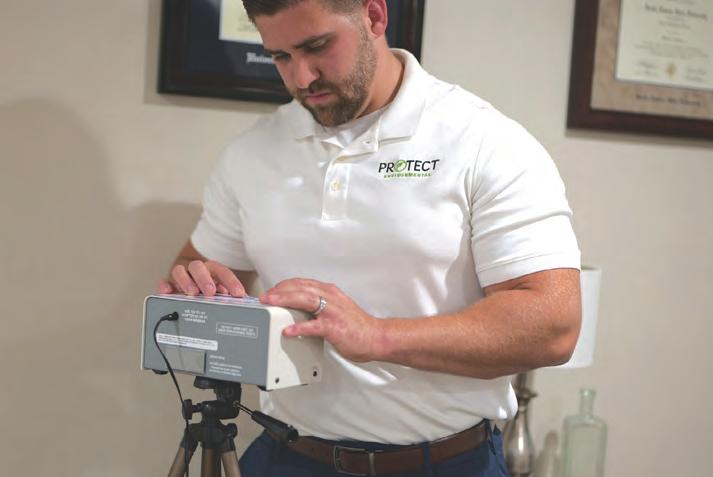
Radon – an odorless, tasteless and colorless gas found in homes and buildings at high levels throughout the United States—is the second leading cause of lung cancer, responsible for about 21,000 deaths each year, and the leading cause of lung cancer among people who don’t smoke.
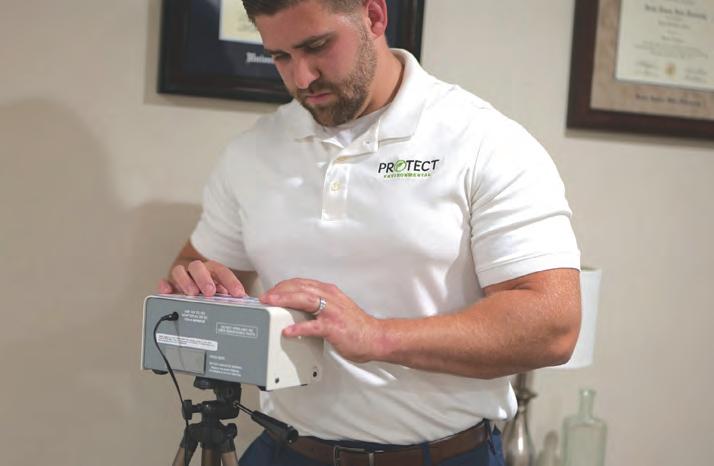
The American Lung Association is partnering with Protect Environmental to educate and empower communities nationwide to take action to prevent lung cancer. As part of the campaign, they are answering some frequently asked questions about radon:
What is radon? Radon is a naturally occurring radioactive gas emitted from the ground. Uranium in soil and rocks breaks down to form radium. As radium decays, radioactive particles (radon gas) are released into the air.
Why is radon found in buildings? Radon gas enters buildings through cracks in walls, basements, floors, foundations, and potentially, through water used in showers and faucets, trapping it inside.
Why is radon harmful? Radon gas particles can be inhaled in your lungs, attacking cells with dangerous, cancer-causing radiation. Radon exposure has no immediate symptoms; however, the long-term threat of health problems, including lung cancer, is serious.
How is radon detected? The only way to know the radon level in your home and workplace is to conduct a radon test. Dangerous radon levels have been found in every state, so every building should be regularly tested. Testing is the first step in reducing risk of radon-induced lung cancer and is recommended every two to five years, even
if you have a mitigation system. The Lung Association and Protect Environmental are offering free radon test kits to homeowners in select communities across the United States. Visit Lung.org/protect-environmental to learn more and check your eligibility for receiving a test kit.
What should I do if I detect high radon levels? Radon gas is measured in picocuries per liter (pCi/L) of air. The Environmental Protection Agency recommends taking action to reduce radon if levels are 4.0 pCi/L or greater, and to consider similar actions when the radon level is between 2.0 and 4.0 pCi/L. If you discover high radon levels in your home, a radon mitigation system should be installed to reduce the amount of radon to a safer level. Just be sure you work with a professional who is certified in radon mitigation. Using unqualified professionals may lead to faulty installation, which can cause property damage and even increase indoor radon levels.
The American Lung Association’s campaign to raise awareness on the importance of radon testing is supported by Protect Environmental. For more information, visit Lung.org/protect-environmental.
“I’ve been to too many homes where no one knew to test for radon until someone in the home got the devastating diagnosis of lung cancer,” says Kyle Hoylman, chief executive officer of Protect Environmental. “Taking action to reduce radon through mitigation and regular testing is an investment in the lung health of everyone in the building and could be a lifesaving improvement.” – StatePoint


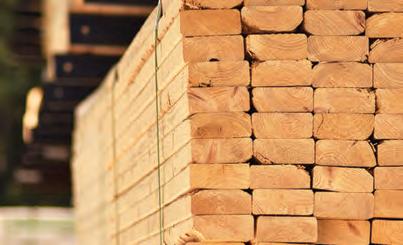
are a full-service provider of lumber and building products with an exceptionally knowledgeable team of sales representatives ready to help with any project large or small
Radon – an odorless, tasteless and colorless gas found in homes and buildings at high levels throughout the United States—is the second leading cause of lung cancer, responsible for about 21,000 deaths each year, and the leading cause of lung cancer among people who don’t smoke.
The American Lung Association is partnering with Protect Environmental to educate and empower communities nationwide to take action to prevent lung cancer. As part of the campaign, they are answering some frequently asked questions about radon:
What is radon? Radon is a naturally occurring radioactive gas emitted from the ground. Uranium in soil and rocks breaks down to form radium. As radium decays, radioactive particles (radon gas) are released into the air.
Why is radon found in buildings? Radon gas enters buildings through cracks in walls, basements, floors, foundations, and potentially, through water used in showers and faucets, trapping it inside.
Why is radon harmful? Radon gas particles can be inhaled in your lungs, attacking cells with dangerous, cancer-causing radiation. Radon exposure has no immediate symptoms; however, the long-term threat of health problems, including lung cancer, is serious.

How is radon detected? The only way to know the radon level in your home and workplace is to conduct a radon test. Dangerous radon levels have been found in every state, so every building should be regularly tested. Testing is the first step in reducing risk of radon-induced lung cancer and is recommended every two to five years, even
if you have a mitigation system. The Lung Association and Protect Environmental are offering free radon test kits to homeowners in select communities across the United States. Visit Lung.org/protect-environmental to learn more and check your eligibility for receiving a test kit.
What should I do if I detect high radon levels? Radon gas is measured in picocuries per liter (pCi/L) of air. The Environmental Protection Agency recommends taking action to reduce radon if levels are 4.0 pCi/L or greater, and to consider similar actions when the radon level is between 2.0 and 4.0 pCi/L. If you discover high radon levels in your home, a radon mitigation system should be installed to reduce the amount of radon to a safer level. Just be sure you work with a professional who is certified in radon mitigation. Using unqualified professionals may lead to faulty installation, which can cause property damage and even increase indoor radon levels.
The American Lung Association’s campaign to raise awareness on the importance of radon testing is supported by Protect Environmental. For more information, visit Lung.org/protect-environmental.
“I’ve been to too many homes where no one knew to test for radon until someone in the home got the devastating diagnosis of lung cancer,” says Kyle Hoylman, chief executive officer of Protect Environmental. “Taking action to reduce radon through mitigation and regular testing is an investment in the lung health of everyone in the building and could be a lifesaving improvement.”


Dethatching your lawn has numerous benefits. But if you’re not sure what dethatching is or how to do it, you may be wondering if it’s really worth all the effort.
To shed light on dethatching, lawn care equipment manufacturer, Exmark is answering some frequently asked questions.
What is Thatch? Thatch is a compacted layer of grass and plant stems, leaves, roots, and other organic debris that builds up faster than it can decompose. It accumulates right below the surface of your lawn and right on top of the soil, at the base of your grasses’ blades. Overly thick thatch blocks water and fertilizer from reaching the grasses’ roots, causing them to be trapped and vulnerable to heat, drought and stress – further stunting your lawn’s health and growth.
However, thatch isn’t always a bad thing – a layer that’s less than a quarterinch thick is normal and isn’t cause for alarm. It actually helps reduce soil compaction and water loss through evaporation, and it increases tolerance for cold and heat by protecting the growing blades.

When Should You Dethatch Your Lawn? For warm-season grasses, it’s best to dethatch in the late spring or early


summer, and for cool-season grasses it’s best to do it in early spring or fall. But before you start dethatching, mow your lawn to half its normal height to avoid
you’ll need to go over it again—this time just barely skimming the top of your lawn to remove all the loose debris that you just dug up. But before you start, call up your local utility company and have them mark any buried lines to avoid unwanted surprises.
What are the Benefits of Dethatching Your Lawn? The time and effort that it takes to remove thatch pays huge dividends. Primarily, it exposes your soil to warmth and sunlight, helping carbon dioxide and key nutrients reach your grasses’ roots, resulting in deeper growth. It also encourages the effectiveness of fertilizers and reduces water pooling on the surface of your yard by facilitating drainage. And, it helps fight back against invasive weeds that thrive in conditions created by a heavy thatch layer. Best of all, it promotes an overall healthier, greener lawn.
For more insights, watch “The Benefits of Dethatching,” an episode of “Backyard Smart,” an original series from lawn care equipment manufacturer, Exmark. To watch the video, visit Backyard Life, which is part of a unique multimedia destination with a focus on helping home-