Inquries about membership, upcoming events, replacement Viewfinder issues, and special orders should be directed to:
Richard Rejino, LHSA Executive Director 14070 Proton Road, Dallas, TX 75244 info@lhsa.org, (972) 233-9107
Viewfinder is the official publication of the LHSA, The International Leica Society, a nonprofit organization incorporated in the state of Delaware. Copyright 2014. Reproduction or use of any material contained herein without permission of the Sociey if forbidden.
Leica is a registered trademark. It and other trademarks pertaining to the Leica System are the property of LEICA CAMERA, USA, INC. ISSN 1543-8732
PRESIDENT Alan Weinschel alan.weinschel@lhsa.org
VICE PRESIDENT Jay Paxton jaypax@mlhs.net
SECRETARY/TREASURER Thomas Campbell leicar7@aol.com
IMMEDIATE PAST PRESIDENT Gary Hough gary.hough@lhsa.org
PRESIDENT EMERITUS
James L. Lager
Rolf Fricke
Bill Rosauer
APPOINTED OFFICERS
Viewfinder Editor Bill Rosauer lhsaeditor@yahoo.com
Associate Viewfinder Editor Ed Schwartzreich ed.schwartzreich@imagere.com
36 the leica q2 by Jonathan Slack
47 further information about photographia zu wetzlar by Ed Schwartzreich
49 synder at wetzlar by Jim Lager
50 leitz propaganda projector (circa 1934/1937) by Jim Lager
51 the hidden fokos by Jim Lager
ELECTED DIRECTORS
Class of 2019 Peter Dooling peter@leicastoremiami.com
Andrew Godlewski harley772@yahoo.com
Bill Royce wfroyce@gmail.com
Class of 2020 Douglas Drumheller dougdrum@comcast.net
David Knoble dmknoble@gmail.com
Dan Tamarkin dan@tamarkin.com
Class of 2021 Wilbur Norman coupdefoudrellc@gmail.com
Keith Sbiral ksbiral@mac.com
David Spielman david@davidspielman.com
CONTRIBUTING EDITORS
S.R. Gilcreast, Jr. (603) 381-8293
James L. Lager jlager100@yahoo.com
S. Willis Wright beoon@aol.com
A LETTER FROM THE PRESIDENT
by ALAN WEINSCHEL
LHSA members, I am pleased to tell you that LHSA is experiencing a significant increase in membership. Our society is growing fast, and we have many new members to welcome. This is in large part due to the program initiated in October with Leica, under which buyers of new Leica system cameras and Leica Qs are offered a free one-year digital membership in LHSA. The Leica product registration page contains an area that the new owner can click on to receive the offer; new camera boxes now contain a flyer describing the offer as well. I am writing this in mid-March and since October 1, we have gained more than 800 new members. Many thanks are due to Dr. Andreas Kaufmann, Leica’s Chairman, and Stefan Daniel, the head of Leica’s camera business who supported us with this initiative.
Increasing our numbers, of course, is a great opportunity for LHSA to finally reach our goal of financial stability. It is our job to see that as many of our new members as possible become dues paying members and we have provided some incentives for them to do that. Many of our new members are from outside the United States. We continue to live up to our name - the International Leica Society, and we are including meetings outside the US (besides our periodic visits to Wetzlar) on our agenda. I hope to see many of you at one of our meetings. You’ll learn more about Leicas and photography, meet old friends and make some new friends, and you can try out Leica gear. Check the website for locations and dates. Like the old commercial, “try it, you’ll like it”.
In addition, having many new members has reminded us to pay attention to what we call “engagement” with our members beyond our meetings. Our members, including new members, include many who are knowledgeable – even “expert” – about photography and Leicas. And all of us have our unique
Leica “story” that can be shared with other members. I recently shared my own story, which began in 1959. Please share your own story with your fellow members. Send it to info@lhsa.org and we will publish as many as we can.
I leave you on a note on the order of “the more things change the more they stay the same:” I was reading a biography of Leonardo da Vinci, who lived from 1452 to 1519, hundreds of years before photography was invented. Leonardo said, “Art is a combination of imagination and observation” and “A great painting arises from light and shade.” Here we are in 2019, five hundred years later, and those statements remain absolutely true, whether you shoot film or digital, regardless of the film you use or the number of megapixels on your sensor or even the sharpness of your Leica lens.
Happy shooting and I hope to see you at a meeting – and I also want to read those Leica stories, so send them in!
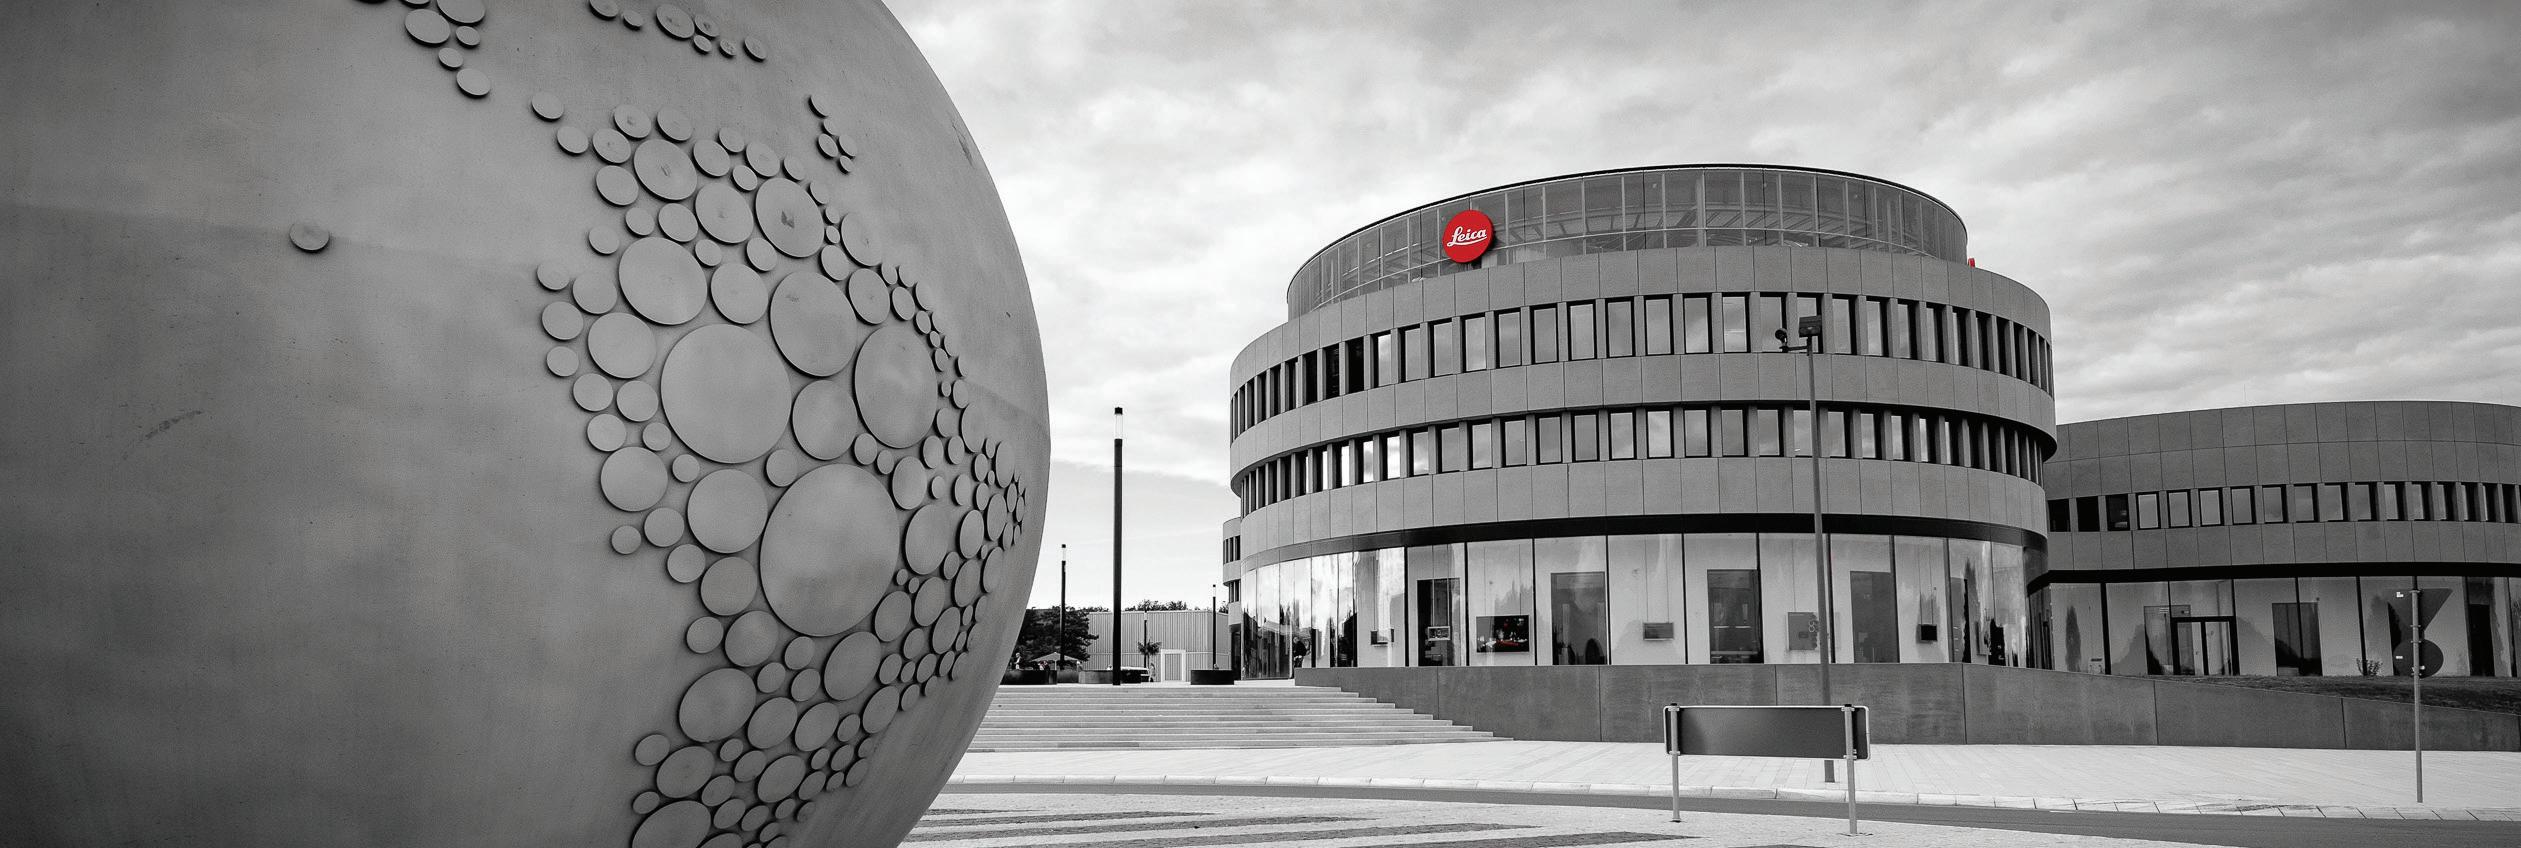
- Alan What’s in a Name (Ours)?
People sometimes ask us about our name and logo.
We are the International Leica Society. We are an international organization of Leica users as well as collectors with members from more than 20 countries.
We were founded fifty years ago as the Leica Historical Society of America (LHSA) and continue to use the LHSA logo as a link to our roots. Just as history plays a large role for Leica cameras, it remains important to us as well.
A LETTER FROM THE EDITOR
by BILL ROSAUER
have just concluded our 50 th anniversary year, and thanks to the efforts of Alan Weinschel working with Leica USA and Leica Germany, the Society is in better shape than it has been in years. Membership is growing, and this is essential for our future. Alan builds upon the efforts of Gary Hough, our immediate past president, and has the backing of our hard working board members. Volume 52 #1 of Viewfinder marks another milestone, as I just realized that this is something like my 74th issue as Viewfinder Editor! I thoroughly enjoy this job, and every issue seems to get better and better. My heartfelt thanks go to my wonderful contributors, my Assistant Editor Ed Schwartzreich and our layout person Kirsten Vignes for making my job easier!
We have another great issue of Viewfinder for you with lots of great articles about new Leica gear, travel, and history. I hope you enjoy this one.
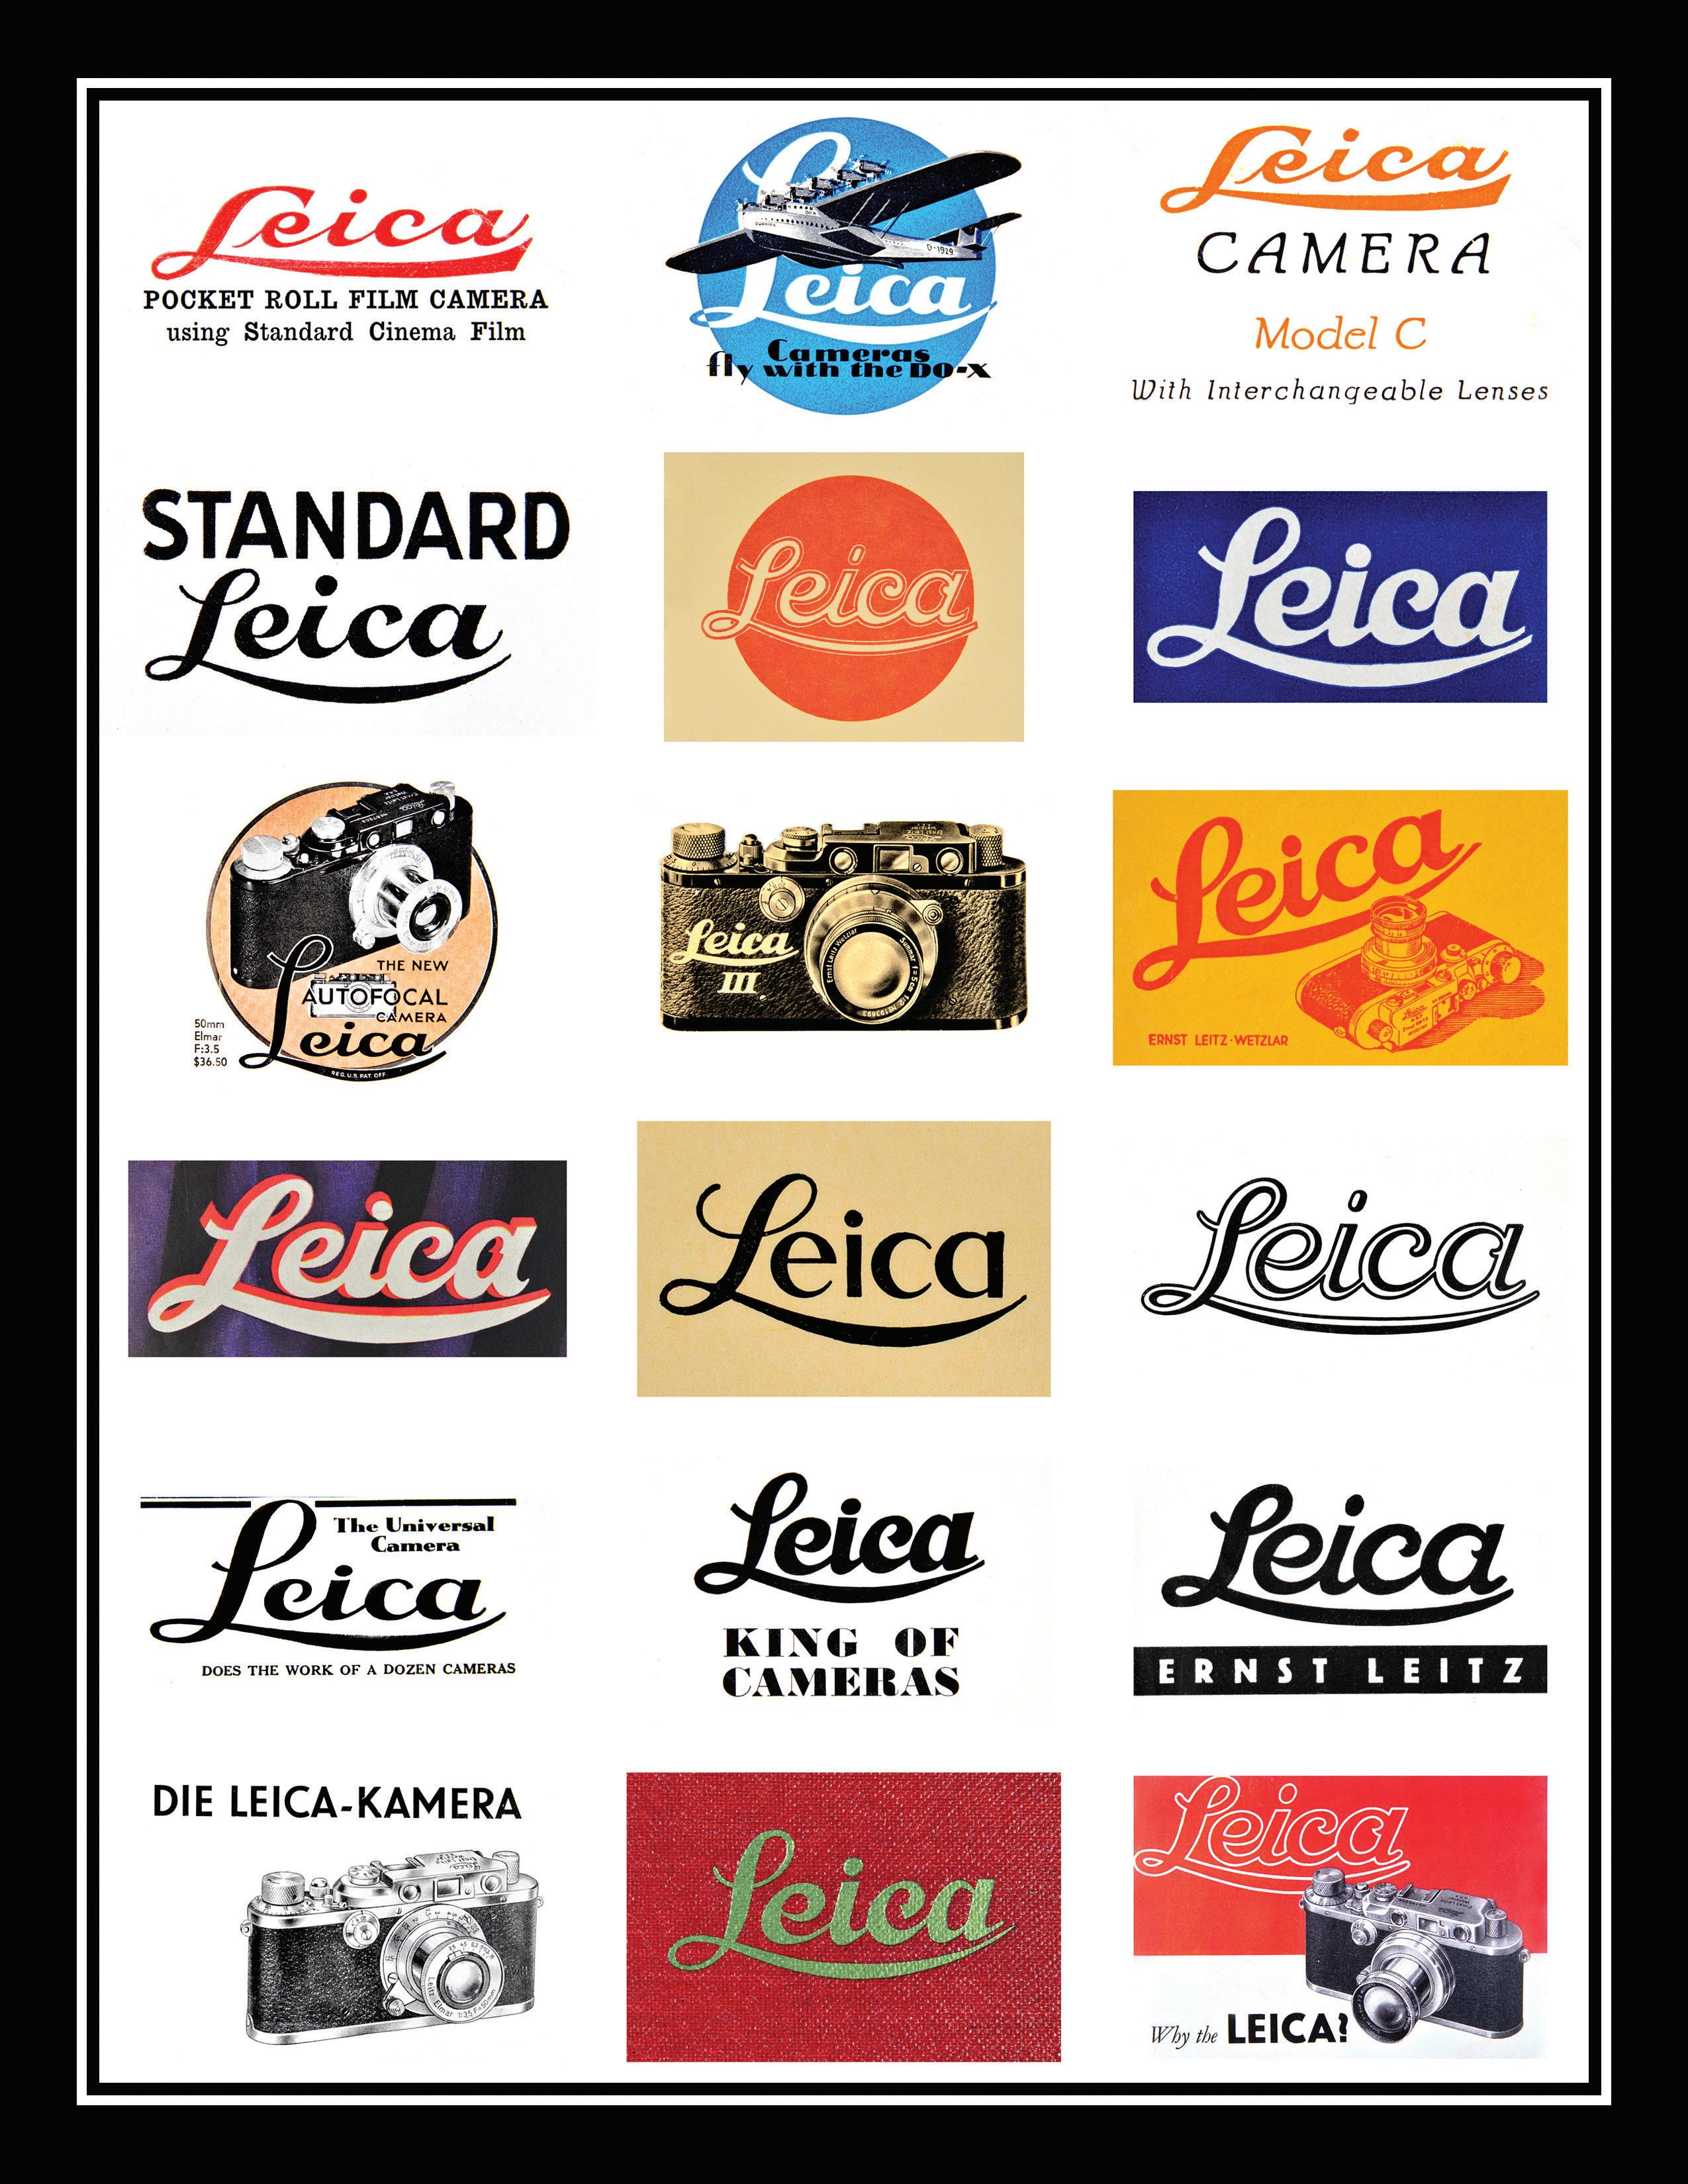
We have several articles by the stalwart Jim Lager. Jim looks at several ultra-rare Leica items. Whoever has heard of, let alone seen, the Leitz Propaganda Projector from the 1930s? Well, now thanks to Jim, you have seen it. Jim also reveals the Voightländer VIRTUS accessory rangefinder, which actually was a Leitz FOKOS in disguise! Jim also sheds some light on who Snyder was and why his name was engraved on various Leica items. Jim also provided the colorful Leica imprints on the back cover of this issue.
Ruth Oratz and Albert Knapp present their beautiful abstract photographs in their article, “Reflections Upon a Lake”. It’s amazing that these images were made at a small lake on their property in Southern Connecticut over a period of season changes. David Knoble reveals the incredible beauty of Southern Iceland and shares some of his experiences with us on photographing this amazing location. Julius Yls takes
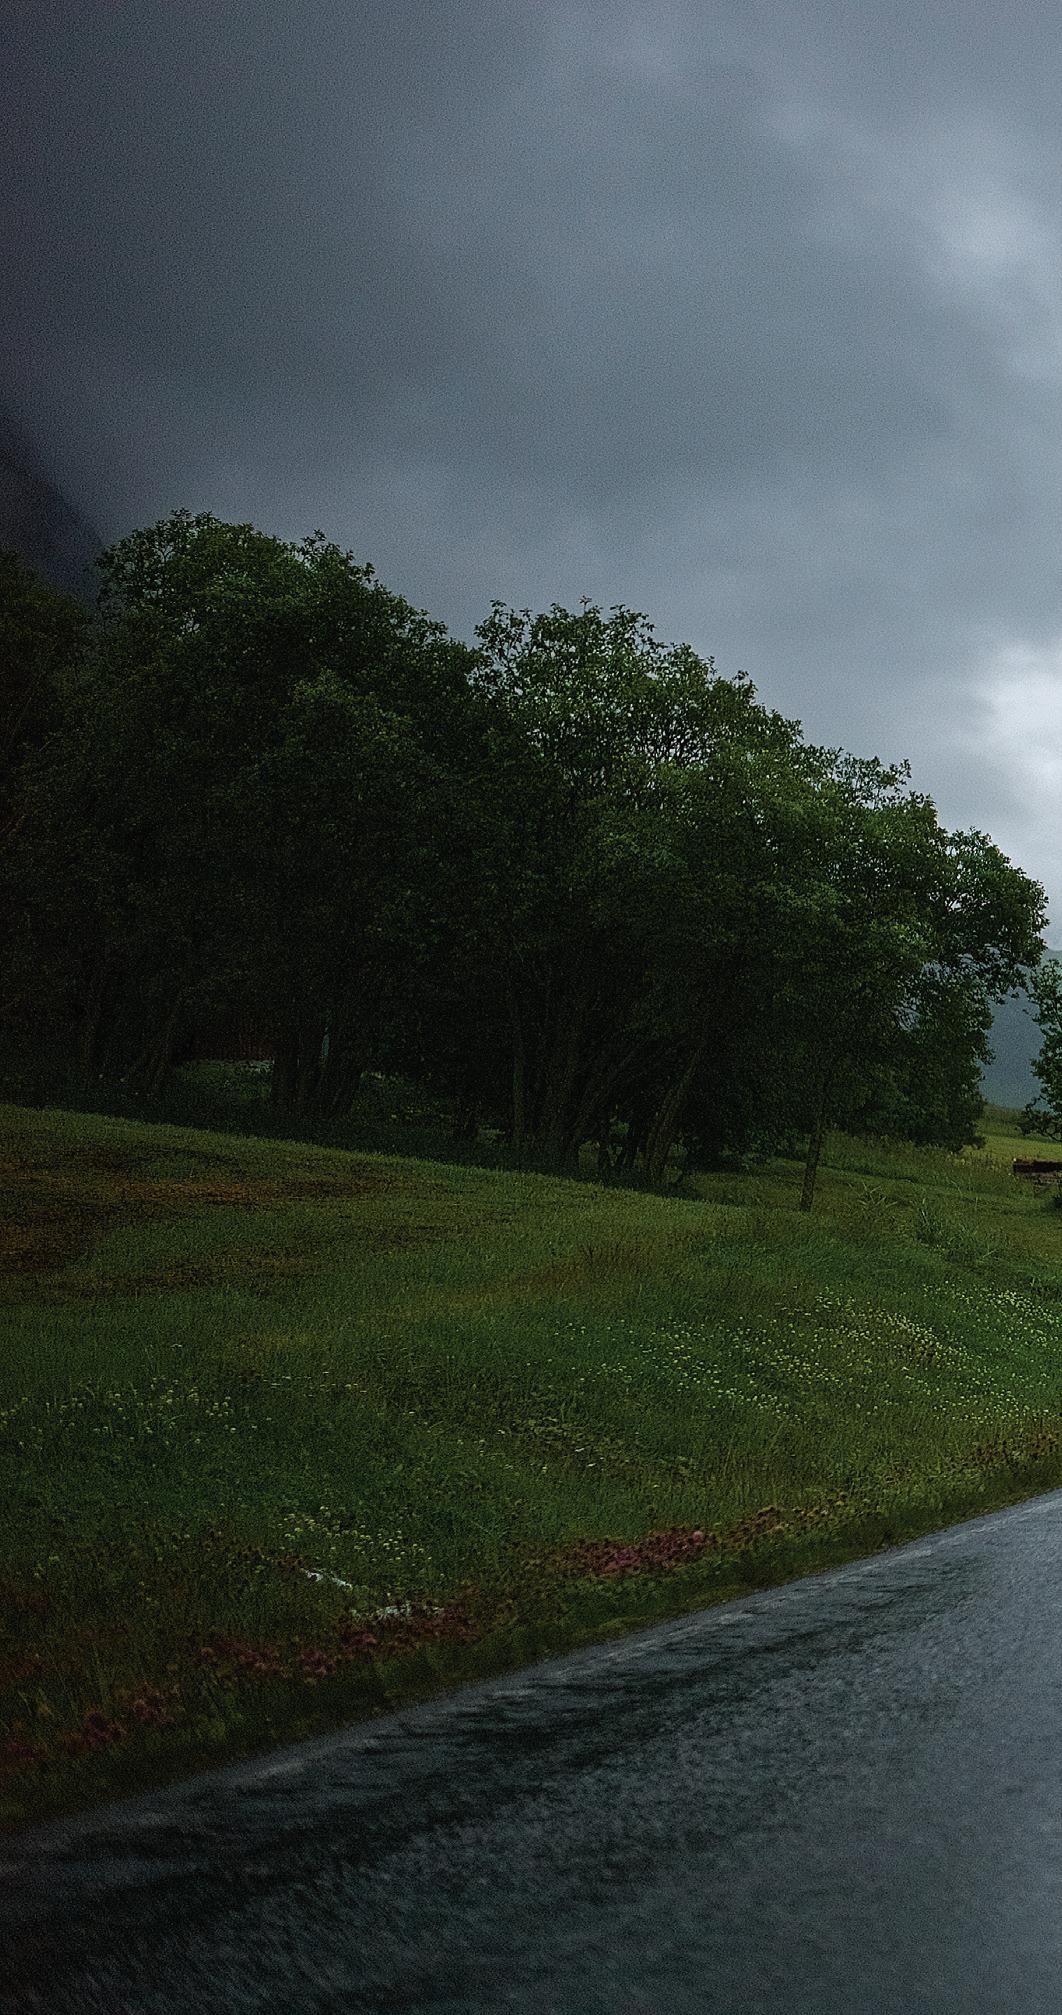
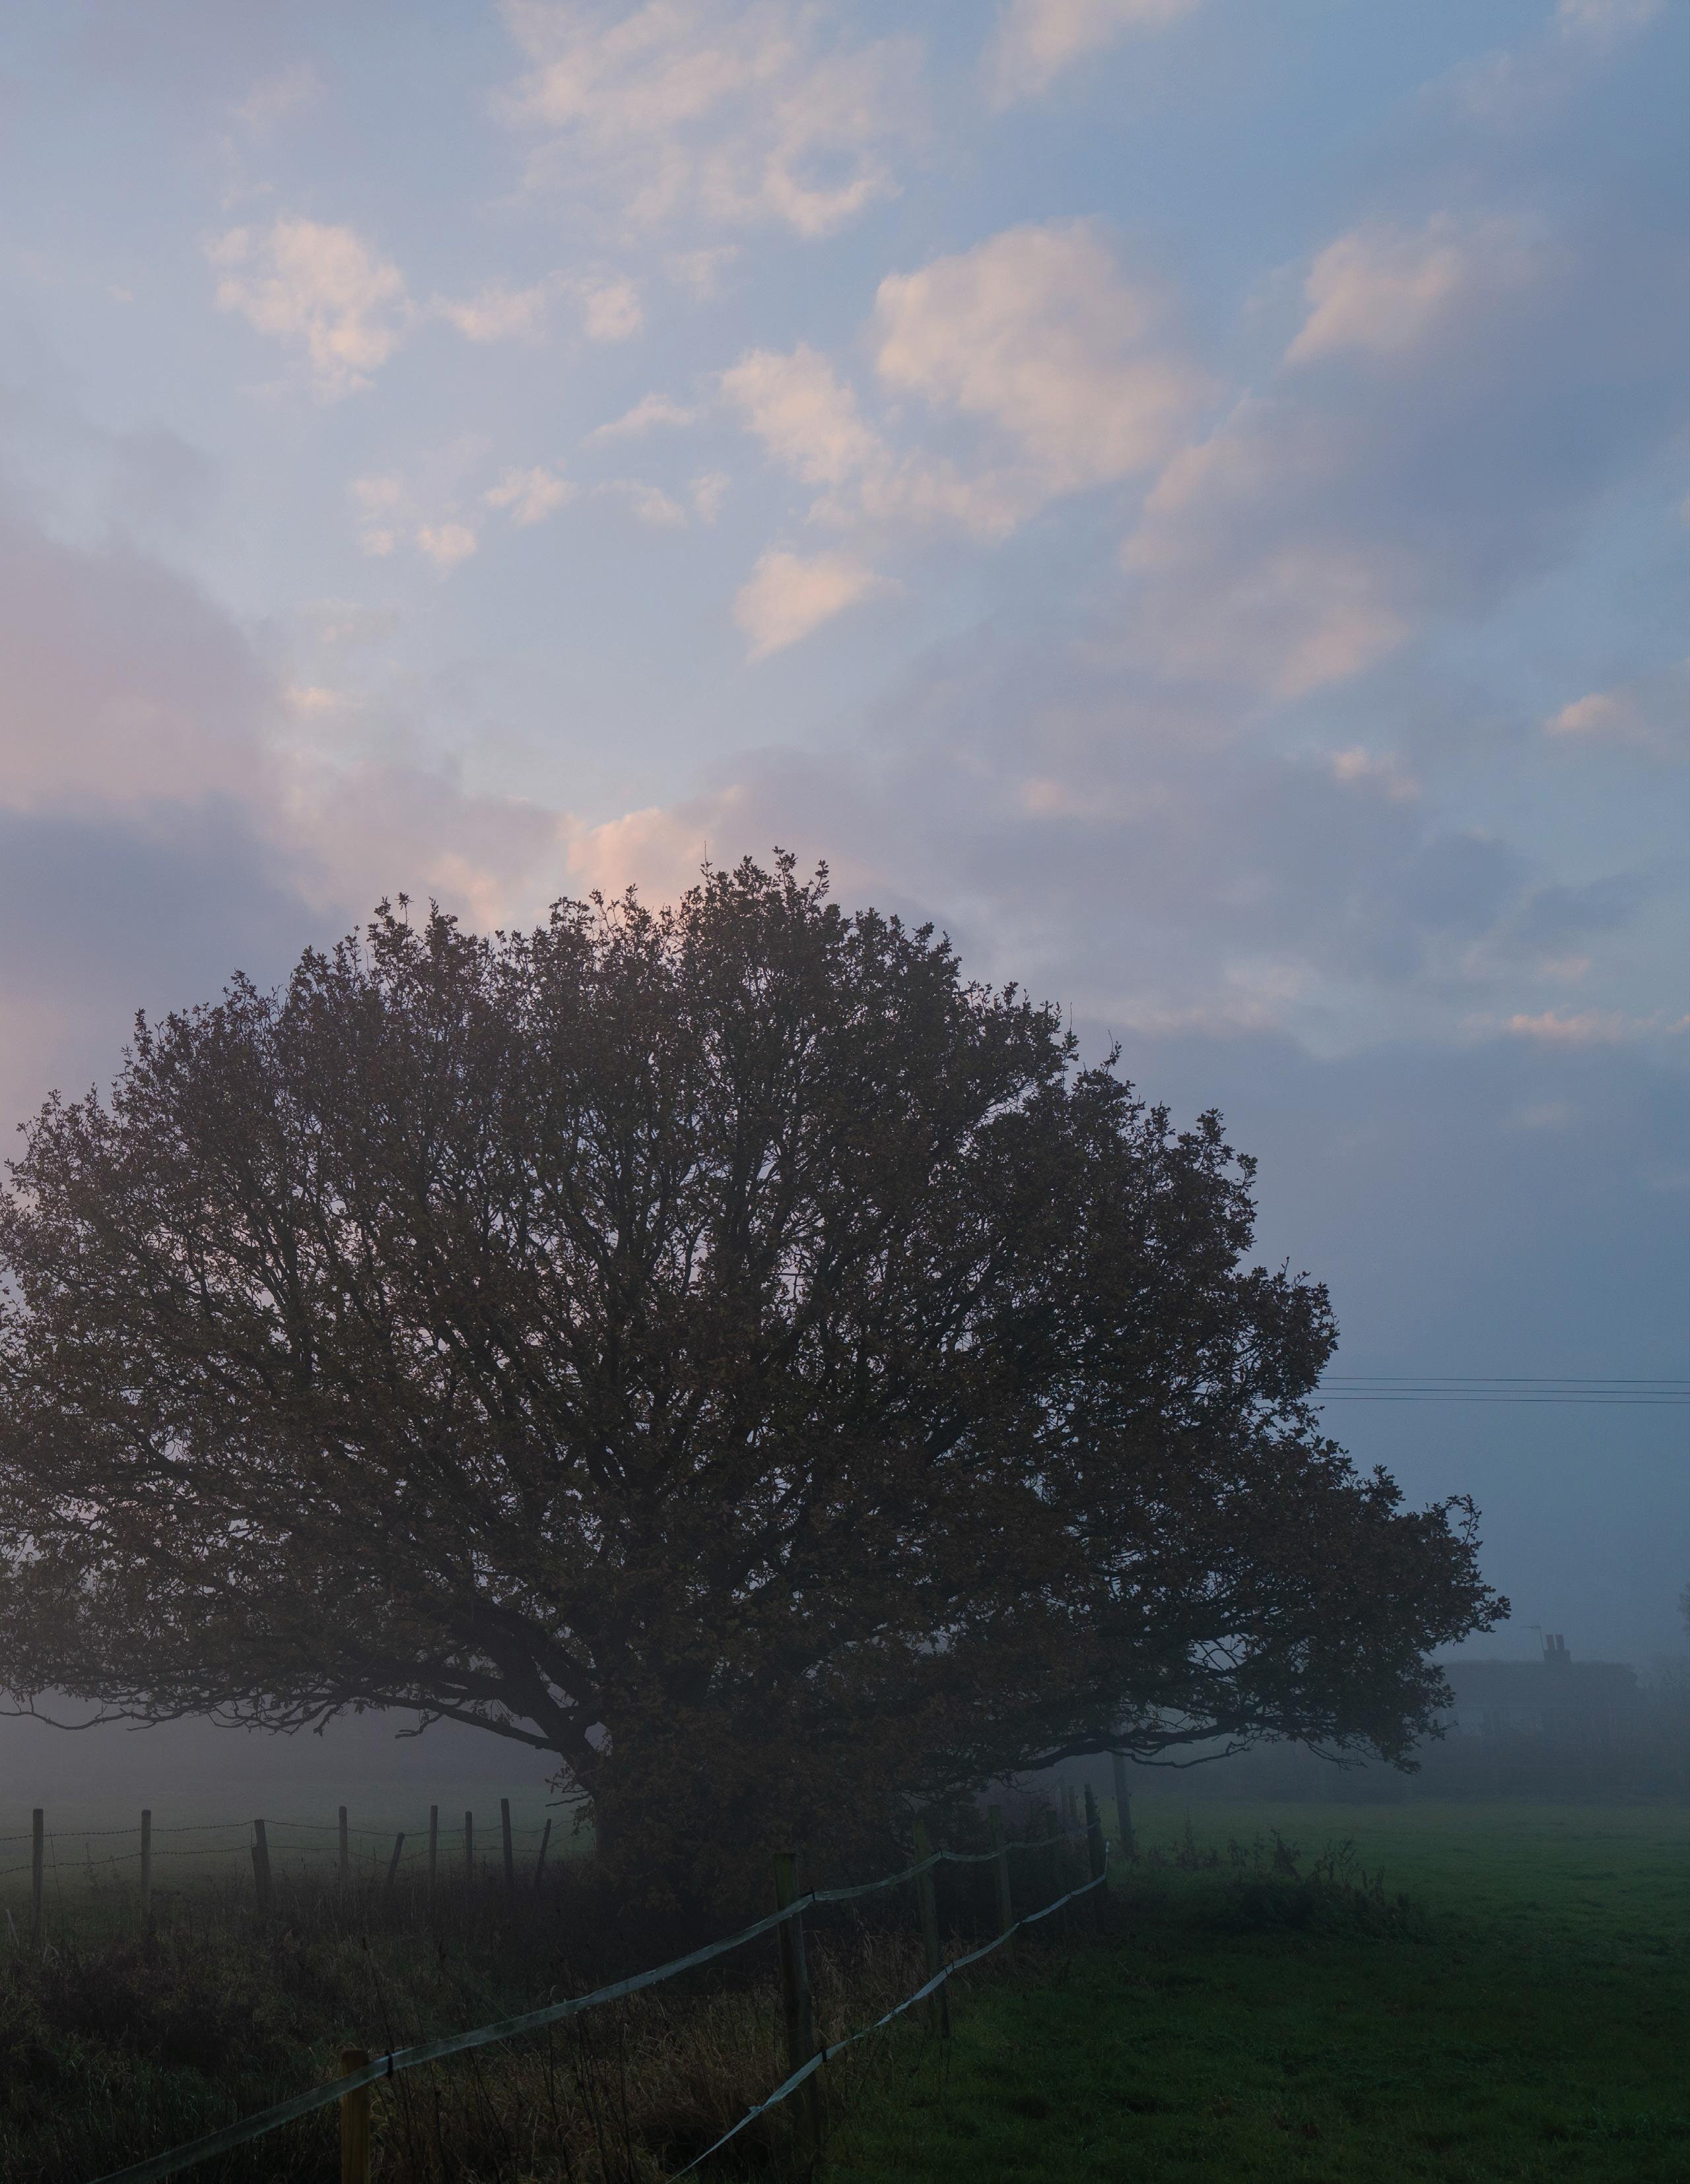
another approach to photographing the landscape of Norway, eschewing the typical wide angle approach, confining himself to the 50mm focal length for all of his images. This disciplined approach brings a whole new way of seeing landscapes.
Dick Gilcreast continues his Tips & Techniques with a look at using a Leica screw-mount camera for school and small theater work. With a normal lens and SBOOI Accessory finder, Dick gets some fantastic results with a tried and true, small pocketable package. Maybe it’s time to dust off some of those shelf queen LTM cameras you have in your collection and see how capable these little gems are.
Of course, Leica has been releasing more new equipment and Jonathan Slack reports on the successor to the phenomenally successful Leica Q with the all-new Q2. This has been big news in the Leica world with long waiting lists forming as I write this. The Q2 looks to be a winner, improving on the original Q in every way, including its new 47 MP sensor. Wow! Jonathan also tests the latest addition to the L-mount lens line, the 35mm APO-Summicron-SL. Needless to say, Jonathan finds it to be an incredible performer, and Leica is going from strength to strength with each new product introduction. It’s a good time to be a Leica user!
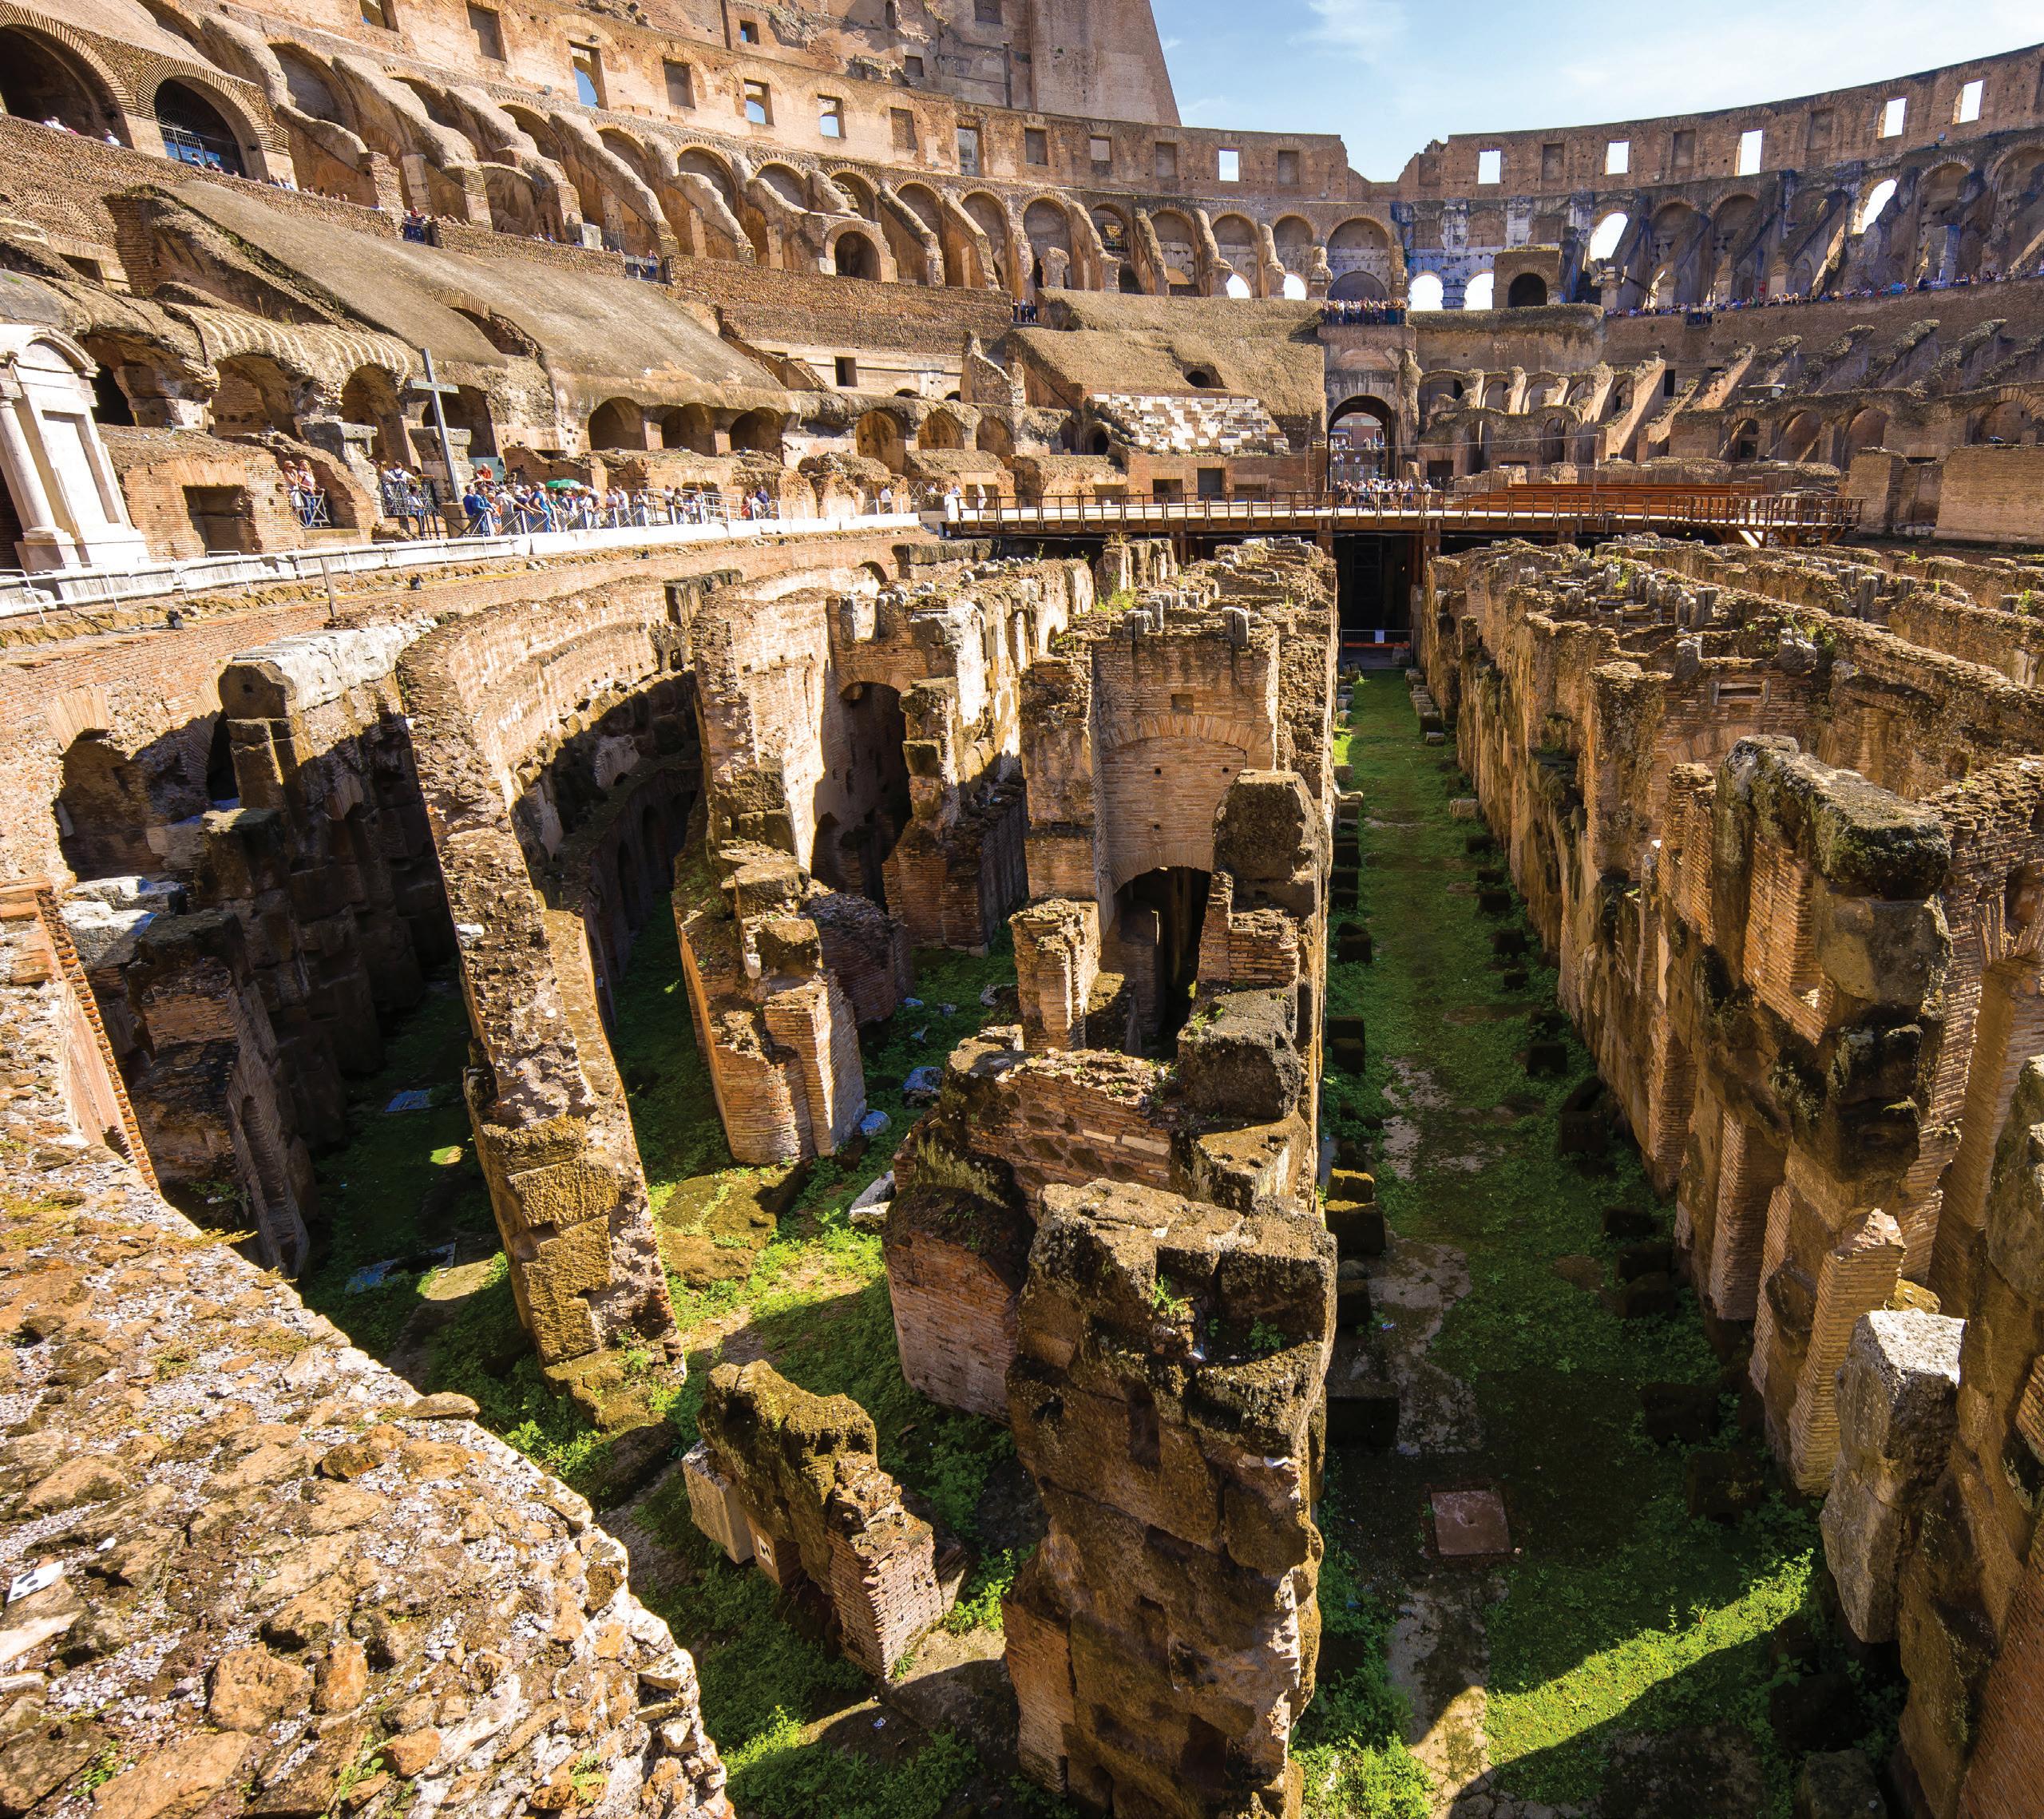
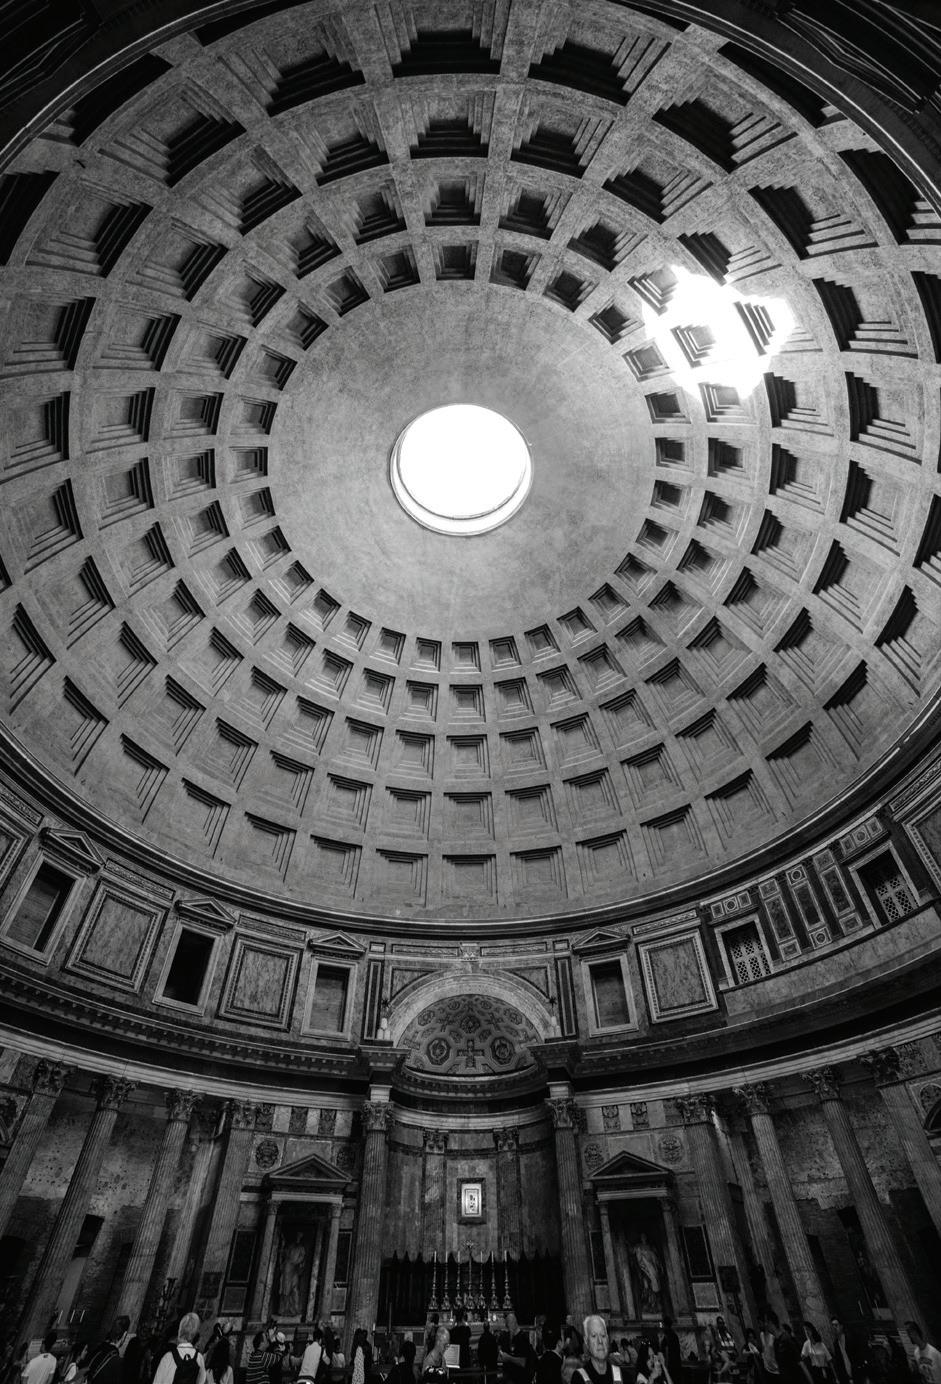
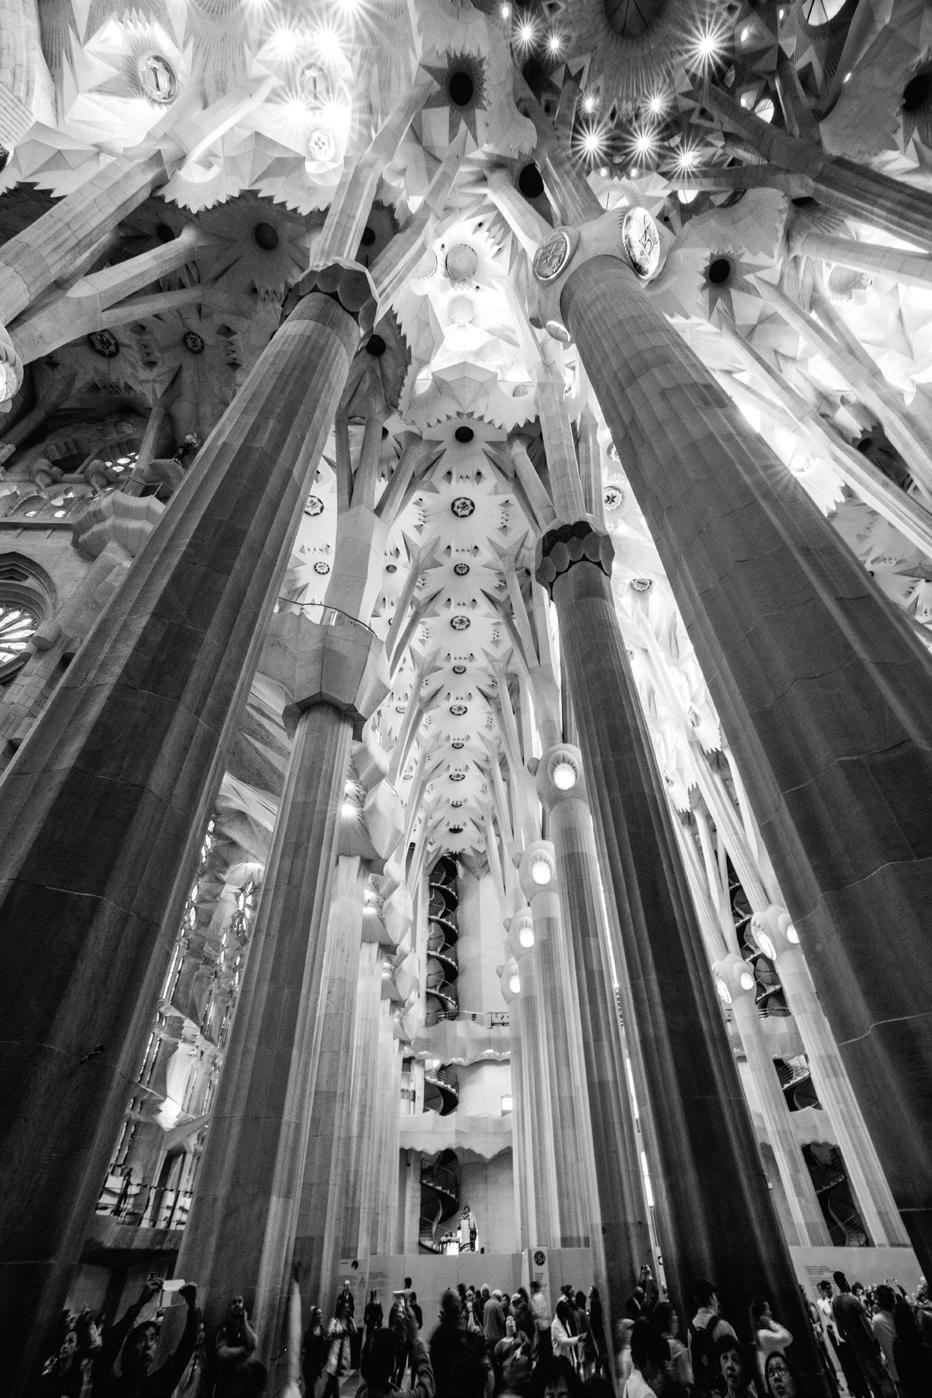
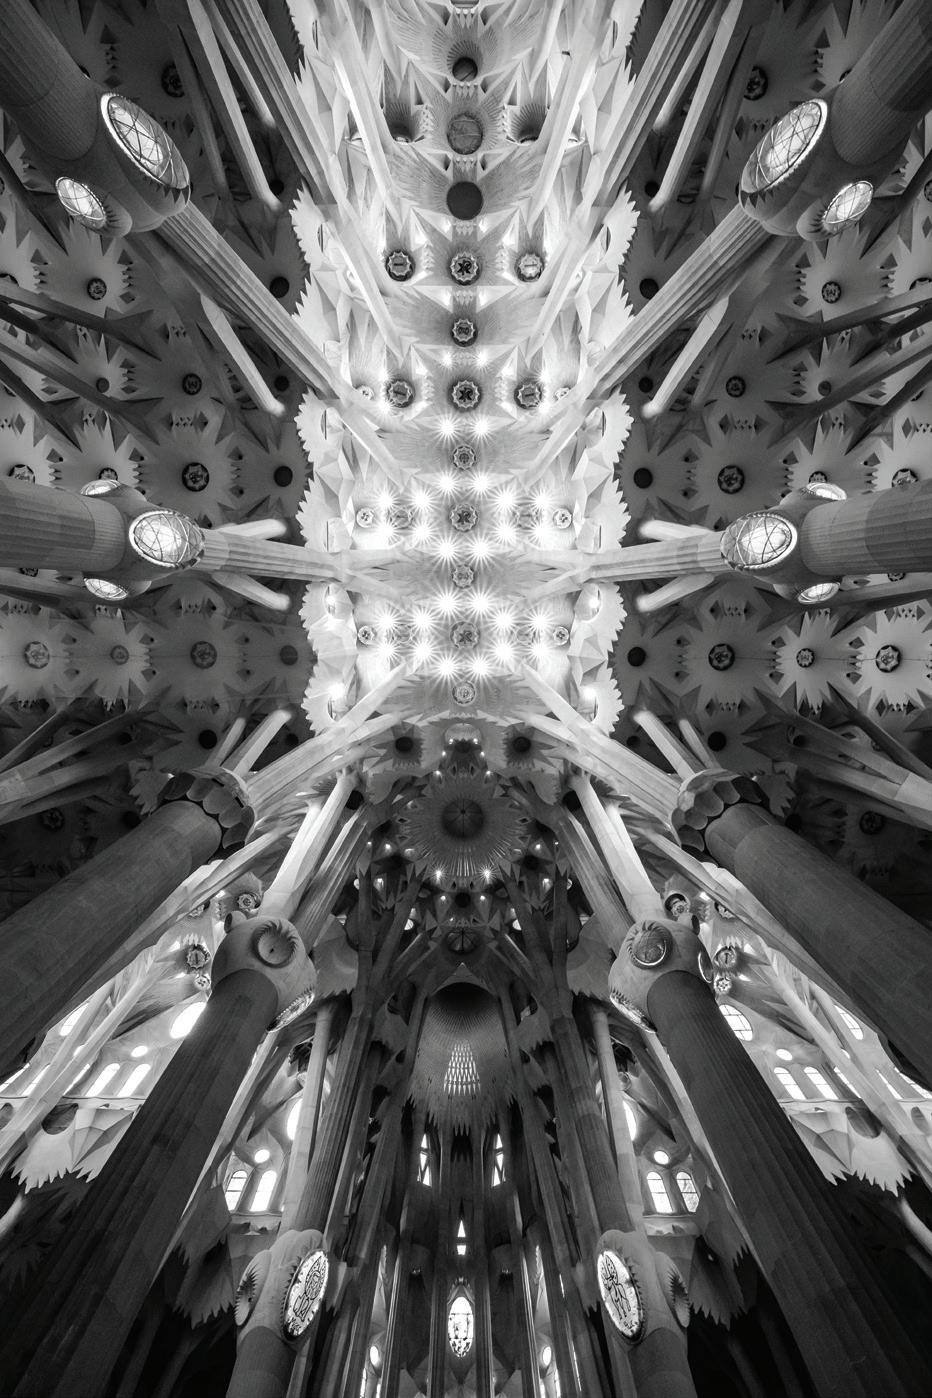
Finally, I report on what I call the “Ideal Travel Lens”, the 16-18-21 Wide Angle Tri-Elmar, popularly known by M users as the WATE. I recently acquired this lens, and it now has a permanent place in my bag. I used it for two European trips in the last year, and got some breathtaking images along the way. The Mothership in Wetzlar, the Vatican, Coliseum and Pantheon in Rome, the Sagrada Familia in Barcelona, the Greek Isles were some of the locations I used the WATE with amazing results. I think you will agree that the WATE is something special. Bis nächste zeit! - Bill
A FILM CAMERA FOR SCHOOL & SMALL THEATER WORK
for
catching the moment you want to preserve during action on stage, the camera features needed most are a large and bright view with visible edges to compose in, continuous viewing so you can see the exact moment you want, quick and accurate focus with a fast lens, and that instant shutter response provided by any Leica rangefinder camera. Also, most important in a theater, a quiet shutter. For school or amateur theater the normal 50mm focal length works well from a seat near the front, showing the characters relatively large. But if the whole stage is suddenly wanted, a two-shot panorama can be joined together by computer after the pictures are scanned to a disk. The 50 is also very usable after the show for close single portraits or groups. No lens changing, no slow speed zoom lens, and no bag full of equipment.
Why film? The advantage of using a wide-latitude film is that a base exposure can be used. The film can accommodate two stops or more of brightness above and below the base exposure, getting all the bright and dim areas on the negatives without having to change aperture or shutter speed for each shot. Just like automatic, but with no delay or error. It is difficult to meter on stage using a TTL camera meter from the audience given such things as bright figures against a dark background, and vice versa. Instead, film gives us the advantage of using a single base exposure midway between the brights and darks. This can be calculated beforehand with closeup metering, and then learned from experience, so the same base exposure can be used for all the scenes that have similar lighting. Exposure corrections for bright figures against a dark background, or the reverse, are now made automatically from the wide latitude negatives by those modern ink-printing machines and their operators at the processing station. If any further corrections are needed, they can be made by re-printing to your satisfaction afterwards.
TIPS & TECHNIQUES
by DICK GILCREAST
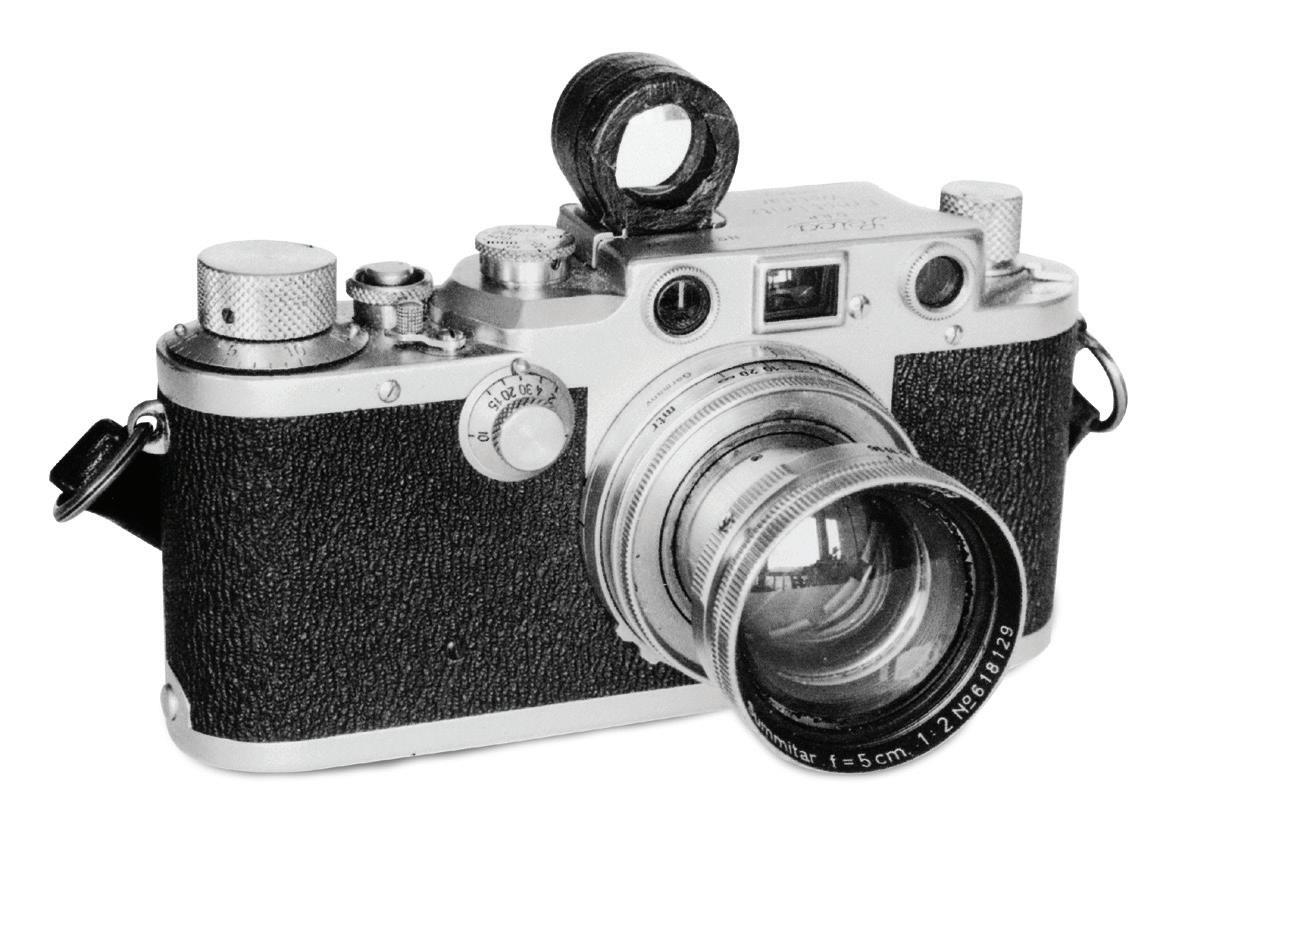
(this page) Leica IIIc No. 504107 with 50mm f/2 Summitar No. 618129 and SBOOI finder. The finder is covered with black masking tape to take away the chrome shine. It is mounted high enough to see over the large front flange of the Summitar, so even when using a hood the full frame view is unobstructed. A dotted parallax correction line in the finder can be used for a vertical portraits between 5 and 3.5 feet.
The Camera For a long time I did this work using an M3 with its large viewfinder image and central rangefinder spot, using ISO 200 and 400 color negative film, and exposing by experience. However, after my eye developed an astigmatism and glasses were needed to use the M3's rangefinder on distant subjects, I could no longer see the entire frame in the finder. After changing to the 0.72x finder of an M6, I could again see the whole 50mm finder frame with my glasses, but then both VF and RF were rather smaller than I wanted. That put me back to trying the old 50mm brightline finder SBOOI which I had used during early days before the M3. I found it worked very well with my glasses, and with the benefit of no distracting RF spot in the middle of the frame. And to get a larger rangefinder image I went back to my old Leica IIIc. It's 1.5x enlarged RF works very well combined with the life size SBOOI, plus it has the advantage of a small range of diopter adjustment. The IIIc, along with the collapsible 50mm f/2 Summitar lens, is easily carried on a strap under a jacket or in a pocket. Considerably slimmer and lighter than the M3 with f/1.4 Summilux in the old days, I lose very little in capability.
At f/2 or 2.8 the focus can be maintained well enough with occasional corrections following movement on stage. The life-size action can be monitored in the viewfinder with no distractions whatsoever. And the continuous vision in the finder shows the exact moment just as I got it. It is a simple, perhaps even Spartan approach, but it keeps me close to the principals of candid photography. I like it far better than a modern SLR camera with its noisy shutter and many automated programs and features that are difficult to keep track of, and only serving to delay the timing and distract attention away from the subject -- not to mention totally losing the view each time the shutter is tripped so you never know exactly what you got!
(above) A stage shot of a grandson made during an elementary school production of "Oliver" at 1/100th at f/2. Normal high school and commercial theater lighting usually allows a base exposure of 1/100th at f/2.8 on ISO 400 film. This smaller school's lighting was a little dimmer, but provided the advantage of an elevated seat in the stands close to the stage.
Leica system has always had a wide angle lens option available, going all the way back to the 3.5cm Elmar and the 2.8cm Hektor lenses in the early days of the interchangeable Barnack Leica cameras. Within a few years of the introduction of the M3, a “Super Wide” lens was introduced, the Schneider produced 21/4 Super Angulon. The Super Angulon was quite radical for its day, with the rear lens elements protruding deeply into the camera, precluding metering with the later metered M cameras. Introduced at Photokina in 1958, four years after the M3 itself, the lens was a sensation for the Leica photographer. My dad purchased a 21/4 Super Angulon at this time, and I have many early memories of this “special lens” with its separate optical viewfinder. The 21 was a tough lens to use properly, and it was several years after I started using the M3 before I achieved the skill level required to use it. In the late 60’s, we acquired a 21/4 Super Angulon-R to use with our Leicaflex SLs. I used this lens for years, as I was hooked on the SLR experience, and the Leicaflex made this lens easier to use as far as framing and composition.
Where the WATE really shines is in enabling you to take the sweeping landscape pictures you envision in your mind’s eye,
Elmarit, and a Voigtlander 15/4.5 Super-Wide Heliar. Last year, I had the chance to acquire the fabled 16-18-21/4 Wide Angle Tri-Elmar (WATE) outfit in virtually unused condition for a very reasonable price. Some major overseas trips were coming up, and I thought the WATE would be the ideal travel companion and could take the place of the 21 and 18, and provide a better solution than the 15 Heliar which had too many issues to use on the M9 or M10 on a regular basis. It also gave me a better solution than having to carry multiple specialized optical finders for the 18 and 21. My WATE came with the Frankenfinder (officially known as the Universal Wide Angle Viewfinder), which if you are using an M camera previous to the M10 or M240, is a necessity. Given that the WATE was introduced back in 2006 with the M8, you need a solution like the Frankenfinder to accurately frame and compose with the WATE. It is a beautiful and versatile piece of kit with frame lines for focal lengths 16-28 and a builtin bubble level, but with the M10 and the option of Live View with the rear screen or the Visoflex 020, it is bit redundant and takes up space in your bag which is better used for other purposes.
In my late teens, I returned to my Leica roots with the purchase of a Black Chrome M4 camera with my earnings from my part-time job at the camera store. My usual kit for that camera was a 50 Summilux and 35 Summilux, and occasionally a 90mm Collapsible Elmar. I was still somewhat intimidated by the Super Angulon M, preferring to use the R version for wide angle. Some years went by and I purchased the first version of the Mandler designed 21/2.8 Elmarit to use with my M6, about the same time as I began travelling to Germany every other year to attend Photokina. The improved optical performance over the Super Angulon was much appreciated as well as the ability to meter with the M6, as by this time the M6 kit was my go-to travel setup. The R was used for more specialized work; Macro, Sports and Event Photography with its better flash setup than the M. It was about this time that our dear departed friend Tom A. became my regular travel companion to Photokina and LHSA meetings all across the country. Those who knew Tom, knew he was a wide angle junkie. Tom had shot every wide angle made, and even had a custom version of the Super Angulon 21/3.4 made with goggles so he didn’t have to use a separate finder in the shoe! Tom’s ultimate and last 21 was the then new 21/3.4 Super Elmar-M ASPH, which he claimed was the best 21 ever made. Being in Tom’s company only reinforced my own use of wide and super wide angle lenses with the Leica.
Along the way, I had also acquired a Zeiss 18/4 Distagon and the 21/2.8 Elmarit ASPH which replaced my older 21/2.8
The WATE is only possible with the advanced optical design and mechanical precision practiced by Leica AG in the era of Peter Karbe as head of optical design. In comparison to the original Tri-Elmar 28-35-50 lens, the WATE is not required to actuate the framelines in the viewfinder, eliminating the incredible mechanical complexity of that earlier lens. It is a true zoom lens with a silky-smooth linear movement, incorporating defined stops for the three focal lengths. The lens can also be set at any in-between focal length from 16 to 21, unlike the earlier Tri-Elmar which could only be used at the marked focal lengths. With a constant aperture of f/4, the WATE has ten elements in six groups, two aspherically ground elements, and internal focusing with two variable groups. If you look closely while moving the focal length ring between the marked focal lengths, you can see the front and rear elements moving in unison with each other. At the 21mm setting, the front and rear elements retract into the lens body, moving out in two further positions for the 18 and 16 focal lengths. Amazing! The lens is very compact for a zoom lens, weighing 335 grams, with a filter size E67 with a special filter holder attachment. The lens dimensions are 54mm x 62mm with a close focusing distance of .5m, which exceeds the .7m limit of the Leica M rangefinder. The lens has clearly marked distance scales in feet and meters and aperture scales for each focal length. A rectangular, threaded lens hood is also provided with cap, and the threads are cut to stop the hood in the proper position when it is fully screwed in. According to Erwin Puts, the WATE has medium to high overall contrast
WATE
(WIDE ANGLE TRI-ELMAR)
By BILL ROSAUER
The Ideal Travel Lens
Santorini, Greece
Colosseum, Rome
wide open with outstandingly good definition over 2/3 of the image height. Stopping down improves the edges and corners to a high level. The lens is very flare resistant even shooting with the sun in the image area, has low distortion and well-controlled curvature of field. Vignetting wide open is on a par with the Noctilux, and improves with stopping down.
Despite being an “old hand” with super wide lenses on the Leica, the WATE does take a little getting used to out in the field. As noted previously, despite having the Frankenfinder available, I found I never took it out of the bag while using the WATE with the M10. The Viso 020 was what I initially used for accurate framing and composing. My first trip with the WATE was to Wetzlar last June, where I had time and the luxury of being in familiar territory for my first serious use of the lens. My pictures came out just fine and were of excellent quality which I used in my tour brochure. The next major trip was our Mediterranean Cruise last October, which took us to ten cities in 2 ½ weeks. Excursions in these cities were more like a marathon in nature, so I soon came to realize how to optimize my camera setups on the run. When covering a lot of locations in one day, jumping in and out of vans and busses, you learn to work fast and efficient. You don’t quite know what to anticipate, so the first impulse is to carry more gear than you need to allow you to cover any situation. Wrong. You learn very quickly that you need to pare down what you are carrying. You need to travel light and learn to be efficient. Ultimately, I ended up carrying the M10, the WATE, a 28 or 24mm lens, and a 50. I left the 35mm and 75mm lenses, along with the Frankenfinder and travel tripod back in the cabin safe. The only other gear I had in my bag were spare batteries and cards, along with my Sony NEX 6 and kit lens that I used as my “decoy camera”. A decoy camera is the one you have on your shoulder, keeping your Leica in your bag until needed when you want to be discreet. The decoy camera comes in handy when travelling in questionable areas, such as Barcelona which Rick Steves calls the pick pocket capital of Europe.
The WATE is a game changer, and is almost indispensable for my kind of travel photography. It provides very high optical performance in a compact, beautifully made package.
Where the WATE really shines is in enabling you to take the sweeping landscape pictures you envision in your mind’s eye, and interior shots where a wide angle and especially a super wide angle lens comes in very handy. As noted previously, I left the Frankenfinder behind and used the Viso 020 to compose and frame my images. I soon began to use the Live View on the rear screen itself, leaving the Viso finder in the bag, becoming comfortable in working this way on the fly. With Live View, you can check your focus with the focus magnification tool and also check your verticals and horizon lines with the grid line tool option selected in the control panel. The only other useful aid to composition would have been an electronic spirit level, not available in the M10. For this feature, you need to use the M10-P or the M240 series cameras.
In practice, I was very pleased with the results I obtained with the M10 and WATE combination. Best practice in use was to preset the camera for hyper focal distance, choose aperture ahead of time, use auto ISO or preset your ISO and shoot in aperture
priority. I obtained a very high rate of keepers in this way, and only had to choose which composition I liked best. With the excellent high ISO performance of the M10, I had few worries about the technical quality of my images. As I was travelling light and working quickly, there was no opportunity to use a tripod or even a table top tripod. Having three focal lengths to choose from, I would take a quick look at the Live View display, choose my focal length, reframe the image and shoot. I would then quickly check my focus by zooming the image on review, and move on to the next shot. I would also recommend shooting a little loose with your image framing, as you can always tweak your framing, alignment and cropping in post processing for the final composition of your image. Vignetting is not a problem in use, and can easily be dealt with in post processing with digital images. The WATE is free from annoying digital artifacts, such as “Italian Flag” Phenomenon which plagues other super wide lenses on the digital M, such as the CV 15 Super-Wide Heliar, the Zeiss ZM 21/2.8 and 4.5 lenses, as well as both versions of the Super Angulon.
The WATE is a game changer, and is almost indispensable for my kind of travel photography. It provides very high optical performance in a compact, beautifully made package. All controls on the lens are very smooth and the lens balances well on the M. For many years the 21 was the widest focal length available to Leica photographers for the M. With the WATE, you now have 18mm and the almost unthinkable 16mm available on a ready basis. Even though there is only 2mm in focal length separating the widest focal lengths, in practical photography there is a big change in angle of view and perspective between them. The WATE has earned a permanent place in my bag, packing big performance in a small package. After extended use of the WATE, I have sold both my Zeiss ZM 18 Distagon and 21/2.8 Elmarit ASPH. Have a look at my images accompanying this article, and I think you will agree. Along with a 28, 50 and short tele, you now have a very compact four lens kit which can cover almost any situation you would encounter while travelling.
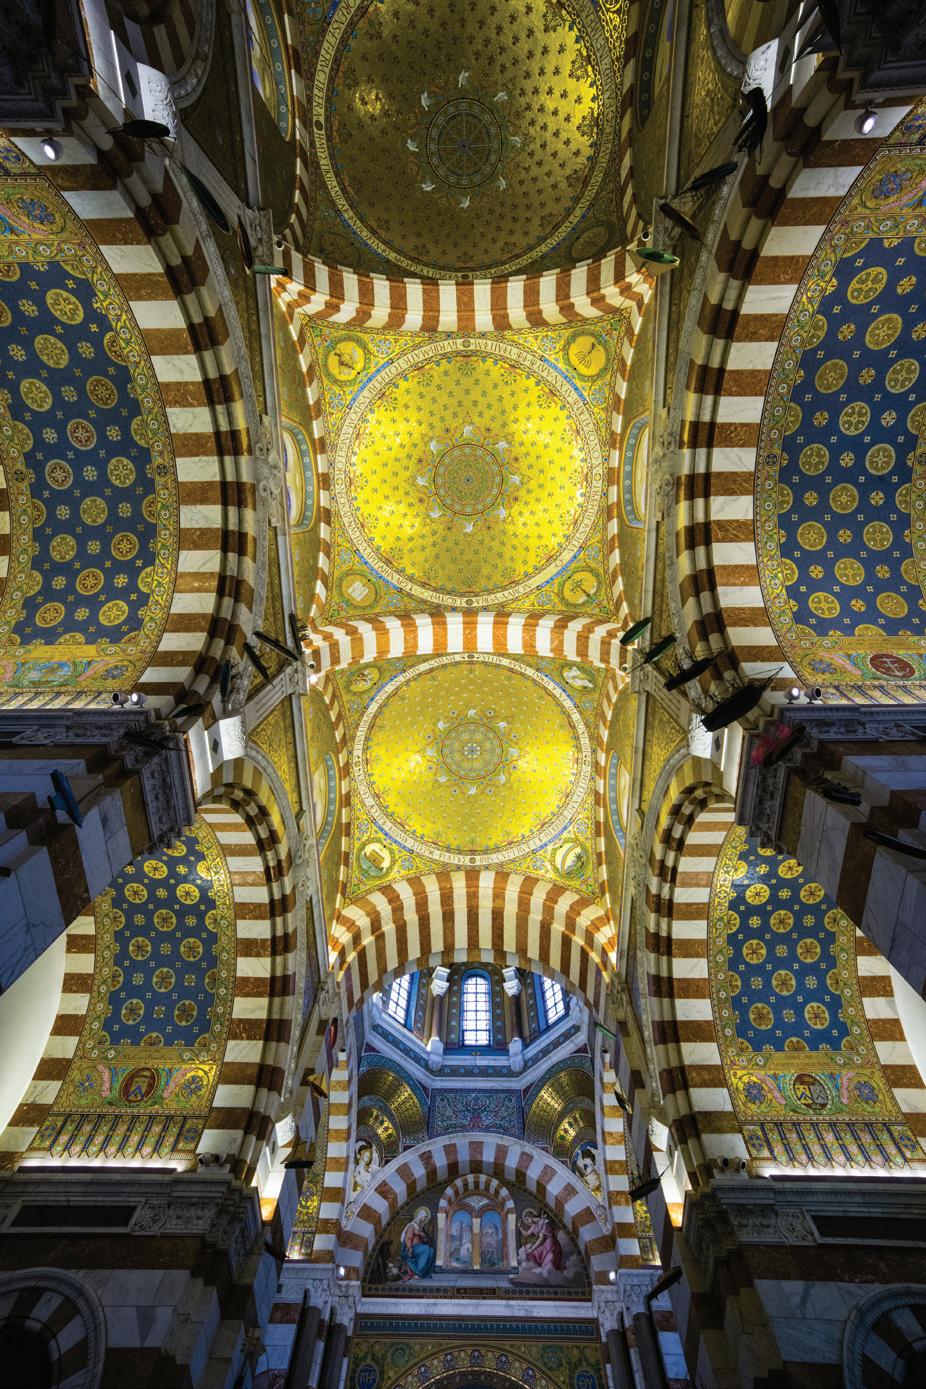
Basilica Notre-Dame de la Garde, Marseille, France
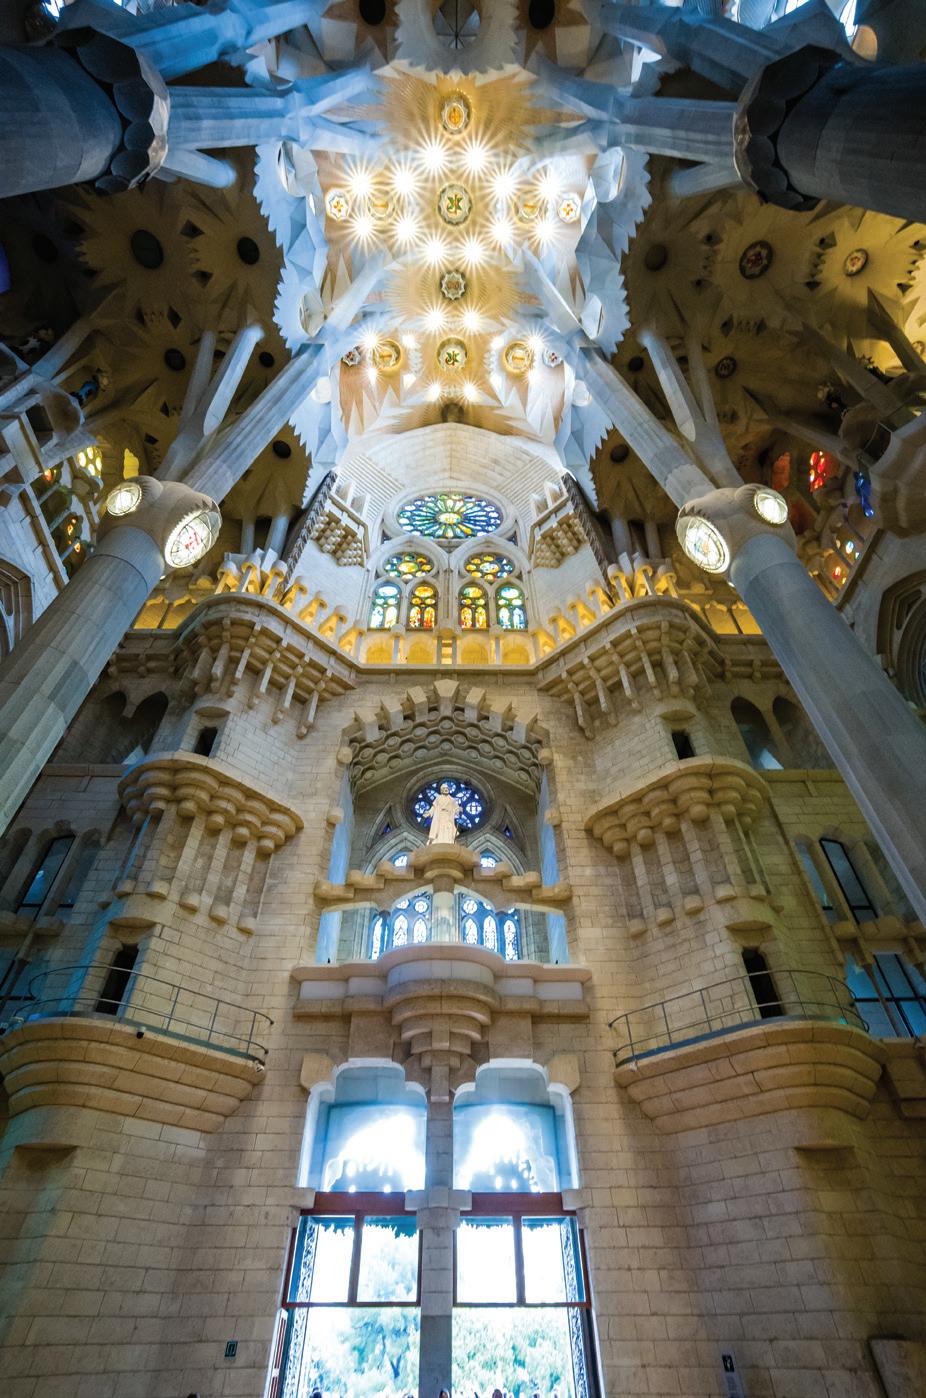
Sagrada Familia, Barcelona, Spain
Pantheon, Rome. Converted to B&W, Processed in SilverFX2.
St. Peter's, Rome, Bernini's Papal Altar. Converted to B&W, Processed in SilverFX2.
Sagrada Familia, Barcelona, Spain. Converted to B&W, Processed in SilverFX2.
Sagrada Familia, Barcelona, Spain. Converted to B&W, Processed in SilverFX2.
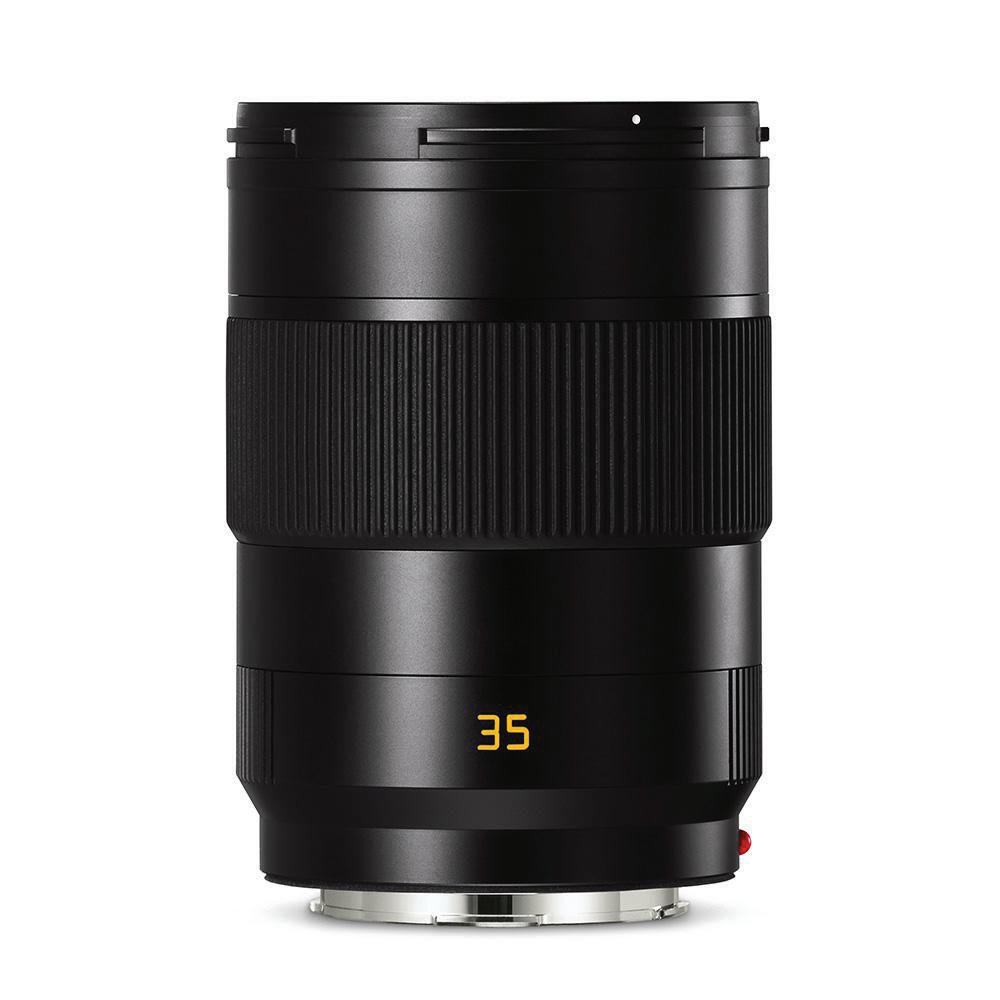
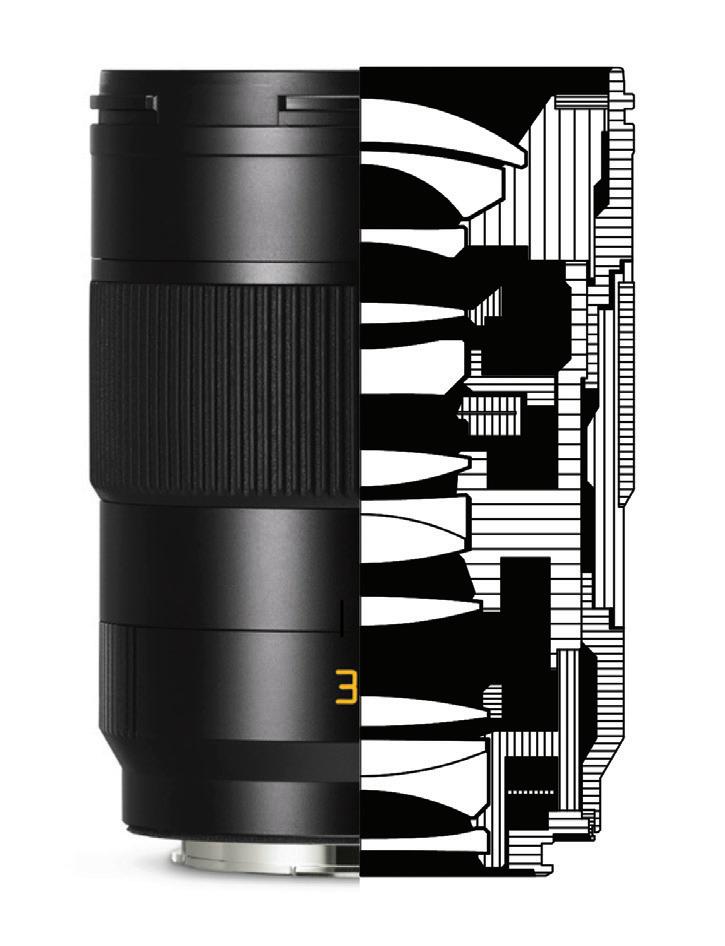
The f /2 Asph.
35mm apo-summicron-sl & The Other Apo-Summicron-SL Lenses
by JONATHAN SLACK
first prototype of the 75mm APO-Summicron-SL arrived in January 2017. I had several copies of that lens over the next year whilst Leica refined the autofocus. I have to say that the image quality never really needed much work.
The lens was finally announced in January 2018. I tried to be sensible and resist, but after a couple of months (and some anguish as to whether to buy the 75 or the 90mm), I cracked and at the end of March I bought my own copy of the 75mm.
Since then I’ve used it for weddings, events, food, nature, street, and especially for portrait work. It’s never failed me and the results have always been splendid.
In my opinion it was technically the best lens I had ever tested (perhaps now exceeded by this 35mm APO SL?). More than that, it still manages to have real character.
I haven’t written about the 75mm as it somehow never seemed to be the right moment. My job here is to write about the newly announced 35mm APO-Summicron-SL, but everything I say here is also relevant to the previous 75 and 90mm, and I’m sure will also be relevant to the upcoming 50mm, as well as the 21, 24 and 28mm wide angles.
Apochromatic Lenses An Apochromat, or apochromatic lens (APO) is a photographic or other lens that has better correction for chromatic and spherical aberration.
Leica has been making APO lenses for some time. As far as I can gather, the first of these were the apochromatic Elcan-R series designed by Walter Mandler in 1965 for the US Military. Only 25 of each focal length were produced. The first publicly available APO lens was the 180mm APO-Telyt-R f/3.4 from 1975, which was in production until 1998.
There were various telephoto lenses in the 70s and 80s, culminating in the 180mm APO-Summicron-R f/2 in 1994 (with which Peter Karbe was involved) and the 90mm APOSummicron-M f/2 in 1998.
Peter Karbe wanted to apply the technology to normal focal length lenses, and the first two of these were the 50mm Summilux-M ASPH (which actually has APO characteristics) in 2004 and the 75MM APO-Summicron-M in 2005.
A 16-year project to make a perfect 50mm lens came to fruition in 2012 when the 50mm APO-Summicron-M was produced. This lens was a Summicron (f/2) rather than a Summilux (f/1.4) because it’s easier to make slower lenses to a higher quality - and of course a smaller size as well.
Large Fast Lenses Since the maturity of digital imaging, and especially with the very high resolution modern sensors, lens sizes seem to have increased exponentially (One only has to think of the Zeiss Otus and the Leica 75mm Noctilux-M) .
If you then also need autofocus, the motors needed for autofocus get bigger as the lens elements get bigger. The Leica 50mm Summilux-SL f/1.4 being a case in point.
So, the concept of a range of incredibly high quality Summicron f/2 lenses for the L-mount was born. The 75mm and the 90mm were released early in 2018.
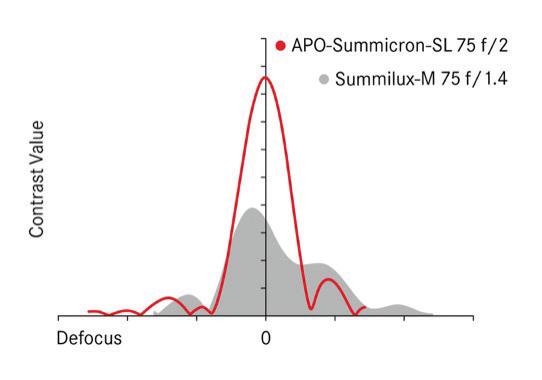
APO Lenses, Contrast & Depth of Field The almost zero aberrations (especially chromatic aberrations) in the new Summicron-SL lenses means a big increase in contrast where the image is in focus. As you move away from the point of perfect focus the contrast drops sharply. This means that the transition between ‘sharp’ and ‘bokeh’ is defined more quickly and results in smoother out of focus areas than in conventional lenses.
I have a diagram drawn for me by Peter Karbe in my notebook, but below is the graph from the Leica website comparing the 75mm APO-Summicron-SL with the 75mm Summilux-M. The result of this is not just that the 75mm APO-Summicron-SL is sharper (it certainly is) , but that it has apparently the same DOF as the 75mm Summilux-M.
So we have a series of modestly sized autofocus lenses for the L-mount which perform better than their aspherical competitors and without any depth of field disadvantage. Of course, they gather less light, but that isn’t often a problem with modern sensors.
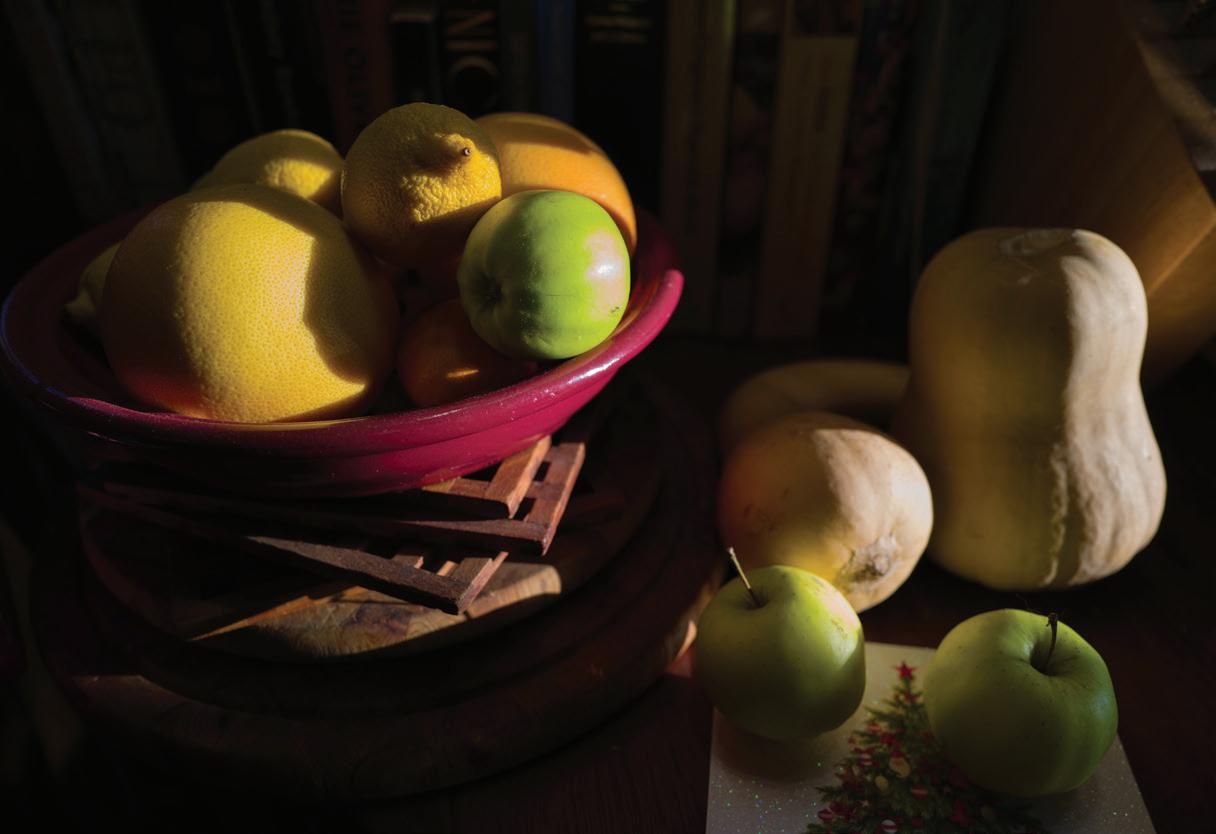
this page:
(top) SL, 1/60 sec at f/2.0, ISO 320 (middle) SL, 1/60 sec at f/2.8, ISO 320 (bottom) SL, 1/60 sec at f/2.2, ISO 50
opposite page:
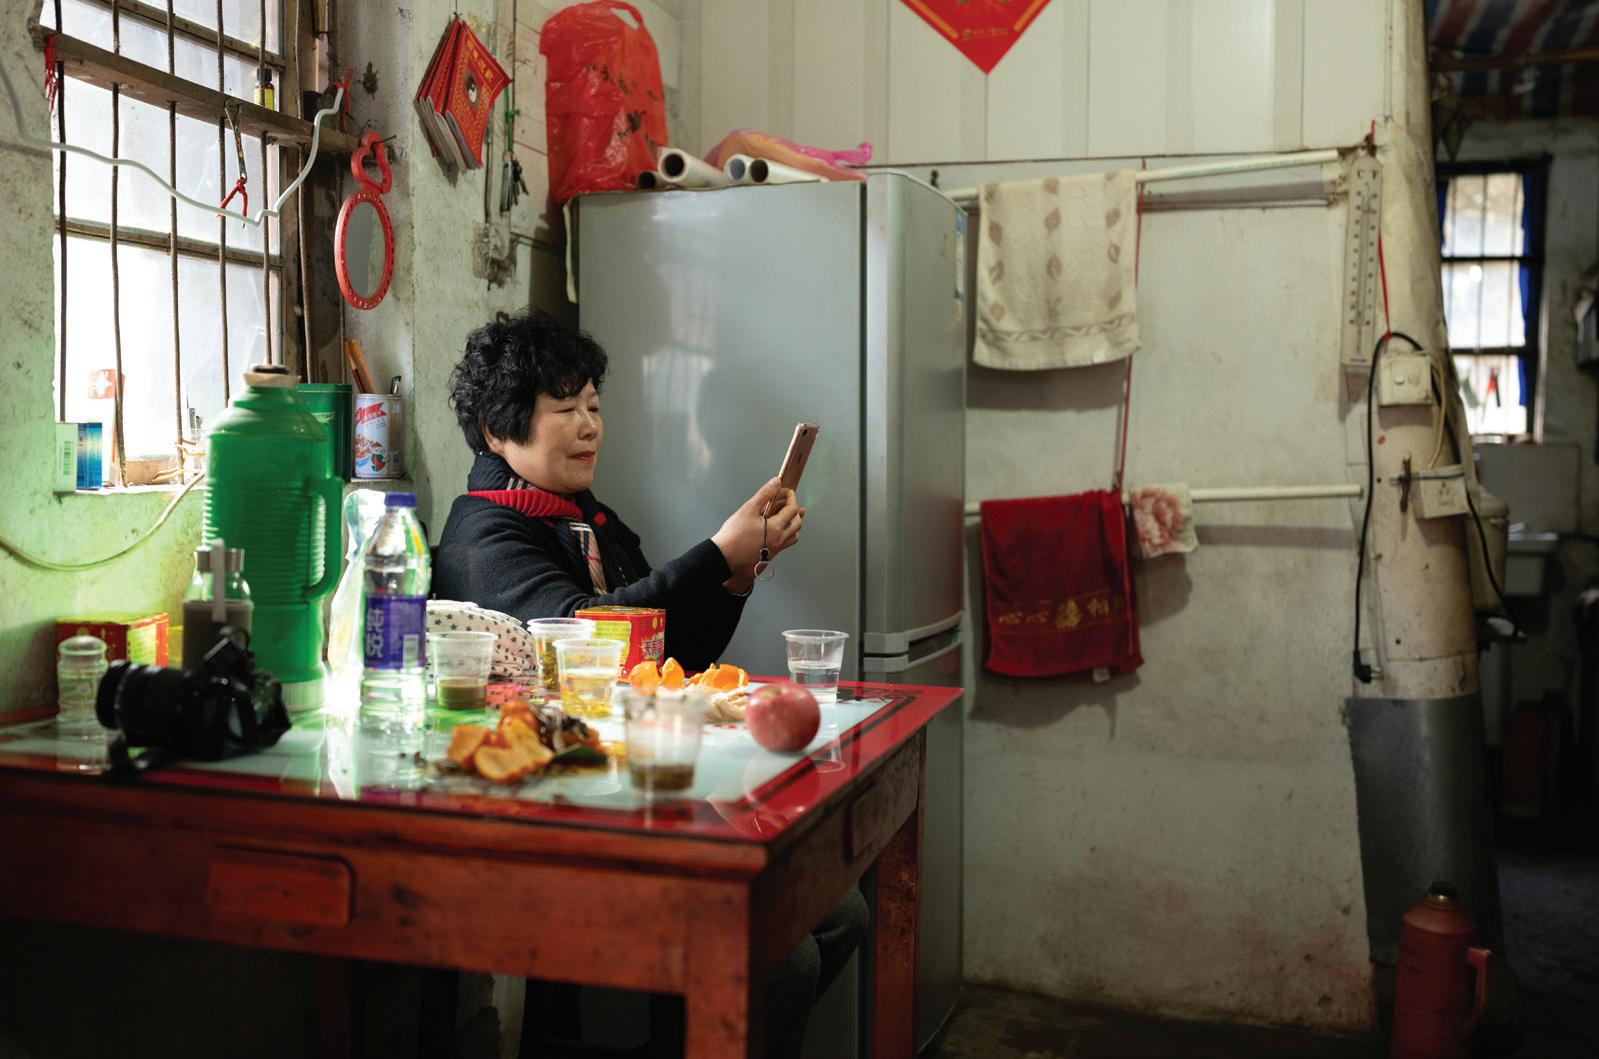
A foodie pic to whet your appetite. Taken with the 75mm APO-Summicron-SL. SL, 1/160 sec at f/2.0, ISO 640
Currently the 75 and 90mm APO-Summicron-SL lenses are available. The 35mm has already begun shipping and the 50mm will be shipping later in 2019. The wider angle lenses are promised for 2020.
The 35mm APO-Summicron-SL f/2 ASPH This brings us to the new 35mm Summicron-SL. It has exactly the same form factor as the previous lenses (and the future ones as well) . It has the same dual synchro-drive motor which delivers fast and silent autofocus. It focuses down to 0.3 meters giving a magnification ratio of 1:5, which is the same as the 75 and 90mm with their longer minimum focus distance.
Like all the other lenses it has an E67 filter thread and weighs a little over 700 grams - this means that it handles nicely on the Leica CL as well as on the SL. Build quality is exemplary (as it should be at this price) . The lens is weather sealed to a high degree like all the other SL lenses.
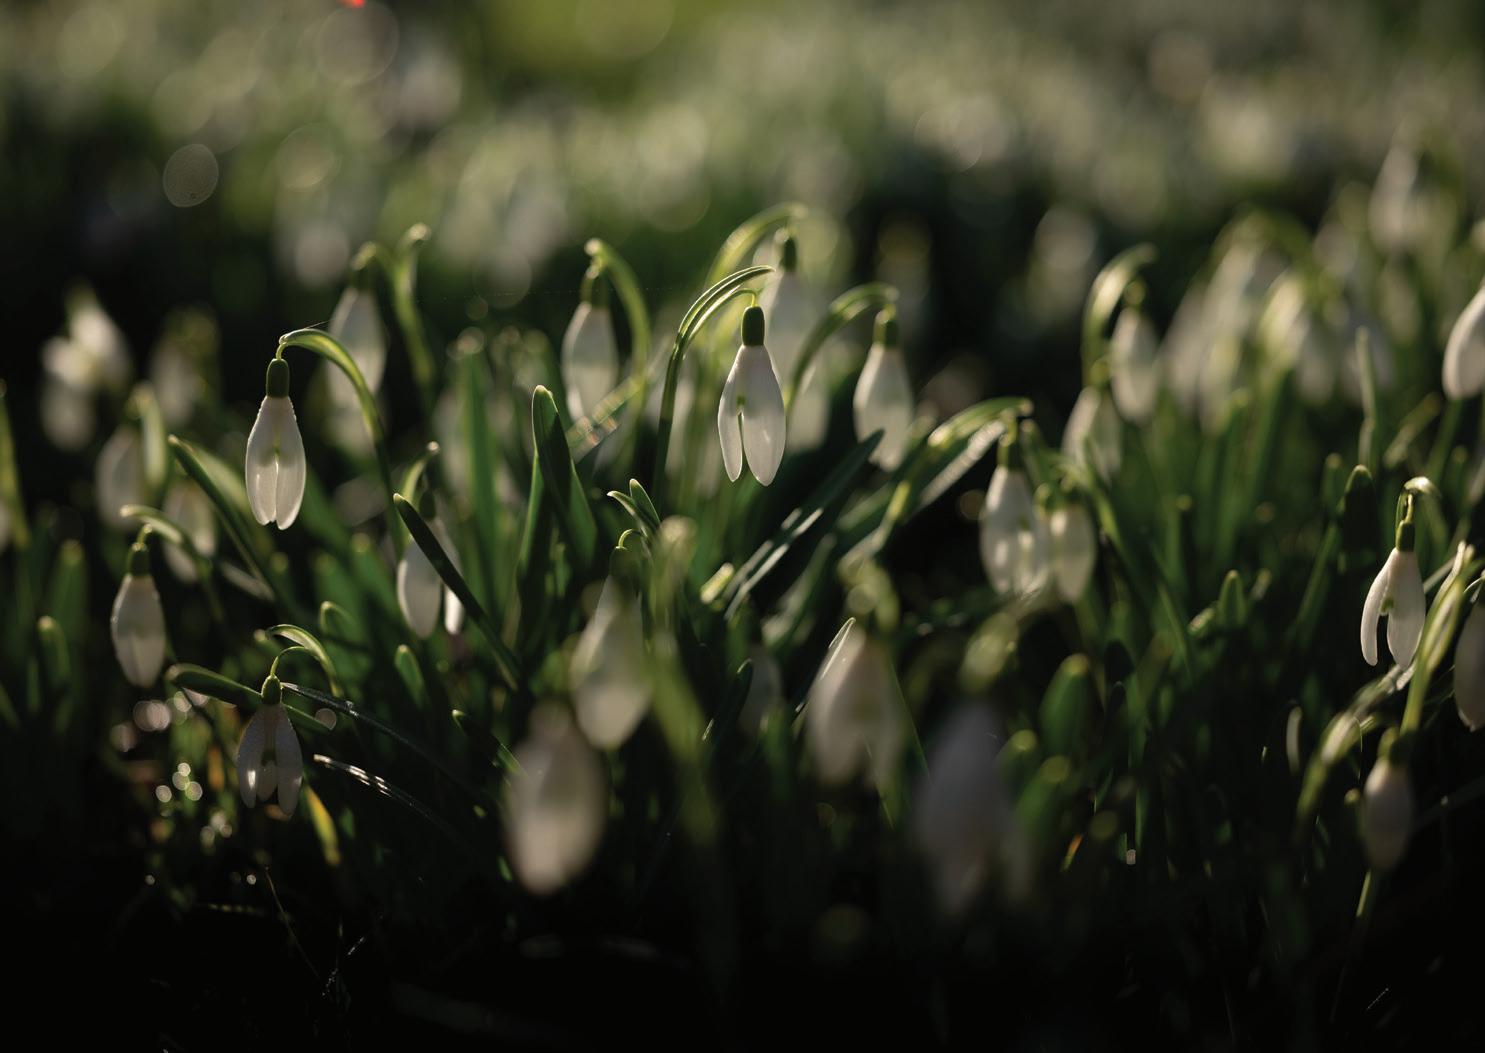
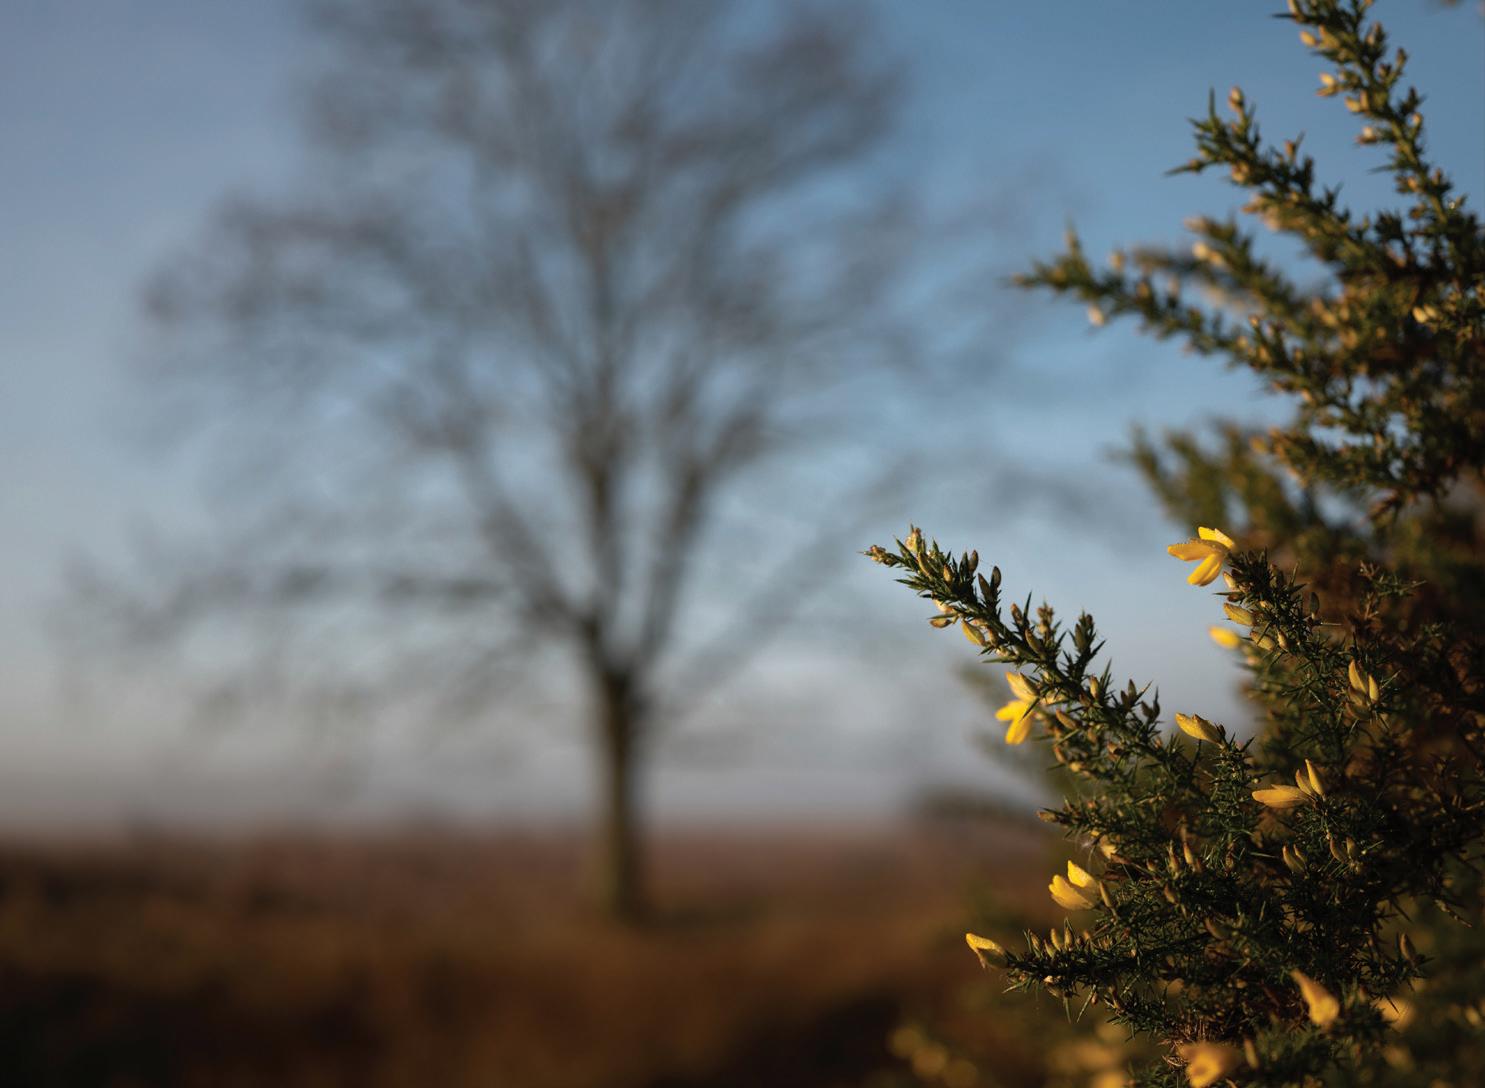
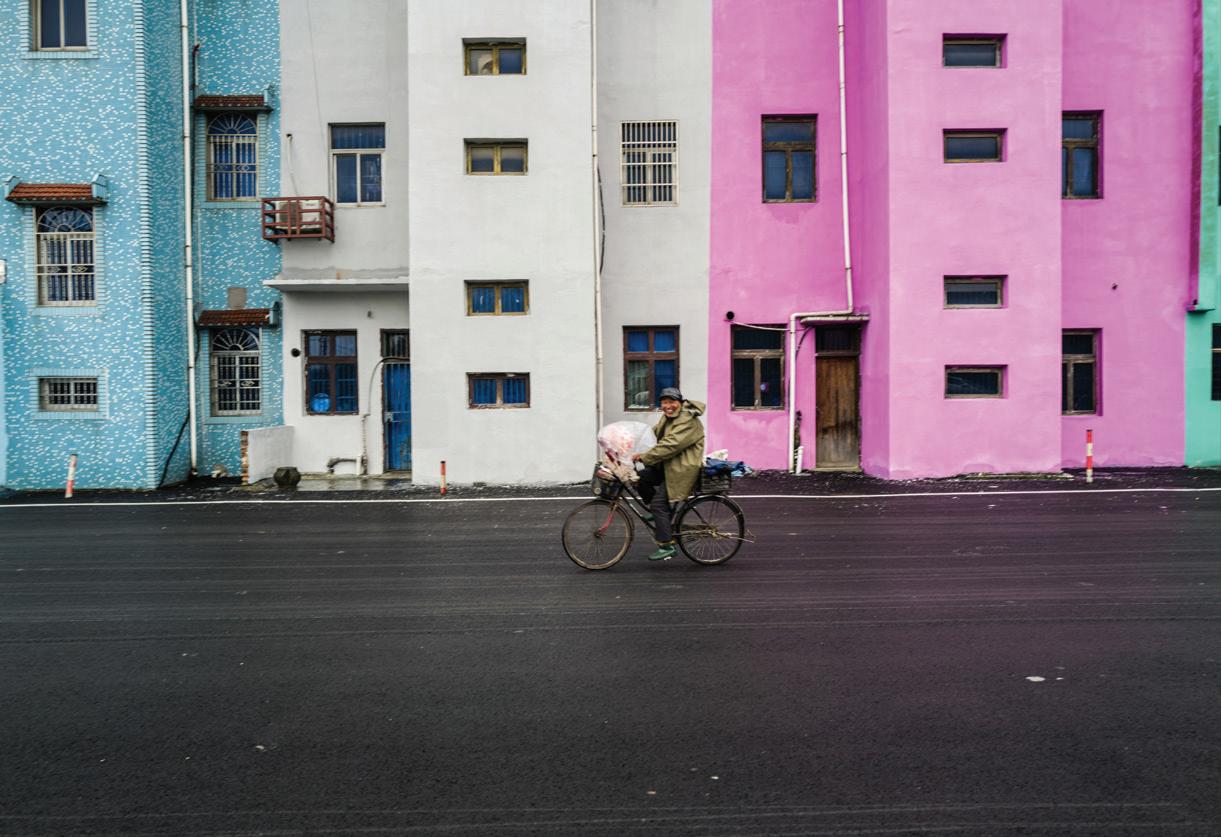
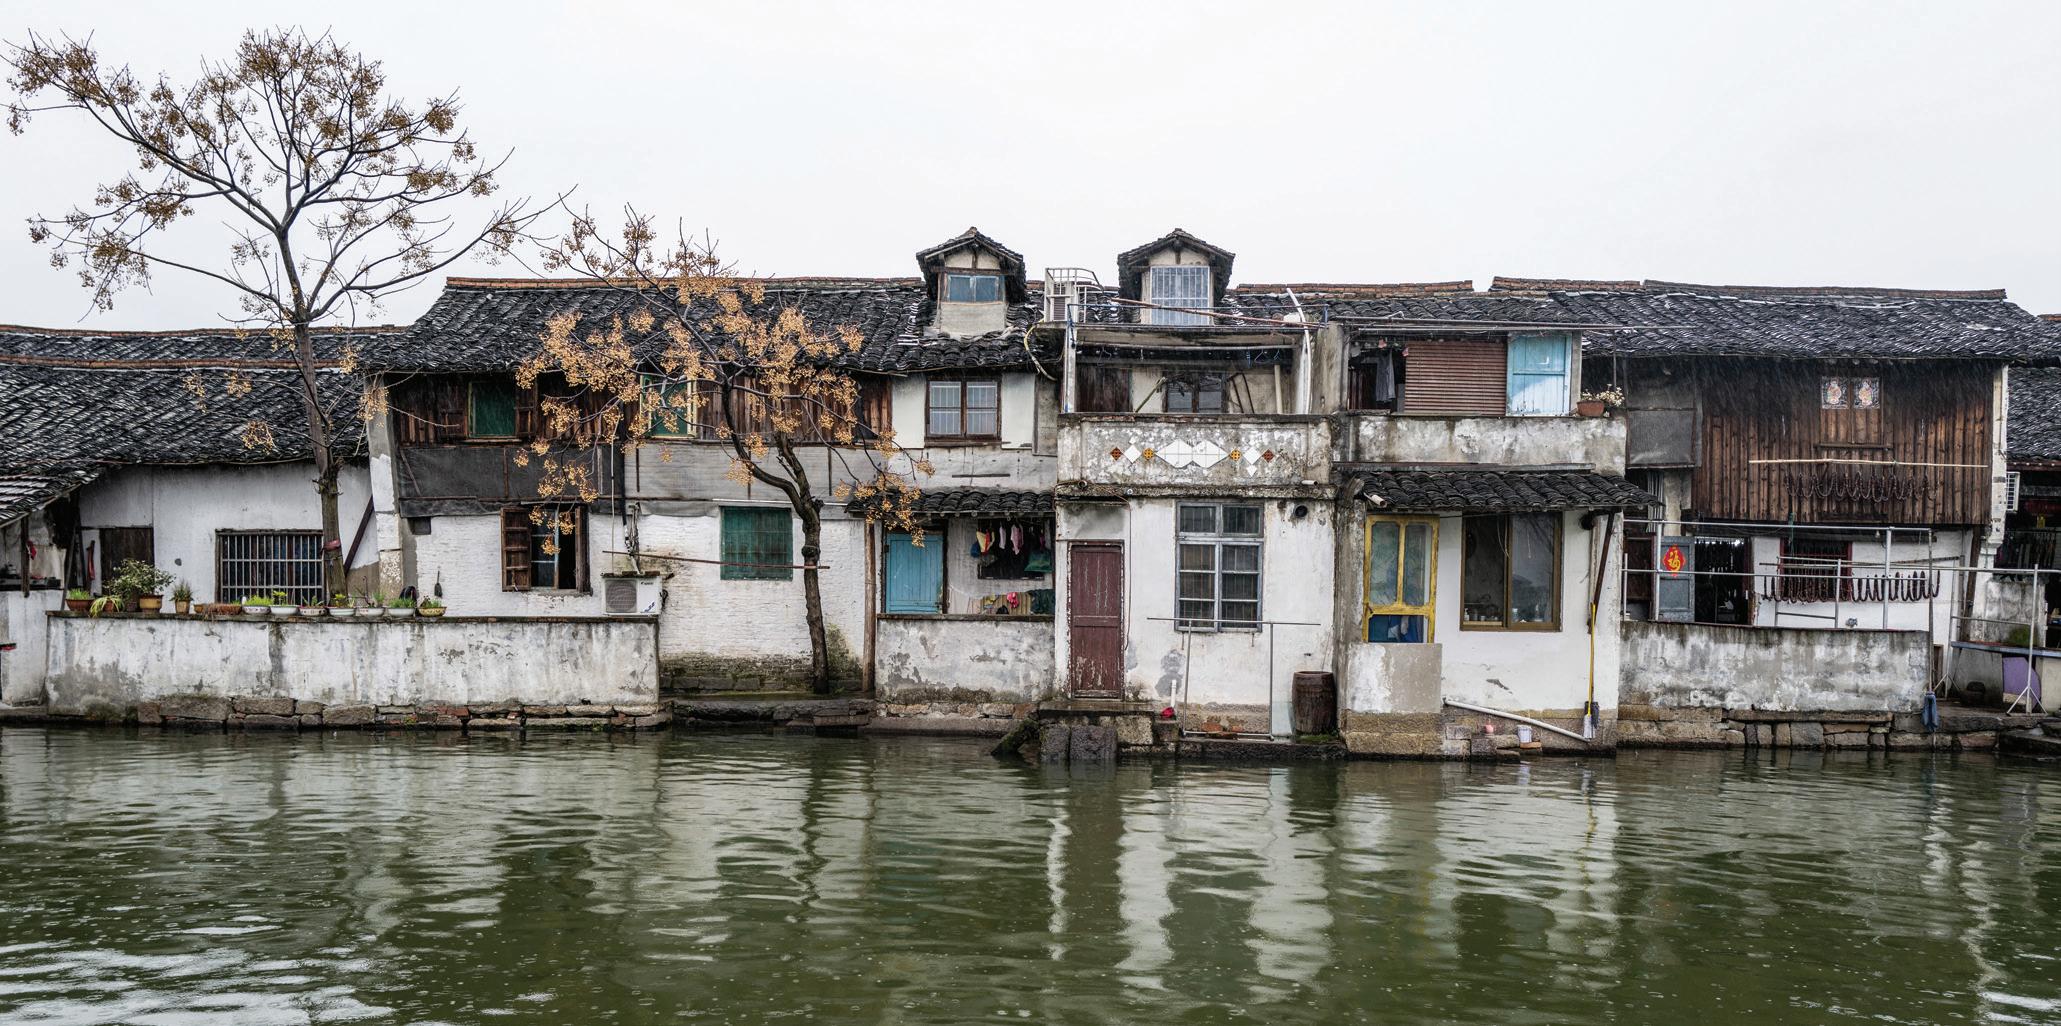
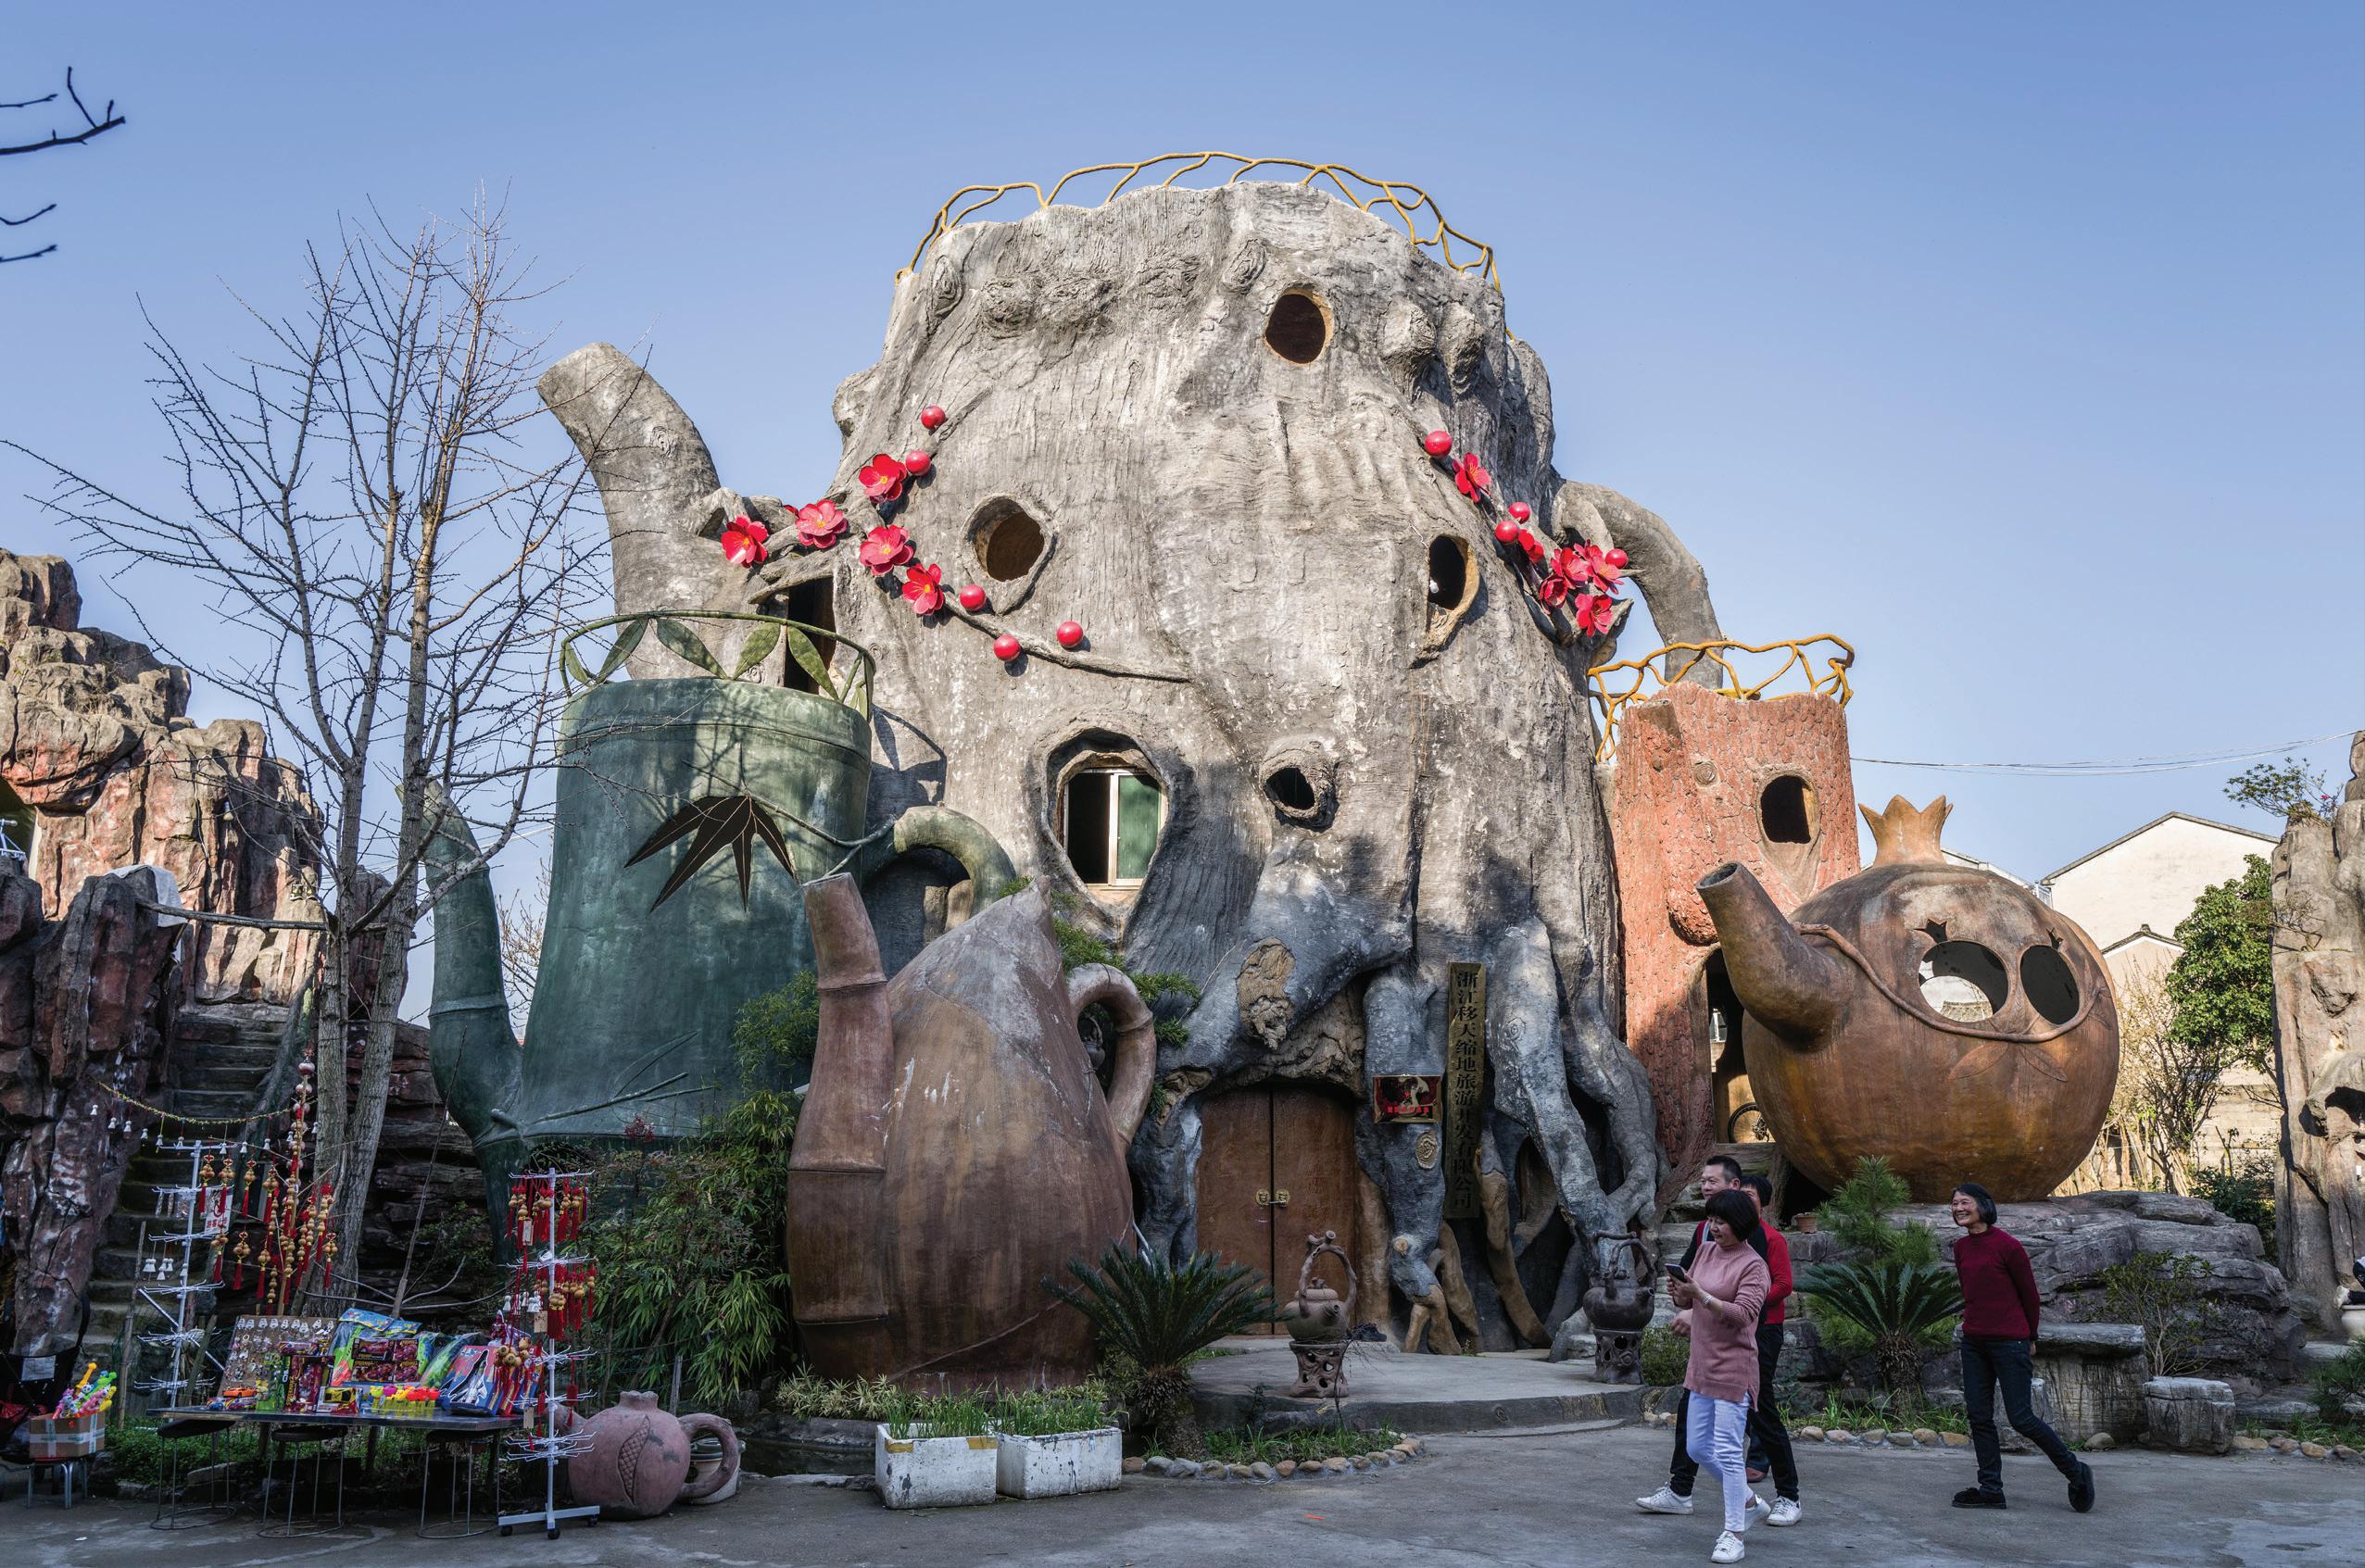
I received my test copy towards the end of January this year, just before we headed off to China to celebrate the Chinese New Year with our son, his girlfriend and her parents (a tea farming family near Longjing). We stayed in a little hotel just on the edge of the West Lake in Hangzhou.
There were lots of long walks in the surrounding countryside and many celebration meals. Sadly the weather was less than photogenic; we only had one sunny afternoon, otherwise, it was 3°C (37°F) and either misty or raining.
I used the 35mm extensively, both in China and in the UK before and after the trip. I’ve used it on both the SL and the CL (where it works nicely as a very high quality 50mm f/2)
The lens focuses quietly and quickly on both the SL and the CL, even in low light situations. As with the other SL lenses, you can manually tweak the focusing after half pressing the shutter to achieve auto focus.
Manual focusing itself is ‘focus by wire’, but it’s very smooth and works well. For still photography I’m very fond of the ‘acceleration’ on the manual focus ring, although I hope that there will be a firmware option later on to allow you to make it linear, which is important for video shooters.
I’ve not seen any chromatic aberration on any images - and I’ve been shooting a lot into bright light. Some flare is occasionally evident when shooting straight into the sun, but it’s minimal and easy to handle.
Image quality is exemplary. I did a series of tests at different apertures and distances and the lens seems to be perfectly sharp at all times, right to the corners. This is borne out by the amazing MTF charts for the lens. As Peter Karbe’s memorable T-Shirt has it: ‘Stop down for What?’.
Theoretically the quality falls off a tiny bit at 0.5 meters and closer, but I was unable to detect it. The bokeh is creamy and soft, and seemingly never ‘nervous’.
Price & Manufacturing This is an expensive lens, and I suppose there will be many who complain that it’s only an f/2, Having discussed this at length with Leica, I understand that to get this sort of quality both the materials (primarily the glass) and the precision of manufacture, together with really stringent quality control, are absolutely paramount; these things do not come cheap.
Conclusion The 35mm APO-Summicron-SL is a wonder of a lens with many virtues, and, as far as I can see, no vices. Fantastic for almost all situations - especially street, event and landscape - it joins the other two Summicron-SL lenses as a tribute to Leica’s determination not to sacrifice anything for quality.
With the advent of the L-mount consortium, I’m certain that these lenses will be in demand for use on the Panasonic and Sigma cameras, as well as on the Leica CL and SL. I can envisage a real shortage of supply, so get your order in soon before the Panasonic S1R guys realize how good it is!
Acknowledgements: Many thanks to Peter Karbe for patiently explaining the wonders of the APO Lenses. Thank you also to Stefan Daniel and Stephan Schulz for checking my facts. Special thanks to my wonderful Emma for putting up with so much whilst I take the pictures and write these articles.
opposite page, clockwise from top left:
CL, 1/200 sec at f/2.0, ISO 100
SL, 1/2000 sec at f/2.0, ISO 50
SL, 1/1600 sec at f/2.0, ISO 50
SL, 1/1600 sec at f/2.0, ISO 50
CL, 1/1600 sec at f/3.5, ISO 100
this page:
CL, 1/60 sec at f/2.0, ISO 3200
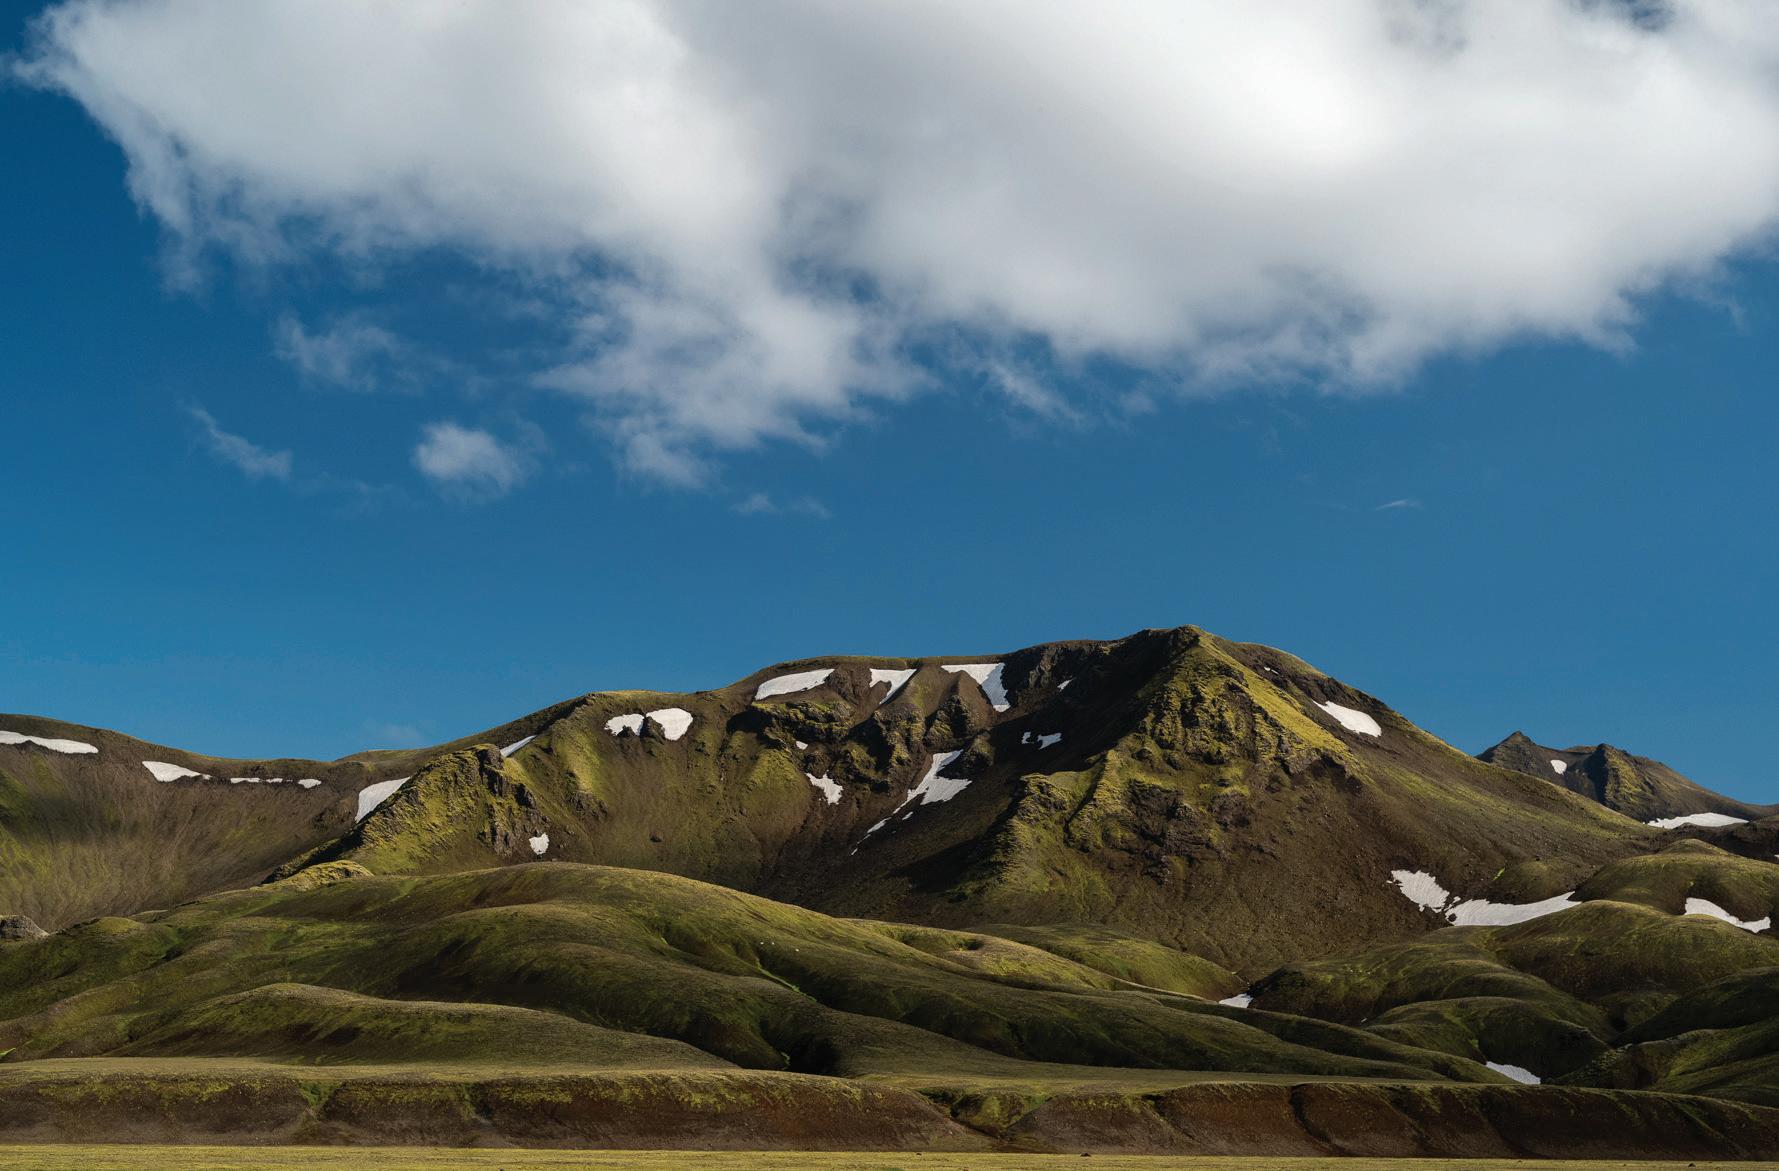
Frostastadavatn Lake. 70mm Summarit-S.
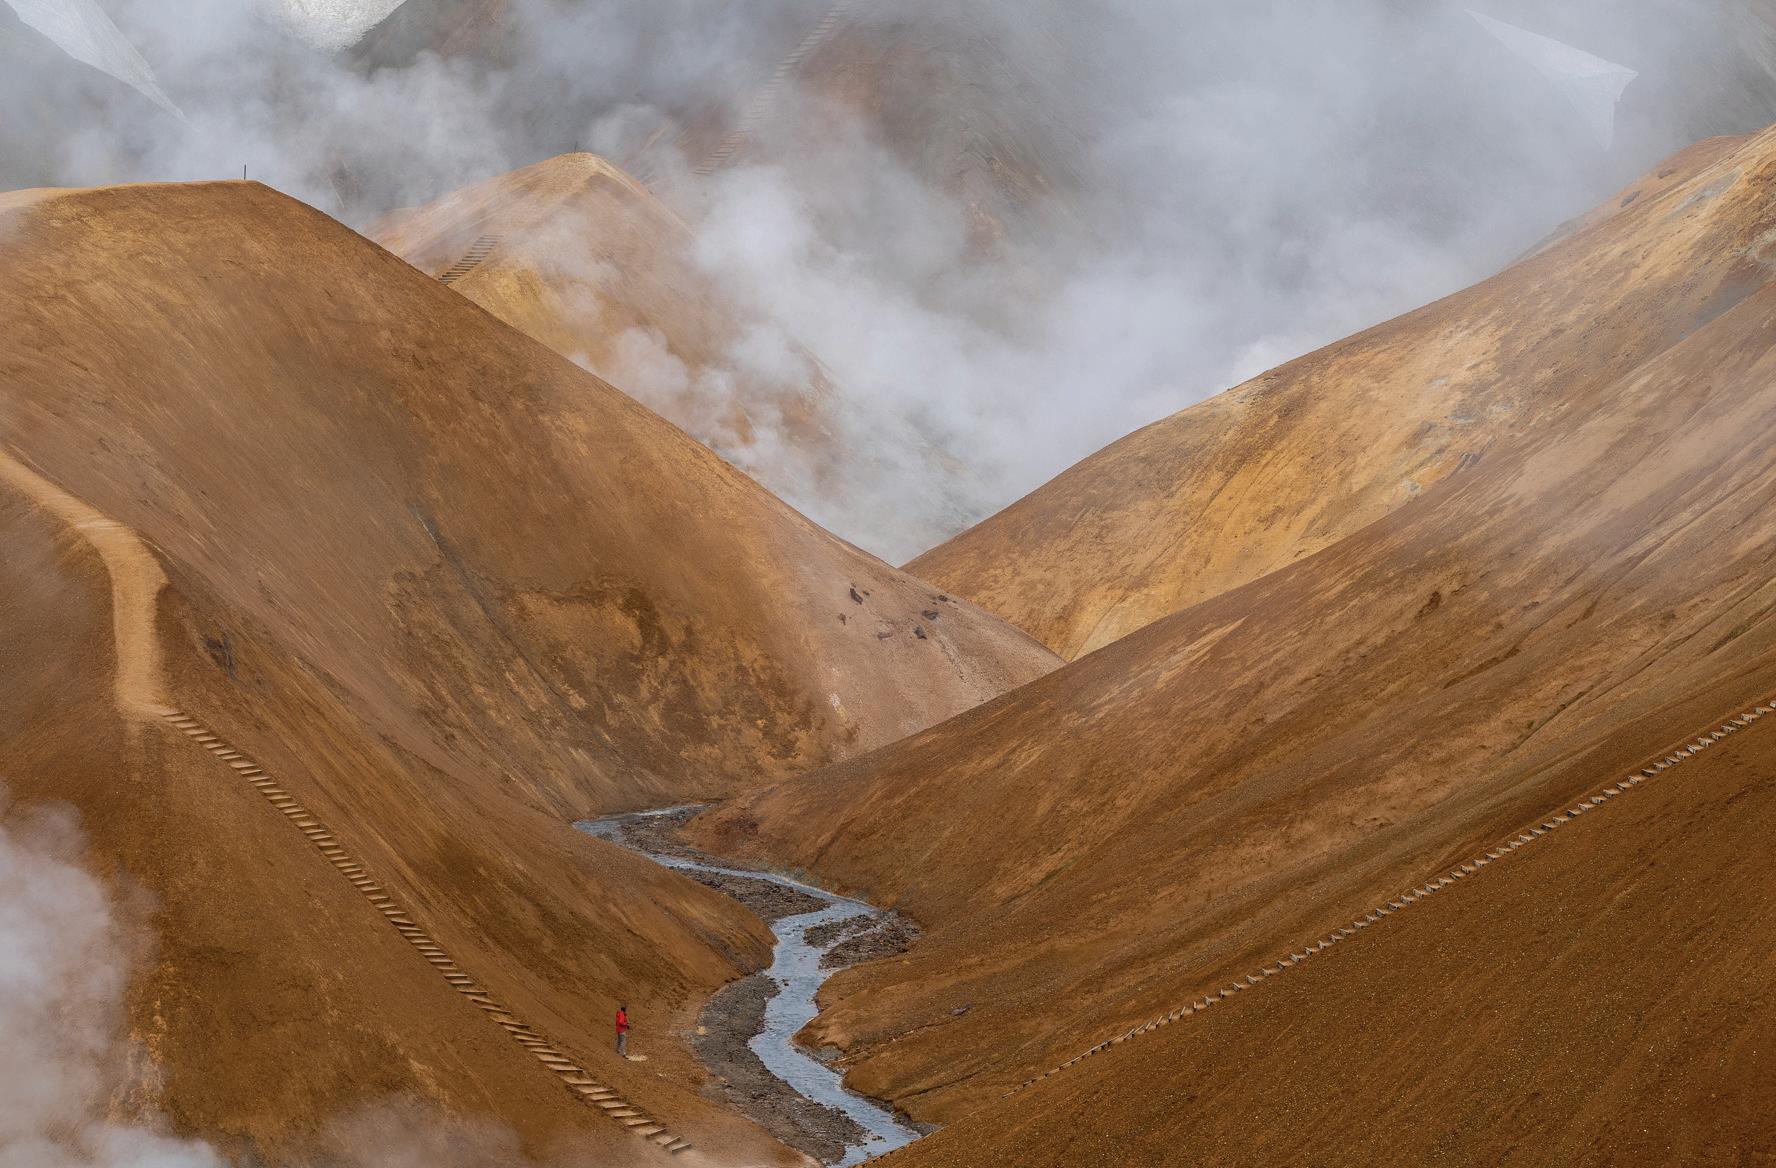
Kerlingarfjöll. 180mm APO-Tele-Elmar-S.
SOUTHERN ICELAND
LEARNING NEW SKILLS AT A PHOTOGRAPHY WORKSHOP
by DAVID KNOBLE
Stokksnes Beach. 70mm Summarit-S.
Frostastadavatn Lake. 180mm APO-Tele-Elmar-S.
My trip started with a delay from the Charlotte airport to New York. The problem was compounded because my once-a-day flight to Iceland was leaving before I was supposed to land. Ultimately, from my New York gate, I ran to a bus, rode across the tarmac and then ran down another concourse to be the last passenger to board. Breathing hard, I was incredibly glad I only had two bags - one backpack and one duffle - no checked baggage!
Over the next ten days I was glad for little luggage and one very weathertight camera with plenty of batteries and warm clothing. It took a single day to fall in love with this very unique country and its incredible history. Just as great was the four months leading up to the trip - planning what gear to take, thinking about what I would learn about landscape photography, and researching the history of this tiny country. Best of all, my expectations were exceeded in every way.
I have a background that includes photography. I dabbled in high school as the yearbook photographer and I taught black and white film photography at UNC Chapel Hill. Keep in mind that film photography was a physics course with chemistry thrown in. Today, journalism departments teach digital photography focusing more on the artistic process. Yet the one common theme from darkroom days to today is that I love to learn about photography and improve my craft. It's no wonder, then, the largest source of my learning is surrounding myself with photographers that have better skills than mine. A great resource for learning is attending a photography workshop.
This workshop in Iceland gave me an opportunity to step-up my skills. Five months later I’m still culling my images to try and create a 50 to 80 image book that contains the best images from the trip. Needless to say, I’m still going through images to pick the final group.
There were about 15 of us in total. Cameras ranged from the Leica Q, M’s, a Monochrom, SL’s and S’s. Because this trip focused on landscape work, I took an S007 and three lenses (24mm, 35mm and 180mm). True to many workshops, I was able to borrow a 70mm lens during our time, which I used for a good number of images. The point is any size and style of camera worked on this trip. Extra batteries and a sturdy tripod were the common gear we all shared, and, we all loved photography.
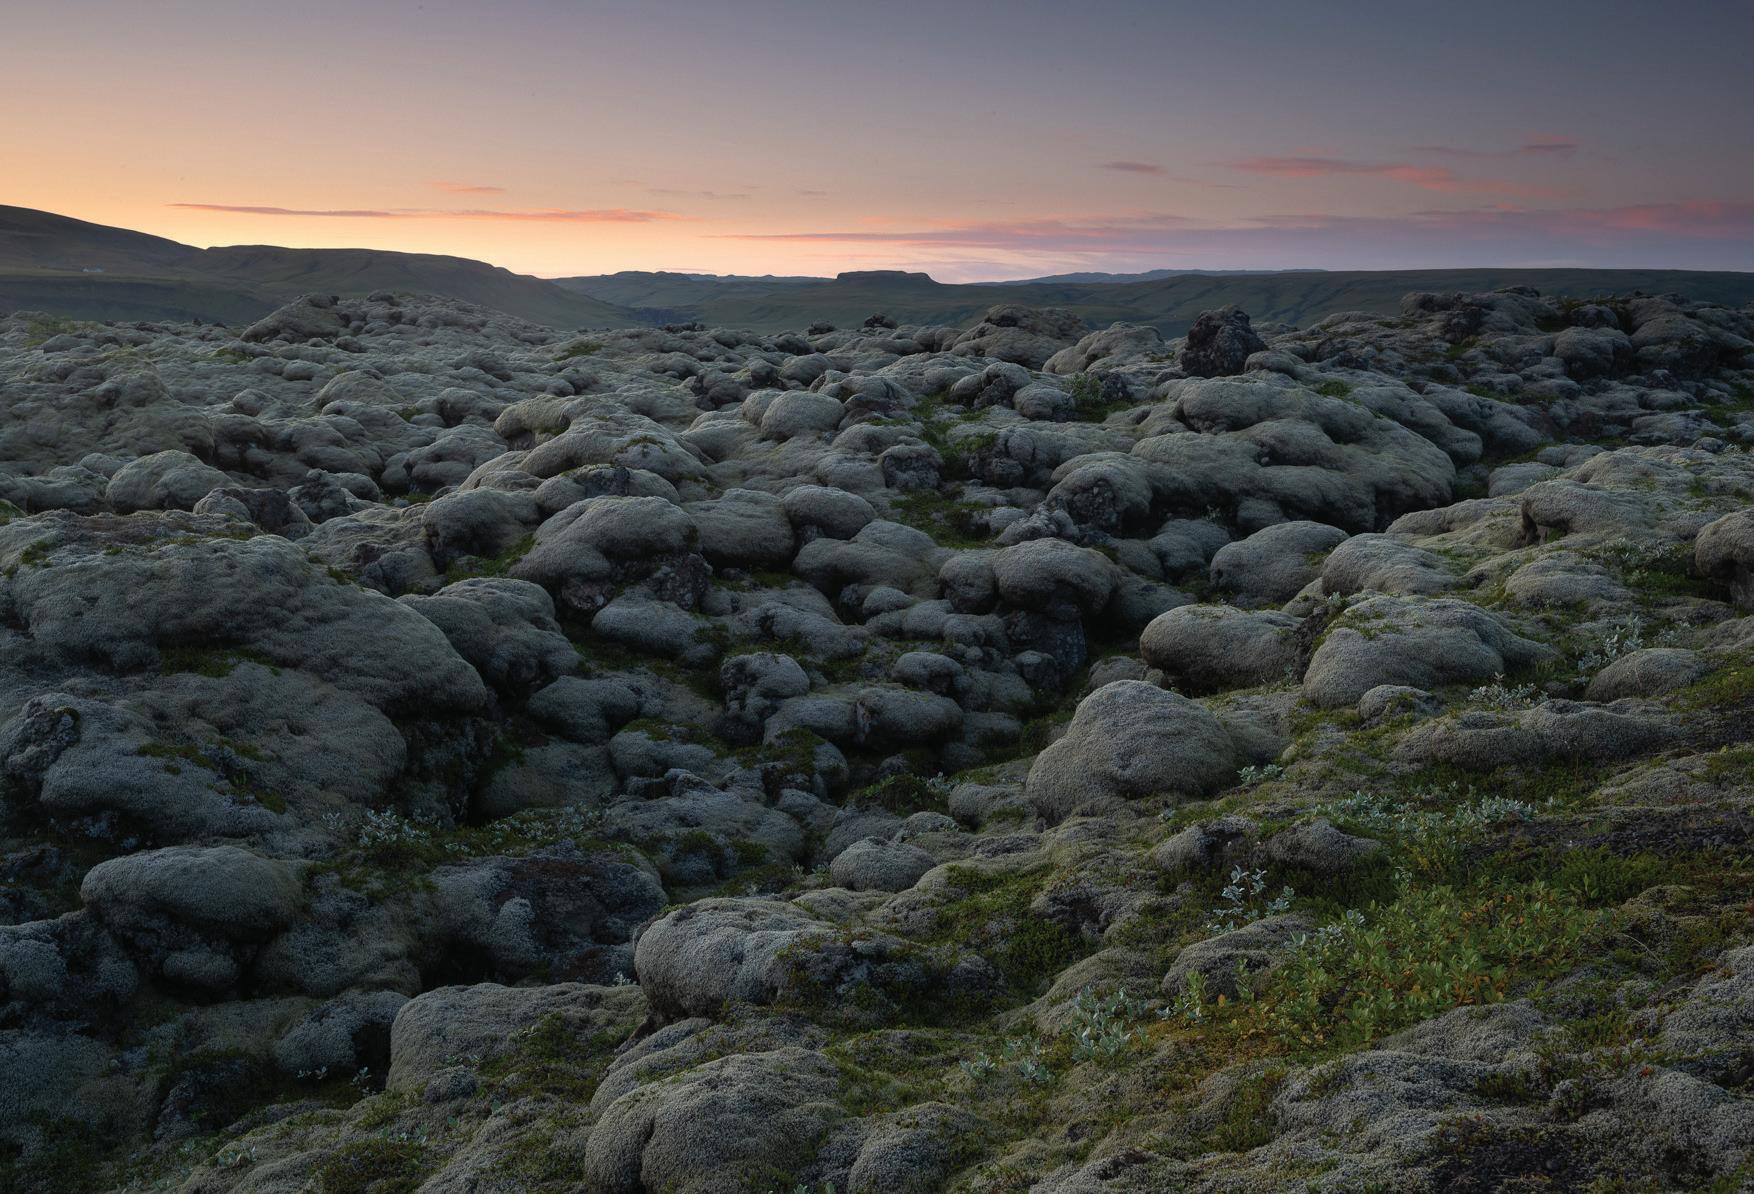
The first day we had some misty weather and spent time photographing an array of geysers. We stopped at an area called Geysir with one of the oldest recorded geysers in the world. Coincidentally, the source of the name geyser today comes from this Icelandic area. My love of writing and research led me to a story about an area called Hveravellir, meaning hot spring fields, which we visited. Hveravellir contains a hot spring named Eyvindarhver that looks like a roaring monster spitting through its mouth. I learned later it was named after an outlaw, Fjalla-Eyvirdur who hid in this area and cooked his food on this spring.
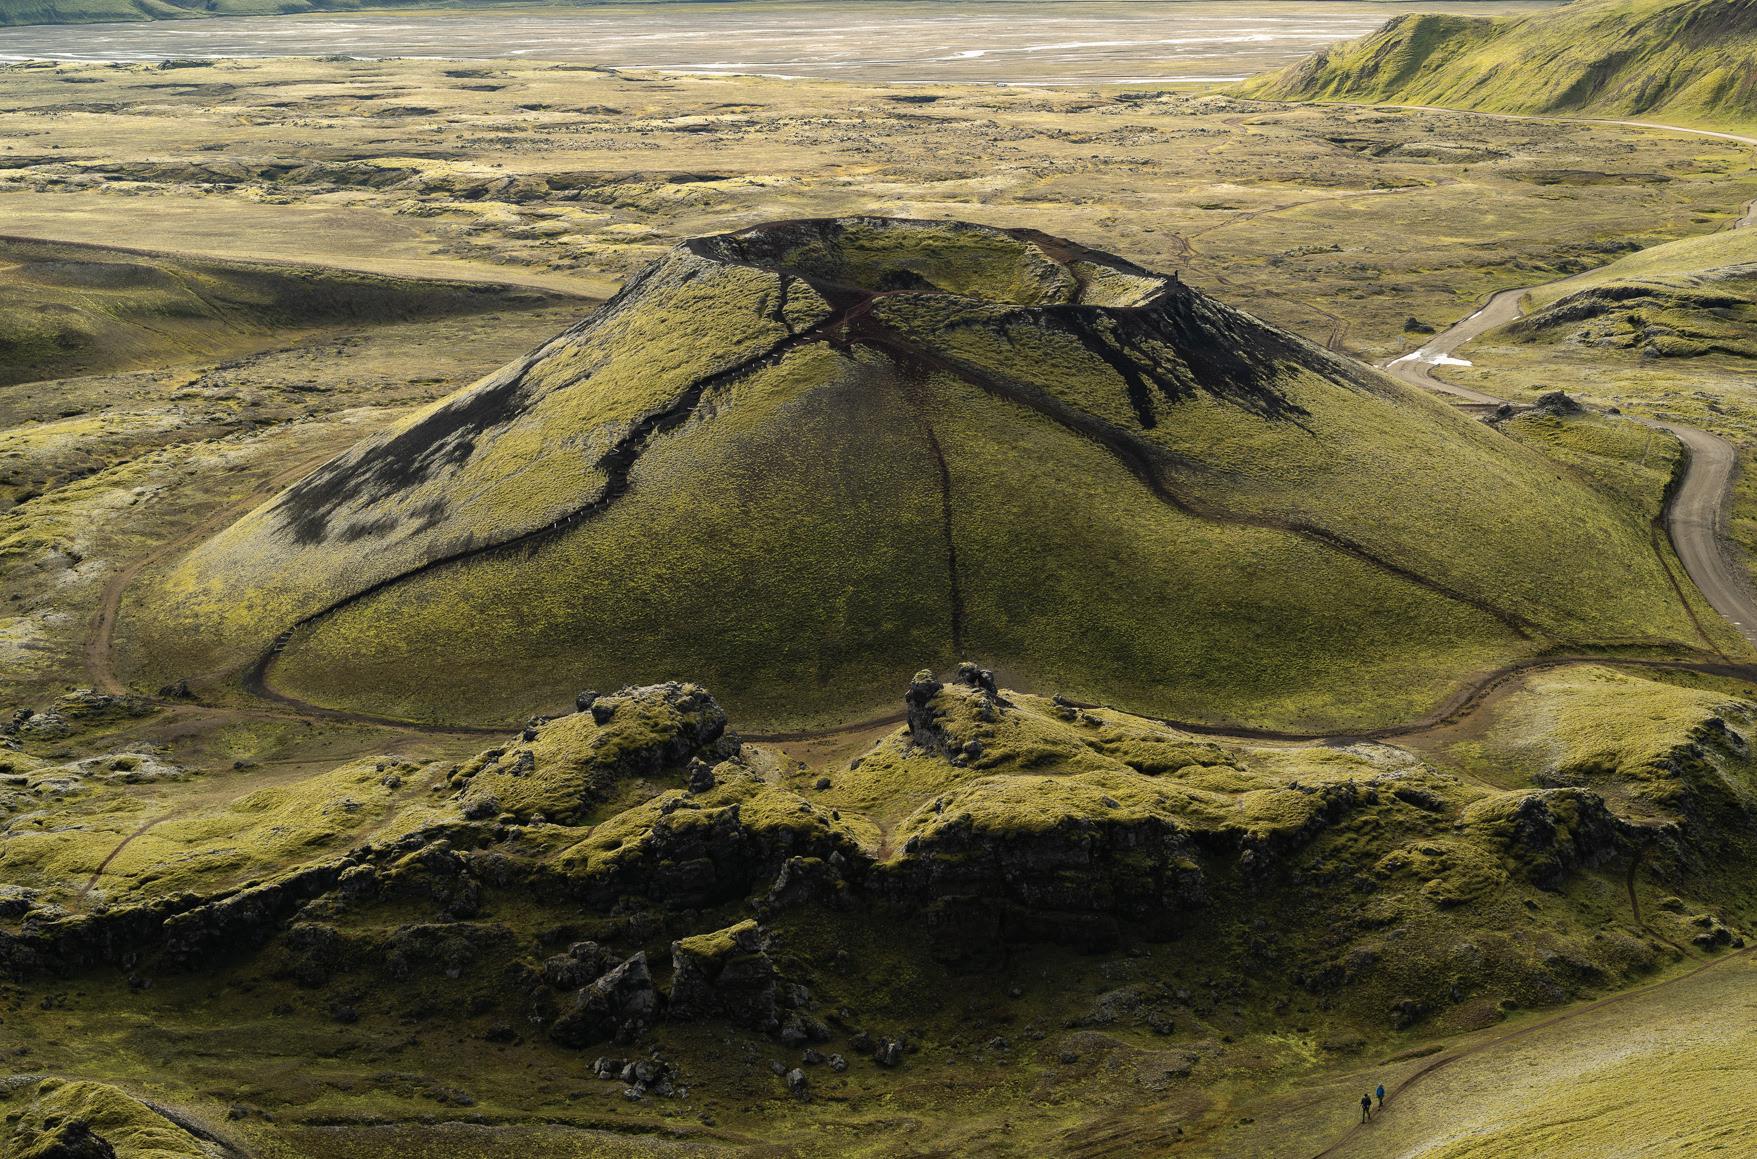
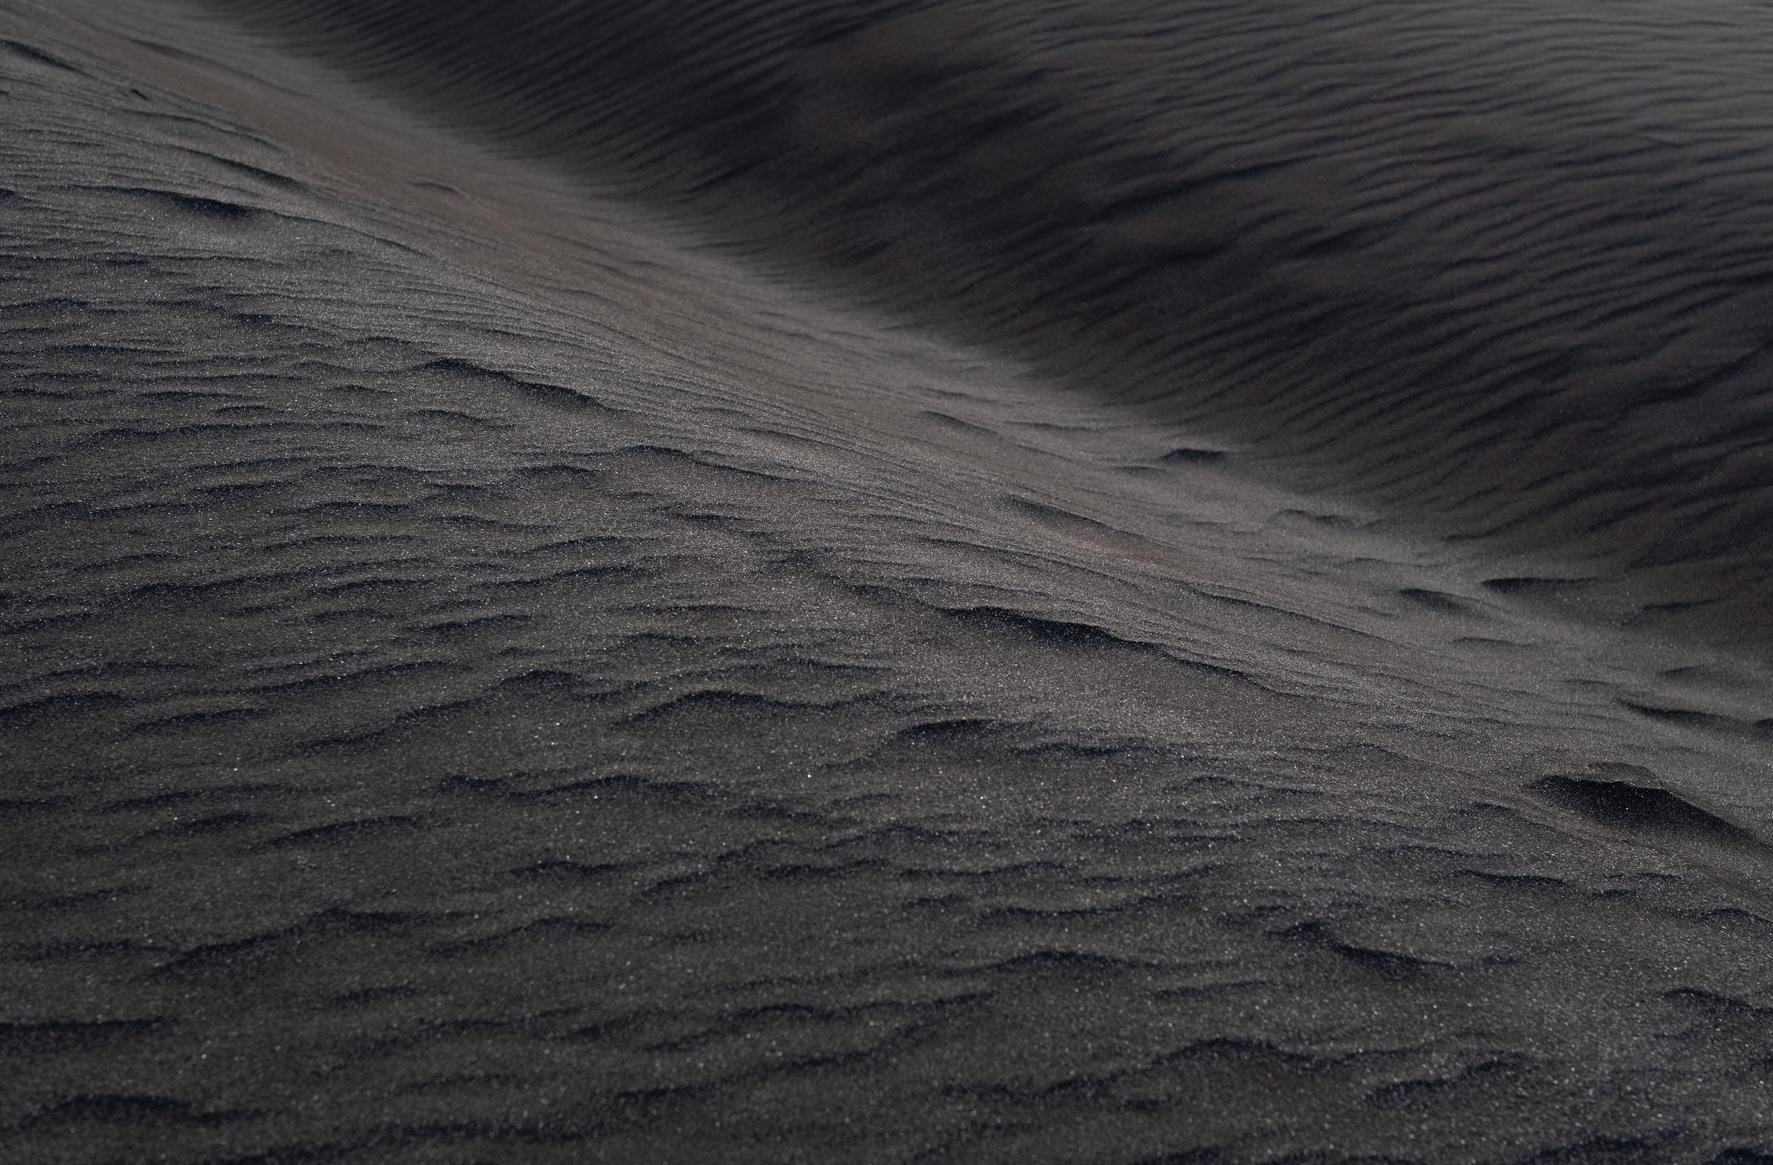
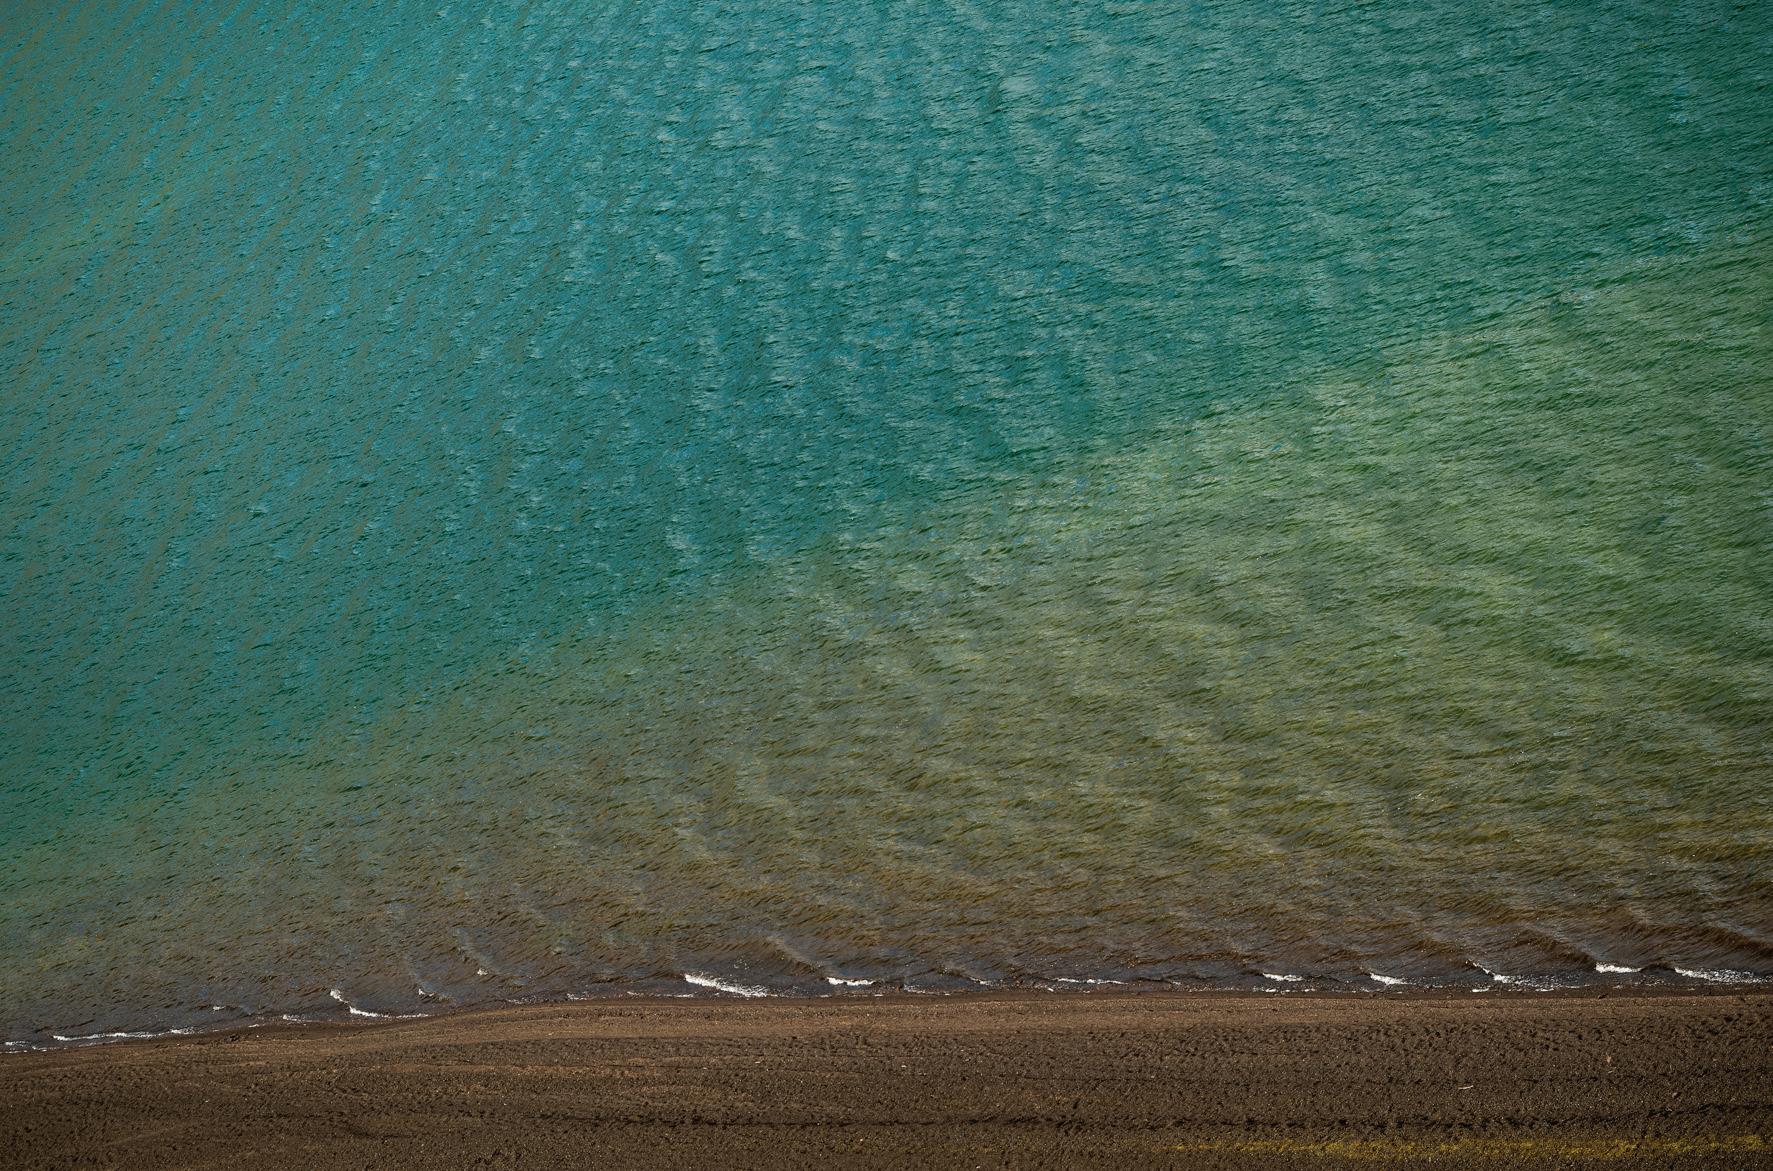
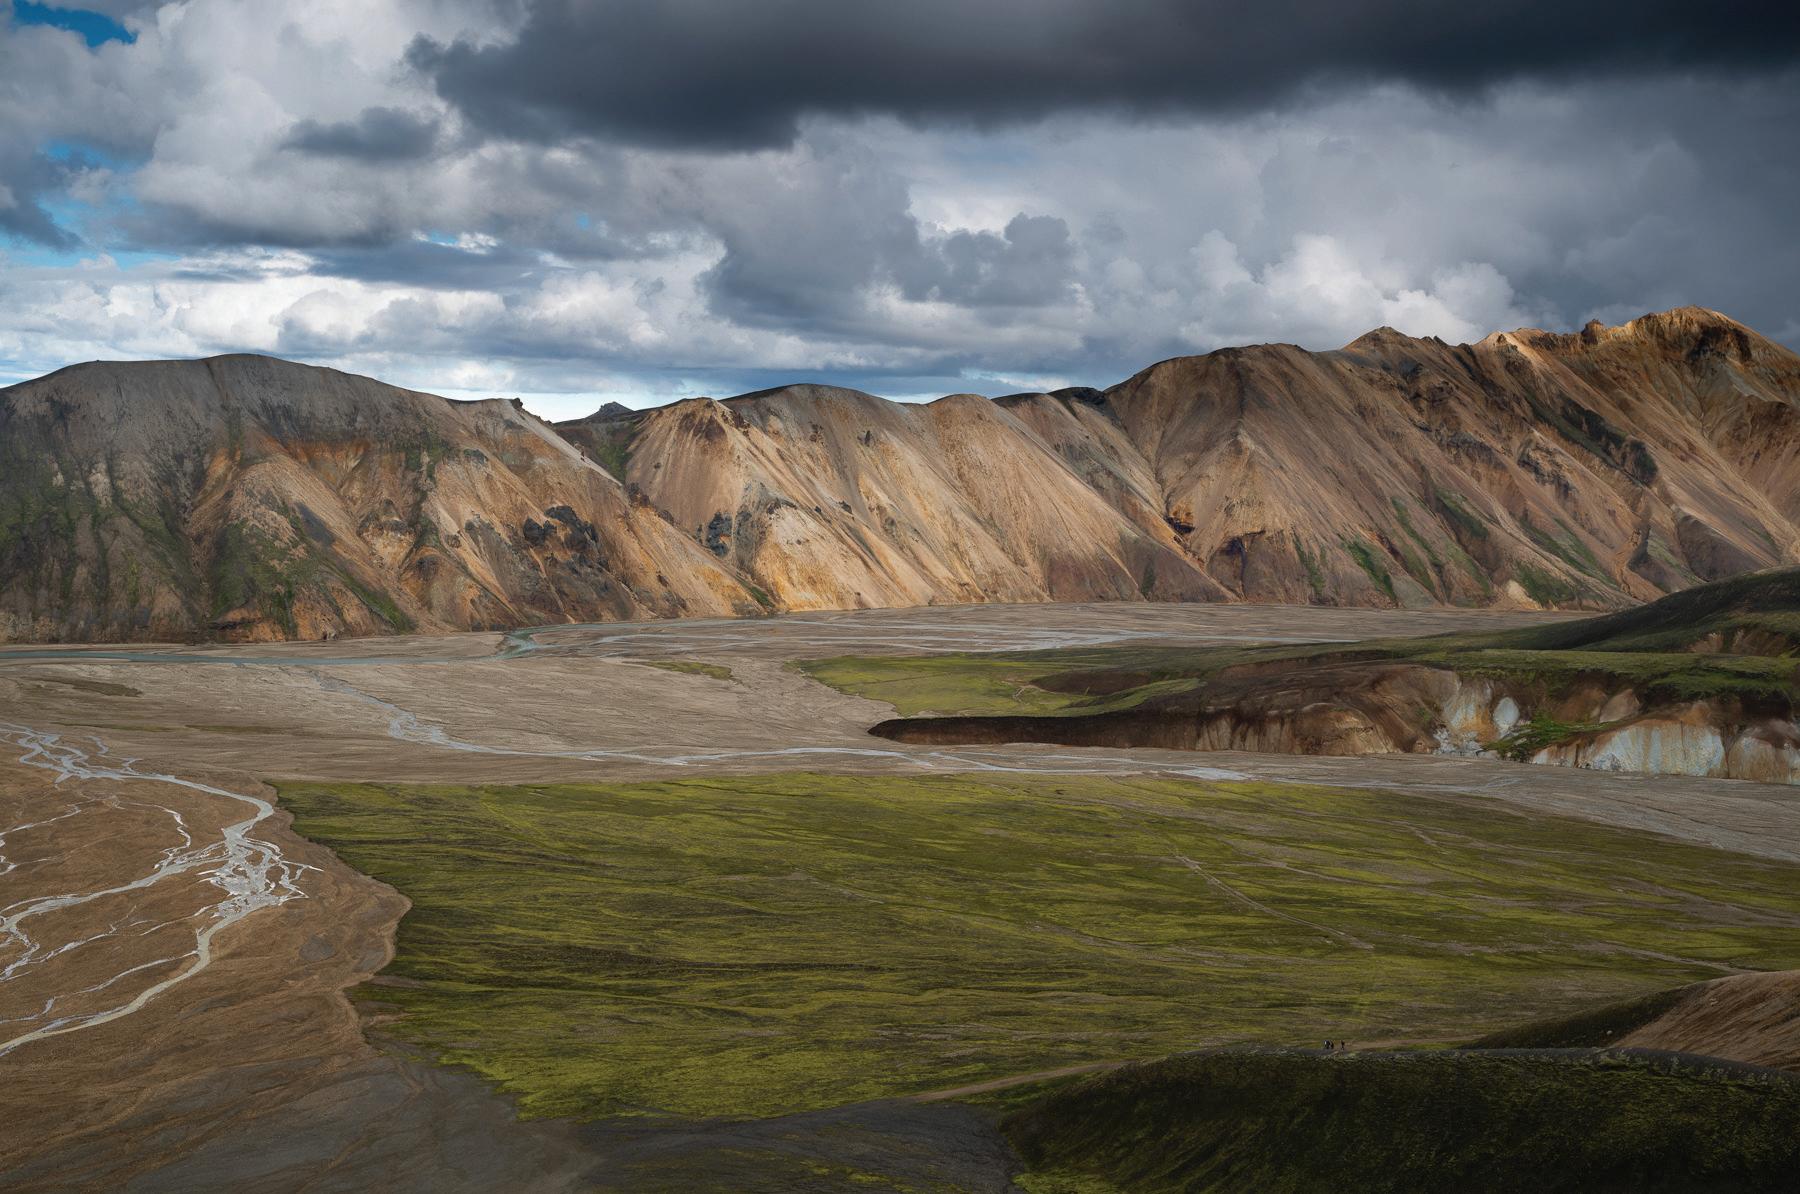
Iceland is full of active volcanoes, and we spent a significant time in the Highlands of central Iceland visiting colorful areas with lava-fields from volcanic eruptions over time. Kerlingerfjöll, or the Red Mountains was one incredible area full of red volcanic Rhyolite highlighted with blues and greens, and surrounded by steaming vents. In other areas I climbed any mountain trail available to get better views. In Hanusapollur (Crater Lake), we were rewarded with views into other older craters of black dirt and red rims. We spent some time at Frostastadavatn Lake (Lake of the Frosty Place) which had rewarding colors and, if you were willing to climb, an outstanding view of a moss covered crater. Because we were all there to photograph, we were not rushed. So we spent time framing and setting exposures. Simply walking on a tour, these images would not have been possible.
"IF YOU WANT TO STRETCH YOURSELF FURTHER AND LEARN MORE, FIND A PHOTOGRAPHY WORKSHOP TO ATTEND."
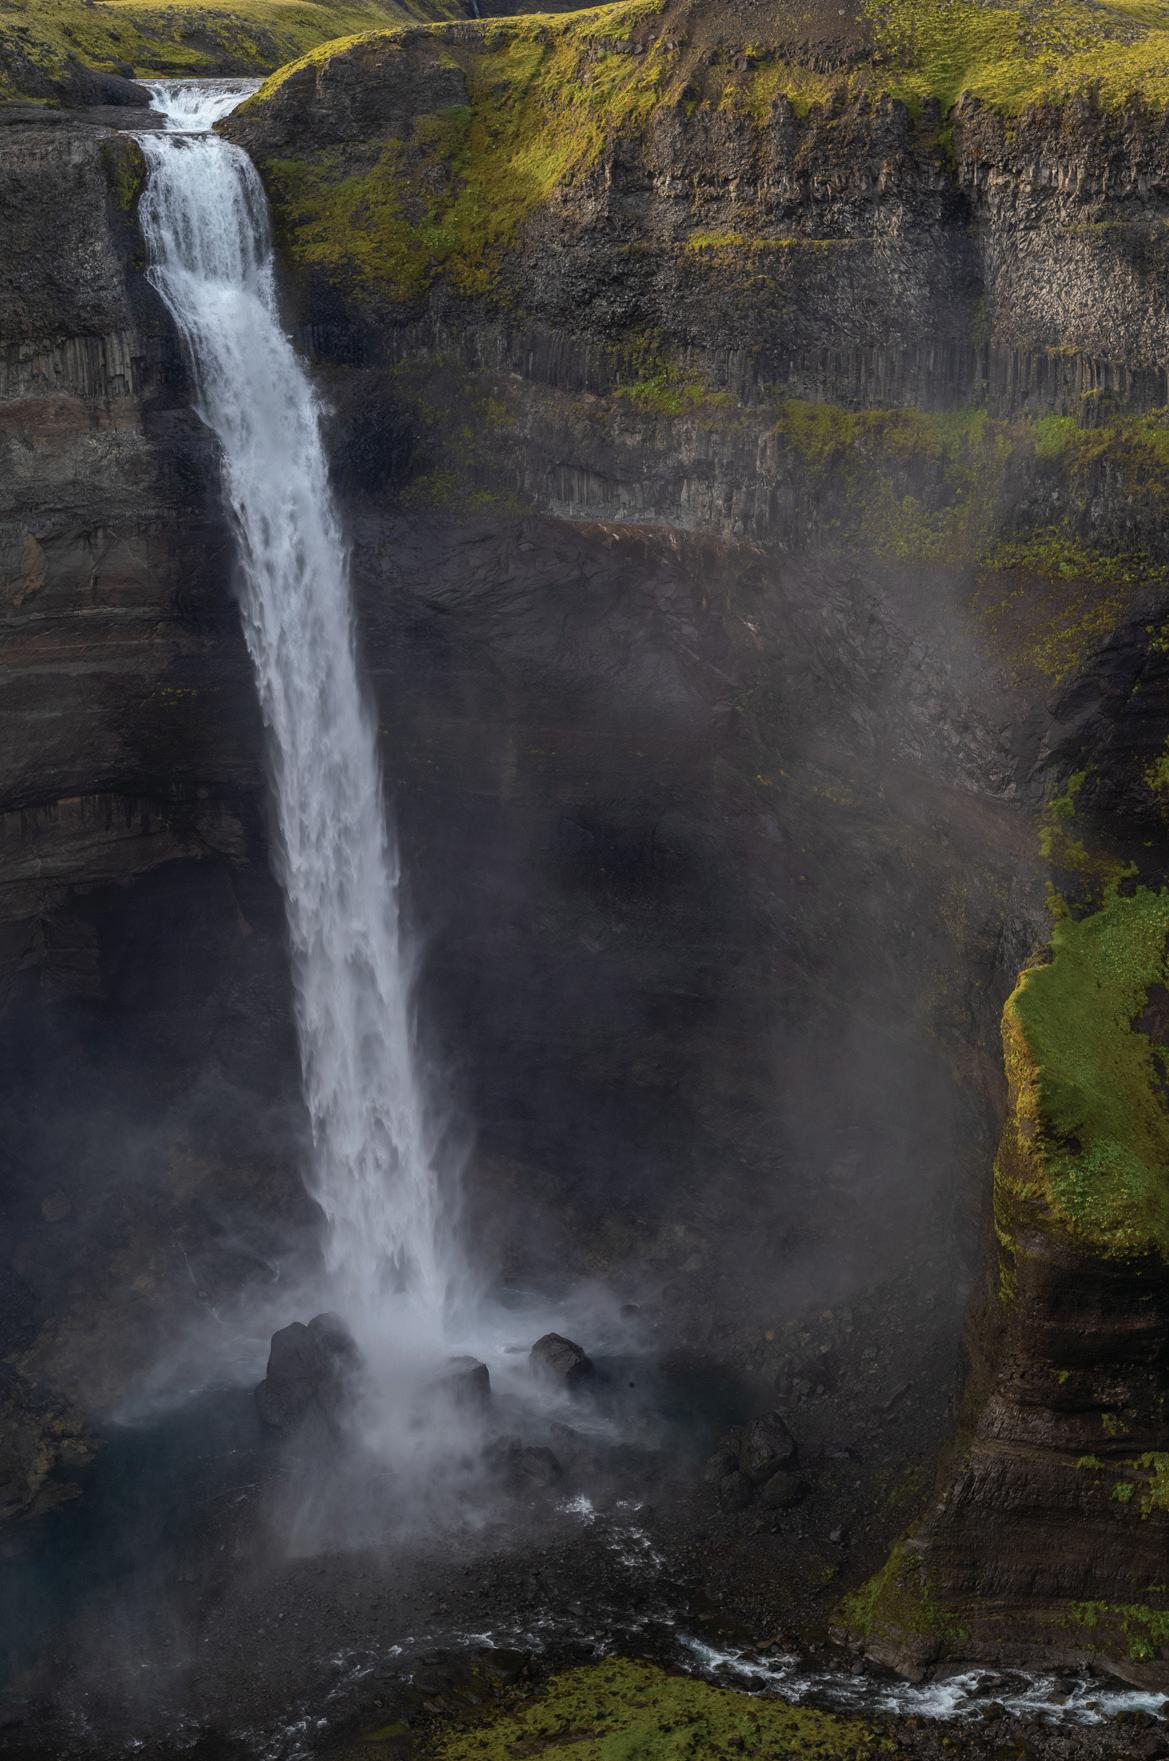
Hàifoss. 70mm Summarit-S.
One of the new skills I learned was the use of a glass filter system great for landscape work. I have used colored filters for almost 40 years to enhance the contrast of black and white film, and neutral density filters are great for daylight photographs using wide open Summilux (f/1.4) or Noctilux (f/0.95) apertures. But these filters were square and had different types of graduations. Some filters were neutral density, but with special coatings to avoid reddish casts on the digital sensors over long exposures. The first opportunity we had to use these filters was at a waterfall called Sigoldufoss, “foss” meaning “falls.” We learned how to cut the light from either the top half or the bottom half of the image and also lower the light so we could slow the exposure and blur the water. So, we began to learn how to manipulate the exposure to get our final image in the camera, avoiding too much post processing.
In my last article you saw what I learned about photographing the Northern Lights, or the Aurora. My first time viewing such a spectacular event in nature, I learned about the exposure process for that night-time phenomenon in this workshop. There is much more we learned than I could fit in just one article. The additional benefit besides learning more about exposure and the specific camera we used, was the friendships we made. Meeting people from around the United States, and some from South America was an equally great experience. We were there in common purpose, but we all had things to share that brought us closer together. I learned about a printing software light-years ahead of what I was using that I now use for all my prints (thank you Peter!). I learned about a great technology solution to hang a high resolution and wide gamut screen up on my wall that I can
update with new photographs while out in the field for my family to see (thank you Tony!). I got to see some great photographs of an operating room and see the perfect bracket for attaching my S to a tripod (Thank you Tony-2!). I came home with no less than ten great ideas I learned from participants like myself and I stay in touch with some of these people still.
Not everyone will be able to take the time to attend a workshop at a location like Iceland. But the results of a workshop are the same no matter where you go and how long you spend. The increase in knowledge and ability will foster new ideas in your own work. I learned much more than I thought from a documentary workshop at the Ohio State Fair and I have used that knowledge to create a documentary about part of Bayonnais, Haiti. I learned from life-long successful and passionate photographers at the LHSA Spring Shoot in Sante Fe during 2017. I am hoping to get down to Miami for the Street Festival one year.
I do not often give advice, so we’ll just call this experience. If you want to stretch yourself further and learn more, find a photography workshop to attend. There are local clubs in many towns that put on workshops. There are many drop-in workshops around the larger cities and especially good oneday workshops at Leica stores around the country. The LHSA Spring Shoots held each year are a great time to meet fellow members and spend time walking and taking images. I am confident you will be rewarded with at least one new friend and one new idea to boost your own photographic work. So let’s go take some more photographs!
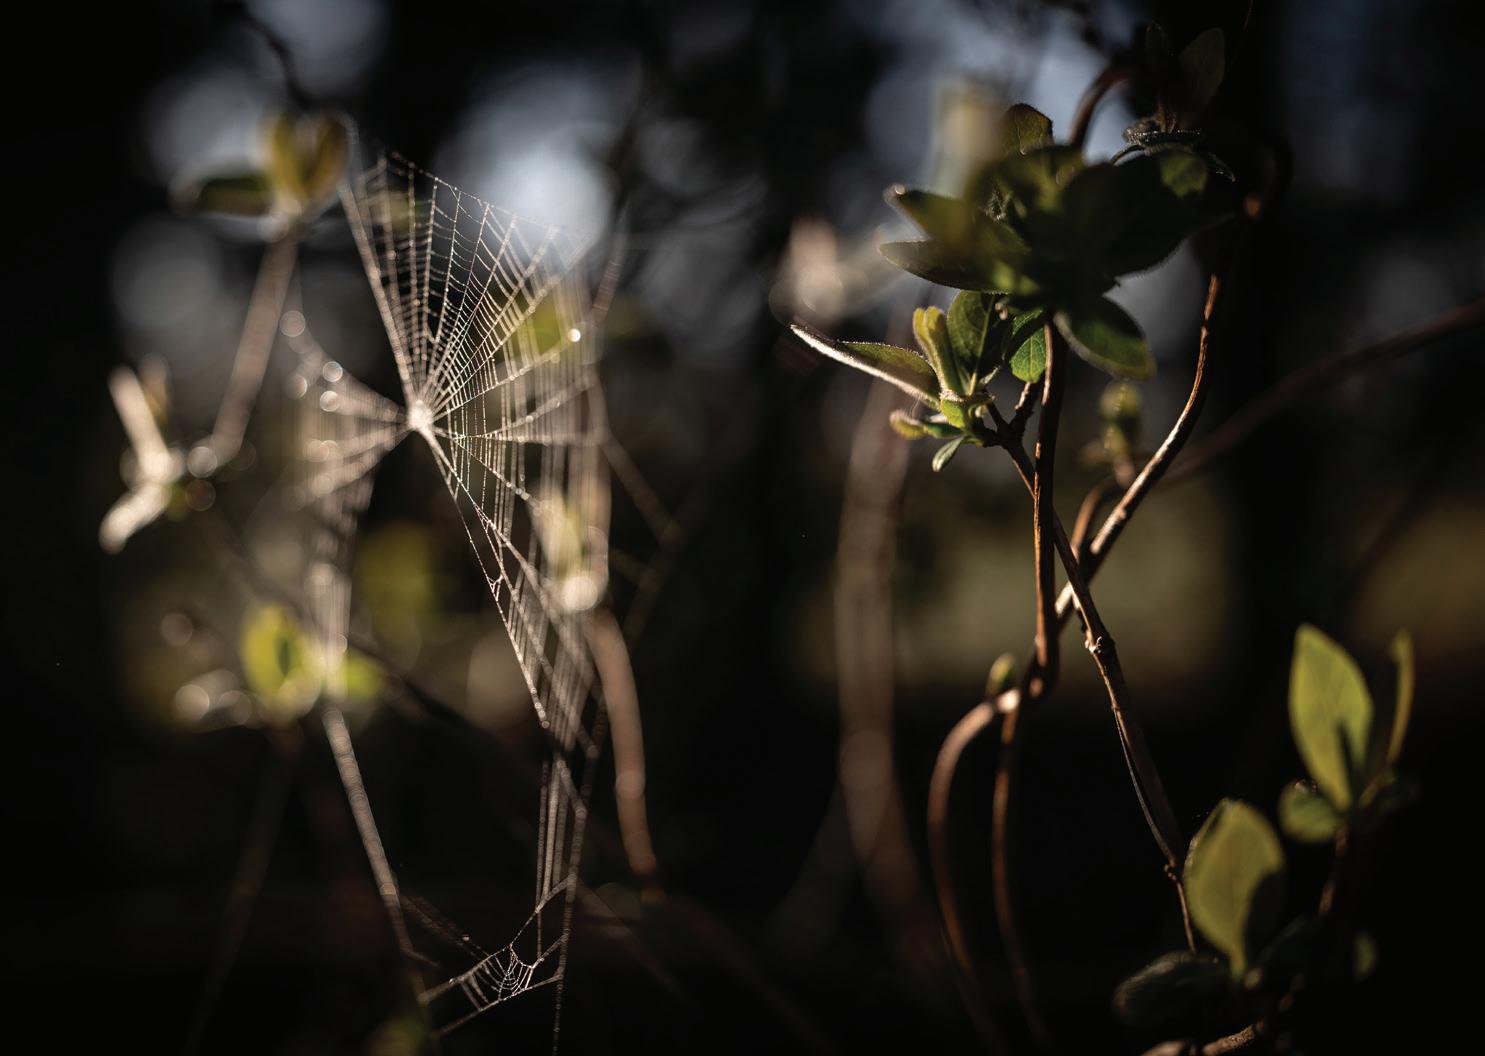
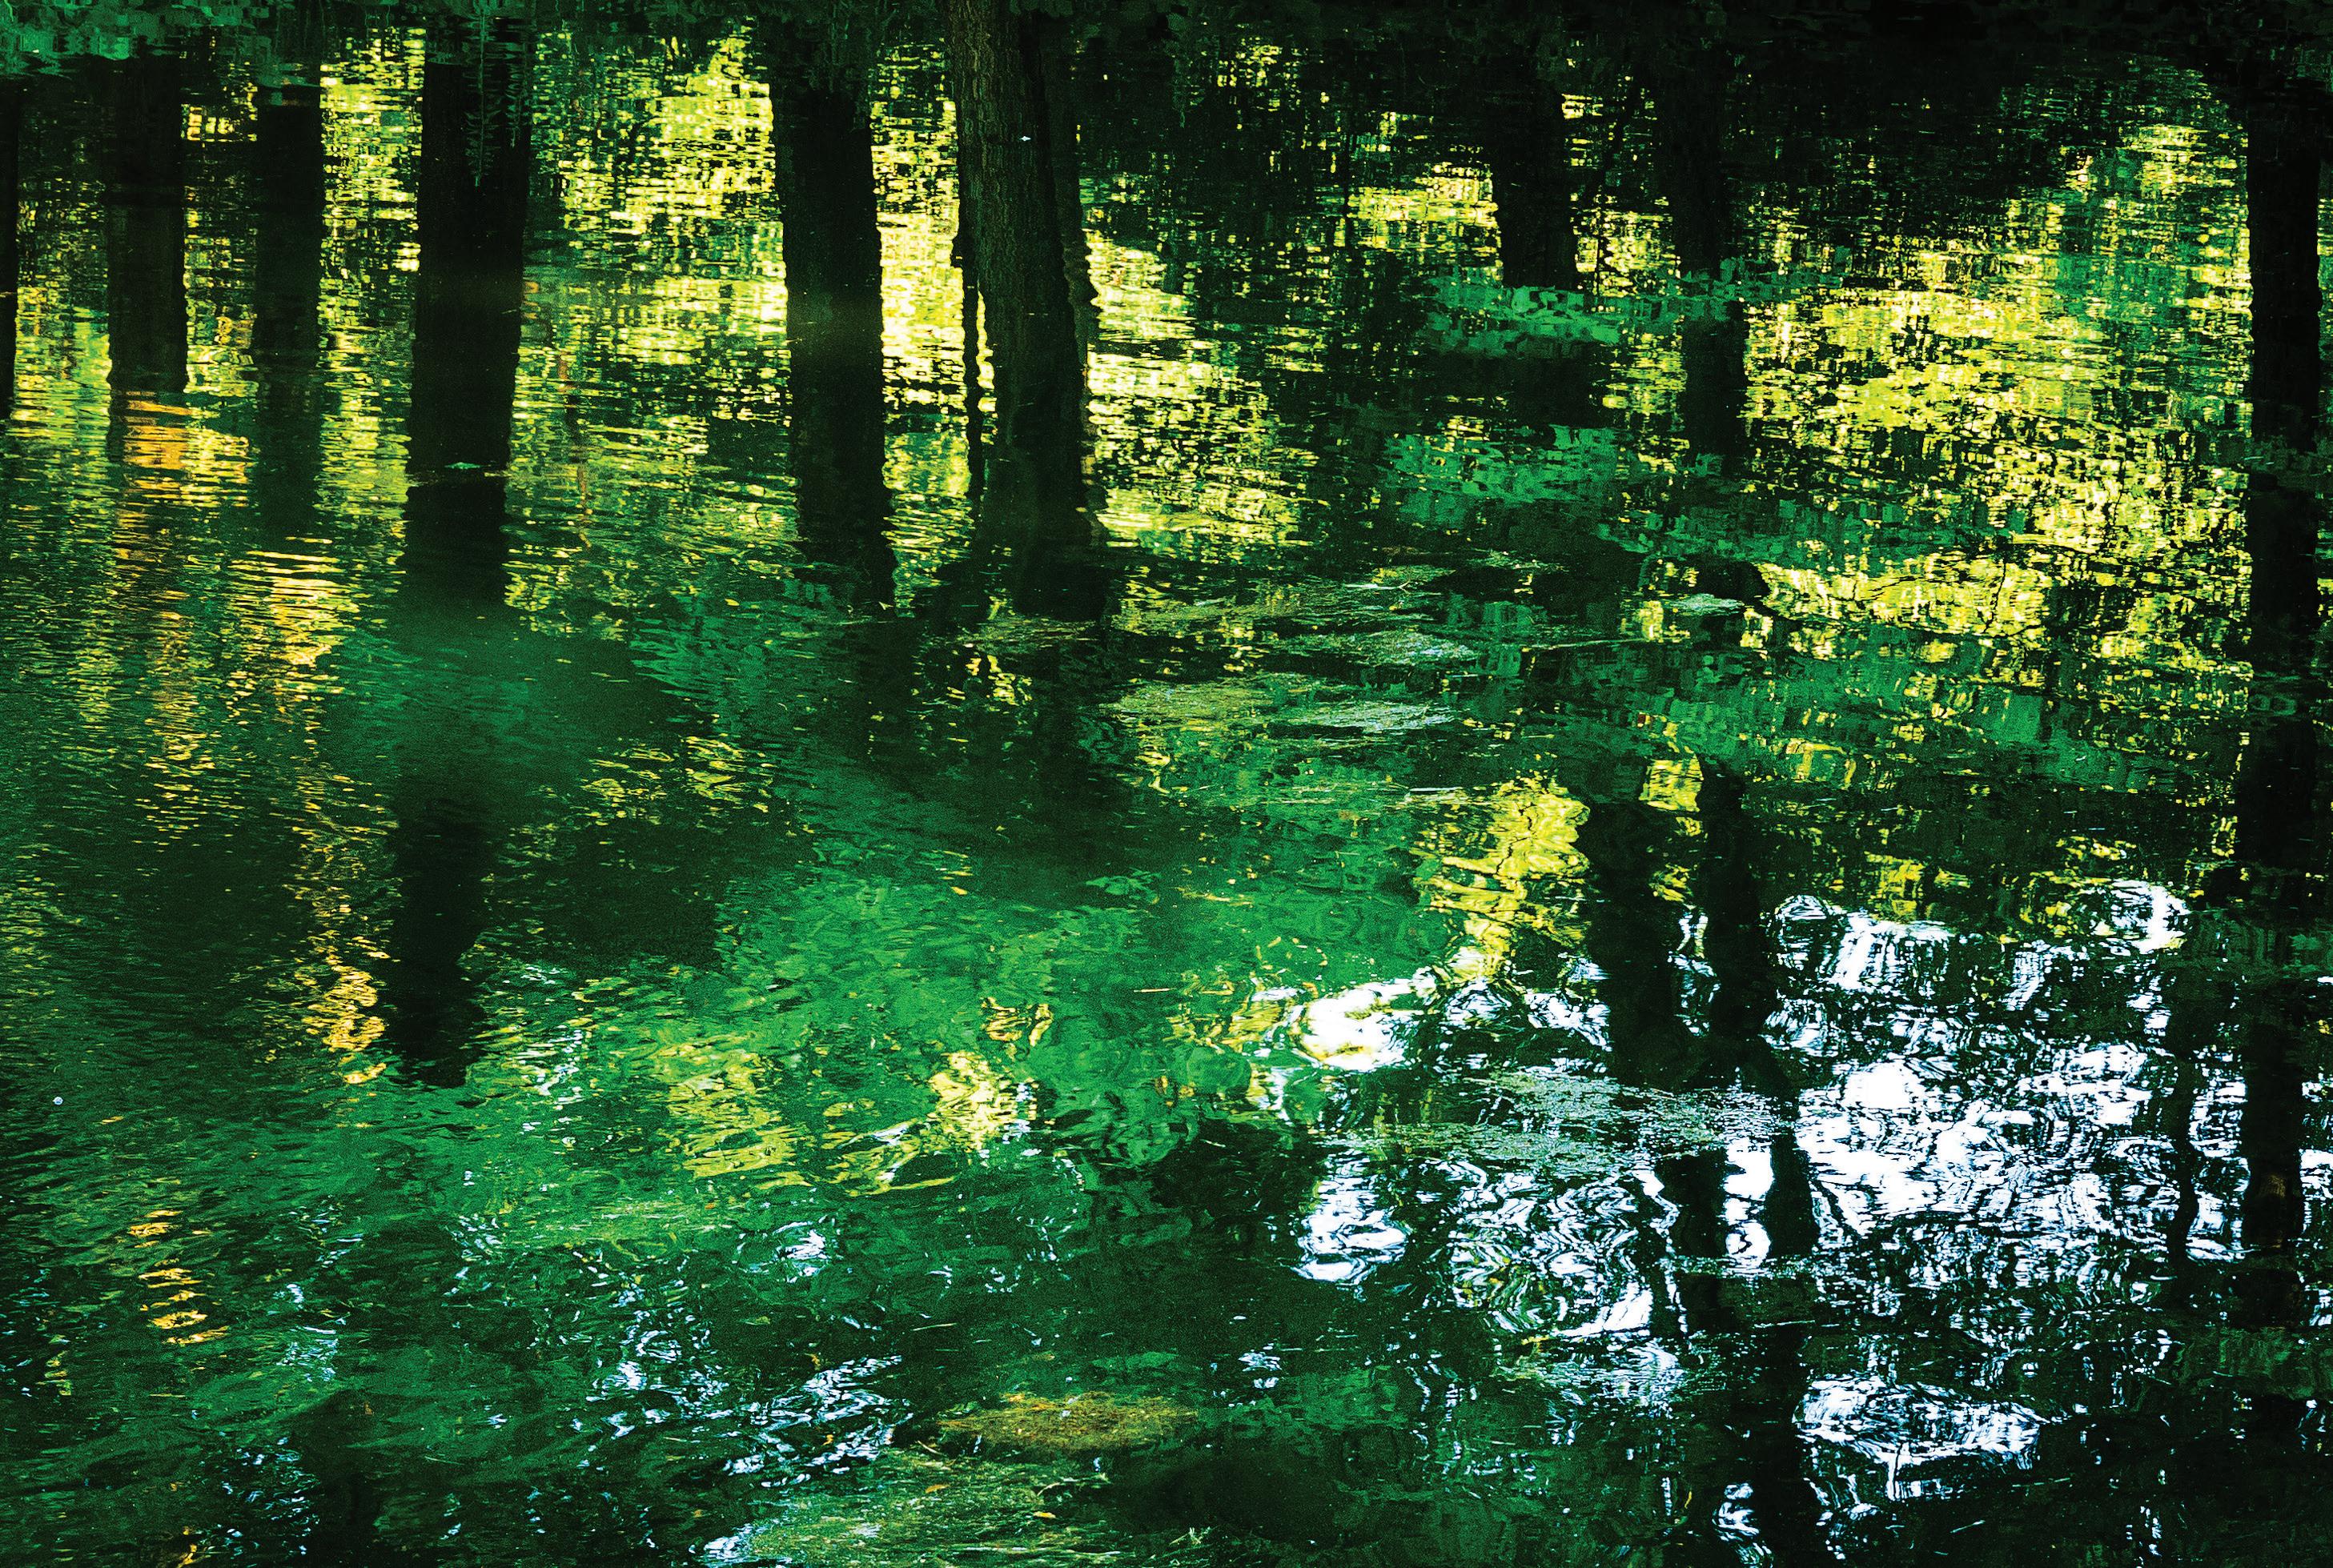
Reflections are ever present in our daily lives - in our morning mirrors, the large plate glass panes of urban buildings, on the shiny metal surfaces of our automobiles.
When we glimpse reflections, we see our world bounced back, yet transformed, upside down, reversed in polarity, distorted in dimension.
These challenge us to consider alternate ways of seeing, viewing other aspects of the familiar and stimulating interior monologue.
(left) FALL. Leica M-P (Typ 240) & 50mm APO-Summicron-M f/2 ASPH at ~f/4, 1/125sec, ISO 1000.
Water is nature’s finest reflective surface. On our property in Southern Connecticut a small lake beckons, seemingly hidden behind a large stand of white pines and mature maples, poplars and birch.
From a distance the slightest glimpse of the water’s surface shimmers – cool grey in the winter months, a deep dark verdant hue in the summer. Spring brings the fresh tender greens of budding new life and autumn the jewel tones of that world falling away.
Over the past few years I have been drawn to the water, seeing beneath the surface and also considering what is mirrored from above. I started studying with my camera the multicolored leaves, single and in groups forming arrays of pattern on the shifting ripples of the lake. Fascinated by color and motion, I created my first impressionistic images of Reflections on a lake.
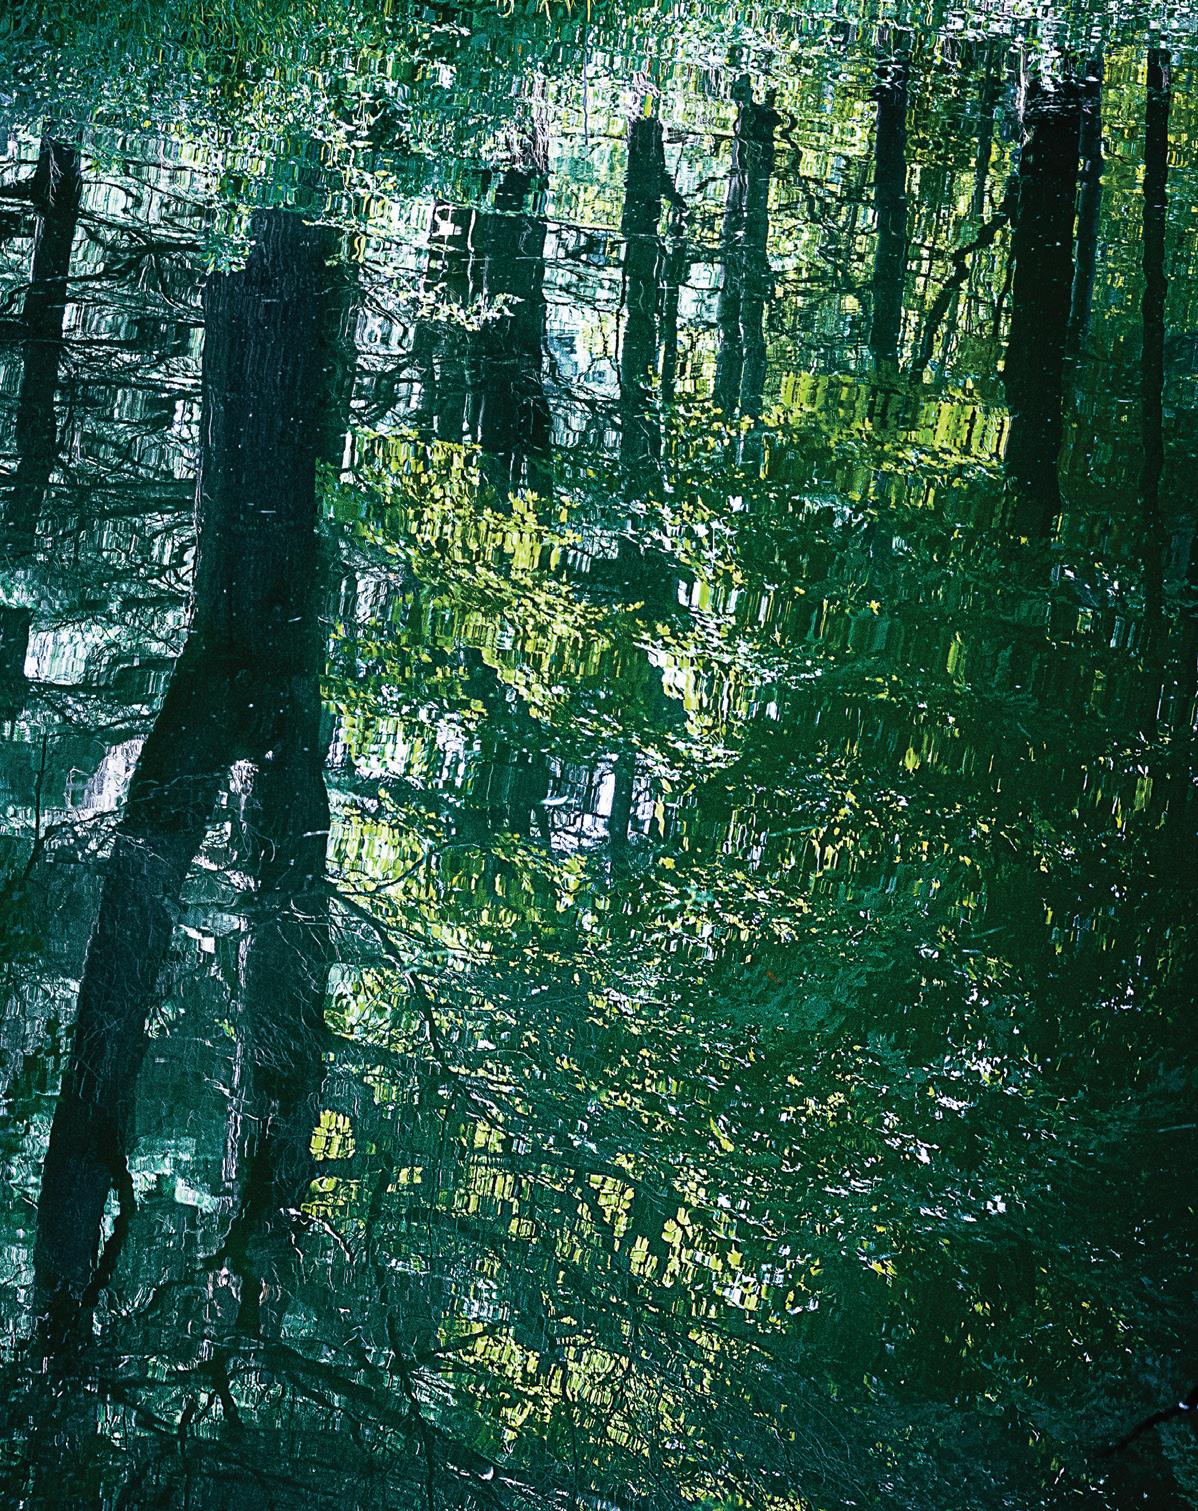
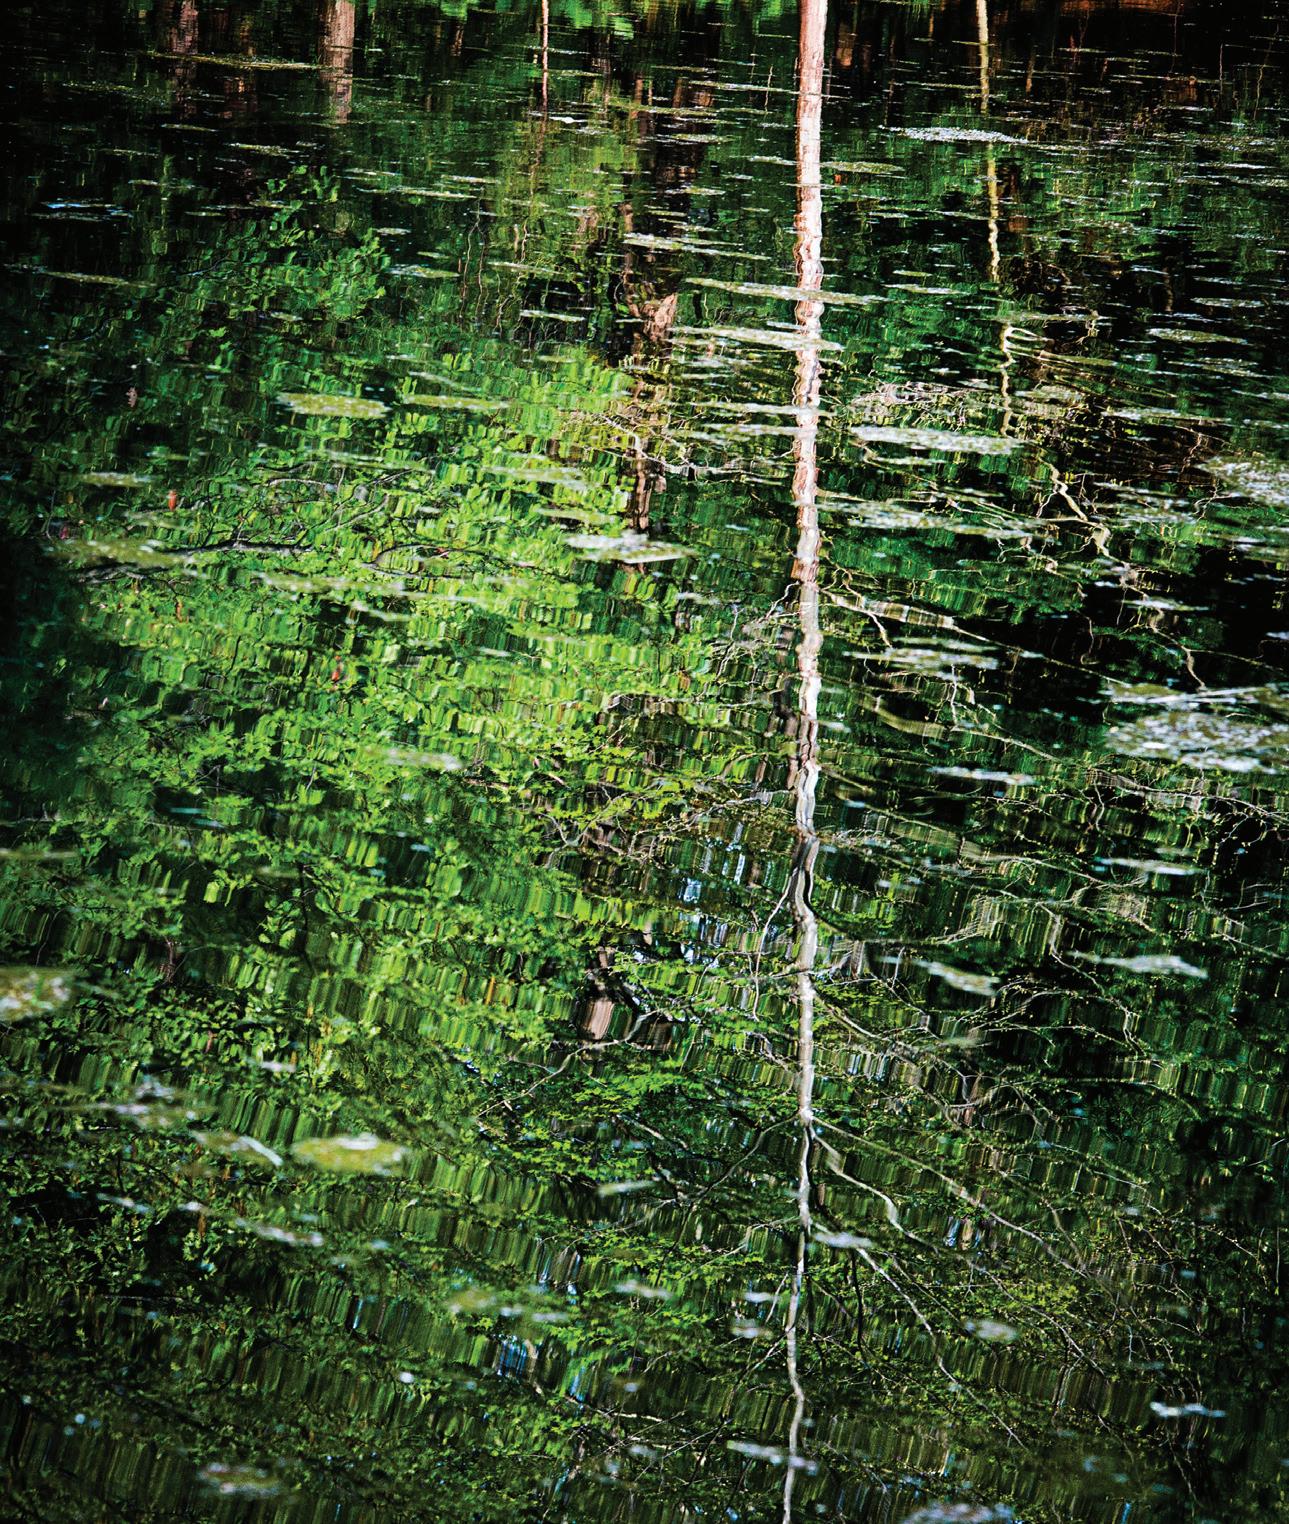
As the season turned, temperatures dropped and daylight waned, I found new patterns and tones on the icy plane. Wintry white clouds, granular frost and broken twigs frozen in place revealed another aspect of our relation to the natural world and brought me deeper into the project. As the year progressed I continued photographing reflections in the lake, finding that the solid trunks of the trees ringing the shore and a bright red bench in one corner became anchoring structures.
The ever-changing colors of the foliage transmuted the lake from grey to green to violet to russet. The motion of wind, stillness of heavy summer air, the patterns of clouds or slanting rays of late afternoon light provided texture to my watery canvas.
(clockwise)
SUMMER. Leica M-P (Typ 240) & 90mm APO-Summicron-M f/2 ASPH at f/16, 1/30sec, ISO 1000.
SUMMER. Leica M-P (Typ 240) & 50mm APO-Summicron-M f/2 ASPH at ~f/4, 1/180sec, ISO 1600.
SPRING. Leica M-P (Typ 240) & 90mm APO-Summicron-M f/2 ASPH at f/6.8, 1/180sec, ISO 1000.
(left, top)
FALL. Leica M-P (Typ 240) & 50mm APO-Summicron-M f/2 ASPH at ~f/4, 1/180sec, ISO 1600.
(left, bottom)
WINTER. Leica M-P (Typ 240) & 90mm APO-Summicron-M f/2 ASPH at f/8, 1/500sec, ISO 1000.
(right)
FALL. Leica M-P (Typ 240) & 50mm APO-Summicron-M f/2 ASPH at ~f/4, 1/180sec, ISO 1000.
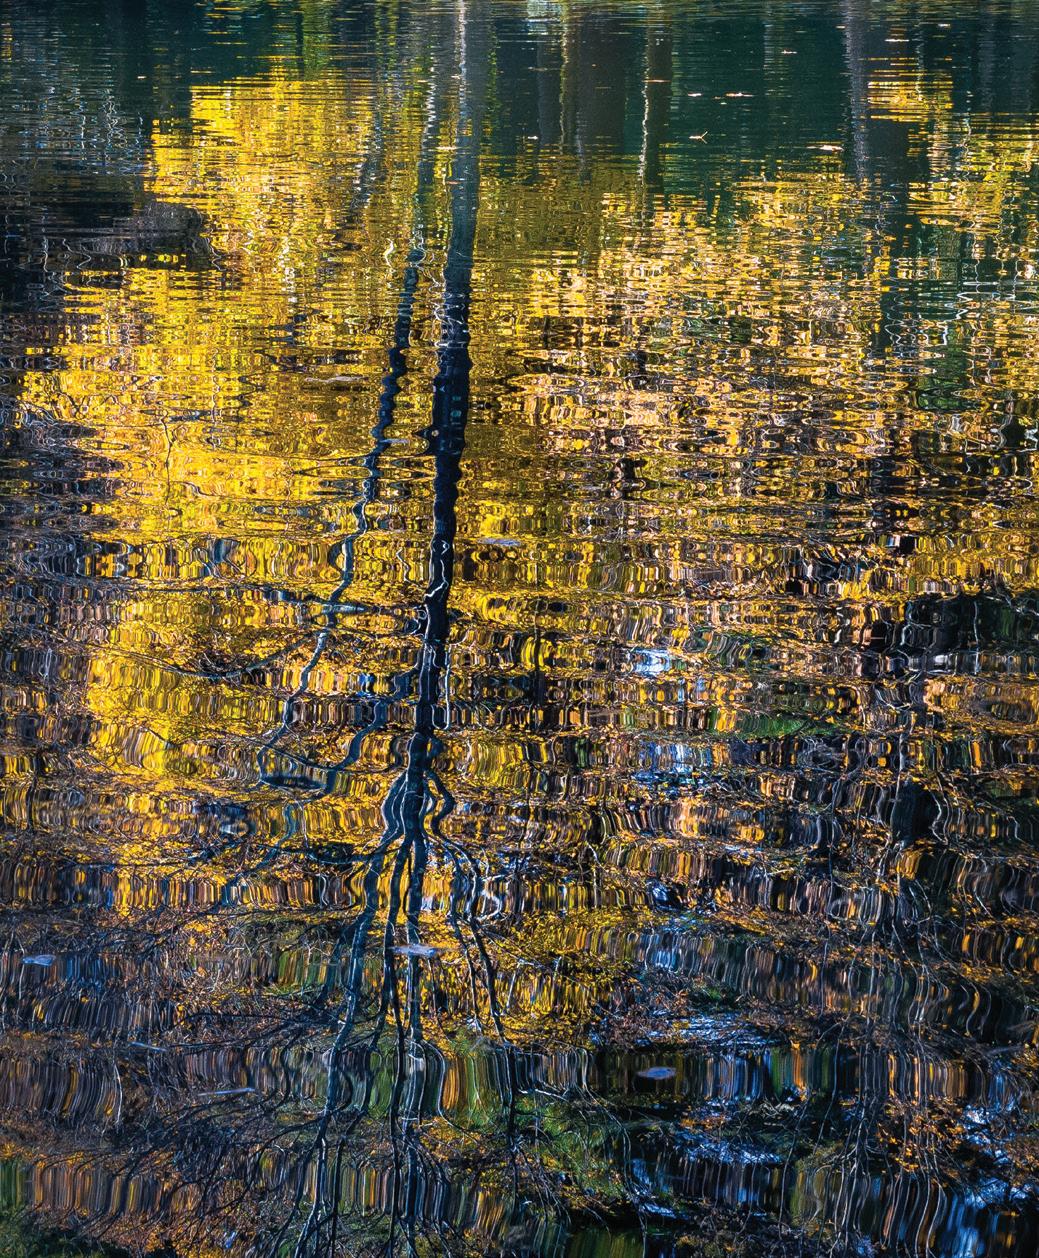
My kit included a Leica M-P (Typ 240) digital camera with either a 50mm APO-Summicron-M f/2 ASPH or a 90mm APO-Summicron-M f/2 ASPH lens.
I quickly realized the amazing beauty, unpredictably, mutability and variability of the reflections. It is truly a collaboration of light and dark, water and land, clouds and forest. The resultant variations defy probability and made each photographic visit unique.
My photographic journey followed an organizational theme beginning with impressionistic studies and culminating in wildly abstract representations. My efforts emphasize line, pattern, texture and color, in the interpretation of natural forms. My challenge was to distill, reduce and focus these awe-inspiring and evanescent gifts of nature into emotive and interesting photographs. In this I was heavily influenced by a congeries of artists including Monet, Cezanne, Kandinsky, Lhotte, Miro, Rothko, Pollock and Twombly.
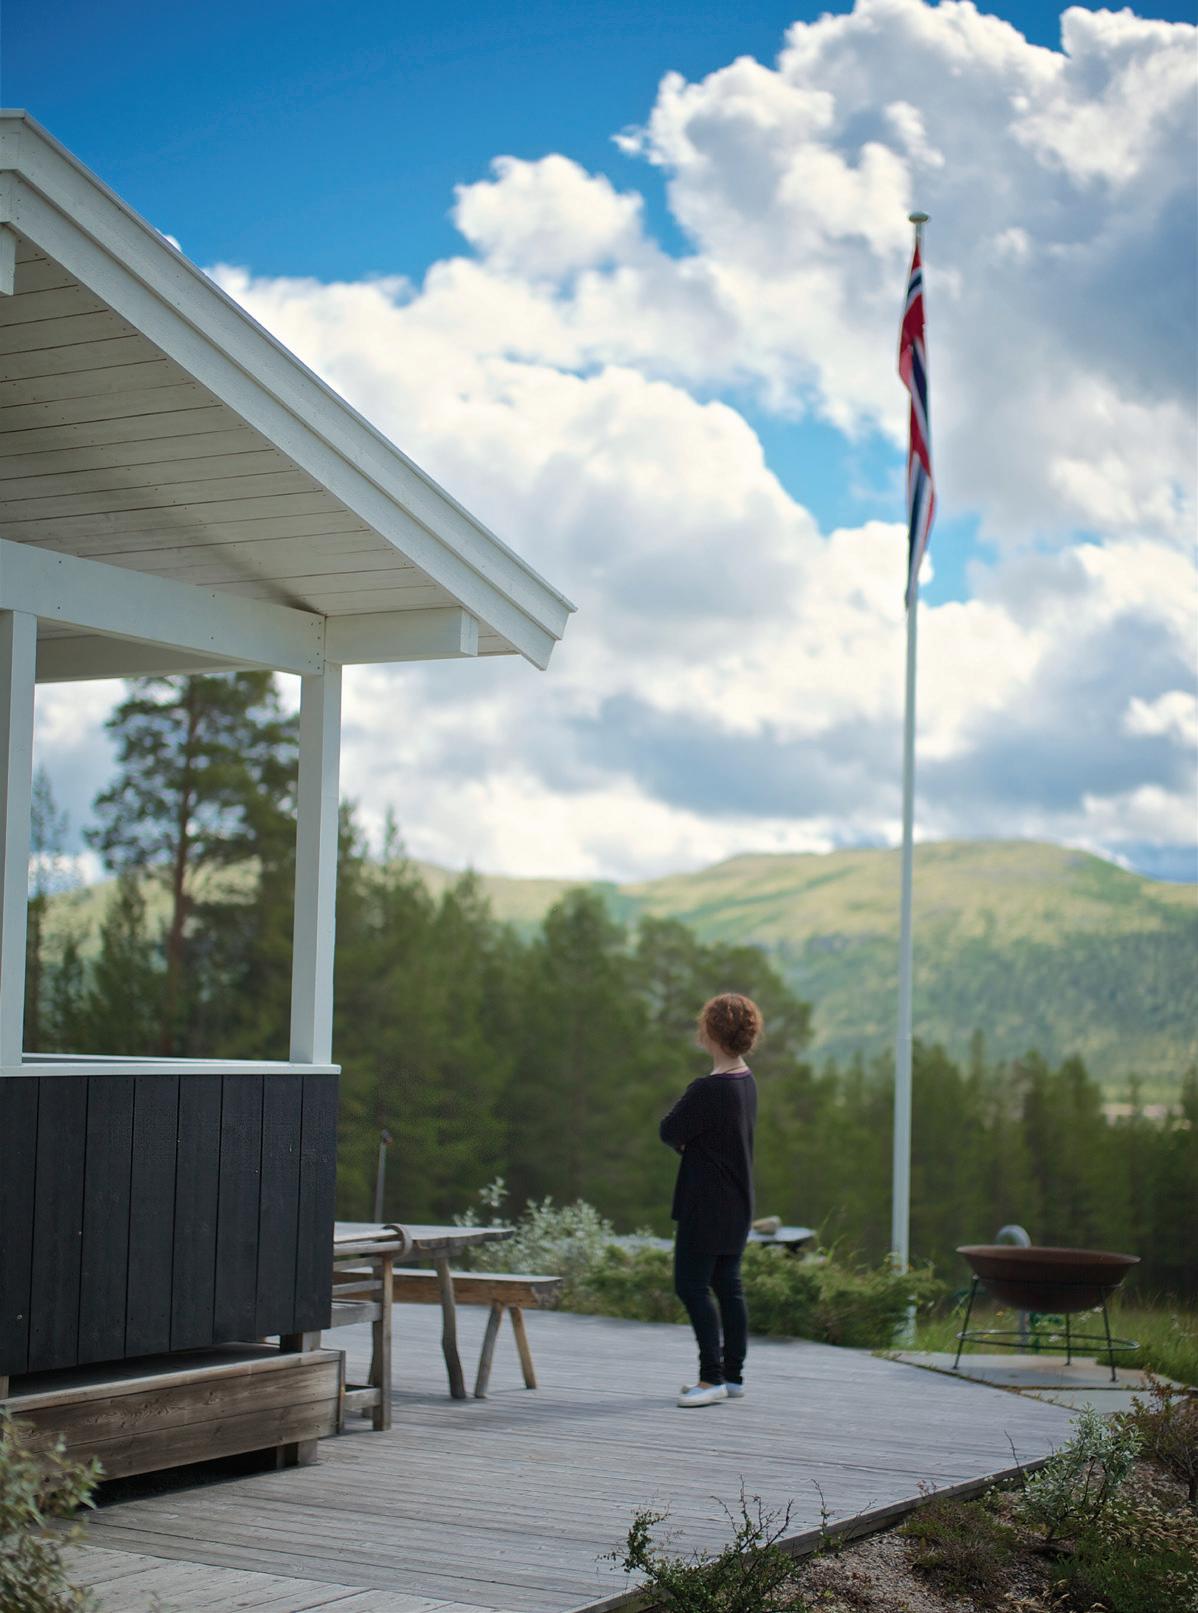
nÔRwĀY
within 50mm fRamelines
by JULIUS YLS
Shooting Norway’s landscape with the 50mm Summilux-M. Norway’s landscape is famous for giant fjords, rows of mountains, and vast tundra wilderness. In this trip I will be trying to capture all those essences with my Leica M-E and standard 50mm Summilux-M, instead of wide angle lenses.
In the past, I would always use my 28mm Elmarit to capture landscapes, being satisfied with the fact that I could capture everything in one frame. But this changed after my trip to Norway capturing the landscape using a 50mm lens. There are many reasons that made for this change, but in this article I will make it simple and to the point.
In the beginning, I had difficulty fitting the landscape into my 50mm frame line. Naturally when I saw a grand landscape I wanted to capture all of it with the hope that it would show the grandeur of scale of the landscape. However, using the 50mm forced me to think and find the core essence of the landscape. What is it that makes this particular landscape special or grand? What is it that I want my audience to feel?
The 50mm fameline gives more personal and intense meaning to your composition.
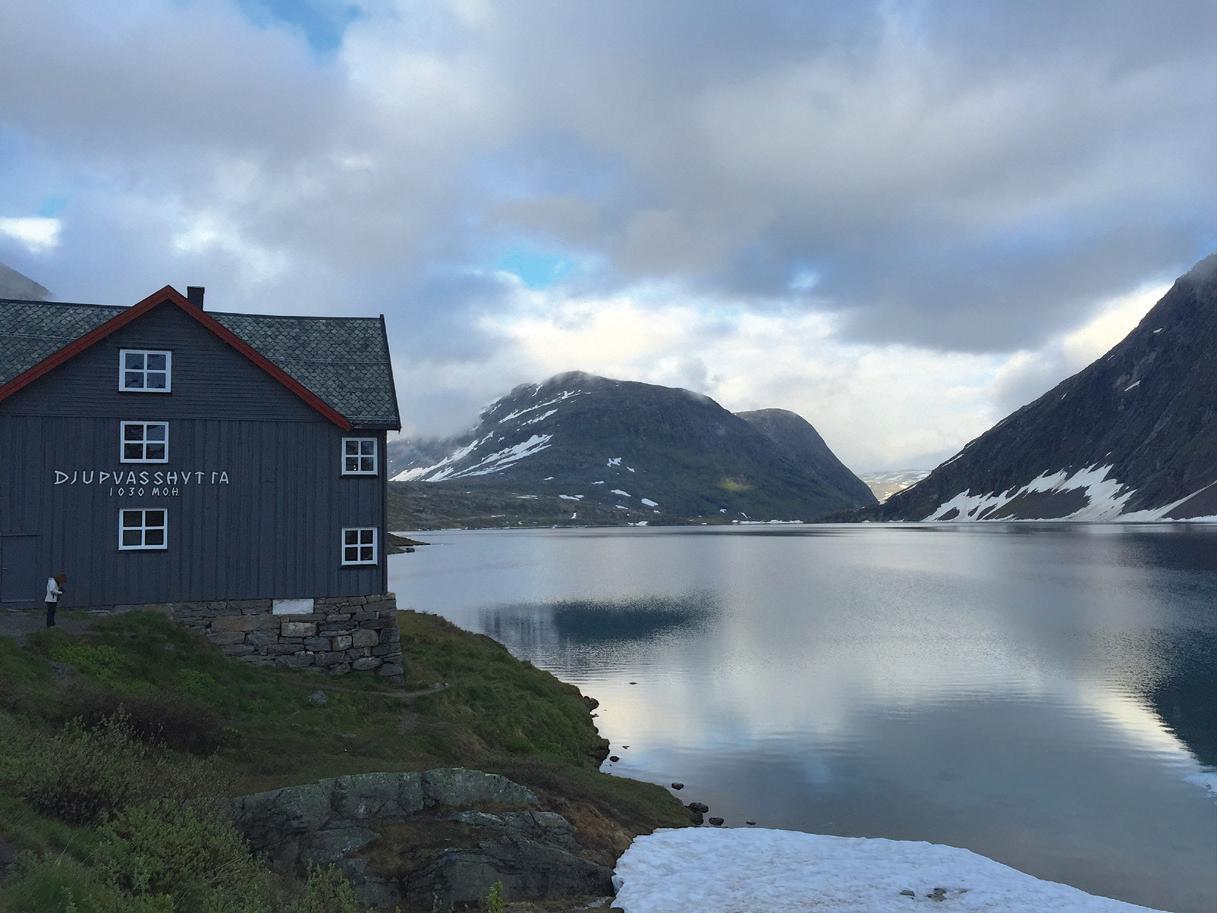
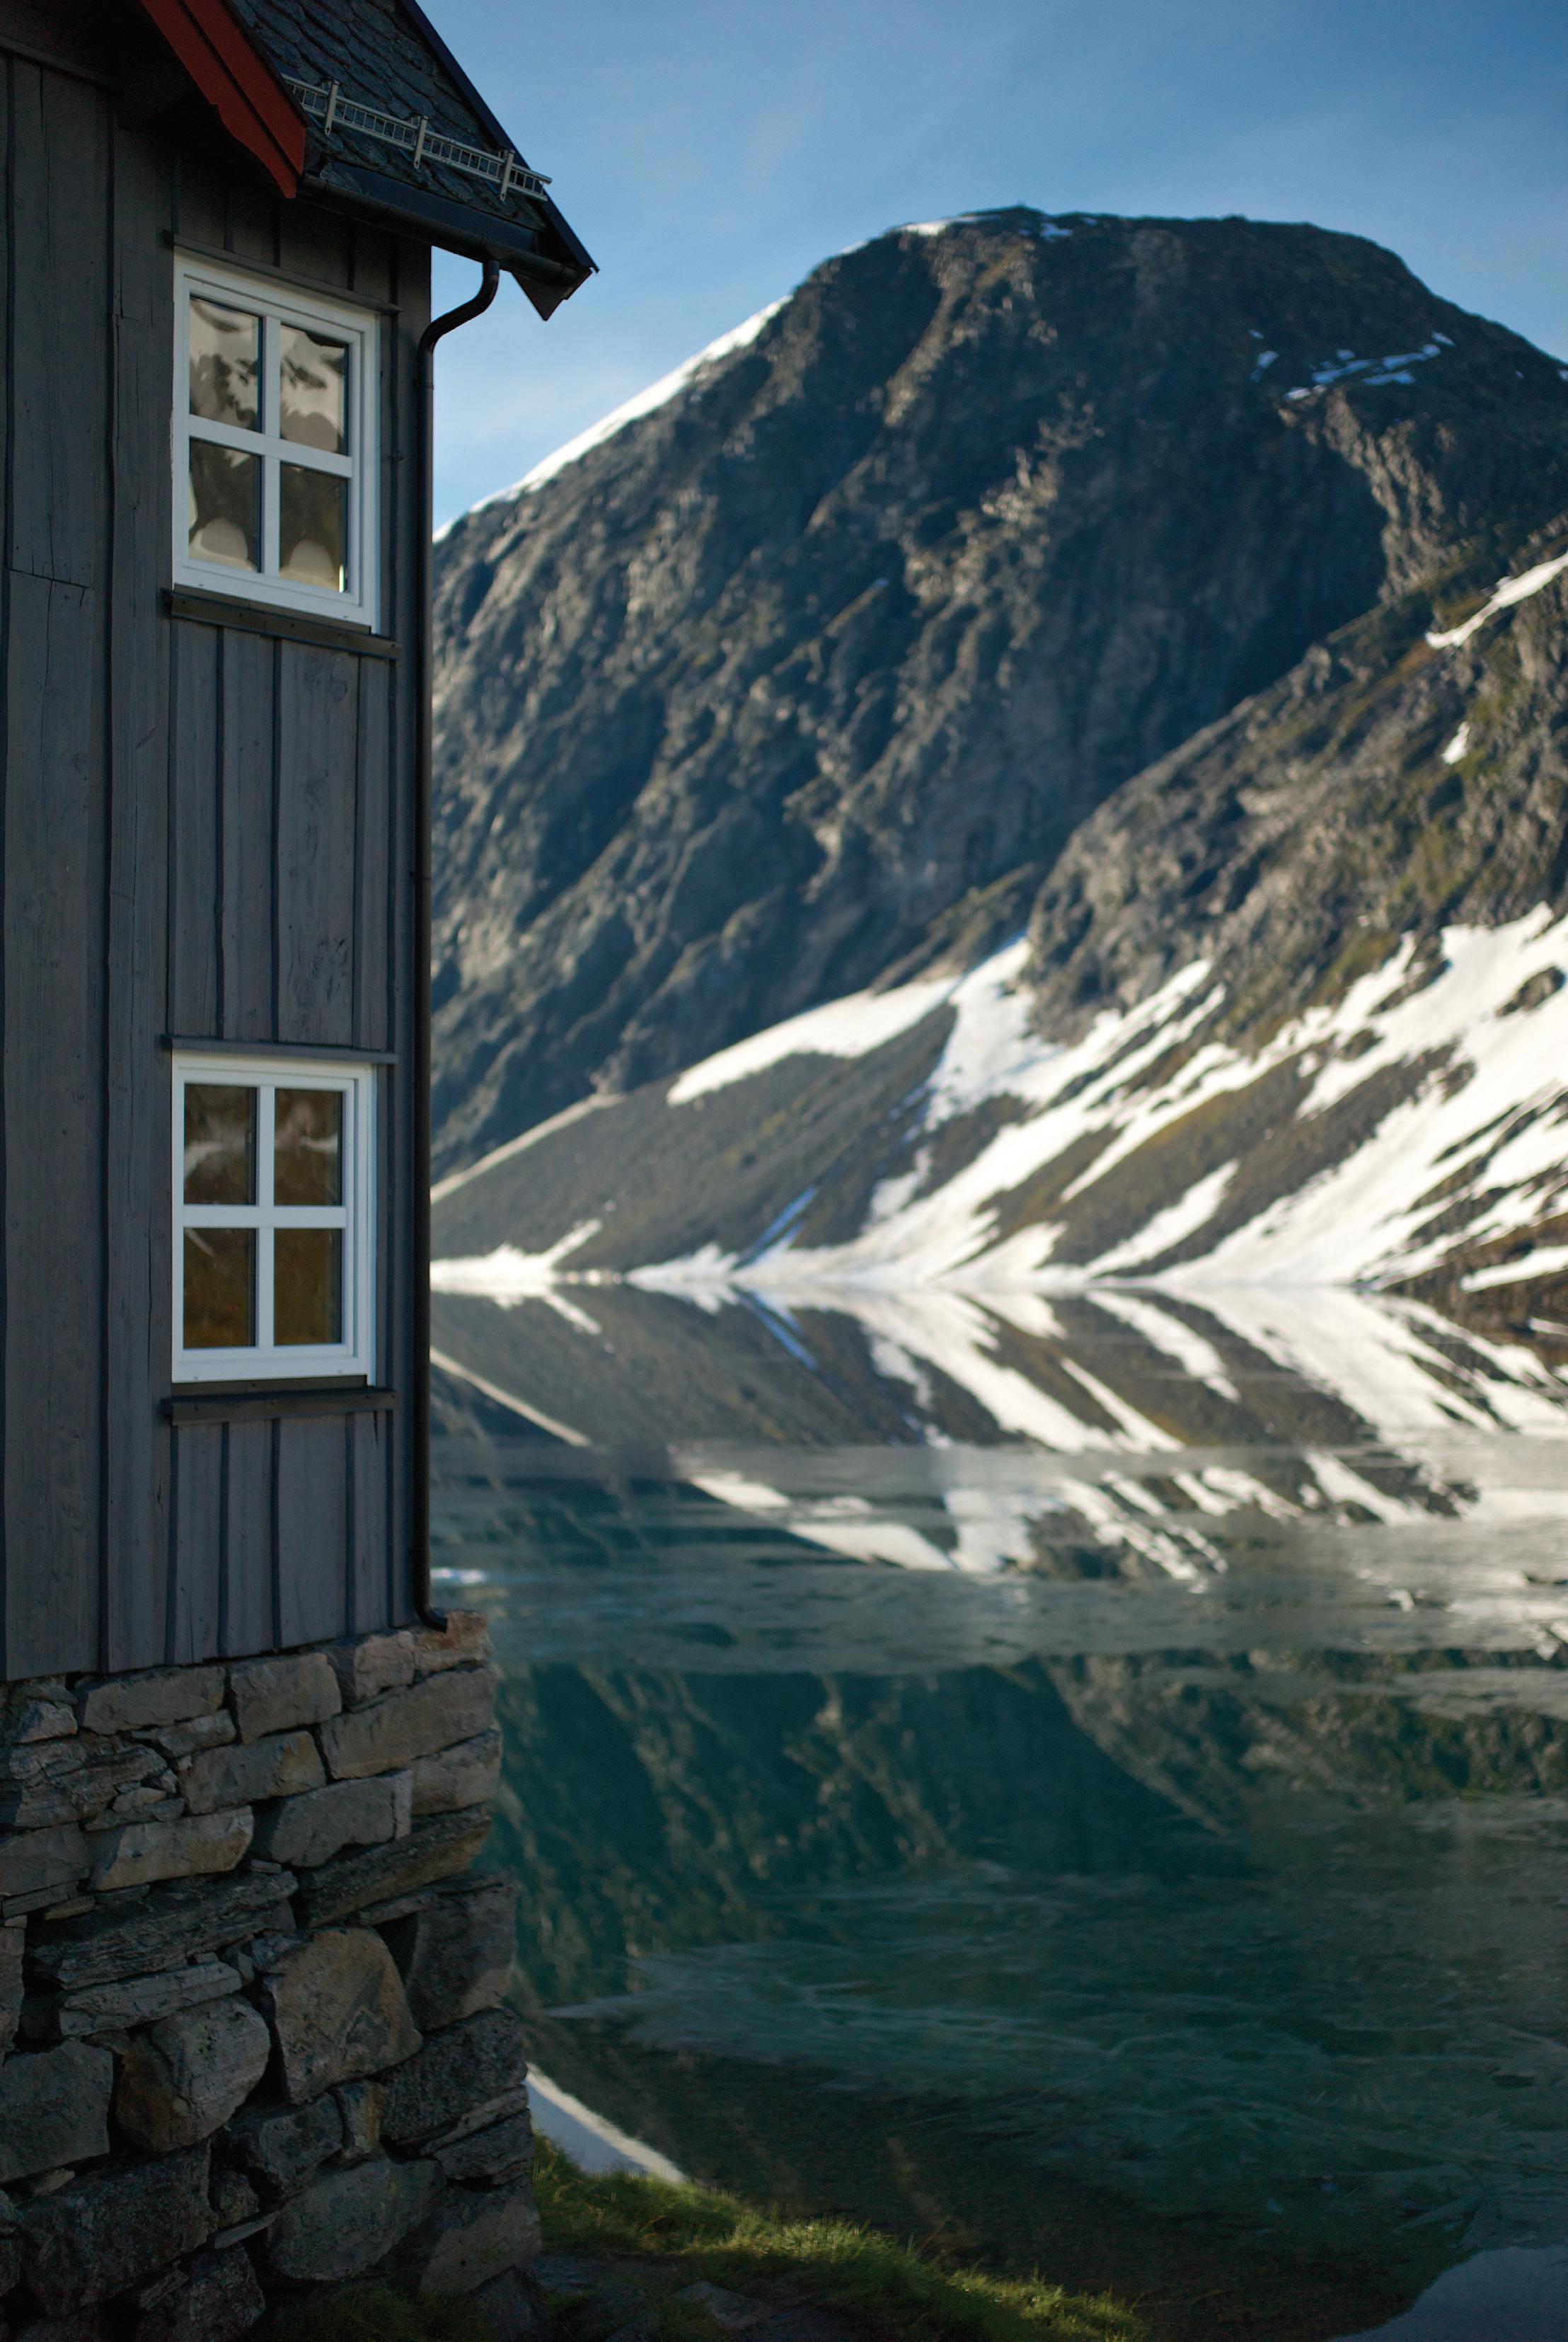
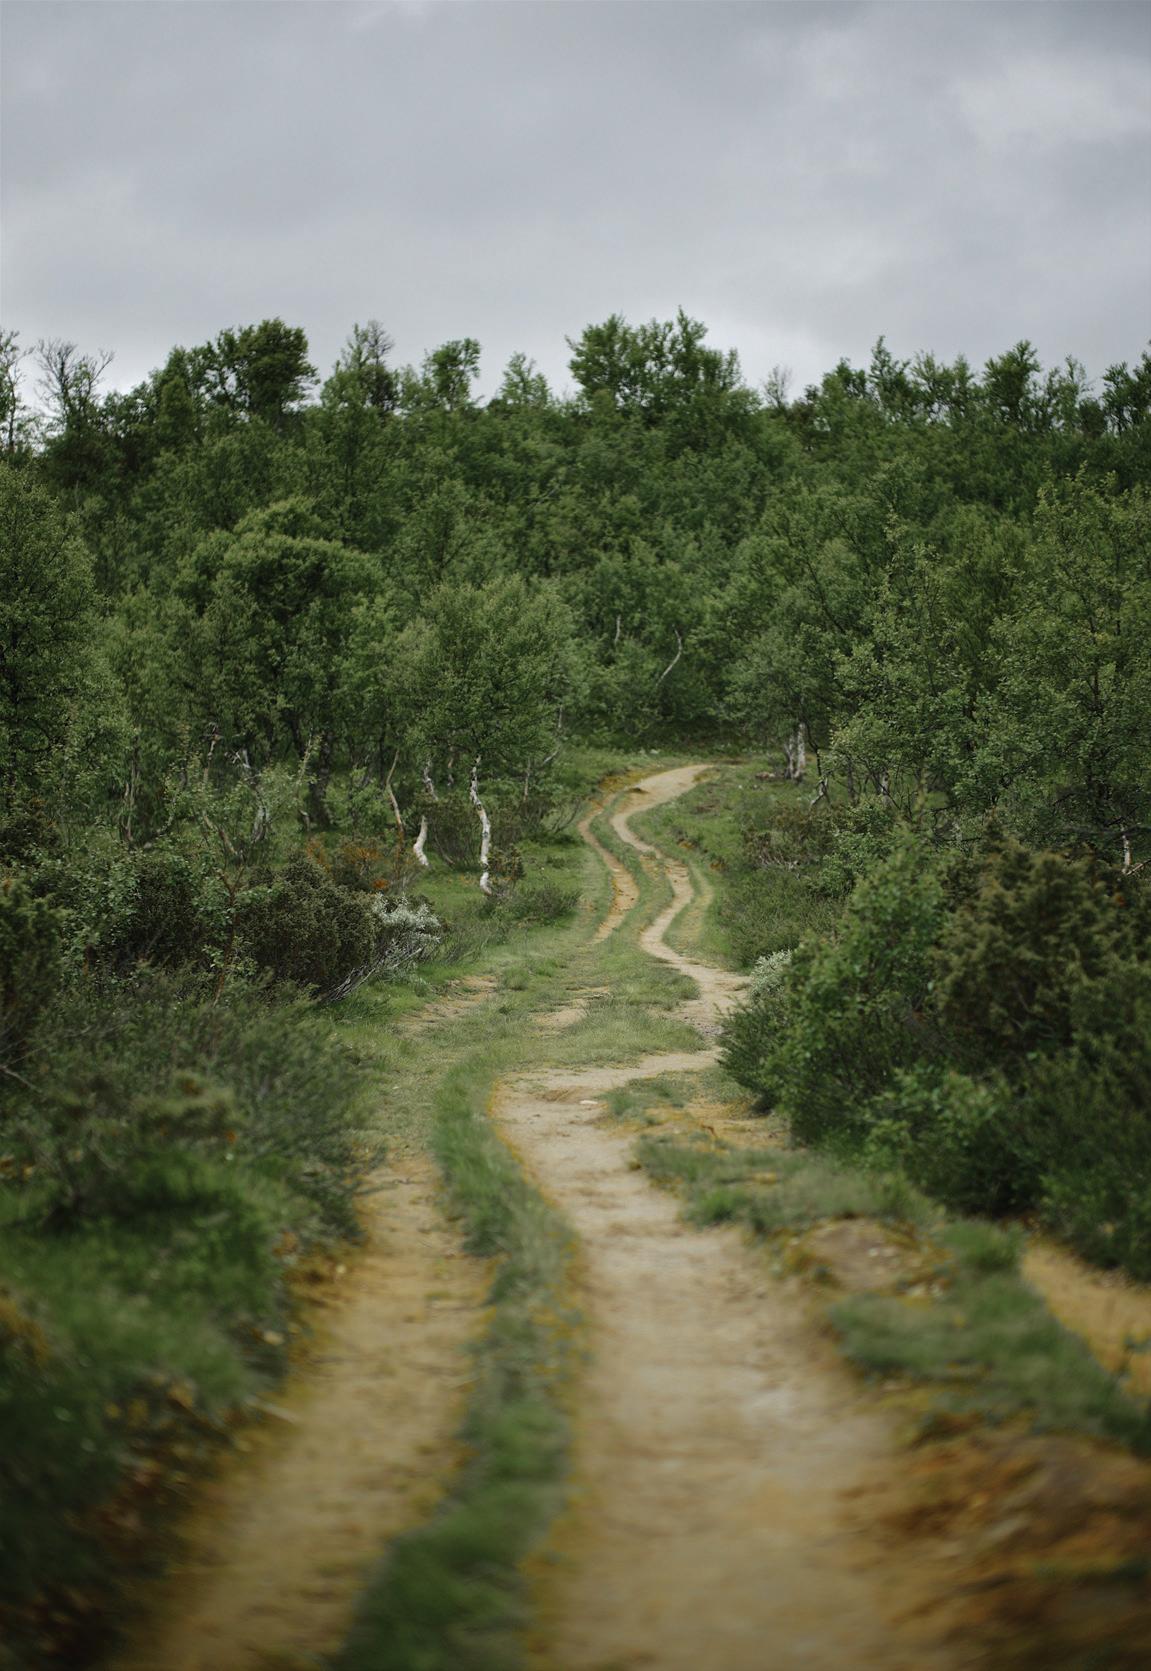
Finding the essence. Often I found that there is some particular spot or composition within the whole landscape that gives me the sentimental feeling about the whole. For example, see the picture on the right taken in Djupvasshytta in the early morning. Although the season was summer, it was a cold morning and the warm sunlight had just started to hit the surface of the mountain. The moment was quiet and the mountain felt calm. I used the 50mm frame line of my Leica M rangefinder to look around the landscape, and found the composition that somehow also represented the intimate experience of being in that place at that time. The picture shows that I am standing close to the wooden hut and seeing bits of warm morning light sparkling around the edges of the grasses. A bit of icy water touches the mountain in the background. Compare this to the image above that I took using a wide angle (on an iPhone) which shows the whole thing; it lacks meaning and intimacy.
The 50mm fame line forces me to look repeatedly at the landscape and find what makes this particular landscape special. While our eyes see far wider than 50mm, actually our focus is narrower, indeed much like a 50mm frame line. What we feel about that landscape at the time is what we are actually focused on.
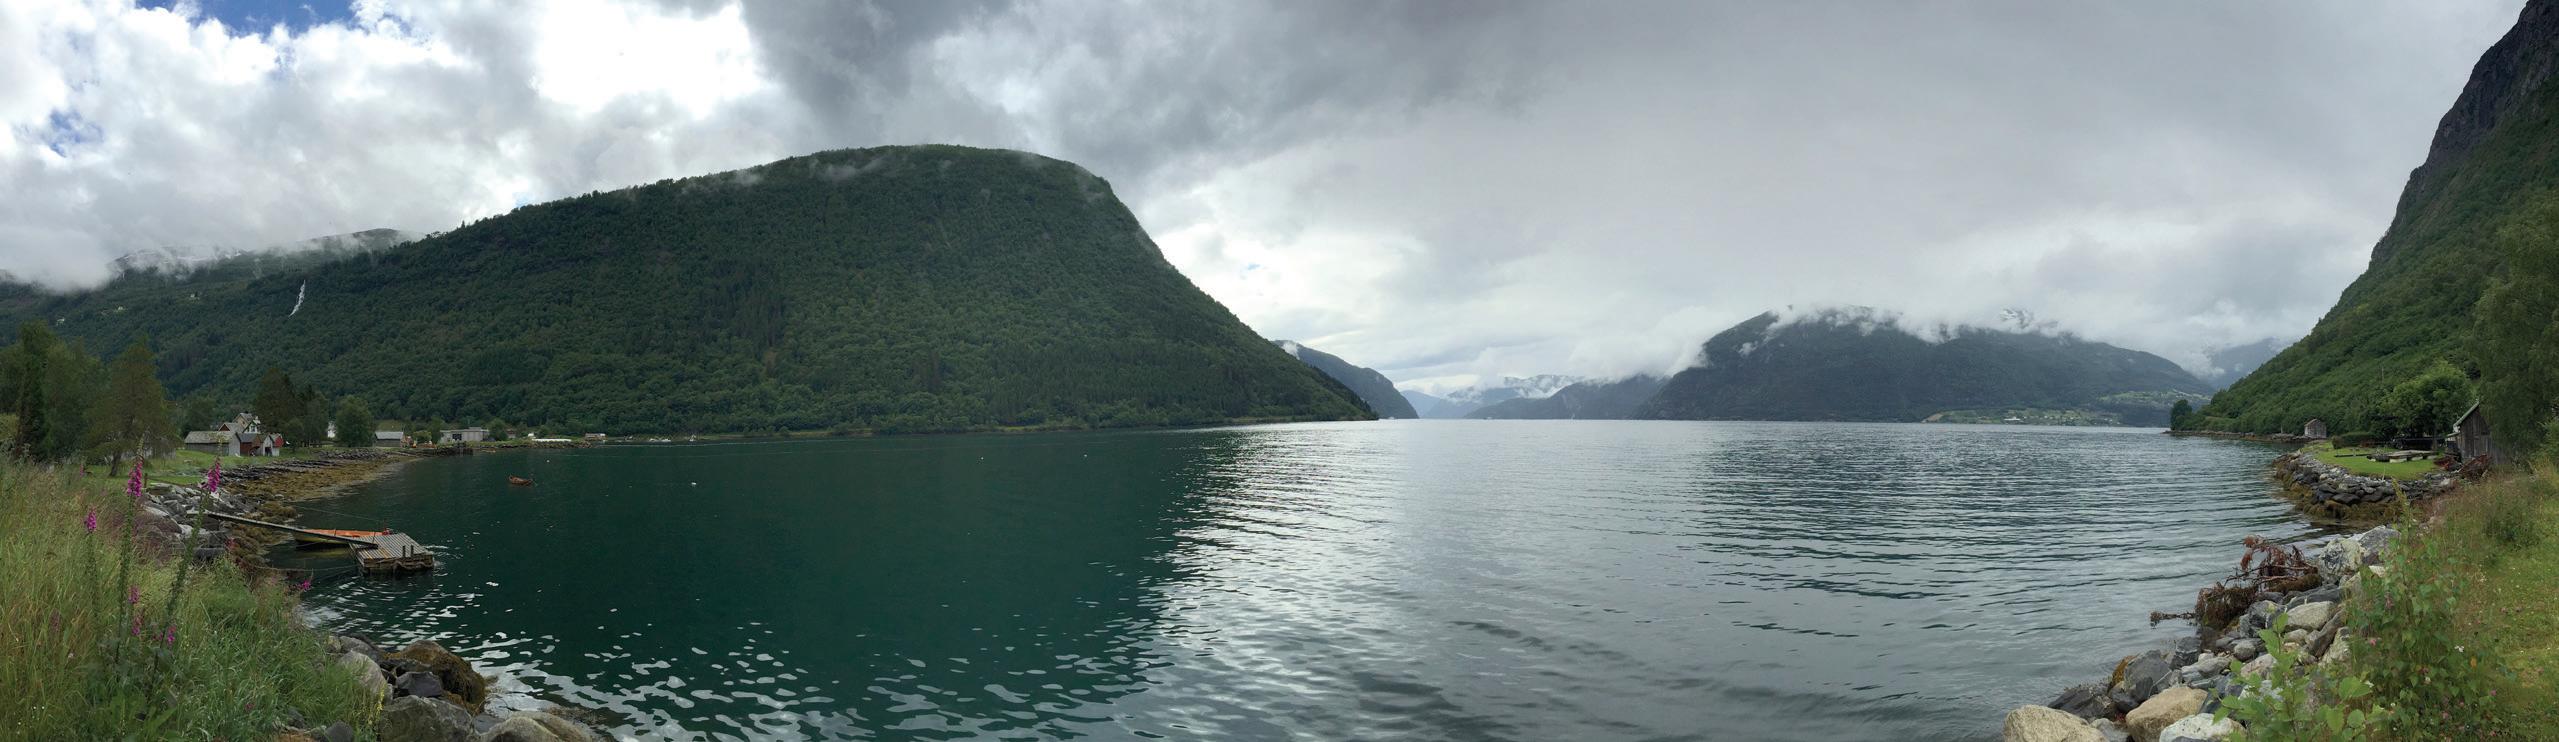
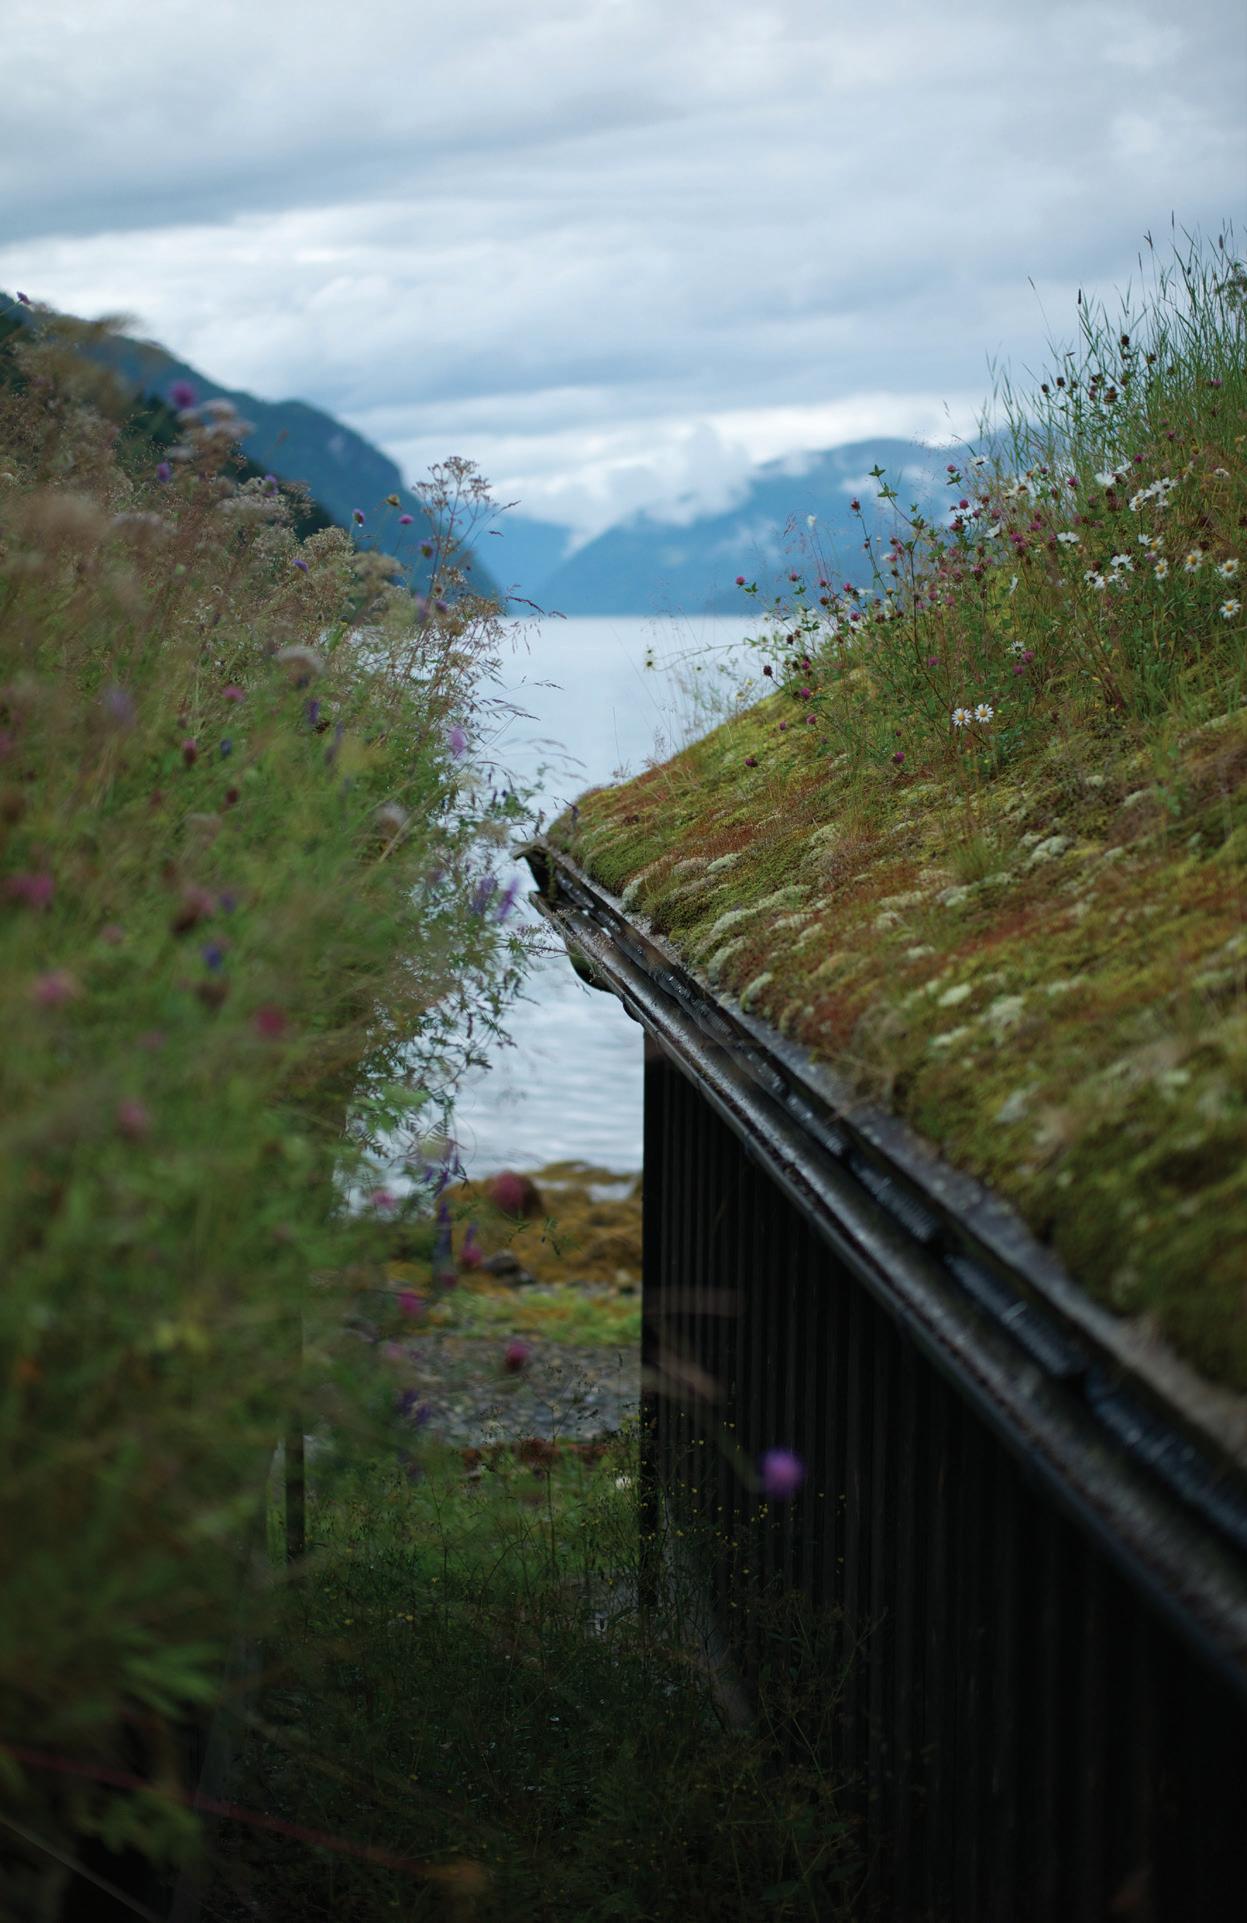
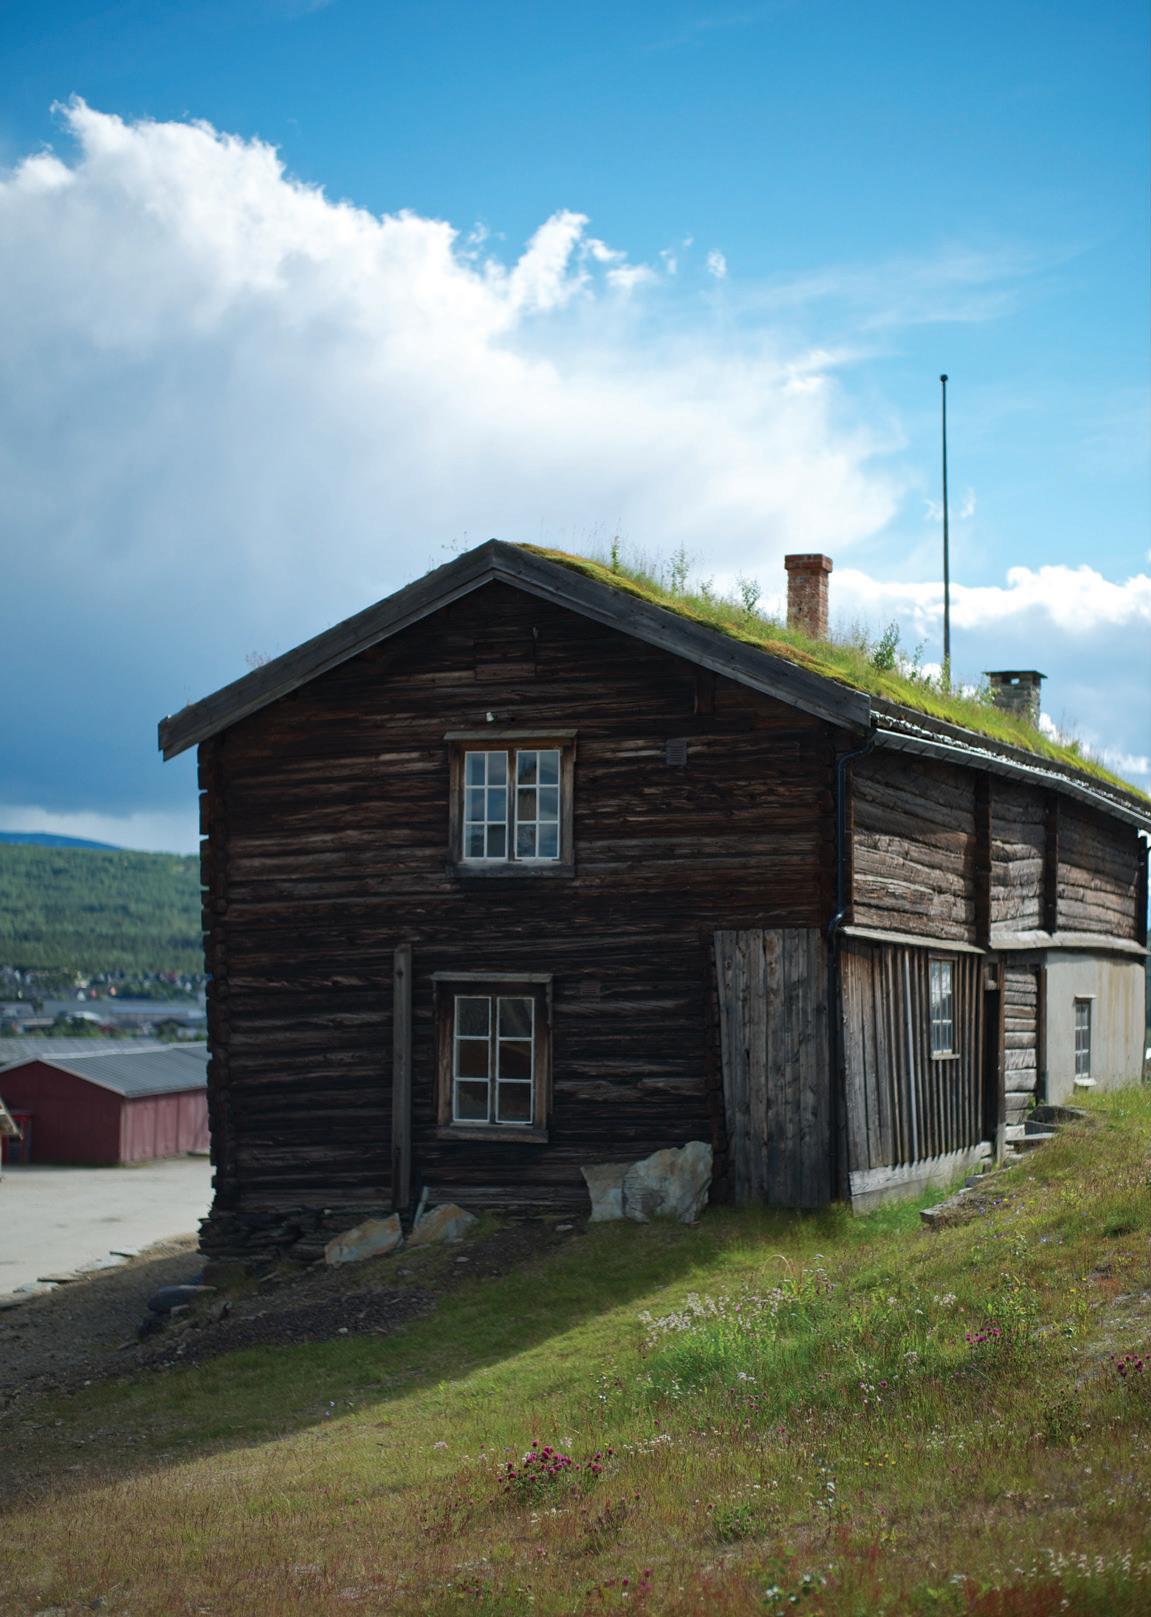
Unique-ify the landscape. The other important advantage that I found using 50mm in landscape photography is that it allows me to “unique-ify” that landscape, setting it apart from other pictures taken at the same place. In the example of the image on the left, I was trying to capture the beautiful fjords and the rows of fishermen’s cabins with plants growing on their roofs. In the past I would use my wide angle lens and capture all of it. But since I chose to fit this within the 50mm frame line, I now have to walk around and find the point of view that somehow captures the essence of both picture elements. I found an interesting POV where somehow the fishermen’s cabins are “watching” the magnificent fjords from a distance. Certainly this gives unique identity to the picture: compare this with the image above which shows the whole thing.
Frameline for the naked eye. Since a 50mm fame line is very similar to the human eye’s focus angle, always using the 50mm fame lines somehow trained my eye and allowed me to recognize good composition without looking through the camera viewfinder all the time. This is critical when one is a traveling photographer and always coming upon new things. This is especially true with a Leica rangefinder camera, where the viewfinder image is a direct view of the scene. It is not a view which has been distorted through the lens, and more closely approximates what the naked eye sees.
To be able to previsualize a great potential composition with the naked eye is crucial; it is like having a 50mm fame line embedded in one’s eye.
The three pictures on the right are a few of those compositions that I spotted without checking them with the viewfinder. These images mostly required having a large or close object as “guidance” to estimate the 50mm frame line with the naked eye.
"...a 50mm view helps us find the essence of a landscape."
I am not saying that we all have to use a 50mm to capture landscapes. There are needs and times where we have to show the whole thing and need wide angle lenses: think commercial assignments or client needs.
What I am trying to describe in this article is that a 50mm view helps us to find the essence of a landscape. Why 50mm? Will 90mm also work? I tried this with tele lenses and what I found is that lenses with a narrower field of view than 50mm produce images with compressed distances that look different from what our naked eye normally sees. This can be a good or bad thing, though.
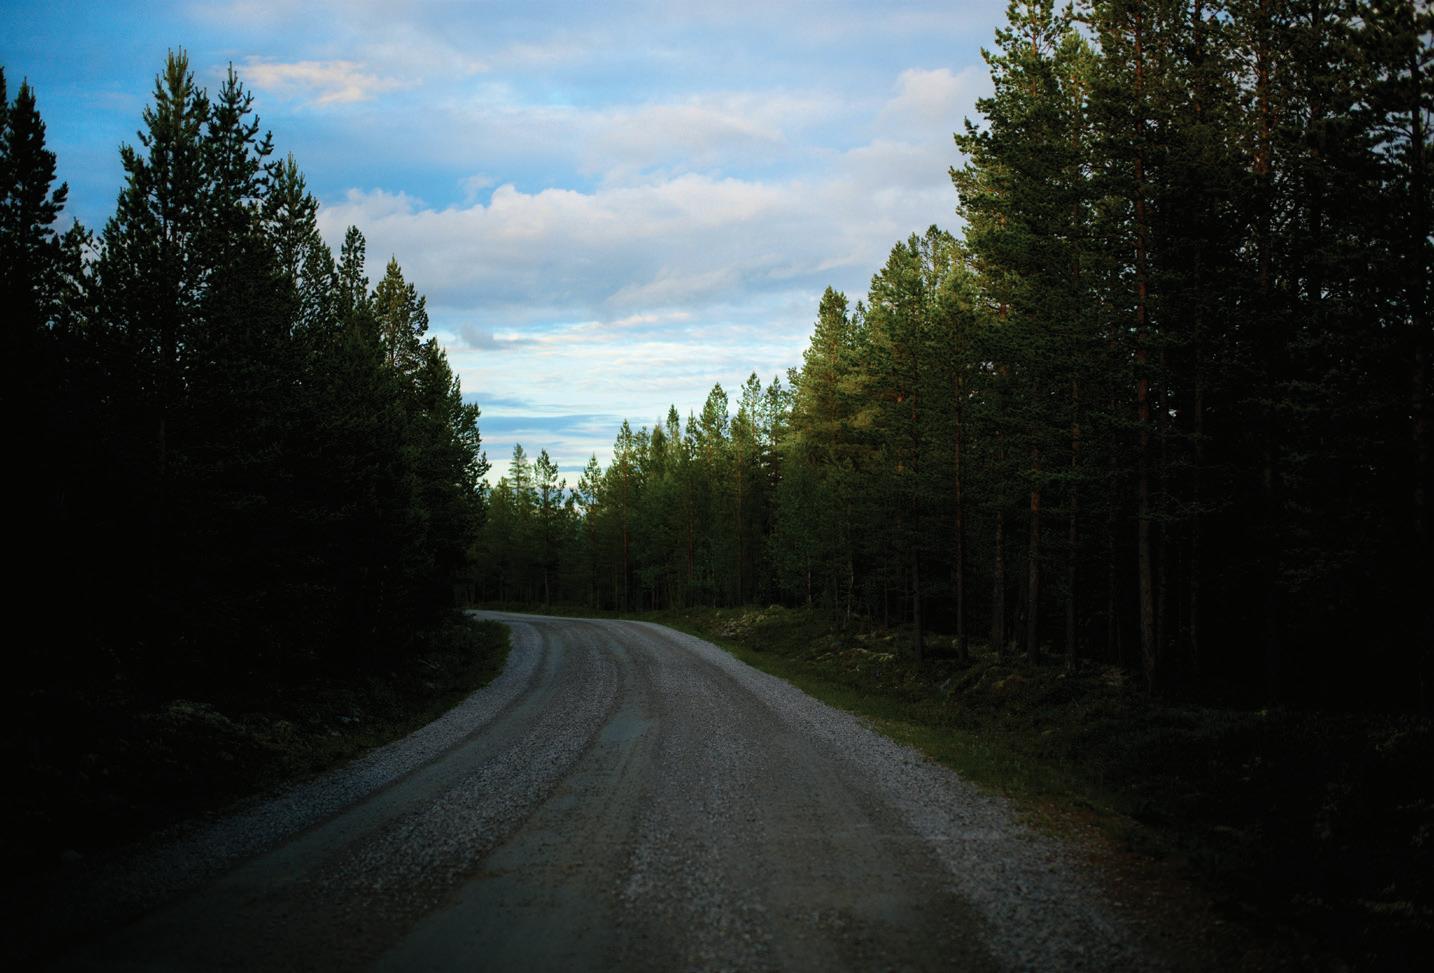
Being “wide angle”. If correctly composed, 50mm is also able to give the impression of being a “wide angle” lens. In the examples above, one can “remove” the impression of being restricted to 50mm if one can show far distance or more picture elements. I think the key here is to find picture elements that will give such an impression: such as roads, layers of mountains, or bodies of water.
Consistency The other good thing about sticking to one focal length all the time is that it creates consistency among the work that I produce. This will eventually lead to the creation of an identity for my work. This I suppose also applies to other lenses such as wide angles or teles; if you stick with
one all the time, then eventually you will master that focal length. When I chose to go with the 50mm, I went through all kinds of challenges and had to try to find solutions for these. In the process this led me to understand more about the lens’ advantages and disadvantages which will ultimately make me the master of that focal length.
Conclusion 50mm lenses have a viewing angle that is very close to that of the naked eye. Thus it produces pictures that are easy to look at and that somehow we are all familiar with. The limit is that it also forces us to re-look and re-think to find the essence of a landscape through better composition. That in turn will lead us to produce more unique photographs.
While using wide angles will produce images that show all the elements of a scene at once and where everything is in focus, it will also have a greater chance of producing images that have a similar composition to and look like everyone else’s images.
I have no intention of preventing people from using wide angle lenses, which have their own advantages and place in photography. However, in my travel experiences I found that the 50mm frame lines force me to find the essence of the place: a more unique picture yet maintaining at the same time an image familiar to the eye of the audience.
"...sticKinG to one focal lenGth...cReates consistencY..."
original Leica Q arrived just in time for Christmas in 2014, it was a real surprise and has proved to be a well deserved success for Leica. My article on the camera “Hemingway: The Leica Q” was published when it was launched on June 10 th, 2015.
At the time of release we were on an exciting trip to China; our son having arranged a varied (and challenging) routine. After our return I wrote another article “The Leica Q in China”.
Since the release of the camera there has been lots of internet chatter about more Q cameras with different focal lengths (principally a 35 or 50mm). But Leica’s attitude was that having a 28mm lens with framelines for 35 and 50mm gave maximum flexibility.
I often get asked whether I have purchased the subject of my camera testing. At this point it’s worth mentioning that if I had bought everything I’ve tested, I would long since have been bankrupted! In the case of the original Q (Typ 116), although I really enjoyed everything about the camera, for me and my use it had a couple of real drawbacks for use as a travel camera.
First of all the resolution, 24 mp at 28mm was fine (my ‘sweet spot’ still) . The 35mm crop of 15.4 mp was also good for most purposes, but the 50mm crop of 7.5 mp was a bit tight for normal use.
Secondly, lots of my photography is in the dreadful English weather - or the beautiful Cretan weather. In one case, rain is a real problem (and I can’t be doing with taking cameras in and out of bags all the time) . In the other case, dust and sweat are just as much of a problem.
So, with regret, on July 13 th, 2015, I sent my well used Q back to Leica. I wonder what’s happened to it now!
Sometime at the end of November 2018, the Q2 arrived on my doorstep. This time it’s going to be a much harder decision to send it back!
At this point it’s worth mentioning that my role with Leica is to test the cameras, not to write reviews of them. And, it’s important to understand that this article is not intended to be a critical review. If I find something wrong with a camera, then I tell Leica. Having said that, this article is my work, nobody has suggested what I should write, and I certainly wouldn’t say anything that I don’t believe to be the case or omit anything that seemed to be an issue.
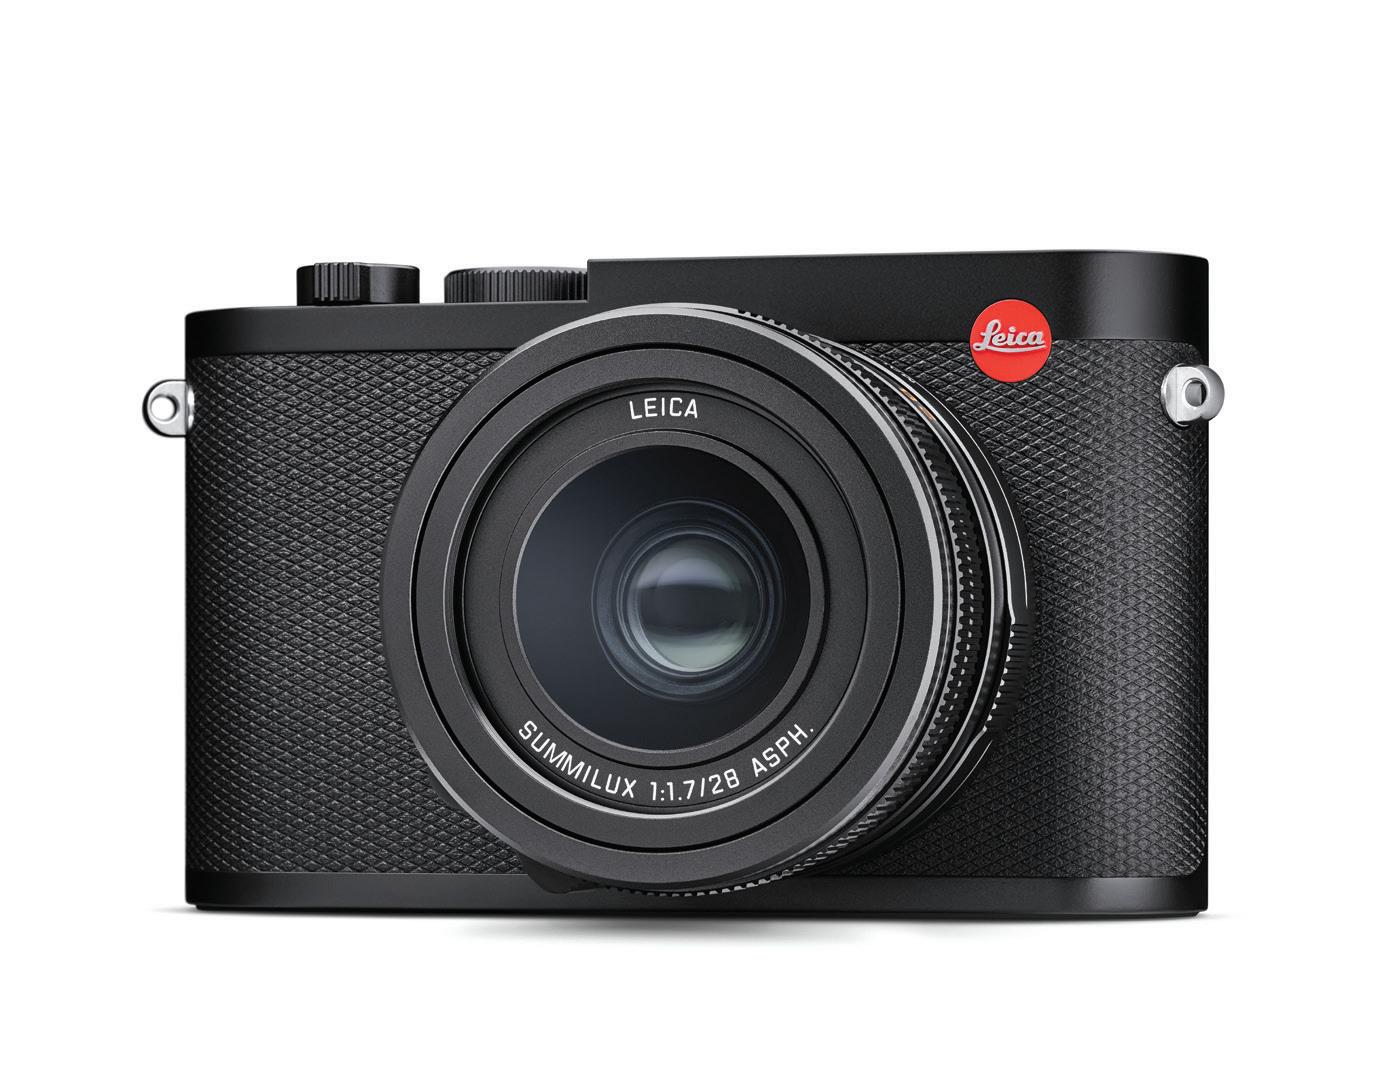
Q2
by JONATHAN SLACK
BASIC FEATURES OF THE Q2
• New full frame 47 mp image sensor.
• Weather sealed, dust & splash proof. (You can see I’m doomed!)
• New, faster Maestro family processing engine.
• Same 28mm Summilux f/1.7 ASPH lens.
• New OLED EVF. (Same 3.68 mp resolution as Q116, but clearer.)
• Extended ISO range from 50-50,000.
• Video: 4K (30 or 24 fps) Cine4K (24 fps) Full HD (24, 30, 60 or 120 fps) .
• Higher speed AF.
• Higher capacity battery (Same battery as the Leica SL.)
• Faster top electronic shutter speed. (1/40,000th sec)
• New 3 button user interface. (Similar to the Leica CL.)
• Touch screen functionality on the LCD
• Improved digital zoom with framelines crops for 28mm, 35mm, 50mm & 75mm
• Improved WiFi & Bluetooth
That’s quite a lot of improvements for what, superficially at least, looks more of a refresh than a replacement. Everything about the camera has been changed or improved, with the exception of the lens, and it’s easy to argue that the lens was already as good as it needed to be. Whether it’s still good enough for a 47mp sensor is a legitimate question, and I’ll be looking at that later on.
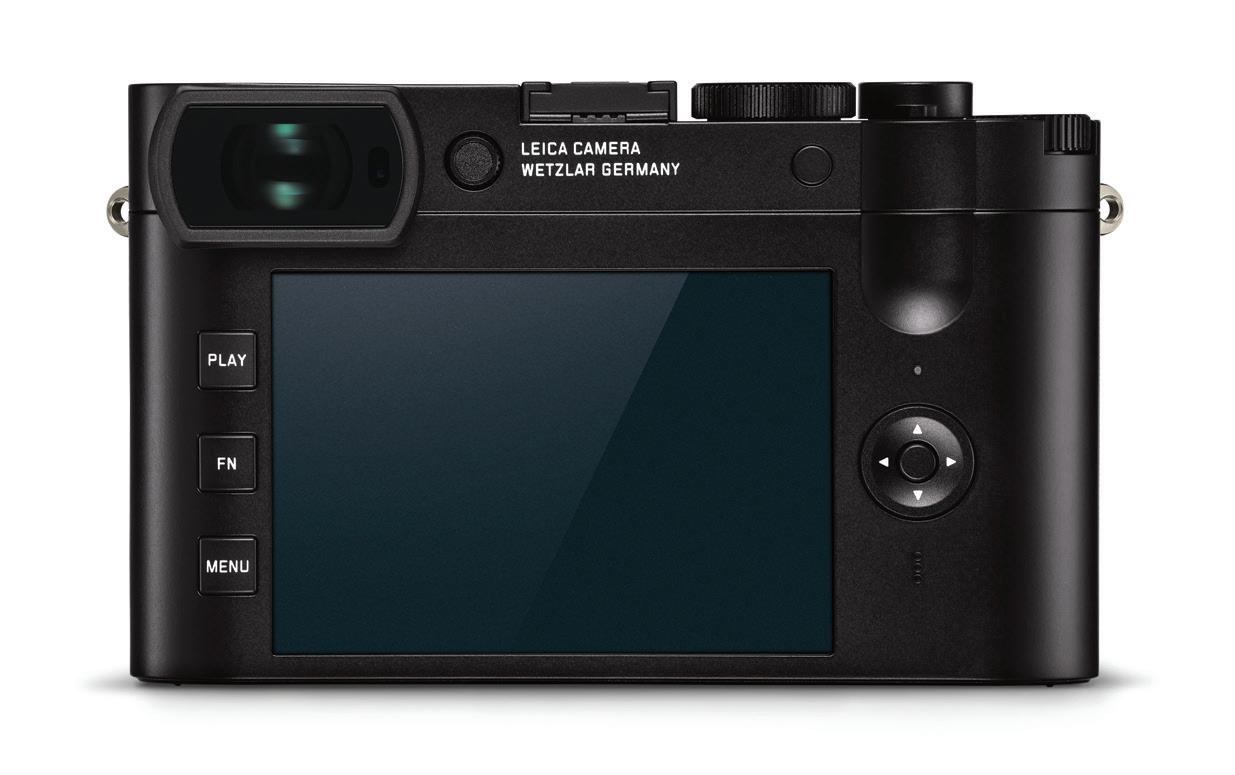
PHYSICAL DIFFERENCES
At first sight, the camera looks pretty much identical to the original Q116, but there are quite a number of subtle differences.
On the back of the camera the five-button layout has been replaced by the three-button layout of the Leica CL. It took me a while to get used to this, but I’m now firmly of the belief that Leica has got it right and found an interface which can be used over a number of different cameras. It’s something I’ve been asking and hoping for for a long time.
The three buttons are:
• Play
• Menu
• FN
The four-way switch is the same as the one on the Q116. I suppose I’d have preferred to have a ‘joy stick’, but this does work okay. The Zoom Lock/Digital Zoom button is also the same as that on the Q116. On the front of the camera and on the lens, all is as it was with the Q116.
On the top of the camera there are a couple of changes. As with the M10 and the CL, the On/Off switch no longer has the drive mode switching (Single/Continuous), although it is still a collar around the shutter release button, which is now squared off, like a black version of the button on the CL. I much prefer this.
The dial is embedded in the top plate like the Q116, but now has a large central button which acts as a second function button (more about this in the interface section) . It has replaced the red video button in the original Q116.
The base of the camera has changed as well. Whereas the Q116 had a single opening door with battery and SD card access, the Q2 has replaced this with two openings. One is a battery compartment which works like the SL: when the battery is inserted it forms part of the base plate, with a rubber 0-ring to keep the moisture out. The SD card door needs to be pushed to one side to pop it open. The whole thing seems very solid and well designed.
The finish of the original camera was excellent and the new one seems to be just the same. I’ve been using it for over three months in rain and shine (not too much shine, but plenty of rain!) . Certainly it’s seen much more rain than it would have done if it had been my own camera and there has been absolutely no sign of problems or water ingress.
BATTERY LIFE
Officially battery life (CIPA) is 350 photos which doesn’t sound very impressive. I didn’t check this out, but I found that it easily lasted a day with normal shooting. It’s also great that it uses the same batteries as the SL - at least if you also shoot with an SL!
USER INTERFACE
Leica seems to have worked hard to get the interface for their different cameras into line. This has been an evolutionary process, but now they seem to have arrived.
The S and SL began the move to customizable buttons and the long press/short press distinction together with the introduction of the Favorites Menu. Whilst the first example of the three-button layout occurred on the M10. This was slightly refined and rationalized for the CL (and the buttons moved around) . The interface on the Q2 is nearly identical to the one on the CL. So much so that you can duplicate favourites and user profiles on the two cameras (which I really like) . It would be even nicer if you could transfer profiles between the cameras.
THE PLAY BUTTON
This is just what you would expect, press it and the image you last took is displayed. Where it is displayed depends on the EVF-LCD setting in the menu, the options are:
• LCD • AUTO
• EVF Extended • EVF
The Auto option relies on an eye sensor in the viewfinder. EVF Extended means that when shooting one is confined to the EVF, but with the Play or Menu button the image/menu comes up on the LCD unless you have your eye to the viewfinder. LCD means that everything is directed to the LCD. EVF means that everything is directed to the EVF.
THE FN BUTTON
(And the button on the dial on the top plate.)
Once again, this works the same way as the CL. A short press brings up the assigned/last used function. A long press brings up the list of functions assigned to the button. This is straightforward in use, but also allows a lot of customization. You can configure the list of functions in the Customize section in the menu.
THE MENU BUTTON
The menu button brings up the favorites menu which can be configured in the Customise option in the Main Menu. It’s possible to have 15 options (two-screens full) . In practice, I found it better to have seven options, which fits on a single screen. The last option is always Main Menu, and this can’t be changed (quite right too)
Pressing the Menu button twice brings up the Main Menu. This is organized into five pages (no menu bloat here) . Each further press of the menu button takes you to the next page.
THE FOUR-WAY CONTROLLER
This works as it did in the Q116 - you use the arrow keys to move through the menu options and the central button to select.
When you are shooting the arrow keys will move the static focus point, and the central button toggles between:
• No information
• Bottom line of information
• Bottom & top lines of information
• Video mode (ouch!)
• No information (etc)
Bottom line of information:
• PASM
• Actual ISO
• Exposure Comp.
• Shots Left
Top line of information:
• MF/AF Mode
• DNG/JPEG
• Drive Mode
• OIS (On / Off / Auto)
• ISO Setting (Auto/ISO)
• F Stop
• Exposure Time
• White Balance
• Exposure Mode
• Film Style
• Battery Remaining
I’m really not happy with video mode being in the cycle of the central button. On more than one occasion, I thought I had taken a picture whereas instead I had started shooting a video. I would have thought it was much more sensible to be able to assign video to one of the function buttons, but that doesn’t seem to be a possibility. I’m hoping this will be modified later in the firmware.
THE ZOOM/LOCK BUTTON
(On the back of the camera next to the thumb indentation.) It can be assigned to:
• Digital Zoom
• AEL
• AEL / AFL
• AFL
This is okay, but it might be good if these functions could also be assigned to the other function buttons (and other functions assigned to this button) .
However, there are two problems. Firstly, you cannot assign AFL (Focus Lock) or AEL (Exposure Lock) to the button and then disable it from the shutter release button. It doesn’t worry me, but many people like to shoot like this.
[Correction: (March 9 th) Thanks to Gotium on the Leica User Forum for pointing out that in fact, if you choose AFL for the zoom lock button then focusing is disabled from the shutter release - as long as you keep pressing the zoom lock. Same goes for AEL. if you choose AEL/AFL then the release button just takes the picture.]
Secondly, if you press the AFL button to focus (or AEL button to lock exposure), you must keep it held down until you have pressed the shutter.
What would be really nice is to have a hold/toggle option in the menu for this. So that the value was saved until you pressed the button again. Many other cameras have this feature, and it is extremely useful.
THE RIGHT-HAND DIAL & 2 ND FUNCTION BUTTON
The right-hand dial is embedded in the top plate the same as it is on the Q116, with a central button acting as a second function button (instead of the video button on the Q116) . This works like the right hand dial on the Leica CL.
The dial has been moved round the camera slightly and I found it a stretch with my right hand (but I have rather small hands) . I’m not sure what the logic for this was, but it’s only a minor irritation.
The new function button on the other hand is great - easy to reach and very useful...
THE ON/OFF SWITCH
Some people will miss the On/Off switch doubling as a drive mode switch, but you can easily put drive mode onto first press on one of the function buttons, and it does stop one making the mistake of going into continuous mode inadvertently.
TOUCH SCREEN LCD
This is pretty much the standard for Leica now - it’s not usable in the menus, in shooting mode there is touch focusing for static focus point and this works reasonably well. In Play mode, the normal gestures work accurately and as you would expect.
HANDLING & ERGONOMICS
The basic controls are identical to the Q116, i.e. the aperture, shutter speed and focus controls on the lens and body. The macro mode works the same way, delightfully bringing up a different distance scale for the manual focusing as you move to macro mode (This is so very sexy!) .
The shutter speed dial is the same, with 1+ to 1/2,000 second and A(uto) mode for the leaf shutter in the lens. Electronic shutter speeds up to 1/40,000 are available as well - a great improvement on the 1/16,000 of the Q116).
The right dial can be set to:
• OFF • Auto*
• Exposure Comp.
*Works differently in PASM and is slightly confusing.
THE DIGITAL ZOOM
Digital zoom is something of a dirty word in the photography industry, probably from the days when small megapixel cameras offered gravelly shots at apparently extended focal length.
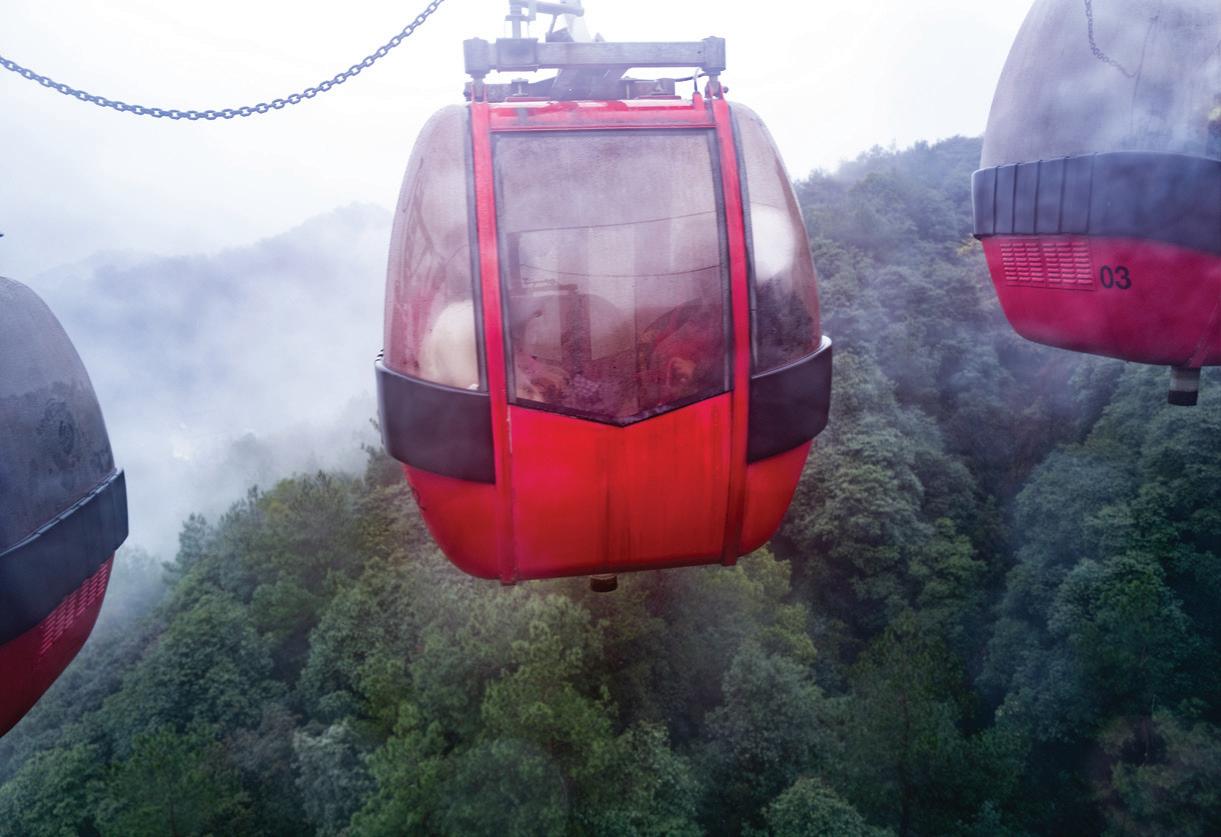
I think it’s a bit different with the Q, partly because the base resolution is so high, and partly because the implementation is so good and so consistent with the Leica rangefinder. This hasn’t changed in principle since the Q116, but it has suddenly become a whole lot more useful with the extra resolution.
Implementation of crop mode or digital zoom in other cameras usually involves the EVF/LCD zooming in. With the Q2 you can change between four focal lengths using the Zoom/ Lock button. Choosing a longer focal length simply puts framelines in the display showing what you are going to get.
If you shoot JPG files then that is exactly what you do get. If you shoot DNG then the image is not actually cropped. However, you use Lightroom CC or Classic, then the DNG file appears in cropped form. You can use the crop tool to change or remove the cropping in post processing.
The four digital zoom modes are: (Addition thanks to John Kot in DPReview for calculating effective aperture.)
I think this is a great feature, and with the increased resolution of the Q2, it makes the 50mm crop zone perfectly usable and the 75mm okay in a pinch, especially as the lens is so sharp.
Of course, it doesn’t actually turn the lens into a different focal length, but the aspect ratio of the resulting image is
exactly the same. What you lose is the depth of field relating to the cropped focal length. Basically, this will always be the same as that of a 28mm f/1.7, so it’s harder to use bokeh to isolate the subject.
USER PROFILES
I have talked to lots of people about the User Profiles, but very few people seem to use them. I think they are just great.
Like the CL, the Q2 has six user-configurable profiles (plus Default) . You can rename them sensibly, and they will save pretty much everything except time and date. The Q is slightly more limited, as you can’t save information which is on physical dials (Aperture, Shutter Speed, PASM mode)
Generally speaking I have four different modes which I use regularly with different settings for White Balance / Focus Mode / Auto ISO Settings / Exposure Metering.
• Daylight: For shooting outside in the daytime
• Nighttime: For shooting in Artificial light
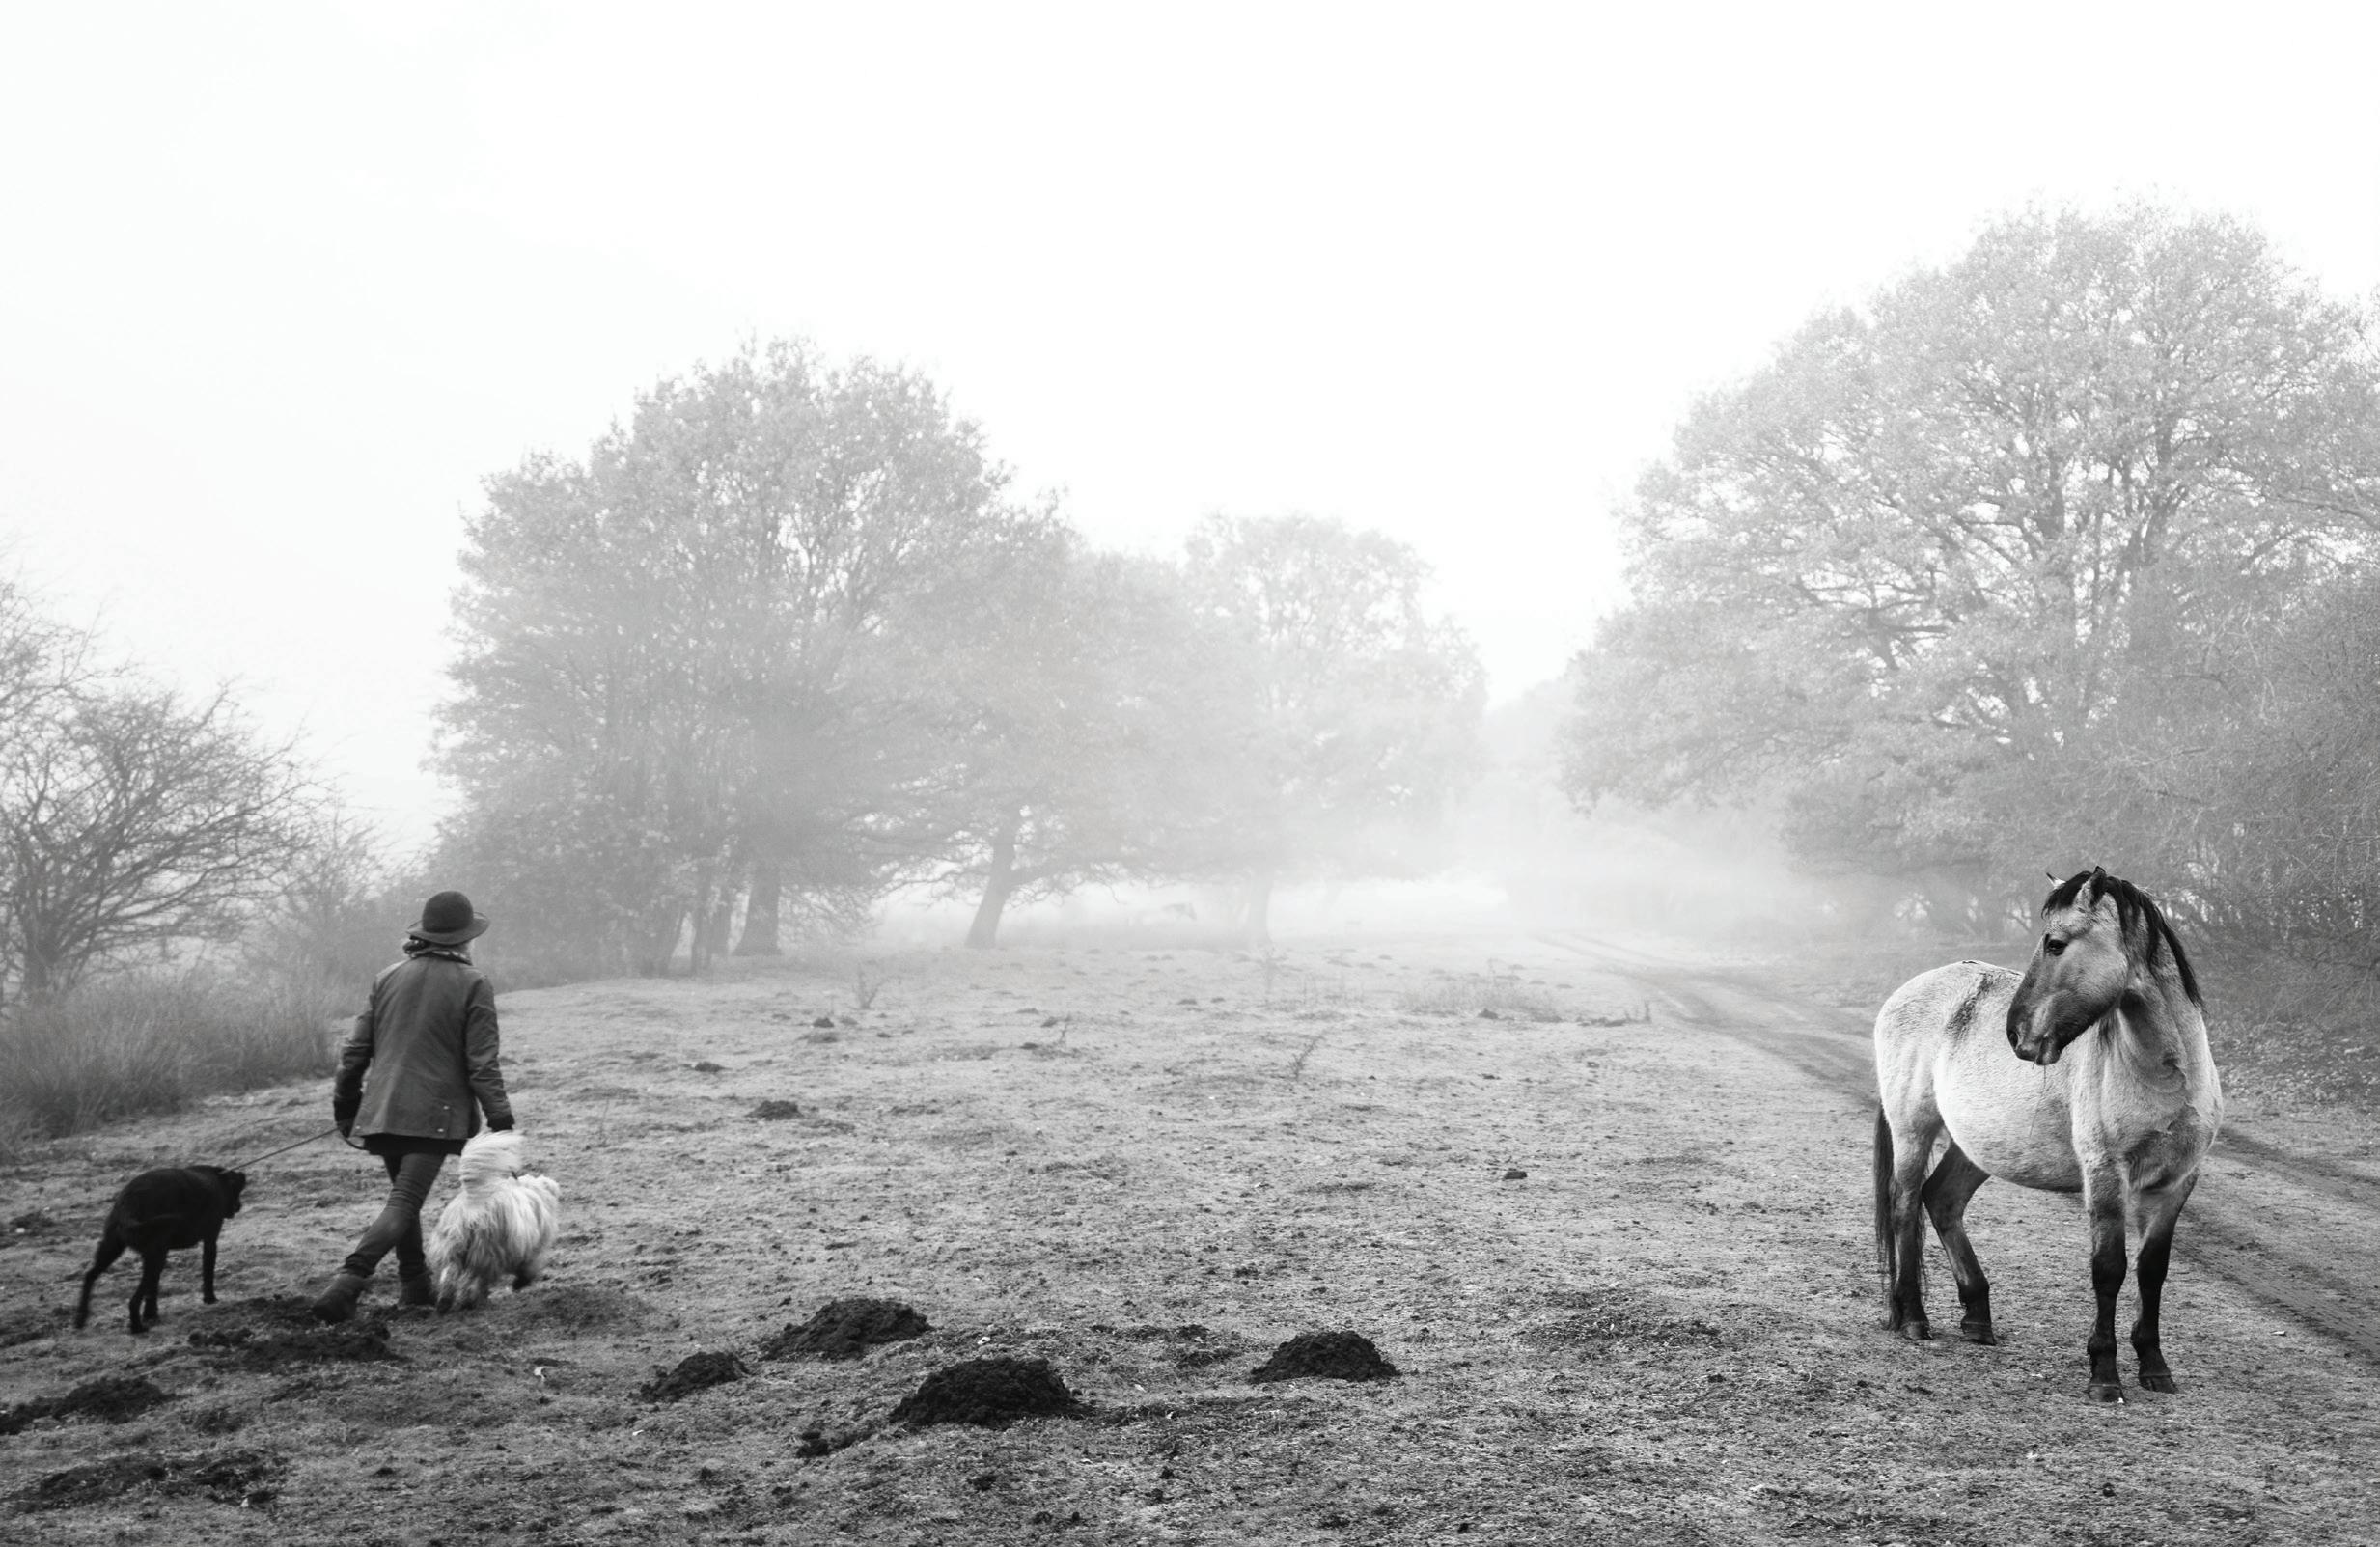
• Monochrome: For shooting on those drab winter English days, with the JPG setting changed to high contrast black and white. This really helps to concentrate on composition rather than color.
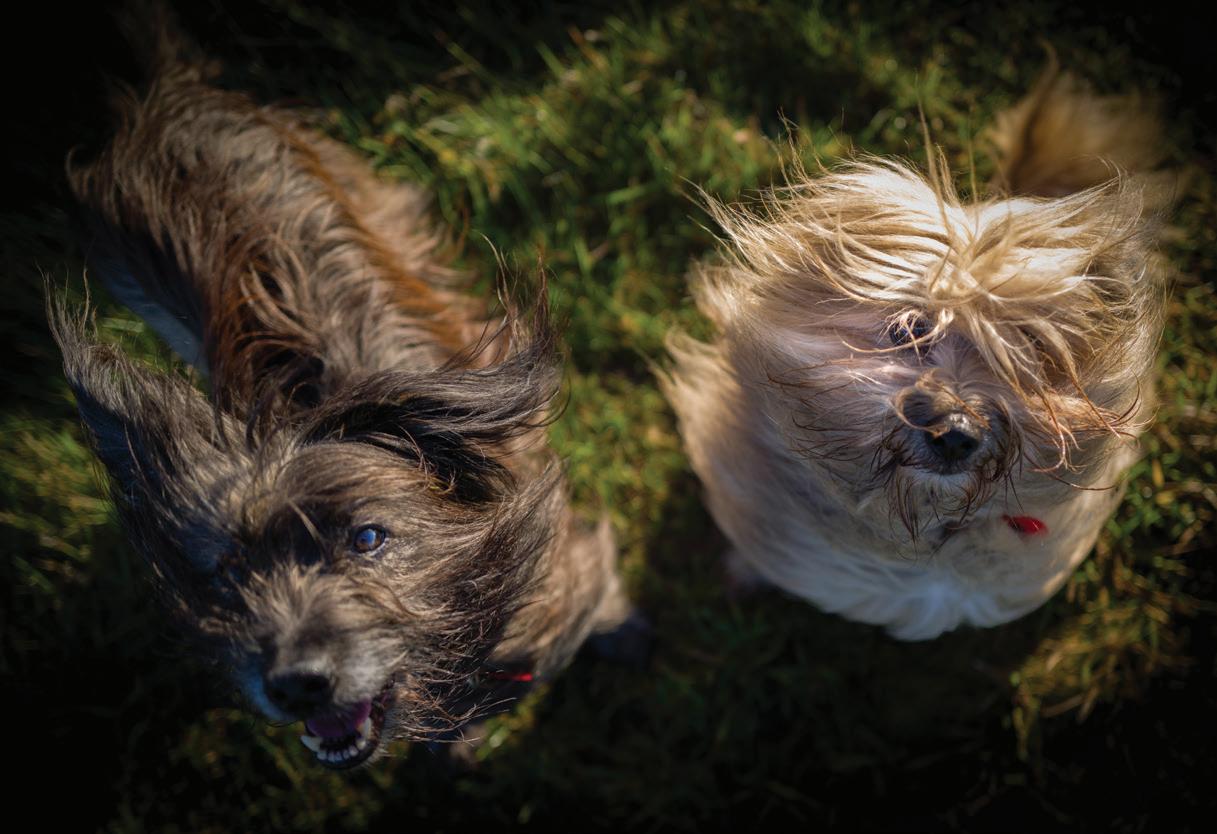
• Tracking: With continuous AF and tracking mode enabled for dogs, footballers, birds, grandchildren.
No need to go into specific settings (Although I can if anyone is interested.) The point is to have a good starting point for your common photographic situations, and to be able to swap between them quickly and easily
FOCUSING
If you wish to focus manually, you need to push a small indent on the focusing tab on the lens. Manual focusing is very smooth and nicely weighted, and it feels like proper manual focusing, with a proper distance scale, even though it is actually focus by wire. The big, clear EVF makes focusing simple, there are the normal focus assistants:
• Auto Magnification
• Focus Peaking
Having been a great advocate for focus assist, I’ve now had a change of heart. I think that modern, high resolution EVF viewfinders like the Q2 are quite good enough to focus manually, and that focus peaking muddies the water rather than making it easy, and that auto magnification makes composition so much harder. So I turn them off, and I’ve been getting almost all of my manual focused images just right.
The Auto Focusing options are:
• Multi Point
• Field (one area)
• Face Detection
• Spot
• Tracking
• Touch AF (LCD)
I haven’t spent much time with the tracking - it seems a slightly odd option for a 28mm lens. The other options work well, autofocus is very fast and very accurate.
THE LENS & IMAGE QUALITY
We all know that the Q116 lens was absolutely good enough for 24 mp, but is it good enough for 47.3 mp ?
Looking through my pictures, it seems that it certainly is. I’ve not seen any unsharp images which are not a function of either the photographer or the situation. The lens still has enviable corner to corner sharpness and it’s breathtaking how far one can zoom in and still see detail.
On the other hand, I’ve always felt that 24 mp is the sweet spot for digital images, and I’ve not spent a lot of time investigating cameras with higher resolutions. I’m certainly not seeing any of the sort of problems that were reported getting sharp images with other high resolution cameras. Perhaps this is helped by the optical image stabilisation.
The new full frame CMOS sensor promises 47.3 mp resolution from a 50.4 mp Sensor with 14 stops of dynamic range and a 50-50,000 ISO range. I think that 50 ISO is likely to be a ‘Pull’ as the camera defaults to using 100 ISO as the base with Auto ISO selected.
Looking through my images I can see that I did use 6400 and 5000 ISO a few times and the results were fine - a little noise as you might expect, but good color representation and perfectly usable.
FOTOS APP & THE FUTURE
Currently I have not been able to use the Q2 with Leica Fotos App (It isn’t ready yet.) but the camera has both Wifi and Bluetooth, so we can hope for GPS tagging from mobile phones and a front-to-back workflow with Adobe Lightroom CC.
CONCLUSION
The original Q (Typ 116) was a brave step for Leica, and was a well deserved success. The Q2 has built on that at every level:
• Higher resolution
• Faster processing
• Better interface
• Weather sealing
• Viewfinder (EVF)
• Bluetooth & Fotos
There are a couple of changes I’d like to see made in a future firmware update, but this camera behaved properly and reliably with beta firmware.
The only real competition for the Q2 is the Sony RX1R ii , a 42 mp camera announced in 2015 (Only 4 or 5 months after the original Q116)
The Q2 is capable of making images to compete with many medium format digital cameras, all in a package you can slip into a coat pocket.
Operating the Q2 is a total pleasure: it’s fast and responsive, autofocus is excellent and manual focus smooth and easy to use. High ISO and dynamic range is up there with the best full-frame digital cameras and the electronic viewfinder is a joy to behold. All this is available in a package which weighs 730 grams including the battery.
If you want a small and beautifully made camera, a rewarding shooting experience and peerless results then there really isn’t anything to compete with the Q2.
FURTHER INFORMATION ABOUT PHOTOGRAPHIA ZU WETZLAR
by ED SCHWARTZREICH
whenhe found out that I was writing about Kurt Kühn and Photographia, our friend Lars Netopil from the German Leica Historica notified me that he had some related materials. What he has sent me included scanned images of several cameras and accesories which Kurt Kühn had produced in the early 1950’s in association with other Wetzlar business entities, and which Lars now holds in his collection. In addition there were a few specifically Photographia-related materials that Lars obtained from the estate of someone who had worked at Photographia during its short life in the late 1940’s.
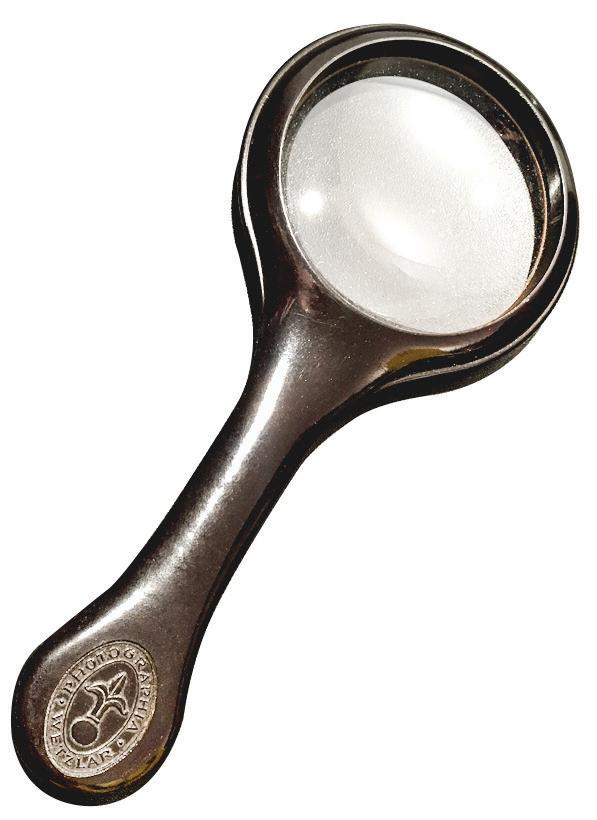
I am sharing two images from the latter group. The first is of a hand loupe, made either from wood or plastic, which has the Photographia logo on its handle. It was likely available as a deluxe accessory to look at Photographia’s nicely-printed images.
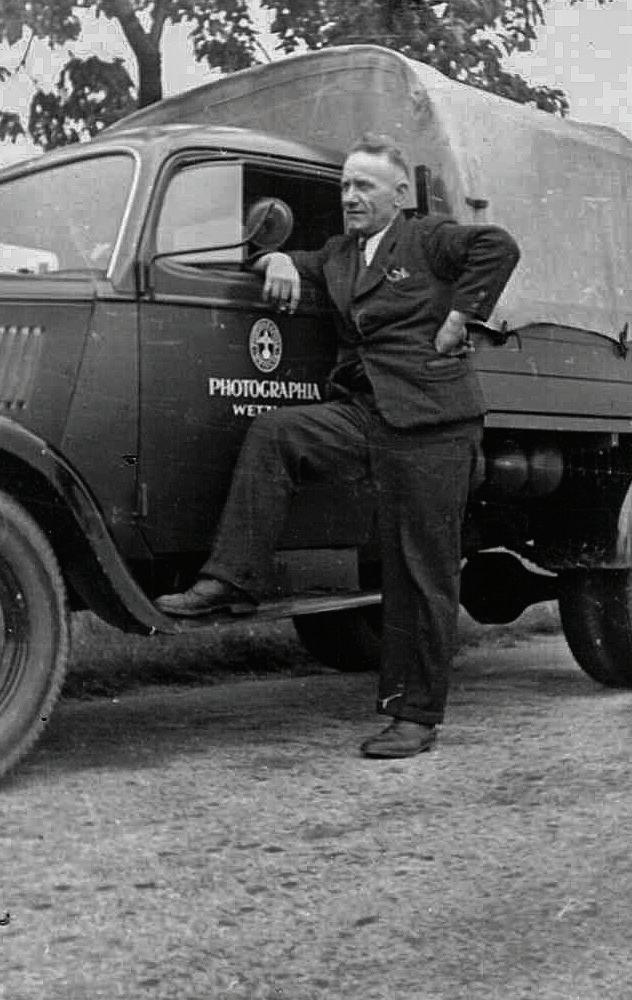
The second image is one from a group of photos of Photographia personnel that shows a truck, presumably a delivery vehicle, with its driver or a company representative posing at its door. On the door panel, there is again the Photographia logo.
I wanted to share these images because they show the substance and quality of Kurt Kühn’s endeavor with Photographia, even apart from their elegant image portfolios. No detail was spared despite the difficult economic conditions at the time.
WETZLAR
You are invited to join Bill Rosauer, LHSA Viewfinder Editor and President Emeritus, on a personal guided tour of Wetzlar and Leitz Park. Our group will be limited to fifteen participants.
Highlights will include:
Tour of Leitz Park, including the Factory, Customer Care and Museum. We have many special events planned at Leitz Park, including meeting with Stefan Daniel and Peter Karbe, Head of Lens Design at Leica. President Emeritus Jim Lager will participate in a special extended visit to the Leica Archives at Leitz Park. Leica Camera will also provide loaner Leica cameras and lenses.
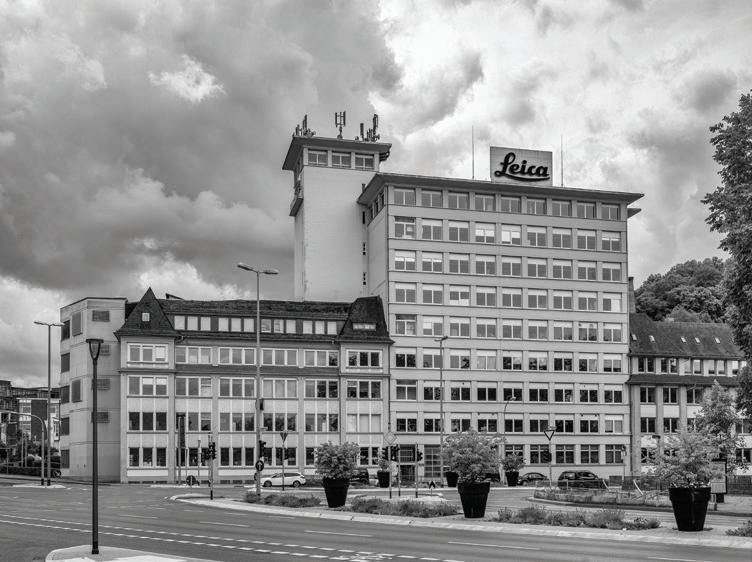
In old Wetzlar, you will stand on the very spot where Oskar Barnack took one of the first images with the Ur-Leica. We will visit the old Leitz factory Hochhaus and adjacent Administration Building, the historic Hausertor Werke where the Leica was originally made, and also the site of the famous Board Meeting of 1924 when Ernst Leitz II made the fateful decision to take the risk to make the Leica. A visit with Lars Netopil, VP of Leica Historica is planned at his shop in
Wetzlar. During this visit, you will have a chance to obtain a personalized copy of Lars Netopil’s new book, “Museum Leica”.
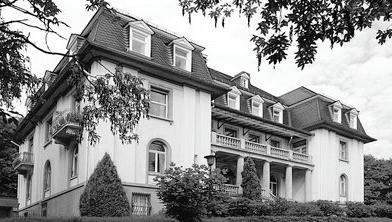
Exclusive for our tour, we will be the special guests of Knut Kühn-Leitz, grandson of Ernst Leitz II for a personal guided tour of Haus Friedwart, the Leitz family home.
We are in the final planning phase now, with the tour scheduled for the week of September 15, 2019 with our home base being the Hotel Ernst Leitz at Leitz Park. The tour includes five nights double occupancy lodging (single at additional cost), all meals (alcohol not included) and transportation to tour locations. Participants are responsible for their own air fare and transportation to Leitz Park.
LHSA members will receive an additional $500 discount off the regular tour price. If you are interested in joining us, see all the details at our website derleicamantours.com or please email me at derleicaman@gmail.com.
derleicaman@gmail.com • www.derleicamantours.com
SNYDER AT WETZLAR
by JIM LAGER
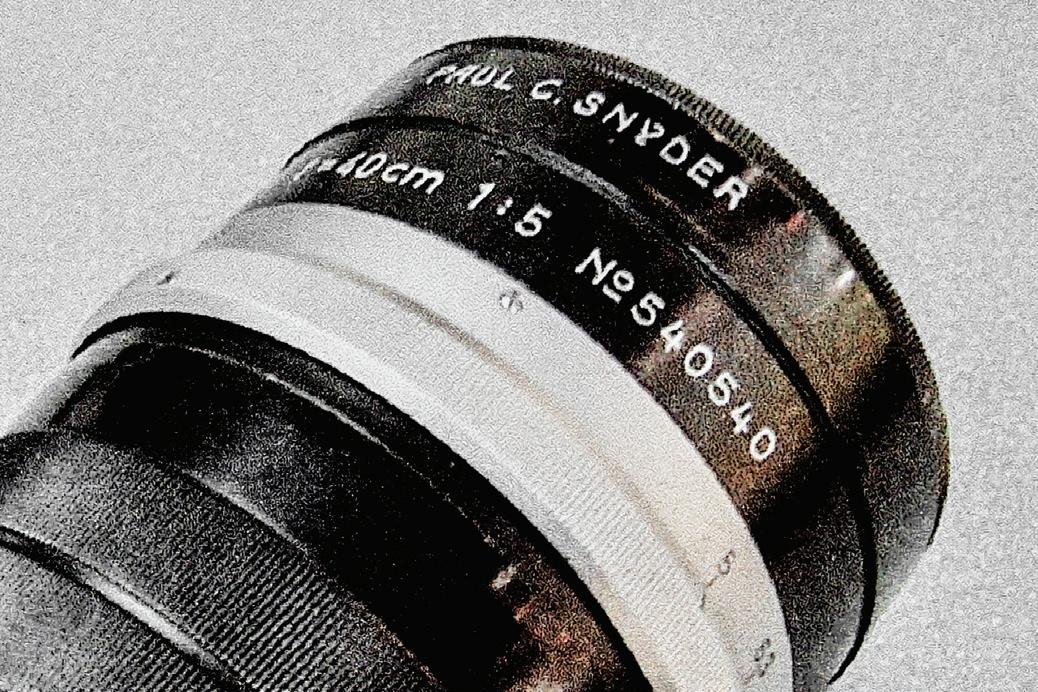
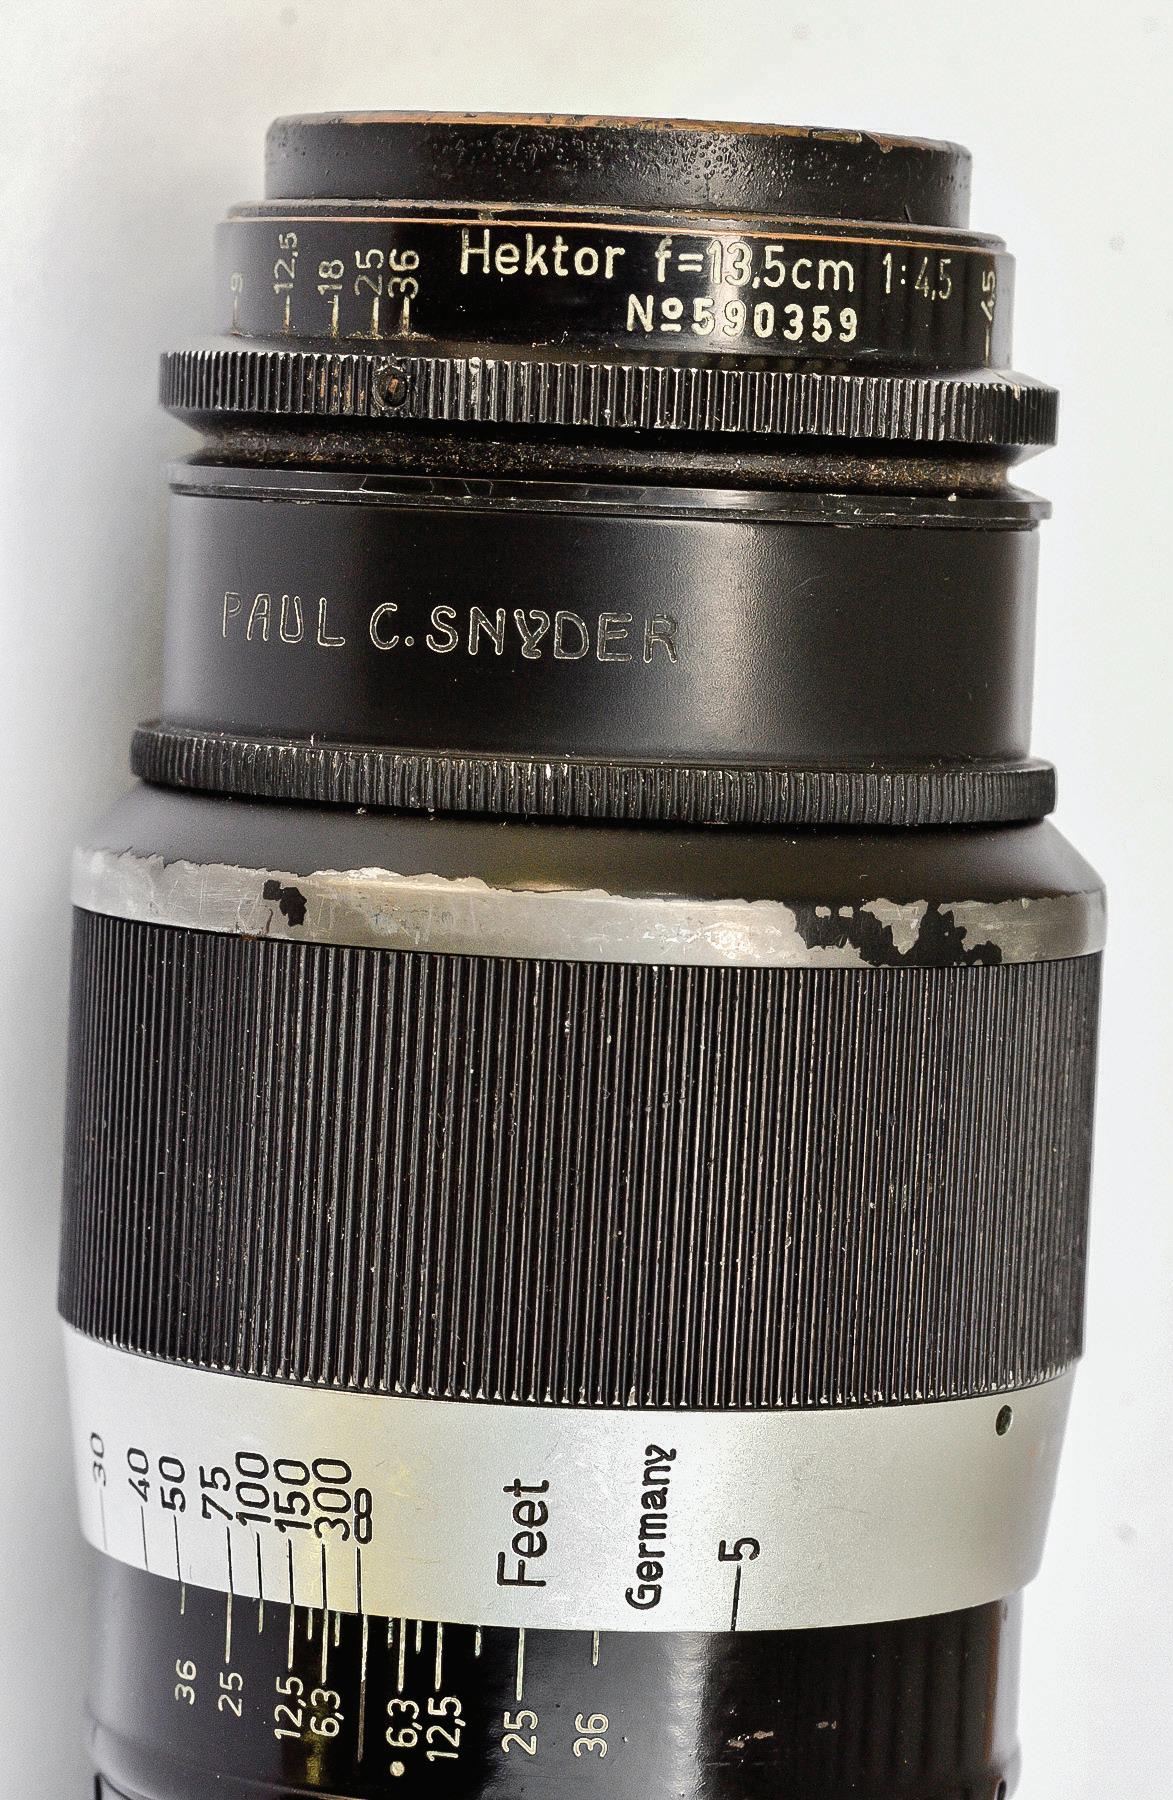
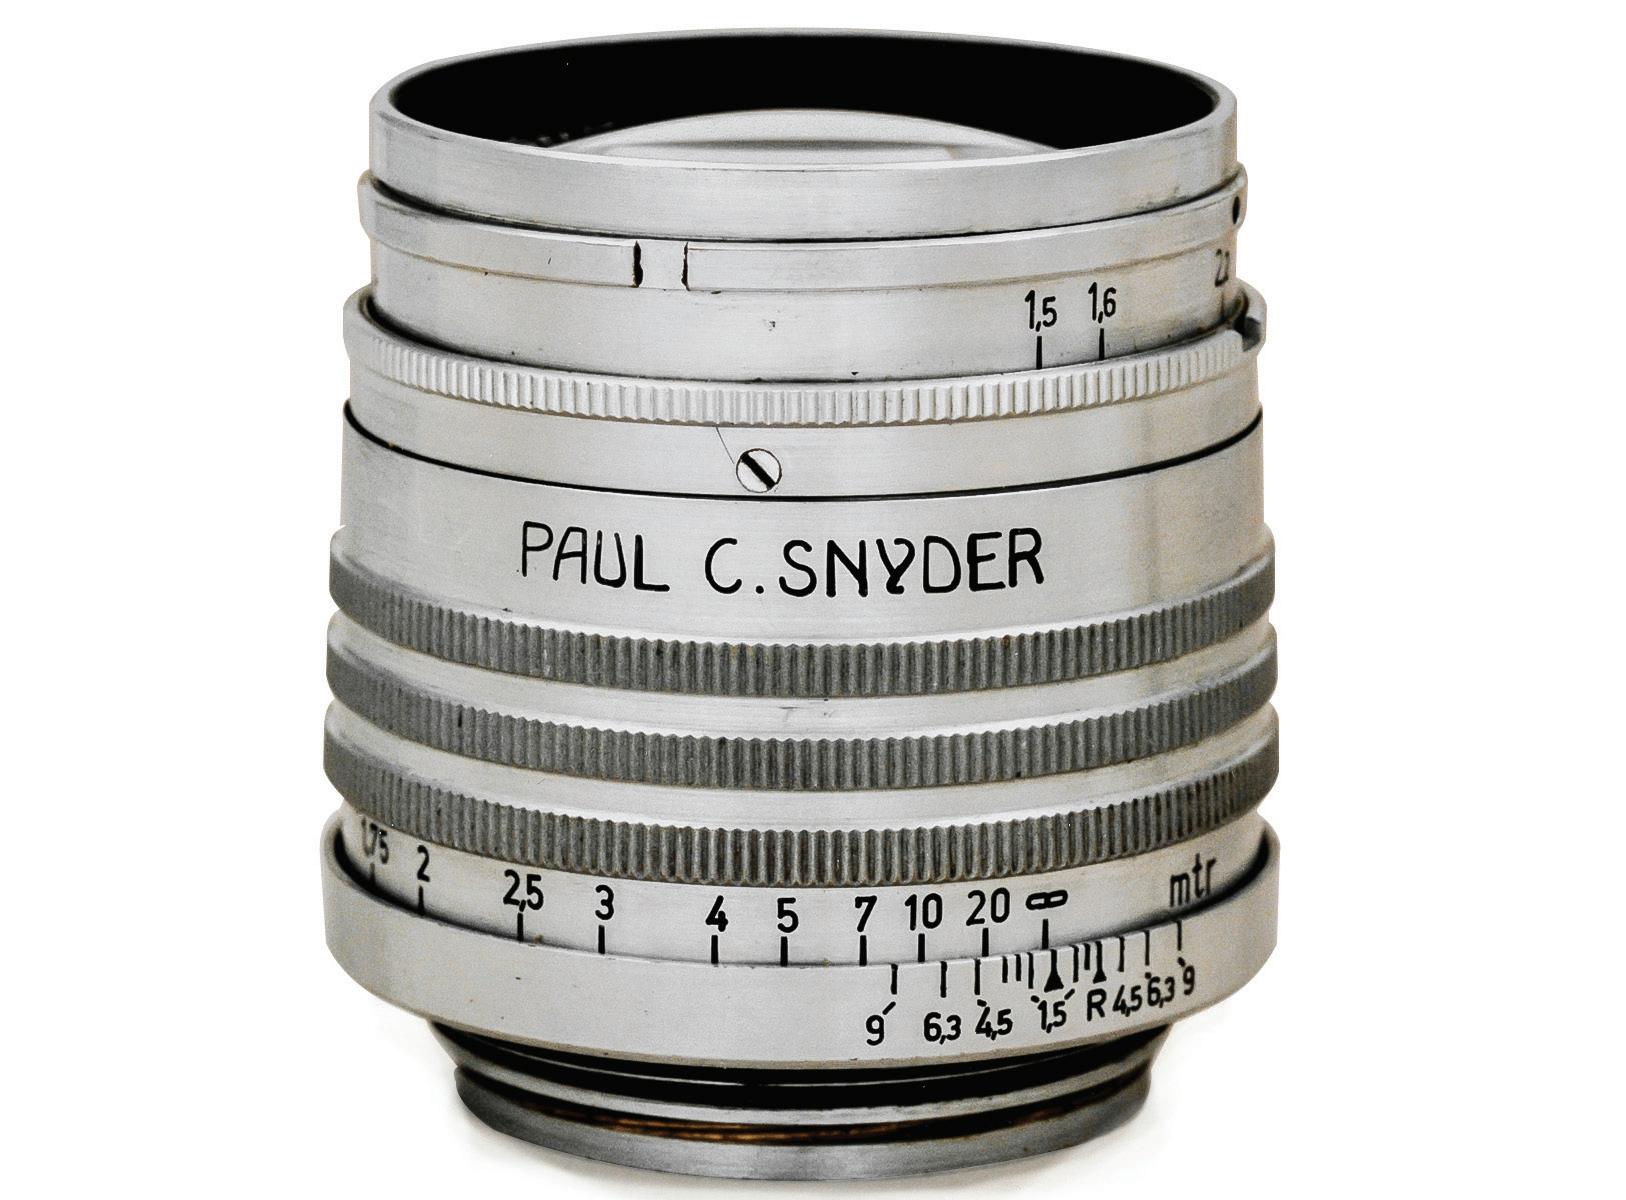
whowas Snyder and what connection did he have to Leitz Wetzlar? Indiana native Paul Snyder served with the United States Army in the European Theatre (France from 1944). A few days after Wetzlar, Germany was liberated Lt. Snyder was assigned to be the U.S. Army representative in charge of Leitz Wetzlar operations. After the War ended then Captain Snyder was separated from the Army in 1947 but remained at Leitz Wetzlar as the U.S. State Department Representative. During his tenure at Wetzlar, he purchased Leitz photographic equipment including the Leica IIIc, numerous lenses, and many small accessories.
Some of the items purchased by Snyder are presently found within Leica collections. The illustrated lenses are factory engraved "Paul Snyder" in the distinctive font of that period. Purchases range between August 1945 to June 1946. Have any additional artifacts survived?
Leica IIc #392275, 3.5cm Elmar #566966, 5cm Summitar #586559, 20cm Telyt #473012, 8.5cm Summarex #593109, 9cm Elmar #592227, PLOOT reflex housing 4239, 5cm Elmar #583205, and possibly 9cm Thambar #540141 and 2.8cm Hektor #580344. Were these items engraved Paul Snyder?
Many thanks to longtime LHSA member George Schilling for his essential assistance in preparing this article.
5cm Xenon 491729 purchased July 5, 1946.
13.5cm Hektor #590359 purchased October 8, 1945.
40cm Telyt #540540 purchased June 6, 1946.
LEITZ PROPAGANDA PROJECTOR (CIRCA 1934/1937)
by JIM LAGER
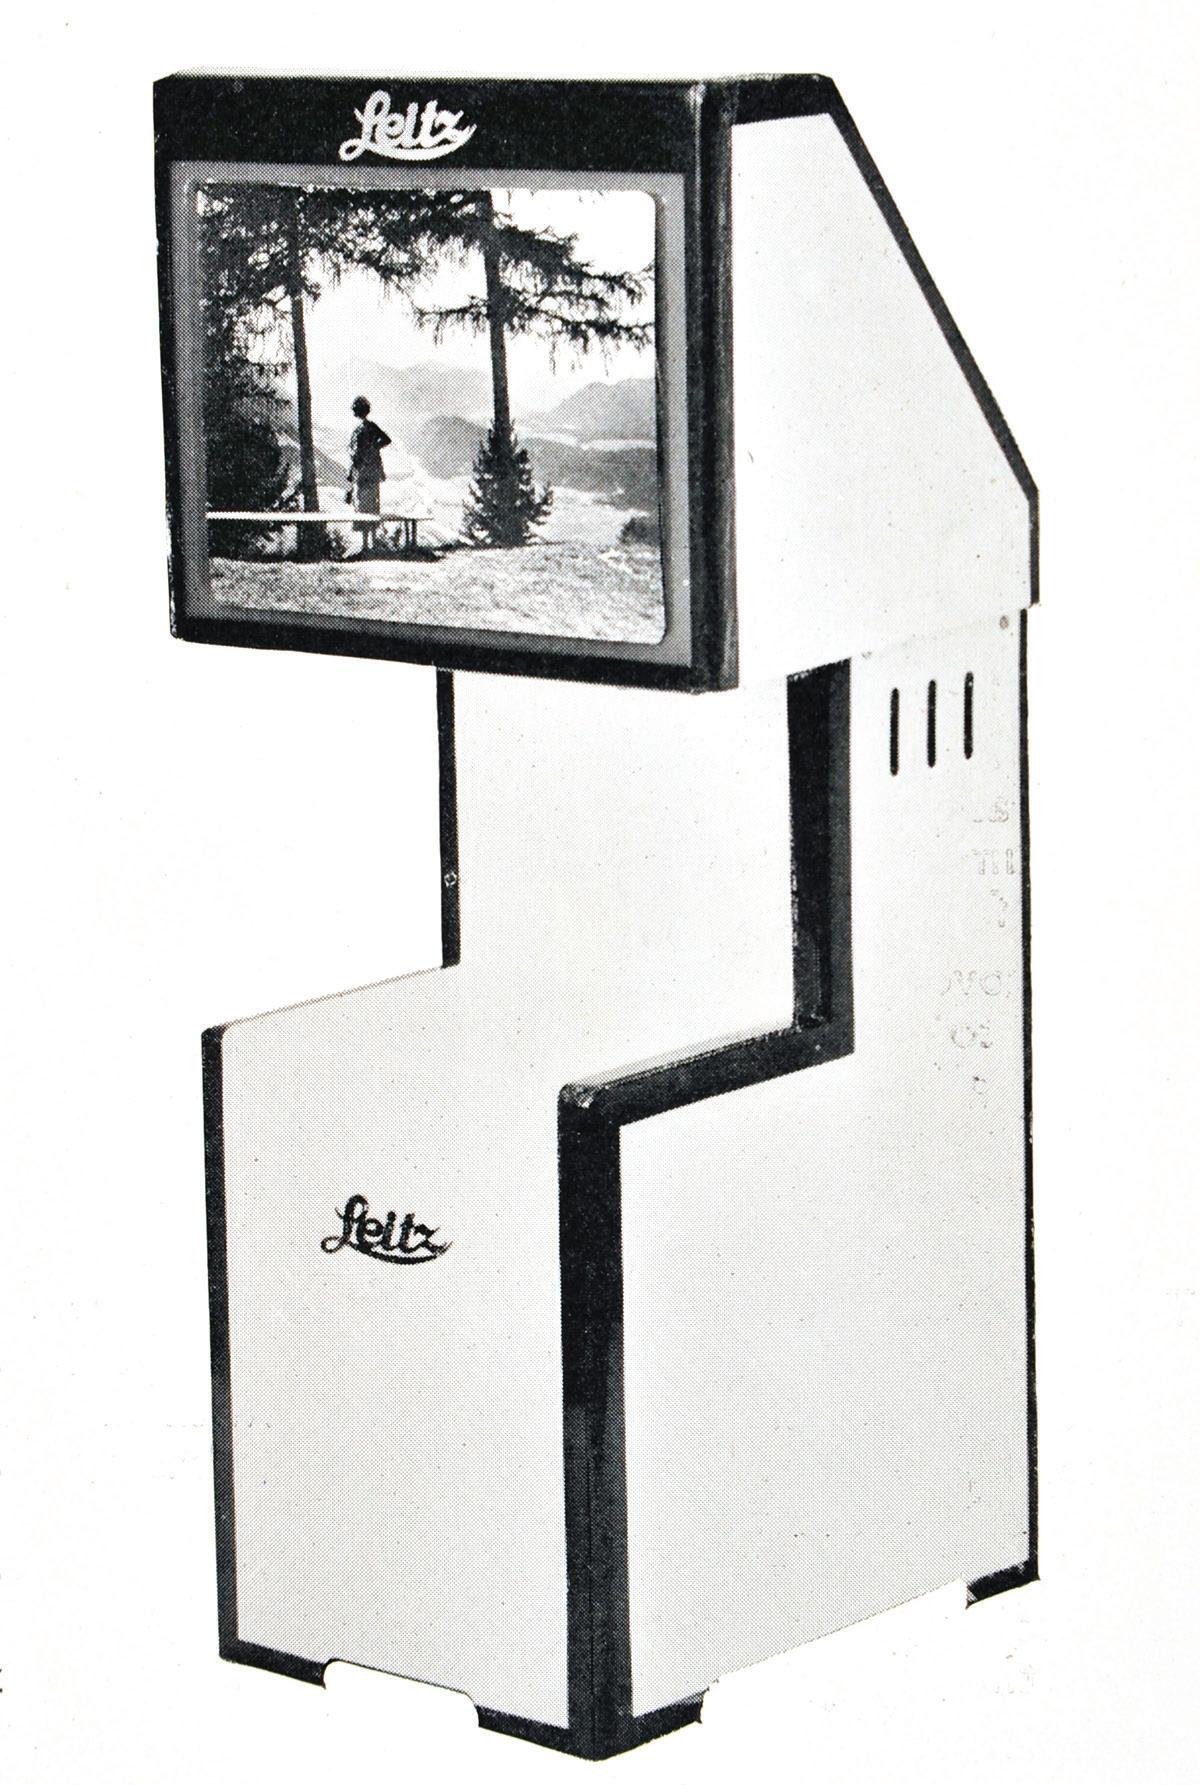
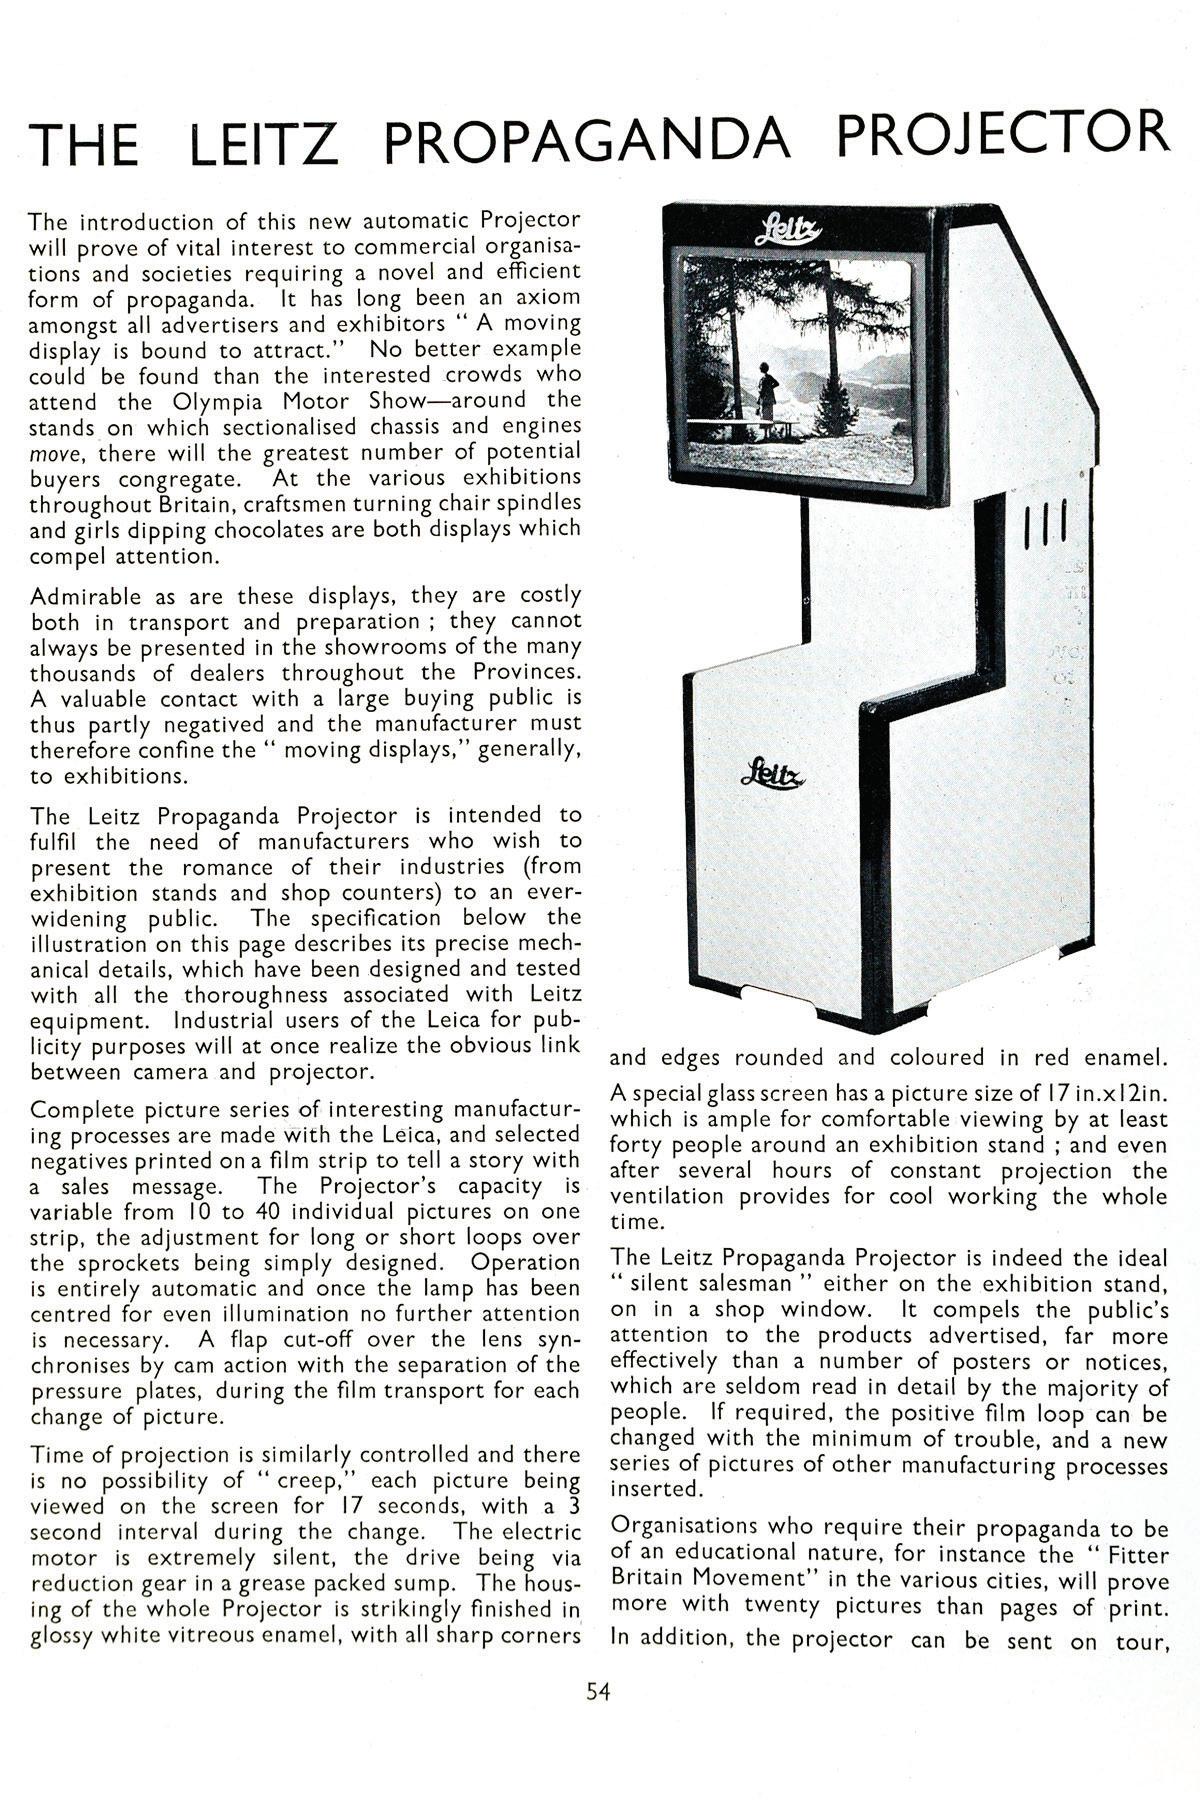
May-June 1937 publication Leica News & Technique from E. Leitz (London) illustrates a device labeled The Leitz Propaganda Projector. The article, reproduced here, details the applications for this unusual Leitz accessory.
The Leica Dealers Bulletin #26, August-September 1934, published by E. Leitz, Inc. New York discusses the device as the UFADE Advertising Continuous Automatic Projector #60050 priced at 415 dollars. Dimensions 42” high, 18” wide, and 19” thickness. Built-in daylight projection screen 12x18” shows a continuous loop of Leica positives at six photos per minute. The following bulletin #27 offers the UFADE to Leica dealers on a loaner basis as sales were undoubtedly minimal. If you cannot sell it, loan it. Has the UFADE survived? Please direct your comments to Editor Rosauer or myself.
THE HIDDEN FOKOS
by JIM LAGER
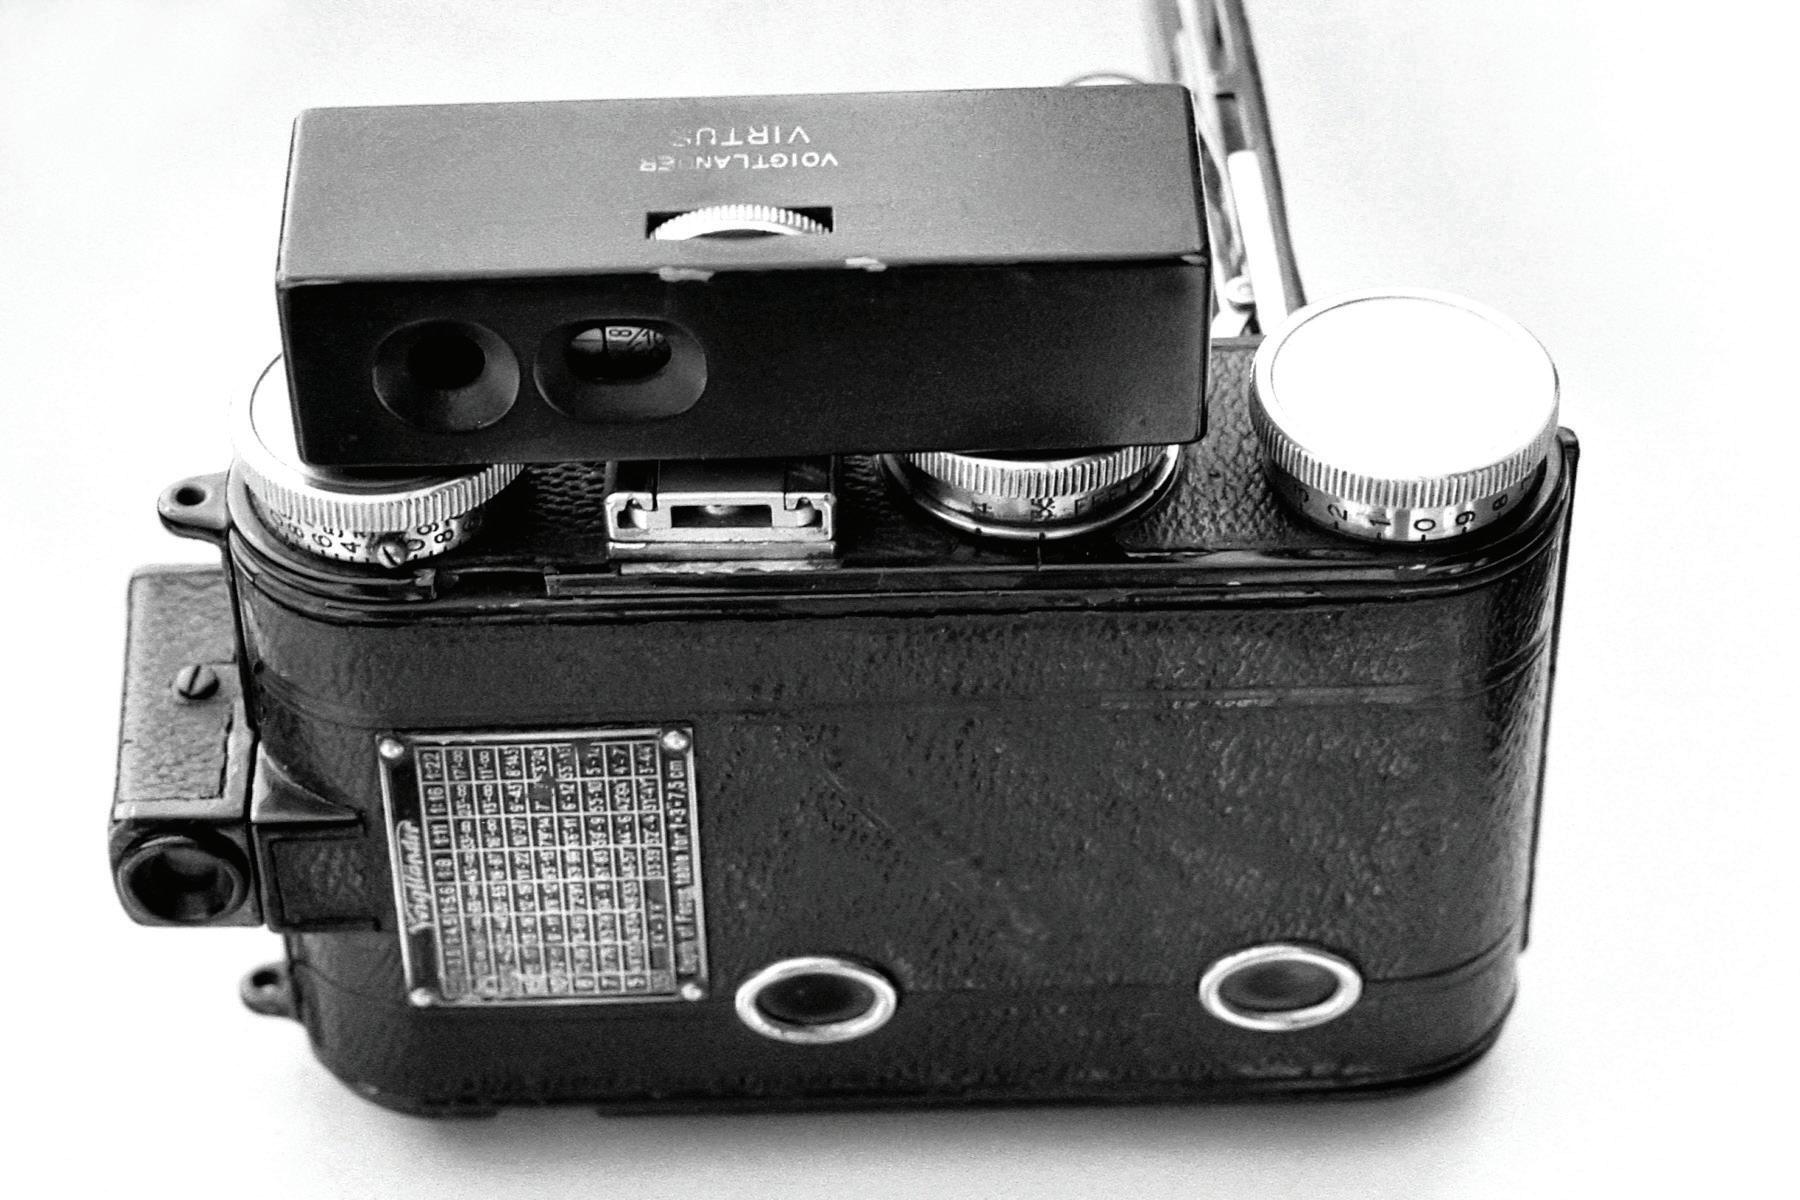
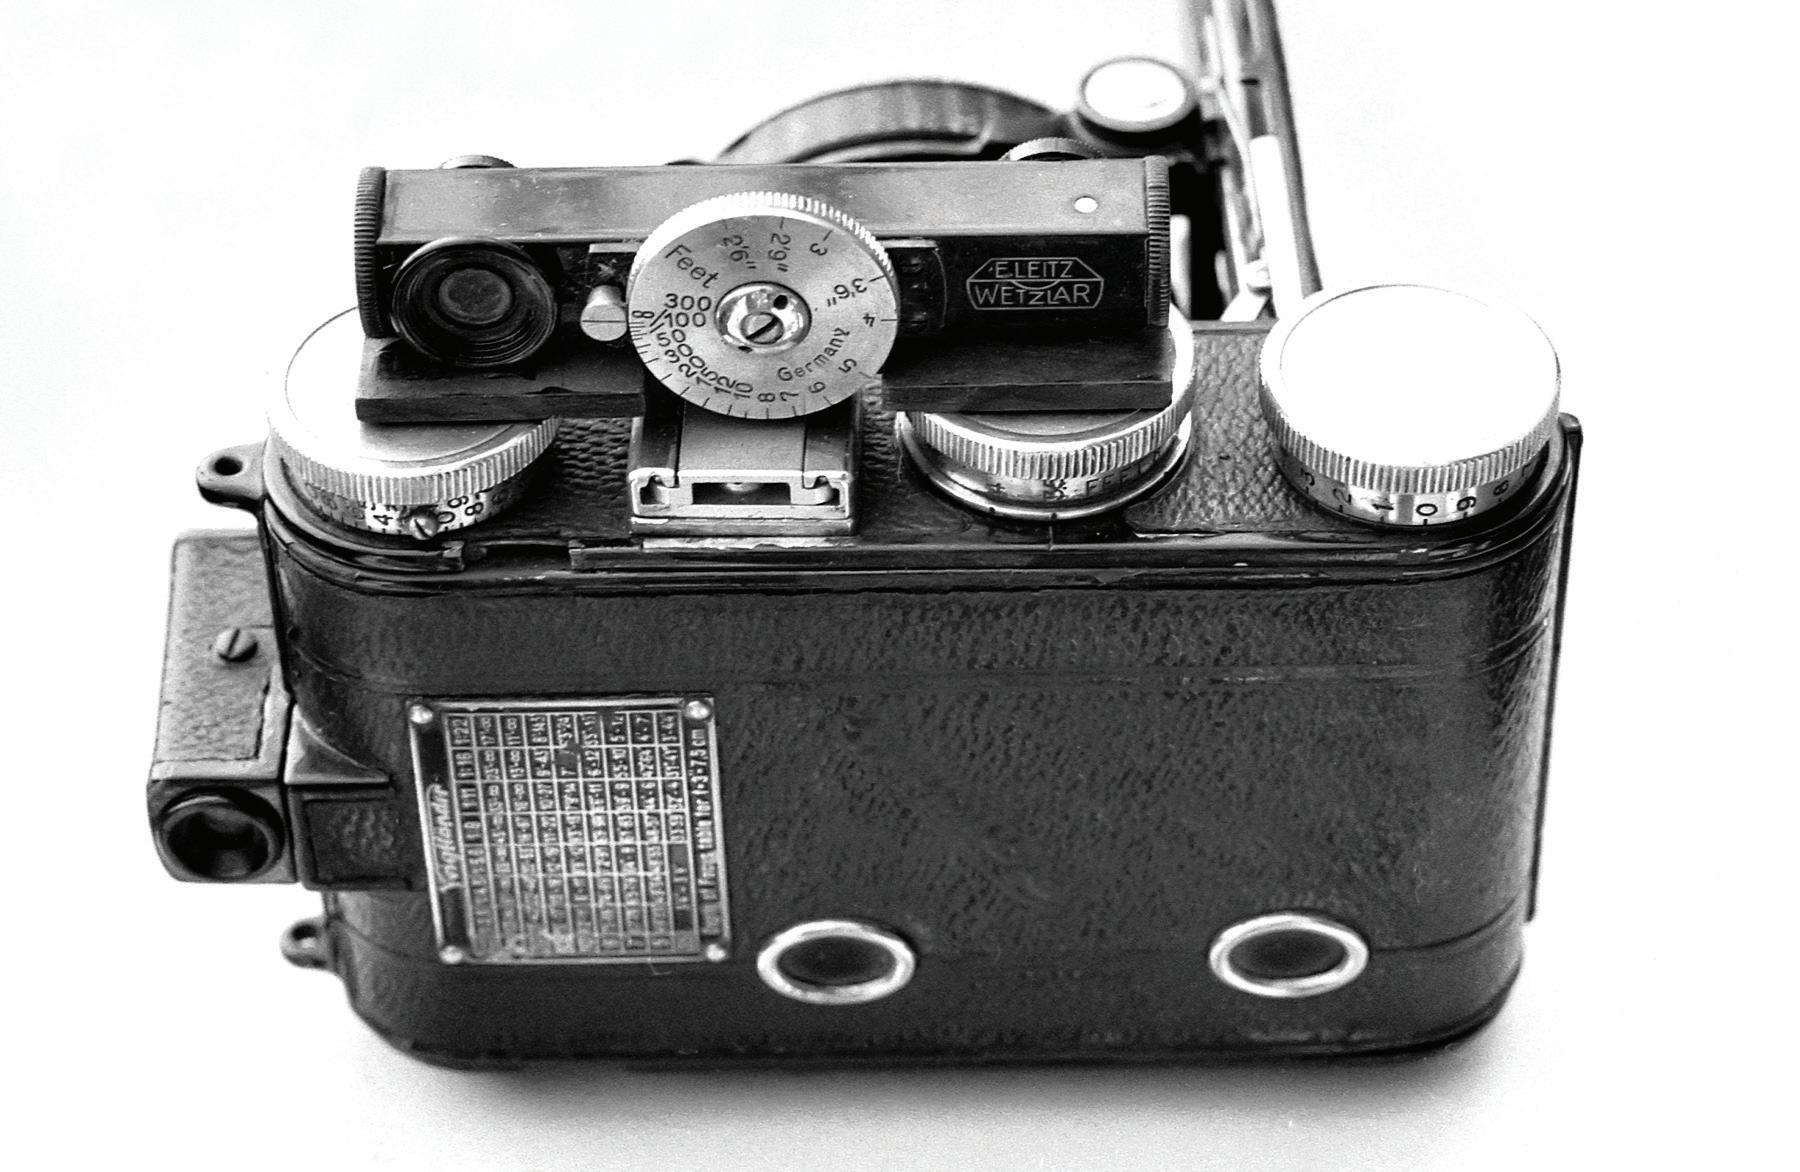
the
1980 PHSNE (Photographic Historical Society of New England) show in Boston featured a number of unusual items for the collector. I encountered a tiny Voigtländer folding camera equipped with a horizontally mounted rangefinder. The rangefinder was mounted inside a beautifully built wood enclosure marked VIRTUS. Upon inspection the wood parts came apart revealing a Leitz FOKOS rangefinder. With the mounting foot the nomenclature is HFOOK. I had NEVER seen this before. It appears that Voigtländer obtained the FOKOS, hid it in the wood box, and marketed the combination camera/rangefinder. Can anyone enlighten us further? The illustrations show the FOKOS hidden and revealed.