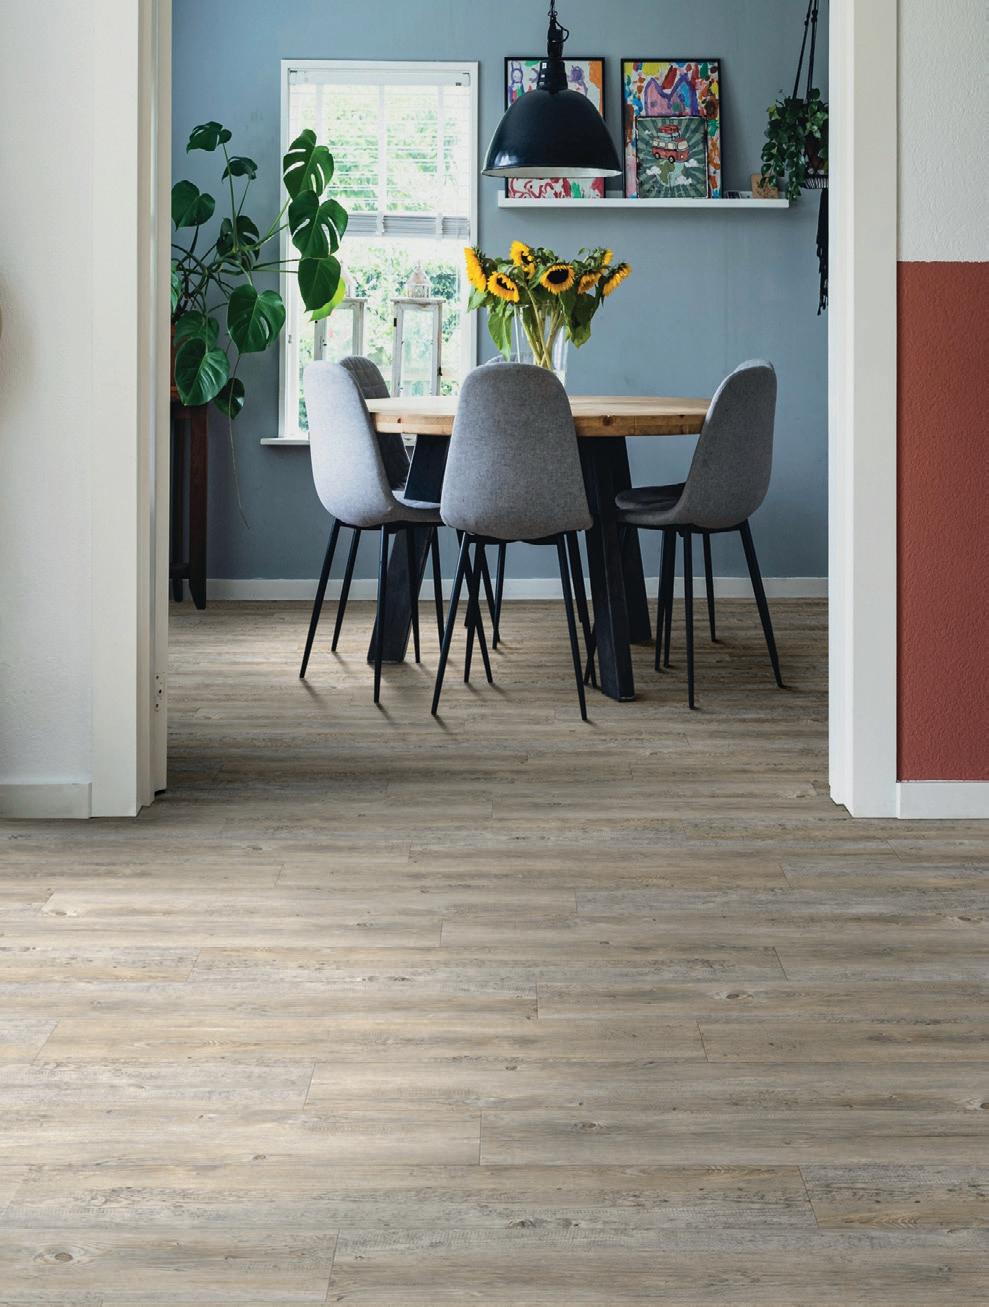
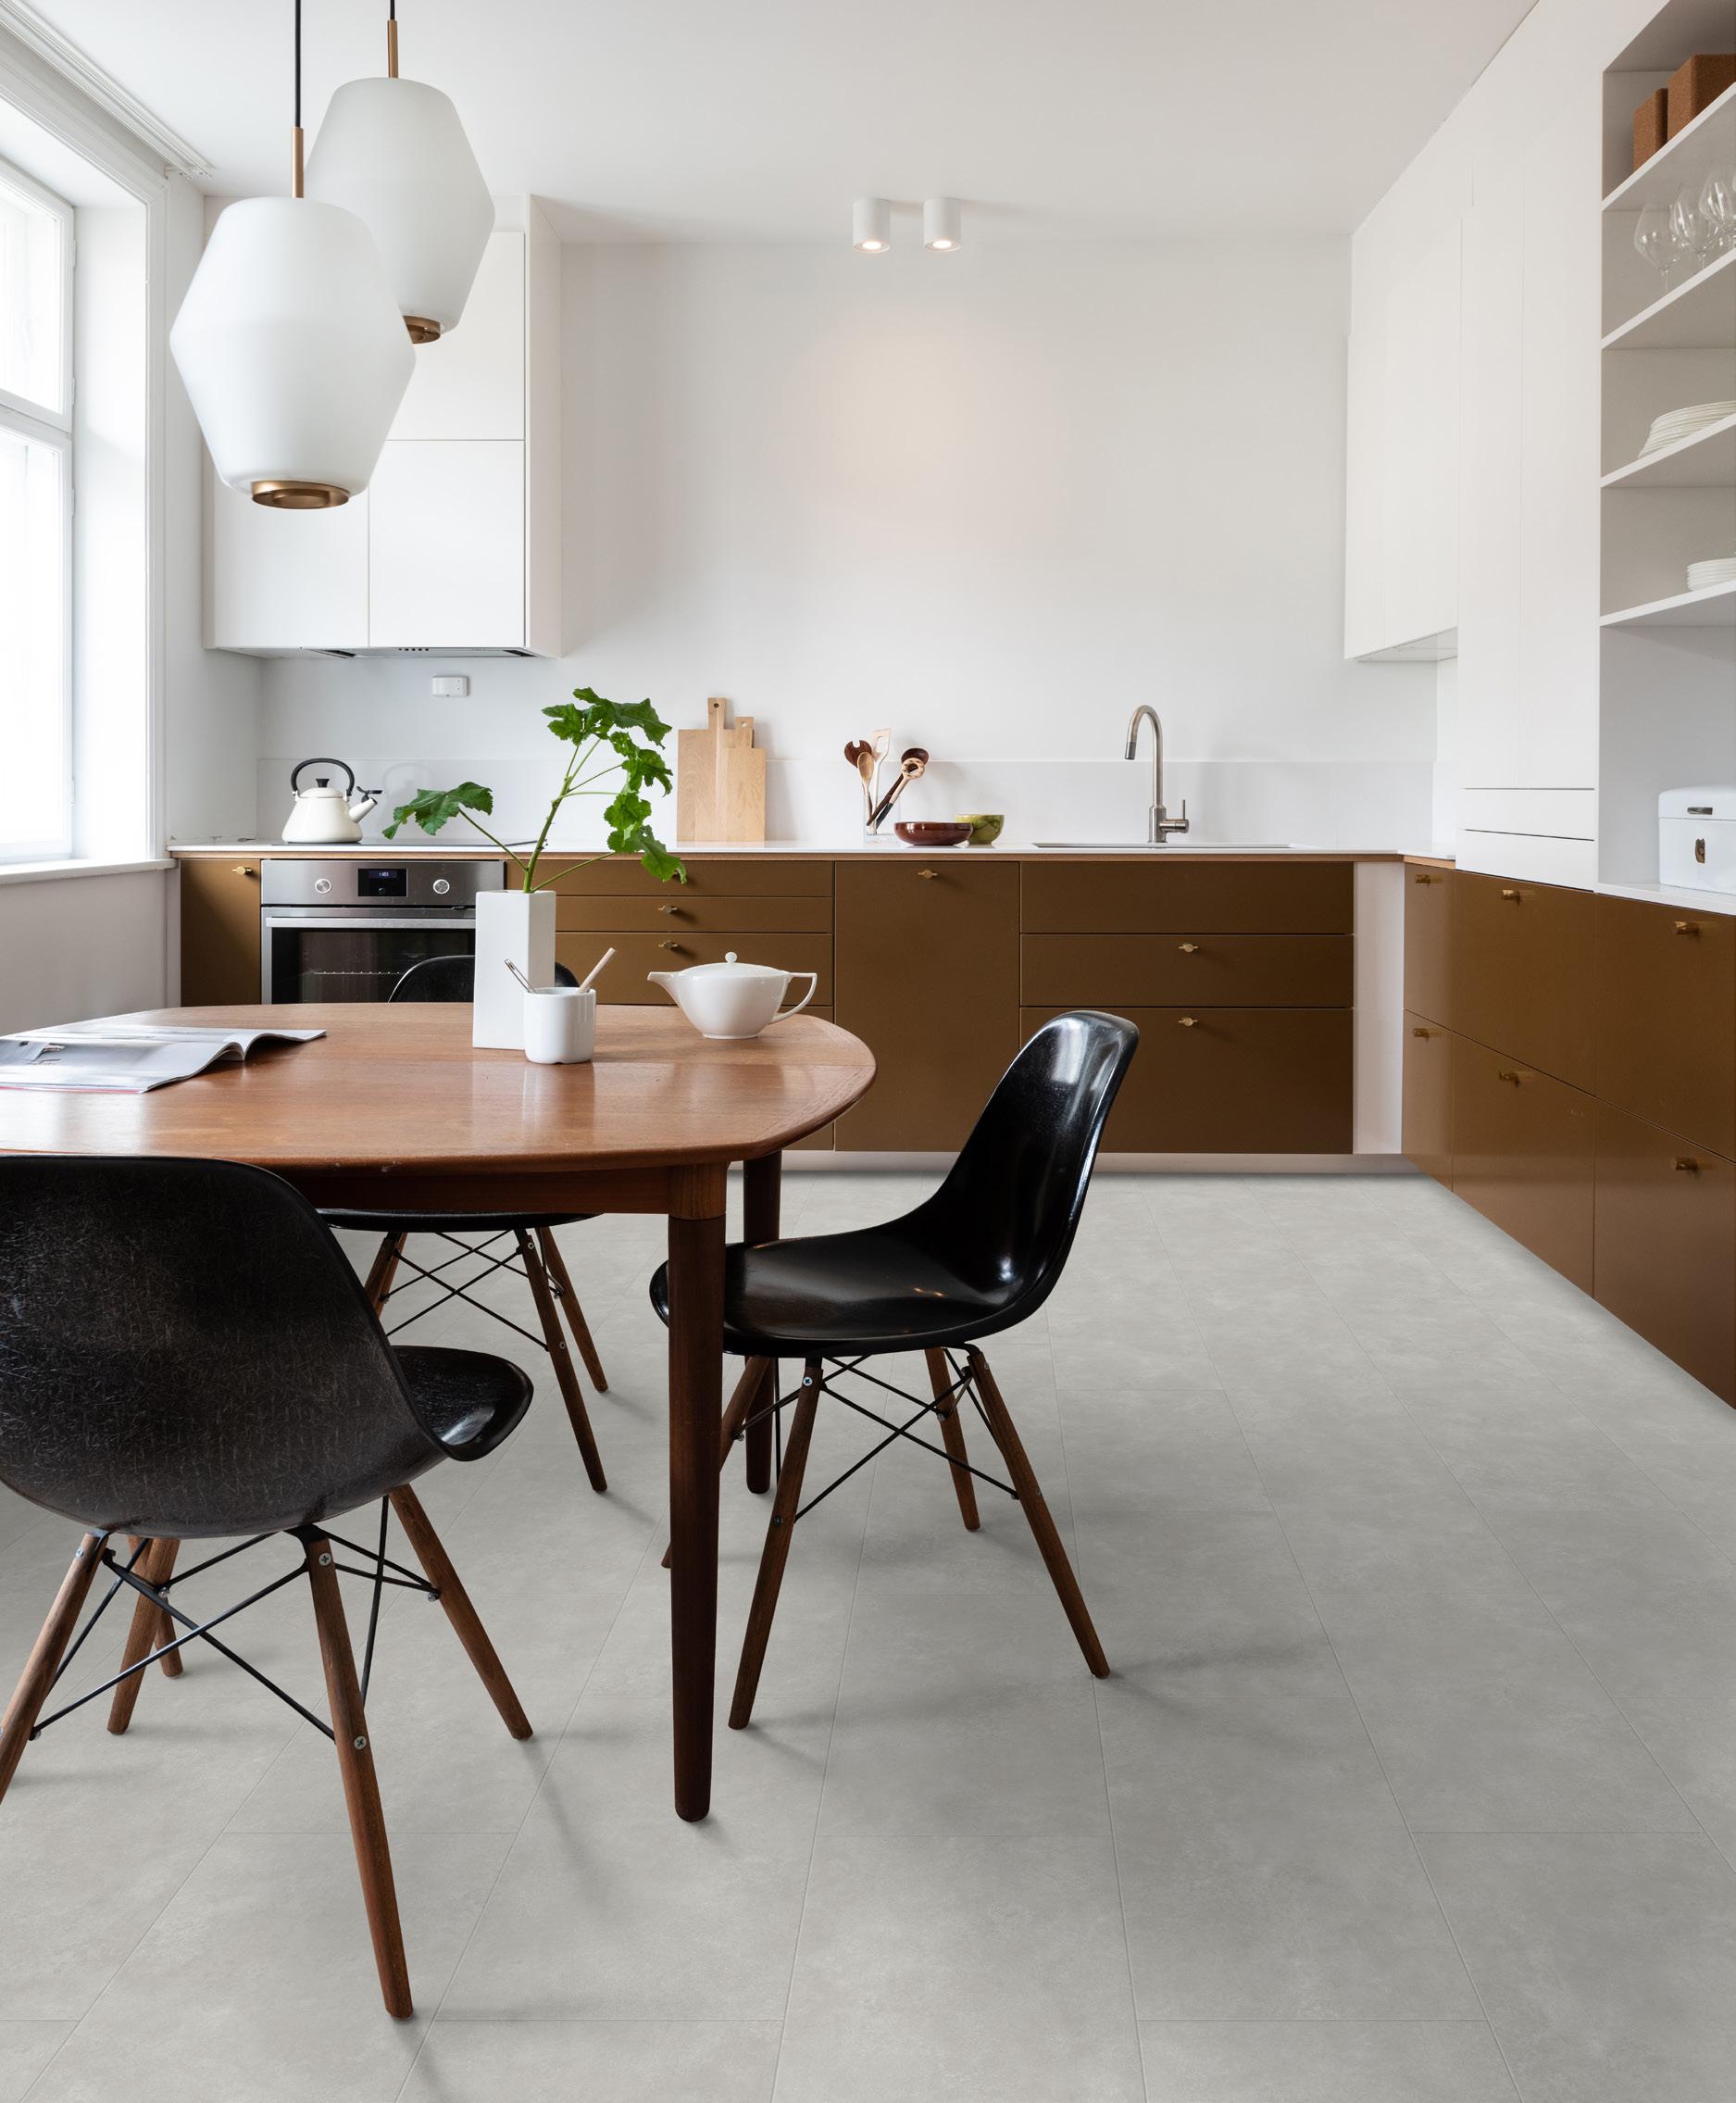
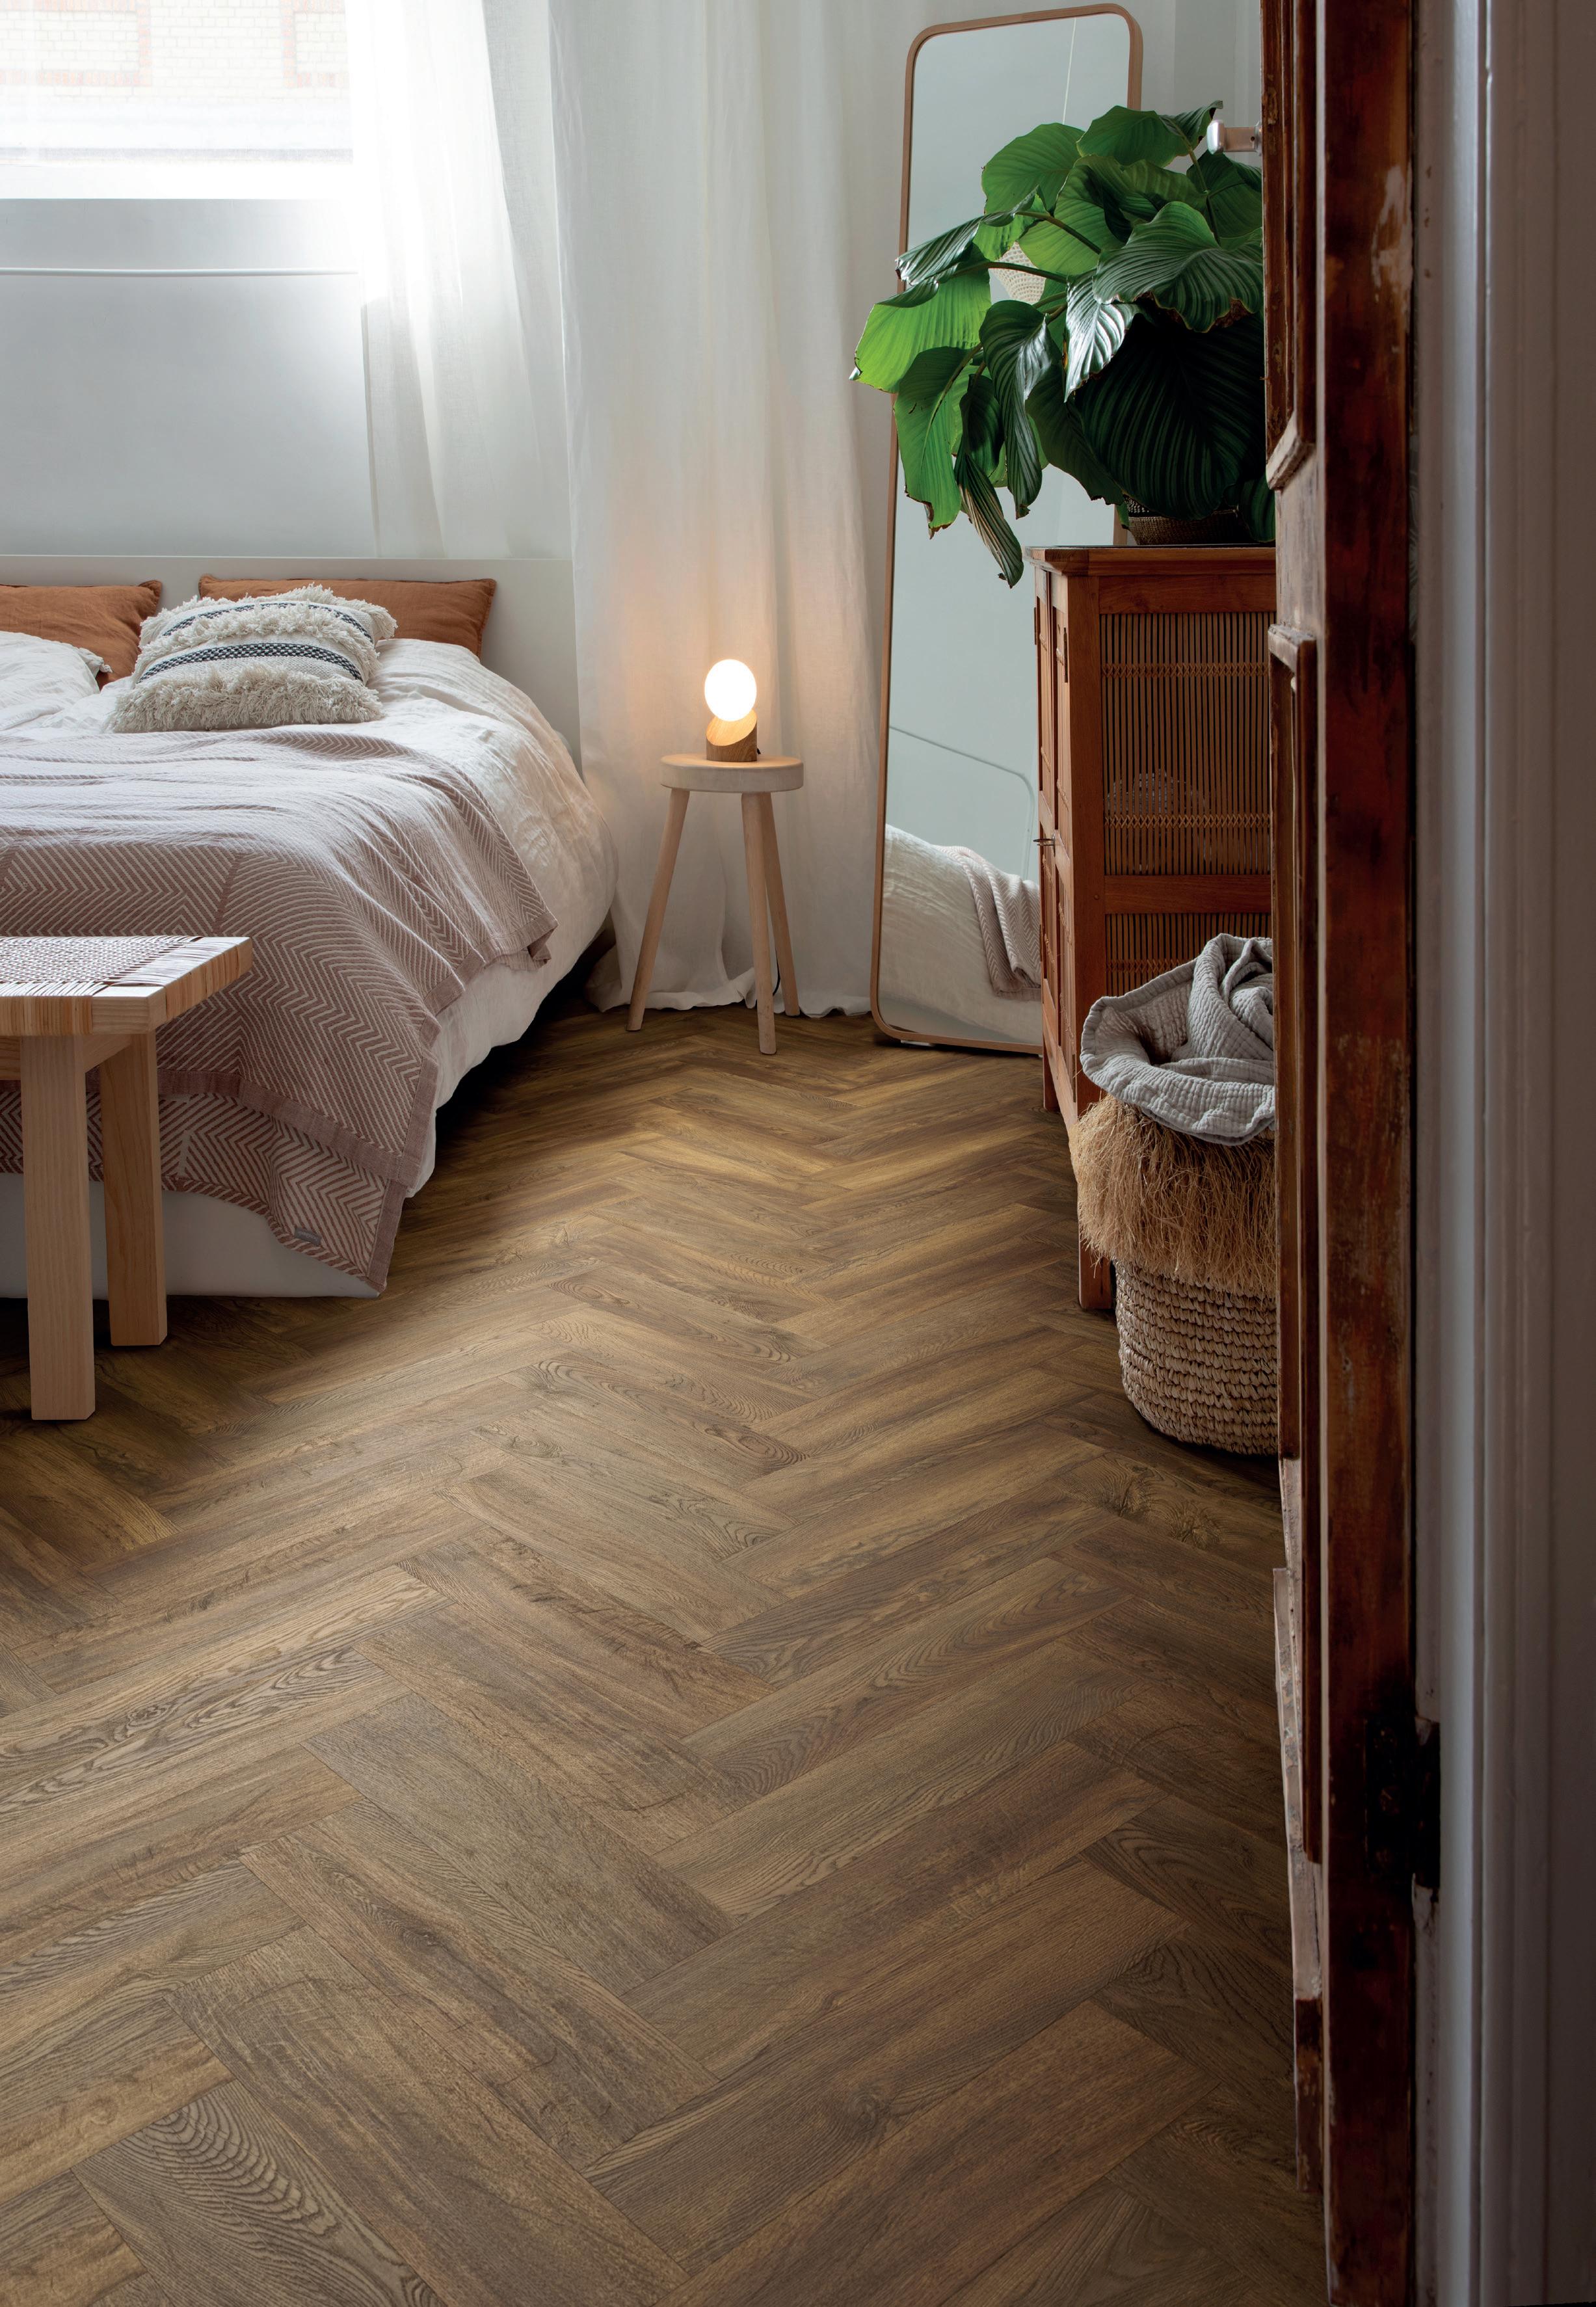
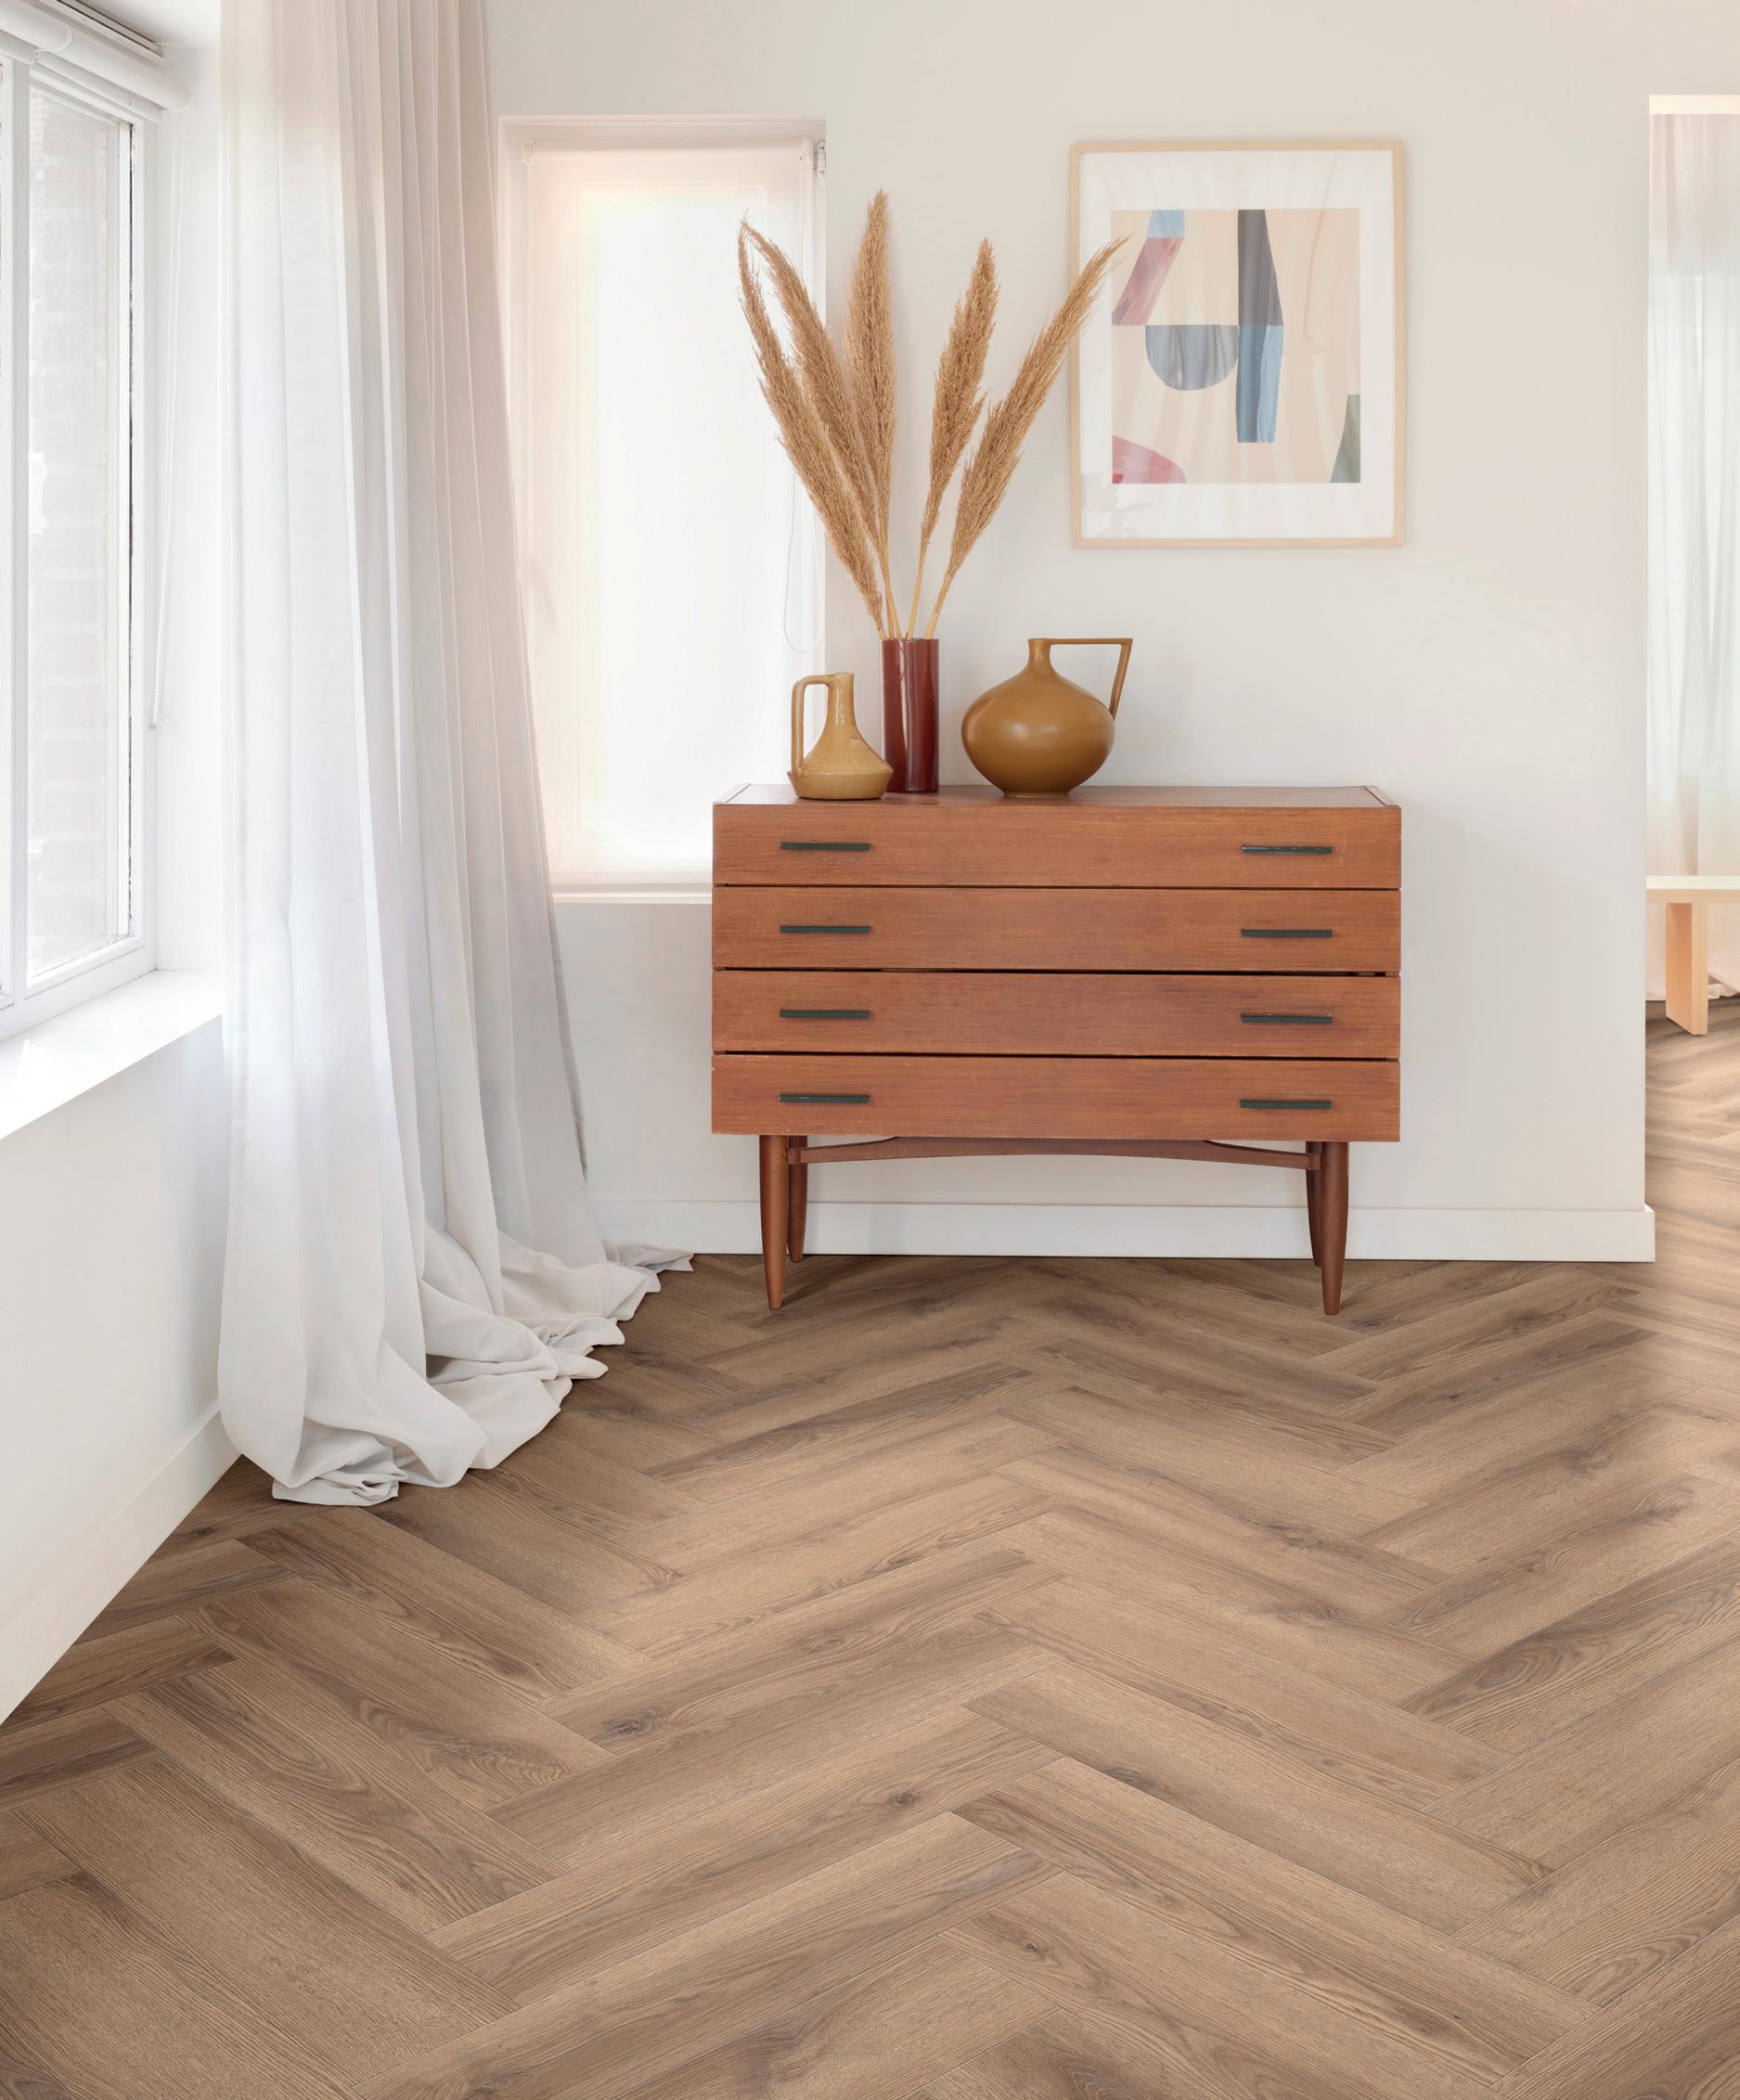
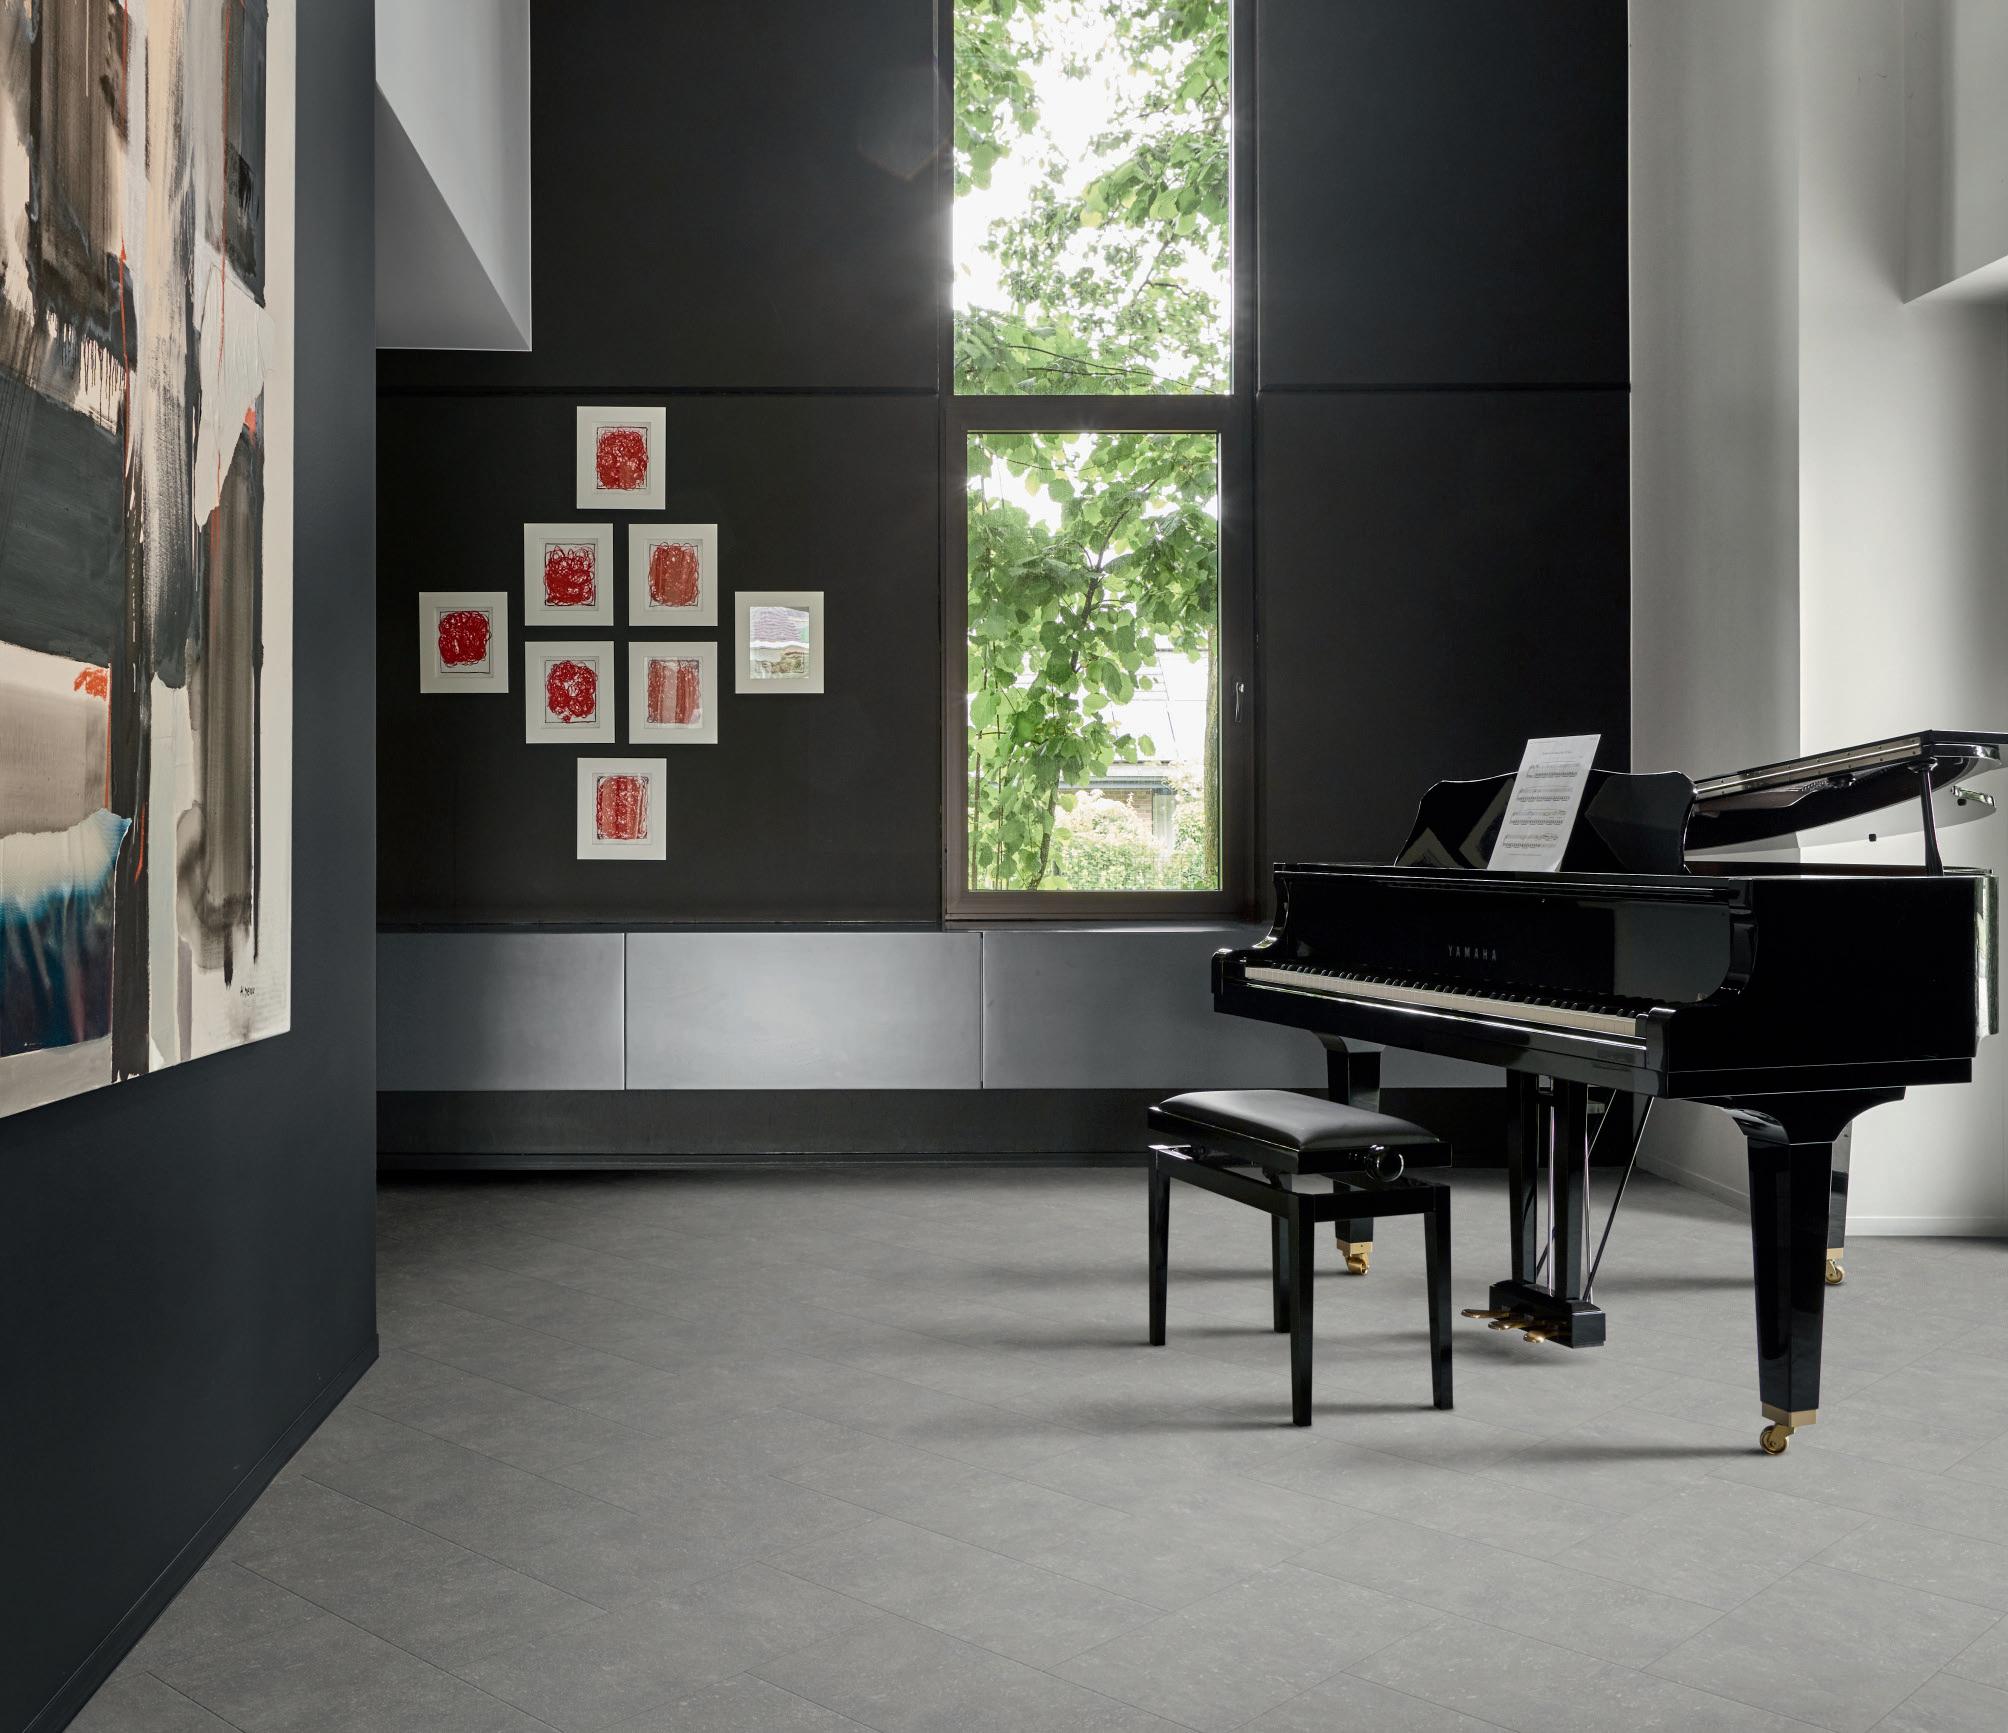
WHATEVER YOUR TASTE, WHATEVER YOUR SPACE...
2023/24 COLLECTION
WWW.KLICKFLOOR.CO.UK
We are Klickfloor...
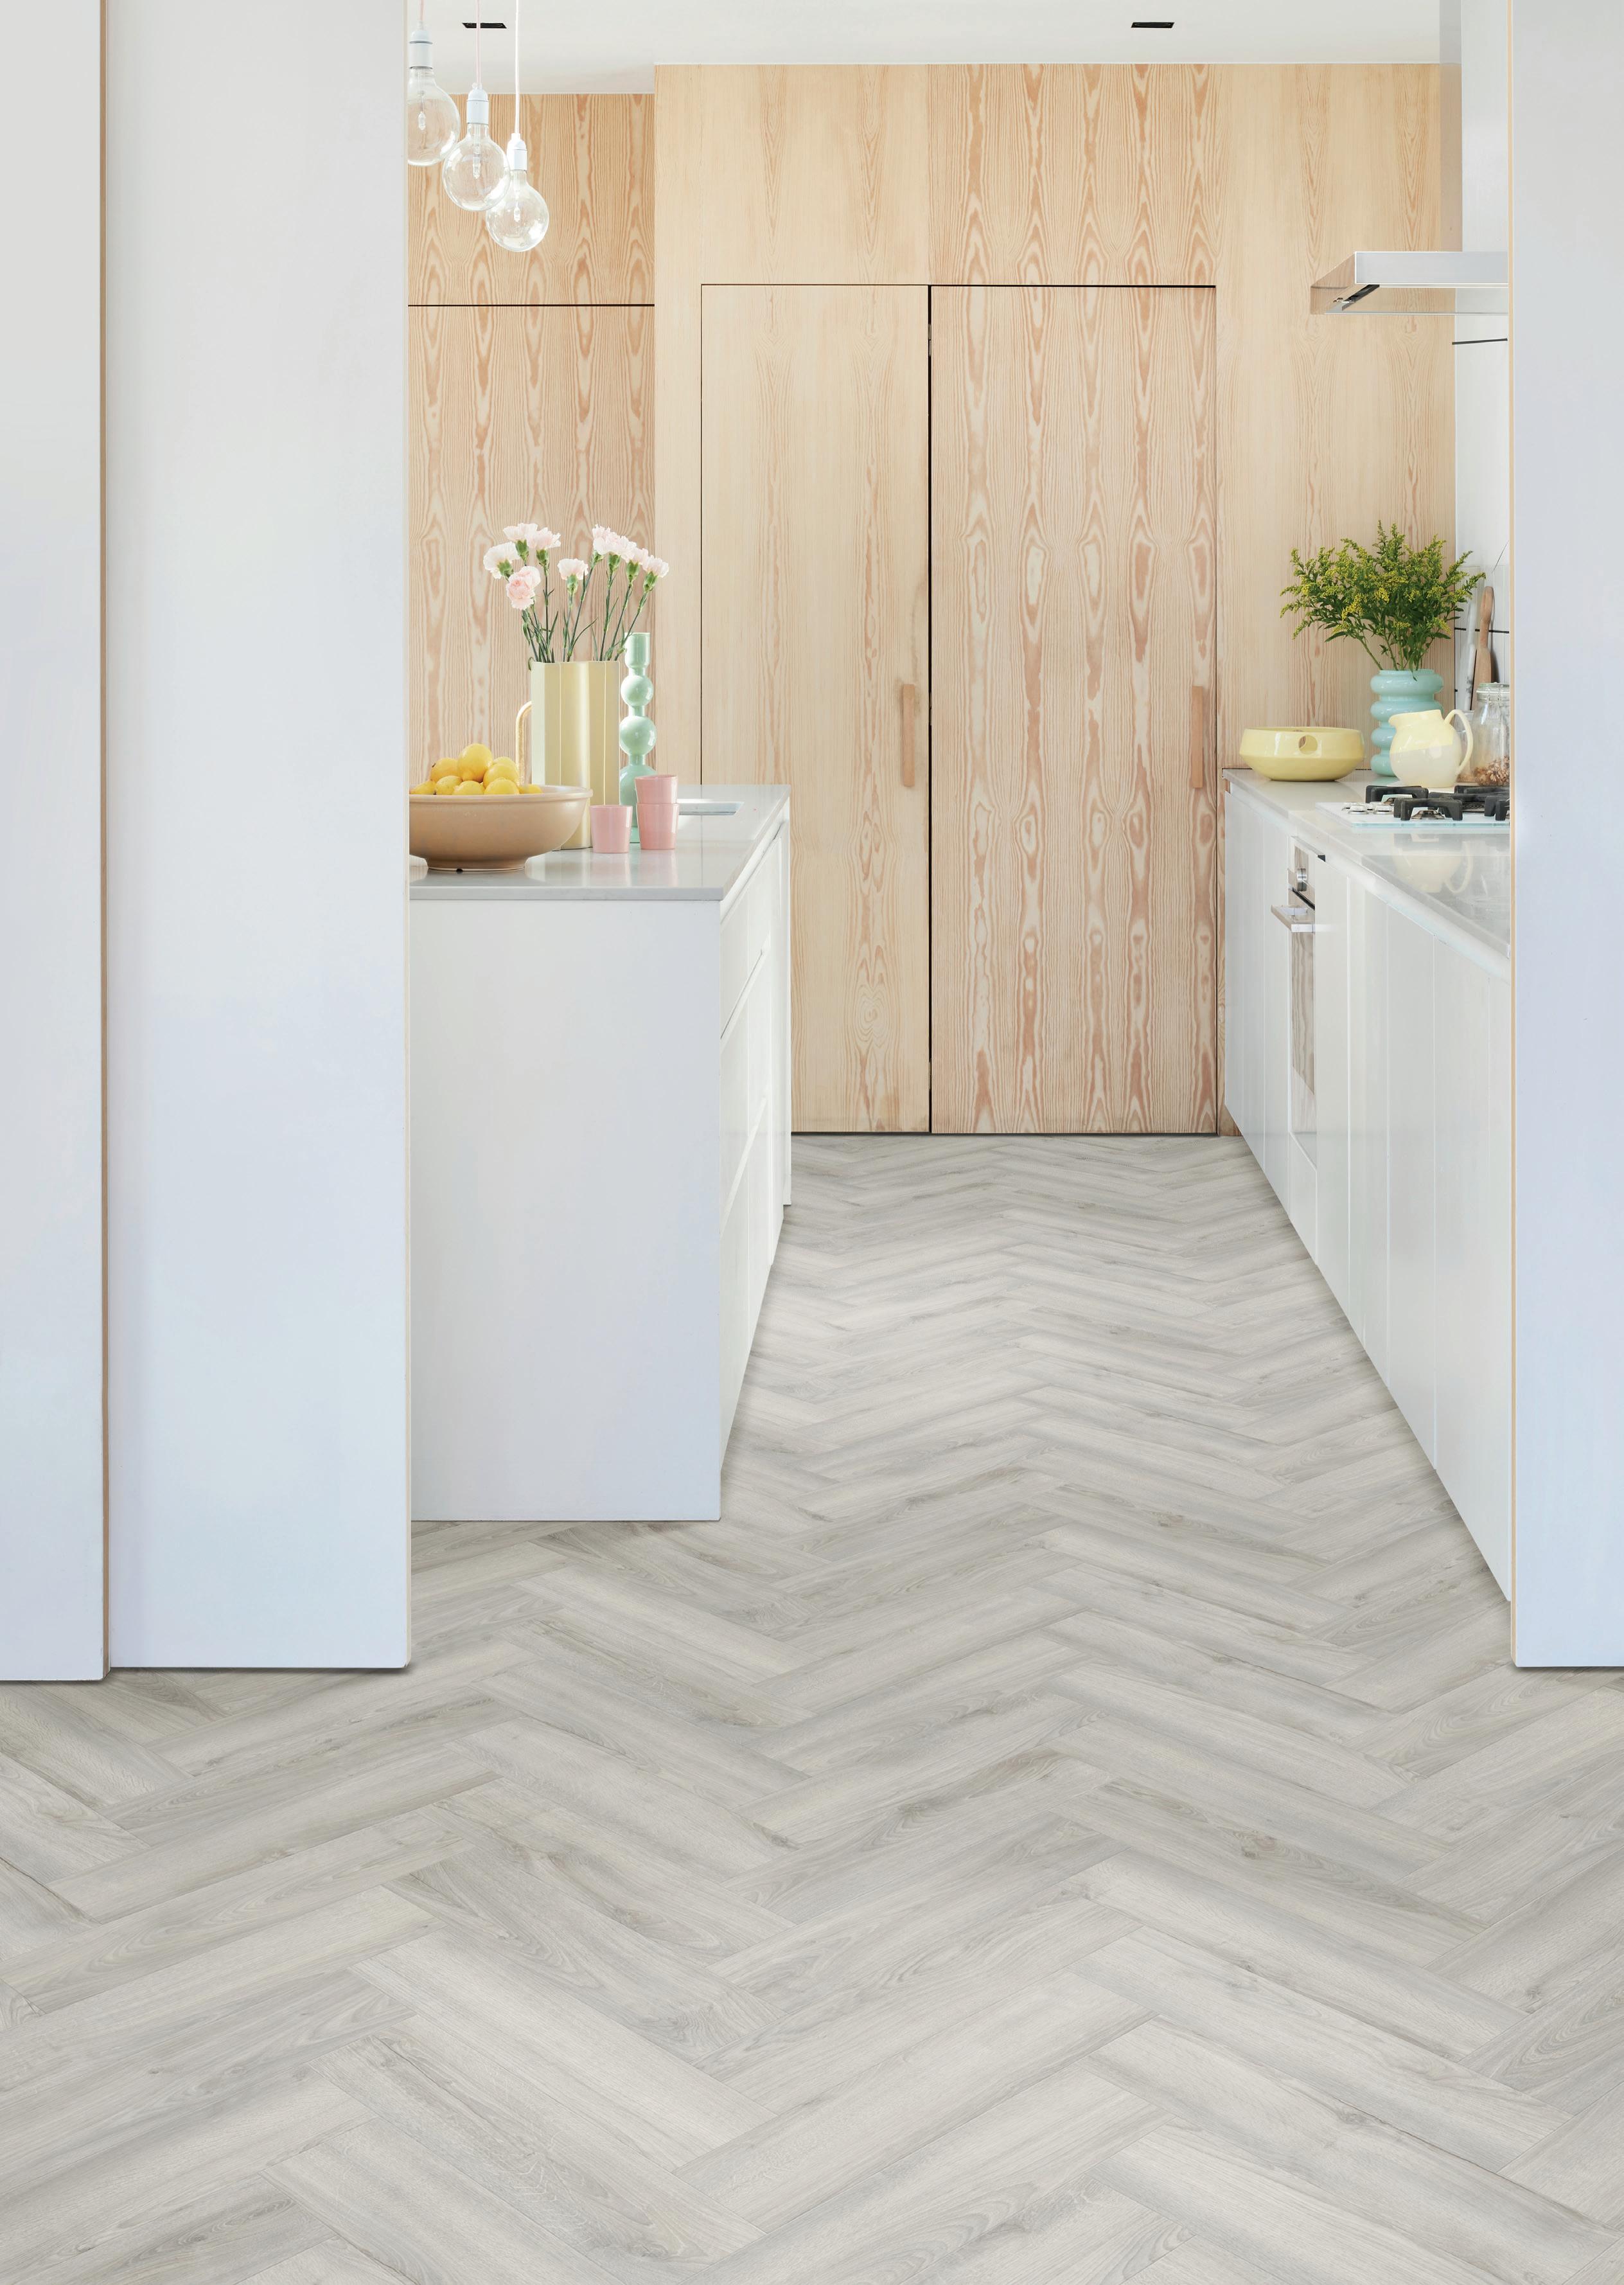
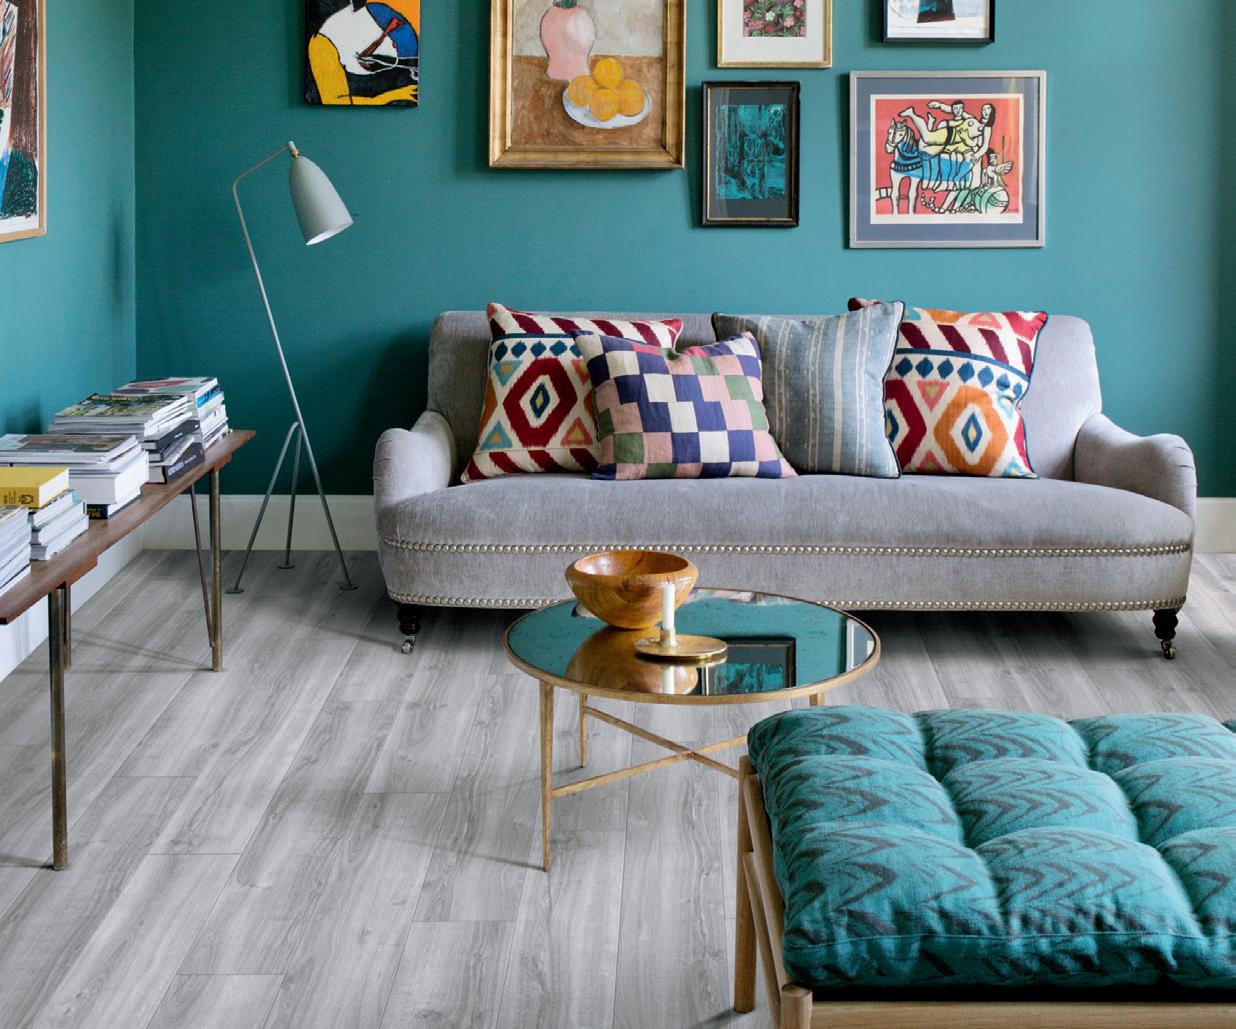
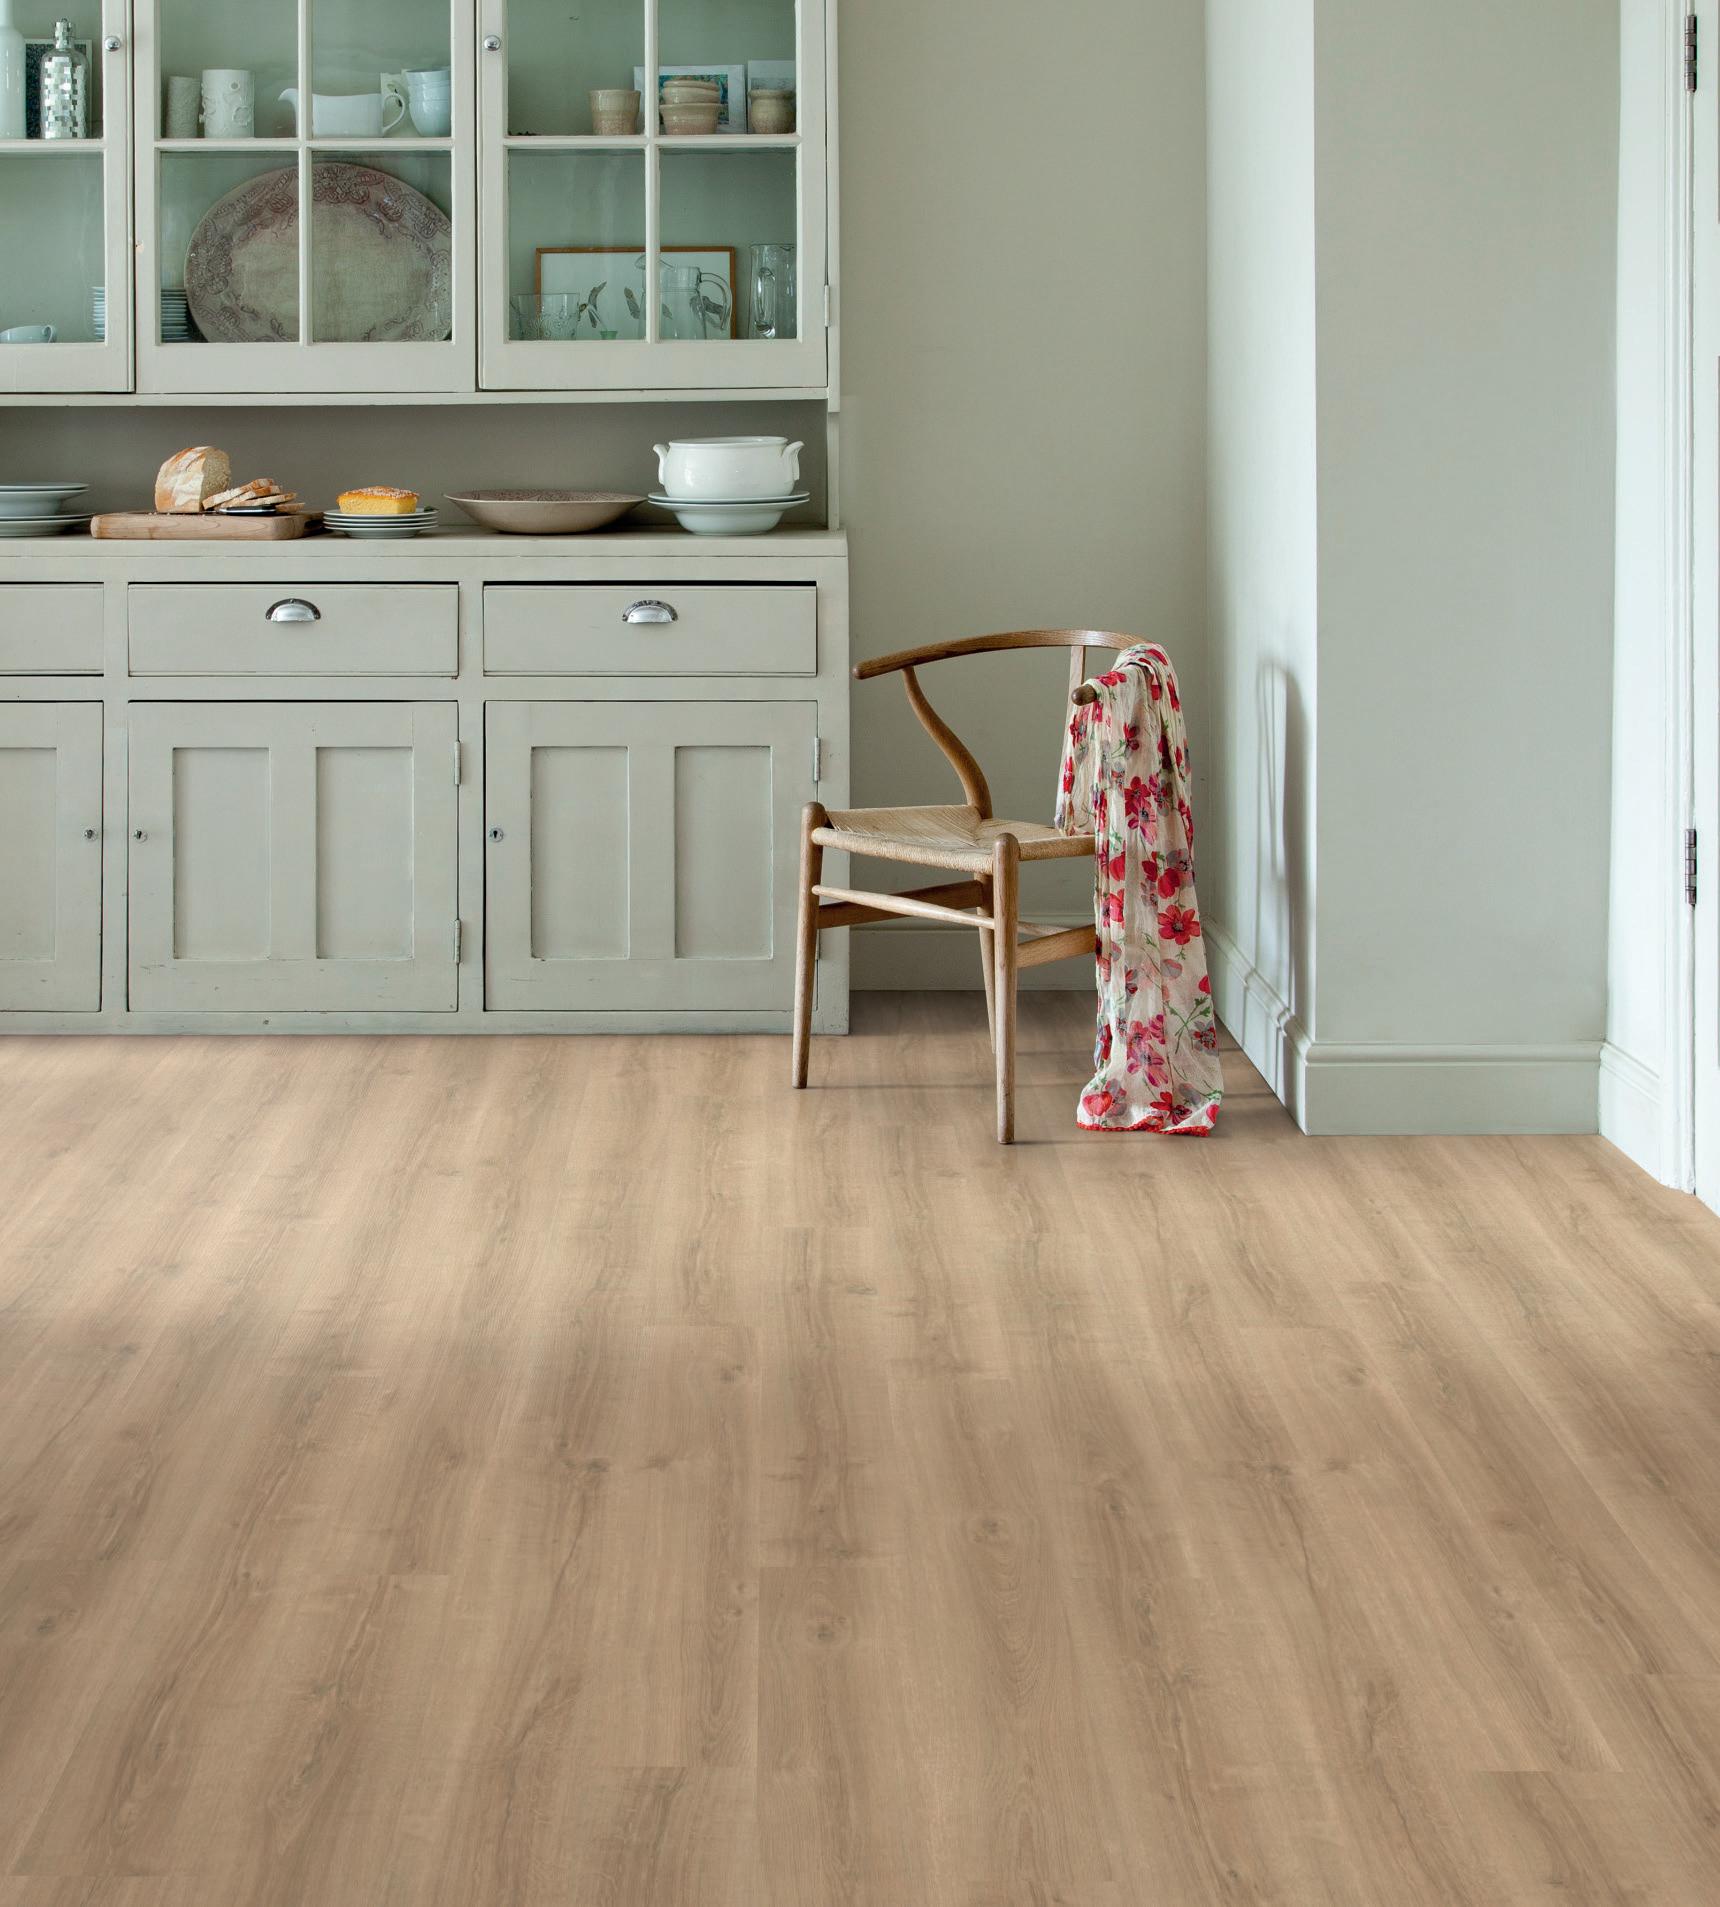
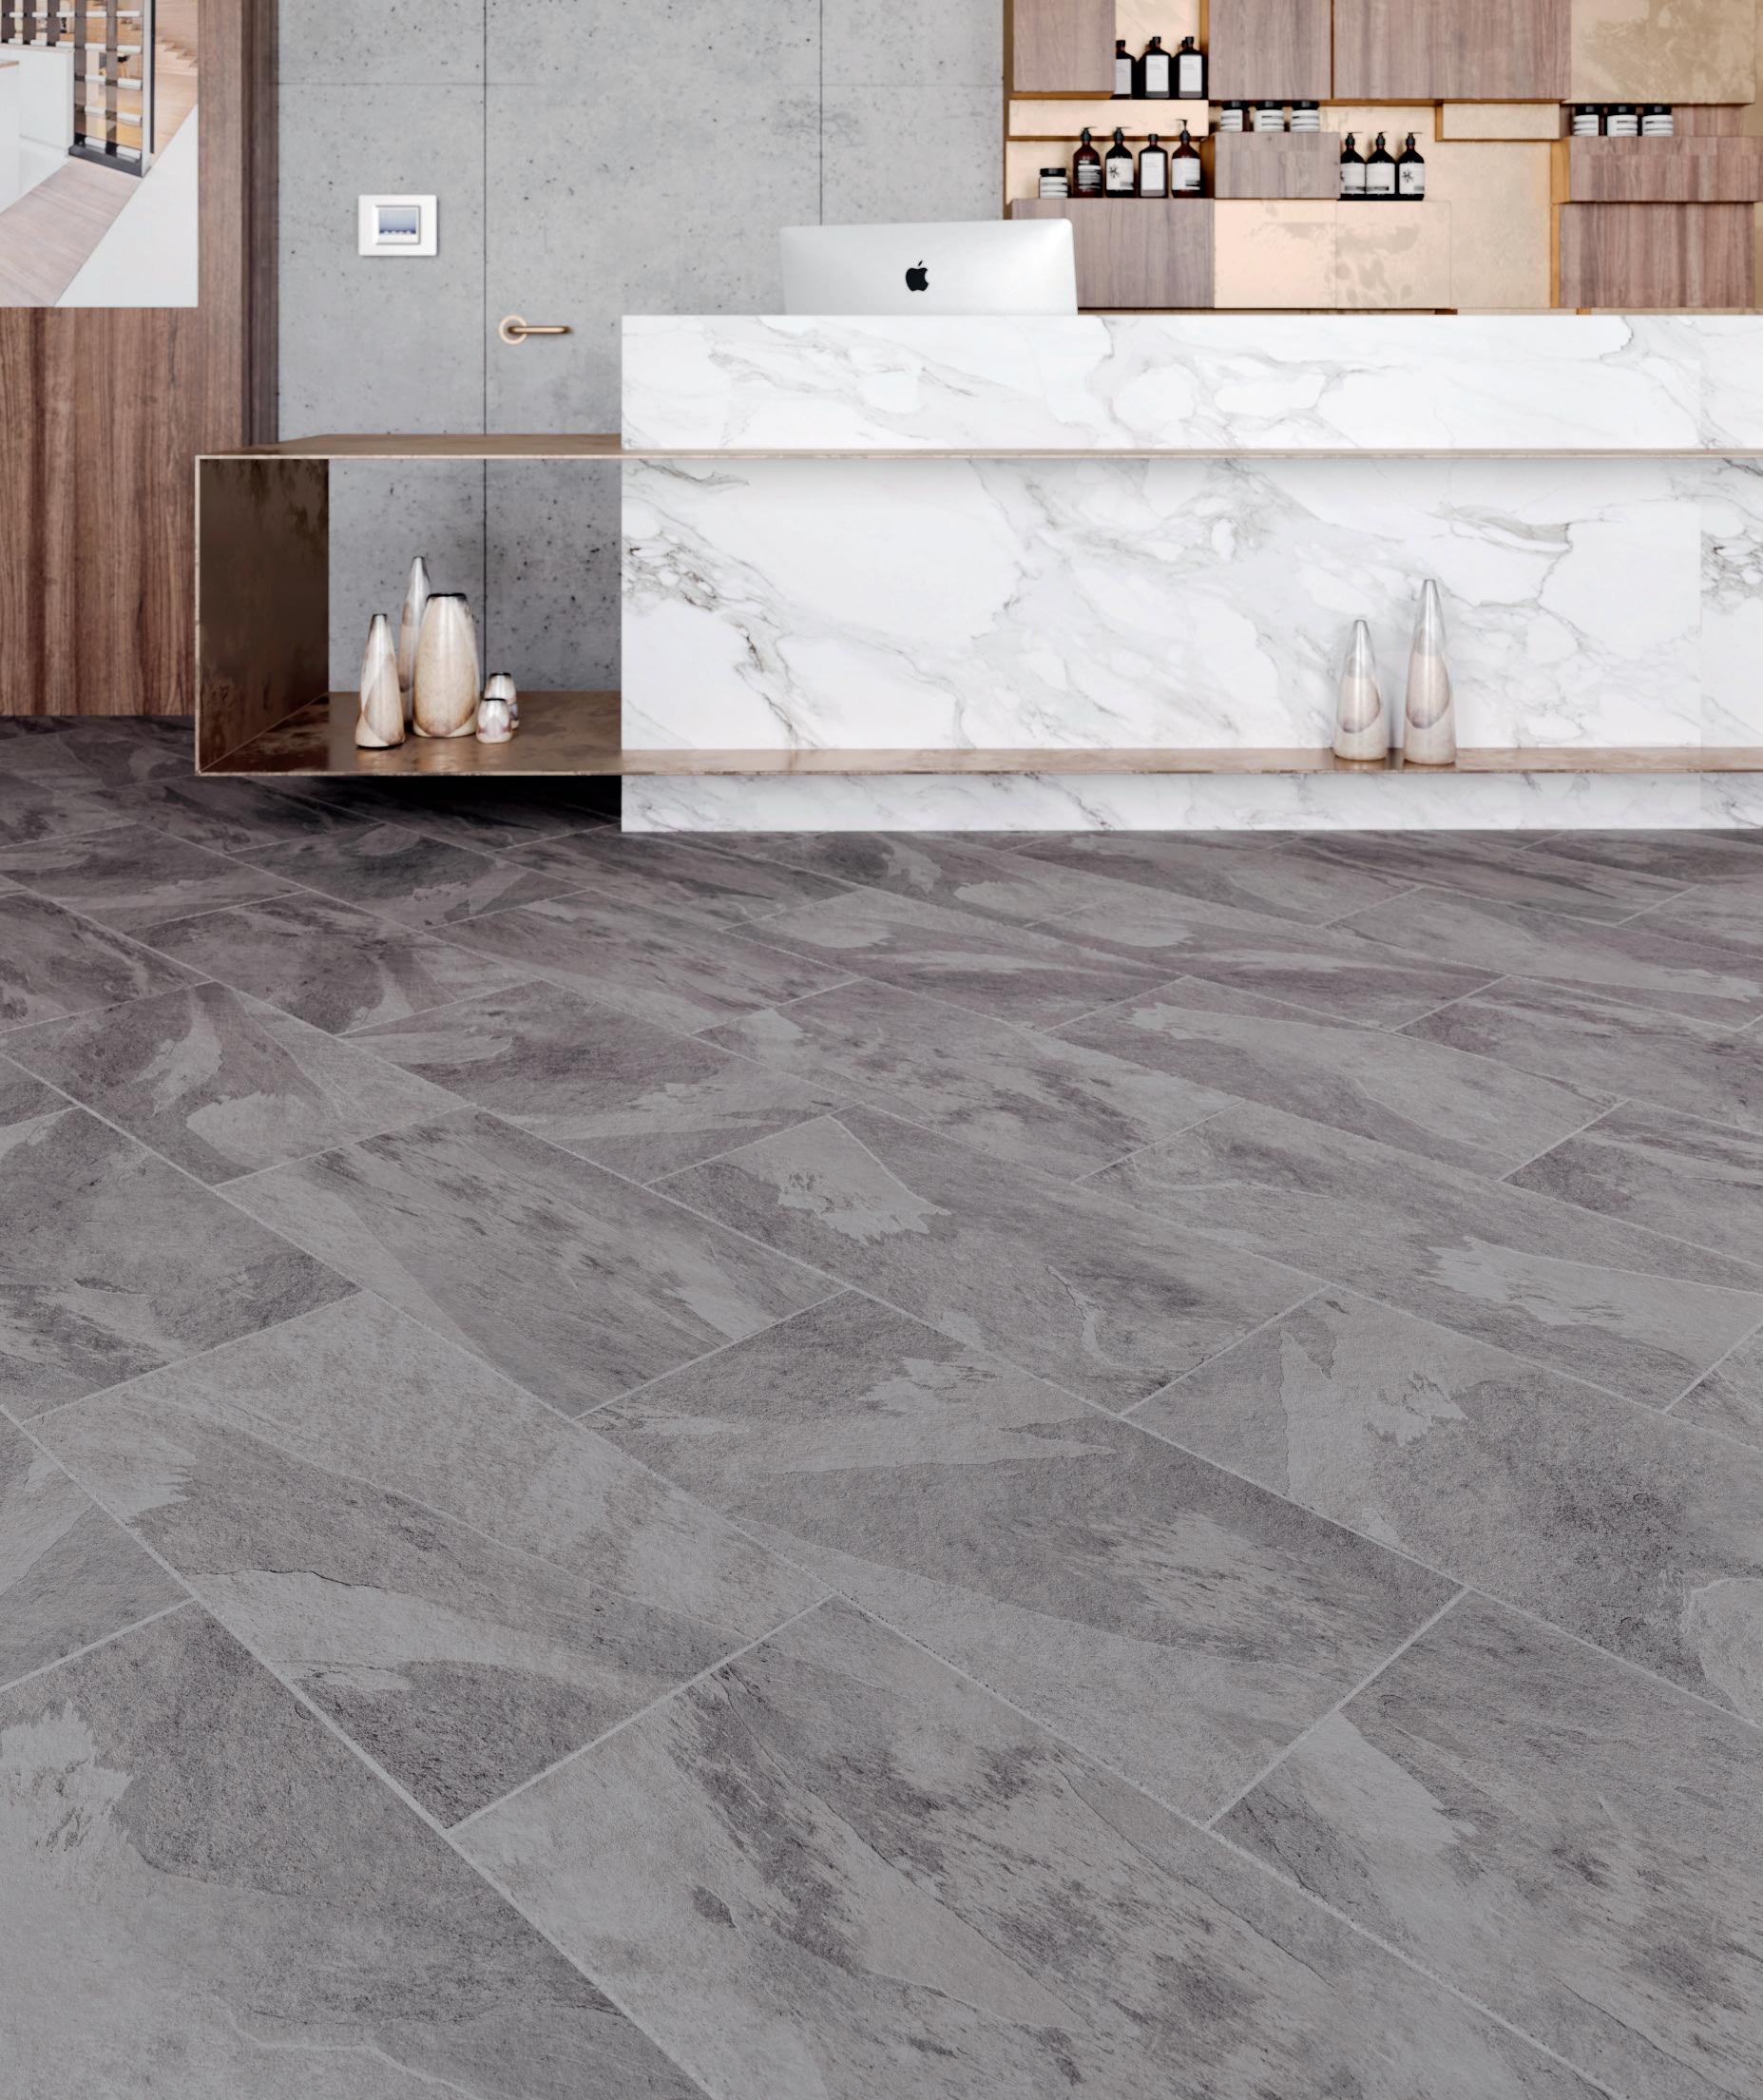
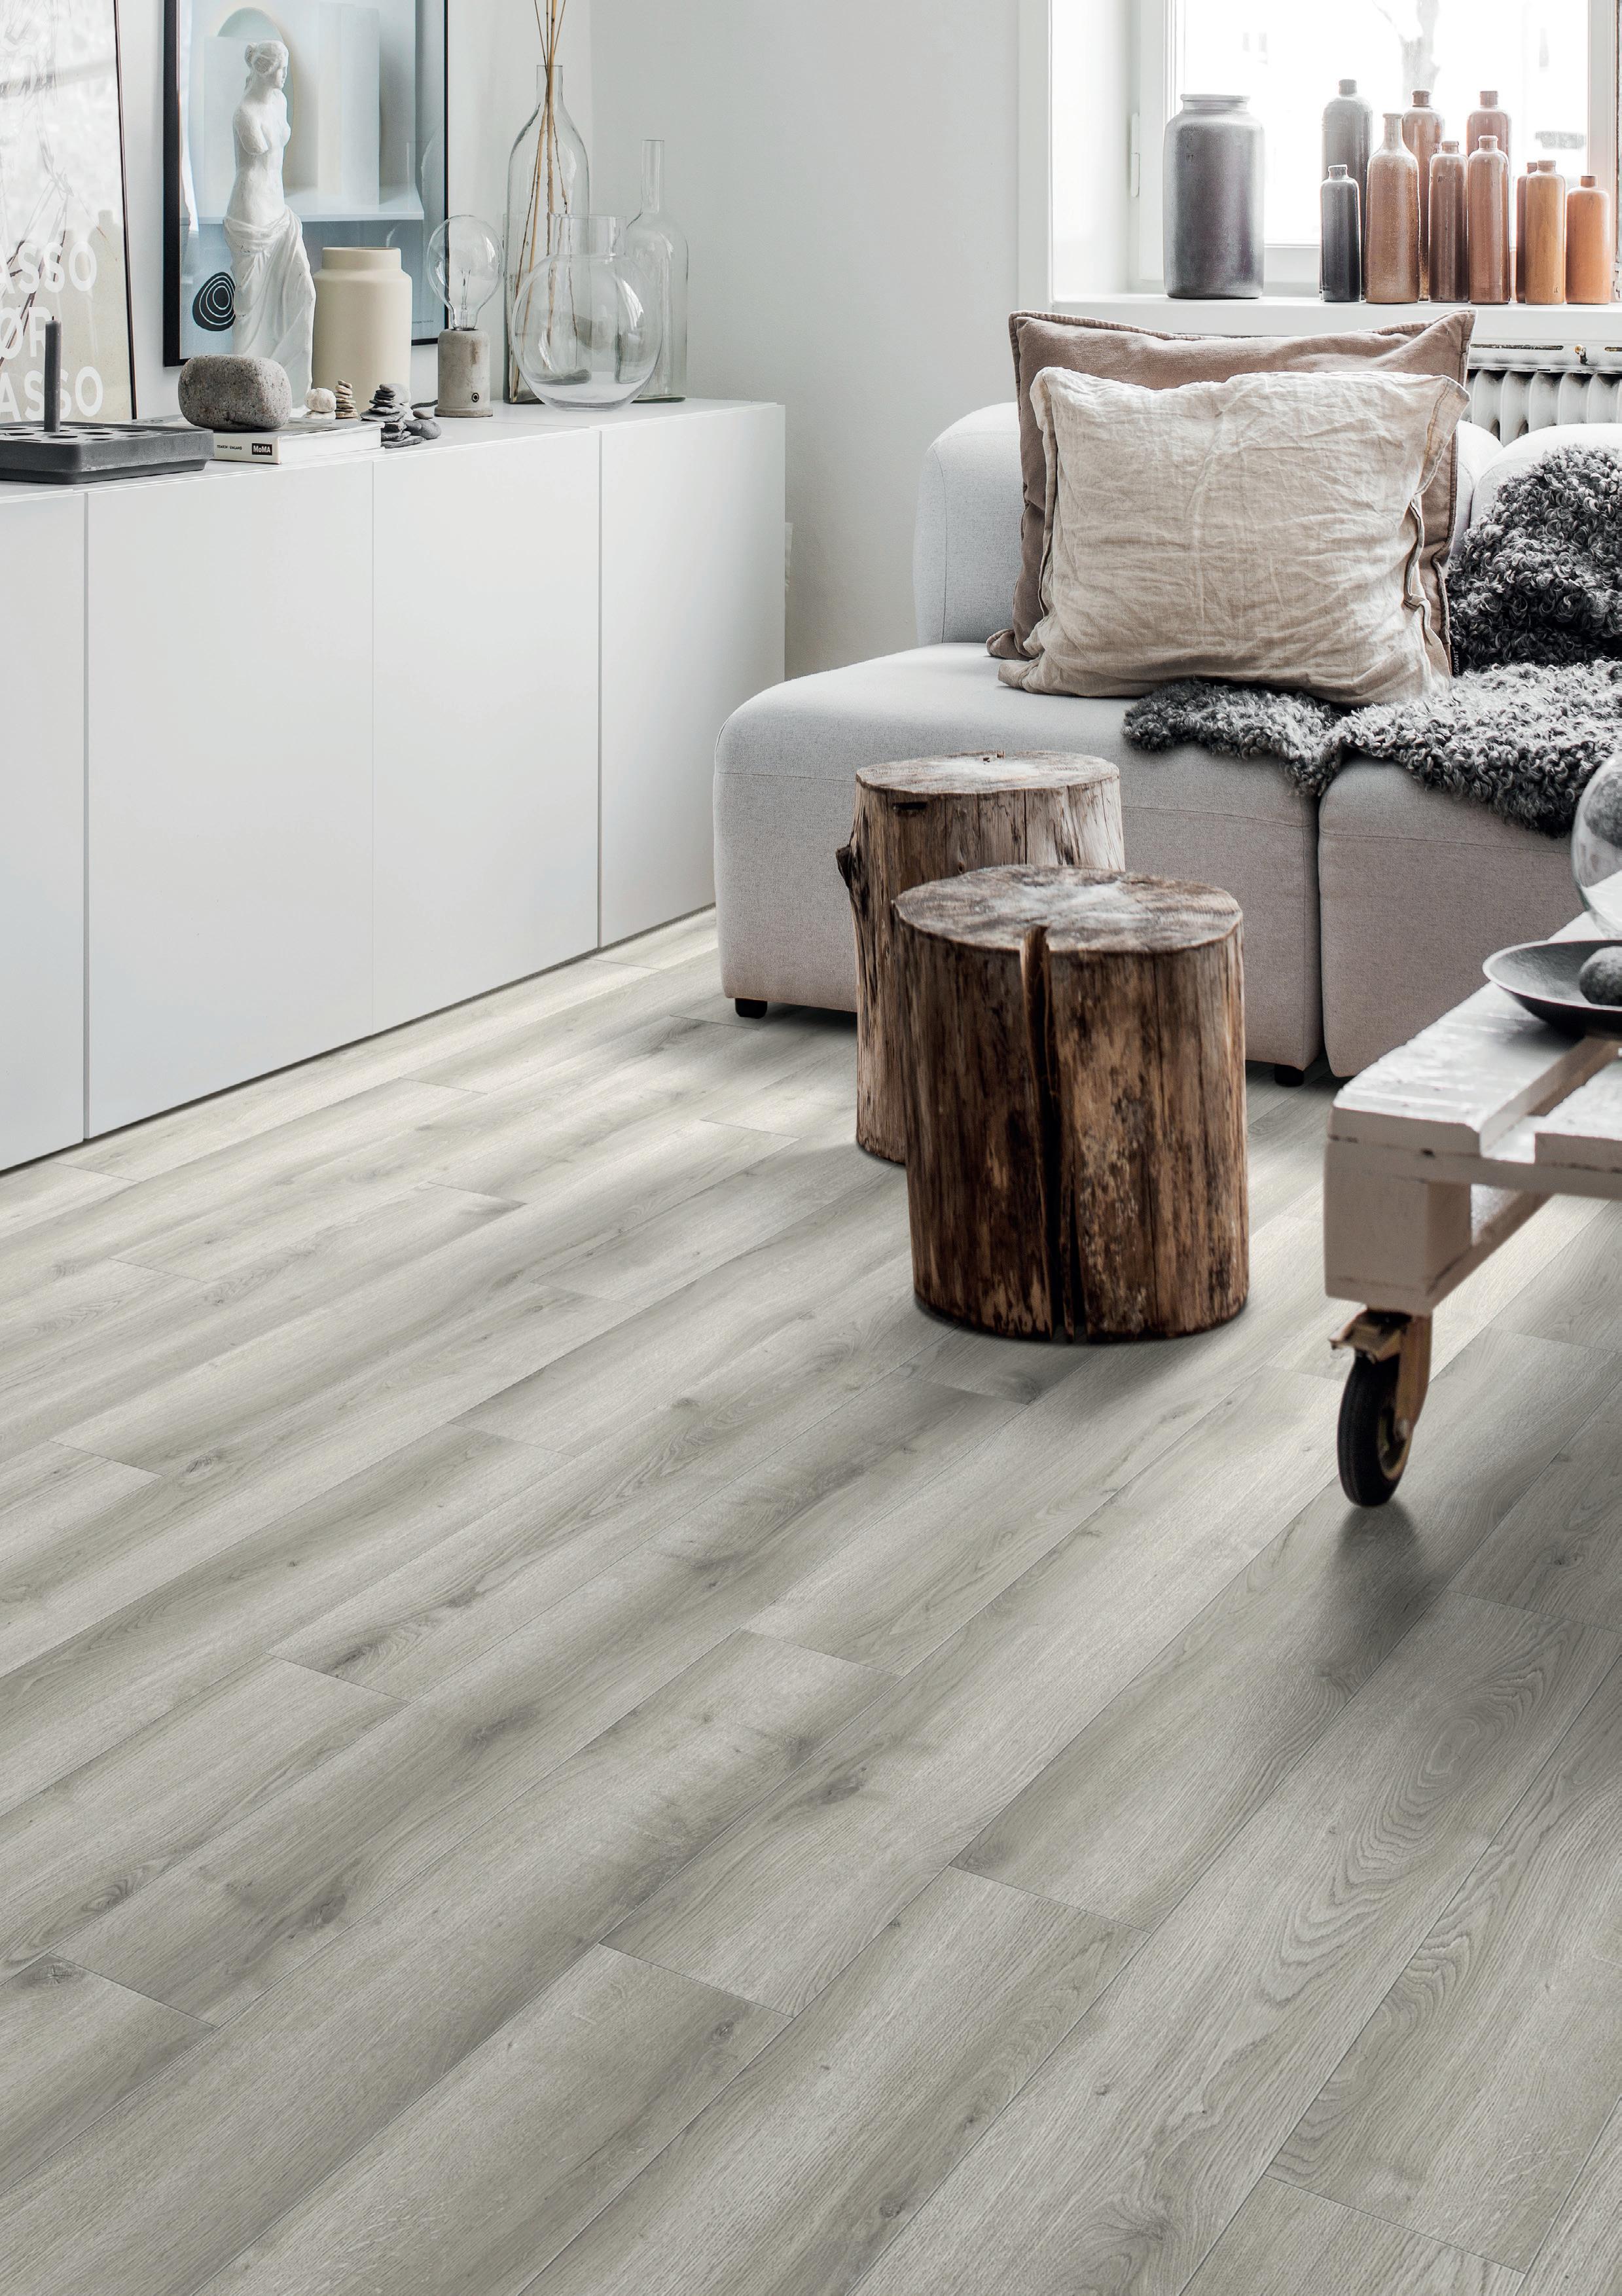
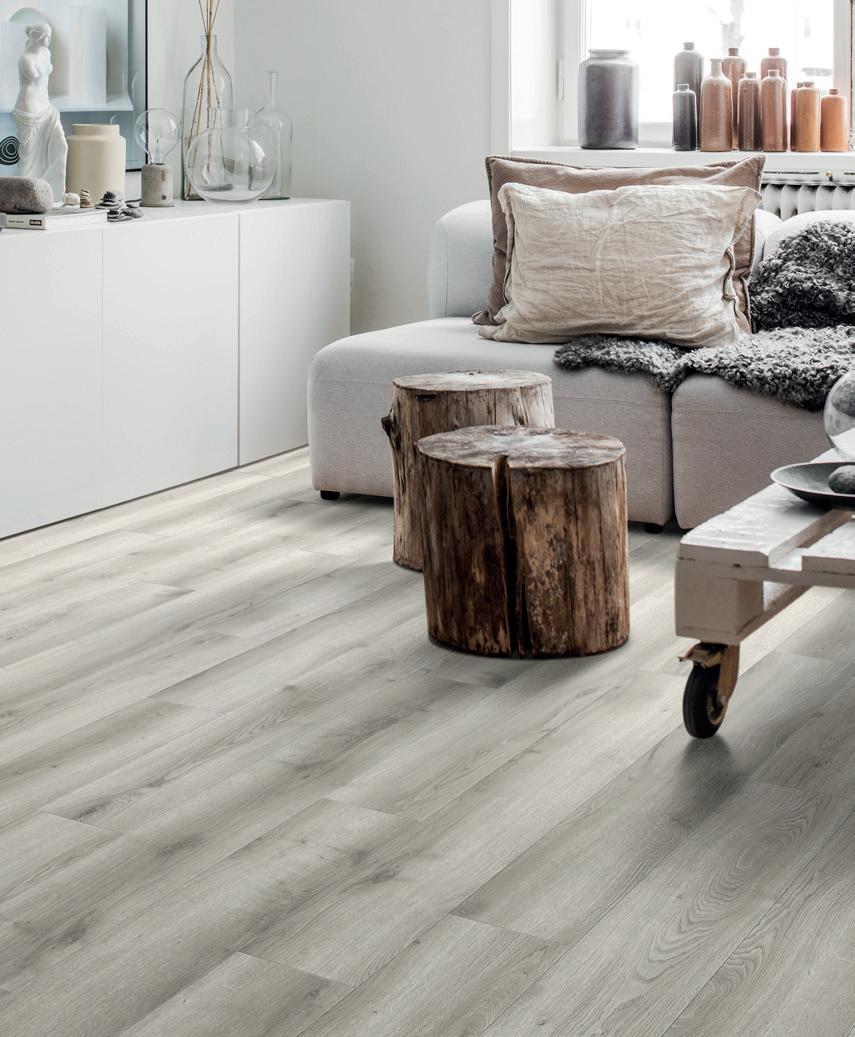
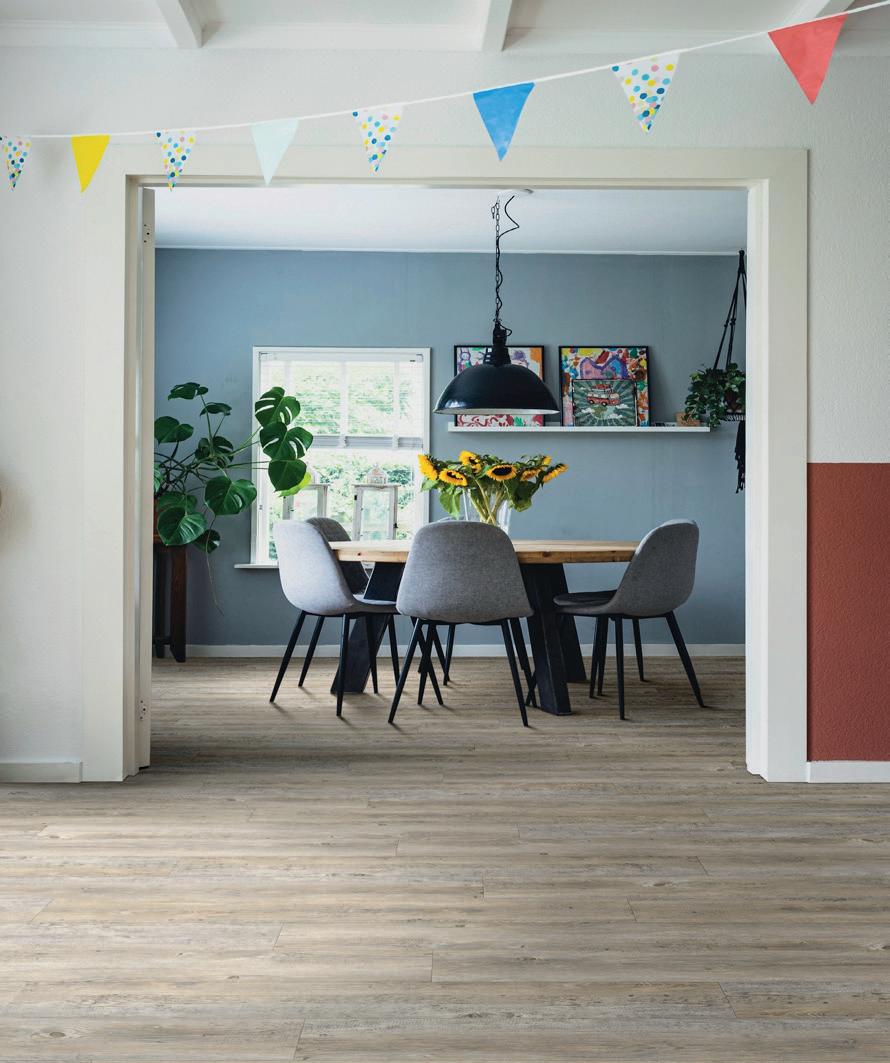
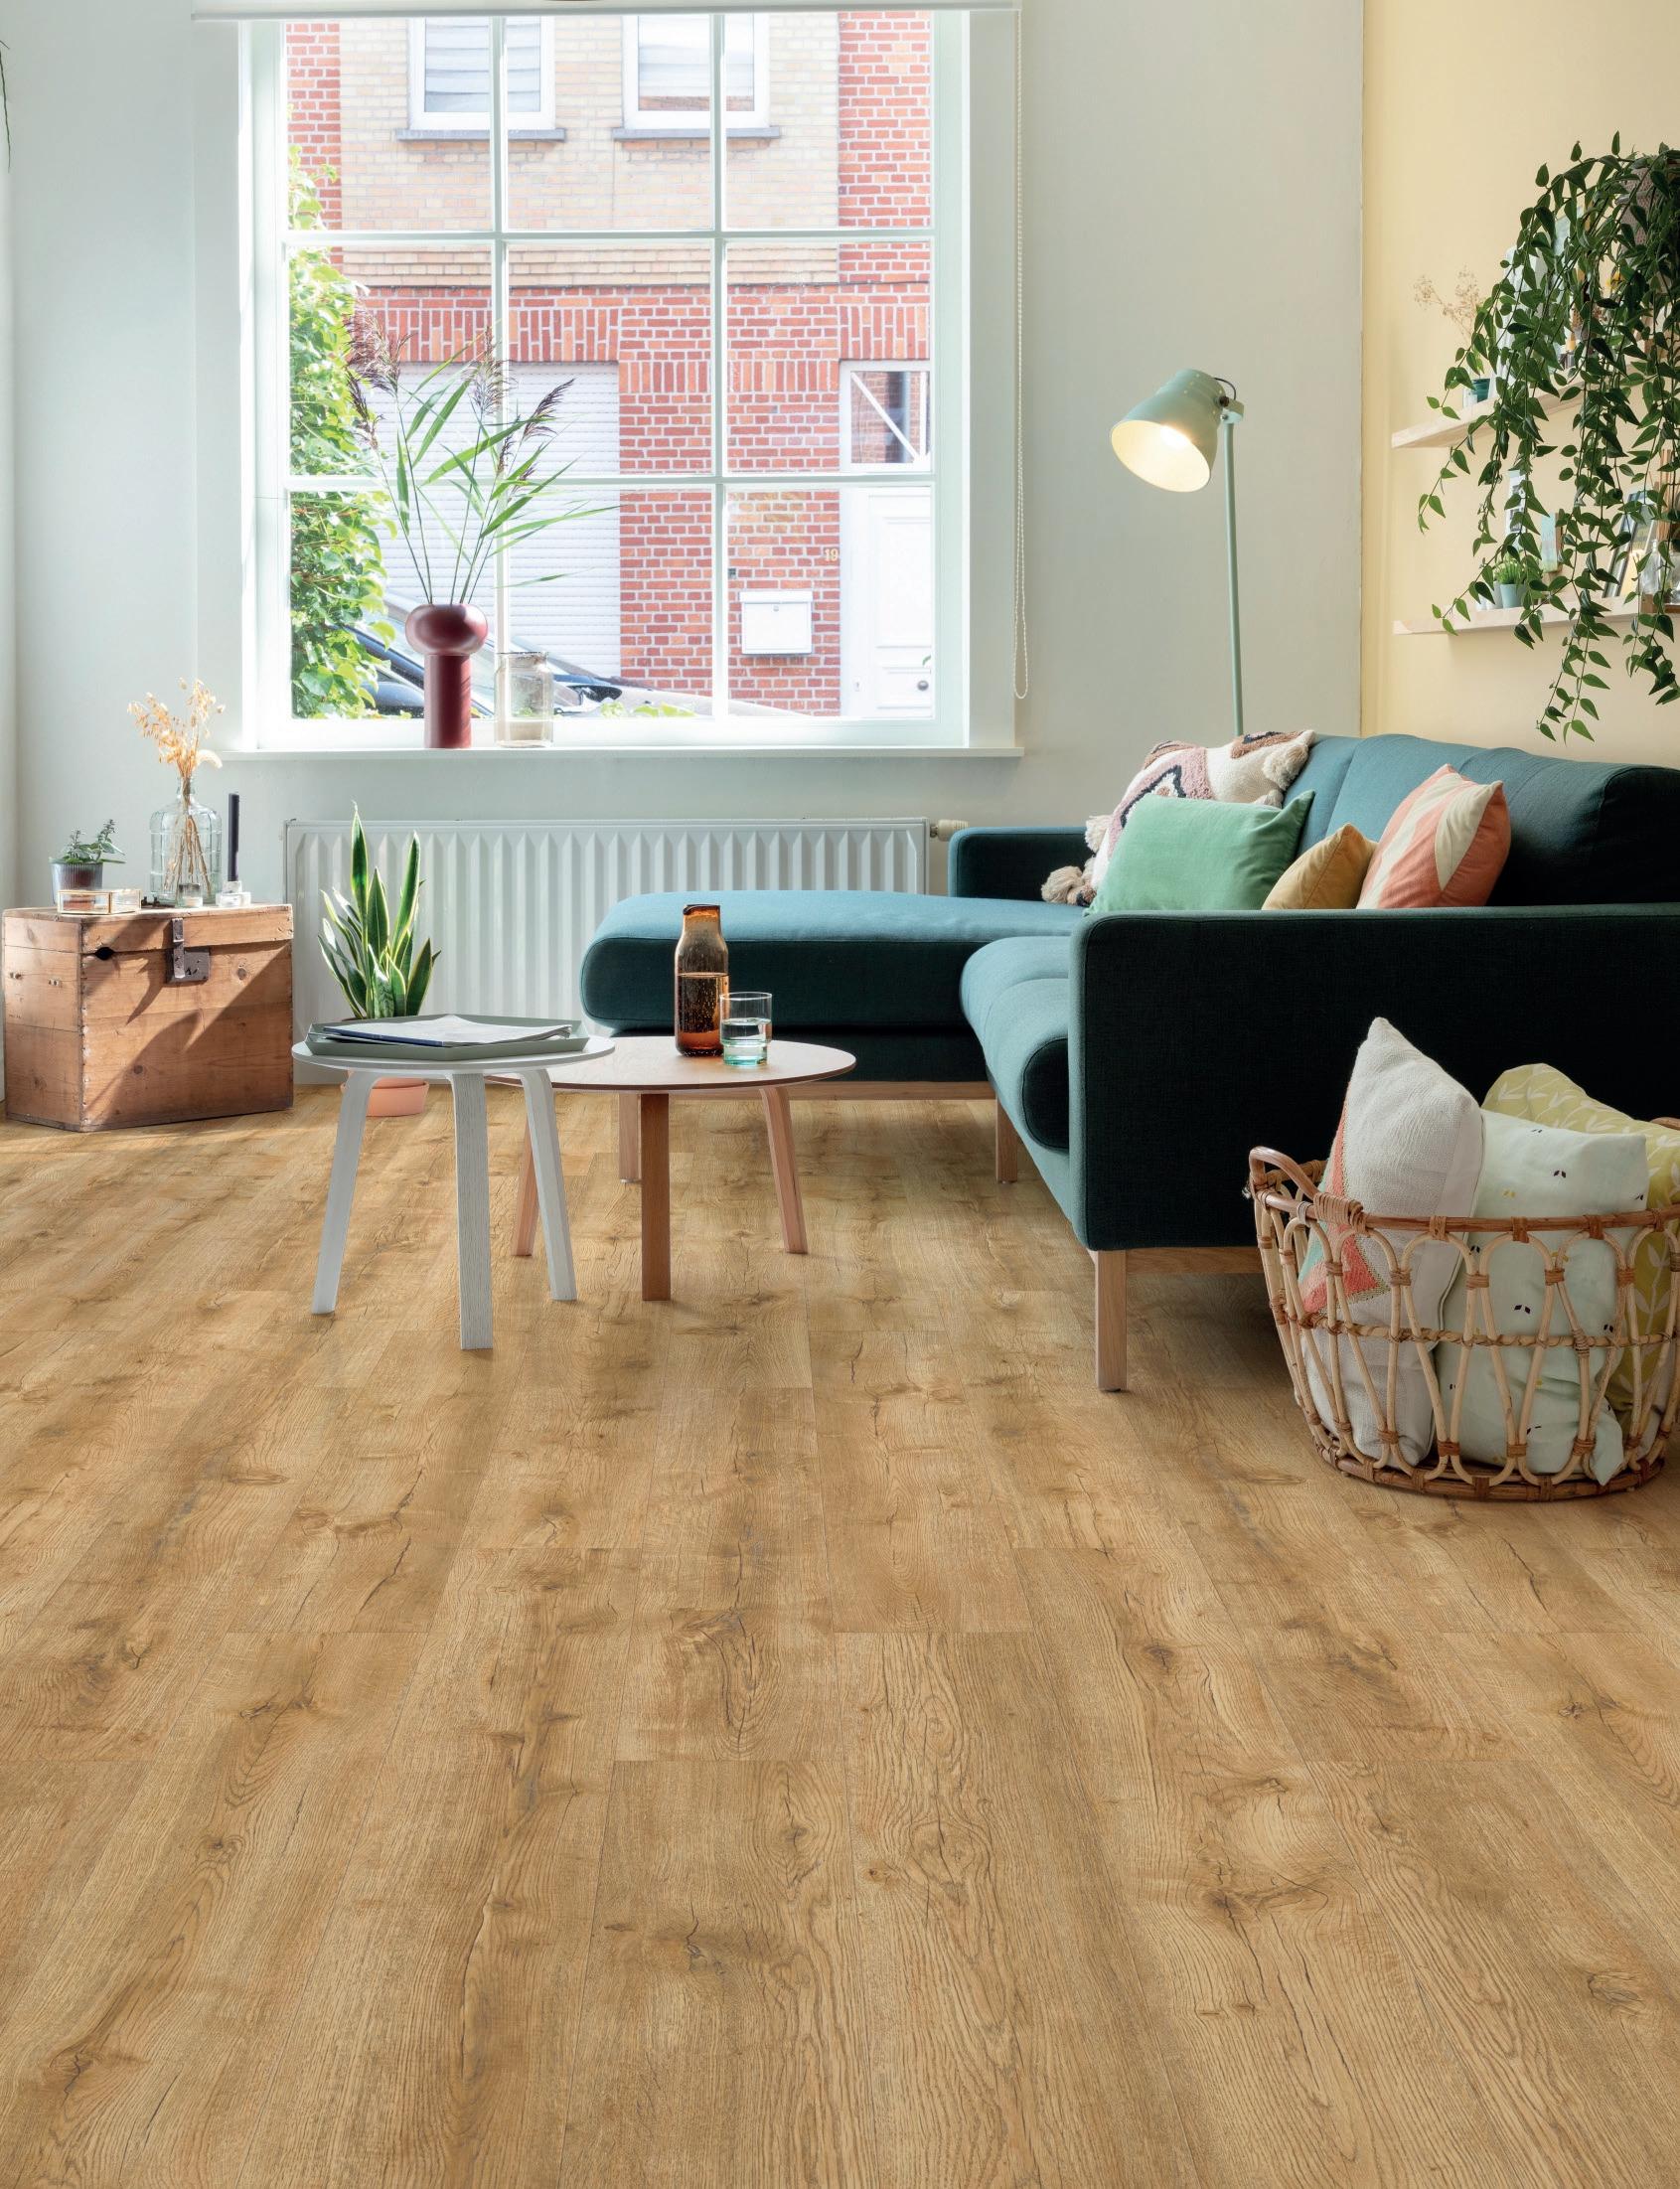
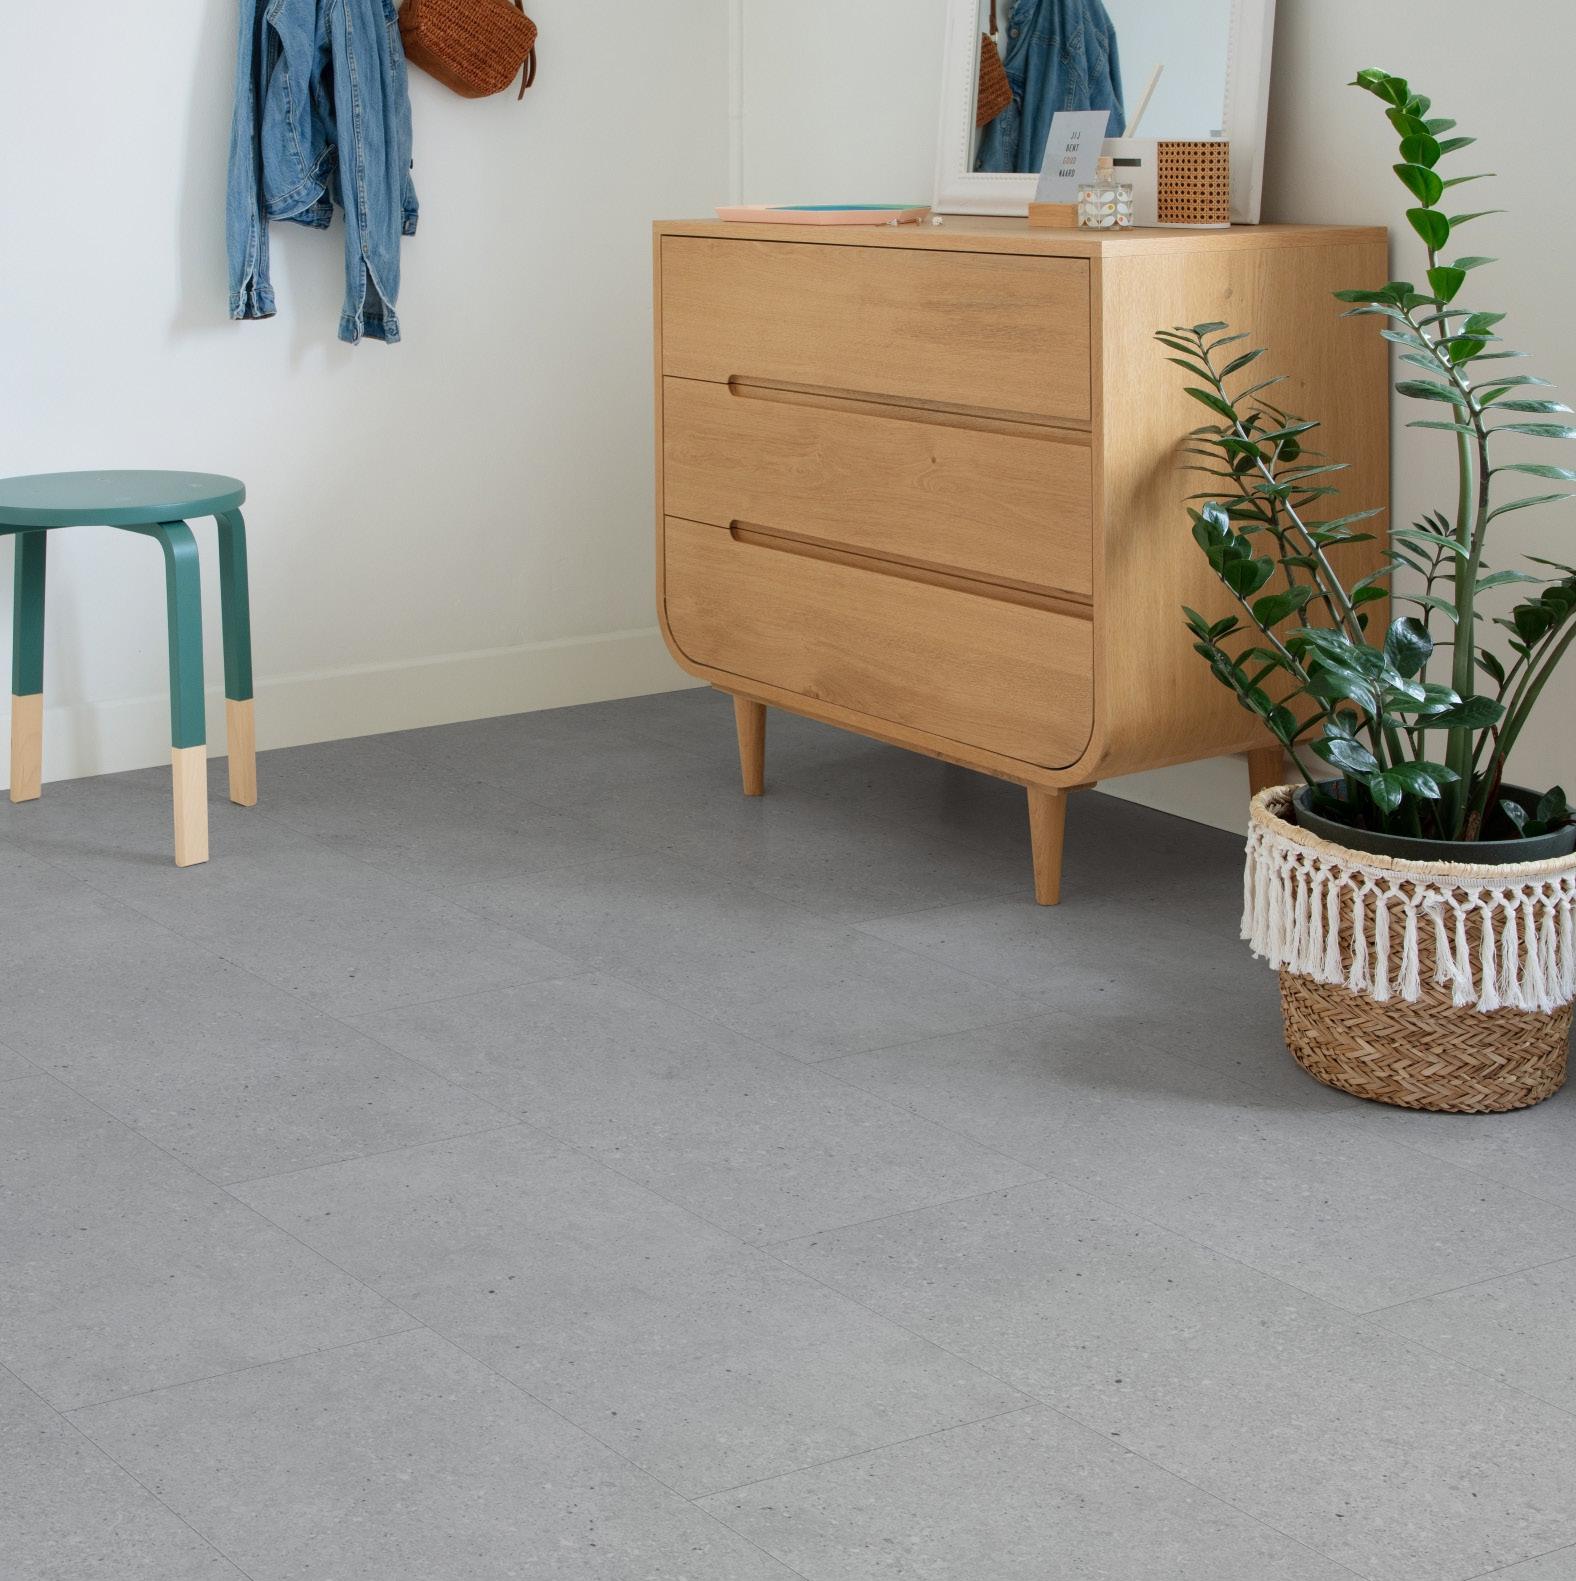
At KlickFloor we create stunning designs, inspired by nature and current trends.
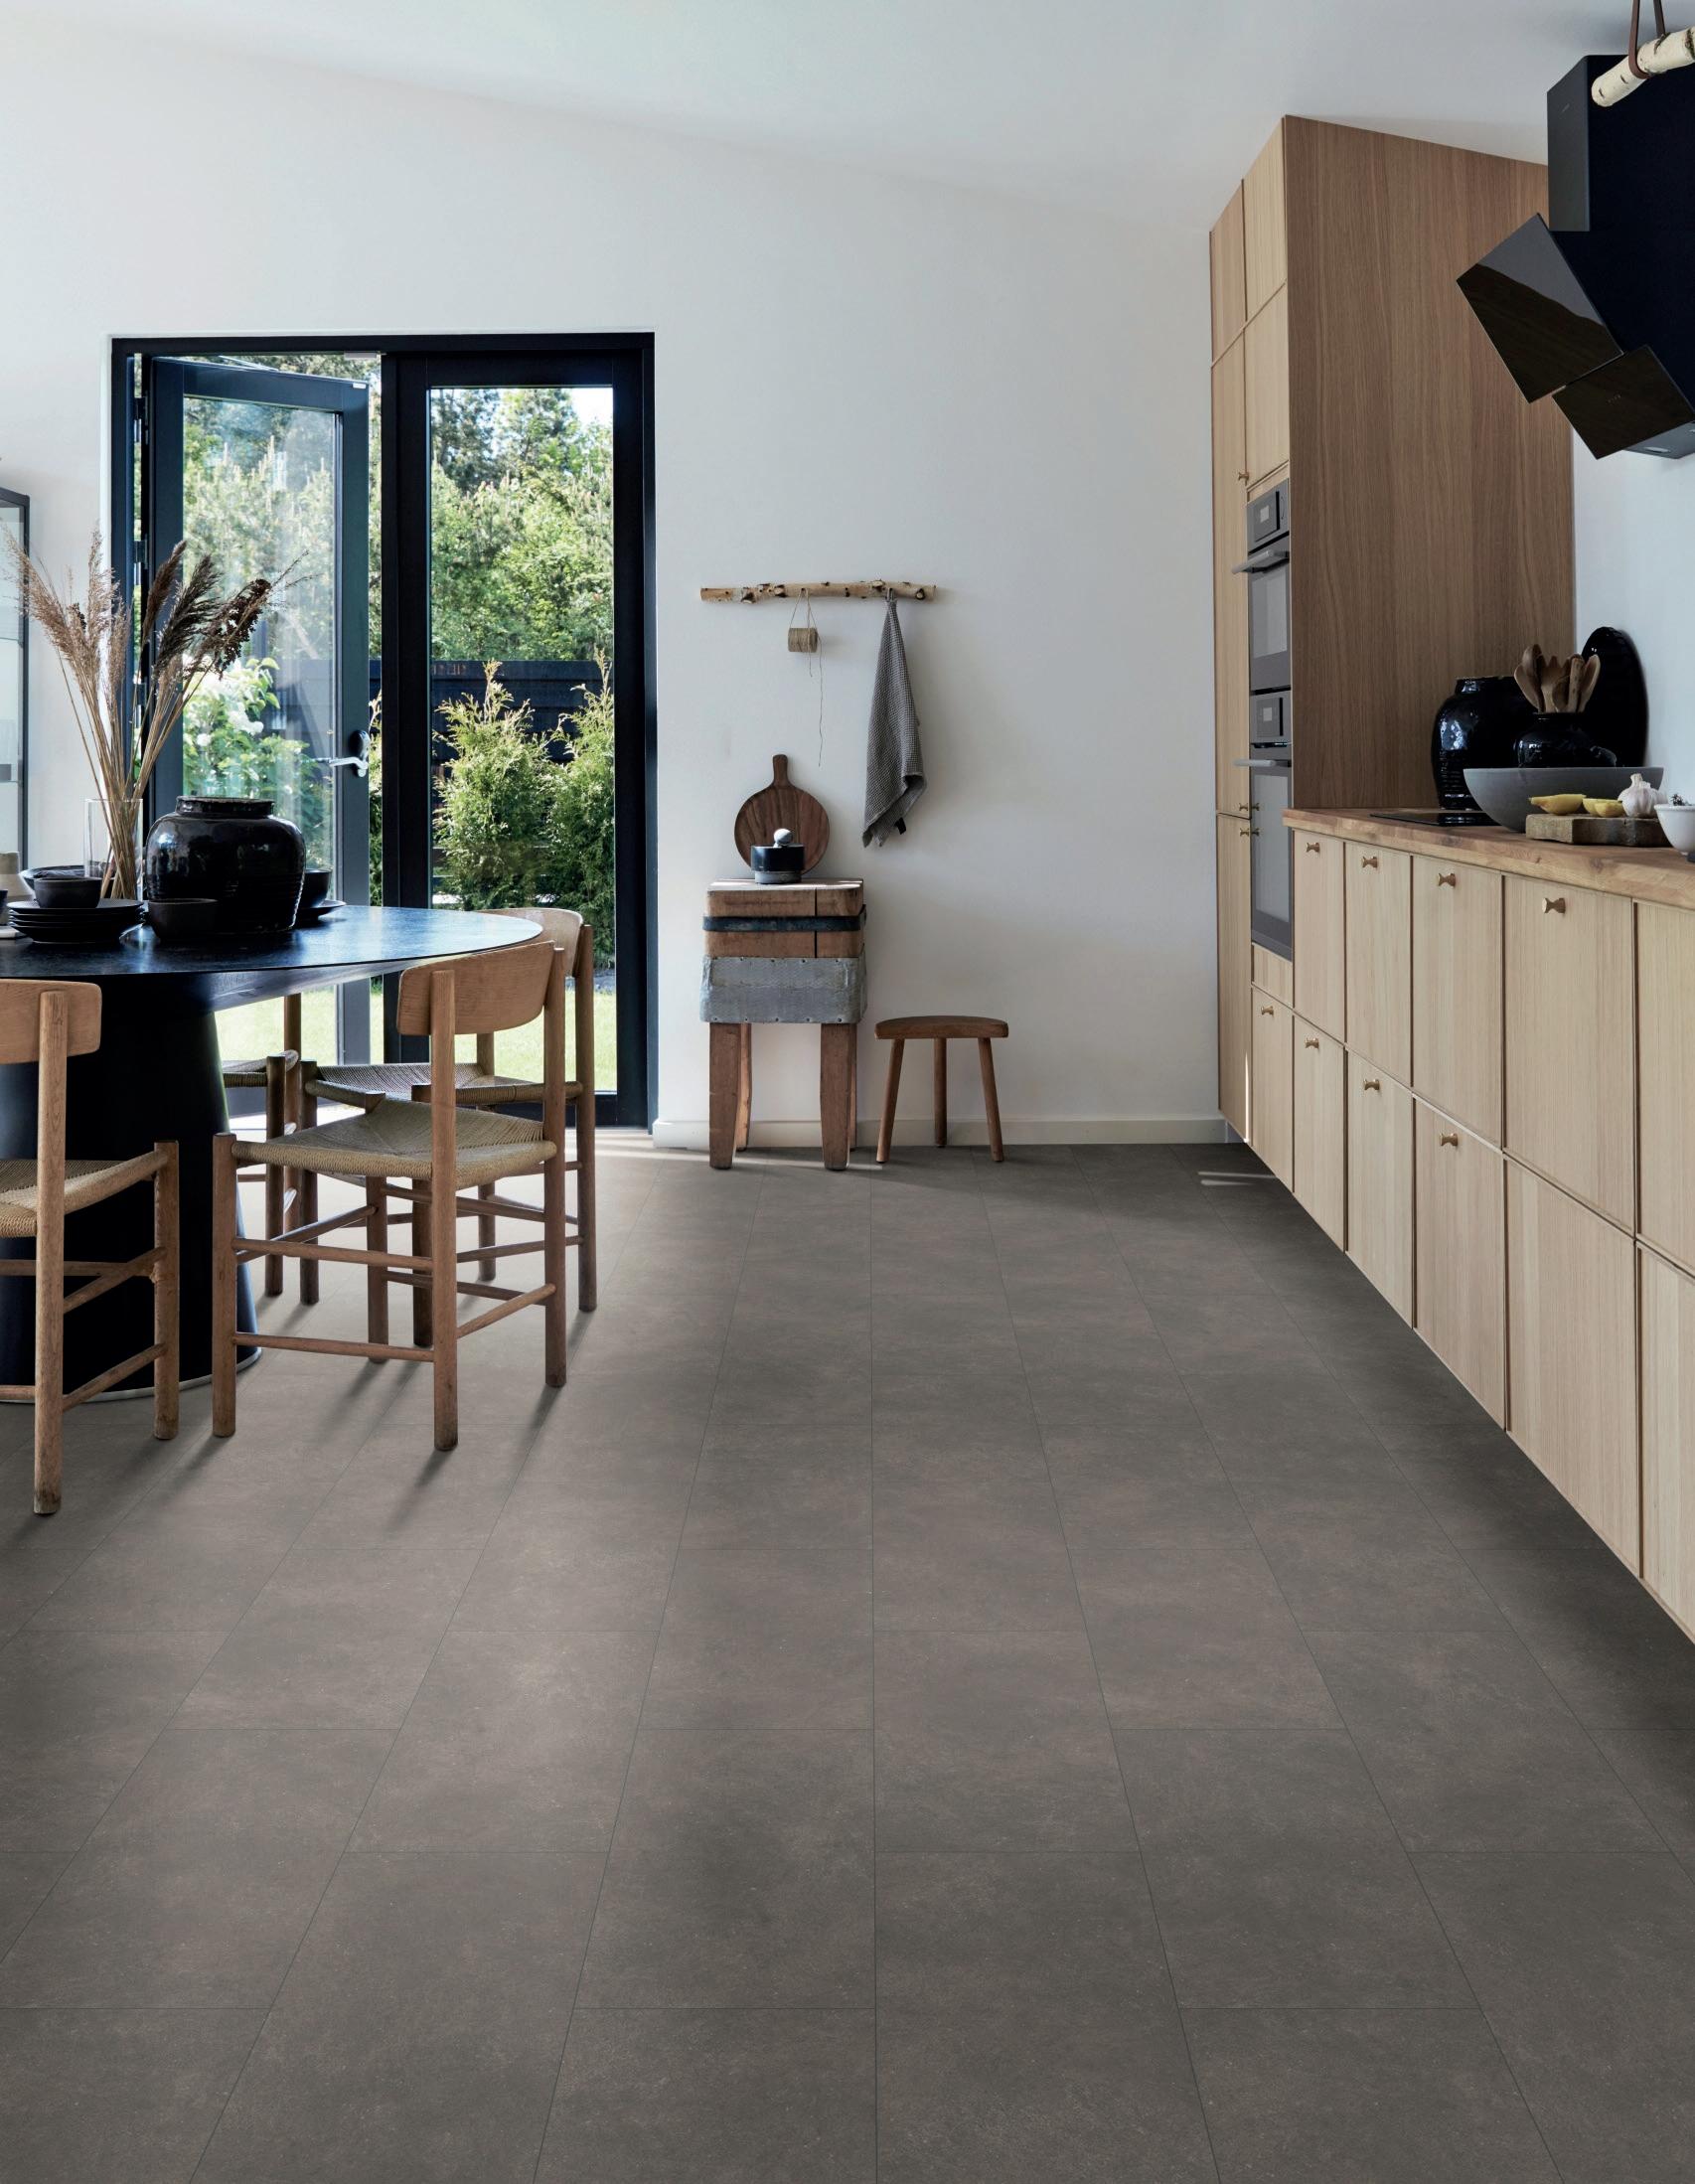
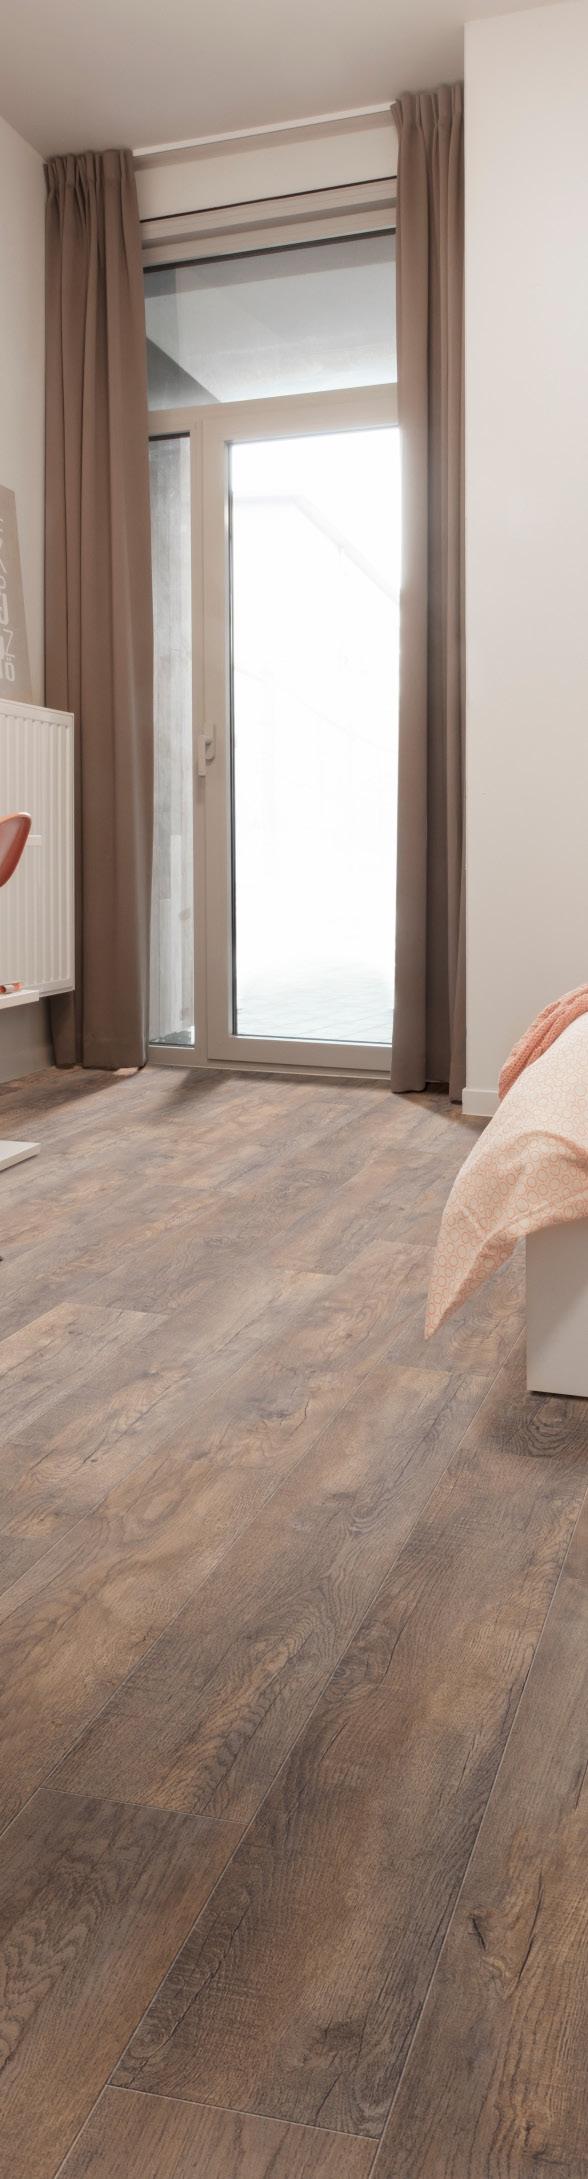
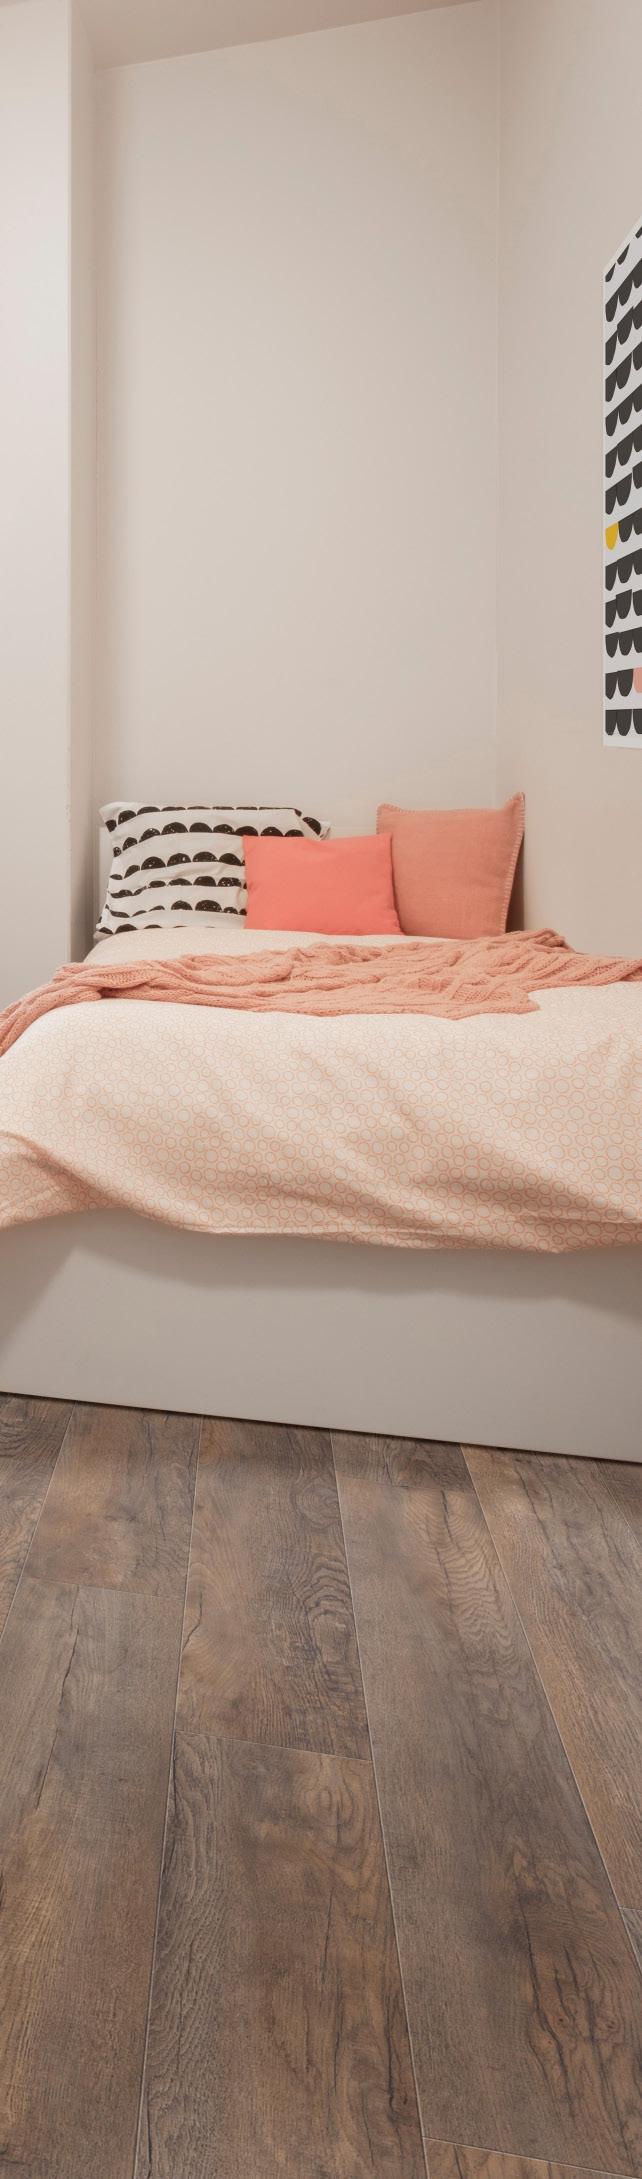
Our unique flooring system ensures pure comfort, soft silence underfoot and a look of class and desirability.
Exceed expectation with KlickFloor innovation.
CONTENTS 04 - 07. FEATURES OF KLICKFLOOR 08 - 11 THE PREMIUM RANGE 12 - 17 THE PREMIUM PLUS RANGE 18 - 23 THE ENGINEERED STONE RANGE 24 - 29 THE ENHANCED ENGINEERED VINYL RANGE 30 - 33 THE ENHANCED ENGINEERED HERRINGBONE RANGE 34 - 35 ACCESSORIES 36 - 39 PRIOR TO INSTALLATION GUIDE 40 - 41 KLICKFLOOR INSTALLATION GUIDELINES 42 - 43 KLICK HERRINGBONE INSTALLATION GUIDELINES 44 KLICKFLOOR MAINTENANCE 45 KLICKFLOOR QUERIES 46 - 47 ECO PRODUCTION
THE FEATURES OF KLICKFLOOR


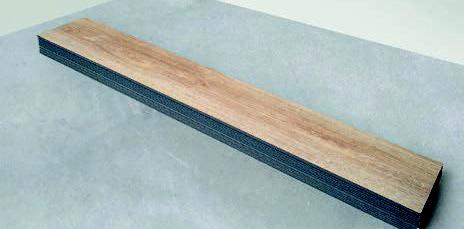
No Indentation


Although a KlickFloor floor is resilient, it has no indentation issues. The floor returns to its original state when weight or pressure (from heels or furniture legs for example) is educed, this is what we call the memory effect.

Protective Top Layer


Your KlickFloor floor can take a beating – that’s very reassuring, don’t you think? It is wear, scratch and stain resistant. The wear layer and patented Protectonite PU coating protect the design, prevent wear and limit scratches. A KlickFloor floor can grace any place. Intensive use allowed. Even a big crowd is no problem.
Low Maintenance
Not that big a fan of household chores? The protective top layer repels dirt, dust mites and other allergens. Any stains can be removed in seconds. Simply sweep, mop or vacuum your KlickFloor floor to keep it spotless and hygienic – saving you time for fun.

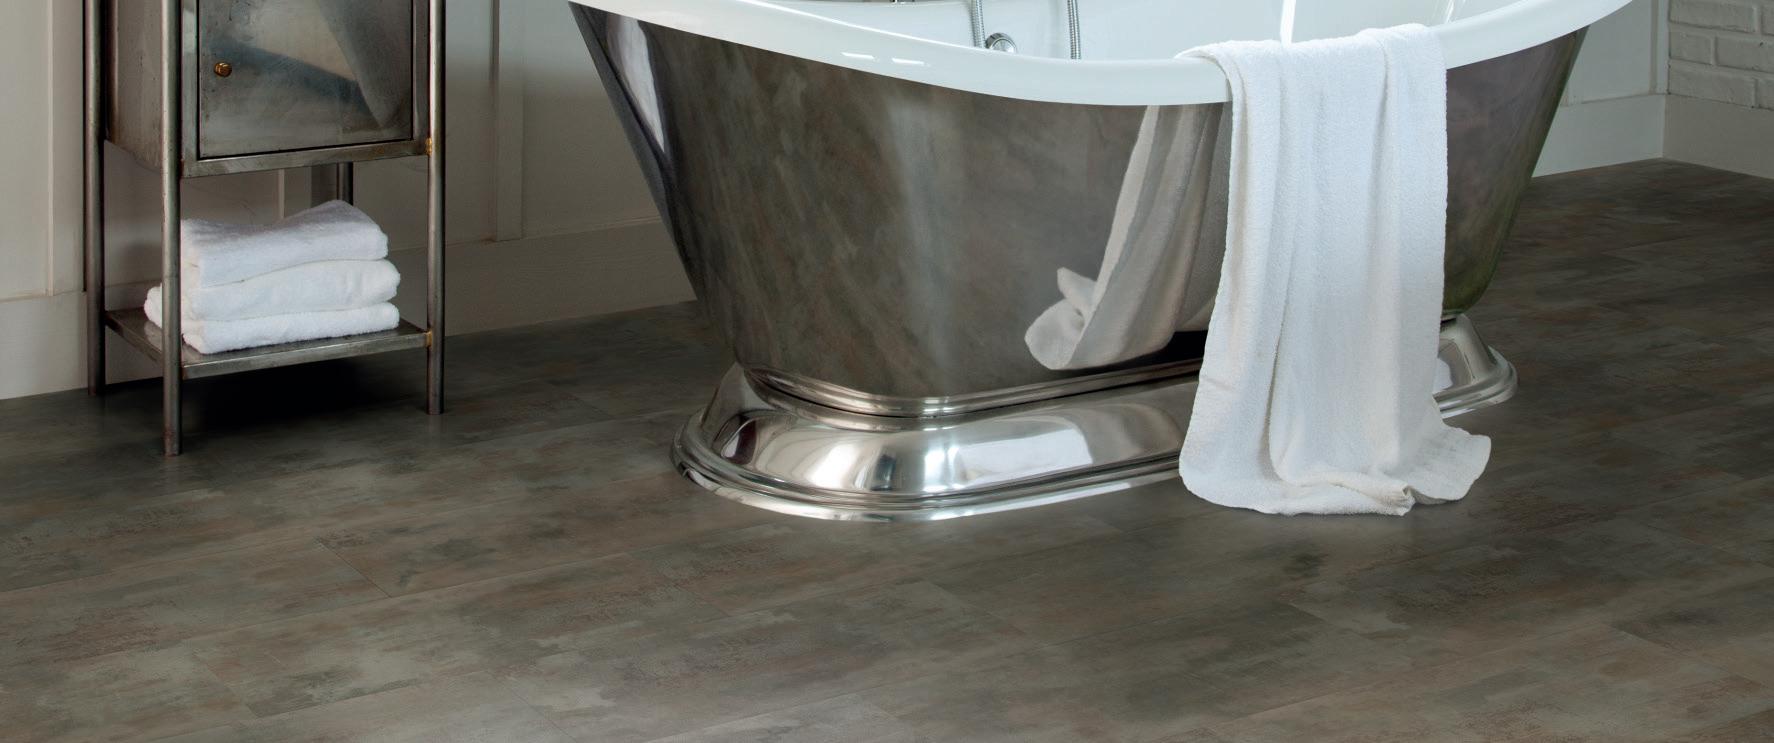
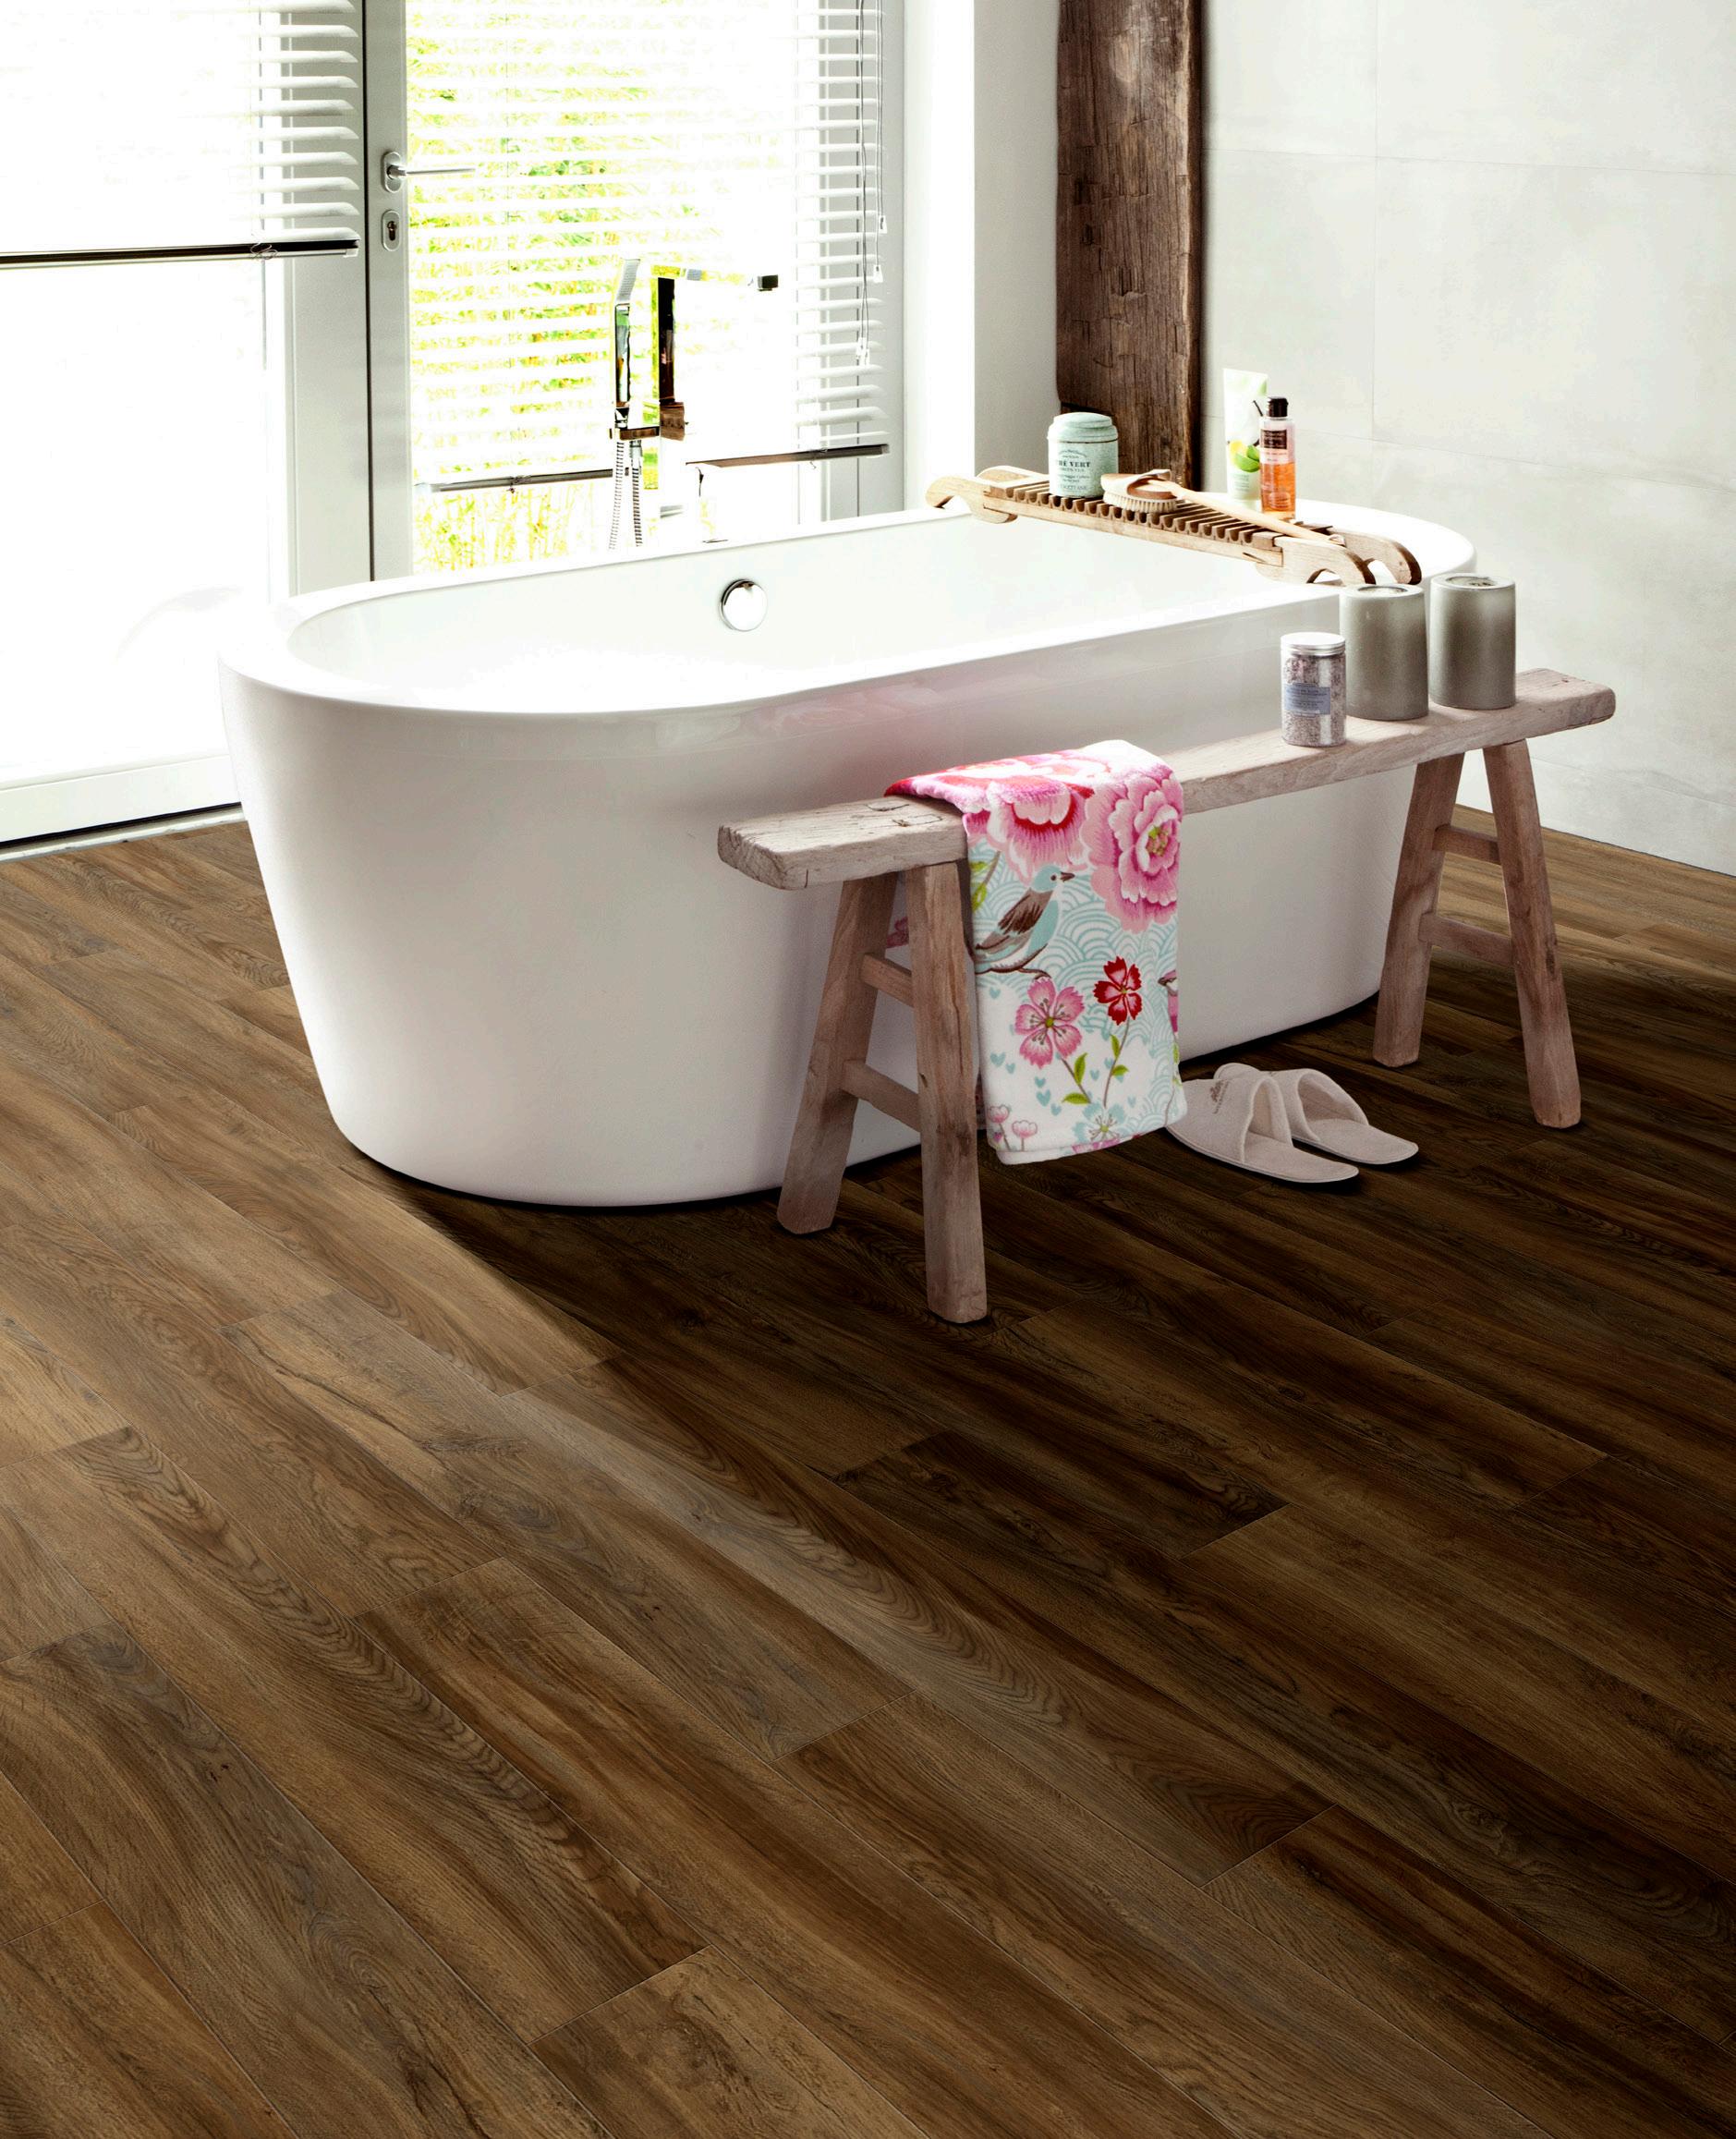
Fully Waterproof

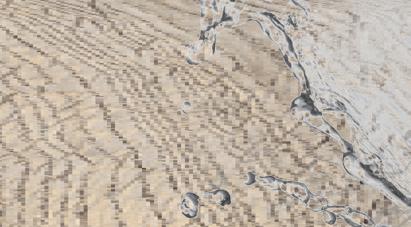
Vinyl repels water, making a KlickFloor floor the perfect solution for kitchens and bathrooms – and for every space at home for that matter. Water balloon fight inside? No problem. The floor is water and slip resistant, and easy to maintain.


Did you know a KlickFloor floor is one of the most durable flooring solutions available? The in-line calendered lamination of the different layers prevents the floor from delaminating due to moisture, so you’ll enjoy the floor for years.
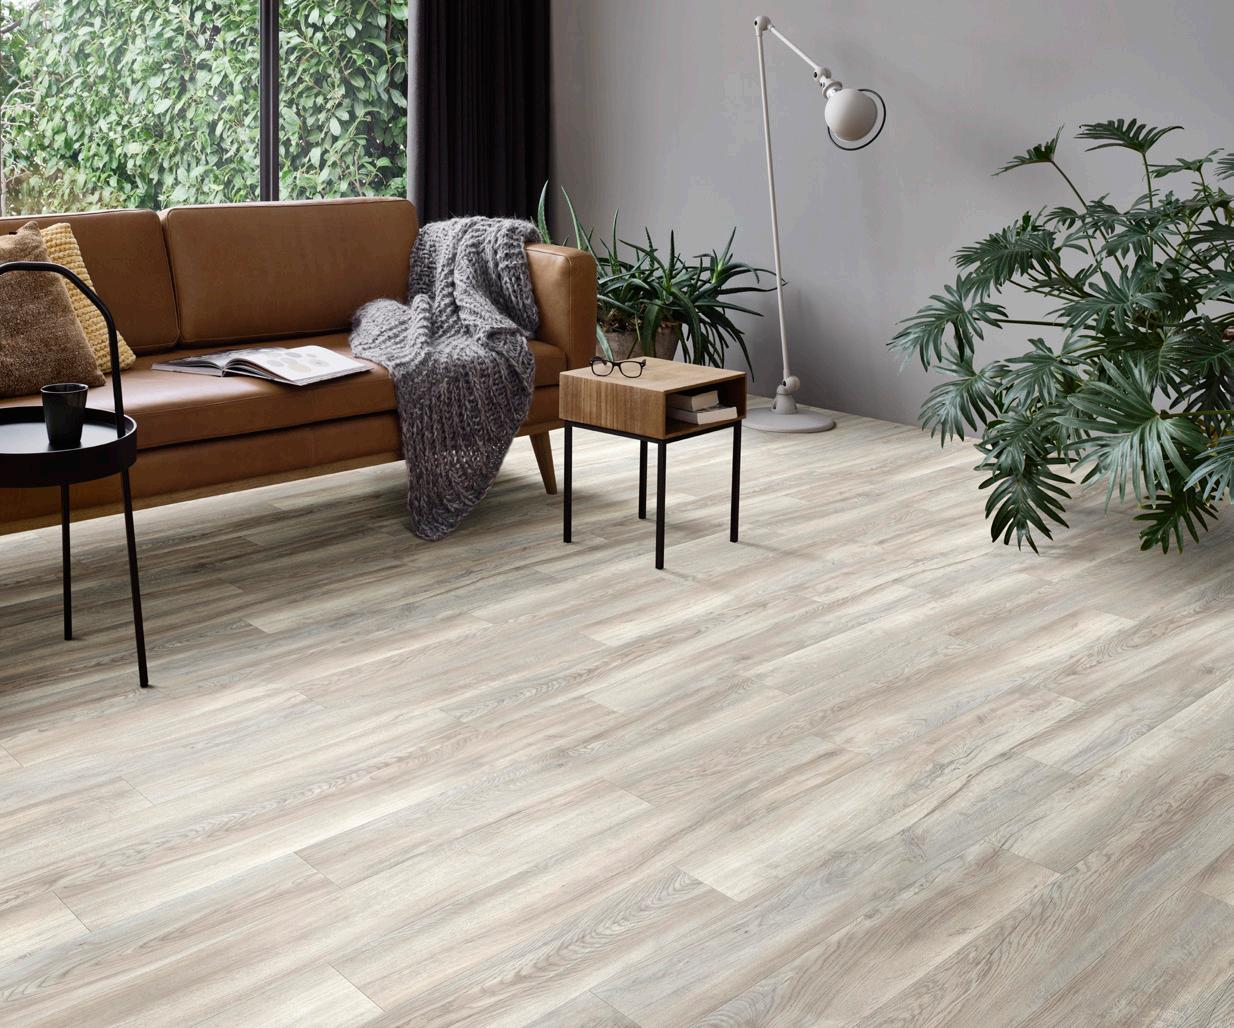
Soft & Warm


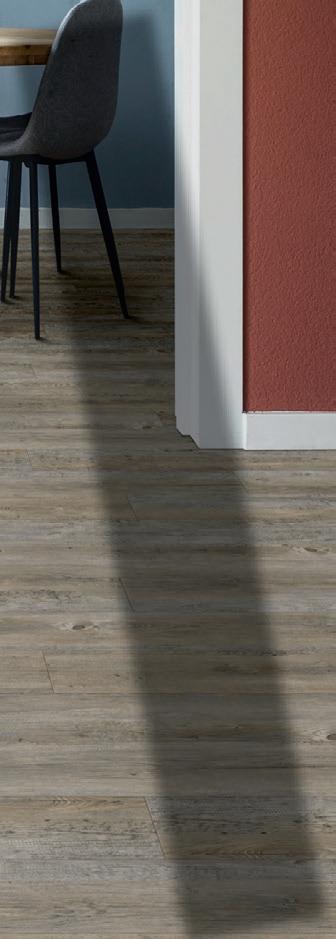
Without knowing it, your feeling of wellbeing increases when walking over a KlickFloor floor. The resilient layer anticipates your body weight, offering you that soft feel underfoot. And what’s more, it feels naturally warm too. Because a KlickFloor floor has great insulating qualities, its temperature remains comfortable in every season.

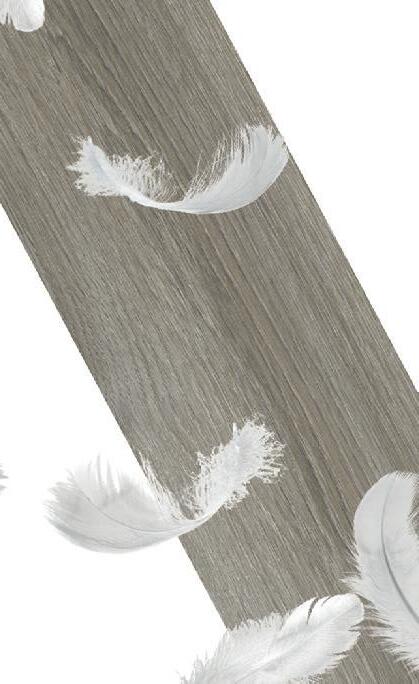
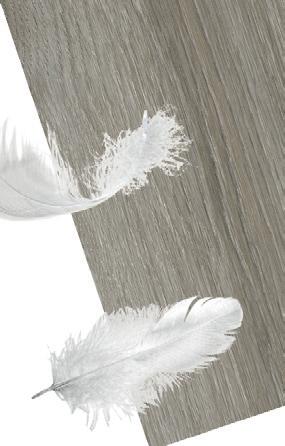
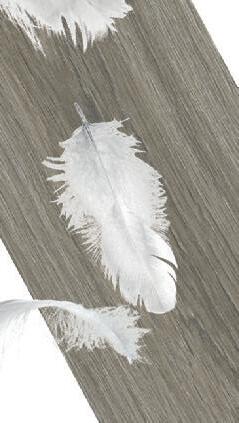


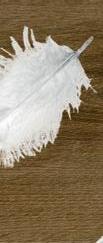
Silent Acoustics


One of the main benefits of a KlickFloor floor is its acoustic comfort. Vinyl is resilient, so it reduces reflective walking sound and transmission sound to a very comfortable level. That’s a valuable asset for both you and your neighbours below. If you want to avoid any annoying noises inside, KlickFloor simply offers you the ultimate flooring solution.


Do you want to please your neighbours even more? Use a KlickFloor underlay for even better transmission sound reduction.
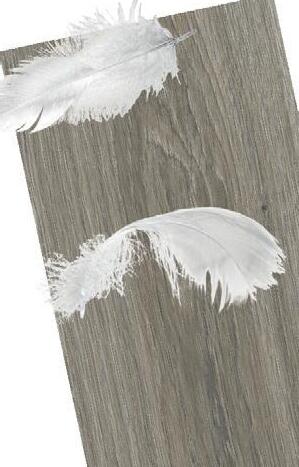
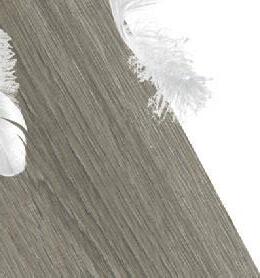
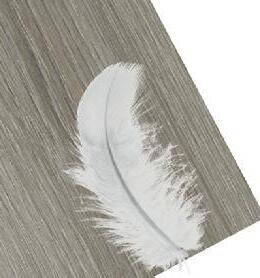
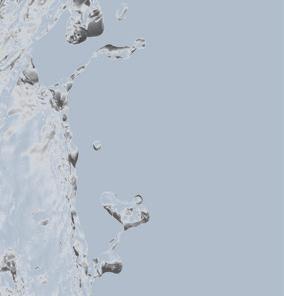
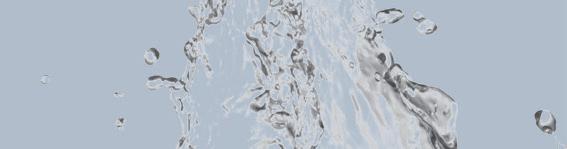
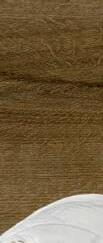
JUST SENSE THE SOFTNESS & SILENCE.


5
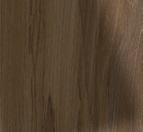
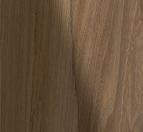
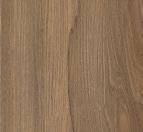
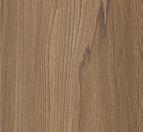
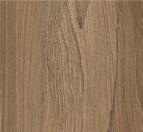
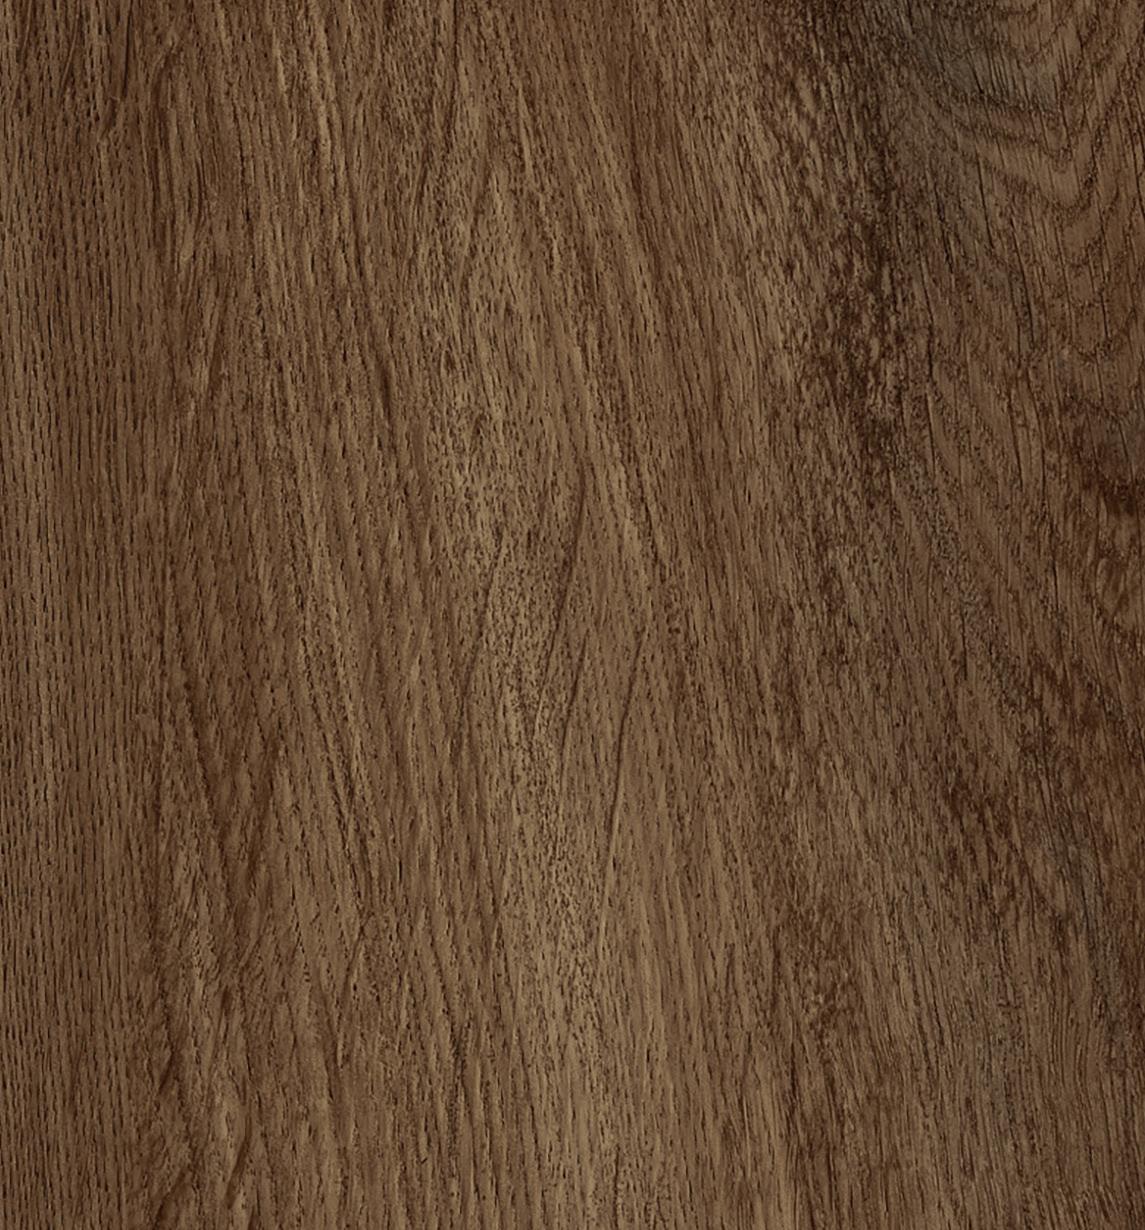
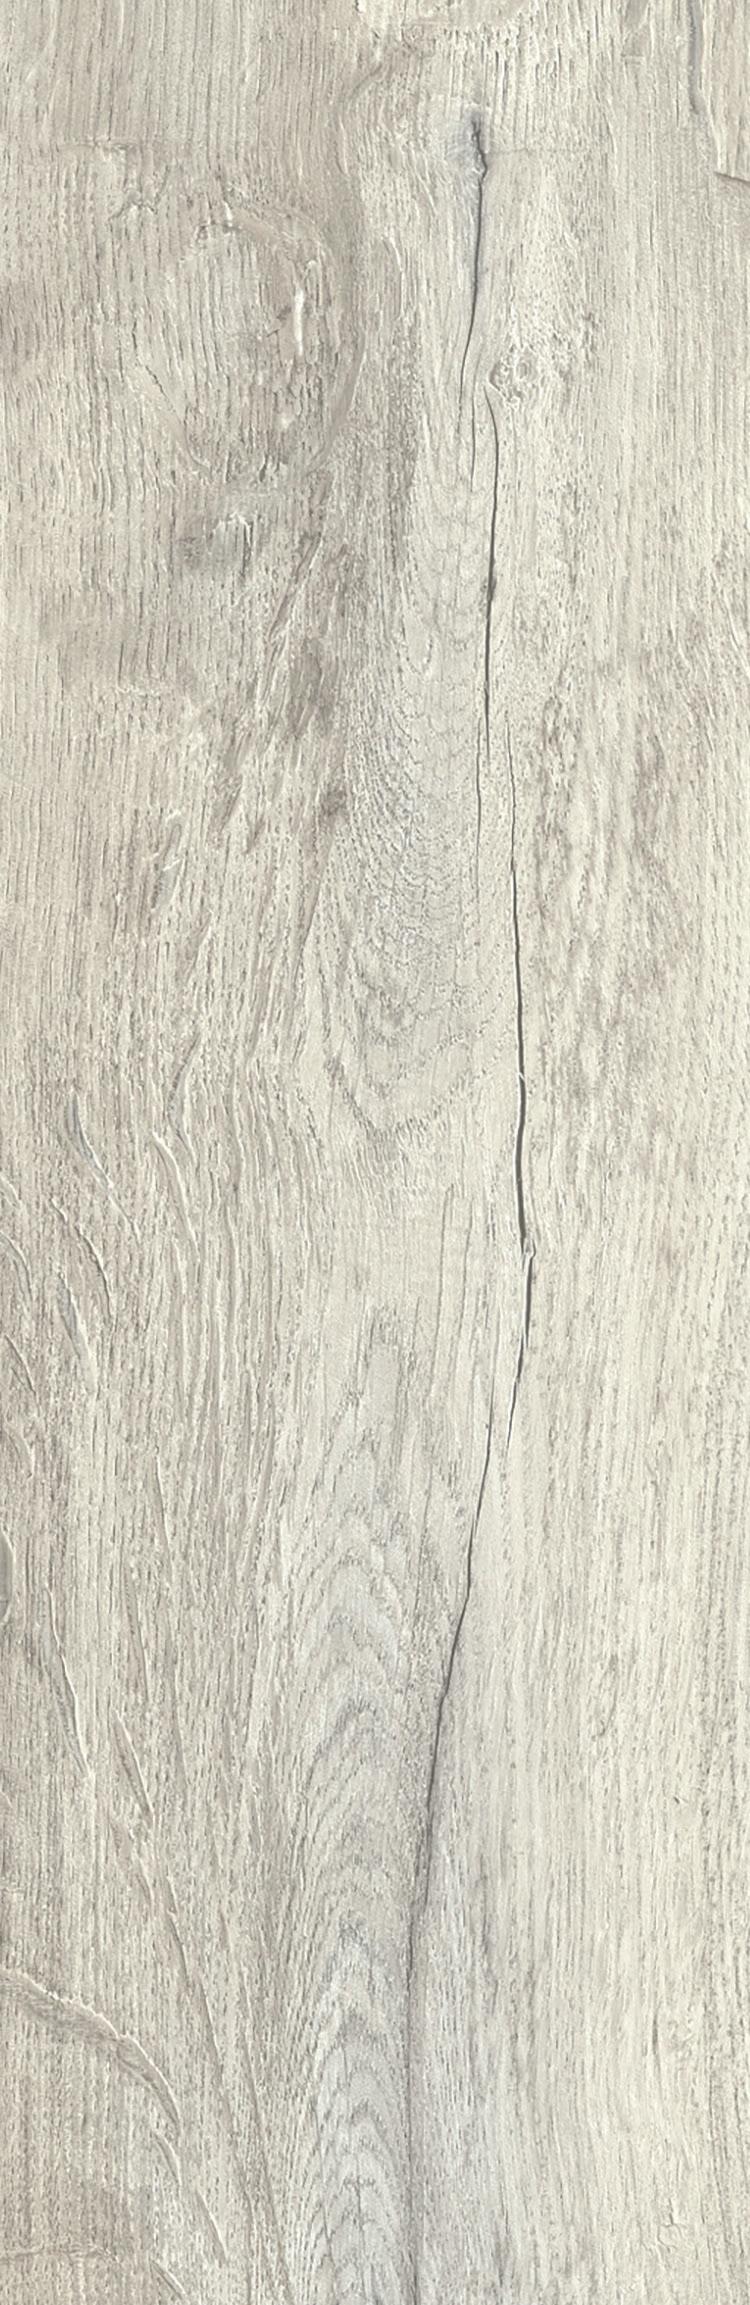
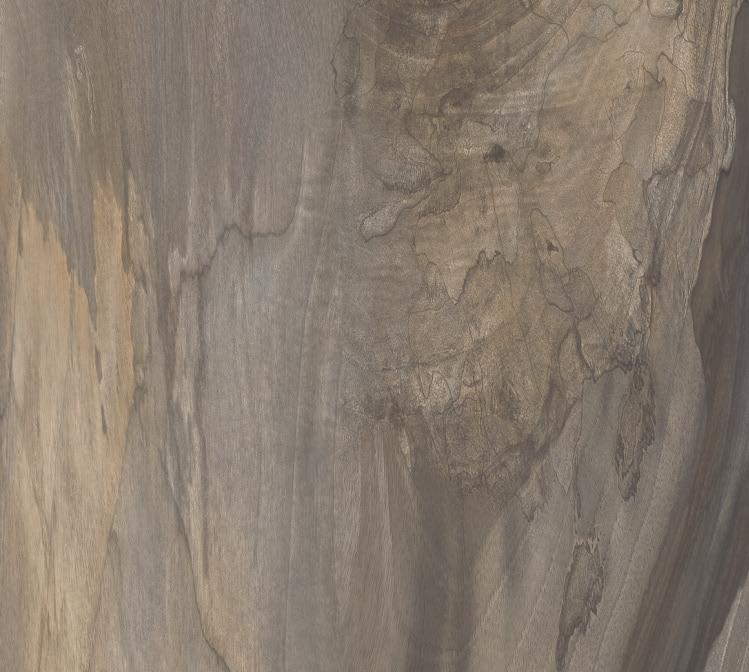
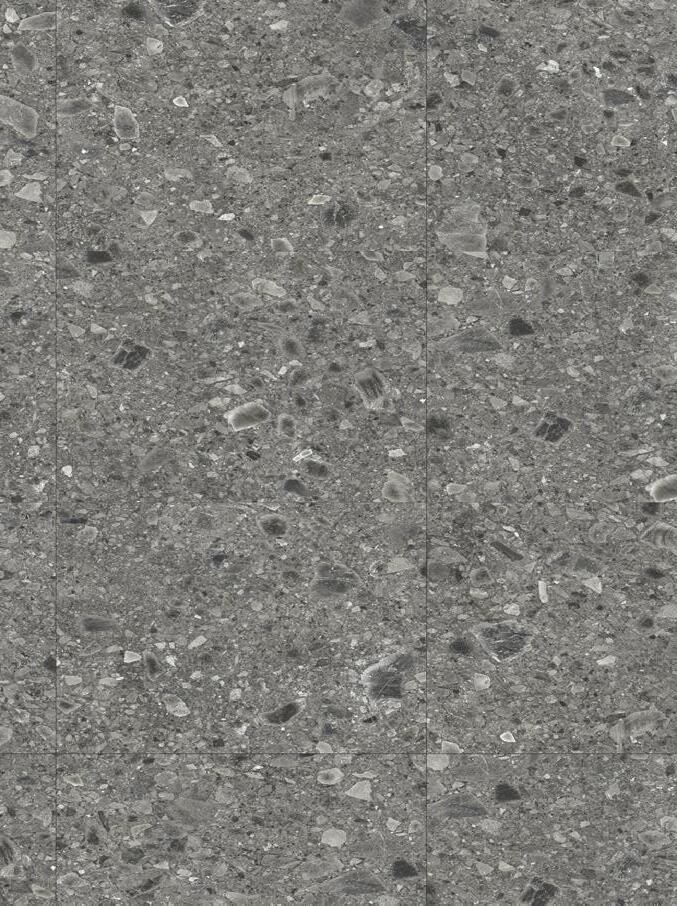
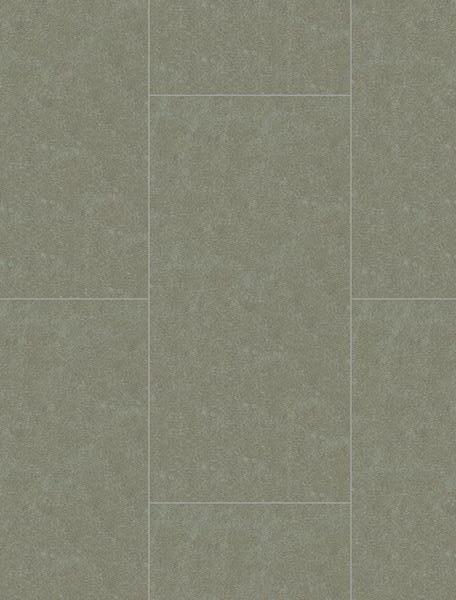
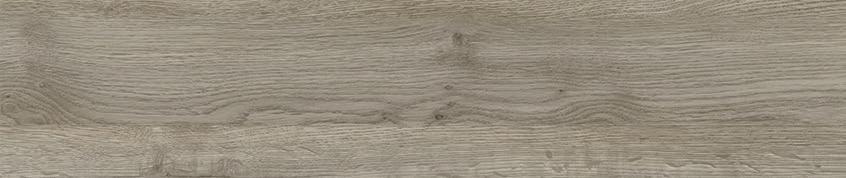
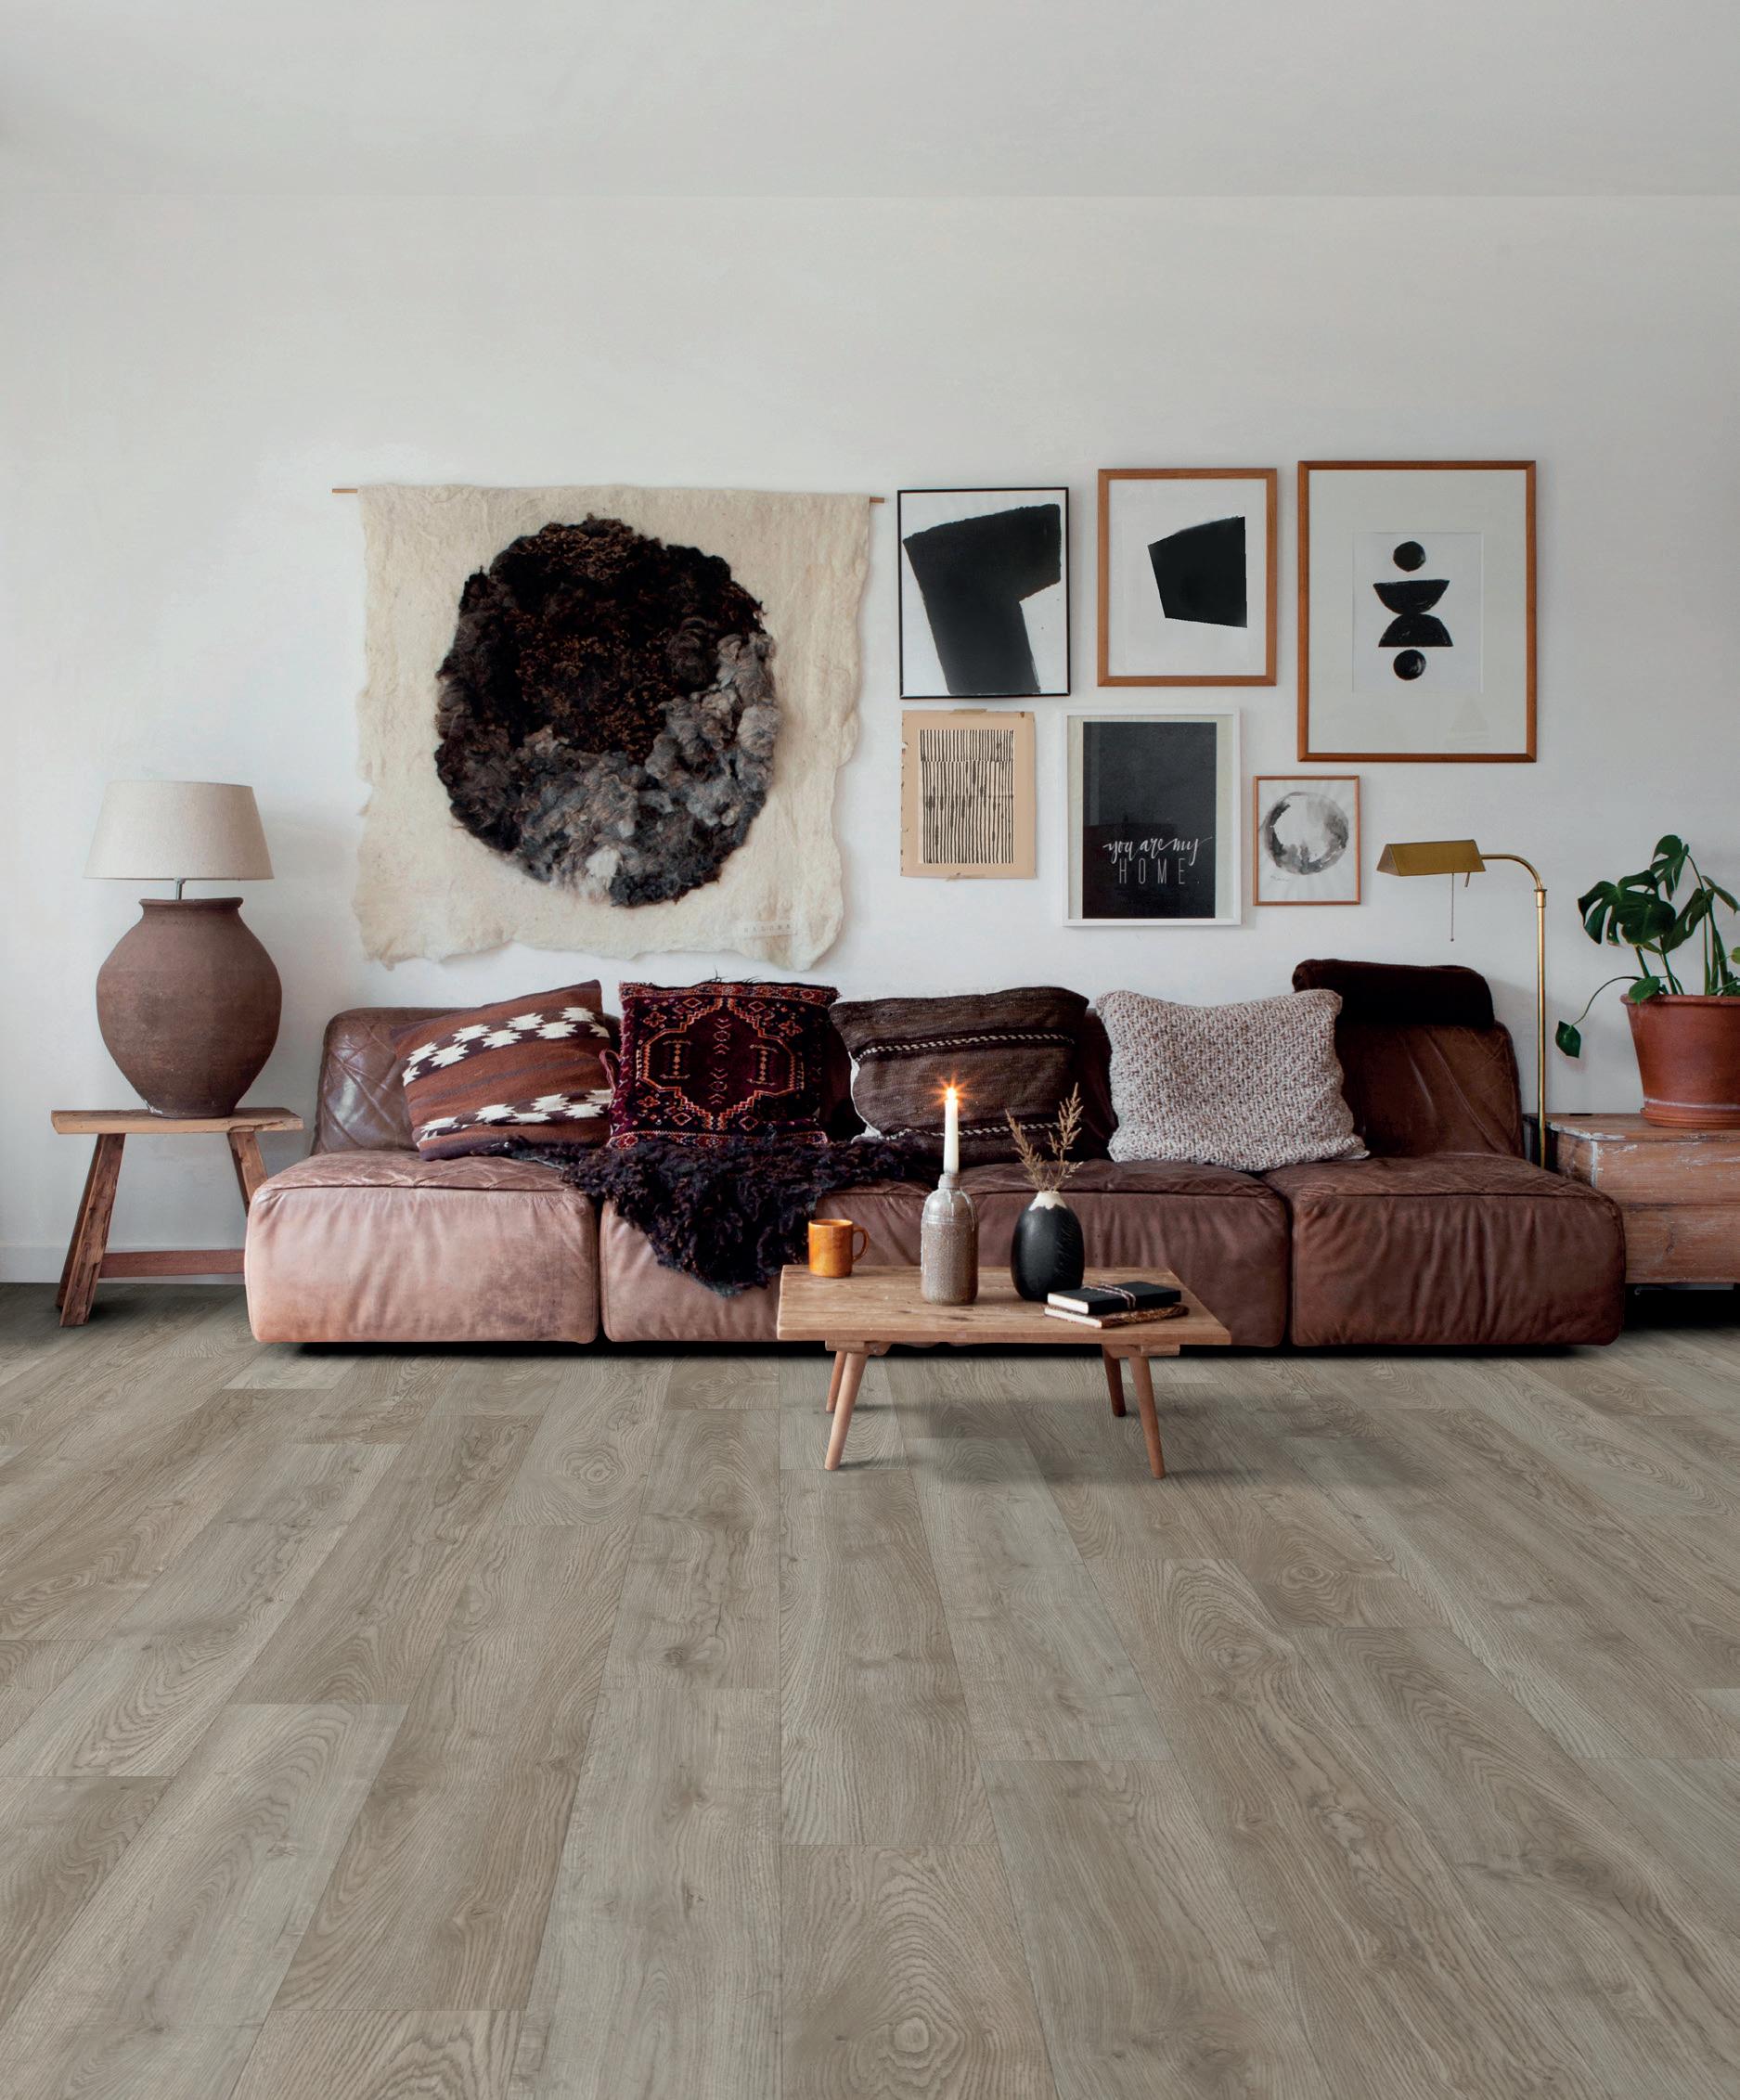
True to Nature Design
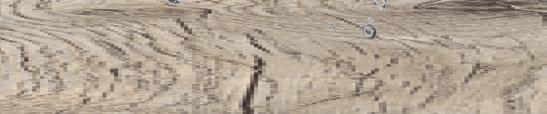
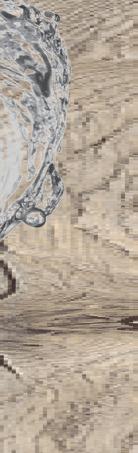
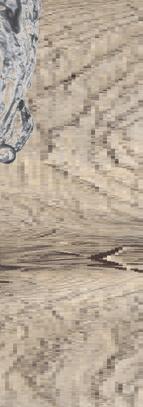
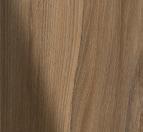
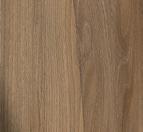
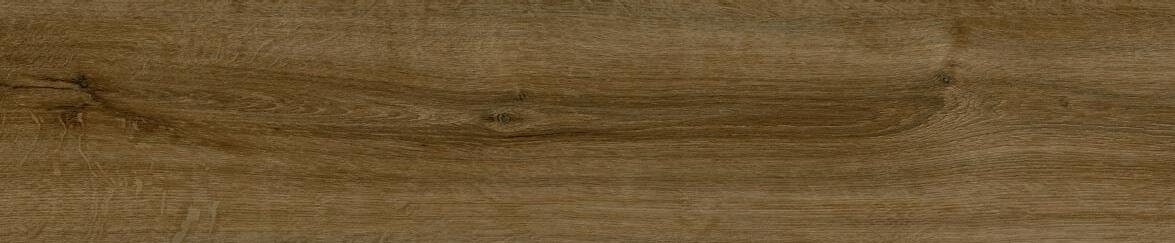
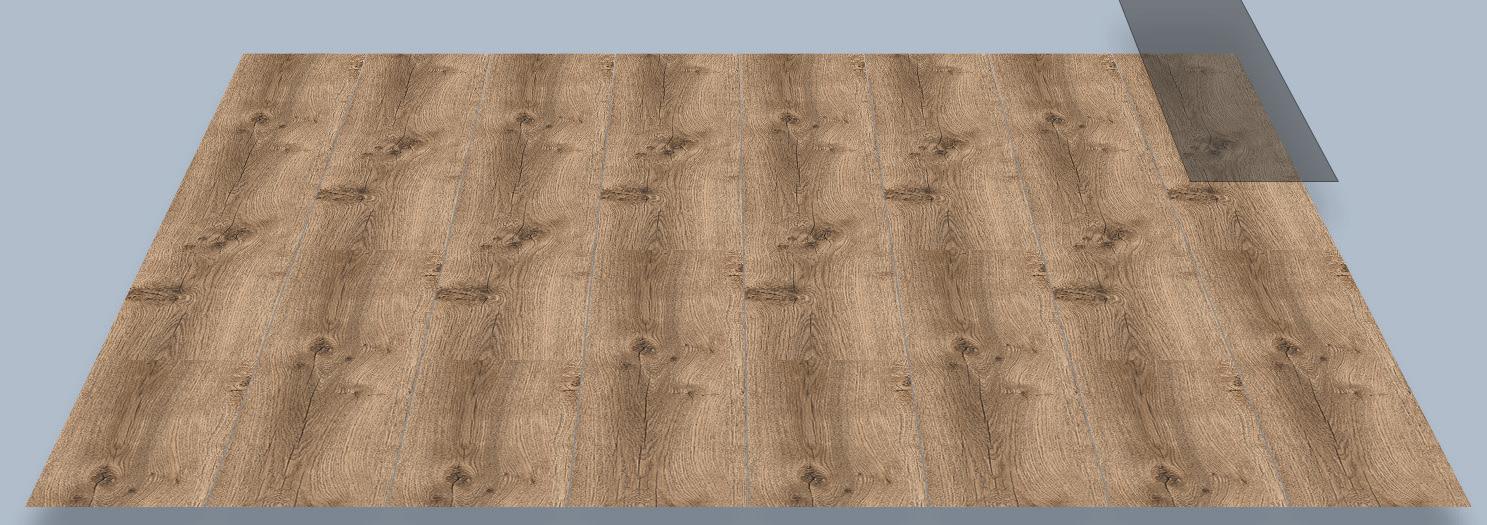
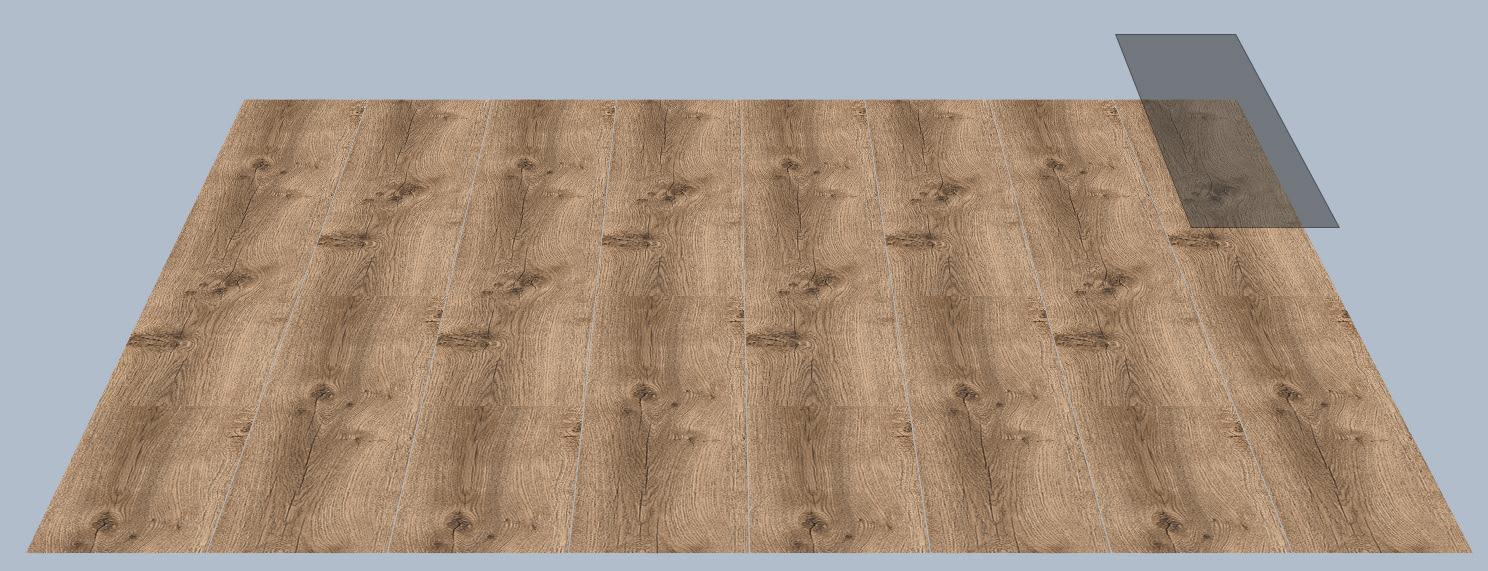
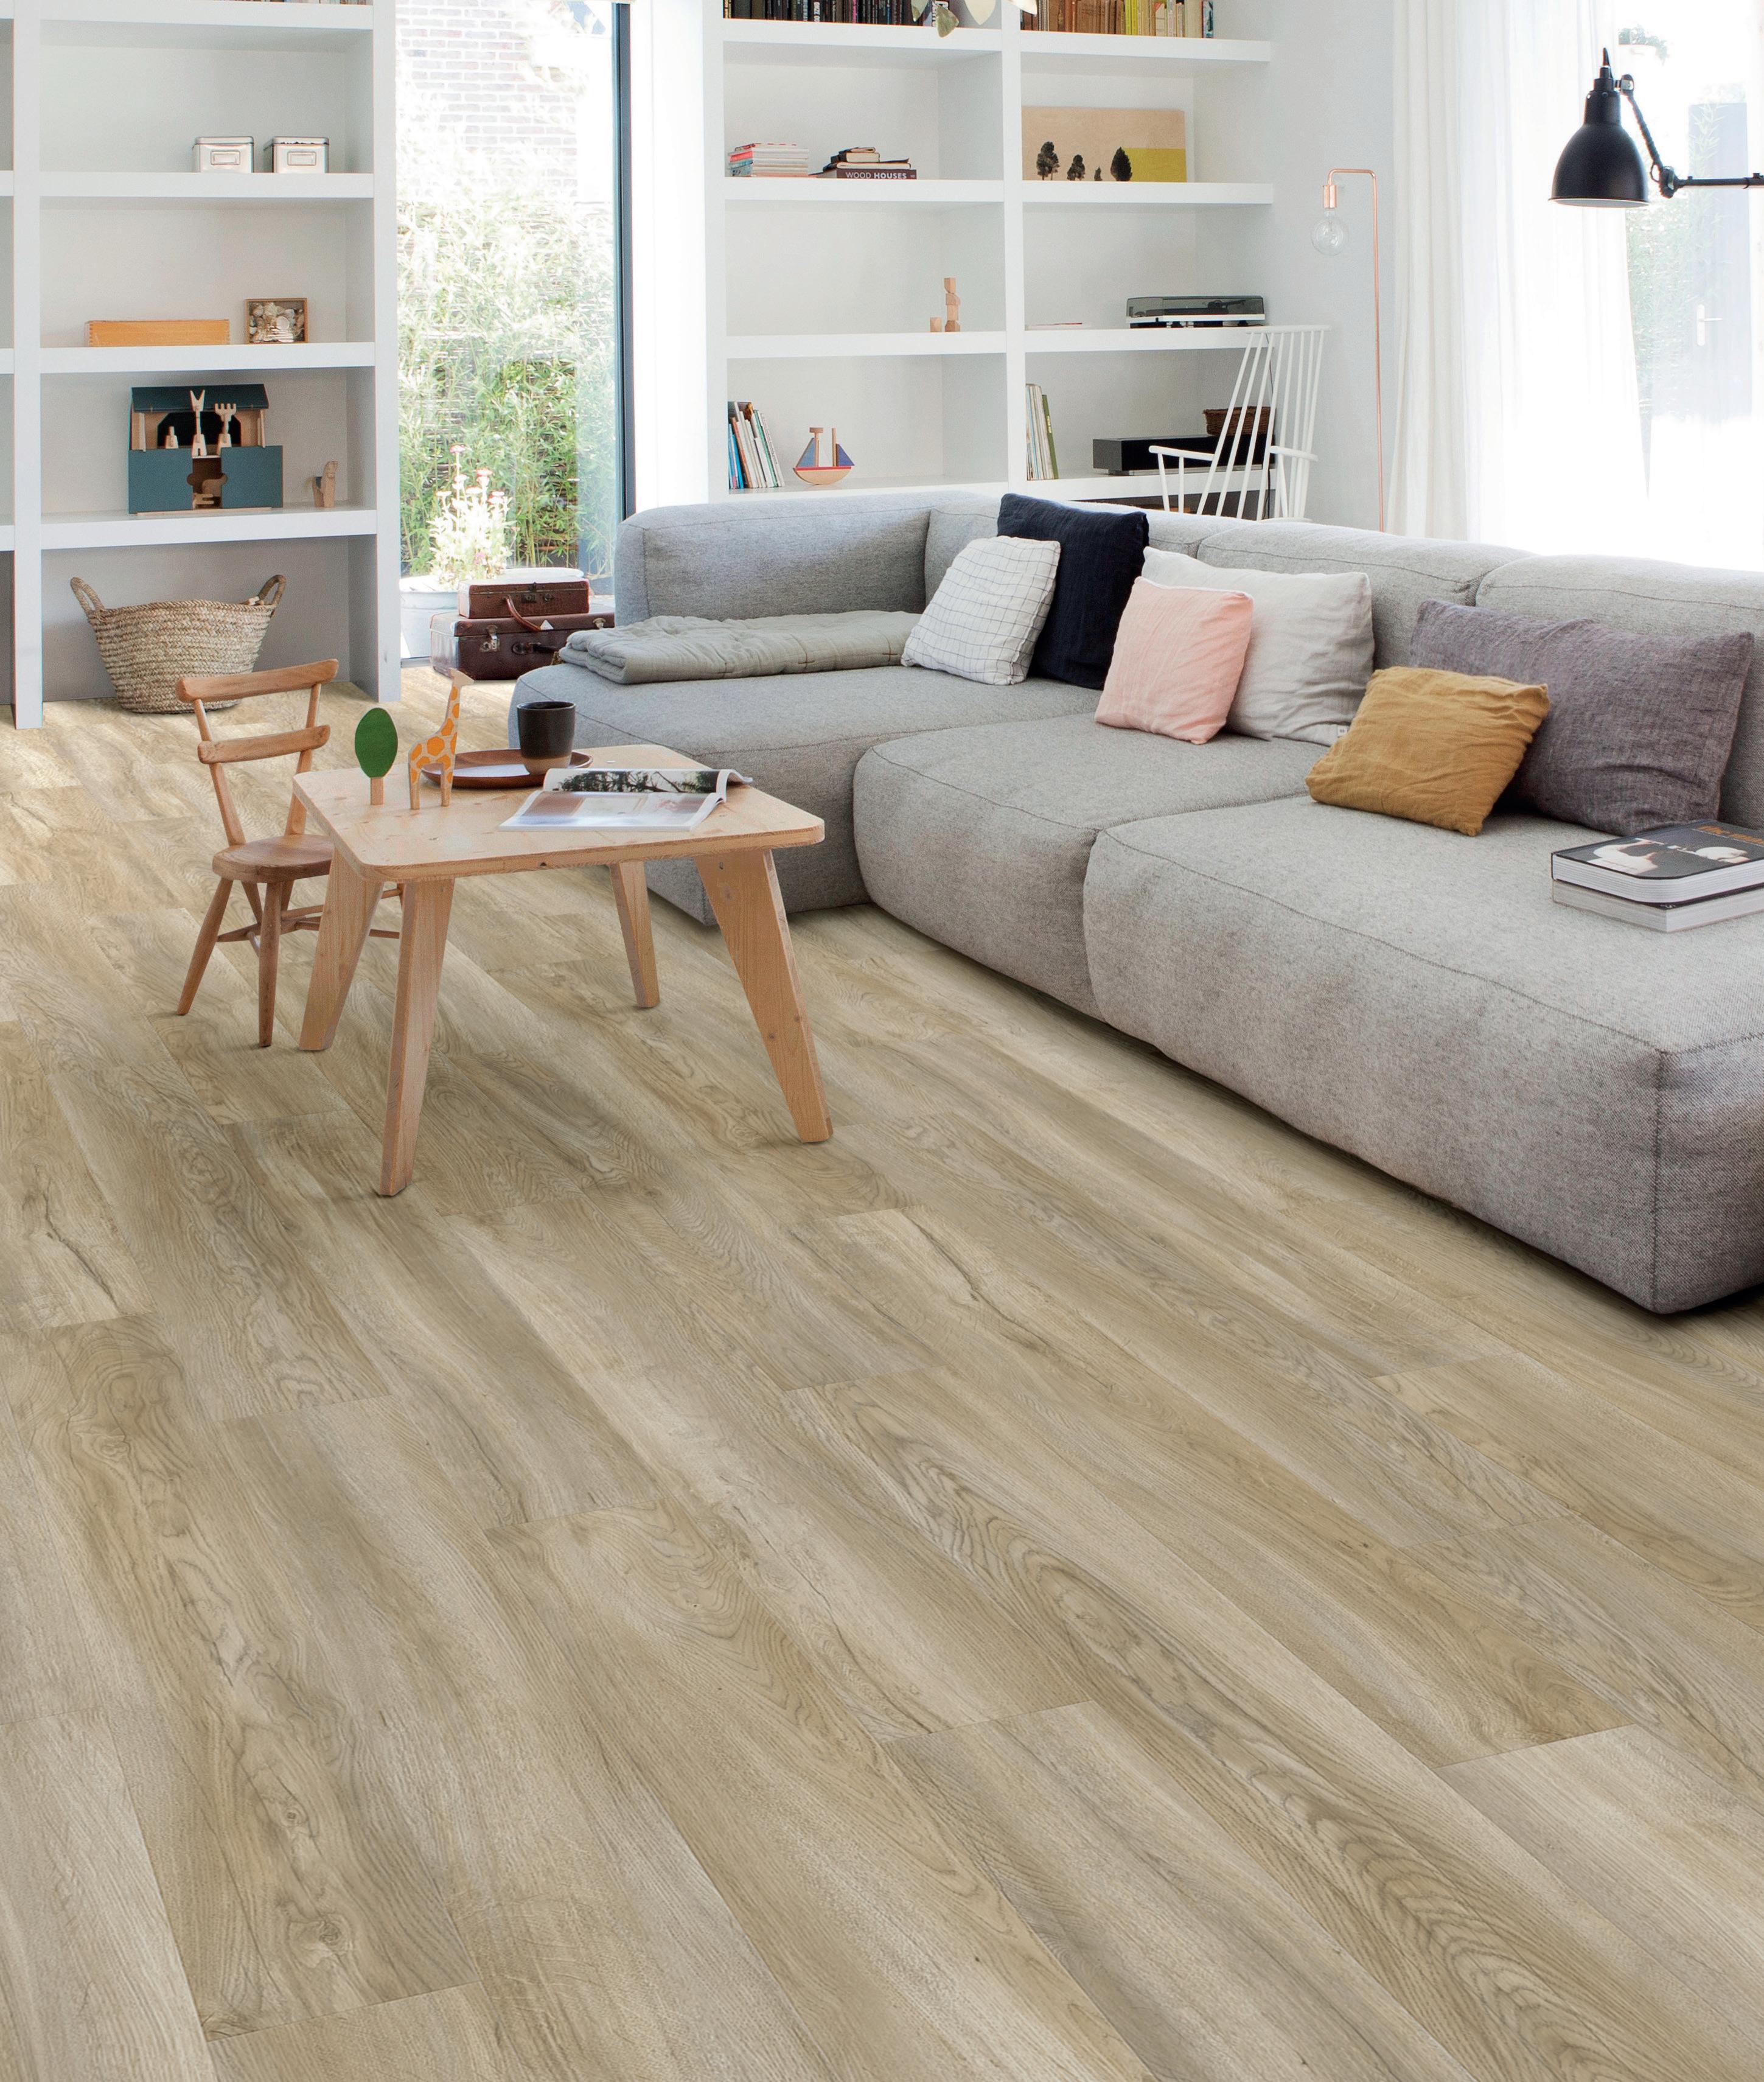
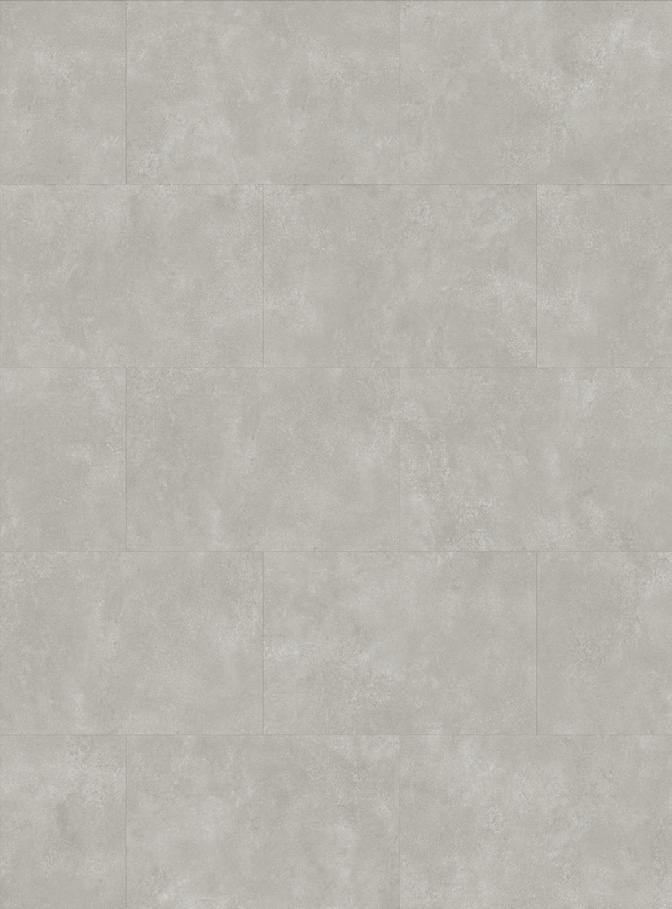
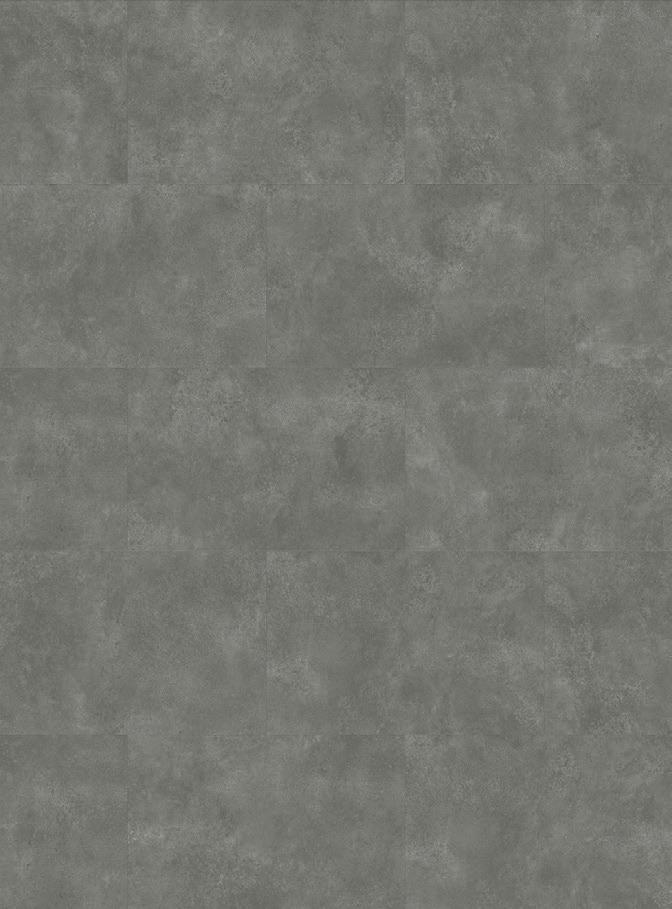
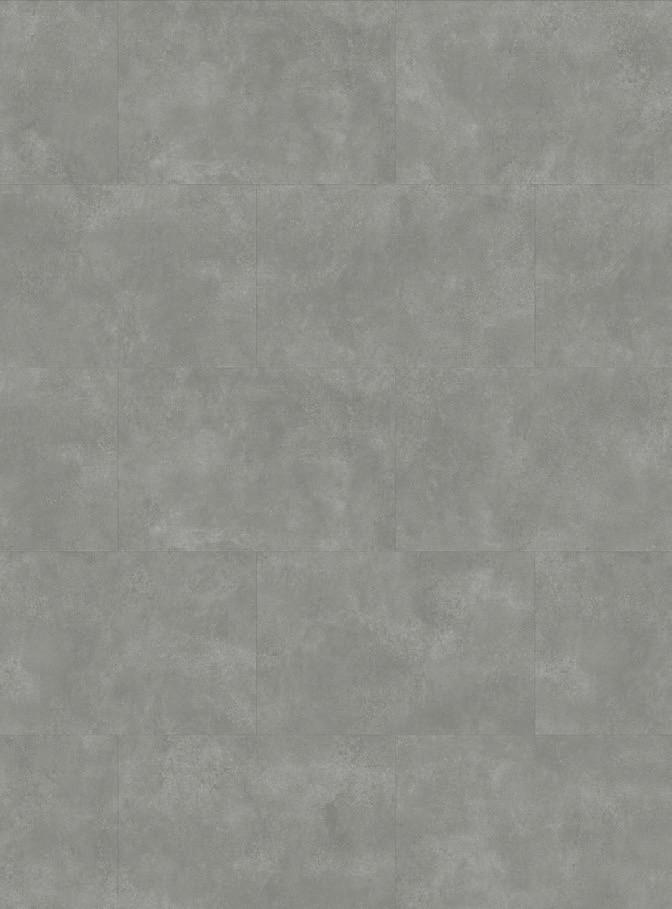
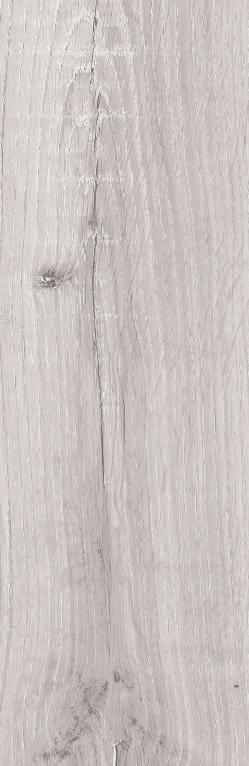
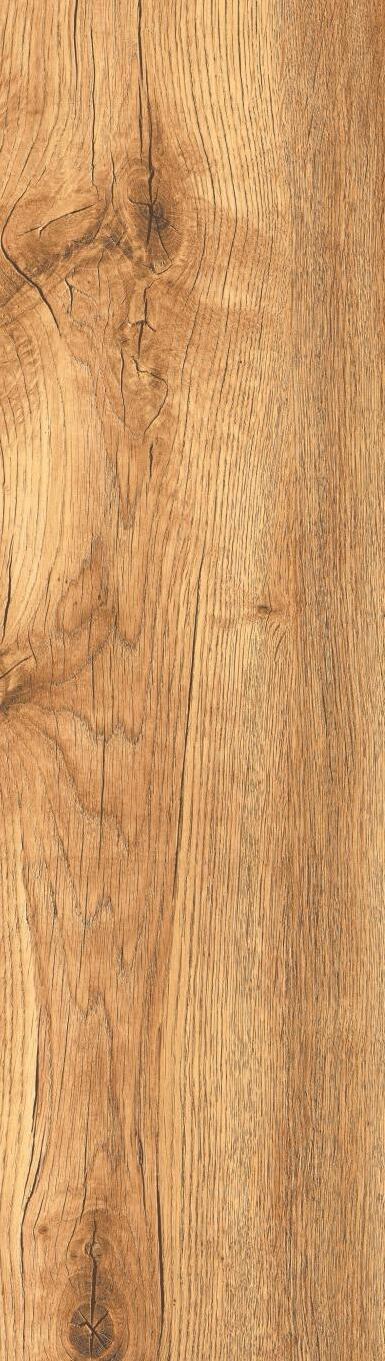
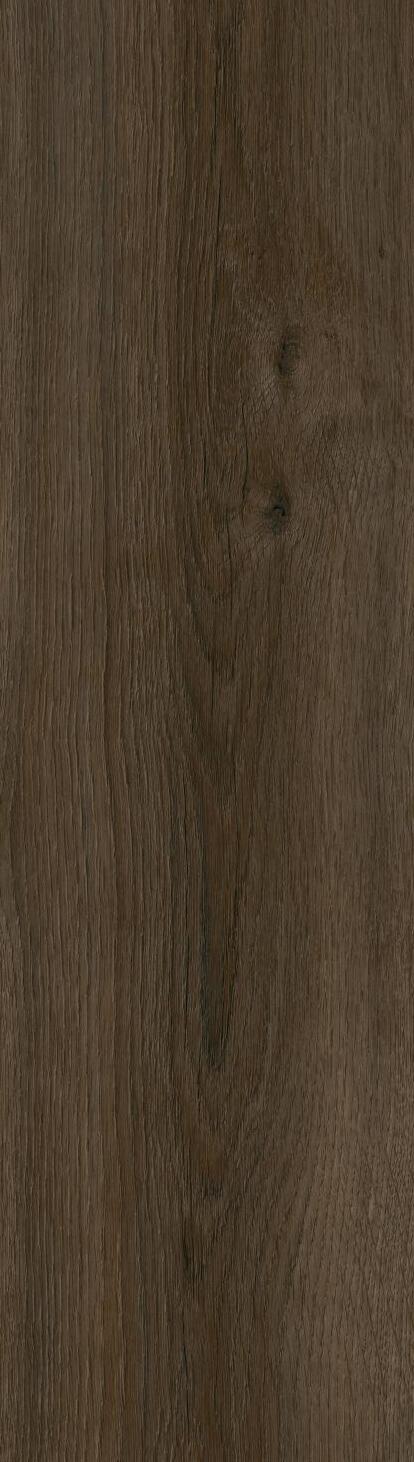
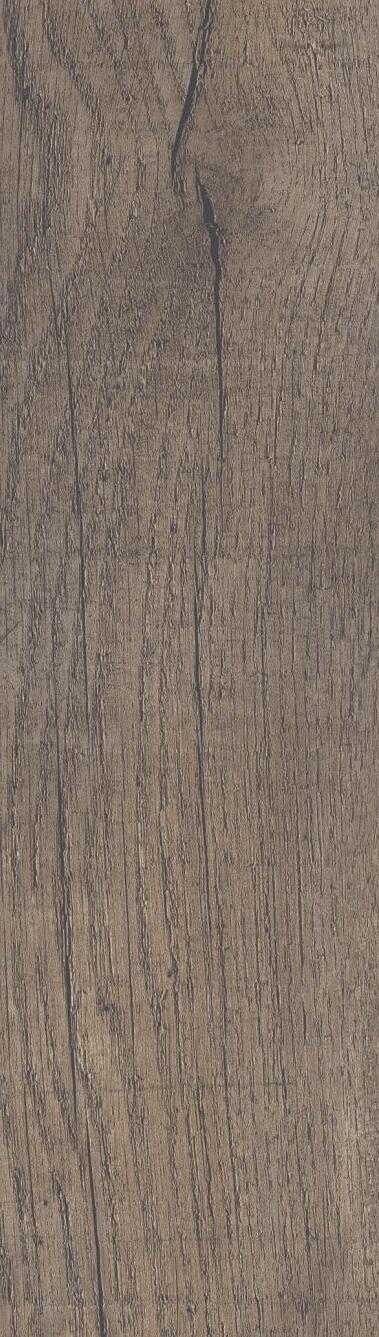
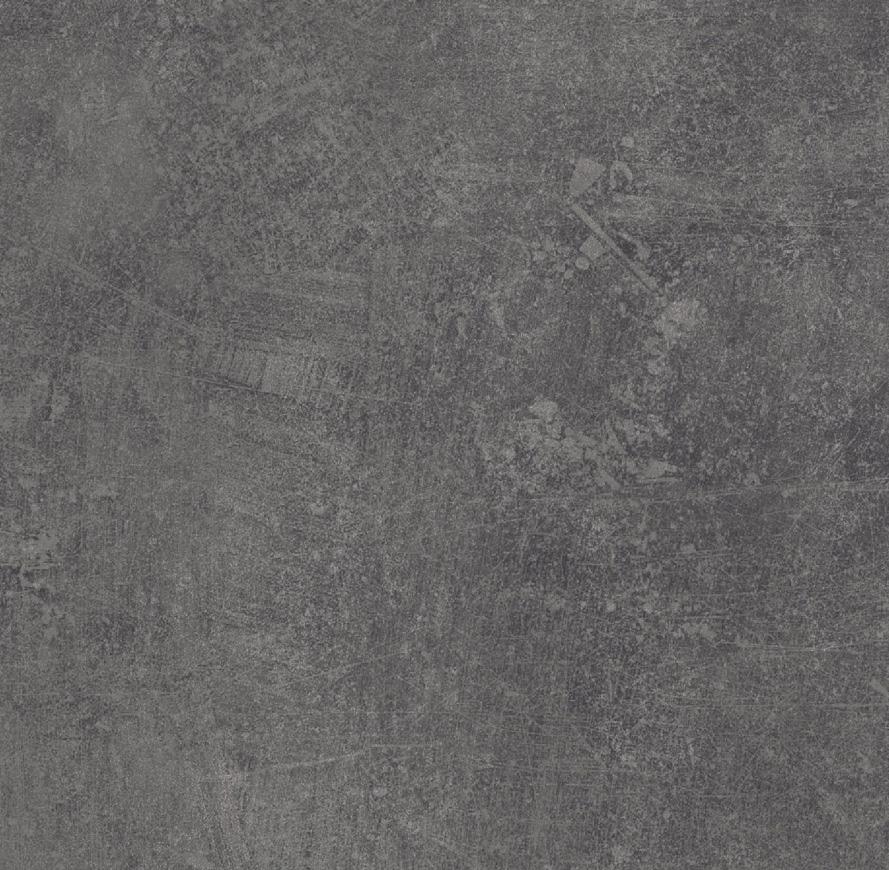
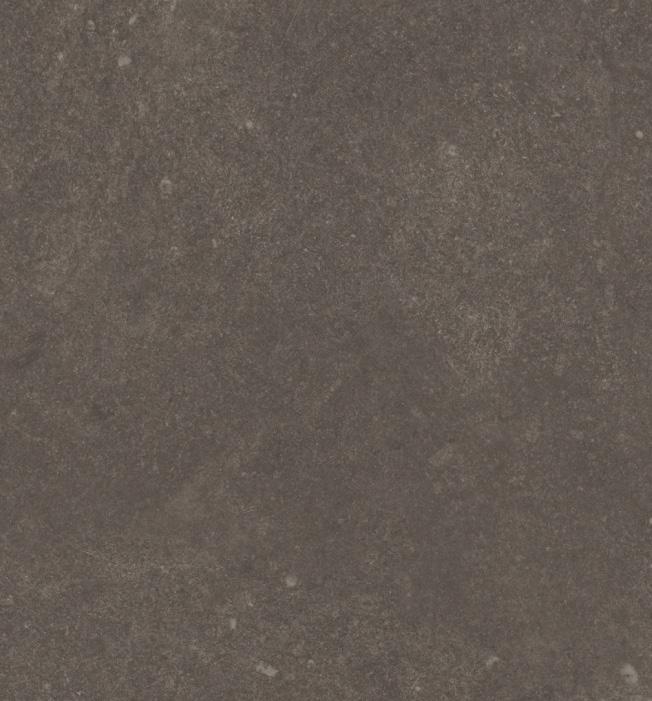
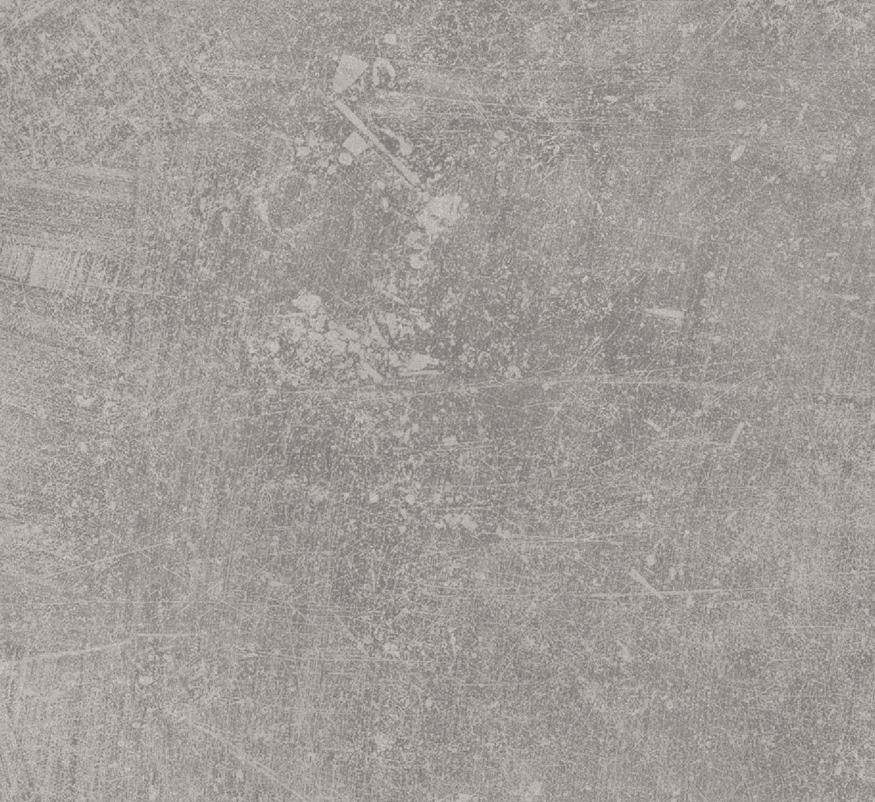
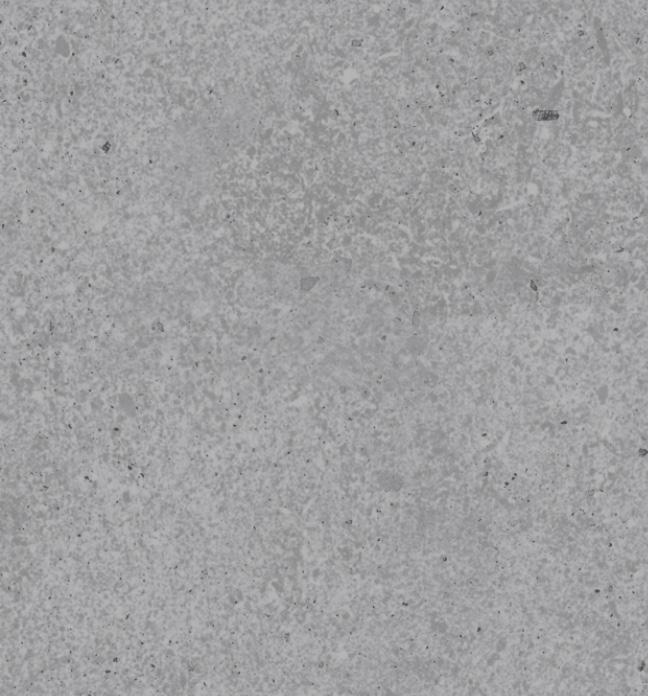
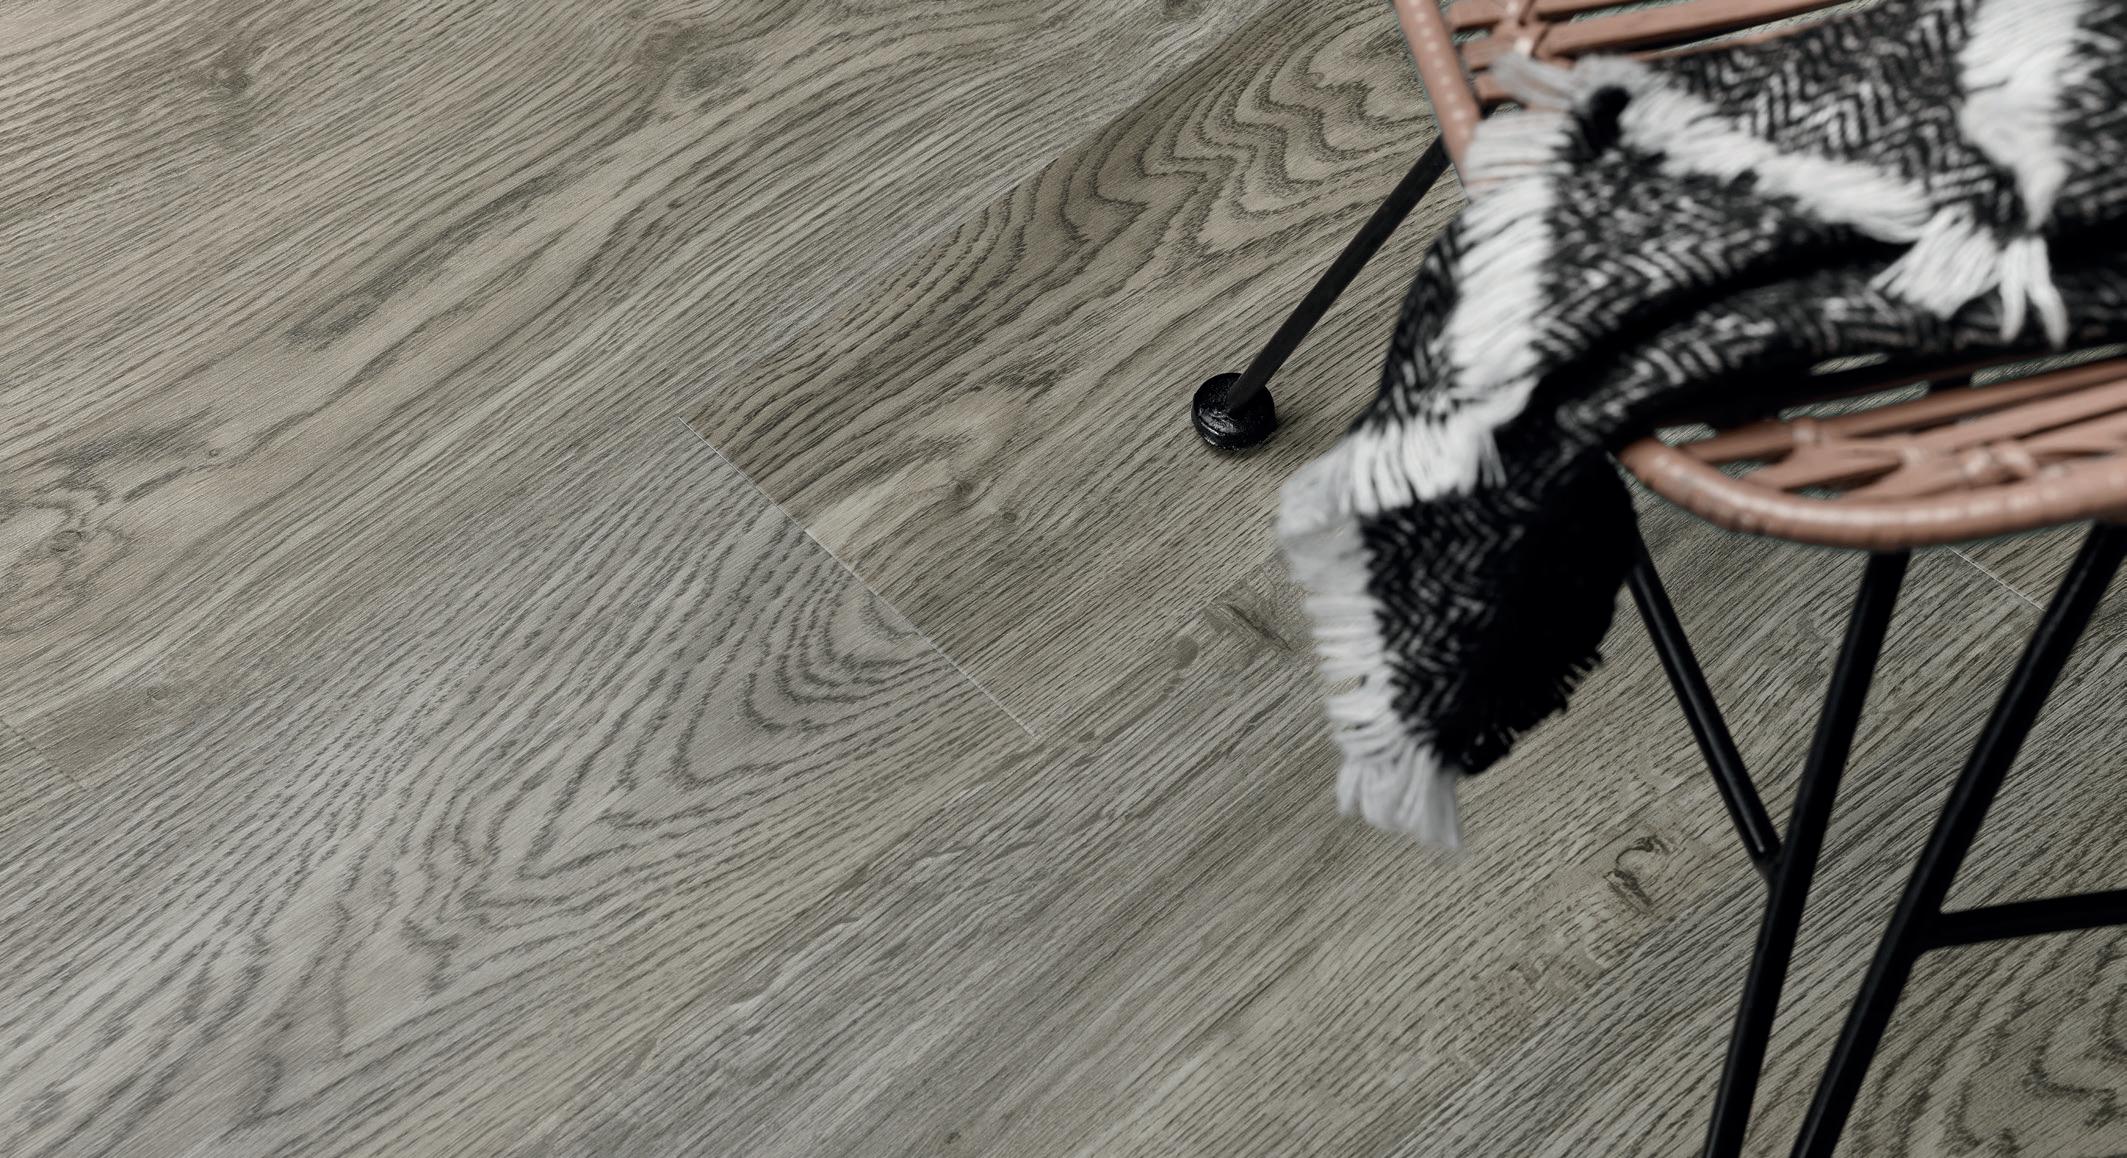
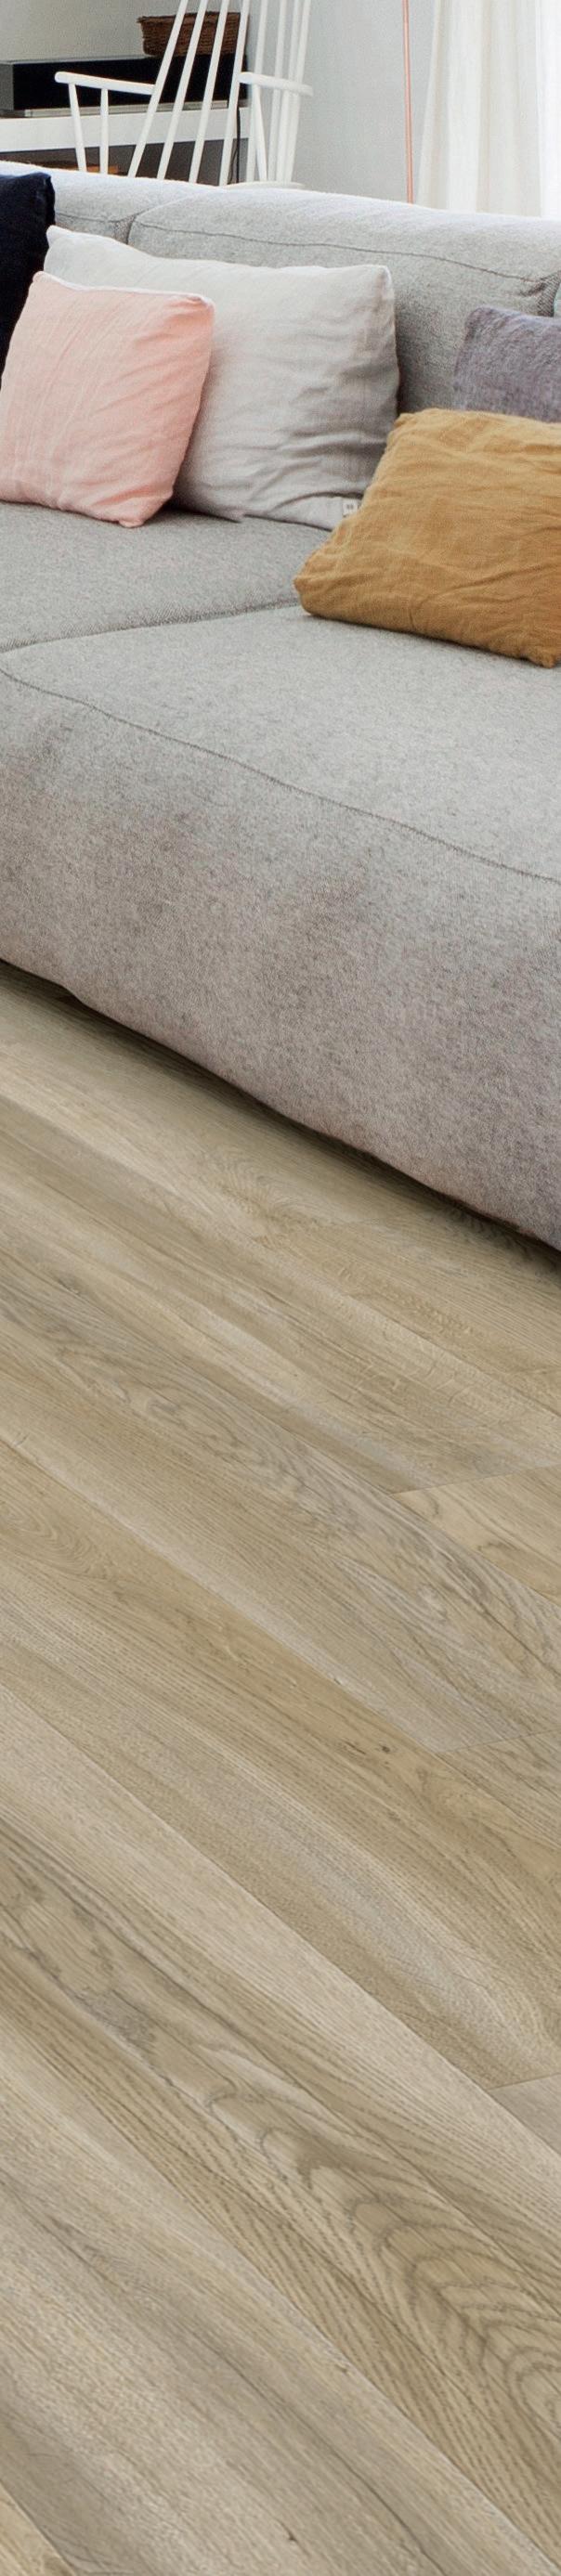
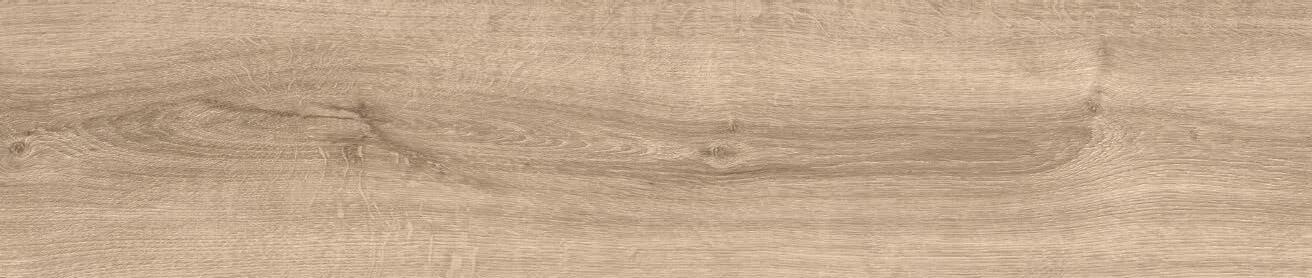
The wood and stone designs of the KlickFloor collection are all inspired by nature and entirely designed, developed and printed in-house. Every design has pin-sharp details, making sure your floor looks as unique as nature.
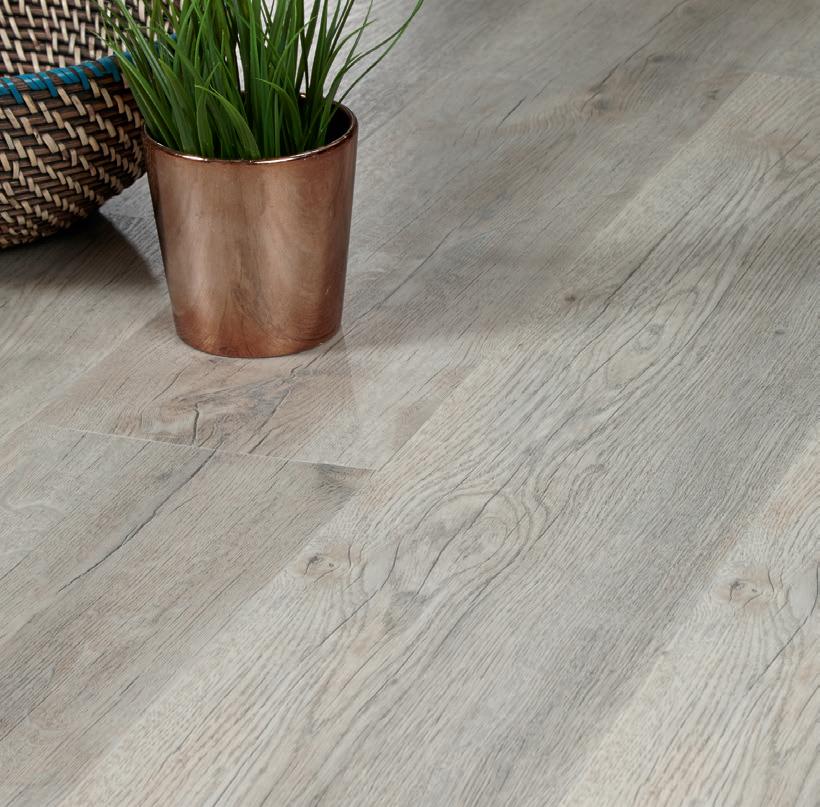


The collection ranges from pure and more pronounced woods to elegant and more distinctive stones. One by one beautifully designed, so you’ll definitely find a floor that fits your expectations and interior.
Our INSPIRATION comes from you.
What you NEED. What you WANT. What you LOVE.
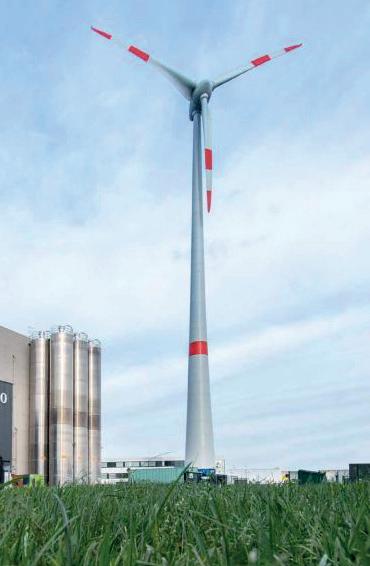
Our design floors are sustainable Choosing KlickFloor is making an eco-friendly choice for the future. Our factory in Belgium is equipped with three wind turbines and is cooled with water from the nearby Scheldt River. The product itself is environmentally friendly too: KlickFloor contain up to 50% recycled material of verified origin, and are themselves recyclable.
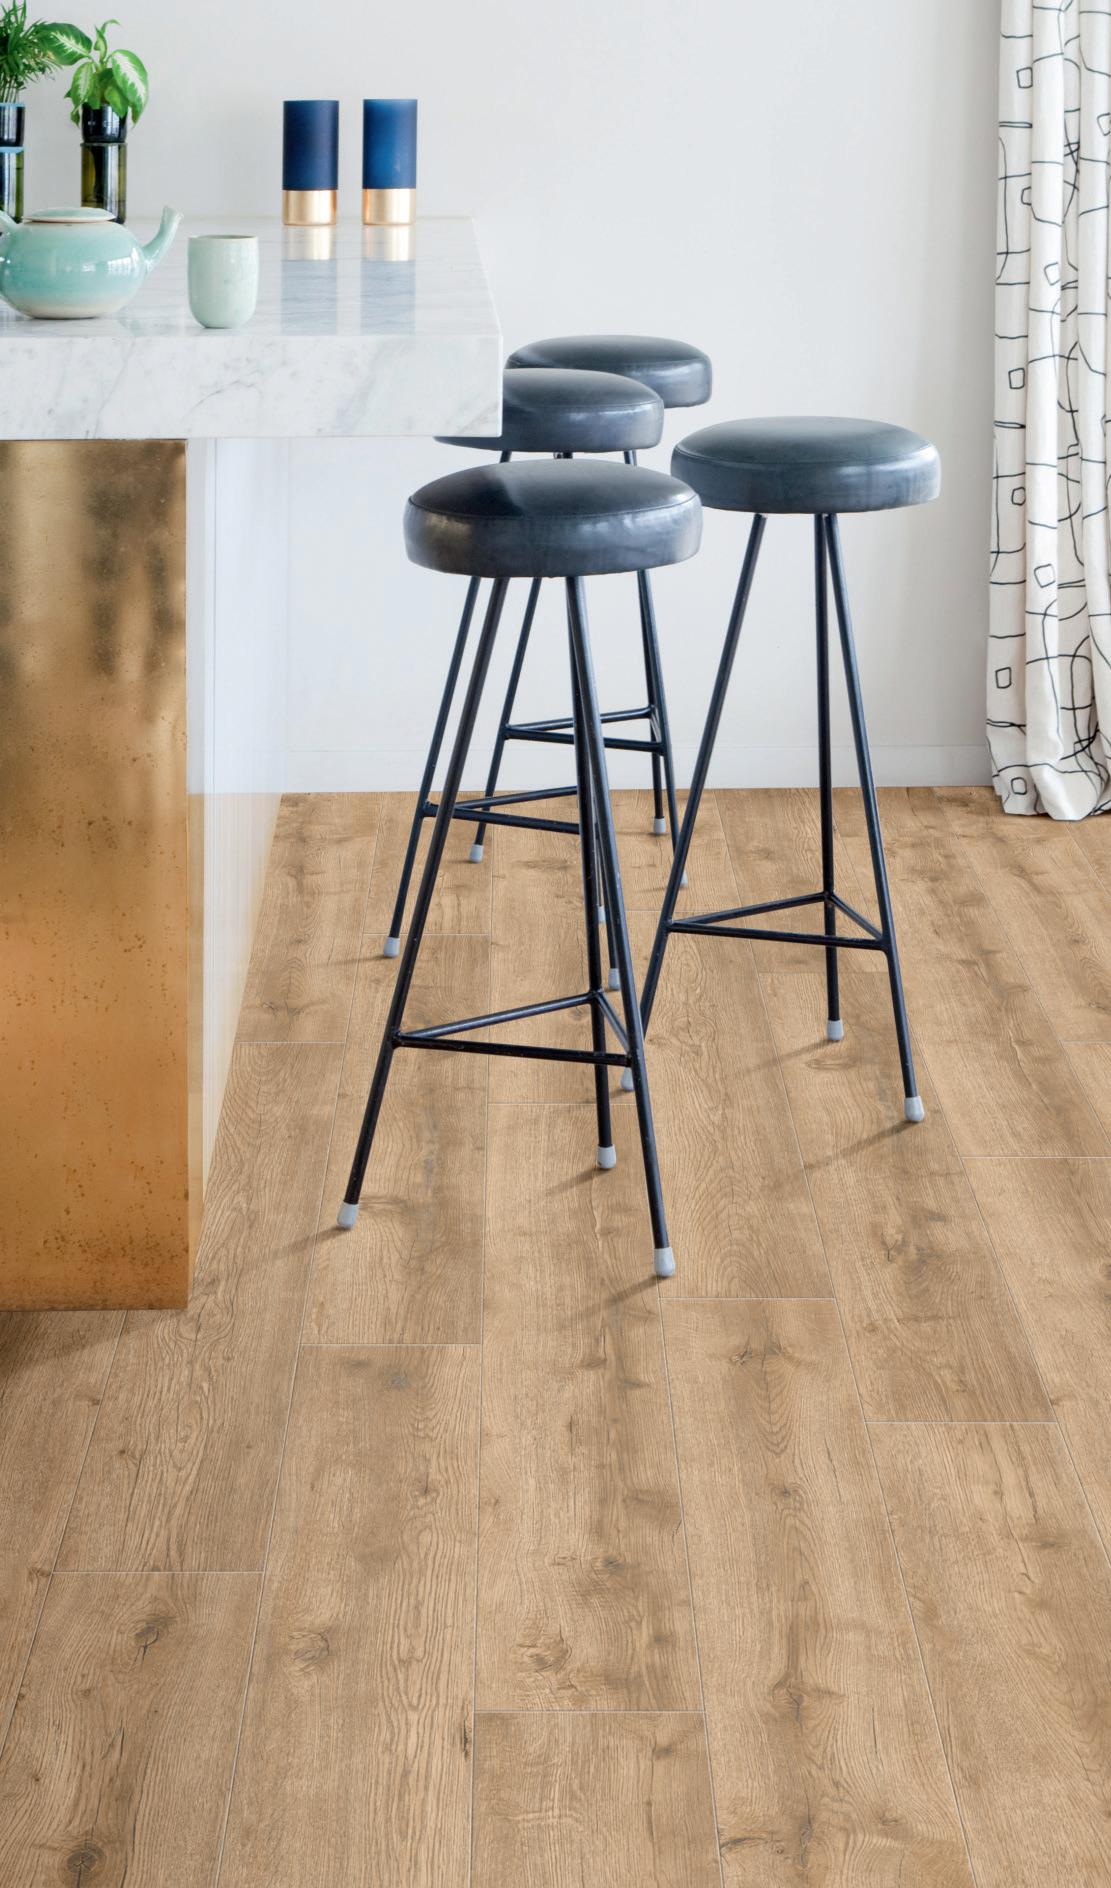
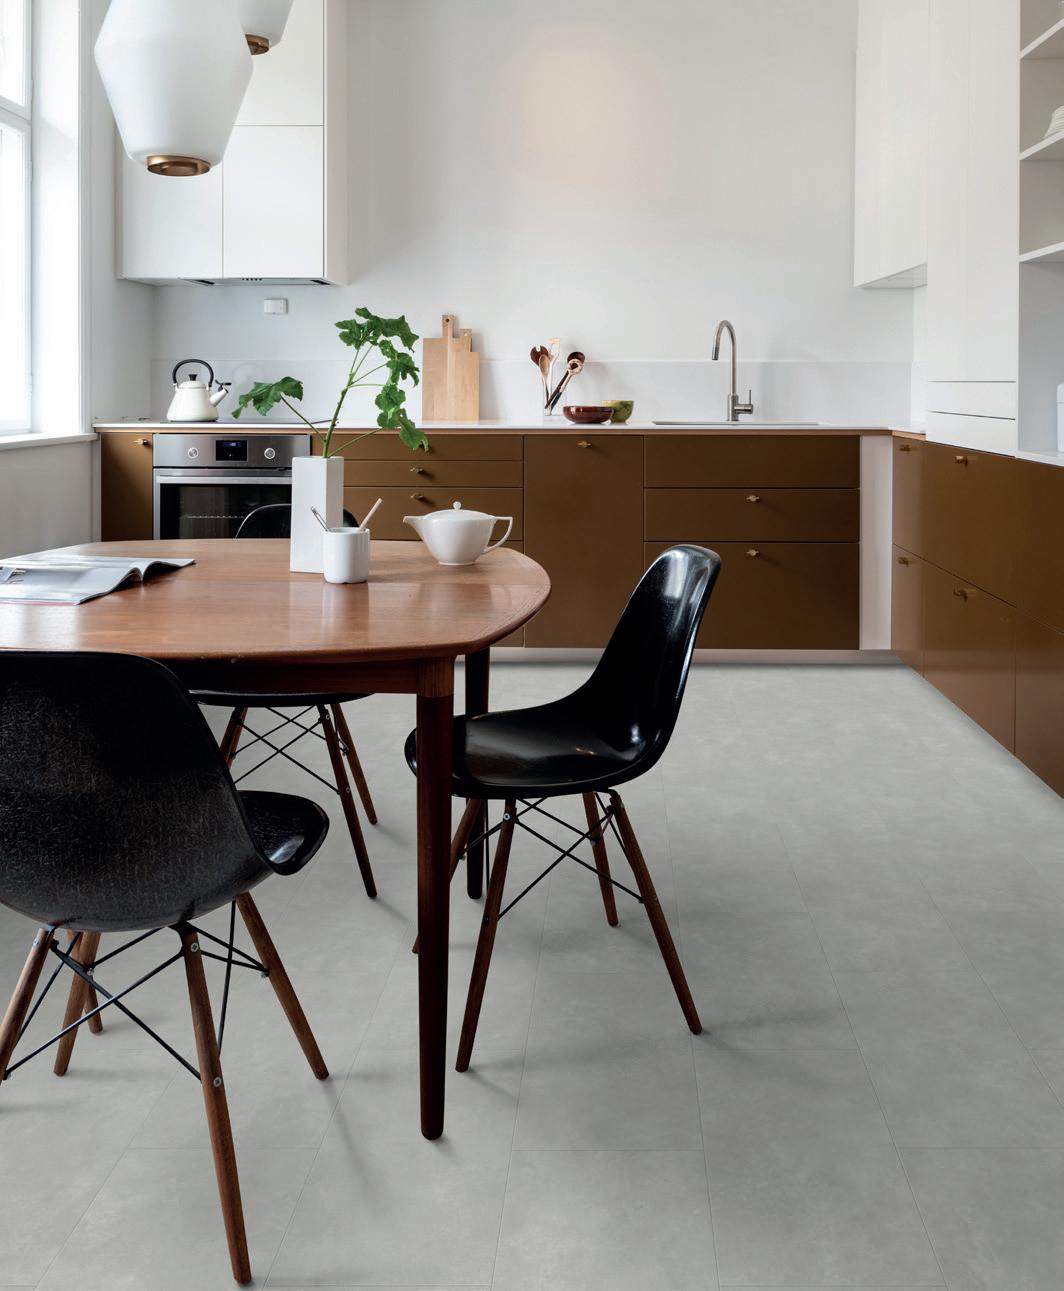
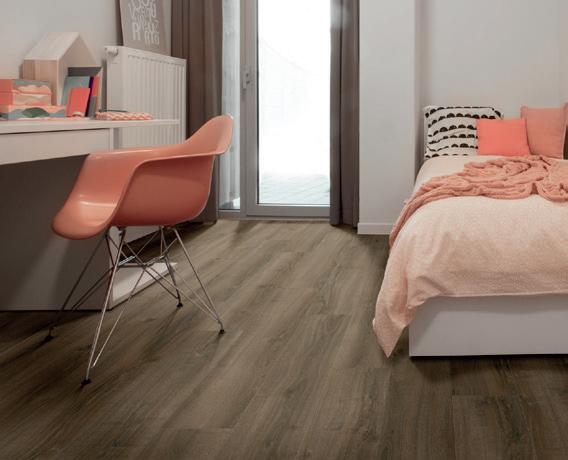
Beautiful and realistic design is key
Our new design floor collection is on-trend, ranging from pure and more pronounced woods to elegant and more distinctive stones. With colour variations from light to dark and everything in between.
We’ve improved the look of must-have oaks. We bring new wood species to the range. Our tile range now offers more options. And we introduce more ‘abstract’ designs to make sure that vinyl planks and tiles can stand out as a material choice with an own unique look.
For people who love to see things big, we have XL planks and tiles. And for those who prefer a more refined design is a herringbone pattern available. So there’s a design floor for every style and personality. And we offer a wide variety of options to choose from.
But there’s more to it than design
That’s true. Let’s not forget KlickFloor also have great functional features. In collaboration with R&D, new steps were taken in the fields of wellness, acoustics and performance. KlickFloor floors have a soft and warm feel, excel in acoustic comfort and come with an improved protective layer that makes them more scratch, stain and slip resistant. They are waterproof and easy to maintain.
Registered Embossed
What’s your first impression about the Impress collection? The ‘embossed in register’ process brings to life the smallest details of real wood: the embossed texture allows you to see and actually feel the depth of the wood rains and knots.
7
THE PREMIUM RANGE
Choose Klick Premium ... Warranty
With a gaurantee of 20 Years Domesic and 12 Year Commercial, you can be assued that Klick Premium is made to be durable and reliable.
High Performance
Premium Klickfloor is designed to reflect the unique patterns and textures found in nature. Klickfloor luxury vinyl flooring combines the authenticity and beauty of natural products, with the rugged durability of innovative vinyl technology.
Luxury Benefits
Thanks to a unique Protectonite PU technology, KlickFloor flooring is scuff and stain resistant, hygienic, slip and moisture resistant, and sound-absorbent. This makes KlickFloor flooring ideal for any room in the home including bathrooms and kitchens while not forgetting commercial applications like restaurants, shops and offices.
Underlay Choices
Choose from three underlay choices to suit your needs; Silent, Powerbase and Flex-Pro. Each is designed to be the perfect partner with Klickfloor - providing a fantastic foundation.
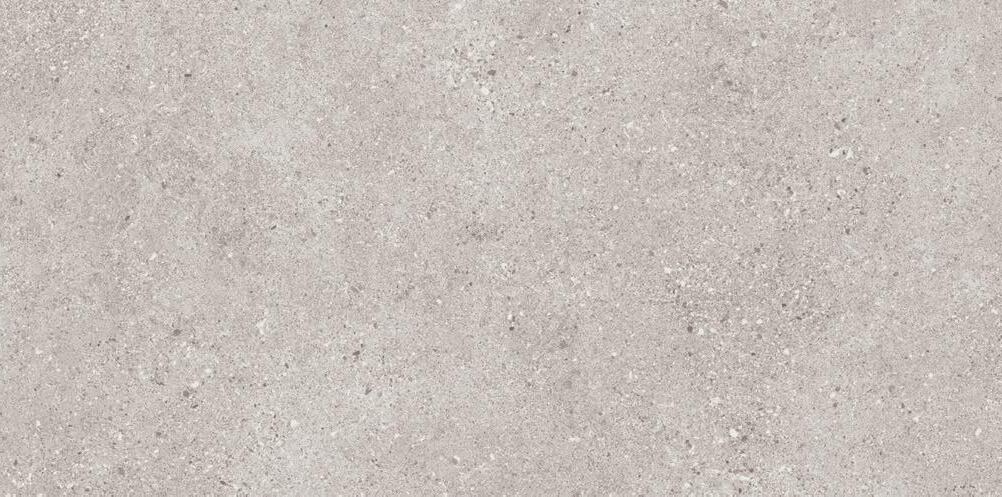
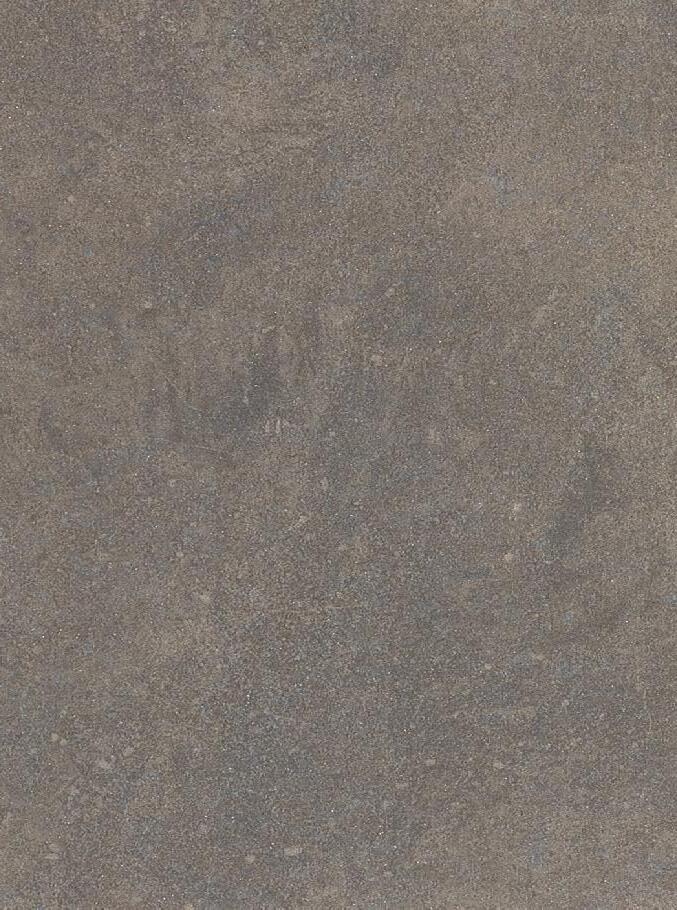
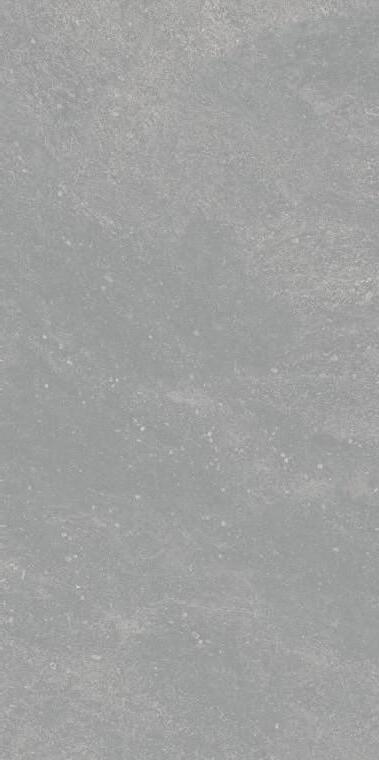
SIERRA GRIGIO MARBLE 46913
PREMIUM VINYL WOODS


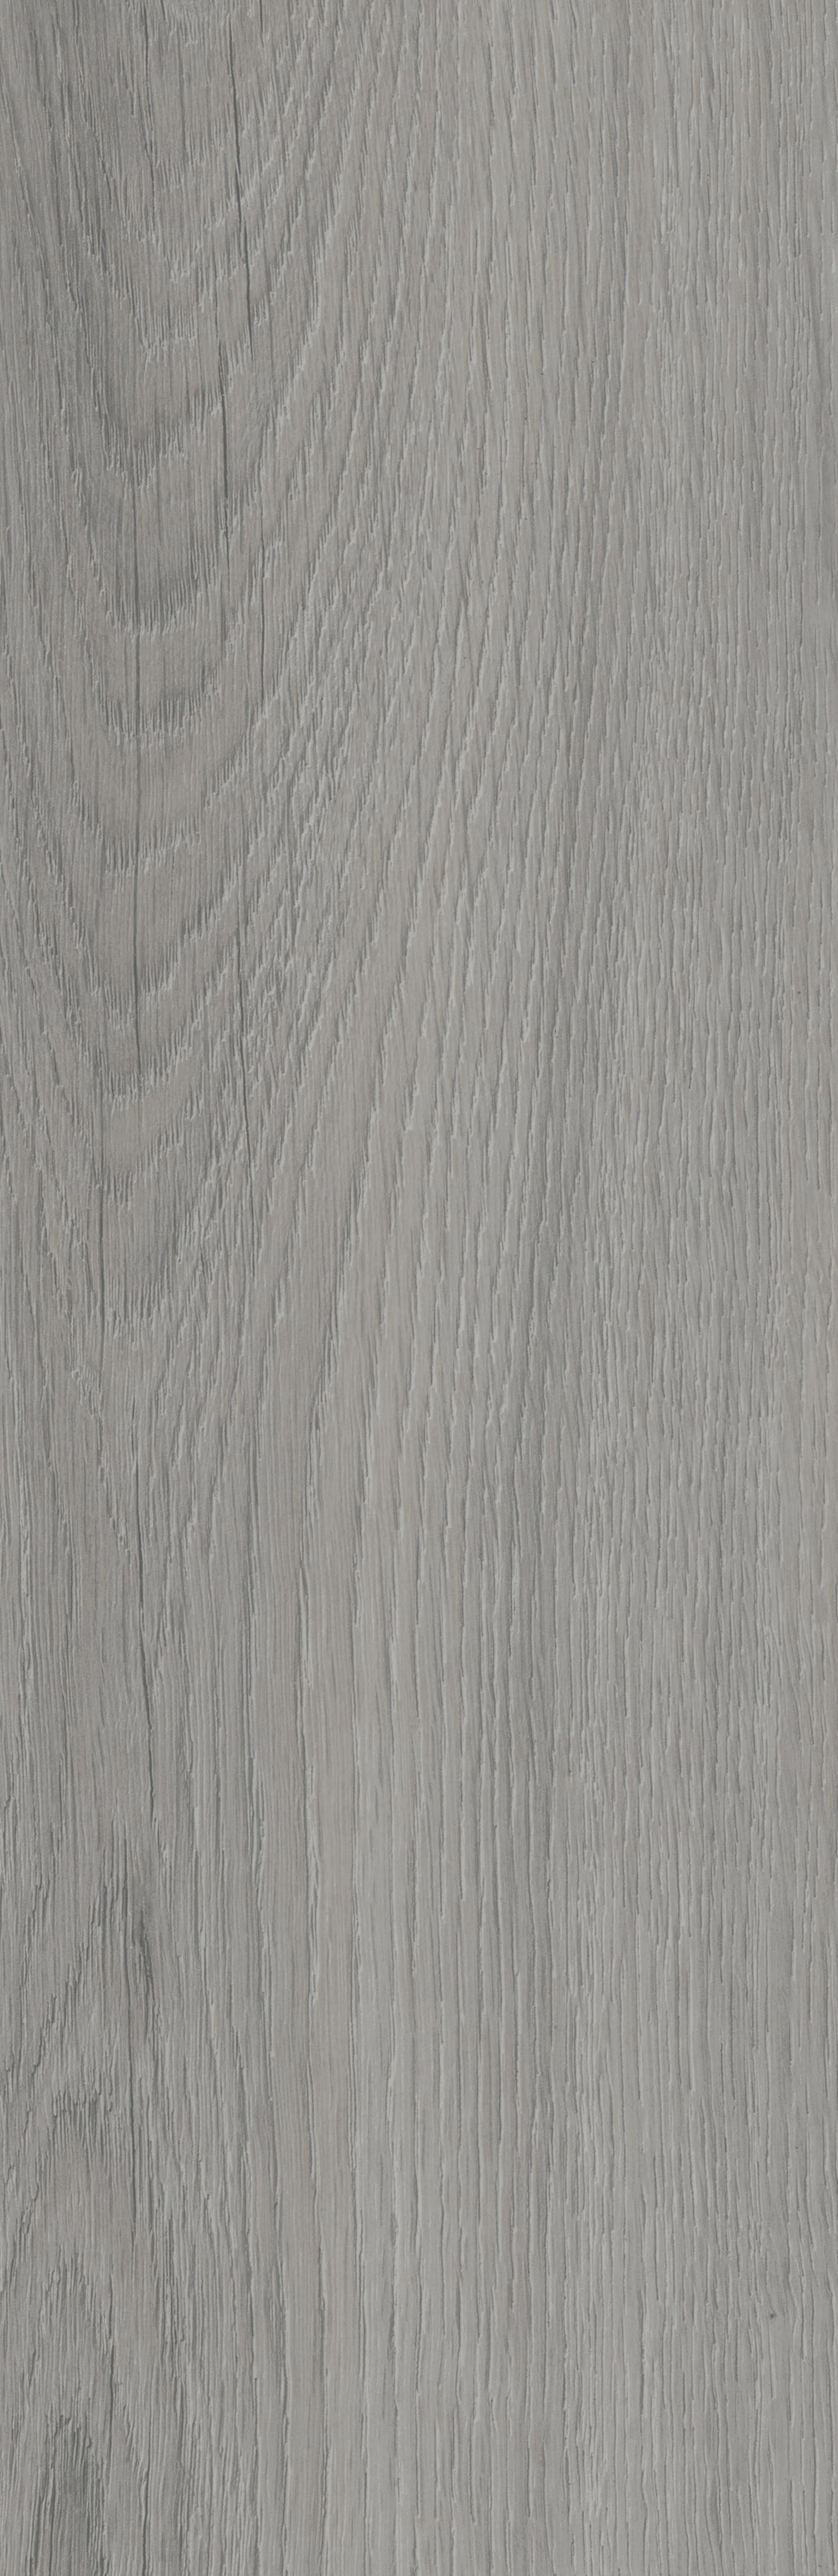

CEDROS GREY OAK 24935 COAST OAK 24219
COAST OAK 24219
GREY OAK 24935 1.76m2 PER BOX 1316 X 191mm 20 YEAR DOMESTIC 12 YEAR COMMERCIAL
CEDROS

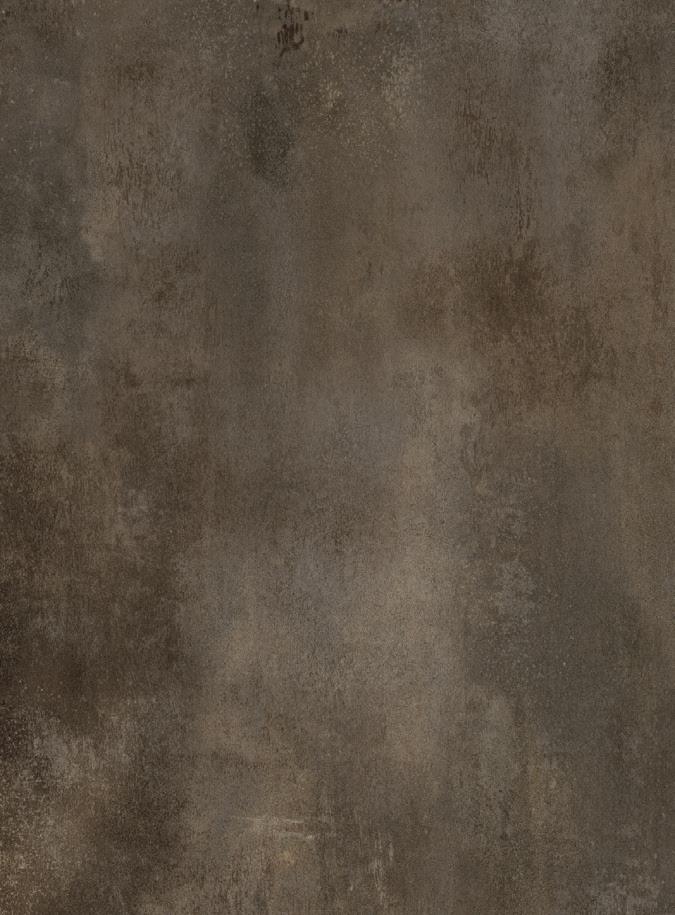


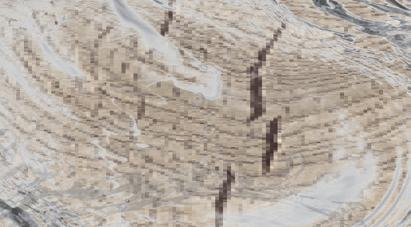
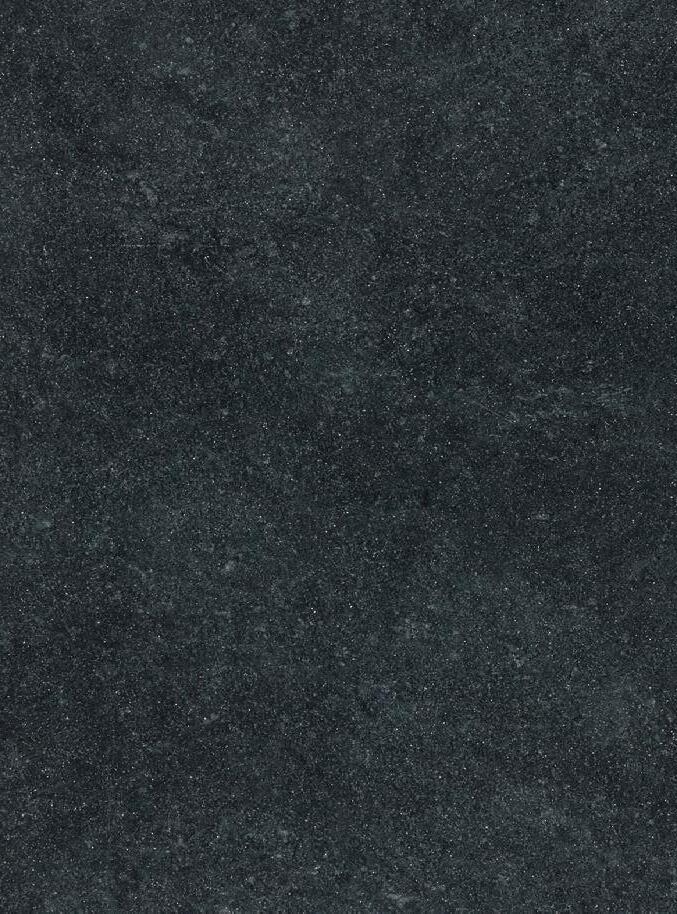
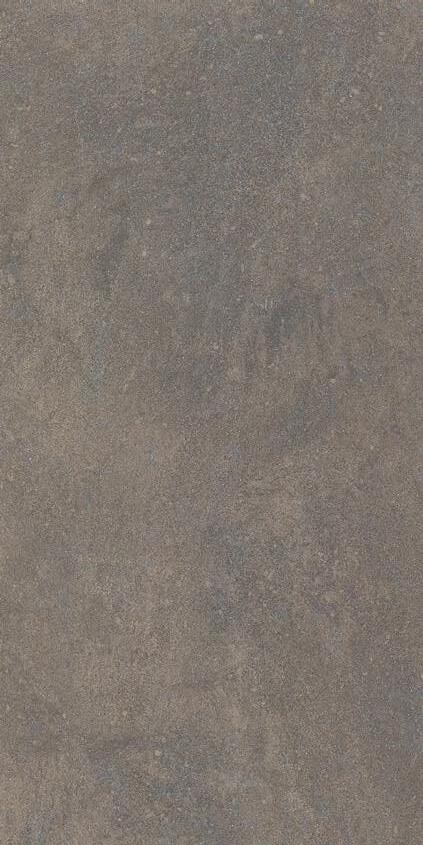
COPPER STONE 40862
SIERRA NERO MARBLE 46976 SIERRA GRIGIO MARBLE 46913
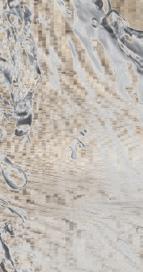
FLEUR STONE SILVER 46965
PREMIUM
COPPER STONE
11 1.49m2 PER BOX 324 X 655mm 20 YEAR DOMESTIC 12 YEAR COMMERCIAL
CERAMICO BEIS 46210
VINYL TILES
40862
THE PREMIUM PLUS RANGE
Choose Klick Premium Plus ...
Warranty
With a gaurantee of 20 Years Domesic and 12 Year Commercial, you can be assued that Klick Premium Plus is made to be durable and reliable.
High Performance
Premium Plus Klickfloor is designed to reflect the unique patterns and textures found in nature, with the deeper embossing and with more textured and authentic details. Klickfloor luxury vinyl flooring combines the authenticity and beauty of natural products, with the rugged durability of innovative vinyl technology.
Luxury Benefits
Thanks to a unique Protectonite PU technology, KlickFloor flooring is scuff and stain resistant, hygienic, slip and moisture resistant, and sound-absorbent. This makes KlickFloor flooring ideal for any room in the home including bathrooms and kitchens while not forgetting commercial applications like restaurants, shops and offices.
Underlay Choices
Choose from three underlay choices to suit your needs; Silent, Powerbase and Flex-Pro. Each is designed to be the perfect partner with Klickfloor - providing a fantastic foundation.
HUCKLEBERRY ABALONE OAK 82231
PREMIUM PLUS VINYL WOODS
HUCKLEBERRY ABALONE OAK 82231

HUCKLEBERRY GREY OAK 82201

HUCKLEBERRY DARK SMOKE OAK 82941


HUCKLEBERRY HICKORY OAK 82871
HUCKLEBERRY BLACK OAK 82991
1.76m2 PER BOX 1316 X 191mm 20 YEAR DOMESTIC 12 YEAR COMMERCIAL
PREMIUM PLUS VINYL WOODS ORIGINAL, OUTSTANDING OAKS.
EVERY PLANK DESIGN IS INSPIRED BY NATURE, FROM BEIGE AND BROWN TO CARAMEL. THIS HUCKLEBERRY COLLECTION OFFERS REGISTERED EMBOSSED TEXTURE, SO YOU CAN ACTUALLY SEE AND FEEL THE GRAINS AND KNOTS, JUST LIKE GENUINE WOOD. IN A WAY, IT LOOKS LIKE KLICKFLOOR MEETS AND EVEN BEATS REALITY.
HUCKLEBERRY HICKORY OAK 82871 HUCKLEBERRY GREY OAK 82201
15
PREMIUM PLUS VINYL TILES LUXURY & PIZZAZZ.
OUR PREMIUM PLUS RANGE FEATURES THE EVER-POPULAR STARSTONE COLLECTION; OFFERING A PLAYFUL MIXTURE OF DARKER AND LIGHTER TONES, COMBINING WITH A HINT OF SPARKLE, TO CREATE A DESIGN THAT IS PERFECT AND FULL OF GLAMOUR AND PIZZAZZ.
ALTERNATIVELY, THIS RANGE OFFERS MARBEL DEISGNS FOR A TRULY LUXURIOUS FINISH TO YOUR HOME.

PIZARRA ANTRACITA SLATE 70928
1.49m2 PER BOX 324 X 655mm 20 YEAR DOMESTIC 12 YEAR COMMERCIAL
STARSTONE ORION BLACK 46985
PREMIUM PLUS VINYL TILES


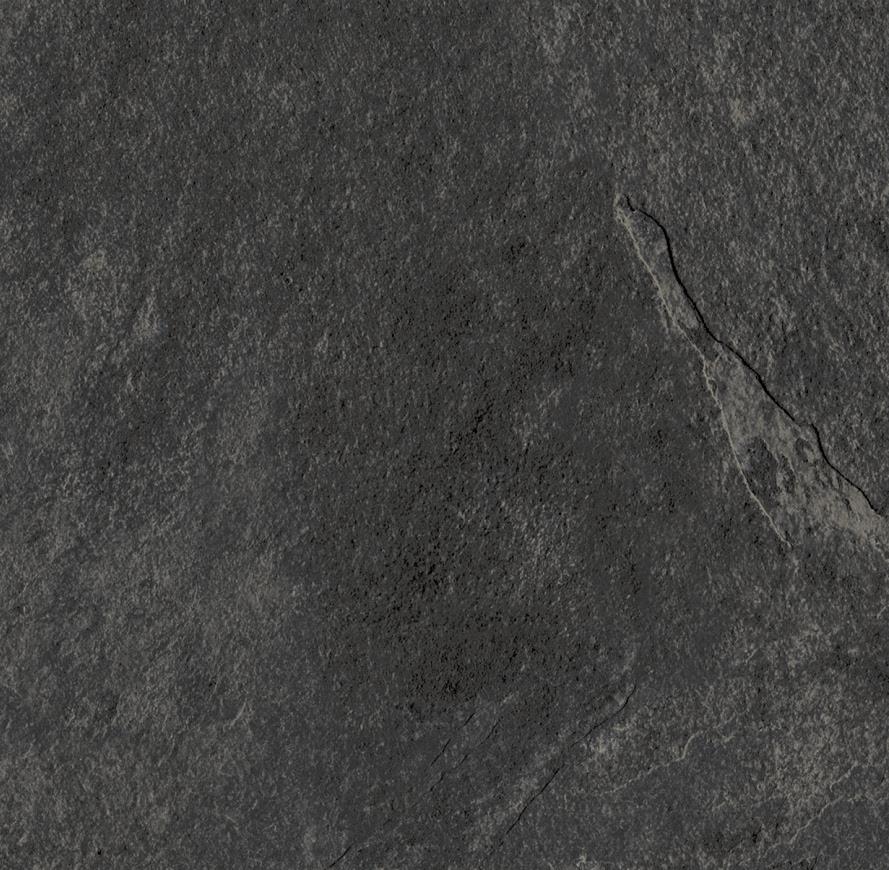
 PIZARRA ANTRACITA SLATE 70928
STARSTONE GRAFFIAS GREY 46939
PIZARRA NEGRA SLATE 70948
STARSTONE AVIOR ANTHRACITE 46959
STARSTONE ORION BLACK 46985
STARSTONE NEMBUS BROWN 46860
PIZARRA ANTRACITA SLATE 70928
STARSTONE GRAFFIAS GREY 46939
PIZARRA NEGRA SLATE 70948
STARSTONE AVIOR ANTHRACITE 46959
STARSTONE ORION BLACK 46985
STARSTONE NEMBUS BROWN 46860
17
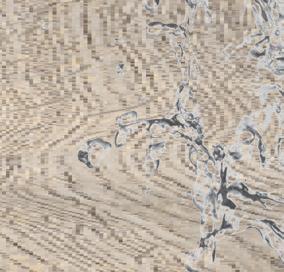
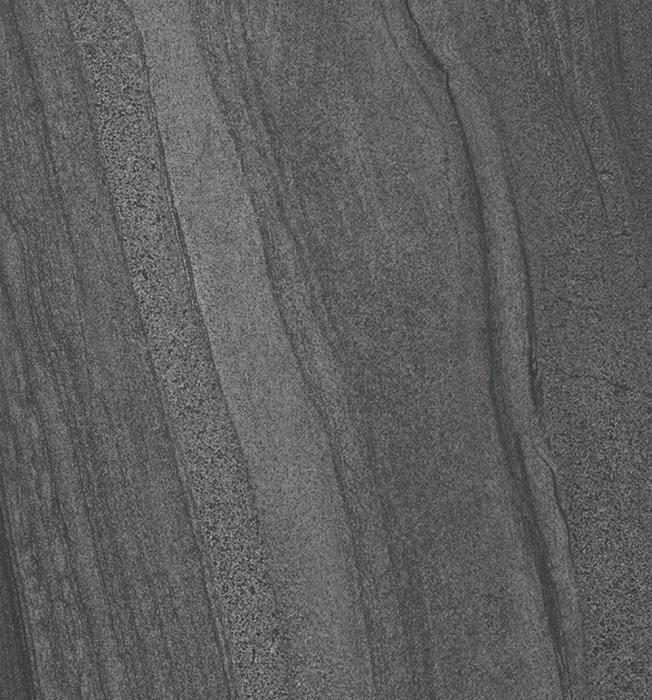
STARSTONE SIRIUS GREY 46280 BRECCA GREY ROCK 46961 WILLOW WOOD 46882
THE ENGINEERED STONE RANGE
Choose Engineered Stone...
Lifetime Warranty
By following our care and maintenance guide, Engineered Stone has a LIFETIME warranty. It really is made to last.
Registered Embossed
Our embossed in regsiter technology provides a realistic texture in both look and feel. Perfect for bringing nature into your home.
Factory-Fitted Integrated Underlay
Klick Engineered Stone comes with a factory-fitted integrated underlay feature. Enabling better sound dampening and easier installation.
Rigid Composition
Engineered Stone has a composition of 80% limestone and 20% acrylic, offering a much more rigid alternative. This also provides enhanced heat and sound resiliance and enhanced uneven sub-floor performance.
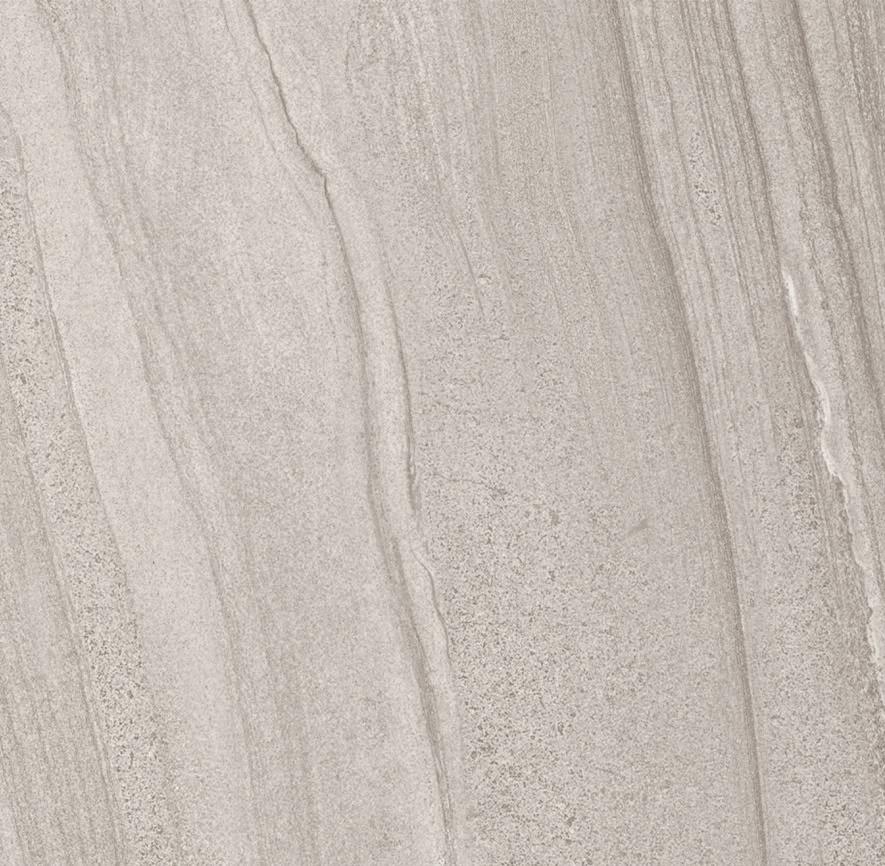
SESSILE GREY OAK 03935
ENGINEERED STONE WOODS WITH INTEGRATED UNDERLAY
SPANISH WHITE OAK 03121

SESSILE GREY OAK 03935


SHINGLE OAK 04870
SHUMARD GREY OAK 04977
OVERCUP OAK 03952
BLACKJACK OAK 04880
2.61 PER BOX 1219 x 178mm LIFETIME WARRANTY
ENGINEERED STONE WOODS STRONG CORE. BEAUTIFUL DESIGN.
OUR ENGINEERED STONE RANGE FEATURES A COMPOSITION OF 80% LIMESTONE AND 20% ACRYLIC, PROVIDING A MORE RIGID ALTERNATIVE. THE RIGID TECHNOLOGY PROVIDES ENHANCED HEAT RESISTANCE AND IMPROVED UNEVEN FLOOR PERFORMANCE. IT ALSO COMES WITH FACTORYFITTED INTEGRATED UNDERLAY, ALLOWIG FOR MUCH EASIER INSTALLATION.
SHUMARD OAK 04977
SESSILE GREY OAK 03935
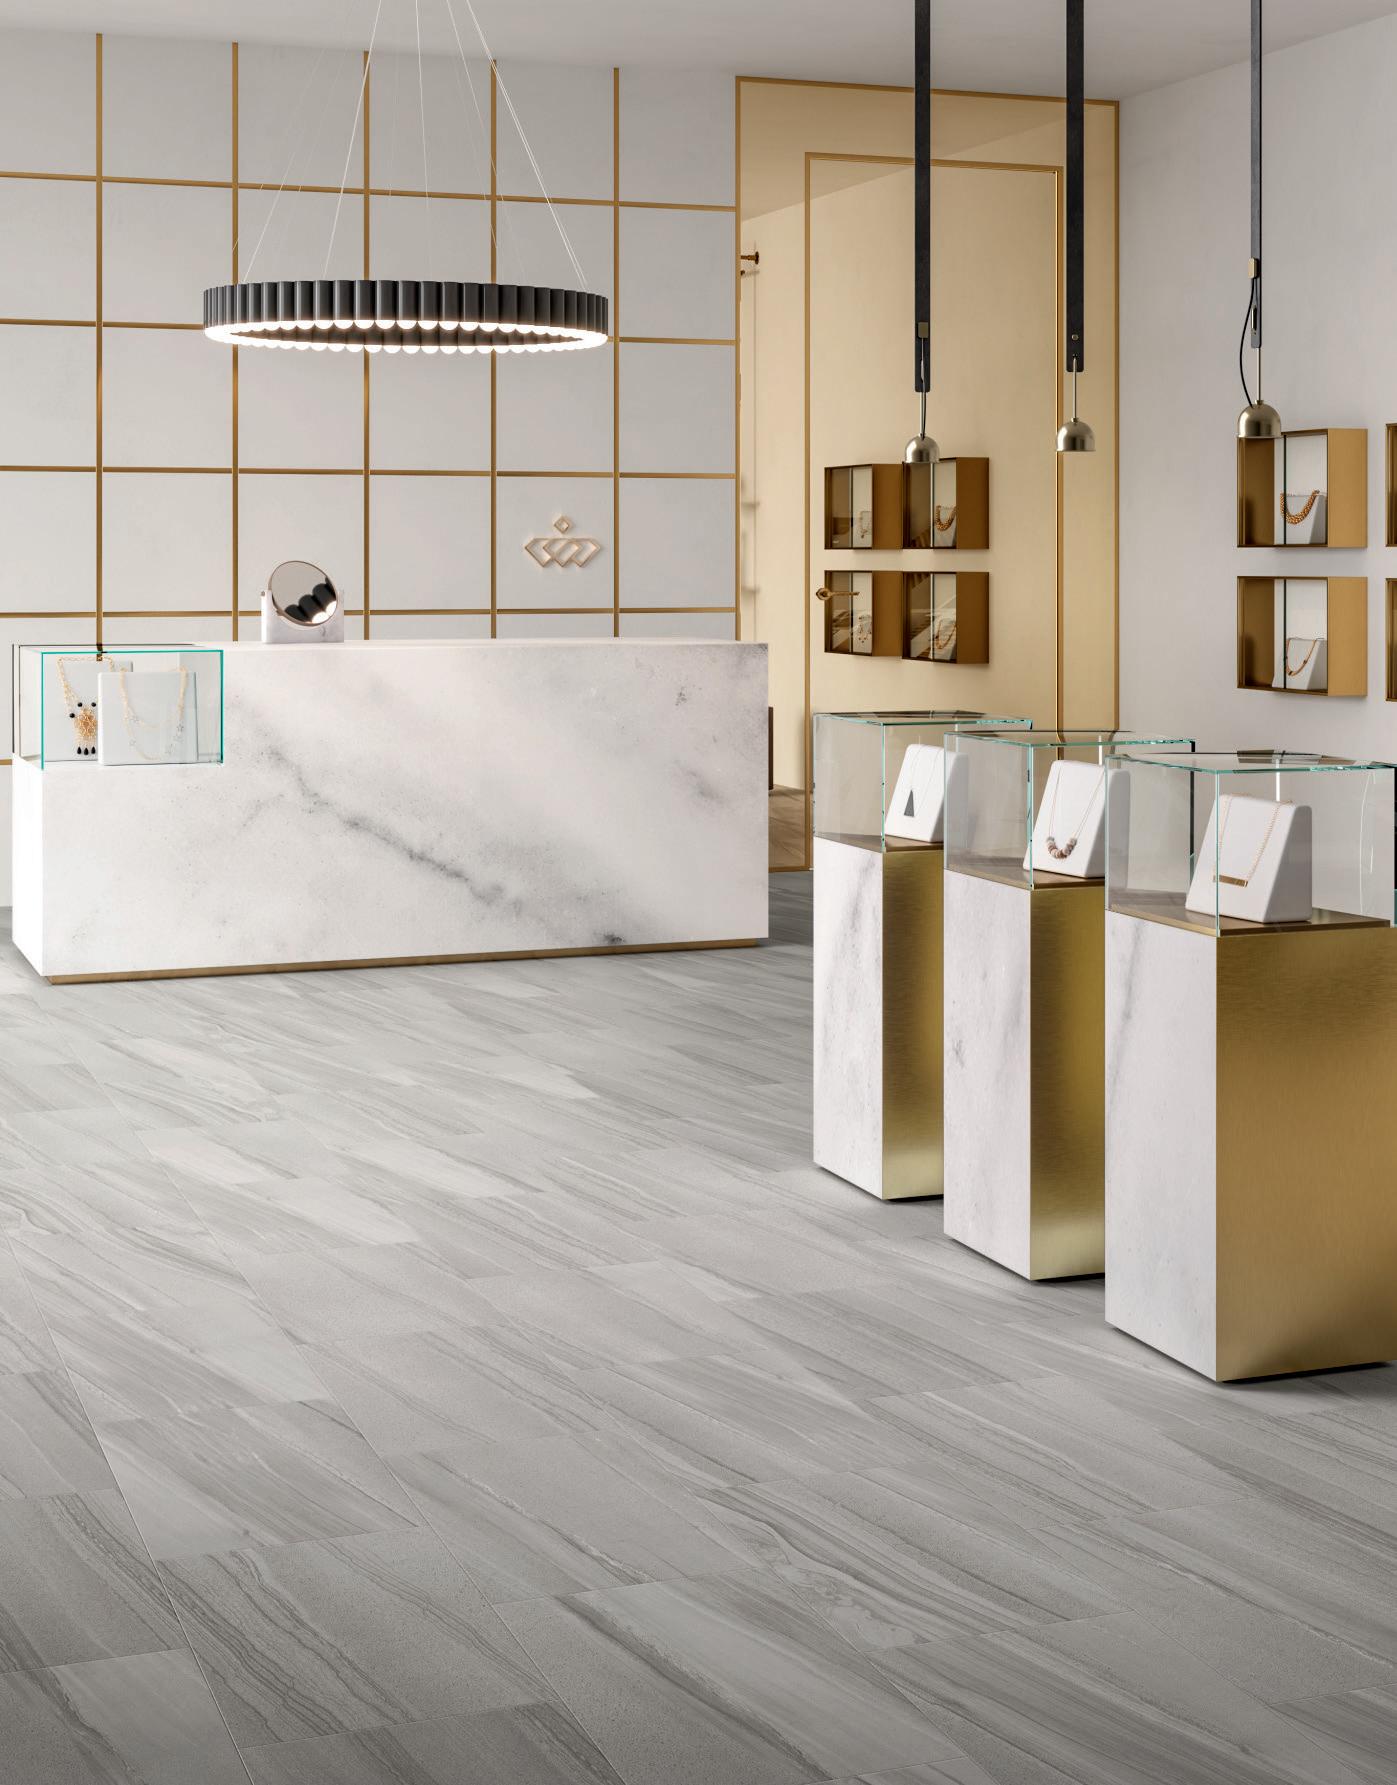
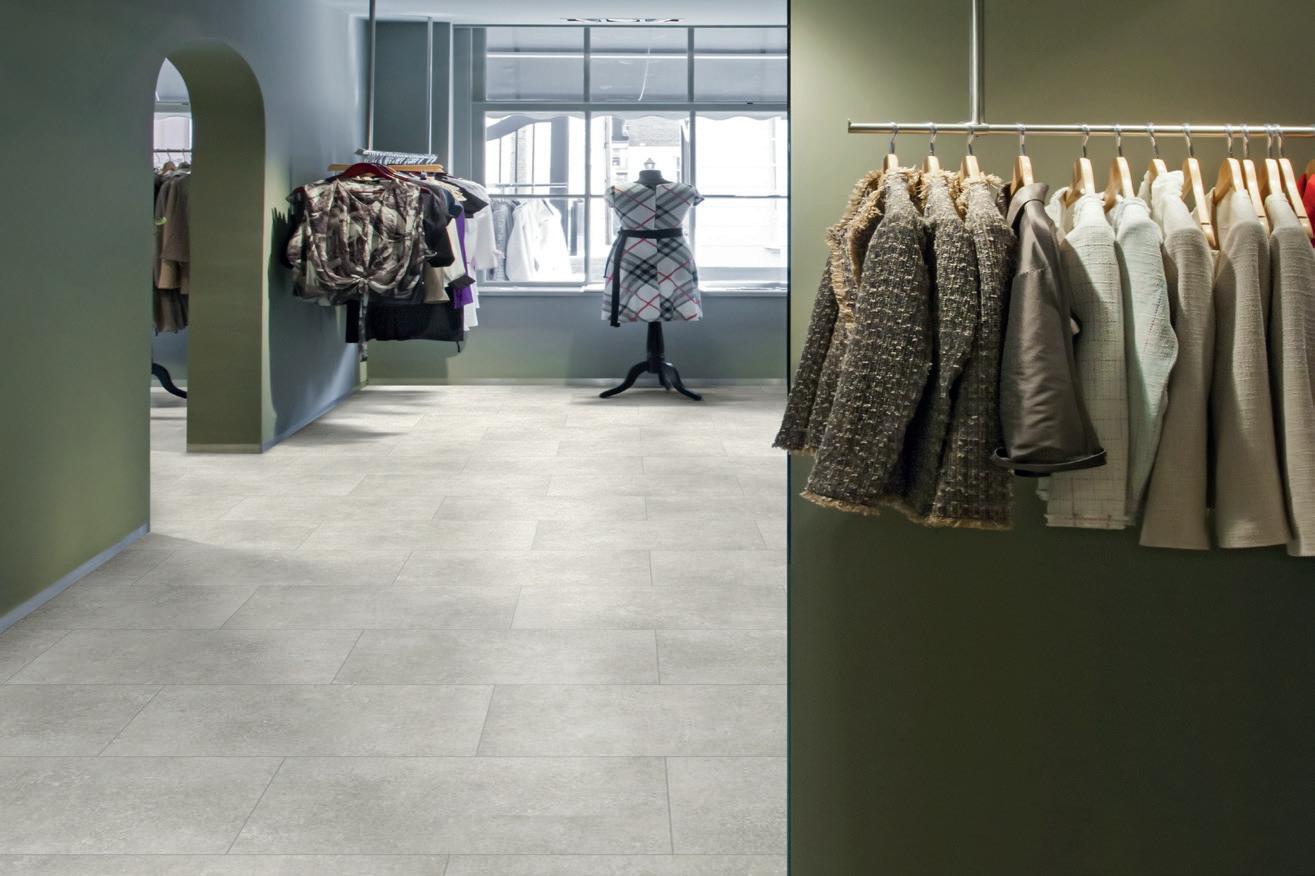
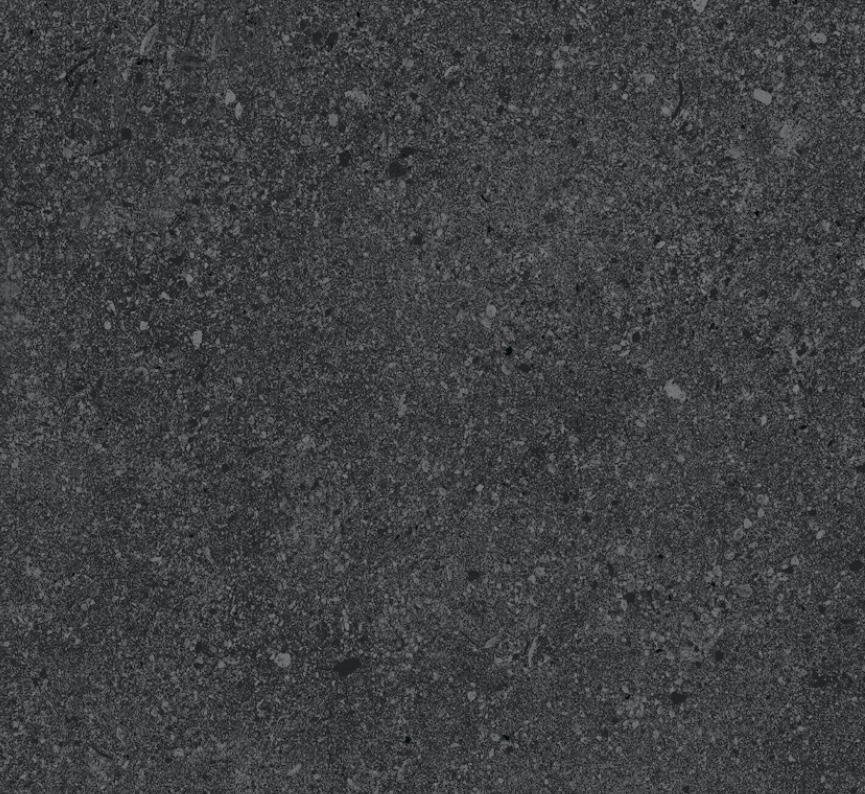
ENGINEERED STONE TILES CONTEMPORARY. LUXURY.
IMAGINE THE LOOK OF NATURAL STONE AND THINK OF TILES WITH BEAUTIFUL ORGANIC PATTERNS AND SOFT SHADES; FOR A MINIMALISTIC APPROACH TO YOUR INTERIOR.
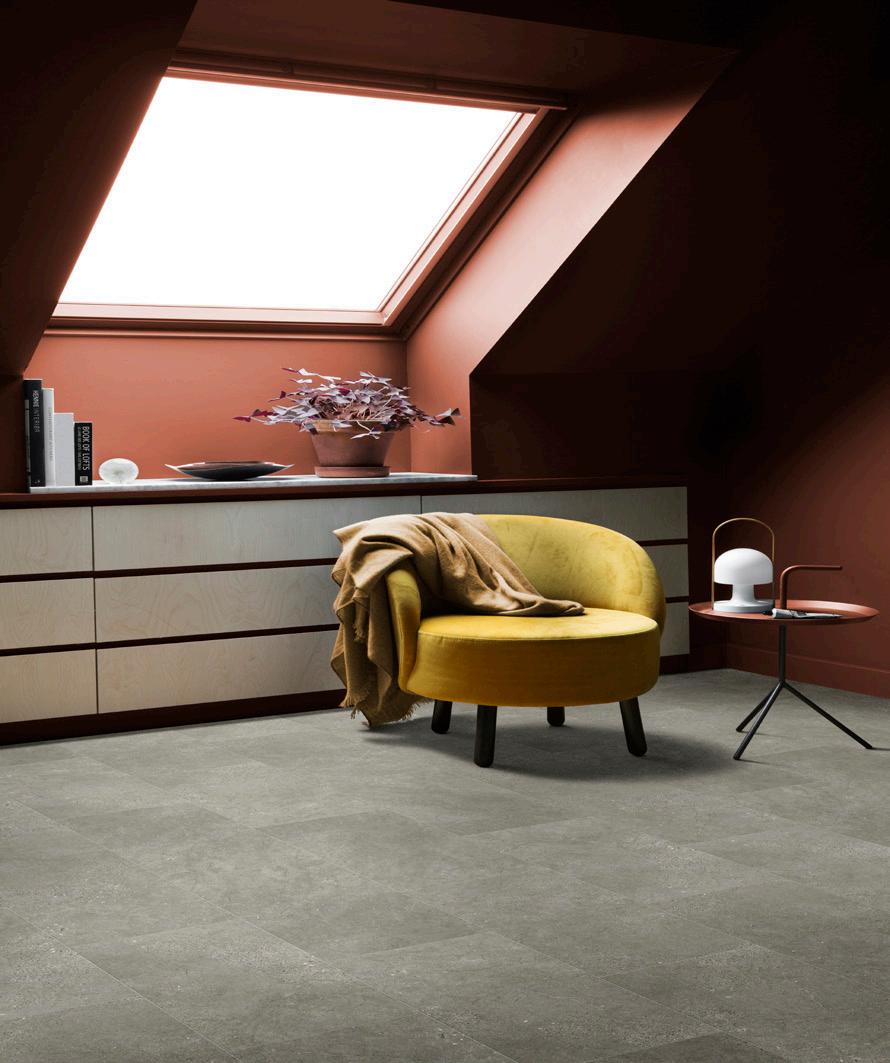
OPT FOR LIGHT STONE IF YOU PREFER A CLEAN, YET STRONG AESTHETIC. OR MAKE A ROOM APPEAR MORE LIVELYAND INTERESTING WITH A DARKER STONE.
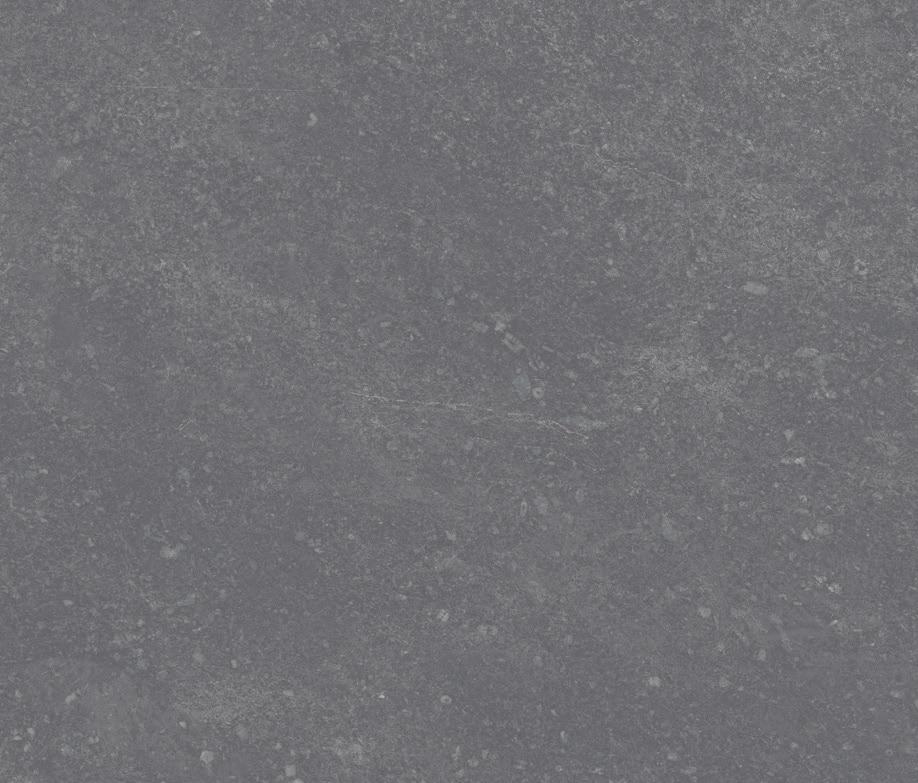
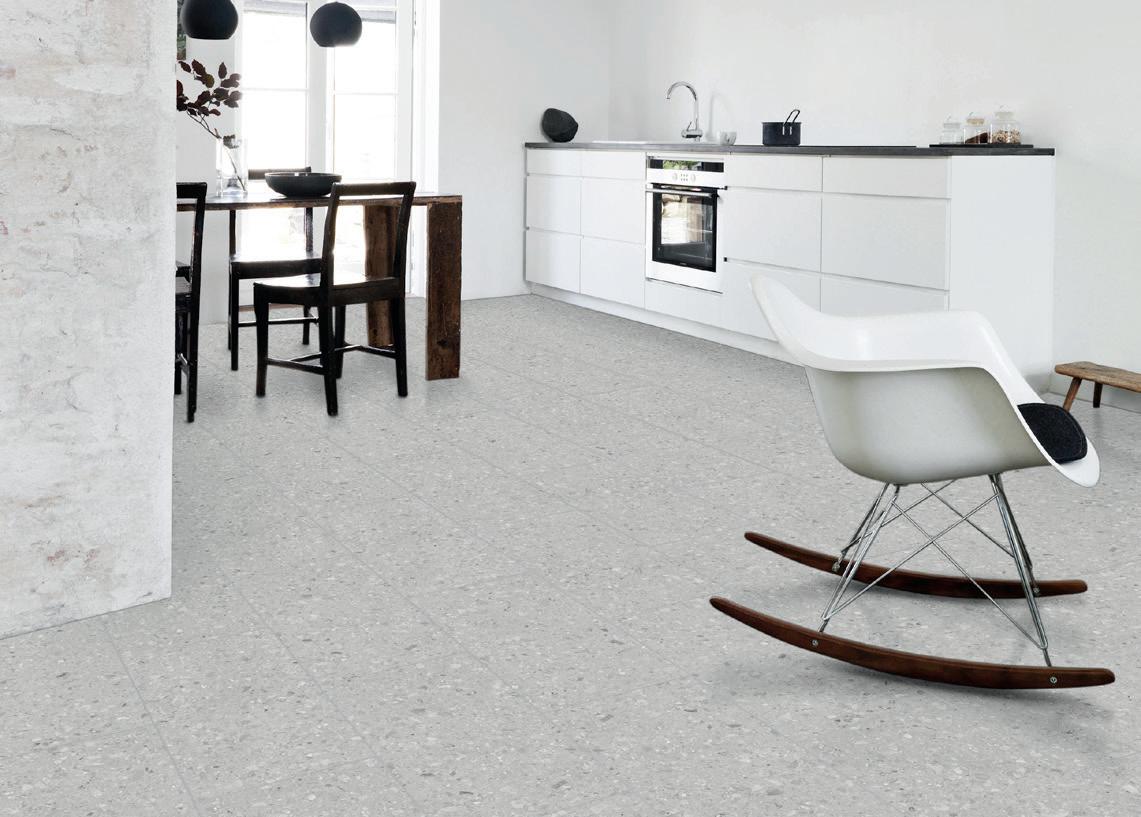
 CERAMICA GRIGIO 11966
MELEKE LIMESTONE 11976
CERAMICA GRIGIO 11966
MELEKE LIMESTONE 11976

CERAMICA GRIGIO SCURO 11986 CERAMICA GRIGIO 11966 KOTA LIMESTONE 11232 TAMALA LIMESTONE 11931 MELEKE LIMESTONE 11976 ENGINEERED
TILES WITH INTEGRATED UNDERLAY 2.58 PER BOX 303 x 607 mm LIFETIME WARRANTY CERAMICA GRIGIO CHIARO 11936 23
STONE
THE ENHANCED ENGINEERED VINYL RANGE
Choose Enhanced Engineered Vinyl...
Lifetime Warranty
By following our care and maintenance guide, Enhanced Engineered Vinyl has a LIFETIME warranty. It really is made to last.
Registered Embossed
Our embossed in regsiter technology provides a realistic texture in both look and feel. Perfect for bringing nature into your home.
Factory-Fitted Integrated Underlay
Klick Enhanced Engineered Vinyl comes with a factory-fitted integrated underlay feature; enabling better sound dampening and easier installation.
Enhanced Performance
Klick Enhanced Engineered Vinyl is a smart solution, offering enhanced scratch & stain resistnace and more enhanced underfoot acoustics. It is also the perfect solution for kitchens and bathrooms due to its water repeling features.
NEW PEWTER MATT CONCRETE 46970
ENHANCED ENGINEERED VINYL WOODS WITH


INTEGRATED UNDERLAY
SNOW PINE 24115
SERATTA OAK 22292
CERRIS OAK 22147
NEW GREY ALEPPO OAK 22938


BARLEY PINE 24242
KERMES OAK 24235
PEACAN BURR OAK 24279
CARAMEL BURR OAK 24847
ENGINEERED VINYL WOODS AN OASIS OF CALM.
OUR NATURAL WOOD DESIGNS ADD AUTHENTIC CHARACTER TO EVERY ROOM. SWIRLING DESIGNS LEAVE A LASTING IMPRESSION - THEY HAVE A GREAT STORY TO TELL AND A BRIGHT FUTURE IN YOUR INTERIOR. ABLE TO STAND THE TEST OF TIME, ENJOY THE QUALITY OF KLICKGFLOOR IN YOUR HOME FOR YEARS TO COME.
NEW TAUPE SUBER OAK 24962
COFFEE BURR OAK 24892
2.49m2 PER BOX 1318 X 189MM LIFETIME WARRANTY
PECAN BURR OAK
27279
BARLEY PINE 24242
27
ENGINEERED VINYL TILES

UNIQUE YET NATURAL.
AUTHENTIC YET NATURAL VINYL TILES. OUR ENGINEERED FLOORS ARE A SMART AND DURABLE SOLUTION FOR EVERY SPACE IN YOUR HOME FOR EVERY DAY USE. WHY TAKE THE RISK OF A BROKEN TILE WHEN YOU CAN INSTALL OUR LUXURY KLICK VINYL FLOORING WITH THE SAME STONE LOOK? OUR DESIGNS ARE TRULY UNIQUE AND BEYOND THE ORDINARY.
FROSTED WHITE QUARRYSTONE 46126 PEARL GREY QUARRYSTONE 46952 2.22 PER BOX 303 x 610 mm LIFETIME WARRANTY
ENHANCED ENGINEERED
VINYL TILES WITH INTEGRATED UNDERLAY

 FROSTED WHITE QUARRYSTONE 46126
DOVE CELESTIAL 46966
JASMINE GREY QUARRYSTONE 46228
NEW ASH MATT CONCRETE 46920
NEW PEWTER MATT CONCRETE 46970
PEARL GREY QUARRYSTONE 46952
FROSTED WHITE QUARRYSTONE 46126
DOVE CELESTIAL 46966
JASMINE GREY QUARRYSTONE 46228
NEW ASH MATT CONCRETE 46920
NEW PEWTER MATT CONCRETE 46970
PEARL GREY QUARRYSTONE 46952
29
CARBON CELESTIAL 46988
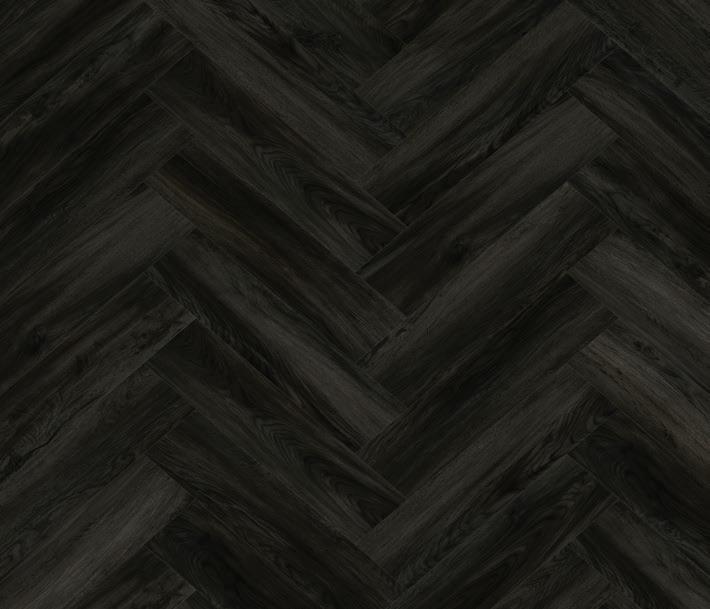
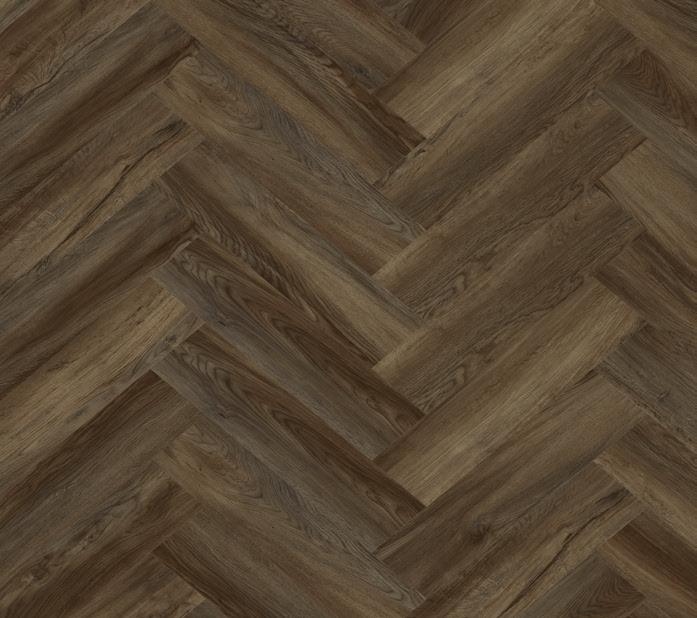
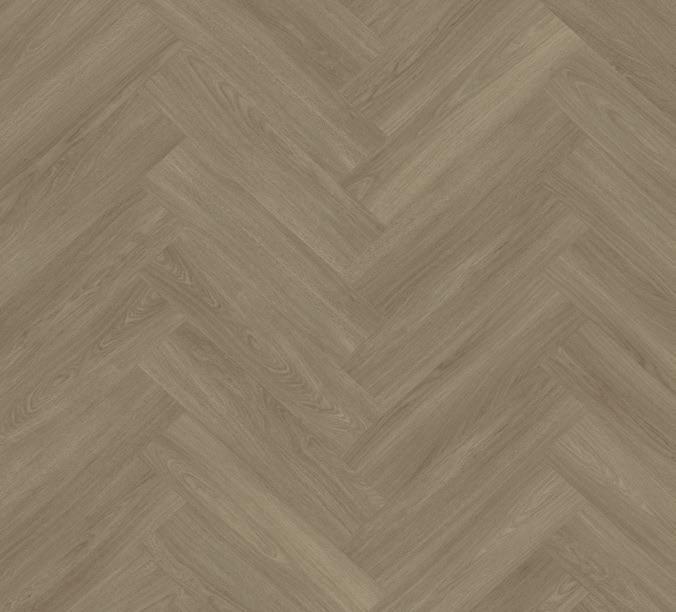
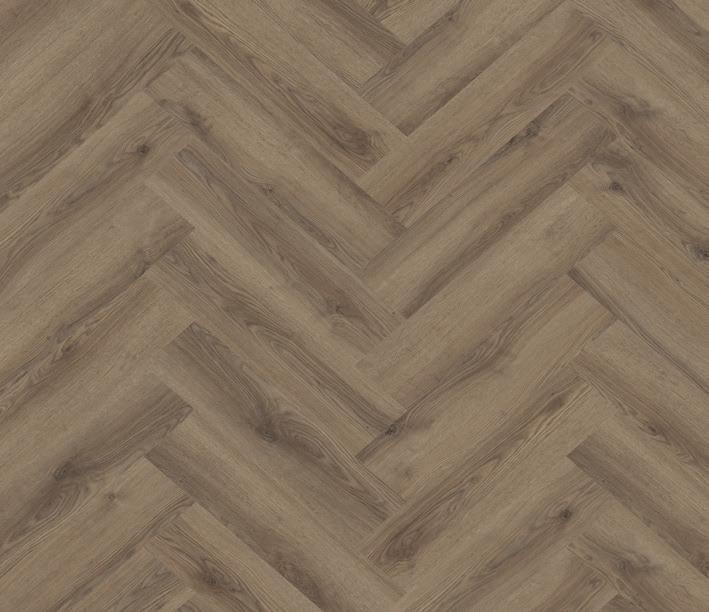
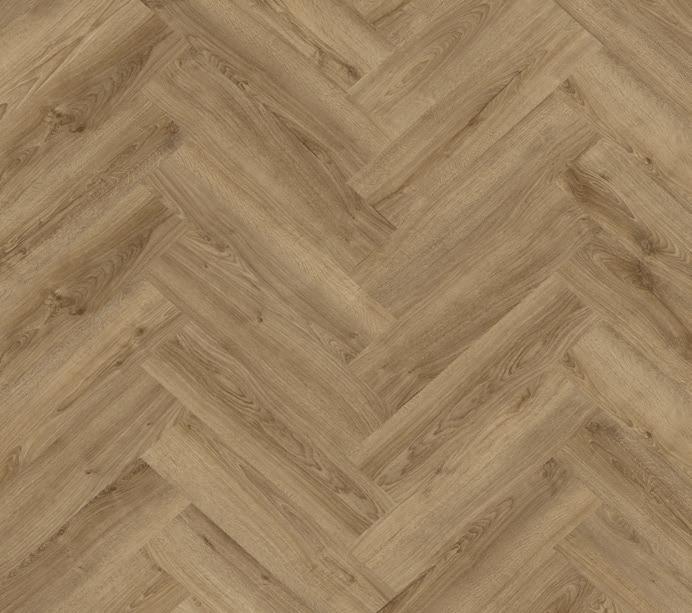
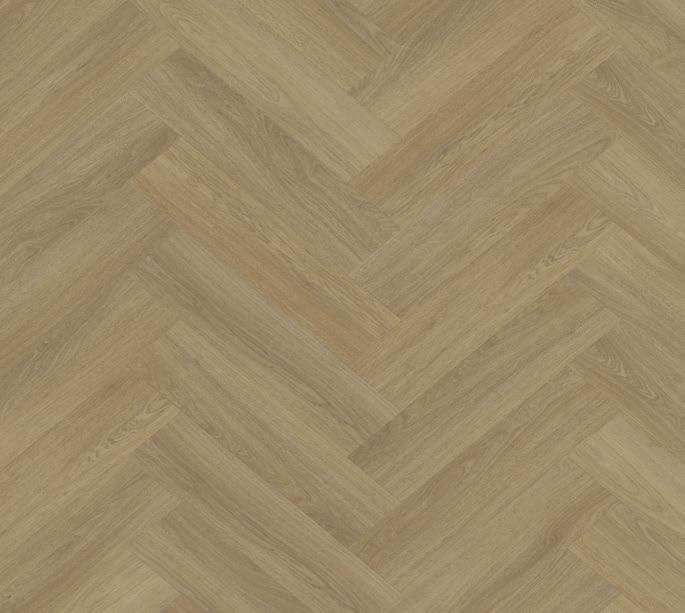
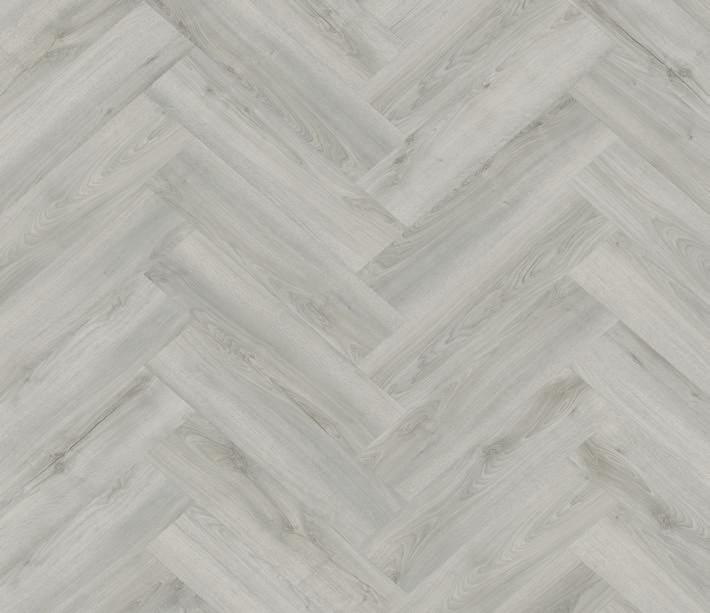
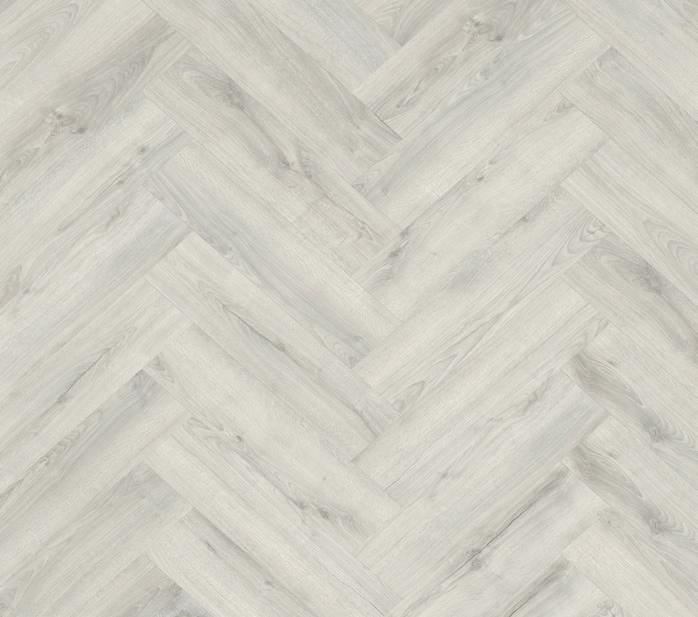
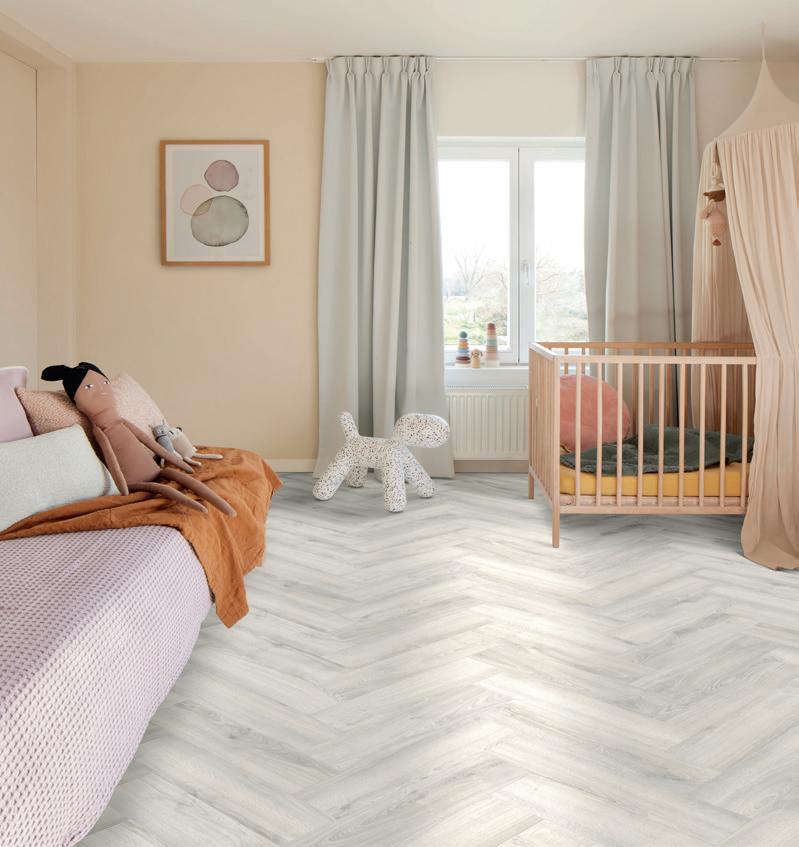
THE ENHANCED ENGINEERED VINYL HERRINGBONE RANGE
Choose Enhanced Engineered Vinyl Herringbone...
Lifetime Warranty
By following our care and maintenance guide, Herringbone has a LIFETIME warranty. It really is made to last.
Registered Embossed
Our embossed in regsiter technology provides a realistic texture in both look and feel. Perfect for bringing nature into your home.
Factory-Fitted Integrated Underlay
Klick Herringbone comes with a factory-fitted integrated underlay feature. Enabling better sound dampening and easier installation.
Universal Lock System
With the Universal Lock System, Klick Herringbone flooring is shaped with just one plank that clicks together both ways. It’s faster and easier.
SHUMARD OAK 82871
ENHANCED ENGINEERED VINYL


HERRINGBONE WITH


QUERCUS PALE OAK 83113 QUERCUS GREY OAK 83233 QUERCUS LIGHT OAK 85246 QUERCUS HONEY OAK 83853 CHERRY OAK 84864 VIRENTES OAK 85296 SHUMARD OAK 82871 SHUMARD DARK OAK 82991
INTEGRATED UNDERLAY 0.8 M2PER 630 x 126mm LIFETIME WARRANTY ONE-TILE UNIVERSAL LOCK SYSTEM
MADE TO LAST.
✓ LIFETIME WARRANTY ✓ ONE-TILE UNIVERSAL LOCK SYSTEM ✓ REGISTERED EMBOSSED TECHNOLOGY ✓ FACTORY-FITTED INTEGRATED UNDERLAY
CLASSIC HERRINGBONE BEAUTIFULLY AUTHENTIC, WONDERFULLY PRACTICAL.
WITH THEIR AUTHENTIC LOOKS AND REALISTIC TEXTURES, KLICK HERRINGBONE FLOORS ARE NATURALLY BEAUTIFUL AND FEEL SO COMFORTABLE UNDERFOOT. BUT AT THE SAME TIME, BEING SCRATCH, STAIN & WATER RESISTANT AS WELL AS EASY TO MAINTAIN - MAKING THEM HUGELY PRACTICAL.
CHERRY OAK 84864
QUERCUS PALE OAK 83113
KLICKFLOOR ACCESSORIES
XTRAFLOOR UNDERLAYS BEDROOMS
SILENT UNDERLAY KKXSUNDERLAY 12.5M2, 1.1MM THICK
POWER BASE UNDERLAY KKXUNDERLAY 10M2, 1.5MM THICK
Our range of cleaning products have been specifically formulated for use with luxury vinyl floors and most vinyl, rubber and linoleum floors.
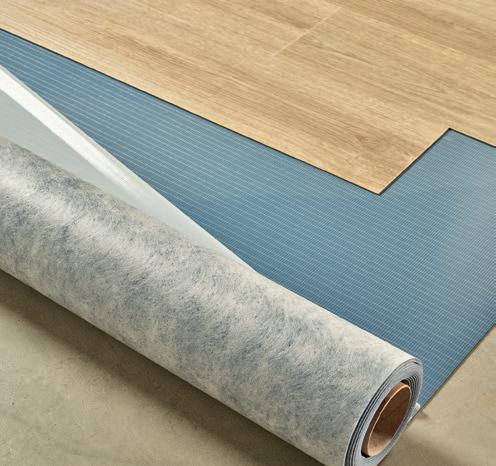
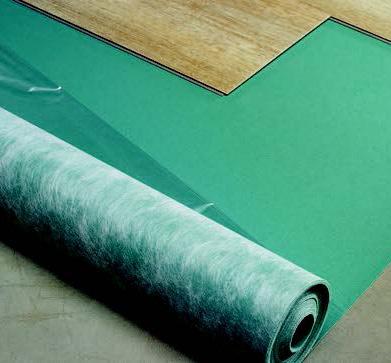
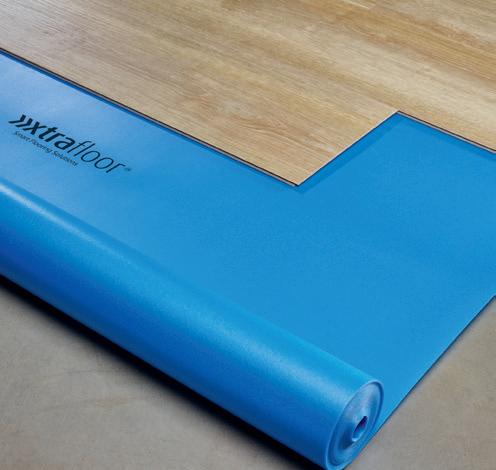
Klickfloor Underlay is designed to be the perfect partner with Klickfloor. Our underlay provides a fantastic foundation to your floor and is particularly suited for the floating installation under Klickfloor.
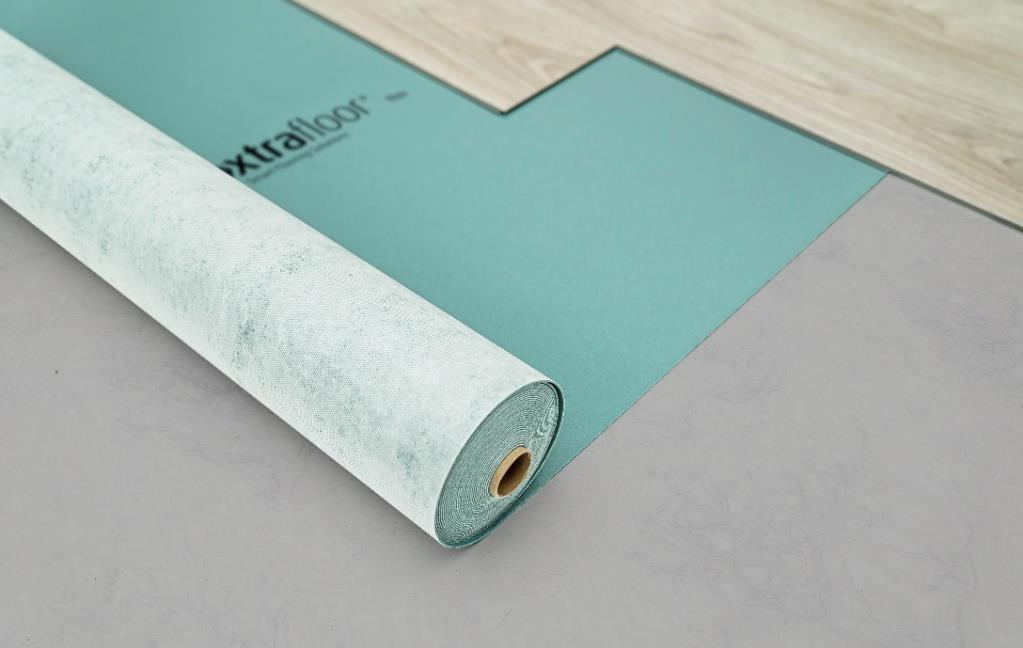
Underlays and maintenance products from Klickfloor help you to enhance and protect luxury vinyl floors, keeping them at their best for years to come.
FLEX PRO UNDERLAY KKXPUNDERLAY 6.5M2, 1.8MM THICK
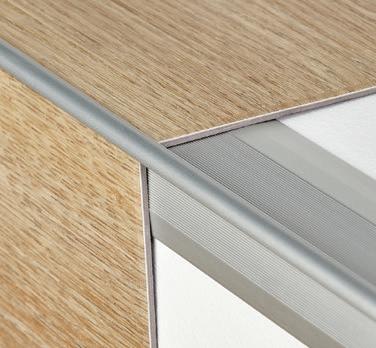
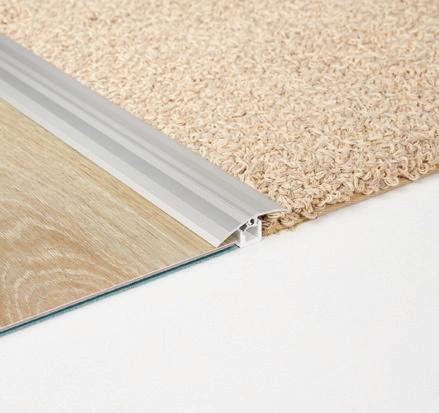
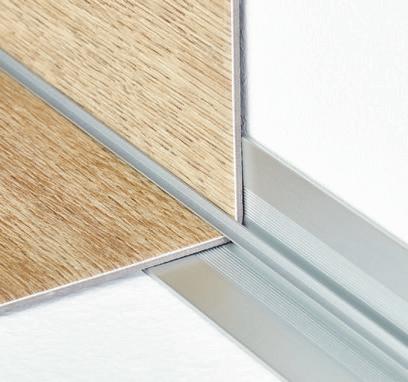
MULTI-PURPOSE PROFILE KKXMULTIPROFILE 1860X45X12MM
STAIR EXTERNAL PROFILE KKXSTAIREXT 2400X42X28MM
STAIR INTERNAL PROFILE KKXSTAIRINT 2400X27X27MM
XTRAFLOOR TOOLS
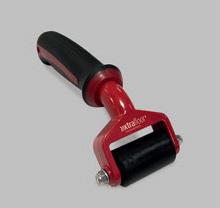
HAND ROLLER KKXHANDROLLER
KITCHENS BATHROOMS
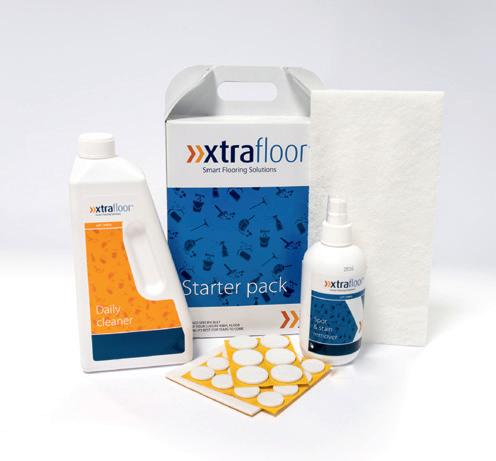
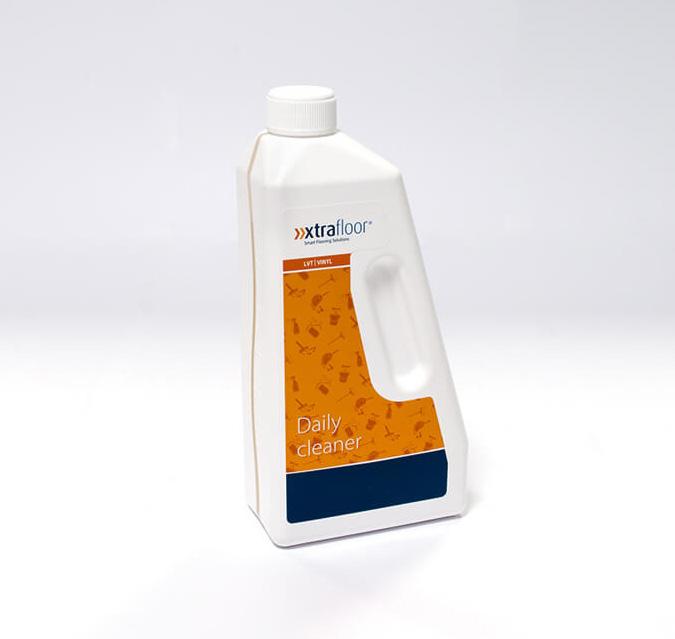
CUSTOMER CARE KIT KKXCAREKIT XTRAFLOOR MAINTENANCE PRODUCTS DAILY CLEANER 0.75L KKXCLEANERDR DOVE CELESTIAL 46966 35
KLICKFLOOR PRIOR TO INSTALLATION GUIDE
STORAGE & TRANSPORTATION
Cartons should be stored and transported on a flat surface in neat stacks, always store the cartons flat and never put them on-end. Do not store the cartons in very cold (less than 2C°) or very warm (more than 40°C) or humid places.
VISUAL INSPECTION
Please inspect product prior to installation. Check that the colours correspond to those ordered, the quantities are correct and there is no visible damage to the boxes. Check the vinyl planks or tiles during installation for any visible defects. Do not install any planks or tiles that display any imperfections.
We recommend that you always use materials from a single production batch for each installation, as we cannot guarantee a shade match between different batches.
SUITABILITY
• Kompact KlickFloor design floors can be laid on concrete, cementitious screed, anhydrite (calcium sulphate), timber, plywood, particleboard and ceramic tiles, which have been suitably prepared (see Floor Preparation).
• Kompact KlickFloor design floors can be used with traditional waterbased underfloor heating and cooling systems. Electric wire systems are not recommended unless the system is encased in a minimum of 9mm of suitable levelling compound. Direct contact with wired heating systems must be avoided. If in doubt seek further advice.
• Kompact KlickFloor design floors is only suitable for indoor installation.
• Seasonal temperature conditions: Kompact KlickFloor design floors can be used in any indoor situation, such as temperature controlled conservatories and holiday homes.
Keep under all conditions the temperature between 6C° and 35C°. Avoid rapid temperature increases of more than 5C° per 12 hours.
• For commercial applications where roller castor chairs or heavy rolling loads are to be used we strongly recommend the use of Kompact KlickFloor HD+. However, if you do want to use Kompact KlickFloor, please contact the Kompact Technical Support Team.
QUALITY OF THE SUBFLOOR
Knowledge of the composition and construction provides valuable information that allows you to correctly check the acceptable humidity, compressive and tensile strength of the subfloor. In addition it tells you what type of floor preparation, levelling compound, and possible moister barrier you may need during the installation process. When there is ambiguity or doubt about the quality or composition of your subfloor check with your floor preparation, levelling compound manufacturer/ supplier.
SUBFLOOR PREPARATION
IRREGULARITIES IN THE SUBFLOOR
Good preparation is essential for trouble-free installation. It is vital for an excellent Kompact KlickFloor design floors finish. The appearance of Kompact KlickFloor design floors will only be as good as the quality of the base over which it is installed. Any irregularities in the subfloor will show through the finished floor and must be suitably prepared before installation.
The subfloor must be hard, smooth, clean and dry, as well as being free from defects and fit for purpose. When required, scrape off and remove old adhesives and loose laying levelling compound. Make sure the subfloor is flat and free from chemical substances and other contamination.
Unevenness of the subfloor may not be greater than 2mm measured over a width of 200cm.
A suitable plywood/levelling compound should be selected to ensure that no irregularities show through to the surface of the finished floor. However, the selection of suitable materials, including plywood, smoothing/ levelling compounds and any ancillary products, is dependent upon the occupational use of the area and must be agreed by the supplier of the preparative materials and the flooring contractor. All floor preparation materials used must be used in accordance with the manufacturer’s recommendations and in accordance with the national standards for resilient floor coverings.
ACCLIMATISATION
Kompact KlickFloor design floors must acclimatise in the room of installation, or an equivalent area for at least 24 hours prior to installation, or until such time as the product has achieved an ambient temperature. Again, this is a minimum temperature of 18°C and a maximum of 27°C.
• Unpack the Kompact KlickFloor design floors and check all planks or tiles in daylight for possible defects or discrepancies in colour.
• Stack the plank or tiles in straight piles away from heating, cooling or windows with direct intense sunlight. This is to achieve a gradual acclimatisation.
TEMPERATURE CONDITION BEFORE INSTALLATION
Kompact KlickFloor design floors should be installed with a room temperature of between 18°C and 27°C and a floor temperature of above 15°C.
Installations in areas colder than recommended will influence the installation properties of Kompact KlickFloor design floors. The planks or tiles will be less flexible, cutting will be harder and small pieces difficult to cut out. The lower the temperature, the more difficult the installation. For installation in areas warmer than recommended, we advise consultation with your local retailer/ installer on how to create the appropriate installation conditions.
TEMPERATURE CONDITION DURING INSTALLATION
A constant temperature, fluctuating no more than 5°C per day, not below the required 18°C room temperature and 15°C subfloor temperature, should be maintained 24 hours before, during and 72 hours after installation.
37
KLICKFLOOR PRIOR TO INSTALLATION
UNDERFLOOR HEATING
Kompact KlickFloor design floors can be used with traditional water based underfloor heating systems, provided there is a constant room temperature of 18°C for the acclimatisation period, installation and for 72 hours after installation. 24 hours after installation the underfloor heating must be gradually increased by increments of 5°C per day until it reaches the standard operating temperature conditions, with a maximum operating temperature of 27°C. For the suitability of the system please check the manufacturer’s instructions. We do not recommend the use of any electric mat heating systems with KlickFloor.
UNDERFLOOR COOLING
Kompact KlickFloor design floors can also be installed over floor cooling systems. However, the supply temperature of the cooling water must not be reduced below the dew point temperature. Temperatures below this point will produce condensation and can therefore damage the floor covering. Thermostats in the room must never be set at a temperature which is more than 5°C lower than the room temperature.
RECOMMENDED UNDERLAY
Installing the correct underlay is paramount. Whether you require excellent sound control, a solution in a heavy duty environment or a base for general purposes, Xtrafloor™ has an underlay suitable for your requirements.
1. Xtrafloor™ Base: Residential Use

• Improved sound insulation (ΔLw=13 dB with 4.5 mm Kompact KlickFloor)
• Protective foil and lightly tackified film for easy installation.
• Suitable for underfloor heating and cooling
• Provides excellent dimensional stability
• Not suitable for roller castor chairs or heavy duty use
2. Xtrafloor™ Flex Pro: Heavy Duty Use
• Improved sound insulation (ΔLw=13 dB with 4.5 mm Kompact KlickFloor)
• Protective foil and pressure sensitive adhesive film for easy installation.
• Suitable for underfloor heating and cooling
• Provides excellent dimensional stability
• Suitable for roller castor chairs & rolling loads up to 250kg
3. Xtrafloor™ Silent : Superior Sound Insulation for Residential Use
• Improved sound insulation (ΔLw=21 dB and ΔLlin=10 dB with 4.5 mm Kompact KlickFloor)
• Anti-slip coating for quick and easy installation
• Suited for underfloor heating and cooling
• Not suitable for roller castor chairs or heavy duty use and areas with exposure to direct sunlight e.g. conservatories or excessive fluctuations in temperature.
INSTALLATION OF UNDERLAY
Lay the sheets butted, edge-toedge, at a 90 angle to the laying direction of the new floorcovering. Xtrafloor™ Base and Xtrafloor™ Flex-Pro is to be laid PET Film side up and Xtrafloor™ Silent is to be laid anti-slip side up. There is no need to fix one sheet to another. A section at a time, separate the PET-film from the underlay sheet (not applicable for Xtrafloor™ Silent) and begin laying your new floor according to the fitting instructions. Do not use primer or other adhesive.
REQUIRED EXPANSION GAP
• KlickFloor is a “floating” floor. The panels should not be glued or fixed to the subfloor below.

• For areas larger than 50 m2, a 5mm expansion joint must be incorporated at the perimeter of the room/area.

• For areas larger than 200 m2, it is recommended to create an expansion joint of 10mm around the perimeter of the room/area.

• In addition, should a single wall or run be longer than 20 linear meters, then a 5mm expansion gap should be allowed within the floor surface.
• It is recommended that an expansion gap is left between doorways, especially where there are temperature differences between different areas.
39
KLICKFLOOR INSTALLATION GUIDELINES

STEP BY STEP INSTALLATION
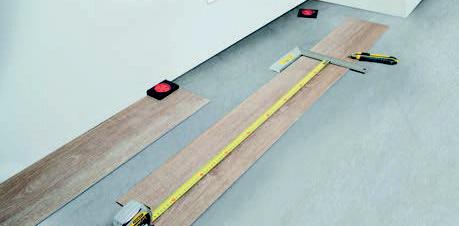
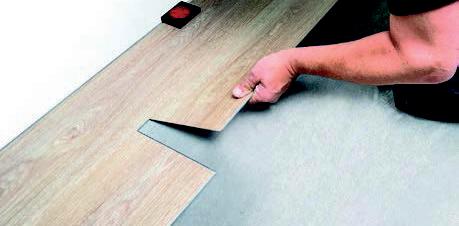
1. The Kompact KlickFloor system panels can be joined in two different ways, either tongue-in-groove or grooveunder-tongue. The simplest procedure, however, is groove-under-tongue, working from left to right. The advantage of the Kompact KlickFloor system is that it allows you to choose your own starting position. You can start in the middle of the room/area and work to both sides, or start at the wall and work your way in. Determine the installation direction of the Kompact KlickFloor design floor. Measure the room carefully to determine whether the first row of panels needs to be narrowed. If not, the lower groove lip of the first row of panels needs to be removed. Use a utility knife to neatly cut off the lower groove lip.
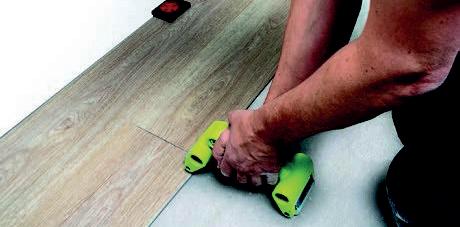
2. Begin by laying the first row in the corner of the room on your left hand side as you are looking at the wall. Always work from left to right and with the tongue towards yourself.
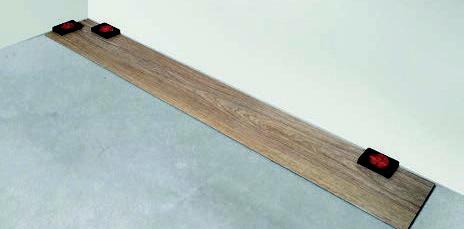
3. Lay the first row in a straight line and click the head ends together. Put the short side of the profile into the head end of the previous panel and press the panel downwards. It is recommended to use a hand roller for connecting the head ends so that the joint fits securely. We advise to use the Xtrafloor™ roller. Use the spacers to fill out the contour of the wall so that the panels do not move and are 100% installed.
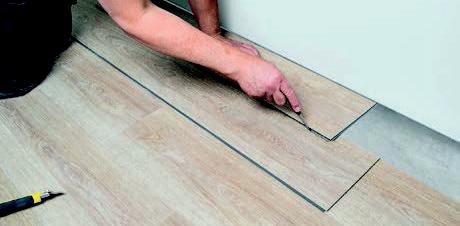
4. For the last piece, measure the last plank so that the required expansion gap is maintained. Do not lay the panel completely tight to the wall. Cut away the marked piece and fit the end panel in the same way as the previous panels. When cutting the panel with a utility knife, make sure that you cut through the wear layer before breaking the panel. For an attractive and natural appearance, we advise to use the piece left over from row 1 as the first piece in the following rows.
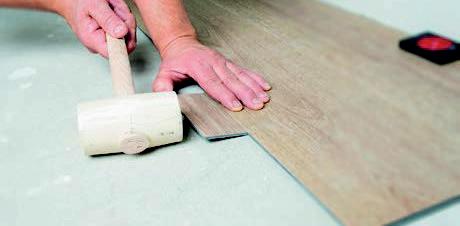
5. For the second/next row, take a new panel and decide how big the first piece must be (or use one of the left overs from previous rows). Make sure that the front seam is at least 20-30 cm different from the previous rows.
6. Fit the second row as you did for the first: start on the left hand side and slide the groove of the panel under an angle of about 25°over the tongue of the previous row, clicking the groove into the tongue by laying down the panel while pushing it firmly against the first row. Along the long edge, it is advisable to use a recoil or rubber hammer and tapping block, or cut piece of panel profile to tap the panels tightly together and to ensure the click mechanism is firmly locked.
7. Next, fit the second panel by sliding the groove under, at an angle of 25°, into the tongue of the previous row. Position the left corner of the head end against the previous panel and then drop the short side of the profile into the head end of the previous panel, push downward and press into place using a hand roller. Repeat until you reach the end of the row. Do not hammer the end joints into place. Repeat steps 5, 6 & 7 until all rows are complete, and only the last row needs to be placed.
8. To fit the last row of panels you will usually need to narrow them. Do this as follows: lay a panel on top of the previous row with the groove towards the wall, lay another panel upside down up to the edge of the wall and mark the panel underneath. Cut the panel to size and fit the last row.
Door-jambs and heating pipes also need to be individually fitted. First cut the panel to the right length, then place the panel next to the object and draw the correct fitting. Next, cut the panel to size. Door-jambs can also be sawn (undercut) to size if necessary. The Kompact KlickFloor can them be neatly installed underneath.
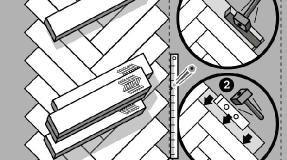
RECOMMENDED TOOLS:
• Tape measure
• Pencil
• Set square
• Utility knife

• Hand roller
• Recoil- or rubber hammer
• Tapping block
• Spacers for setting the rows in an uneven wall

1 2 3 8 7 6 5 4 41
ENHANCED ENGINEERED HERRINGBONE
INSTALLATION GUIDELINES
INS INSTALLATION INFORMATION
Before starting, carefully measure the length and the width of the room to plan a precise layout to achieve a balanced appearance of the floor. This is very important when installing herringbone. This will ensure also you will not end up with the last row being too narrow.
As opposed to many other herringbone click planks, the KlickFloor Engineered Click Acoustic Herringbone planks do not come in “A” and “B” planks, but in a universal plank equipped with the patented Unizip profile. No need to sort the planks out and to make separate piles.
INS UNDERFLOOR HEATING
KlickFloor Enhanced Engineered Herringbone can be used with traditional water-based underfloor heating systems (according to standard EN 1264 part 1 to 5). Wired electrical systems are not recommended unless the system is encased in a minimum of 9mm of suitable levelling compound. Direct contact with electrical wired heating systems must be avoided. The surface temperature must never exceed 27°C. If in doubt seek further advice. Some infrared heating panels may be suitable; however, care should be taken as some of these systems can provide very sudden heat gain which is not recommended. In any circumstance the surface temperature must not exceed 27°C. If in doubt seek further advice.
After installation the underfloor heating must be gradually increased by increments of 5°C per day until it reaches the standard operating temperature conditions, with a maximum subfloor temperature of 27°C. For the suitability of the system please check the manufacturer’s instructions.
UNDERFLOOR COOLING
KlickFloor Enhanced Engineered Herringbone can also be installed over floor cooling systems. However, the supply temperature of the cooling water must not be reduced below the dew point temperature. Always keep the temperature of the subfloor at least 3 degrees above the dewpoint. Temperatures below this point will produce condensation and can therefore create a humid atmosphere behind the floor covering which may encourage mould growth, etc.
REQUIRED EXPANSION GAP
KlickFloor Enhancd Engineered Herringbone is a “floating” floor. The panels should not be glued together or fixed to the subfloor. A 0,75mm expansion gap, per linear meter of KlickFloor Engineered Click Acoustic Herringbone is required in any direction and must be incorporated at the perimeter of the room/area in “standard rooms and conditions”, see
INSTALLATION METHODS
As KlickFloor Enhanced Engineered Herringbone comes with an integrated underlay, it is simple: just install it loose laid on the subfloor! Klick Herringbone is a floating floor and should never be adhered to the subfloor.
For alternative installation methods, not included in this overview, always seek technical advice from KlickFloor.

Klick Herringbone is a floating floor and should never be adhered to the subfloor.
Because KlickFloor Enhanced Engineered Herringbone comes with an integrated underlay already, a separate underlay is not required before installing the Herringbone panels.
RECOMMENDED TOOLS: • Tape measure • Pencil • Set square • Utility knife • Hand roller • Recoil- or rubber hammer • Tapping block • Spacers for setting the rows in an uneven wall
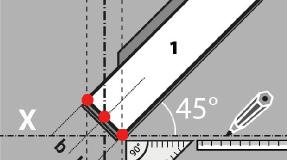
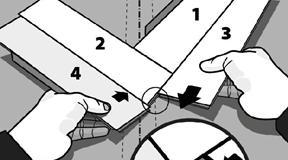
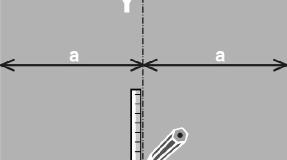
A herringbone design should typically be started from a central axis. Use a chalk line or straight edge to mark the center of your room, creating the ‘y’ line. Place your first plank (1) at an angle of 45°. Draw parallel to the “Y” line, extra “A” and “B” lines to mark the corners. Also draw an extra reference line “X” as shown in the diagram.
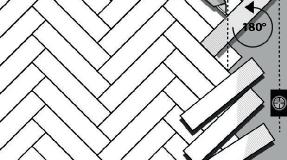
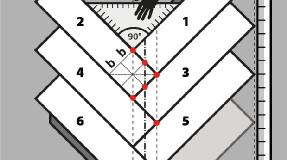
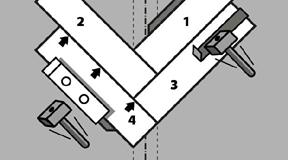
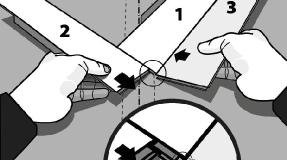
Place your first plank (1). Use another plank (3) and attach it to the first by inserting it into the groove at an angle of +-20°. Do not fold it down. Use plank (3) as a guide to install plank (2). Let plank (3) extend past plank (1) with +-5mm at the bottom. Now insert plank (2) into the short side of plank (1) and slide it till it is stopped by plank (3). Now fold down plank (2).
Now repeat the same method with plank (3) and (4). Plank (4) now serves as a stopper for plank (3). Fold down plank (3). Continue this process until you finish the center rows.
Make sure that the joint is closed tightly. Use hammer and tapping block to gently tap and ensure the locking mechanism is correctly engaged.
Work your way down. Do not forget to tap gently to perfectly engage the joint. Use a straight edge or additional reference line to ensure that the rows remain straight! Repeat this line with new rows.
Having placed multiple planks in the center row. Fill the open triangle close to the wall. Use the spacers to maintain the correct expansion gap between the wall and the floor. It is recommended to place some unopened boxes (or other type of weight) to keep the already installed section in place.
Now work your way up the pattern as shown.
(1) Connect the short end first. Lift the long edge at +-20° and slide into the joint of the already installed floor.(2) Now gently tap the plank with a tapping block and a hammer into the connection. (3) Finish by
Place your planks in the last row in the position as you were to continue a normal row. Now turn one plank 180° and place the corner against the wall minus the distance of the spacer. You now can draw the cutting line and cut off the surplus. Turn back the plank 180° and install it. Repeat this with each individual plank. Once finished, remove the spacers. Your floor can now expand and contract freely.
After installing the whole floor, the spacers must be removed so that the floor can expand and contract freely.
Doorjambs and heating pipes also need to be individually fitted, maintaining a movement gap. First cut the panel to the right length, then place the panel next to the object and draw the correct fitting. Next, cut the panel to size. Doorjambs can also be sawn (undercut) to size, if necessary, the KlickFloor Engineered Click Acoustic Herringbone can them be neatly installed underneath.
43
KLICKFLOOR MAINTENANCE
CARING FOR YOUR FLOOR
MAINTAINING YOUR FLOOR
Appropriate maintenance procedures will help to preserve the appearance and will extend the life of a Kompact KlickFloor design floor. The frequency of maintenance will depend on the amount and type of traffic, degree of soiling, the floor colour and type. Kompact KlickFloor design floors have a Protectonite-PU lacquer on top of the resistant wear layer. This lacquer protects against soiling and makes overall maintenance easier. Protectonite also makes any posttreatment with protection polish unnecessary.
SPILL AND SPOT CLEANING
Spills and spots are inevitable, but they do not have to be permanent. Remove a spill quickly and there is less chance of permanent staining. First try to blot the spill with a dry cloth/ kitchen towel, then use water. Only use detergents/cleaning products when the above is not sufficient to remove the spill/ stain.
VACUUMING
Regular vacuuming is the most important part of a successful maintenance program to remove all grit, debris, and other solid particles. Vacuuming is far more effective for this type of soiling than wet mopping, which normally moves soiling from one place to another, rather than removing it.
CLEANING
A common error is to use excess detergent, which then leaves a film on the surface. In this instance, clean the floor a few times without any detergent to remove the excess soap/detergent, this would bring you back to a standard condition. Care should be taken to dilute detergents in accordance with the manufacturers’ recommendations. Periodic cleaning is far more beneficial to the floorcovering than infrequent heavy or deep cleaning. However, seasonality can influence the amount of cleaning required. Once dust and debris free, with a spray, apply a solution of neutral pH cleaner to the section to be cleaned (or dependent upon the level of soiling, a light alkaline cleaner), carefully diluted to the manufacturer’s instructions. Leave for enough time to react with and lift the soiling. Some agitation with a soft brush may be required.
EXTERNAL CONDITIONS
The appropriate management of external conditions can help to protect the flooring, which saves time and expenses on cleaning and maintenance, and also extends its lifespan. Most soiling comes from an external source and is transported indoors by foot and rolling traffic. If dirt lodges under sliding furniture, the flooring will not only be soiled but will also suffer (light) damage in the form of scratches.
PROTECTION OF SLIDING FURNITURE
Place good quality protective felt pads under chair and table legs. Furniture cups should be used to avoid high point loading.
IMPORTANT POINTS
VARIOUS KEY POINTS OF INFO:
Klickfloor must always be stored flat on an even surface to avoid damage to the joint system.
Do NOT use any rubber backed / latex mats on top of KlickFloor, to prevent plasticisation which can discolour your KlickFloor.
Do not use abrasive cleaners of any type on your KlickFloor to prevent surface scratching.
If using products with different batch numbers, please ensure that your installer mixes the tiles /planks to ensure uniformity of colour.
Always use the furniture protection pads supplied in your XtraFloor Consumer Kit to prevent damage to your KlickFloor.
Always acclimatise your KlickFloor for at least 24 hours to the room before installation
Always use an entrance mat to act as a clean-off area to protect the surface of your KlickFloor. Avoid use of rubber or latex backed mats as these may discolour your KlickFloor.
Almost all flooring will vary in colour over time when exposed to UV light. Avoid this by using curtains or blinds when the sun is very bright
Do not allow cigarettes, matches and other very hot items to contact the floor as this causes permanent damage
KLICKFLOOR QUERIES
FREQUENTLY ASKED QUESTIONS
QUESTIONS & ANSWERS
Do I need to use underlay with KlickFloor?
Klickfloor only recommends the use of KlickFloor Xtrafloor Underlay, which has been specifically designed for use with this product. XtraFloor Underlay will always enhance the performance of your KlickFloor, providing increased comfort, sound & heat insulation and will smooth out any irregularities in your subfloor. Use of any other underlay not designed for KlickFloor may invalidate your warranty.
How do I clean my KlickFloor?
Your new KlickFloor should be swept / mopped or vacuumed regularly. Occasionally KlickFloor should be damp mopped using XtraFloor Routine cleaner. Kompact only recommend the use of KlickFloor XtraFloor Routine Cleaner & Maintainer. This will maintain the finish of your KlickFloor and maintain the SupaGuard coating on your KlickFloor. This should be supplied by your Retailer / Installer after installation or can be purchased online at www.leakerdirect.co.uk. For heavy domestic / commercial users, a 2.5ltr container is also available. Use of any other cleaning product may invalidate your warranty.
Can my KlickFloor be used with underfloor heating?
Yes, but we recommend that KlickFloor must be acclimatised to the room and that the underfloor heating be on before and during installation (preferably around 18°C). Use of KlickFloor XtraFloor underlay will enhance the performance of your floor with underfloor heating. We do not recommend the use of any electric mat heating systems with KlickFloor.
How level does my floor need to be to install KlickFloor?
The finished appearance of your new KlickFloor will only be as good as the quality of the subfloor it is installed onto. Your installer should ensure that the subfloor has no irregularities greater than 5mm wide or 2mm deep. Use of XtraFloor underlay will smooth out small irregularities in your floor.
Can I fit KlickFloor over existing ceramic tiles?
Yes, but as above , your installer should ensure that the subfloor is suitable, and use of XtraFloor underlay will enhance the installation.
How do I cut my KlickFloor?
KlickFloor can be easily cut using a utility type knife. Once the surface is scored, a clean break snap apart.
TROUBLESHOOTING
IDENTIFYING YOUR ISSUE:
My KlickFloor joints are coming apart in certain areas
This is normally caused by either an uneven subfloor or the joint system not being correctly locked on installation. Please contact your installer to rectify
My KlickFloor has a ‘whitish bloom’ on the surface after contact with water
This is a harmless effect caused by a reaction with water by the SupaGuard surface coating. Once the water / damp contact is removed your KlickFloor will return to normal over a period of days, as the moisture disappears.
My KlickFloor is showing some scratching on the surface
This is normal for any hard floor, and can be alleviated by use of XtraFloor Routine Cleaner to maintain the SupaGuard surface of your KlickFloor
45
E C O.
Green energy production


KlickFloor floors contain up to 50% recycled material of verified origin, and are themselves recyclable. Post-industrial recycling also enables us to obtain an especially pure type of PVC with a limited impact on the environment. Furthermore, we are always looking for new ways to package products and limit waste
Ingenious cooling system
By manufacturing our products as close to the customer as possible, we minimise the impact transportation has on the environment. This helps to keep CO2 emissions and our ecological footprint to a minimum.


Silent Acoustics
With a diverse range of durable, stylish products and the convenience of an all-in floor solution, as well as excellent customer service and unparalleled ‘green’ credentials, KlickFloor is proud to be different.


KlickFloor is produced in our vertically integrated factory in Avelgem, Belgium, which is specially constructed to enable us to produce flooring in a responsible manner. In addition, we have a fully automated warehouse on site with the capacity to store 2,000,000 m2 of KlickFloor flooring. Not only are a large number of energy-saving and waste reduction measures in place in our factory, unlike other producers we have full control over the design, production and logistics process. This allows us to retain total control, every step of the way.
KlickFloor is the residential luxury design floor manufactured by IVC Group, a world leader in the development and manufacture of design floors.
Eco Standard

KlickFloor sets the standard for future generations of luxury design floors. On the one hand, it combines sustainable production with the ease of installation and maintenance of vinyl floors. On the other, KlickFloor truly stands out because of its range of designs and innovations.


47

www.klickfloor.co.uk
