5 minute read
IN THE KITCHEN


Shortcuts in the Kitchen
By Joyce Godwin
Advertisement
In this issue, we are taking a different approach to our kitchen spot. It’s been “Jamie’s Kitchen” since we started Anna Living Magazine, but Jamie is a full-time classroom teacher in Melissa and simply doesn’t have the time to do this for our readers on a regular basis. Going forward she will contribute from time to time when her schedule permits. As her mom who is always considerate of her children’s time, I didn’t want her to have anything else to cause stress. We will welcome anyone else who would like to take a stab at being our visiting chef. Hopefully Christi Mahon will continue to participate as she has been a wonderful addition to our kitchen corner.
So, for this issue, it’s my turn in the kitchen. I do like to cook — I just don’t do much of it anymore. And like Jamie, I don’t have a lot of time, so I like to take short cuts. Some of those include letting my husband cook, but that’s a story for another issue.
Today I want to share a couple of things I like to do that are quick and so easy, but look like it took a lot of time.
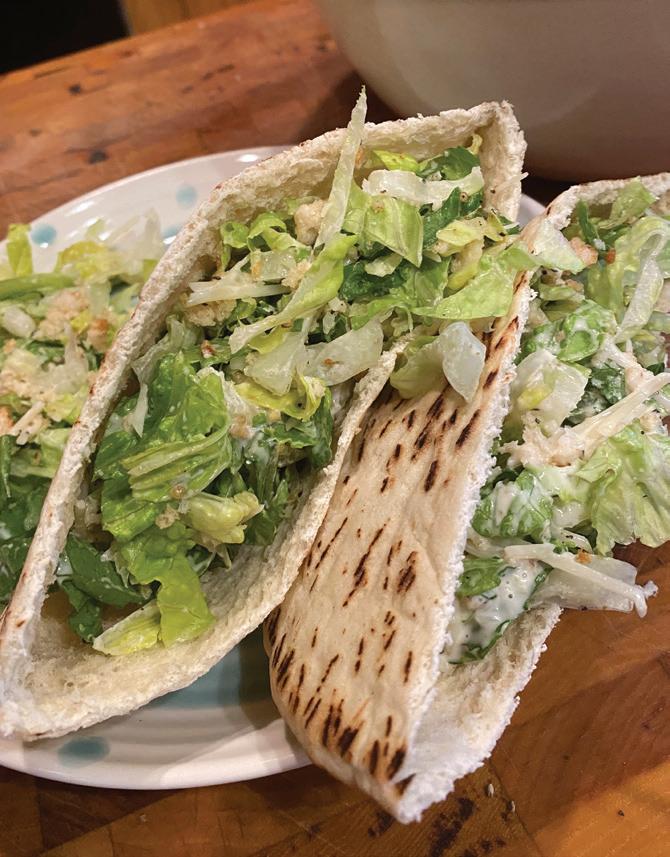
Pita Pocket Caesar Salad
INGREDIENTS: • Pita Pocket Bread • Caesar salad
DIRECTIONS:
To make this dish, I simply bought pita pocket bread at the store and the Caesar salad in a bag. It’s in the produce department close to the salad ingredients. We’ve found we like several of the choices there. But if you want to make the dressing yourself, there is a good and easy recipe for it on BonAppetit.com and a great number of other websites. Another option is to make the salad yourself and buy the Caesar’s dressing in a bottle right off the shelf. No muss, no fuss — quick and easy.
After mixing the salad with its dressing in a large bowl, remove the Pita Bread from its package and cut it down the middle so you have two pockets. Then stuff each with the salad mixture.
Here is a bit of trivia in case you are among the folks who thought Caesar salad was named after Julius Caesar because it was his favorite dish. It is more likely to have been named for Caesar Cardini, an Italian chef in Tijuana, who is said to have devised the concoction in 1924.
Now that we have that settled, let’s move on to the next presentation for today’s offerings — dessert.
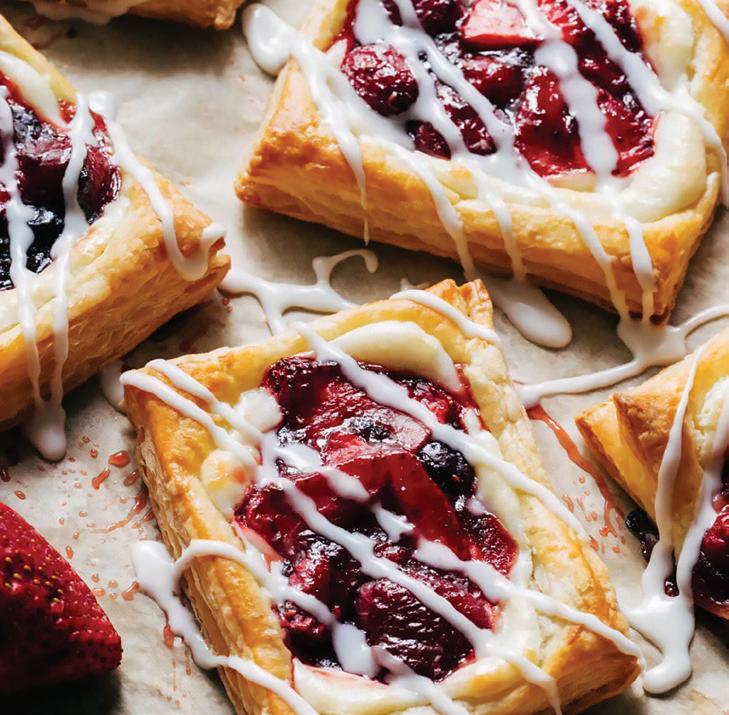
Puffed Pastry Cream Cheese Danish
I discovered puff pastry years ago and what I’ve found is, you can do simple things with it that always make you look like an accomplished pastry chef. You can find it in your grocer’s freezer and it can stay in your freezer for months until you’re ready to use it. Of course, there is a homemade option which I’ve never tried. I have thought about it and went so far as to read the recipe and instructions. And now I know I don’t ever want to try to make it unless the grocery store stops carrying it. A lot of time and labor is required.
To use puff pastry, remove from the box and let it thaw. It only takes about a half hour to an hour at room temperature.
Before you start working with it, it should be thawed enough to fold open and roll, but not too soft. The key to delicious puff pastry is the chilled butter between each layer. That’s why you want to keep the puff pastry as cold as possible, while still giving it enough warmth to be workable.
What makes this pastry special, besides the puff pastry, is two fillings: cream cheese filling, and red fruity filling.
INGREDIENTS for cream cheese filling: • 4 oz Cream cheese • 2 T Granulated sugar • 1/2 tsp Vanilla extract • 1/8 tsp Almond extract (optional) • 2 tsp Lemon juice
Mix all the ingredients to make a smooth cream-cheese spread. You don’t want it to be too sweet, so be sure to taste as you go. This is the first layer on top of the baked puff pastry.
INGREDIENTS for Red Fruity Filling: • Fresh, fruit of your choosing • about 1/2 cup Raspberries • about 1/2 cup Strawberries (you can substitute any fruit you like) • Fruit preserves to take in the fruit • Tapioca flour enough to thicken the mixture.
The Tapioca flour will help the filling hold together while baking.
DIRECTIONS: 1. Mix the ingredients and set aside. This will be the top layer. 2. Preheat oven to 400F. 3. Now turn your attention to the puff pastry which should be thawed by now. Line a baking pan with parchment paper. 4. Unfold the puff pastry and lightly roll out, a couple of times each way. Cut the pastry in half (I like to use a pizza cutter for this), then cut each half into three rectangles so you now have six pastries. Place the pastries on the baking sheet with parchment paper and space them evenly. 5. Use a knife to score a 1/4-inch border around each Danish without cutting all the way through. This will help the edges to rise and help contain the filling. 6. Brush the edges with an egg wash (1
whole egg whisked with 2 tsp water or milk). Then, add a dollop of the cream cheese filling into the center of each danish. Spread an even layer within the border. 7. Add the red fruity filling on top. 8. Bake 20-25 minutes or until evenly puffed and golden brown around the edges. 9. Let them cool and then top with powdered sugar or icing or something else that appeals to you.
I found a similar recipe on line and after making it several times, have learned to be creative. Whipped cream on top is good and other fruit is also tasty. Ice cream on the side is also inviting. Play with it, make it your own, and most of all, look like a pro investing very little time with puff pastry.