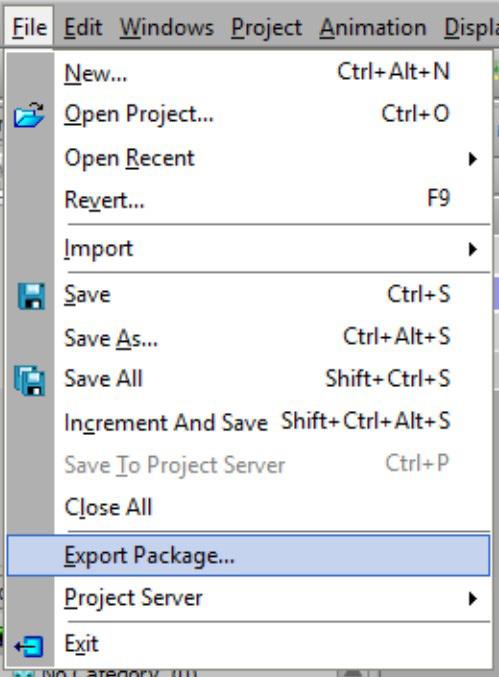
1 minute read
Adding materials to an object

Xpression CG notes
Scale Tool 00:17:34 – 00:18:12 - Looks similar to Move Tool • Has blocks instead of arrows - Allows the user to stretch and pull object on both the X and Y axis • Red Block = X axis • Green Block = Y axis • Yellow Ball = freeform scale
Advertisement
Pivot Tool 00:18:15 – 00:19:48 - Up until now, the pivot point of objects has been fixed in the center of the object - the Pivot Tools allows uses to move the pivot point anywhere along the
X or Y axis of the object • Red arrow (facing inward) = X axis • Green arrow (facing inward) = Y axis
Adding Materials to the surface of an object
00:27:53 - 00:32:50
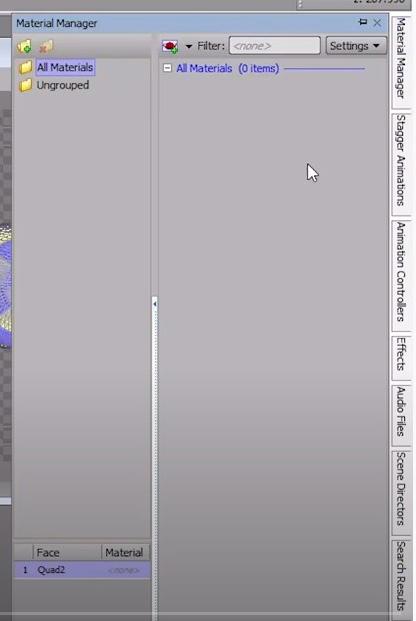
- Objects in the scene start out with no materials on them • They appear blue with a yellow checkerboard pattern • Have a red line around them when selected
- Using the Object Manager, select an object • Note the red line around it indicating its selected • Click on the Material Manager (side tab) this should start out empty because you haven’t created any yet
Xpression CG notes
- click on the Create New Material button

• object should appear in the library called “Material 1”
• Material Editor window will open
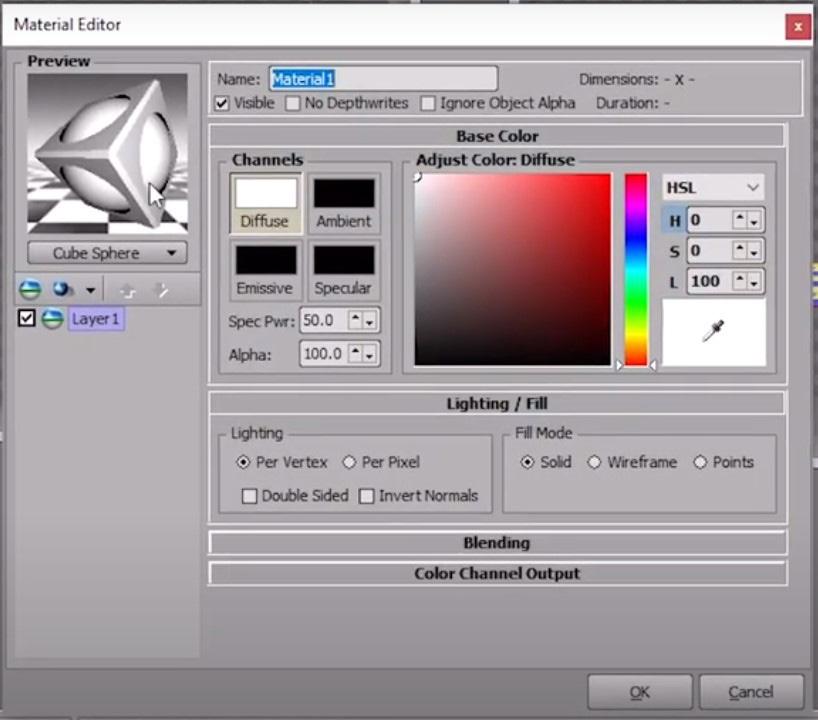
Xpression CG notes
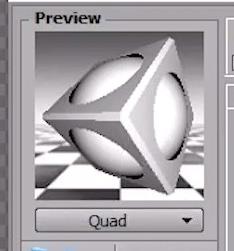
- In the Preview window of Material Editor the default material is applied to a “cubesphere”
• You CAN change it to something else if you want, but staff recommends that you stick with the default
- Choose a color from the color picker for your new material
- Give the new material a name
- Click
NOTE
the object has NOT changed yet. This is because the material hasn’t been APPLIED to it.
All we did was create a new material.
Applying the material to the image
- Make sure the object is selected (Red outline) - Reopen the Material Manager side tab o Find the material that you just created • Double click on it o The object in the Main Viewport should now have the material on it