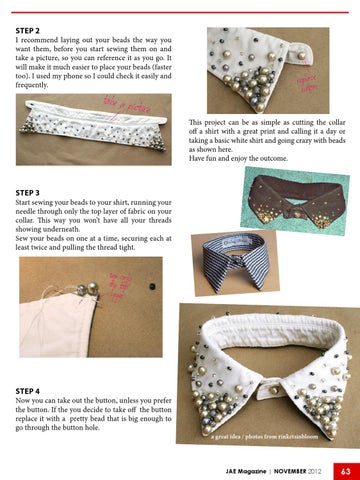
STEP 2 I recommend laying out your beads the way you want them, before you start sewing them on and take a picture, so you can reference it as you go. It will make it much easier to place your beads (faster too). I used my phone so I could check it easily and frequently.
This project can be as simple as cutting the collar off a shirt with a great print and calling it a day or taking a basic white shirt and going crazy with beads as shown here. Have fun and enjoy the outcome.
STEP 3 Start sewing your beads to your shirt, running your needle through only the top layer of fabric on your collar. This way you won’t have all your threads showing underneath. Sew your beads on one at a time, securing each at least twice and pulling the thread tight.
STEP 4 Now you can take out the button, unless you prefer the button. If the you decide to take off the button replace it with a pretty bead that is big enough to go through the button hole.
a great idea / photos from rinketsinbloom
JAE Magazine | NOVEMBER 2012
63