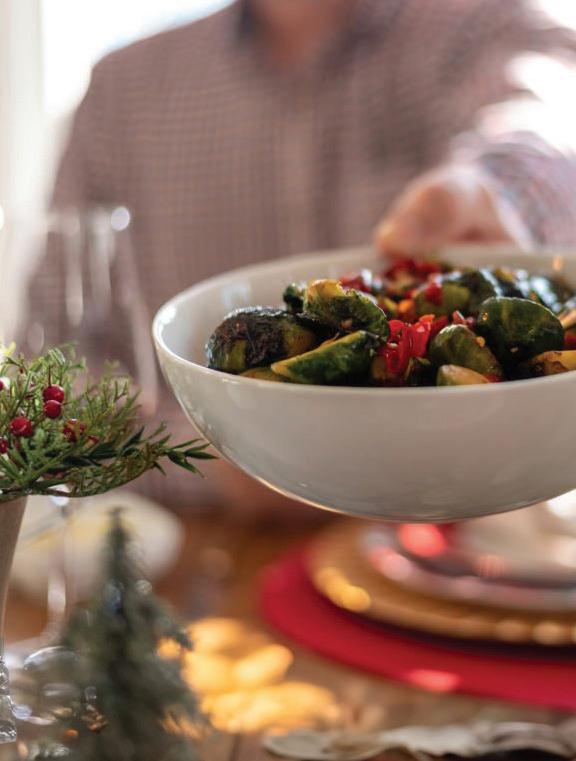
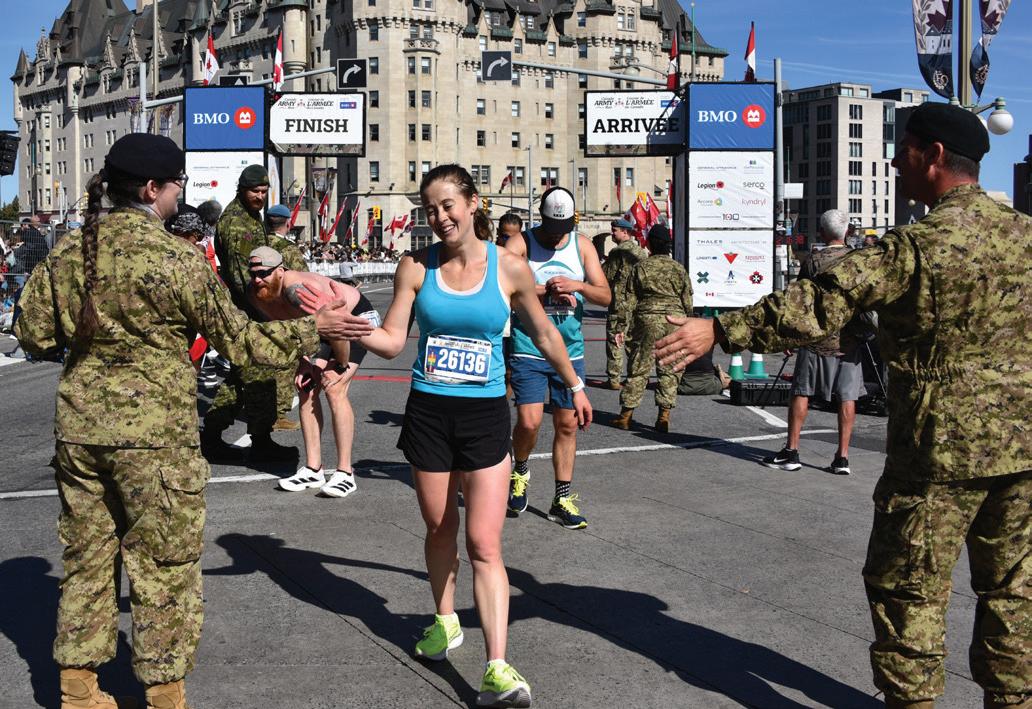
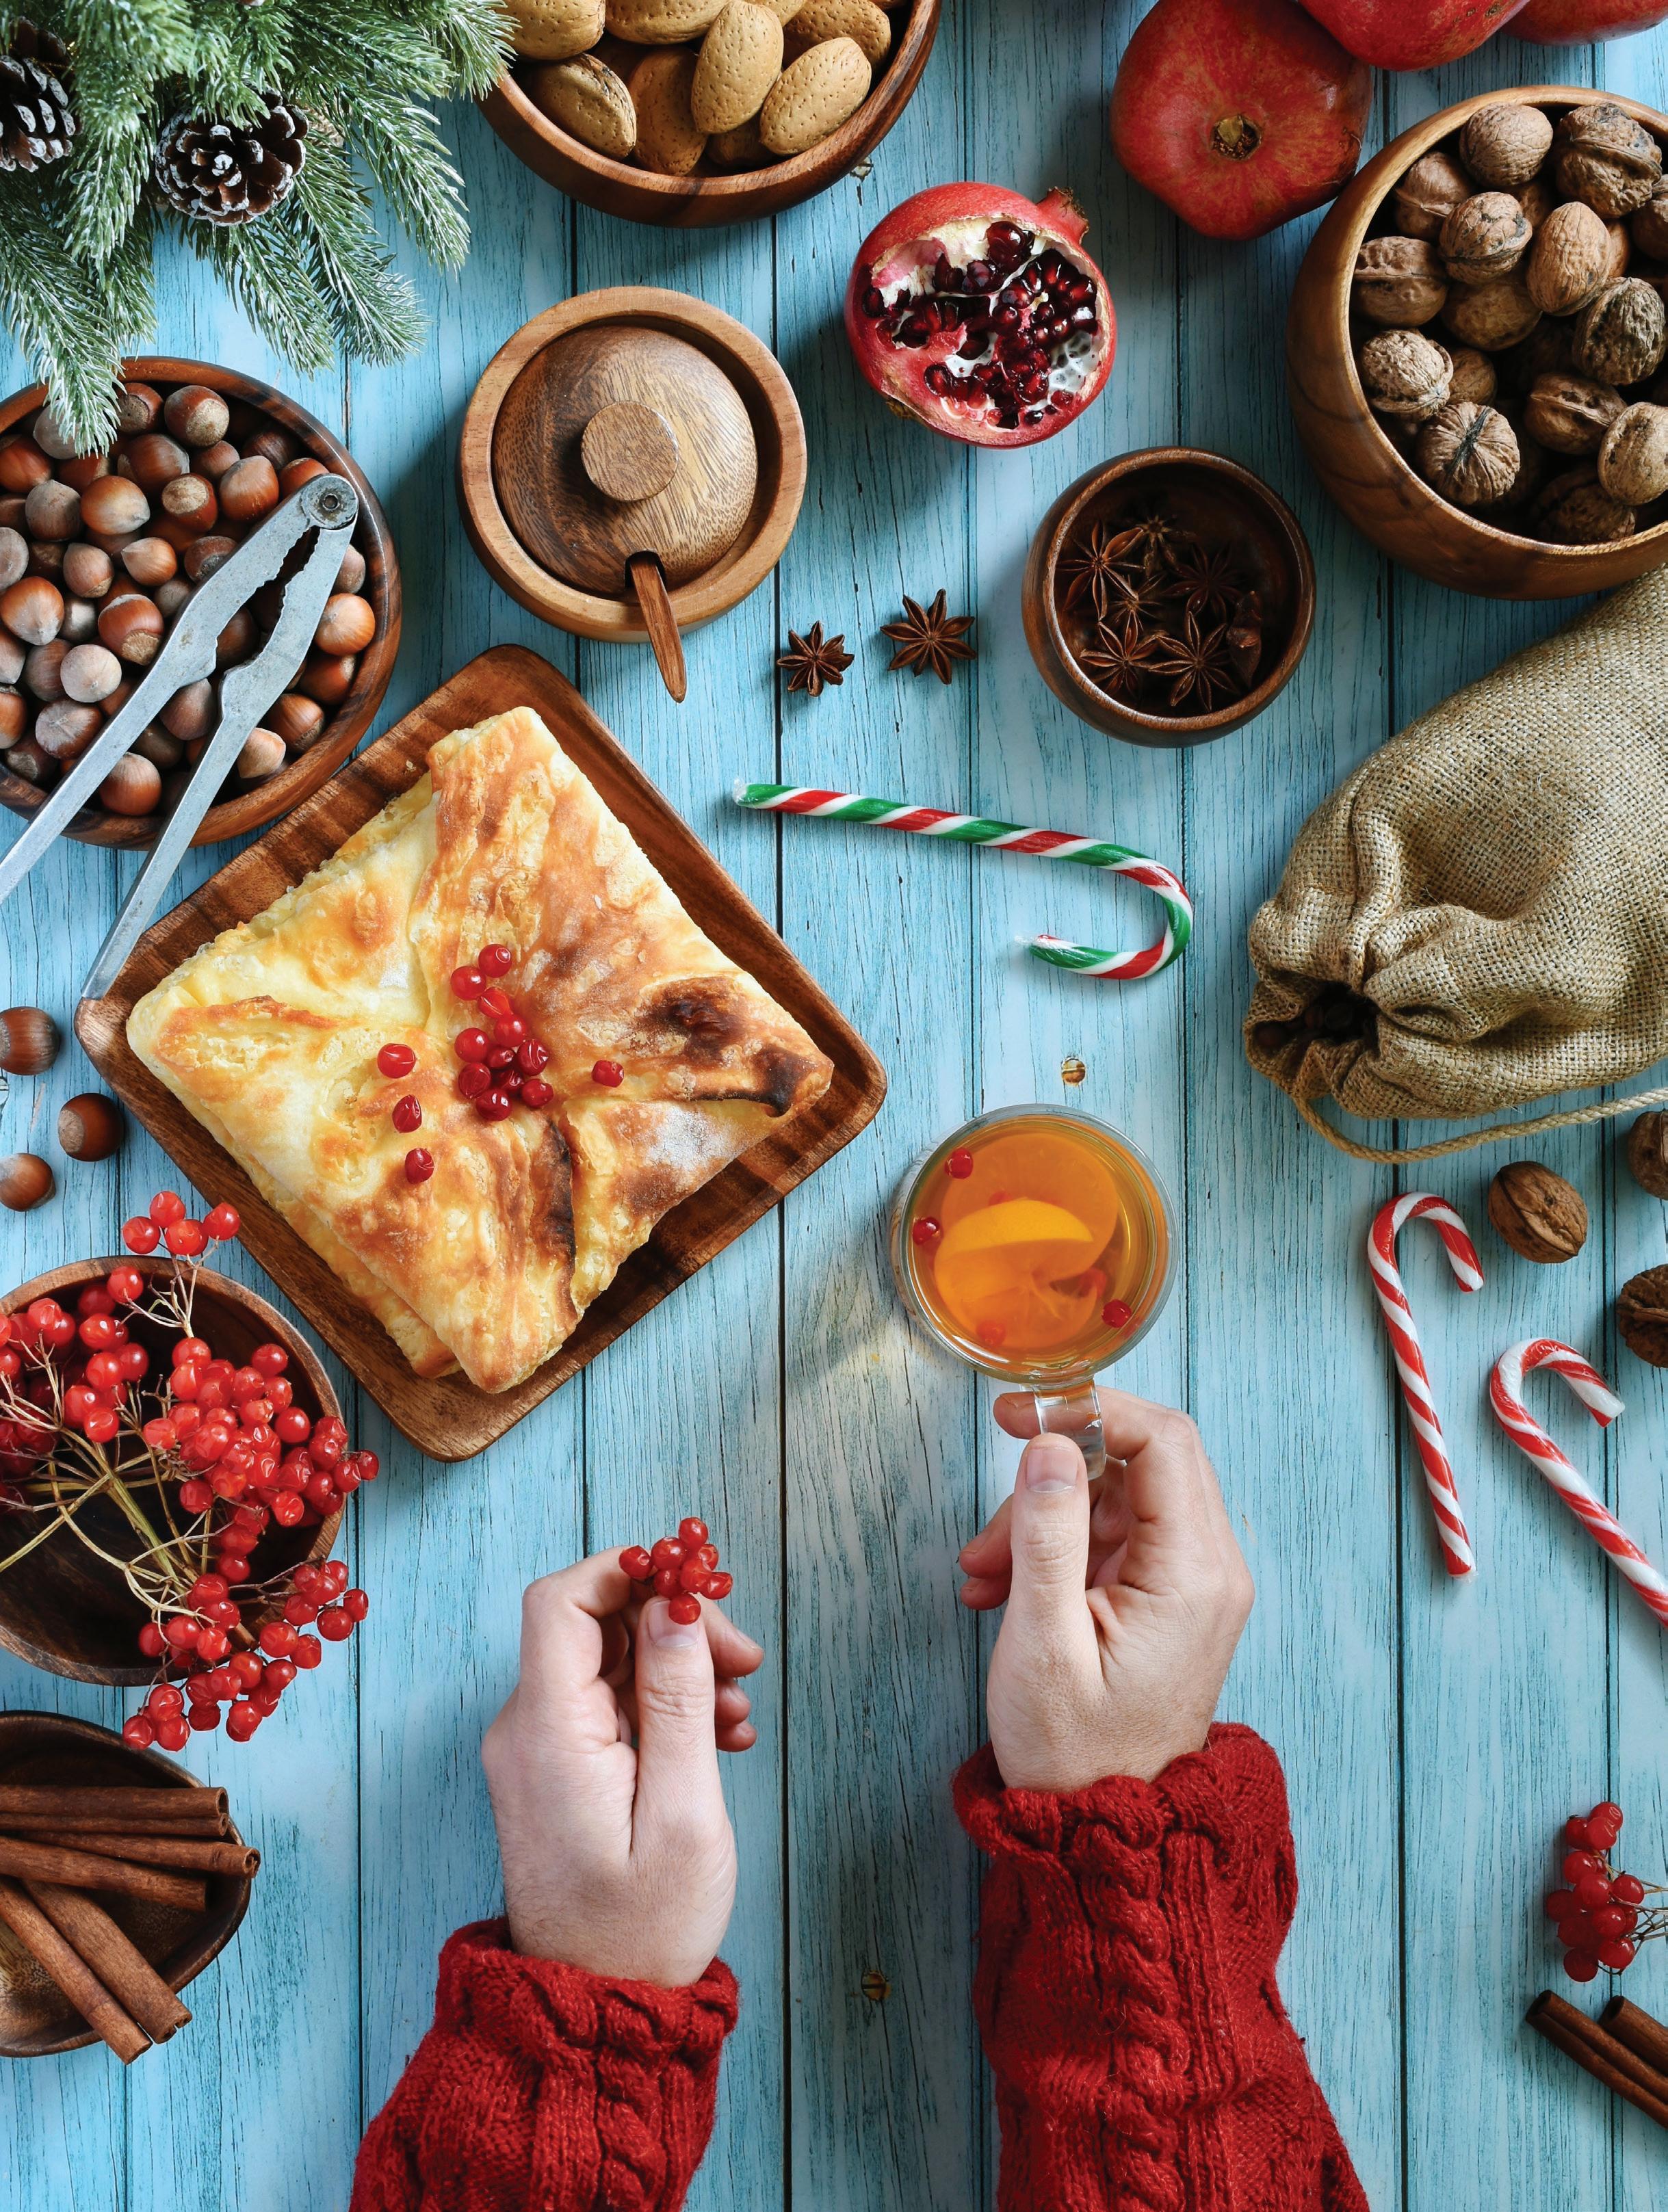
Days of Fitness Giveaways
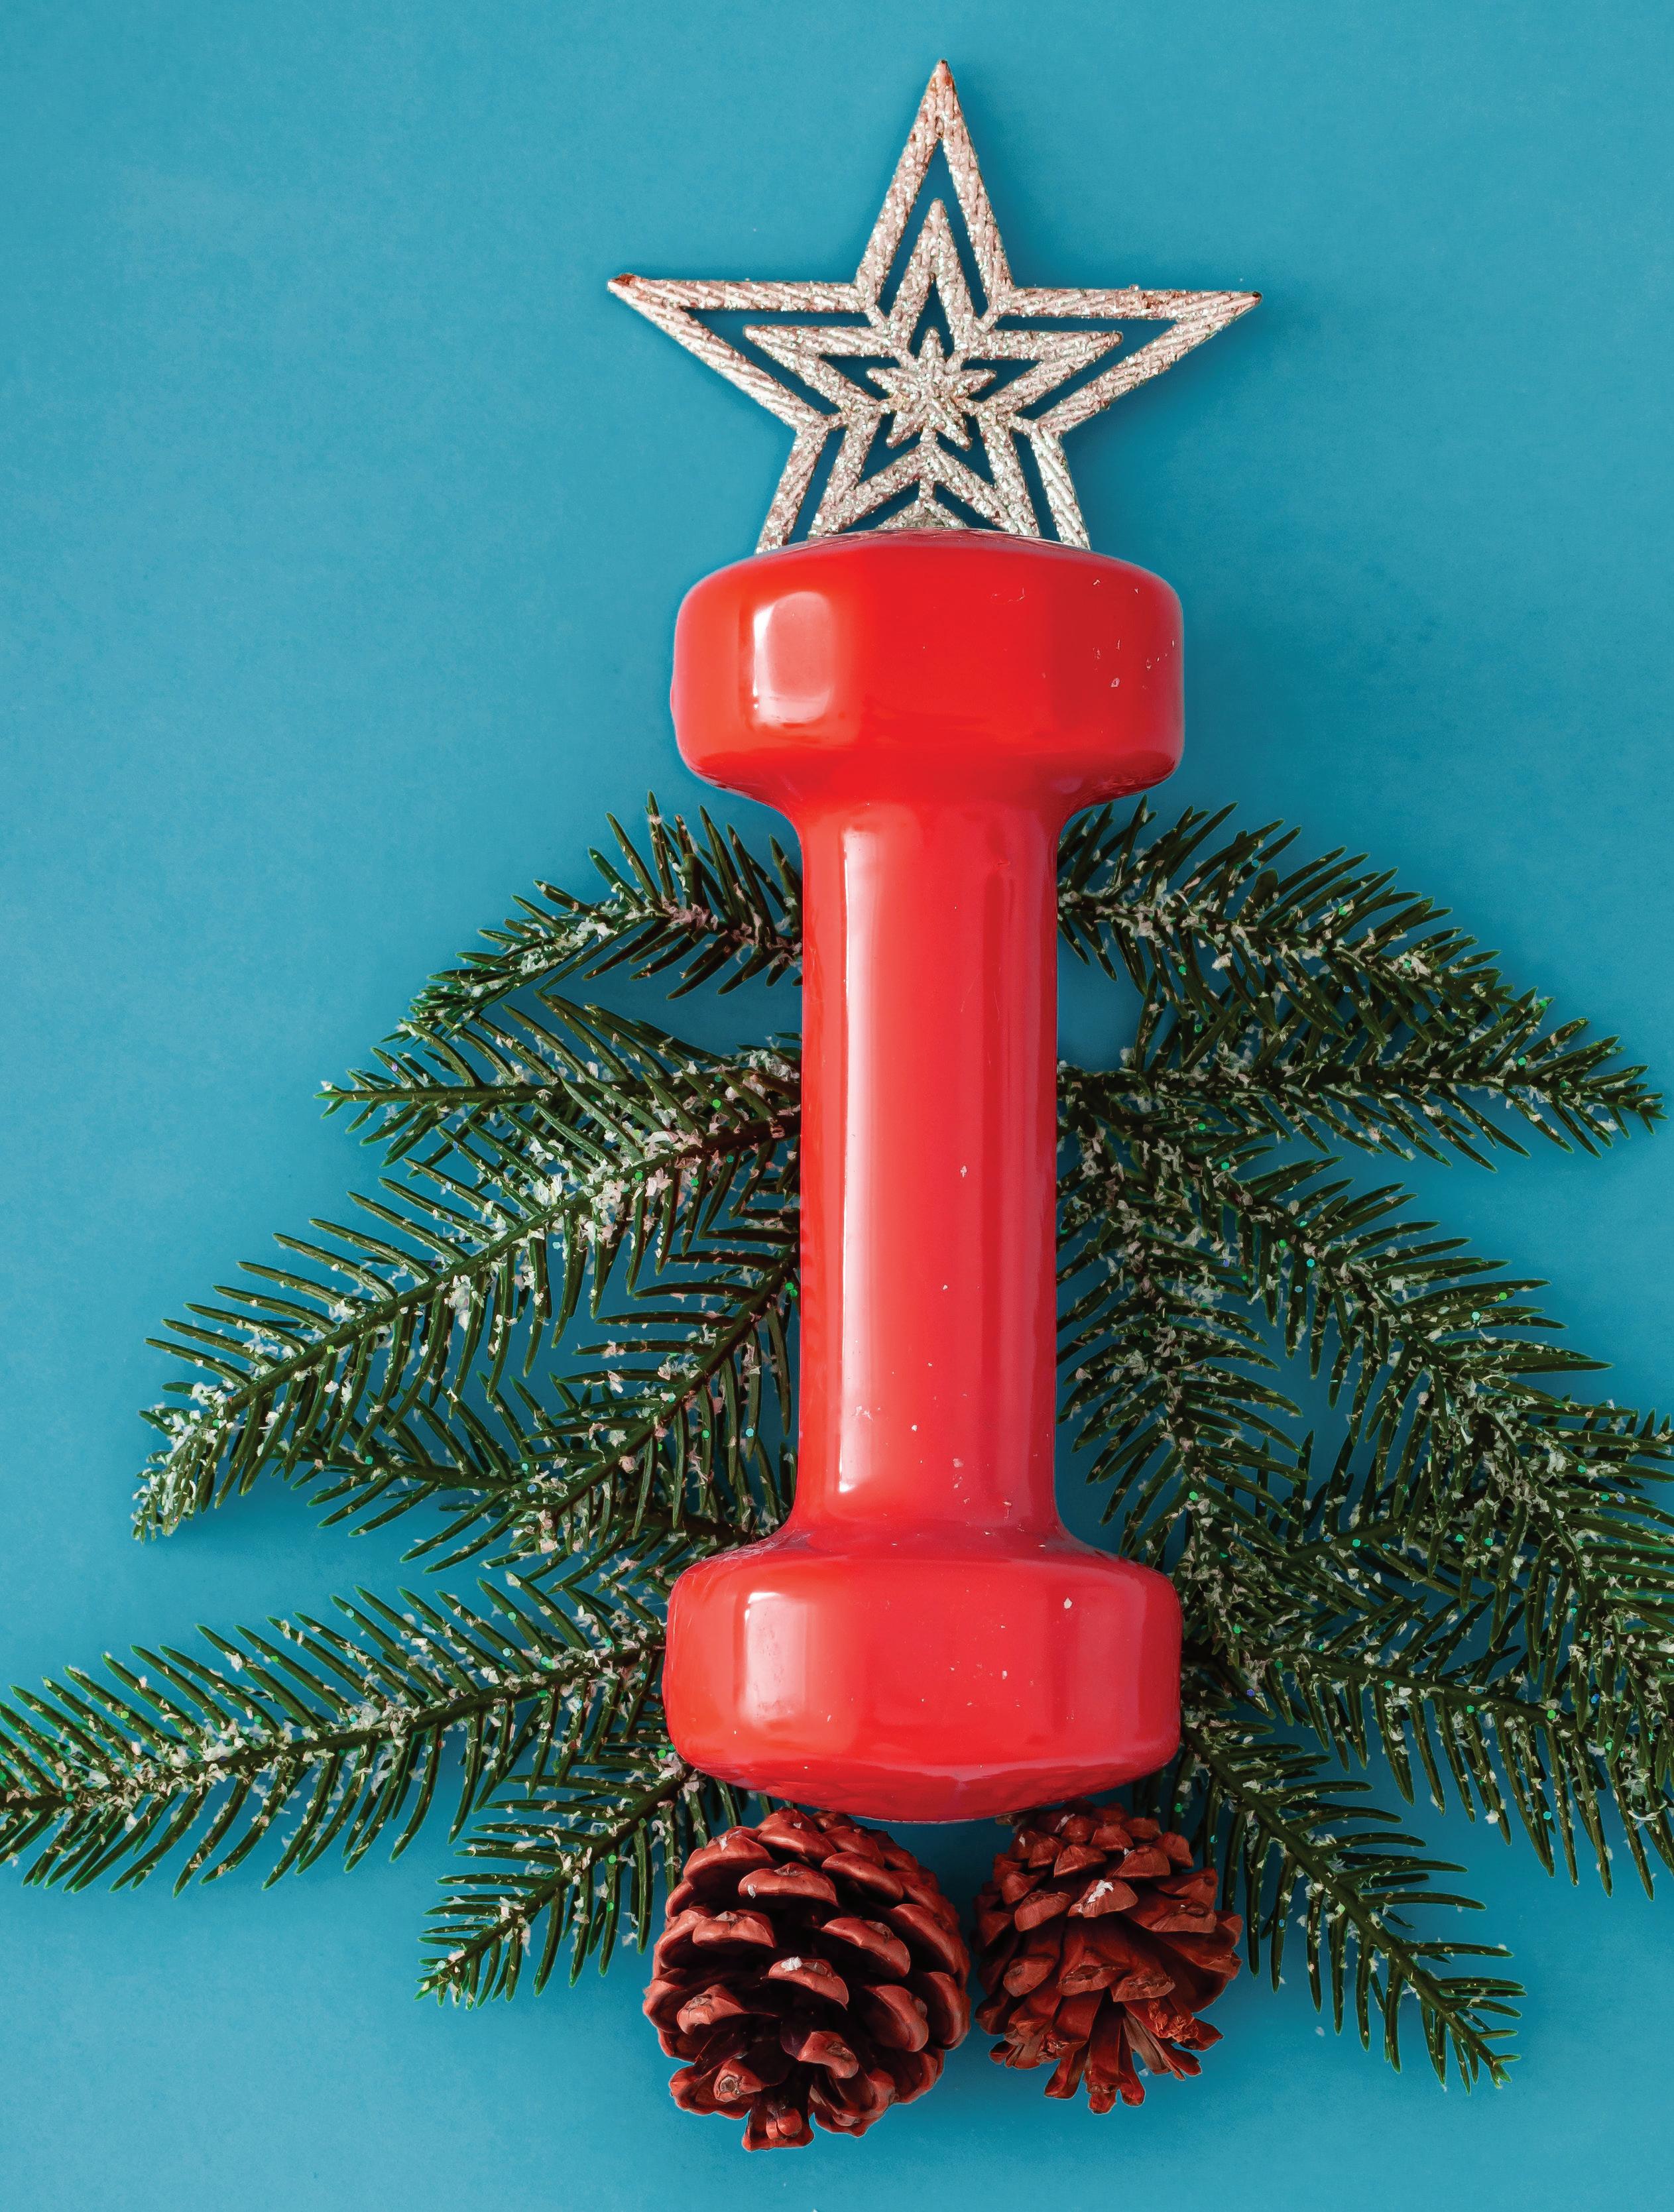


Days of Fitness Giveaways

Enter to win beginning December 1st on Instagram!
Get ready for the holiday season with our 12 Days of Fitness Giveaways! We’re giving away thousands of dollars in exciting prizes, all generously provided by our amazing partners within these pages. Each day bring a new chance to win premium fitness gear, exclusive memberships, sports & wellness products and home essentials. Enter daily!


BY NASTASIA LIAVAS
When the weather starts to weigh people down, small daily actions can retrain the brain’s reward system. The goal is to build resilience through movement, rest, and mindful focus.
Dopamine is the brain’s natural motivation messenger. It helps you feel focused, energized, and engaged. During winter, dopamine can be harder to access, which is why simple daily habits play such an important role. You do not need a full workout plan or a dramatic lifestyle overhaul. You just need small, intentional practices that help you feel grounded and capable. These gentle shifts can build real momentum, even on the darkest days.
Below are five habits I encourage people to weave into their fall and winter seasons. They are realistic, approachable, and supportive. Think of them as tools you can reach for whenever you need a little boost.
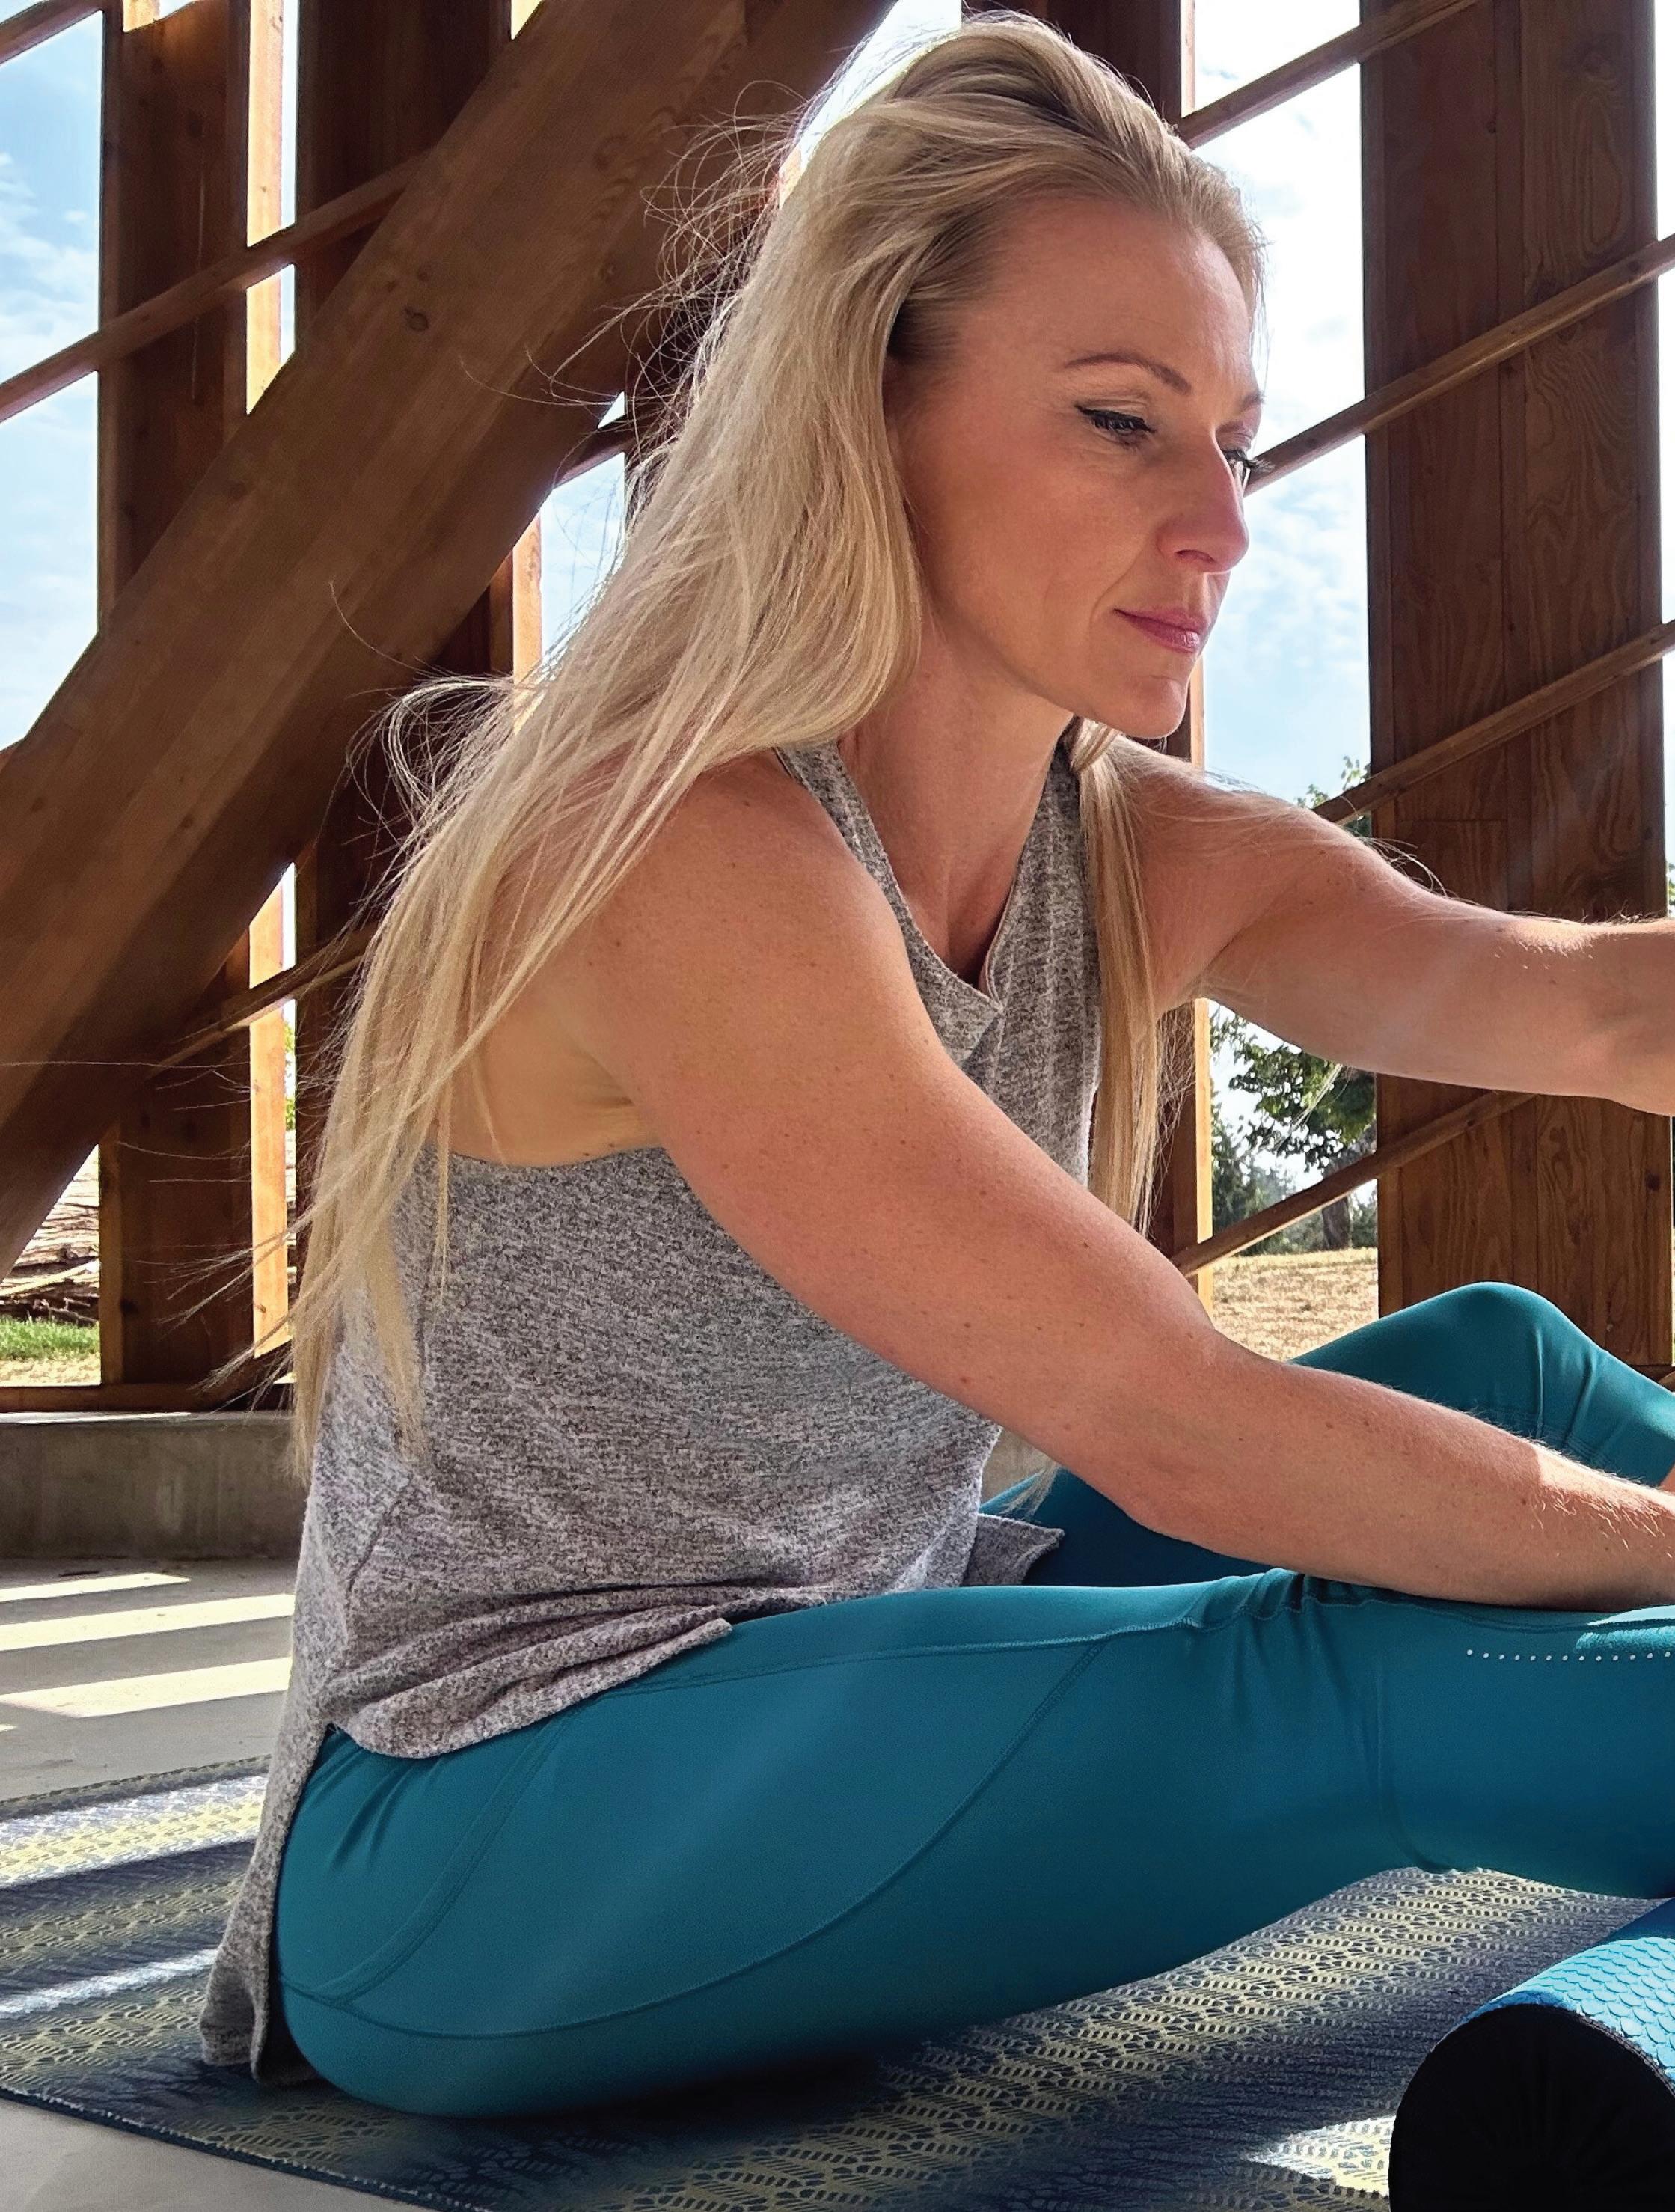
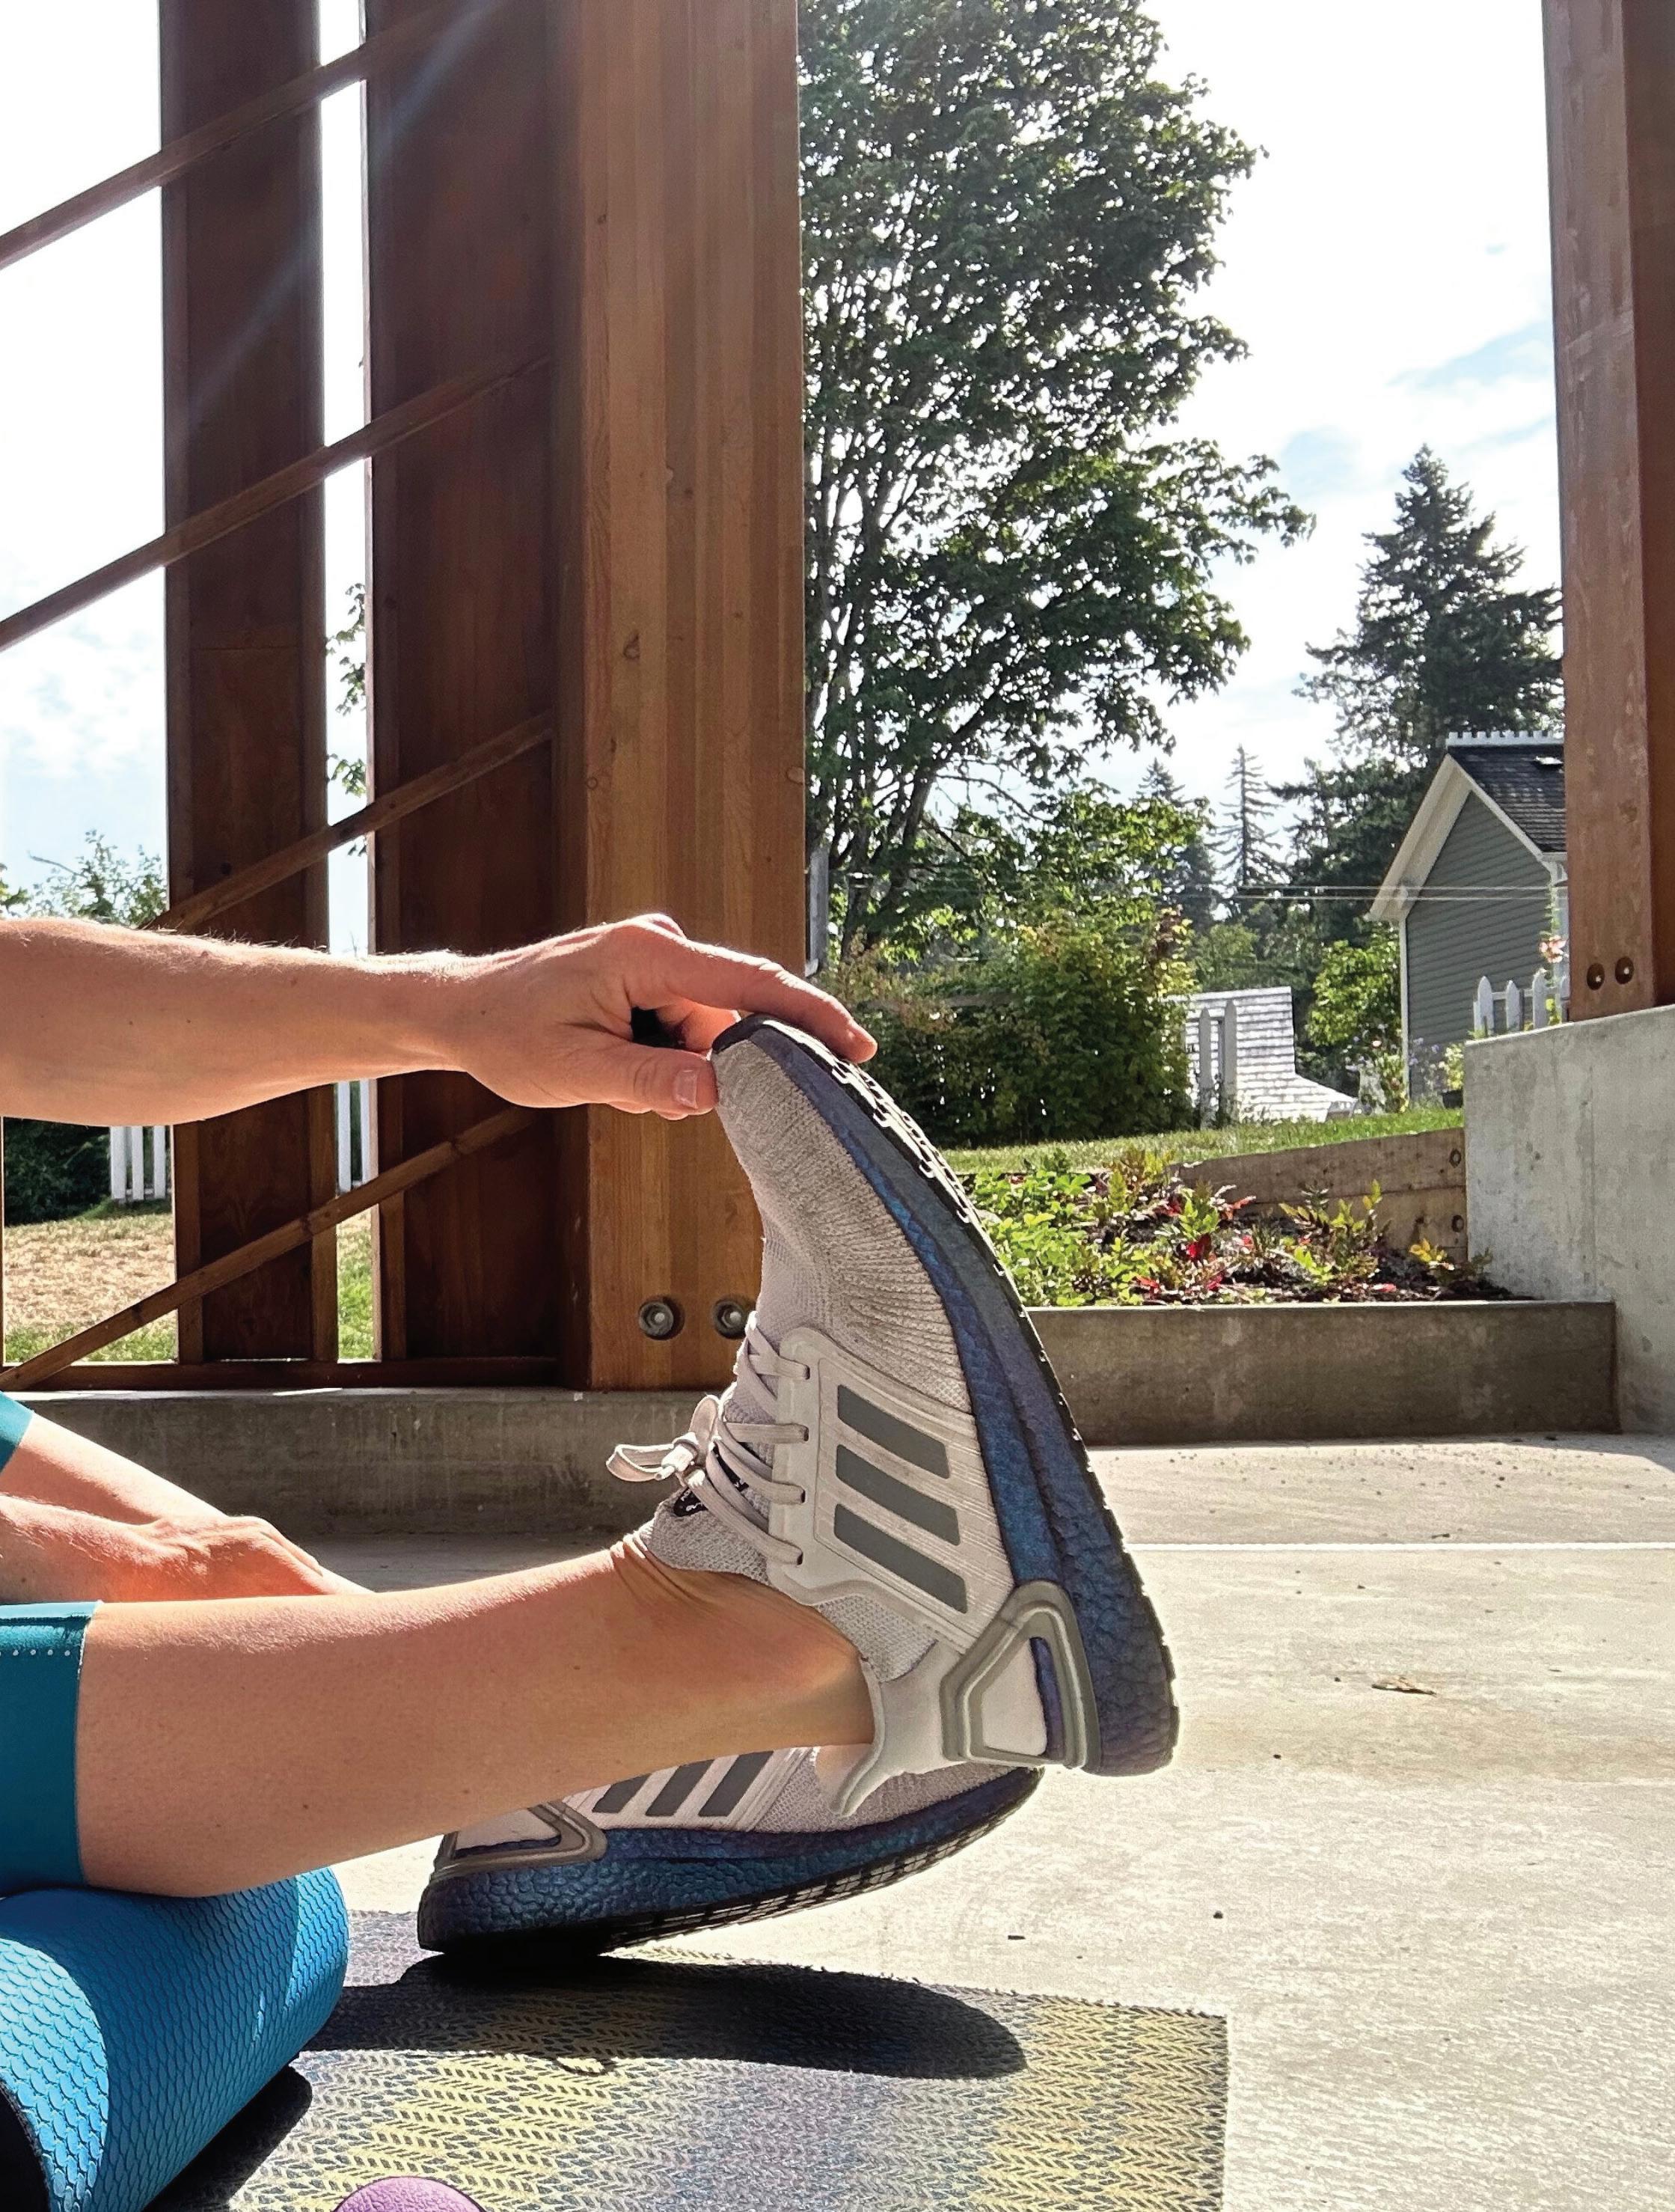
1. Move Daily
• Short bursts of activity count. A quick walk, stretch session, or gym visit stimulates dopamine release and supports mental clarity.
• Add movement to routines you already have, like doing a few exercises while your coffee brews.
• Use short movement breaks during the day. Two to five minutes is enough to shift your mood.
• On low-energy days, begin with two minutes. Often, the hardest part is starting.
2. Celebrate Small Wins
• •Completing realistic tasks sparks a healthy release of dopamine. Simple accomplishments such as making the bed or completing a weekly movement plan help maintain momentum during darker months.
• Keep a simple list of daily wins on your phone. It can include anything that makes you feel proud or steady.
• Pair habits together, like stretching after making your bed or taking ten slow breaths before opening your laptop.
• Speak your progress out loud. Acknowledging your efforts builds confidence and motivation.

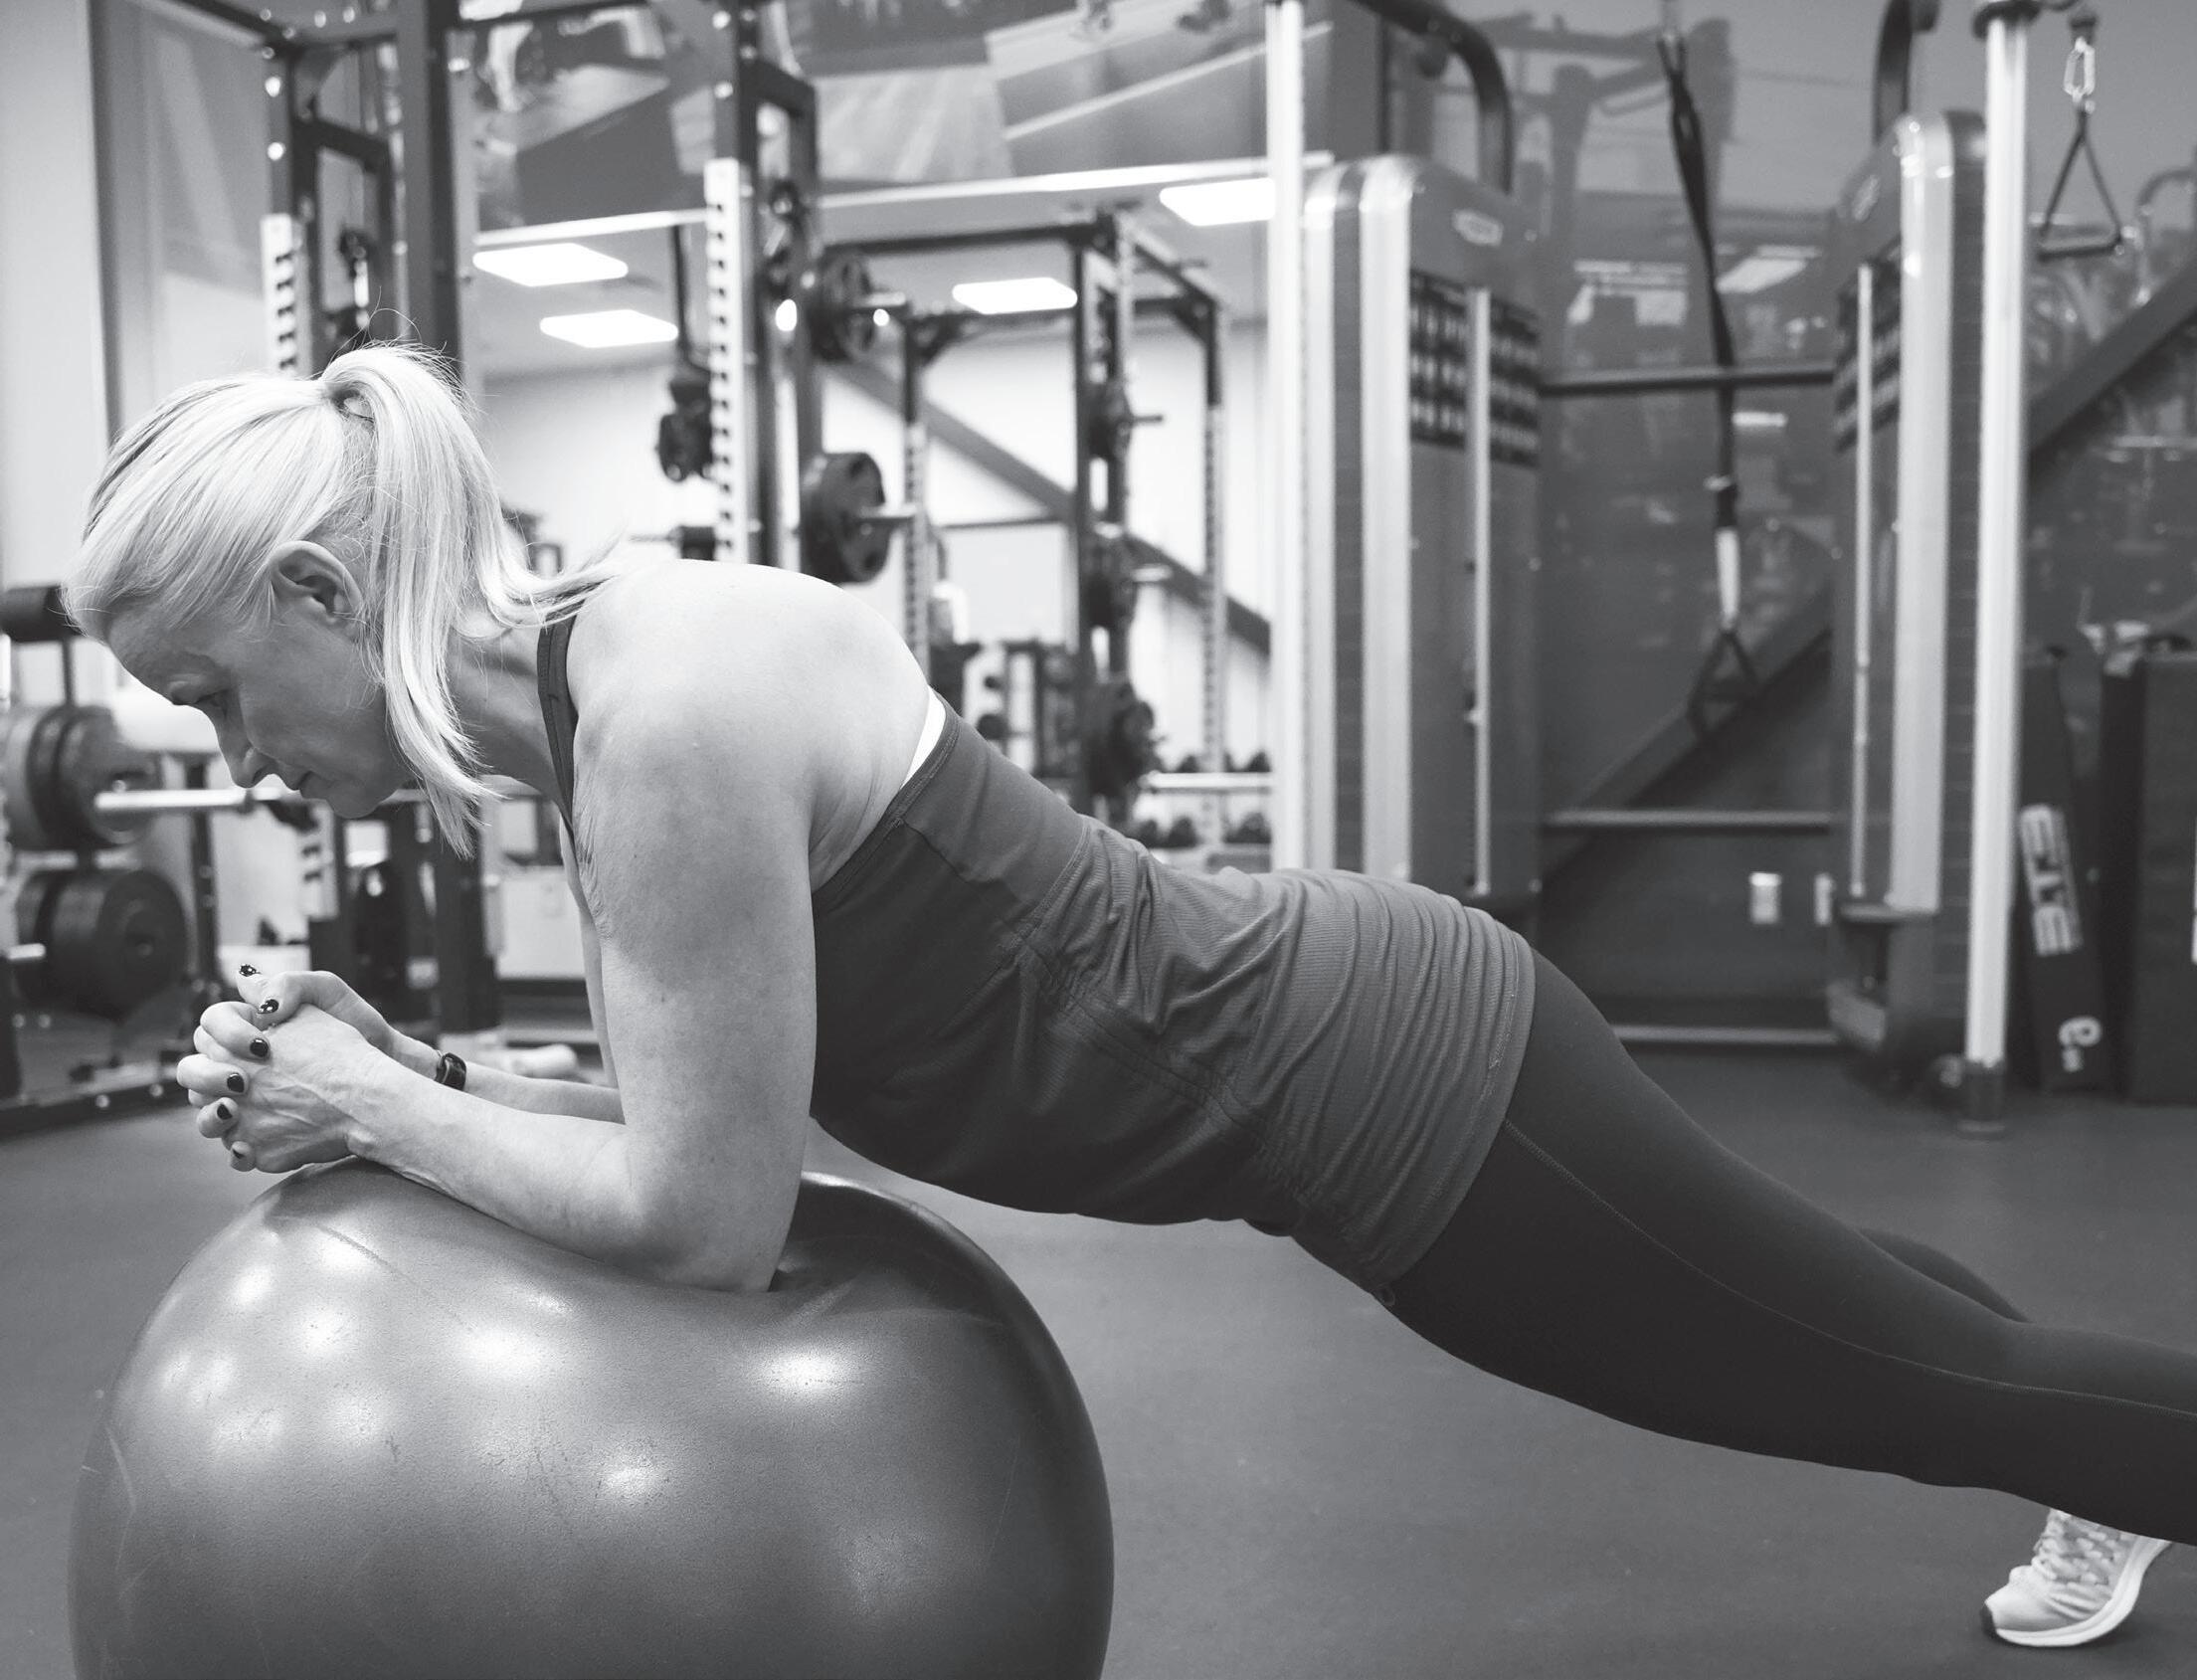
3. Strength Train in Bite-sized Sessions
• Lifting weights or performing resistance exercises can help regulate hormones, such as dopamine, and reduce cortisol levels. Foundational exercises such as squats, planks, glute bridges, and push-ups can be performed at home or at the gym to build both physical and mental strength, while also boosting self-esteem and improving motivation.
• Aim for Two or Three Short Sessions Each Week:
• Lower Body: Squats, glute bridges, and lunges for about ten minutes.
• Core and Upper Body: Planks, push-ups, or band pulls for about ten minutes.
• Full Body Reset: Light circuits that combine core, legs, and upper body for about fifteen minutes.
• Shorter sessions are easier to stick with and still provide all the mental and physical benefits you need through winter.
4. Pause for Mindfulness
• A few quiet minutes can reset stress responses. Meditation, intentional breathing, or a silent walk helps regulate dopamine patterns and reduce tension.
• Try one or two minutes of box breathing.
• Go for a quiet walk without headphones and let your mind settle.
• Use micro breaks between tasks to take a few slow breaths.
• Create a gentle evening routine with stretching or reading to help your body wind down.
5. Keep Sleep Consistent
• Seven hours or more supports the activity of dopamine receptors. A regular bedtime and wake time protects energy, attention, and mood regulation.
Winter may feel long, but it does not have to feel defeating.
When you support your body with small, intentional habits, you create a foundation of resilience that carries you through the season. Movement, mindfulness, and consistent rest are powerful tools that help you stay steady and connected to yourself. Each small action is a reminder that you are strong, capable, and worthy of feeling good, no matter what the weather is doing outside.

BY SASKIA STEINER AND CAMILLE FRASER
Saskia is a physiotherapist and co-founder of Knee Deep Fitness in Golden, B.C. She works with athletes, post-surgical clients, and older adults, with a speciality in pelvic and women’s health.
Camille is a kinesiologist, running coach and co-founder of Knee Deep Fitness in Fernie, B.C. She has years of experience working with young athletes and older adults taking a goal-based approach focusing on long-term sustainability.
KNEEDEEPFITNESS
As winter approaches, anticipation rises with the promise of fresh powder, crisp mountain air, and the familiar rush of carving down the slopes. But behind every smooth turn and confident descent lies an essential—if less glamorous—element of the sport: proper physical preparation. Skiing is a dynamic, full-body pursuit that demands strength, power, mobility, coordination, and endurance. The forces generated on the mountain place particular stress on key muscle groups, including the hips, glutes, quadriceps, hamstrings, and core stabilisers.
Well-conditioned hips and glutes support strong edging and help prevent the inward knee collapse that can throw a skier off balance. Powerful quadriceps and hamstrings are crucial for maintaining a stable ski stance, absorbing shock, protecting the joints, and controlling speed. A strong core keeps skiers centred over their skis, even in unpredictable snow or challenging terrain.
Early-season conditioning isn’t just about performance it’s a cornerstone of injury prevention. Skiing places significant strain on the knee joint and its supporting ligaments, particularly the ACL, making knee injuries some of the most common on the mountain. Many of these issues stem from inadequate muscular endurance. When the body doesn’t have the required strength, the knees end up absorbing forces they aren’t ready to handle. Strengthening the muscles that support ski-specific movements helps distribute load more effectively and reduces unnecessary stress on joints and connective tissues.
The good news? Pre-season training doesn’t have to be complicated. Even short, consistent sessions focused on the right muscle groups can deliver impressive benefits.
And one final tip: don’t abandon your strength routine once the lifts start spinning. Continuing your training throughout the season is one of the best ways to stay strong and ski better.
Squat
3 sets × 8 reps, 1-minute rest between sets
A foundational strength exercise that targets the quadriceps and glutes. These muscles take on significant load during downhill skiing—especially the quadriceps of the outside leg as you initiate and hold a turn.
• Start with feet shoulder-width apart
• Bend your knees to lower into the squat as far as your range of motion allows, then push back up to standing
• Make sure your knees track over your feet—if they wobble, engage your glutes to stabilise
• Keep your pelvis in a neutral position throughout the movement
Split Squat
3 sets × 8 reps, 1-minute rest between sets
This single-leg variation builds quad strength while also improving balance and hip stability. It’s an excellent way to train the control needed for dynamic weight shifts on the slopes.
• Start with one foot in front of the other, about hip-width apart
• Lower your back knee toward the floor until both legs form roughly 90° angles, keeping your back knee hovering just above the ground
• Push through your front foot to return to standing
• If you’re wobbling, pick a spot to focus on or stay close to a wall for extra support
Dead Bug
3 sets × 8 reps, 1-minute rest between sets
A highly effective core activation exercise that helps reinforce the stability and posture required for maintaining a strong, centred position over your skis.
• Lie on your back with your arms extended toward the ceiling and legs bent at 90°
• Lower your opposite arm and leg until they hover just above the ground, then bring them back to the starting position
• Repeat on the other side
• Keep your lower back pressed into the mat throughout the movement Side-Lying Adduction
3 sets × 8 reps, 1-minute rest between sets
This movement targets the adductors—the inner-thigh muscles heavily engaged in skiing. Strong adductors contribute to a solid ski stance and assist in stabilising the knee during edging and turning.
• Lie on your side with your hips stacked
• Bring your top leg slightly forward with your foot on the ground
• Lift your bottom leg toward the ceiling, keeping your pelvis and trunk stable
• Use your hand for balance if needed
Hamstring Curl
3 sets × 8 reps, 1-minute rest between sets
Designed to strengthen the hamstrings, which play a key role in knee stability. Balanced strength between the quadriceps and hamstrings is essential and can help reduce the risk of ACL-related injuries.
• Lie on your back with your feet resting on an exercise ball and legs extended
• Press your heels into the ball and roll it toward your glutes
• To make it more challenging, lift your hips into a bridge position
• Keep your arms by your sides, pressing into the floor for stability
Optional: For an added challenge, alternate 8 reps of squats with 8 reps of split squats before taking your 1-minute rest. This continuous cycle increases quadriceps endurance. Repeat for 3 rounds.


two pounds, on average. The real issue is not those
disruption to your habits, routines, sleep, digestion, and stress levels. That’s what makes January feel like a battle uphill.
digestive health specialist, I see it every year: it isn’t the holiday meals that throw people off. It is the all-or-nothing mindset
calendar flips to December. Many people say, “I’ll start fresh in January,” without realizing how much harder that approach makes things. Your health doesn’t need perfection during the holidays. It needs connection — to how you
Healthy holidays aren’t about saying no to the foods or experiences you love. They are about staying connected to what supports your energy, your gut, and your long-term well-being.
1. Choose Intention Over Restriction
Rather than avoiding festive foods, ask yourself how you want to feel. Add more fiber, prioritize veggies, drink more water, and enjoy treats slowly and intentionally.
2. Make Smart Swaps That Still Feel Joyful
Alternate alcohol with sparkling mocktails, build your first plate around vegetables, enjoy a protein-rich snack before a party, or bring a nourishing dish you love.
3. Stay Ahead of Stress and Burnout
Ten minutes of movement, a short outdoor walk, water before coffee, and a consistent bedtime may seem small — but they support your nervous system during a naturally busy season.
4. Protect Your Calendar and Your Peace
White space matters. If something drains more energy than it brings, it is okay to say no. Aim for connection, not perfection.
5. Prioritize Presence Over Performance
We often pressure ourselves to create the “perfect” holiday. But people remember the warmth, the conversations, and the moments — not the flawless table settings.
because people lack willpower — but because they enter January exhausted, inflamed, stressed, and running on low-quality fuel
December often brings:
• Poor sleep
• Heavier meals
• Increased alcohol
• Higher stress
• Less movement
• Blood sugar swings
• Gut disruption that affects mood, cravings, and motivation
When your body is depleted, your mind follows.
Starting the new year from a place of burnout makes motivation feel impossible.
But here’s the good news: small, intentional choices through December can completely transform how you feel in January.
You don’t need a rigid plan, a detox, or a January overhaul. What you need is consistency, compassion, and small habits that help you feel your best — even in a busy season. When you honour your health throughout December, January becomes something you can move into with clarity and confidence, not something to recover from.
Your December Feel-Good Formula
Small choices that keep you energized without sacrificing holiday joy. Connection > Perfection
Share real moments, not flawless hosting.
Nourish Before You Indulge
A veggie-forward plate and a protein-rich snack set you up to enjoy the rest. Move for Your Mood
Ten minutes of fresh air can reset your nervous system.
Hydrate Like It Matters
Because it does — especially in a month of rich meals and late nights. Create Space to Breathe
Saying no is sometimes the healthiest yes.


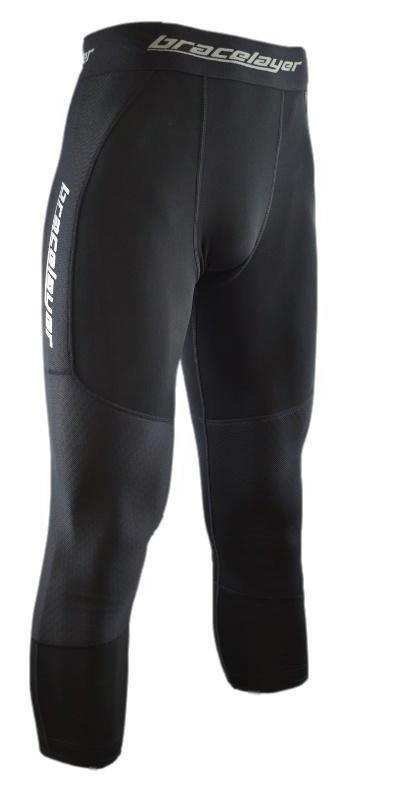

Ski longer and stronger – without knee pain! Bracelayer’s thermal compression pants with built-in knee support can help to combat joint instability, relieve knee pain, and prevent injury. Their KXV boot cut compression pants are available in thermal and non-thermal designs to keep you stable on any adventure.
$125
BRACELAYER BRACELAYER
BRACELAYER.CA
300 MerinoFine™ Polar
The 300 MerinoFine™ Polar Base Layer redefines cold-weather performance and next-to-skin comfort. Designed for those who venture where temperatures drop and conditions intensify, this heavyweight base layer set combines the elemental protection required for extreme environments with an unmatched, luxurious softness. Crafted from 100% ultrafine 15.5-micron MerinoFine™ wool, this set represents the highest expression of icebreaker’s natural fibre innovation: technical, elegant, and uncompromising.
$290 Top $255 Leggings
ICEBREAKERNZ ICEBREAKER
ICEBREAKER.COM


Ideal for taking on the challenges of winter without hesitation. With its full-grain leather upper, these boots will not only keep you looking stylish all season long but will also provide stability on icy streets. Made in Europe, the Rita style is a must-have for unforgettable winter adventures, offering a range of impressive features such as a waterproof membrane and ALASKA outsole with grips by OC System®.
$299.95

Be seen and be safe with 360 degrees of illumination. Features include 6 ultra-bright colours with 3 modes, a front headlight, flash settings, adjustable chest strap and a longlasting rechargeable battery. Weatherproof and sweat-resistant, this is the perfect choice for any runner, walker or cyclist.
$70.00
FRONTRUNNERSVIC FRONTRUNNERSVICTORIA FRONTRUNNERS.CA
Devon + Lang is a Calgary-based brand that gives back to the community with every order. Life-changing underwear for work, play, and everything in betweenbecause feeling good in your underwear isn’t optional.
Penguin Party Bria Bralette $39 Penguin Party Bria Bikini $24 Ice Hockey Journey Boxer $34
DEVONANDLANG DEVONANDLANG DEVONANDLANG.COM


Dream Nation Apparel inspires everyone—from beginners to seasoned athletes—to move with confidence, purpose, and pride. Every piece blends comfort, performance and style. Your dream. Your gear. Your impact. A portion of our sales also goes to support local charity initiatives.
$67 Sports Bra $97 Mesh Sides Leggings Use code IMPACT10 for 10% off your entire order DREAMNATIONAPPAREL DREAMNATIONAPPAREL DREAMNATIONAPPAREL.COM


Most home fragrances are filled with synthetic chemicals. This limited-edition, certified organic reed diffuser captures the warmth of the season with pure frankincense, mandarin, and clove essential oils— nothing artificial. Because the scent of your home should elevate your well-being, not compromise it. Clean living, elevated.
$99
HIGHSTREETSHOPPE HIGHSTREETSHOPPE.CA
HIGHSTREETSHOPPE.CA

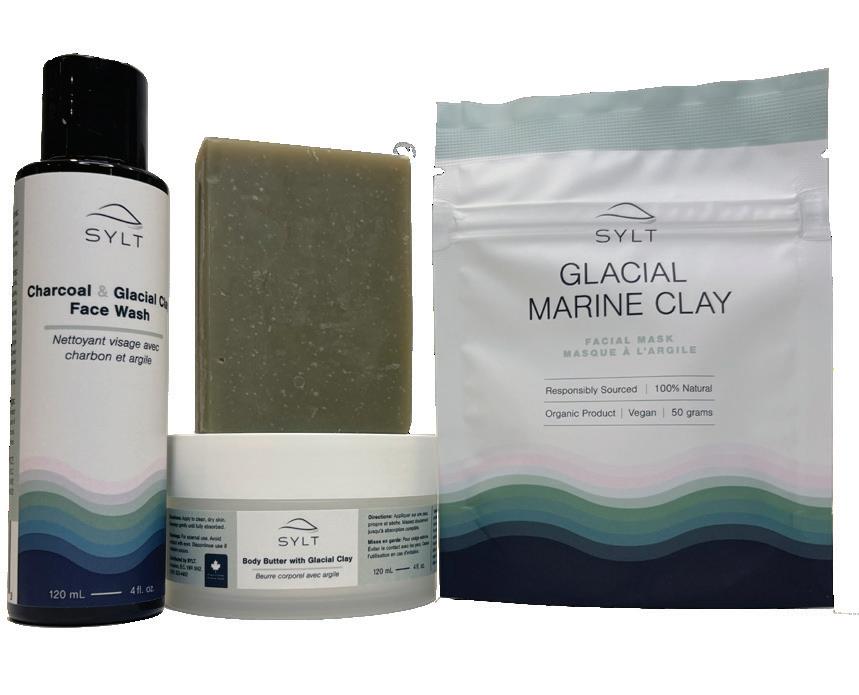
Detox, hydrate and nourish your skin with purely Canadian Glacial Clay products. Loaded with 50+ trace minerals, marine nutrients and naturally charged particles to pull impurities from the skin. Traditionally used by local indigenous communities to heal a range of skin conditions, the clay leaves skin feeling silky and smooth. Treat yourself to a home spa over the holidays!
Holiday Special $74.99 ($103 retail value)
SYLTCLAYCO SYLTCLAYCO SYLTCLAYCOMPANY.COM
Bianca
Meet the perfect anti-aging duo. Begin with Ellie Bianca’s Hydrating Face Toner, powered by Hyaluronic Acid and Niacinamide to deeply boost hydration and revive your glow. Follow with our Rose Face Oil, supporting cell renewal for smoother, brighter, holiday-ready skin. Soft, dewy, naturally radiant — beautifully you.
$89.99 ELLIEBIANCABEAUTY ELLIEBIANCA ELLIEBIANCA.COM


15% off any purchase
Discount code: impact15
*One-time discount applies to online skincare only; cannot be combined with any other discount.

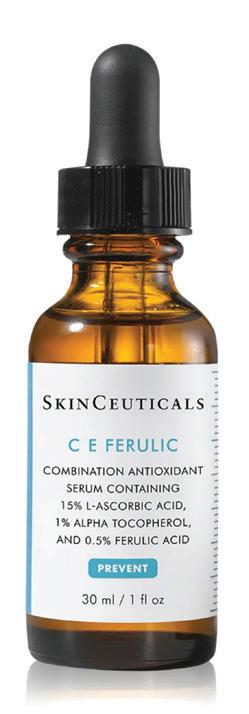
SkinCeuticals CE Ferulic is a renowned antioxidant serum with vitamin C, vitamin E, and ferulic acid for advanced environmental protection. It reduces visible signs of aging, improves firmness, and brightens skin. Known for long-lasting antioxidant performance, it leaves the complexion smoother, more even, and more resilient against daily oxidative damage.
$220
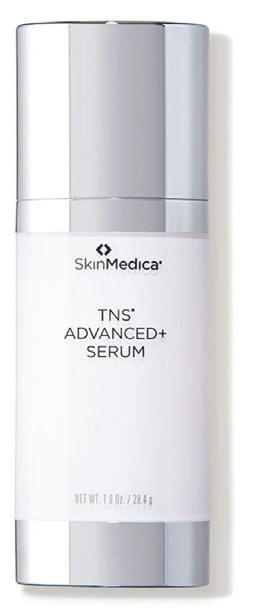
SkinMedica TNS Advanced+ Serum features a dual-chamber system delivering growth factors and peptides to support smoother, firmer, more youthful-looking skin. It targets coarse texture, fine lines, and overall tone. With consistent use, it helps improve visible signs of aging and enhances skin clarity, elasticity, and healthylooking luminosity.
$330
Vivier CE Peptide Serum blends pharmaceutical-grade vitamin C with peptides to brighten skin, soften fine lines, and enhance radiance. Its stabilized formula targets uneven tone and environmental stress. Lightweight and fast-absorbing, it supports collagen production while improving overall texture for a smoother, firmer, and more luminous complexion with daily use.
$216


The ZO Anti-Aging Kit is a curated regimen designed to visibly smooth texture, improve firmness, and support a more youthful complexion. It combines exfoliation, antioxidant protection, and hydration to address fine lines and dullness. Consistent use helps promote healthier-looking skin with improved tone, clarity, and long-term skin barrier strength.
$300

Can’t make a live Get RIPPED! class with Jari Love? Train anytime, anywhere with hundreds of strength, HIIT, mobility, beginner-friendly workouts — plus all our award-winning Get RIPPED!® workouts. Enjoy up to 50% off your first month or year, plus FREE Early Access to the NEW Ageless by Jari launching next month. Lock in your rate and save!
From $19.99/month
RIPPEDJARI JARILOVEFITNESS
JARILOVE.COM
Whether you’re jumping into fitness, reconnecting with community, or finding more ways to play as a family, a Vivo membership gives you everything you need to feel your best, all year long. Until December 24, 2025, when you purchase an annual (12-month) membership during Vivo’s 21st birthday celebration, you’ll receive a 13th month free (an $80 value), plus we’ll waive the $75 Set Up Fee for a total savings of $155!
Adult $965
VIVOYOURLIFE VIVOYOURLIFE
VIVO.CA

VIVOYOURLIFE


Upgrade your recovery routine. The new Travel Roller® High-Performance Foam Rolling System releases deep tension and restores mobility. Guided by the This Is How We Roll ® Method, you’ll ease muscle tightness, speed repair, and elevate your recovery. The perfect gift for anyone striving to stay mobile, strong, and pain-free. Celebrating 18 YEARS of Travel Roller®.
$80
SAVE 15% off all Travel Roller® products with code: IMPACT15 TRAVELROLLERGIRL TRAVELROLLER TRAVELROLLER TRAVELROLLER.COM

Give the gift of wellness and grow your knowledge this holiday season with Human Kinetics’ latest titles – an ideal gift for anyone wanting to build their reading library and feel their best! From training essentials to mindful living, there’s a book for every health, fitness and sports enthusiast.
$35-50
HUMANKINETICSCANADA HUMANKINETICSCANADA
CANADA.HUMANKINETICS.COM


Erin Phelan Fit
Transform your fitness in 90 days with one of Canada’s Top Fitness Instructors. Our 3-Month Virtual Training Package includes two personalized 1:1 coaching sessions and unlimited access to live and recorded workouts designed to build strength, confidence, and consistency. Train anywhere, stay accountable, and feel the impact of expert guidance every step of the way.
$299
ERINPHELANFIT ERINPHELANFIT ERINPHELAN.COM
Feel lighter, clearer, and more balanced with lymphatic massage, red light therapy, pulsed magnetic therapy, cold therapy, and more— either in a single session or across multiple restorative experiences. This is perfect for anyone who wants to start the new year feeling renewed. Open during the holidays.
$99 Six Services
UPGRADELABSCALGARY UPGRADELABSCALGARY
UPGRADELABS.COM/CALGARY

Dial H30: Full-Featured Body Composition Scale
Instead of looking at your body as one unit, the H30 can assess each part separately to establish more exact measurements for body composition outputs, including Percent Body Fat, Skeletal Muscle Mass, Upper/Lower Body Balance and Visceral Fat Level.
$499.00
INBODYCANADA
SHOP.INBODYCANADA.CA

Fyonna Vanderwerf, Bees Knees Wellness Muskoka
A 12-week midlife reset for women who want REAL strength, clarity and energy. No BS, no confusion — just powerful coaching that works. Weekly coaching that’s private PT + a personalized strength + hormone support plan. If you’re ready to feel strong in your body and your life… this is your moment.
$1750 Holiday Promo $997
BEESKNEES_MUSKOKA.PT
BEESKNEESMUSKOKA.COM

Start your holiday season off right! Up until Christmas Eve get 12 admissions for the price of 10 with the 12 Days of Fitness Pass. Stay active with a variety of fitness classes including Get Ripped, Group Power, Yoga, TechnoSPIN, and so much more. Plus, the passes are good for 2 years! There’s something for everyone under the tent!
$152


10 Hour Package in the Energy Enhancement System, using science and light to create a bio photonic field to charge your cells. A natural choice for relief from anxiety, aches, autoimmune conditions and more. If you’ve been looking for a natural, non-invasive way to support your body’s healing, this is for you.
$650
LUMINESCENCE_HEALING LUMINESCENCE HEALING INC. LUMINESCENCEHEALING.COM
For the person who’s impossible to shop for, choose a gift as unique as they are! The MyBlueprint™ DNA kit uses advanced technology to uncover individual genetic insights and provides a personalized action plan for better health. It’s the perfect gift for everyone on your list.
$300 Now $270
AORHEALTH AORHEALTH AOR.CA
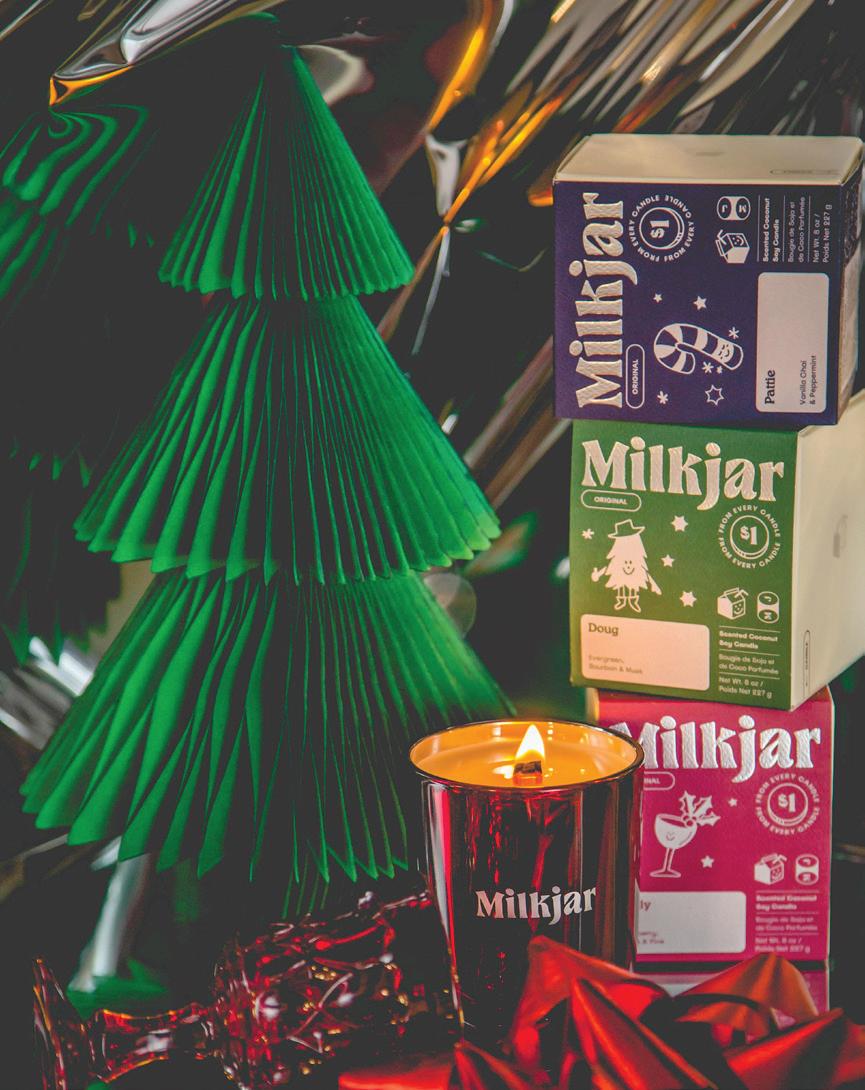

Warm up the holidays with the “Silver Smells” bundle from Milk Jar, three 8-oz candles: cranberry-clove-pine, vanilla-chai-peppermint, and evergreen-bourbon-musk. A trifecta of rich seasonal fragrances that transform any space into a festive delight. Free shipping included on bundles.
$105
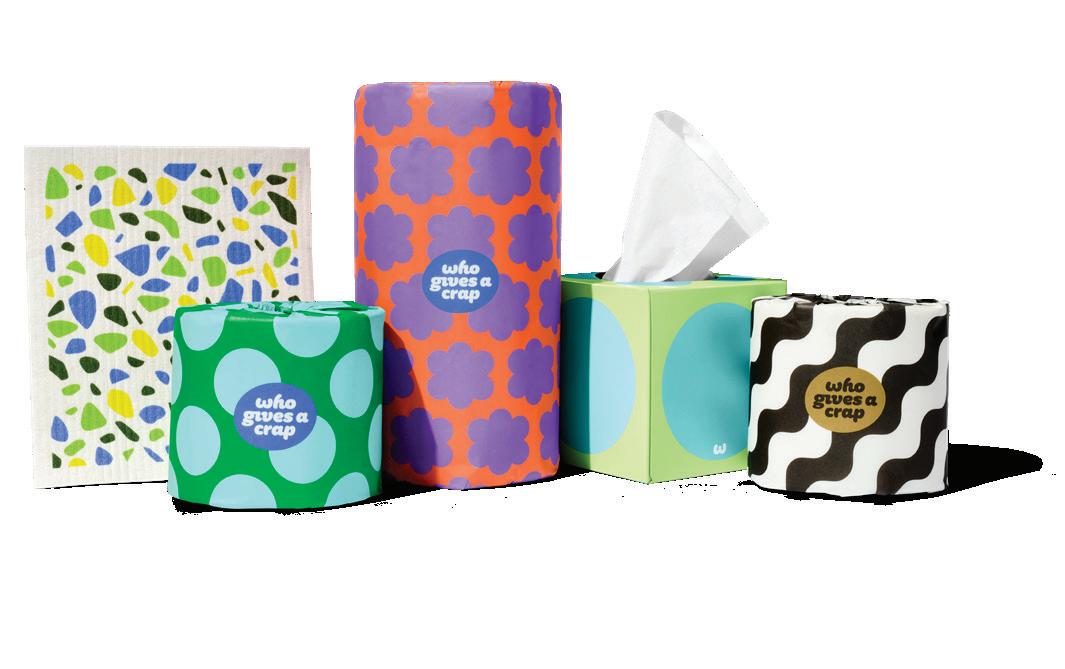
While traditional TP contributes to deforestation in the climate-critical boreal forest, Who Gives a Crap does not cut down virgin trees to make its products and uses 100% Bamboo or recycled materials to make their products. WGAC makes eco-friendly living easy, delightful, and better for people, the planet and your bum.
From $27
WHOGIVESACRAP
WHOGIVESACRAP.ORG
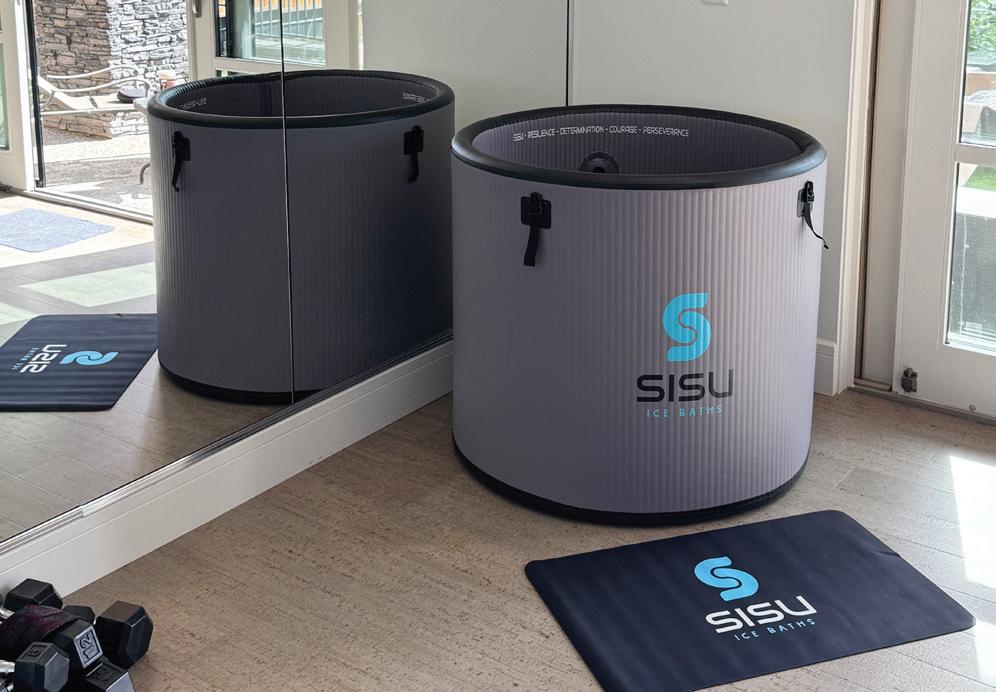
The Kemi Barrel Lite Cold Plunge is your go-to cold therapy solution for fast recovery, mental clarity, and peak physical performance. Built for simplicity and strength, this tub is popular with users across Alberta, Ontario, British Columbia, Quebec, and beyond. From home gyms to outdoor setups, it offers reliable performance wherever you need it.
$999
SISUWELLNESSCO PEOPLE/SISU-WELLNESS
SISUWELLNESSCO.COM
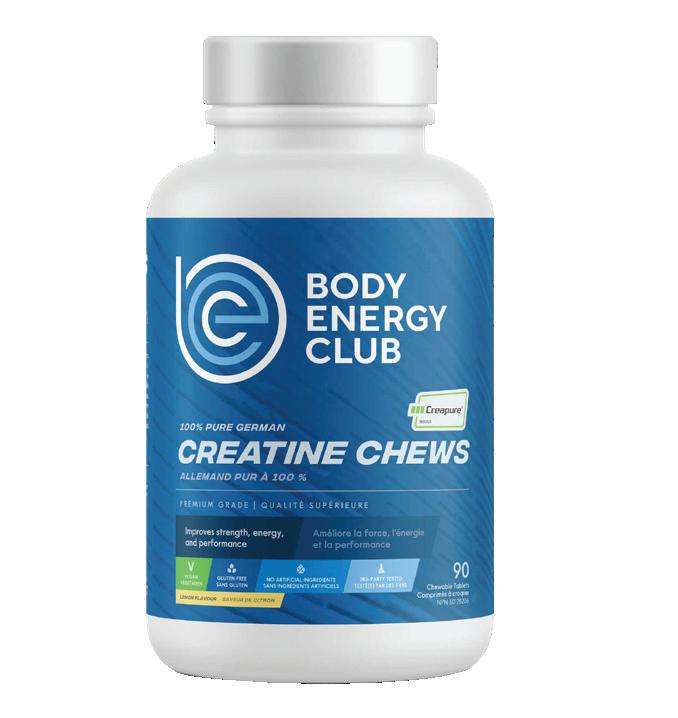
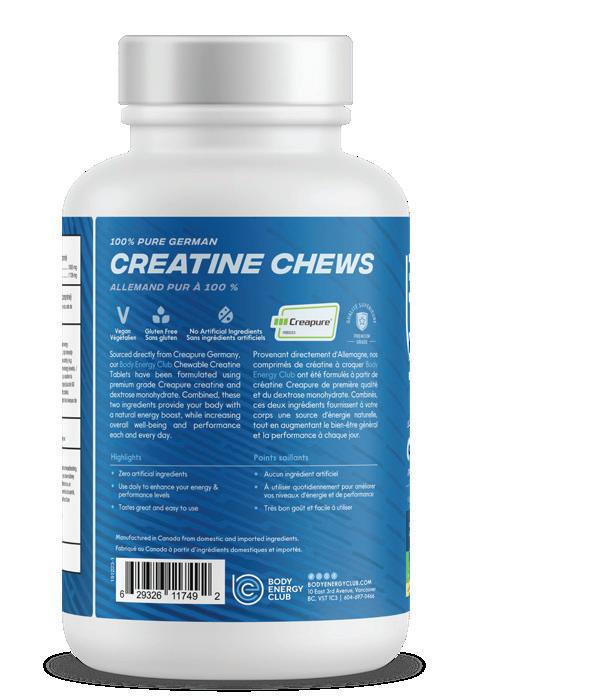
Body Energy Club
Body Energy Club’s Creatine Monohydrate Chews deliver Creapure®—the most studied and clean form of creatine—in a convenient chewable format. Ideal for athletes and trainers with busy schedules, these chews make daily creatine effortless: no water, no measuring, just reliable consistency and a delicious taste. Gluten-free and vegan, they’re a smart addition to any performance-driven routine seeking simplicity and trusted quality.
$34.99
BODYENERGYCLUB BODYENERGYCLUB BODYENERGYCLUB.COM

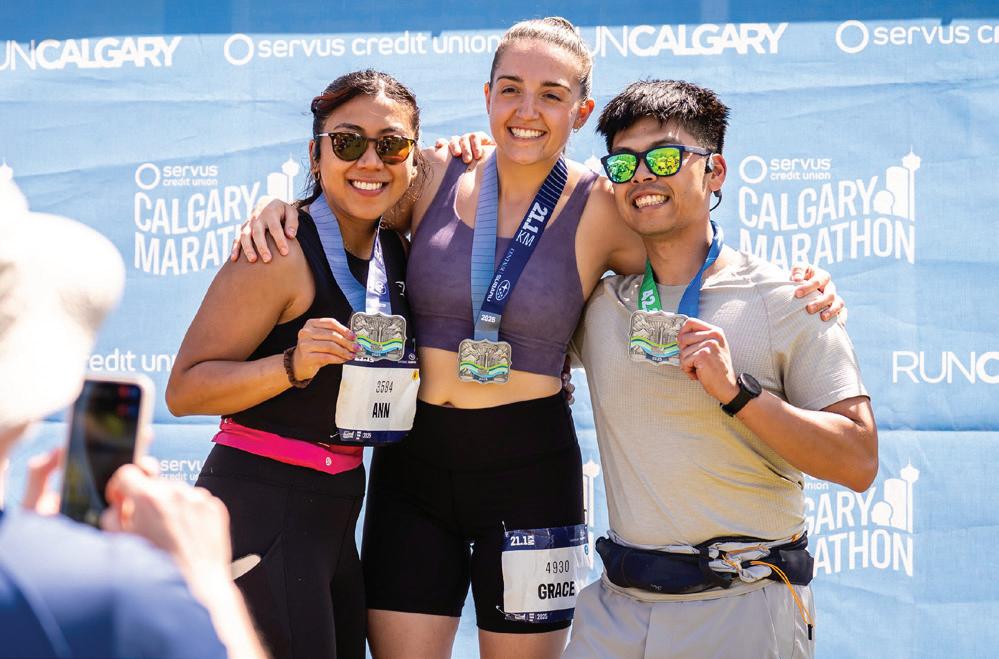
Gift your loved ones a life-changing experience! Train together. Race together. Celebrate together. The Blue Sky City is waiting for you on May 23 & 24! With six distances to choose from, there’s a race for everyone!
$24.68 - $136.69 (Early Bird Pricing)
CALGARYMARATHON CALGARYMARATHON
CALGARYMARATHON.COM
Give yourself or the people you love the gift of experiencing why Canada Army Run is considered “No Ordinary Race” this September! Run, walk or roll with your Canadian Army past meaningful monuments in the Nation’s Capital or join us virtually from anywhere in Canada while raising money to support our serving military members, Veterans and their families.
$50-$120
The Get Shit Done Run is your no-excuses, all-fun kickoff to the new year! Offering 5 km, 10 km, and 21.1 km distances, this high-energy community event is designed to help you crush your goals. Whether you’re walking, jogging, or chasing a new PB, this run is all about showing up, feeling strong, and getting it DONE. Join the movement, register now and lace up on April 26, 2026 at one of the best races in YYC!
$55-$125
RNRPREMIEREVENTS GETSHITDONERUN.COM

Hettas is a Canadian performance footwear brand rooted in research and biomechanics, designed around female anatomy. The Alma Cruise, part of the Alma performance line, features a TPU mesh upper, Pebax plate, and super-critical foam midsole tuned for everyday comfort and energy return. With VeloPropulsion technology, it delivers a supported, cushioned stride—ideal for warmups, walking, and long, slow runs.
$238
WEAR_HETTAS HETTAS
HETTAS.CA
Designed to break records, the Adizero Adios Pro 4 is adidas’ pinnacle marathon shoe. Its elite technology, including carbon-infused ENERGYRODS
2.0 for efficient strides, LIGHTSTRIKE PRO for superior cushioning, and LIGHTTRAXION for ultimate grip, empowers athletes to push past their limits and experience their fastest race yet.
$300
ADIDASRUNNING
ADIDAS.CA


This shoe features the new SuperFloat+ Foam combined with a re-engineered Zig Tech technology in the midsole, to help create an even springier, bouncier, and more stable run. SuperFloat+ is a unique nitrogen-injected lightweight Supercritical foam, which provides premium cushioning and offers a high energy return. Built for new runners, seasoned professionals, and everyone in between, the refined Zig Tech midsole shape offers improved comfort and stability due to a wider midfoot geometry that remains soft and springy through every stride.
$175


Designed for runners who move seamlessly between city streets and rugged trails, this shoe balances comfort, grip, and endurance. TuneLug™ traction, Euforia™ cushioning, and the Rippy™ 66 monomesh upper work together for a stable, breathable, and responsive ride across changing terrain. Built for roadto-trail mileage and mid-to-ultra efforts.
$415
First launched in 2013, the XT-6 became the go-to shoe for elite ultra-distance athletes. Now it’s back, built with Salomon’s proven performance tech: a Mud Contagrip® outsole with deep lugs for tough terrain, an Agile Chassis™ System for stability and cushioning, and a responsive EnergyCell midsole. Designed for comfort and easy wear on or off the trail.
$230


LESSONESEVEN LESSONESEVEN LESSONESEVEN.COM
Designed with a proprietary Arnitel® TPEE midsole for superior energy return and durability, this ultradistance runner pairs an exclusive Vibram® soleplate with the world’s first seamless Dyneema® upper: the strongest and lightest material on Earth. Every component is considered: bio-based Dyneema® laces, custom eTPU insoles for responsive cushioning, and reflective details for 360° visibility. $295


Based on the version that released in 2008, this sneaker is still running on comfort. The shoe’s iconic details from the late 2000s resurface, including the asymmetric upper design and its signature open mesh application. The midsole’s dual-layer EVA foam, GEL® technology inserts, and TRUSSTIC™ system are designed to help provide advanced cushioning and support.
Give a gift of comfort from our kitchen with our Lemon & Ladle Bespoke Gift Baskets. Each is filled with handcrafted soups, savoury casseroles, rustic stews and fresh baking – all made with locally sourced Alberta ingredients. Perfect for the holiday season. Or grab some locally sourced take-home comfort meals from hearty mains such as vegetable soup and stews, enchiladas, mac and cheese and savoury baked goods for yourself!
$100-$300
LEMONANDLADLE LEMONANDLADLE.COM

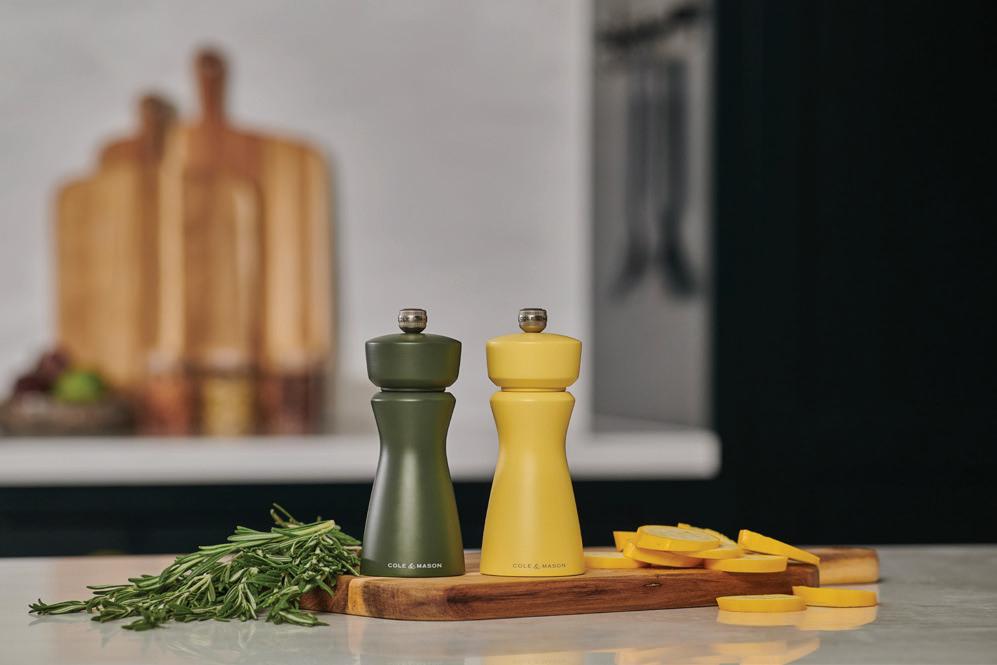
Kenton is the new mill from British heritage brand Cole & Mason, the pioneer in seasoning innovation! Each mill comes with both a salt and a pepper knob, ideal for flexible cooking or gifting as well as color mixing and matching to make a style statement. Available in Blue Salt, Sea Salt, Sage, Sichuan Pepper and in Rosemary and Turmeric (both shown).
$29.95 each COLEANDMASON SWISSMARSHOP.CA
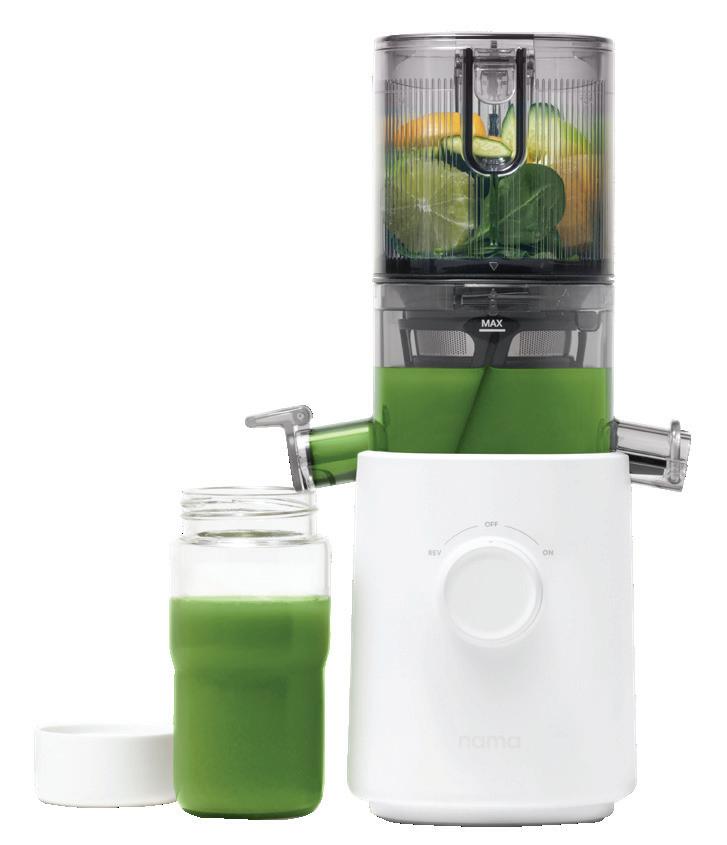
For those who love the benefits of juicing but need a more space-saving option, the Nama J3 is the perfect solution. Offering the same advanced technology and nutrient preservation as the J2, the J3 delivers top-tier juicing performance in a more compact form, making it an ideal gift for those with smaller kitchens or on-the-go lifestyles.
$499

These coffee accessories from Breville’s Craft Collection™ elevate every brewing ritual with premium tools designed for precision and style. From thoughtfully engineered tampers to beautifully crafted naked portafilters, each piece enhances control and performance to bring café-level finesse, durability, and aesthetic appeal to any home barista’s coffee setup.
Starting at $49.99
BREVILLE.CA
Breville’s Oracle® Dual Boiler is the ultimate gift for coffee lovers, offering both Auto and Manual modes for a true café experience. With new Auto Dial-in, Auto Puck, and Auto MilQ features, transform fresh beans and your milk of choice into rich, velvety espresso and perfectly textured microfoam every single time
$4399.99
BREVILLE.CA

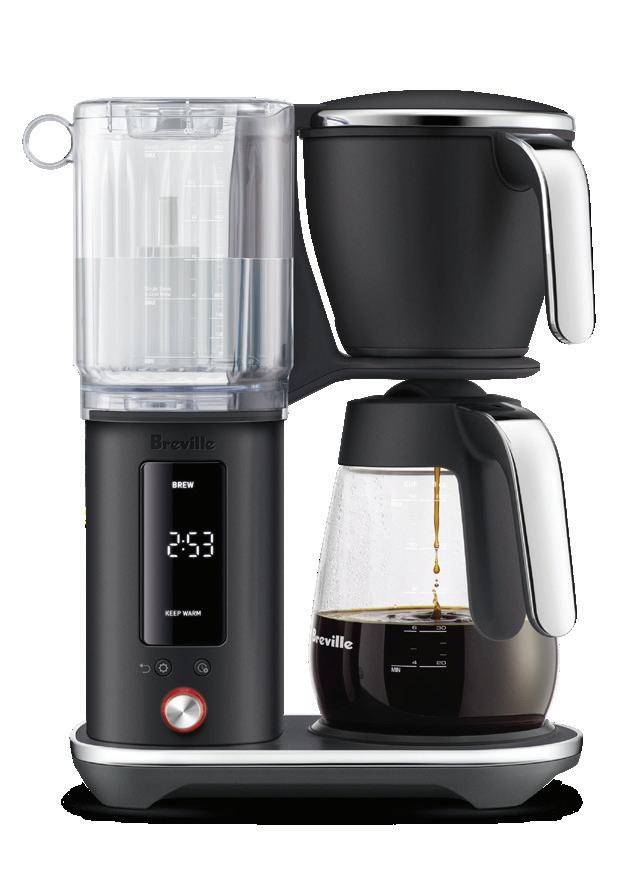
Achieve great brews at the touch of a button. The Luxe Brewer™ Glass by Breville offers customizable coffee options to your exact taste, cold brew ready in up to 30 minutes, an integrated heater plate to keep your coffee hot for up to 6 hours, a programmable timer to start automatically whenever you like, and more.
$449.99
BREVILLE.CA
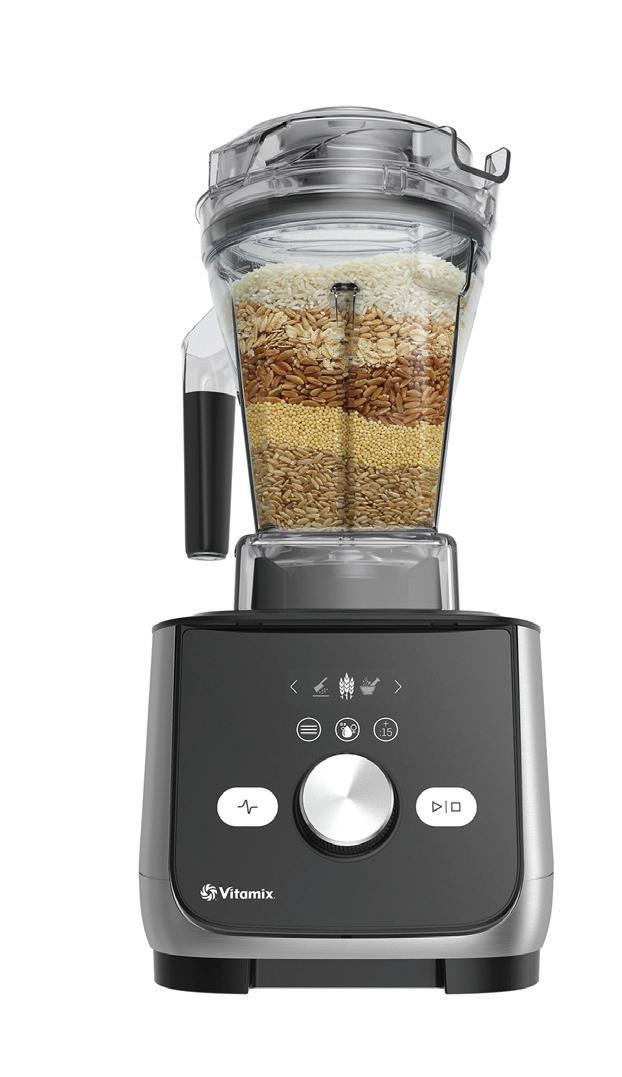
The Vitamix Ascent X5 features a 48-ounce Container, an automatic Self-Cleaning Program, and ten Blending Programs (Smoothies, Frozen Desserts, Soups, Frozen Cocktails, Dips & Spreads, Smoothie Bowl, Frappé, Nut Butters, Non-Dairy Milks, and Spice Grinding). Add SELF-DETECT® containers and attachments to build a customized blending system designed to fit your needs.
$1,099.95
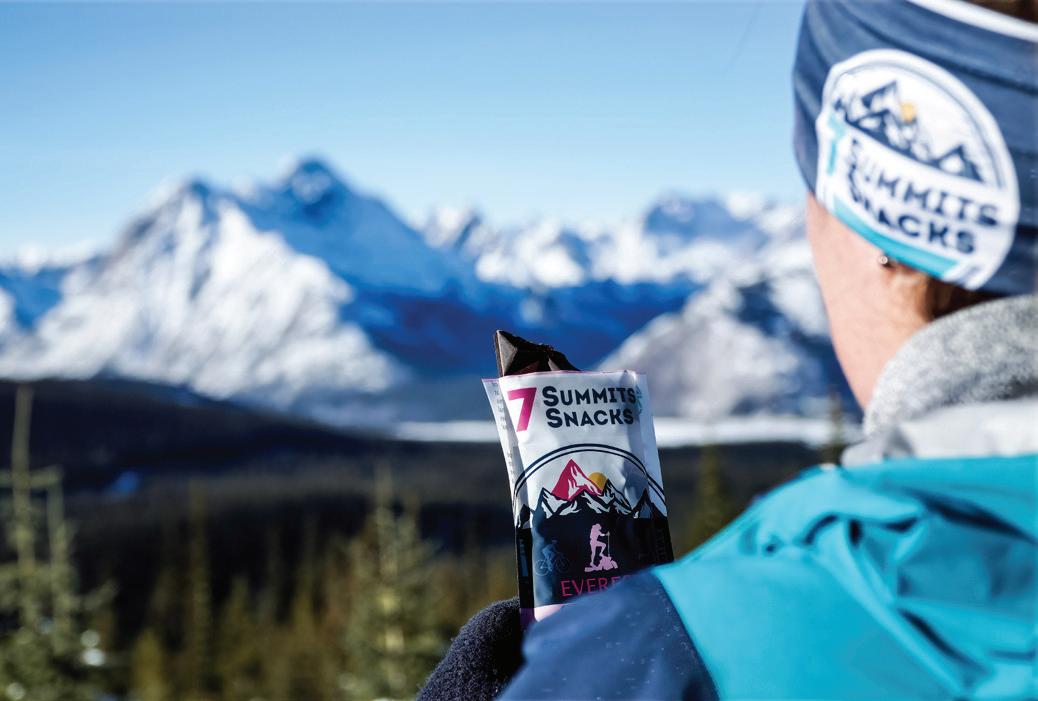
Give the outdoor lover in your life a gift that fuels as well as it tastes. 7 Summits Snacks fuels your next adventure with award winning, functional chocolate crafted to inspire every snowy trail and crisp winter sunrise. In addition to our online store, we are stocked in 200+ retailers in Canada.
Explorer Boxes From $41.50
Use code IMPACT for 15% off your holiday Explorer Box
7SUMMITSSNACKS 7SUMMITSSNACKS
SEVENSUMMITSSNACKS.COM
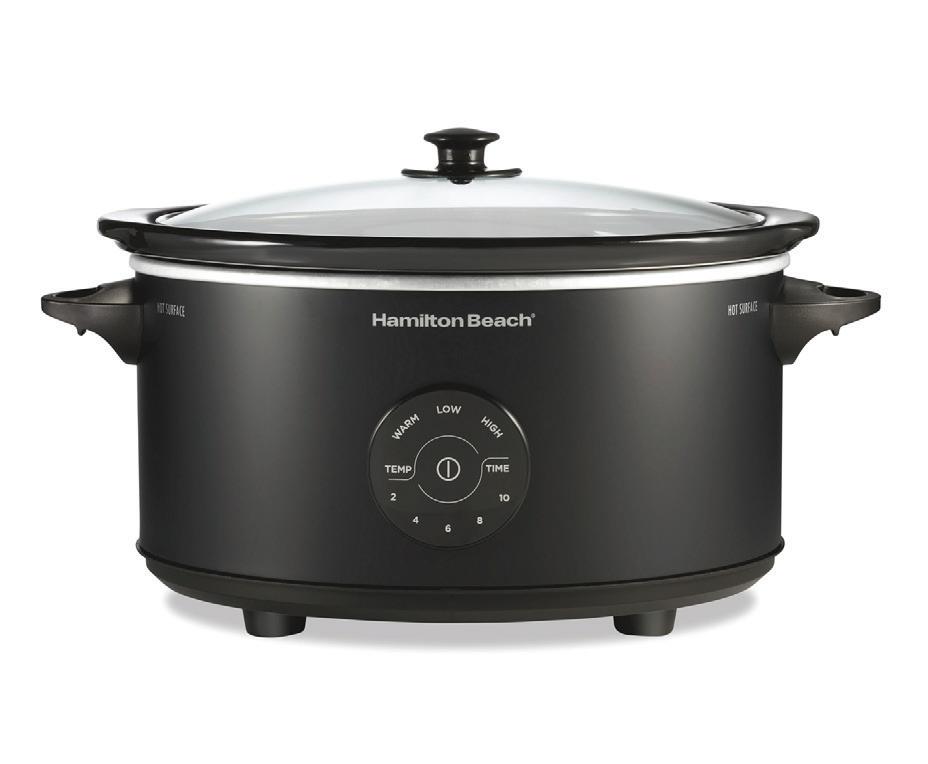
Effortless cooking starts here. The Hamilton Beach® 6 Quart Programmable Slow Cooker features 15 cooking options, a dishwasher-safe crock and lid, and room for a 6 lb. chicken or 4 lb. roast—making it an easy, crowd-pleasing gift for anyone who loves simple, reliable meals for family and friends.
$49.98 until December 17/25
HAMILTONBEACHCA
AVAILABLE AT WALMART CANADA


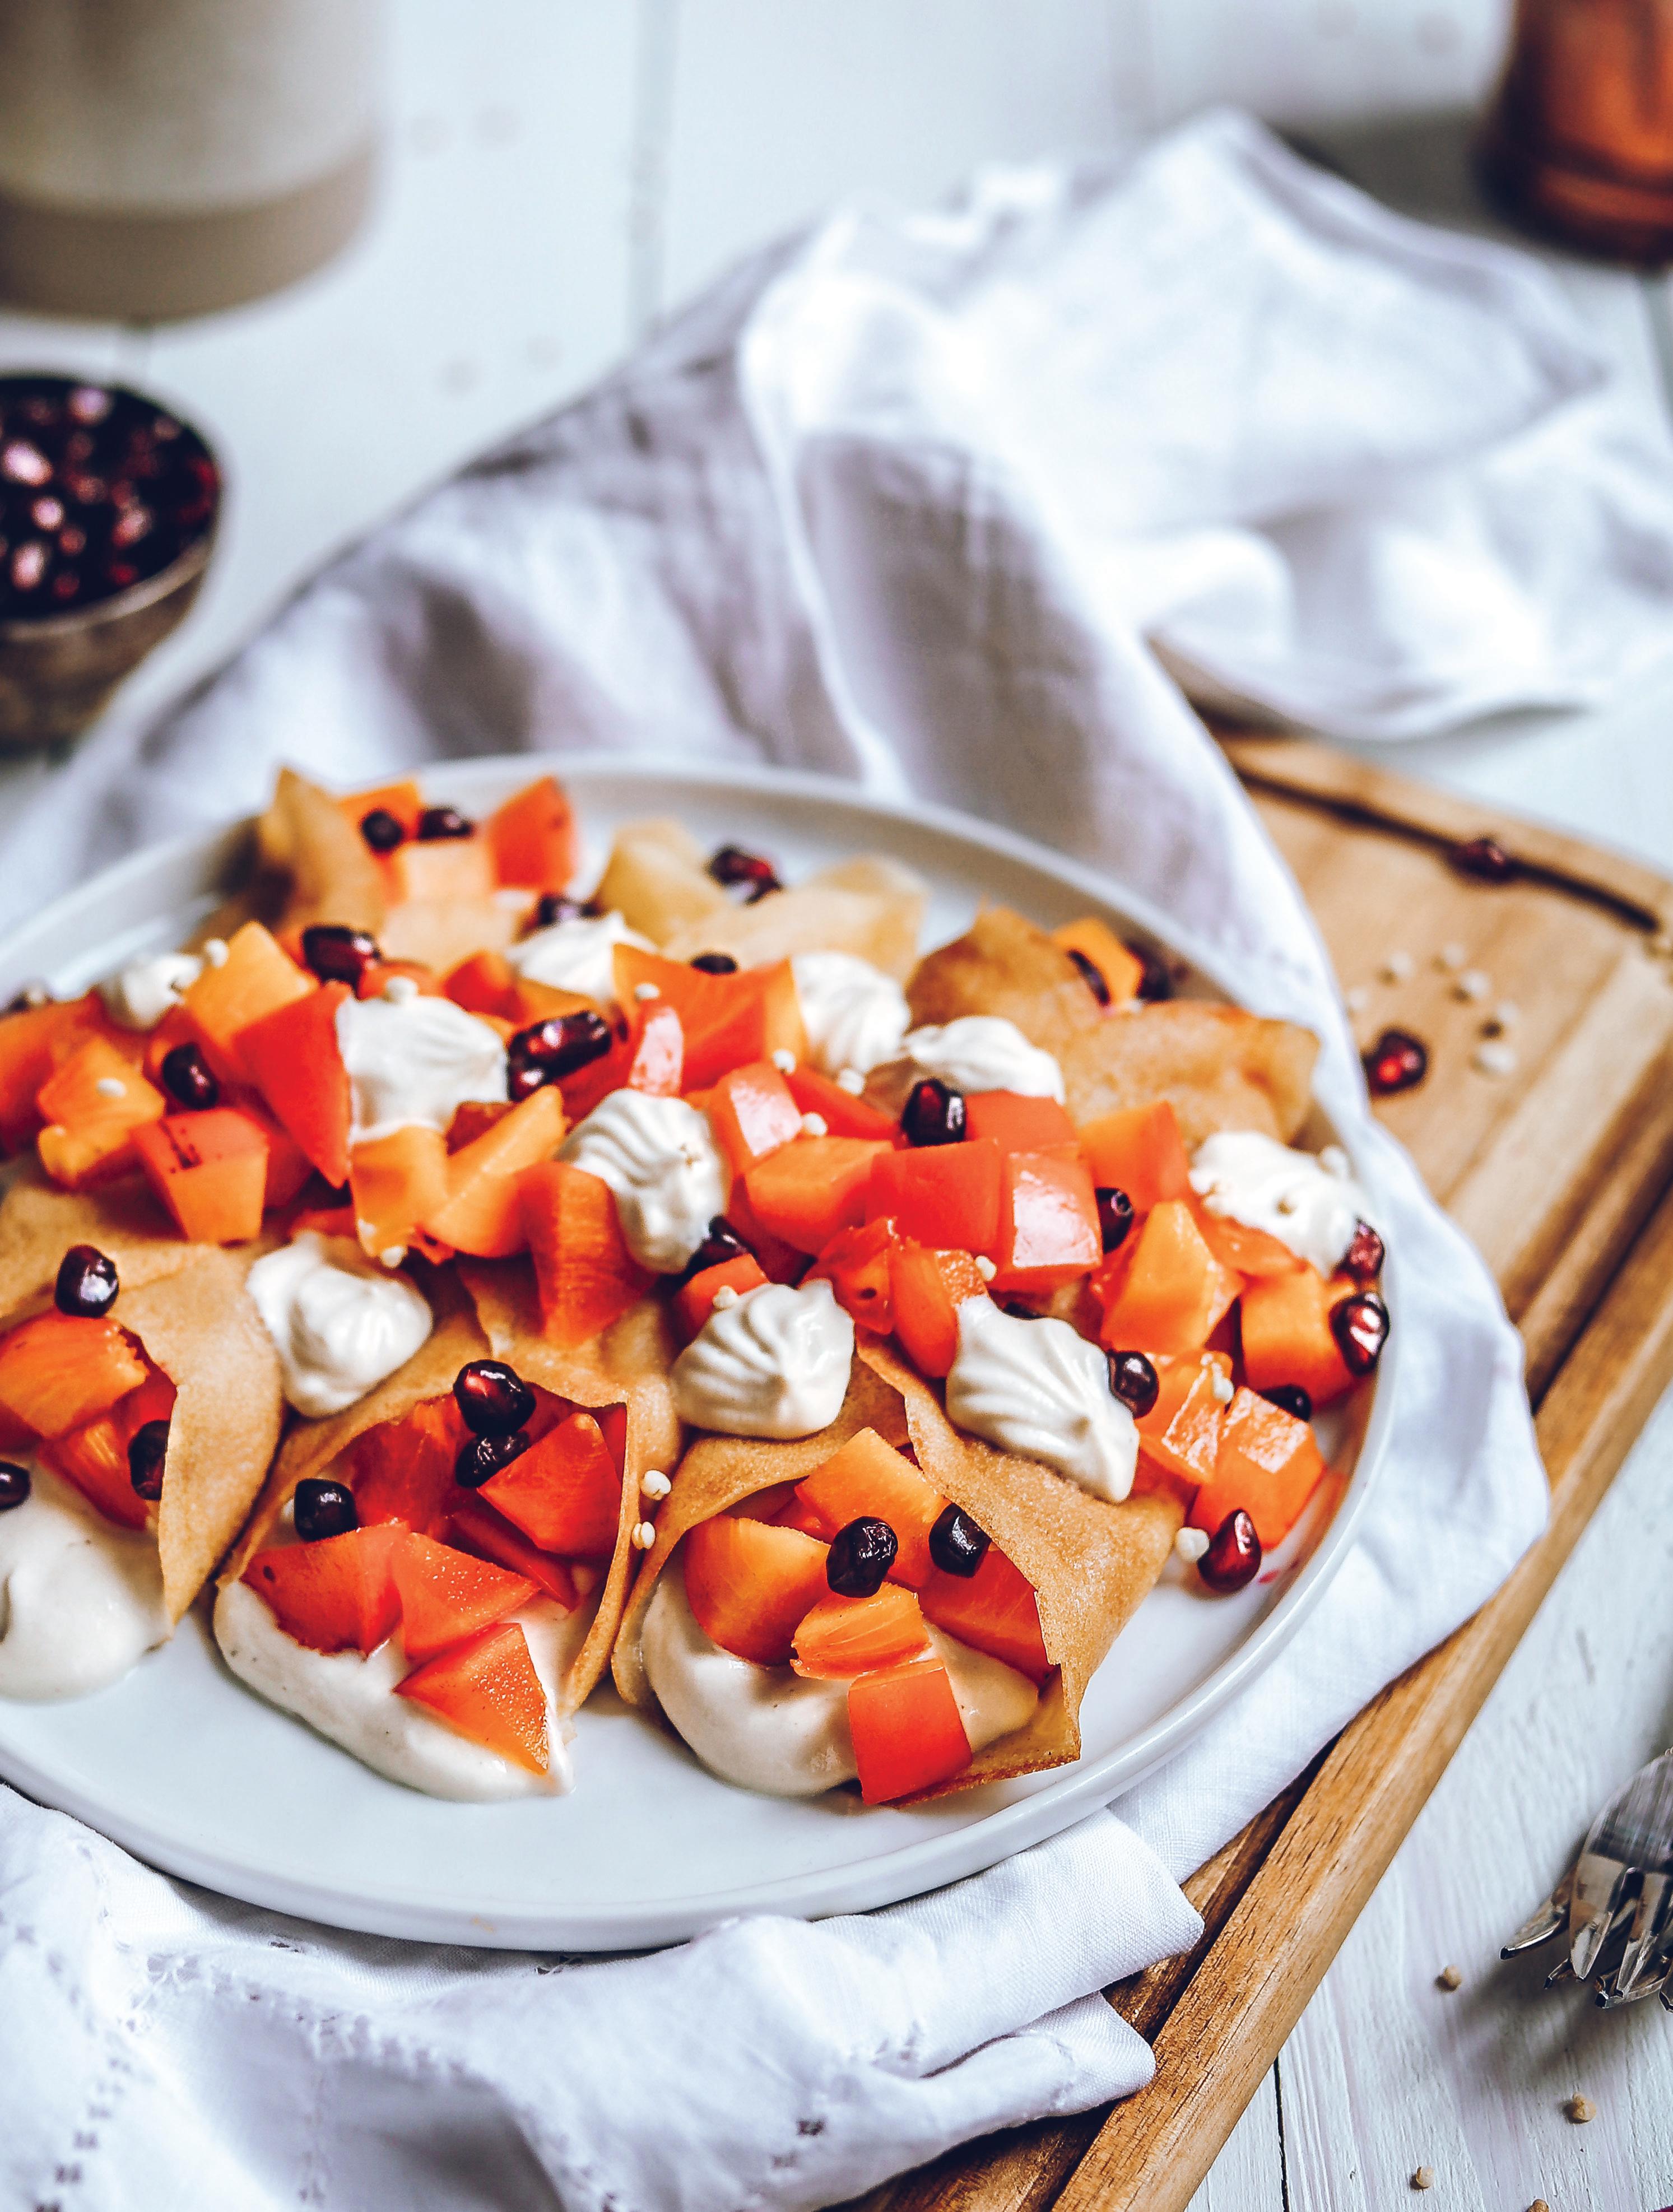
tasty, fruity wrap for Sunday brunch, breakfast or dessert
RECIPE & PHOTOGRAPHY BY HANNAH SUNDERANI
Founder & creator of Two Spoons food blog in Toronto, ON TWOSPOONS.CA TWOSPOONSDOTCA
Asimple and easy classic vegan crepe recipe. Light and pillowy. Topped with ripe persimmon, cashew whipped cream and fresh pomegranate to sprinkle. Try it for brunch!
Makes 10 crepes
INGREDIENTS
CREPES
• 1 cup all purpose flour
• 1/4 tsp. sea salt finely ground
• 1 1/2 cups oat milk or other plant-based milk
• 3 Tbsp. rapeseed oil or other neutralflavoured oil
• 1 Tbsp. maple syrup
• 1 tsp. vanilla extract
• ~2 Tbsp. filtered water optional to add more
• 1 persimmon, chopped
• 1/2 pomegranate
• maple syrup to drizzle
CASHEW WHIPPED CREAM
• 1 cup raw cashews soaked overnight and strained
• 1/4 cup canned coconut milk
• 1 tsp. vanilla extract
• 2 tsp. agave
• 1 tsp. lemon juice
• 1 tsp. apple cider vinegar
• pinch salt
• 4-6 Tbsp. almond milk
CREPES
In a mixing bowl, add flour and salt. Whisk to combine. Add oat milk, oil, maple syrup and vanilla. Whisk again until well combined and place in the fridge to chill for at least one hour.
Lightly oil a non-stick pan and bring to medium heat. Pour 1/4 cup of crepe batter onto the pan and swirl it around until the entire surface is coated (as best you can) and batter takes on a generally circular shape. Cook until edges start to pull away from the pan (1-2 minutes). Then, gently flip and cook the other side for 15-20 seconds. Slide crepe onto a plate. Adjust batter if needed (if it was too thick, add a splash more water. I used 2 Tbsp. water to thin).
Repeat step two until you've used all the batter. To serve, fill the crepes with a scoop cashew whipped cream, top with sliced persimmon and pomegranate seeds. Add maple syrup to drizzle.
Cashew Whipped Cream
In a blender, add soaked cashews (strained), canned coconut milk, vanilla extract, agave, lemon juice, apple cider vinegar, and pinch of salt. Blend or pulse to combine. Then, slowly pour in a few tablespoons of almond milk until cashew icing blends into a smooth, creamy and fluffy mixture. (I used 4 Tbsp. almond milk total).
Nutrition facts per serving Calories 194; protein 4 g; fat 11 g; carbs 20 g.

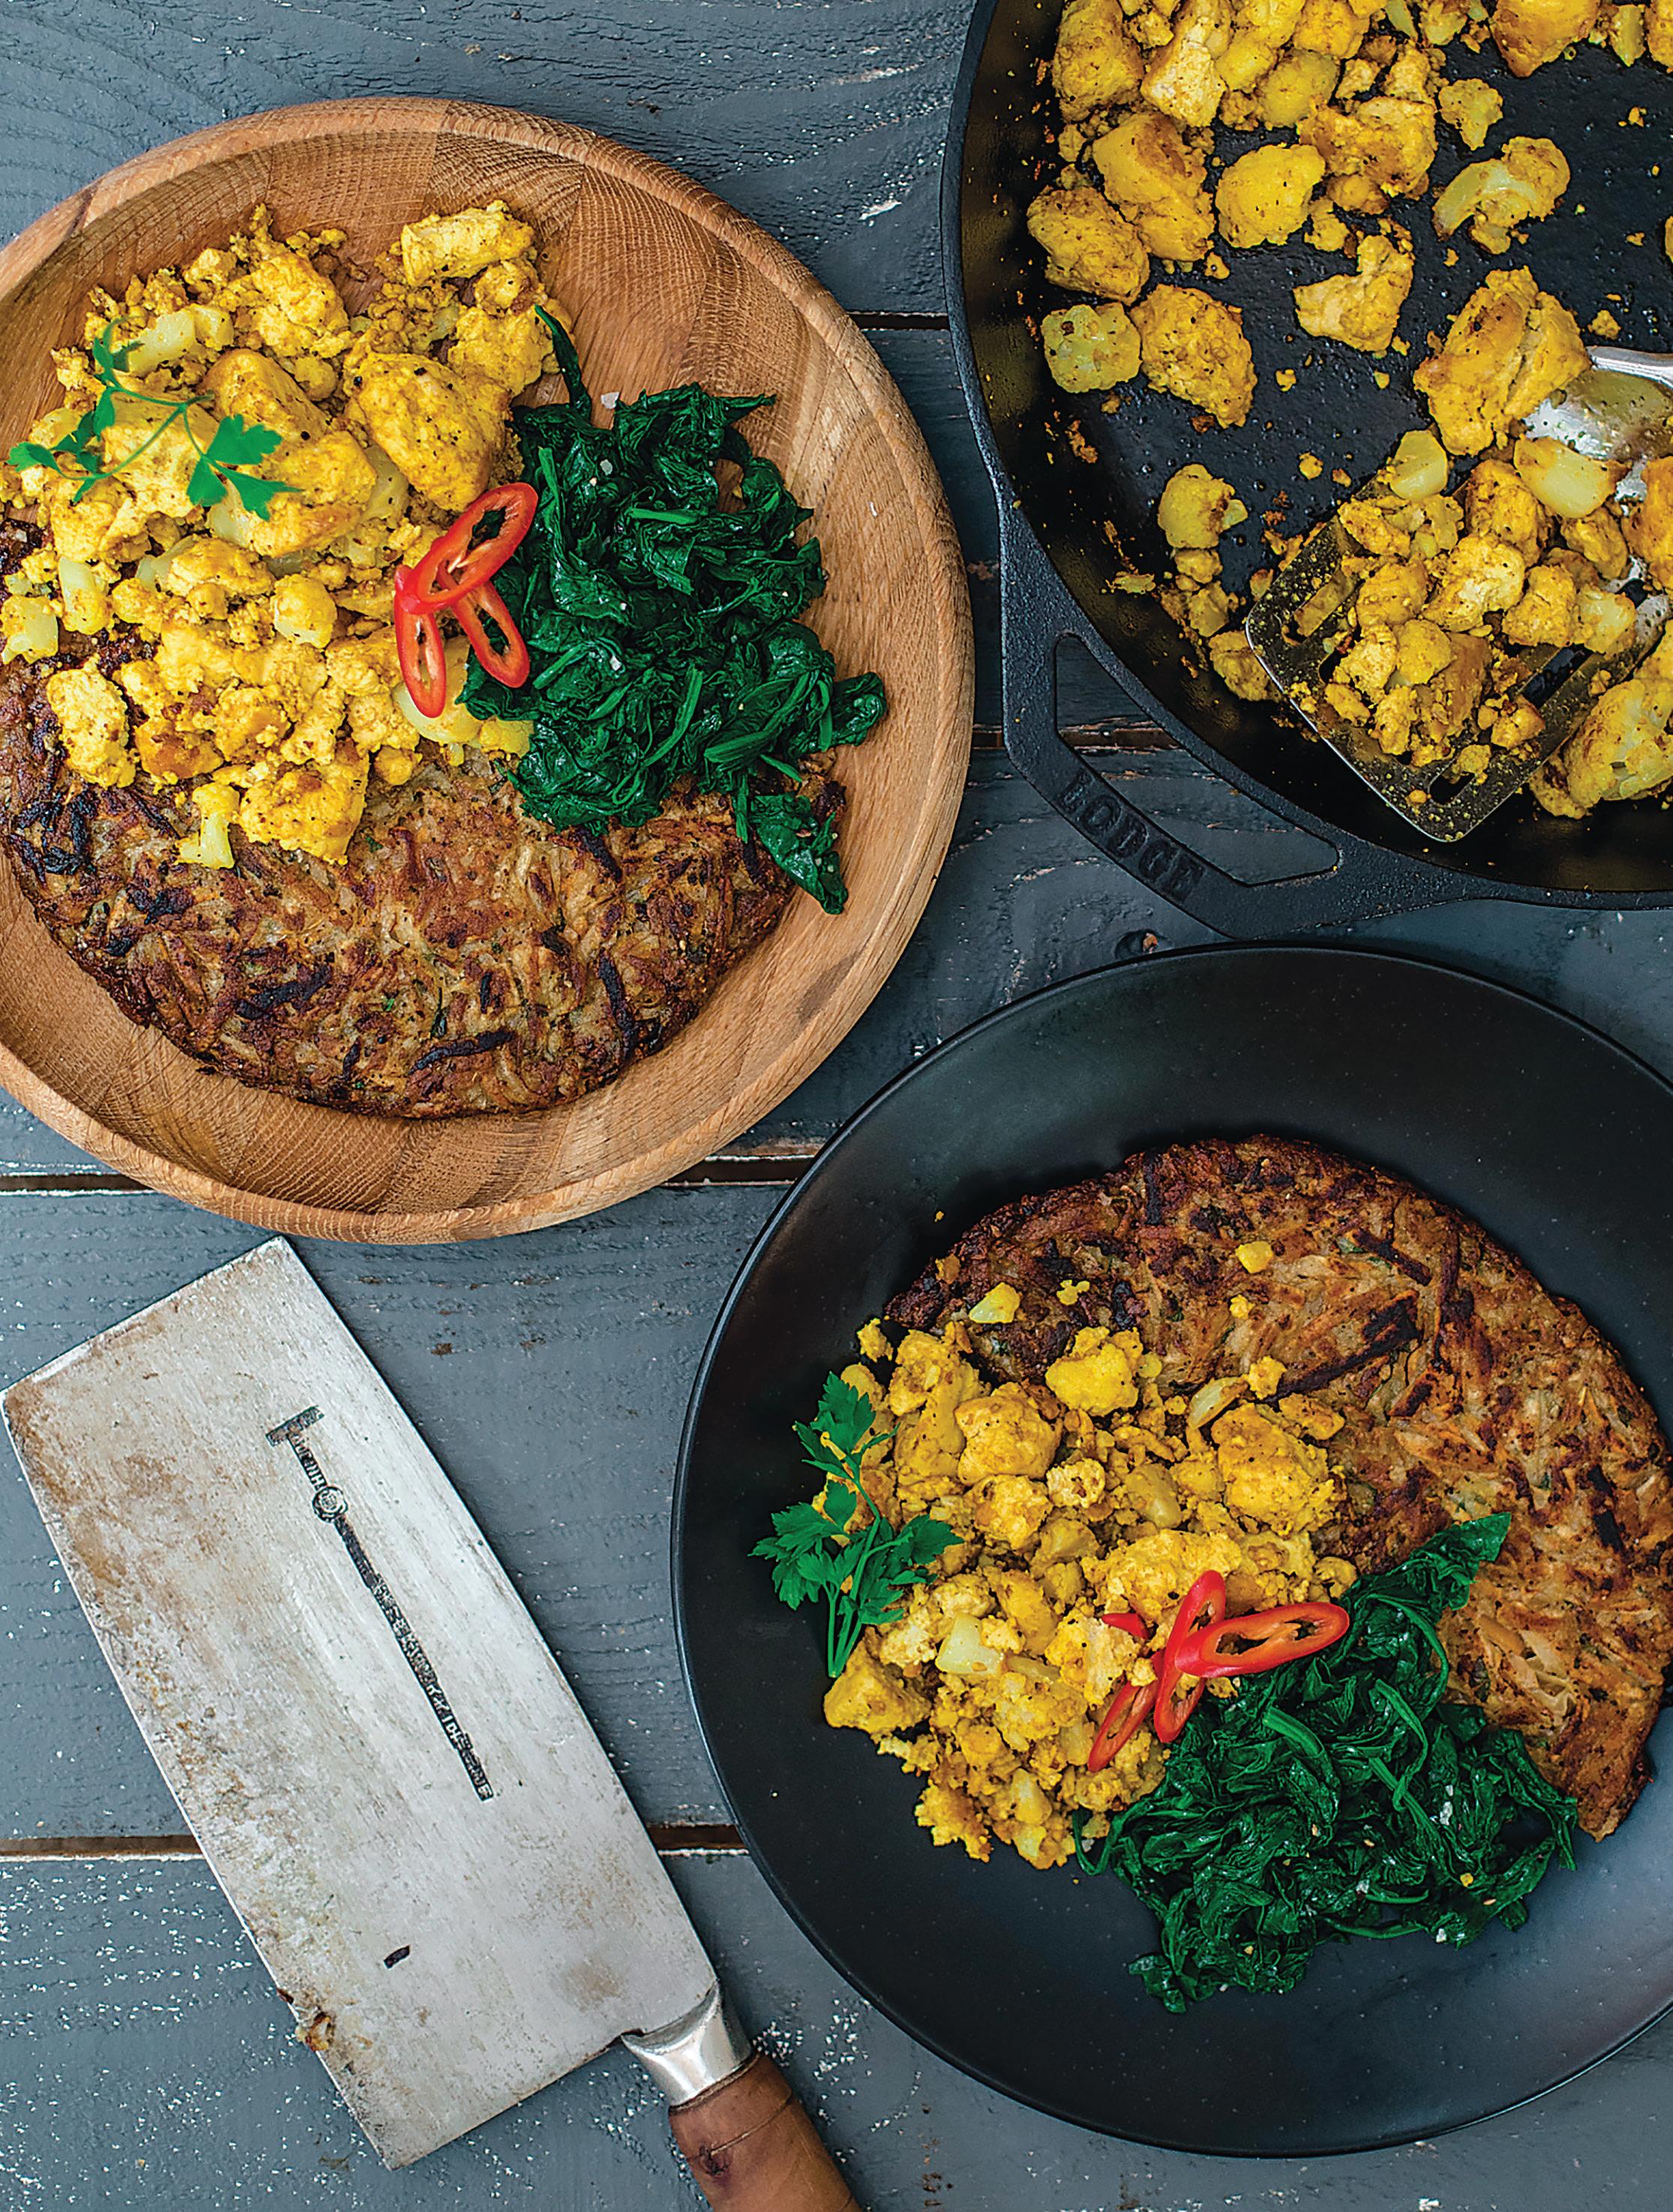
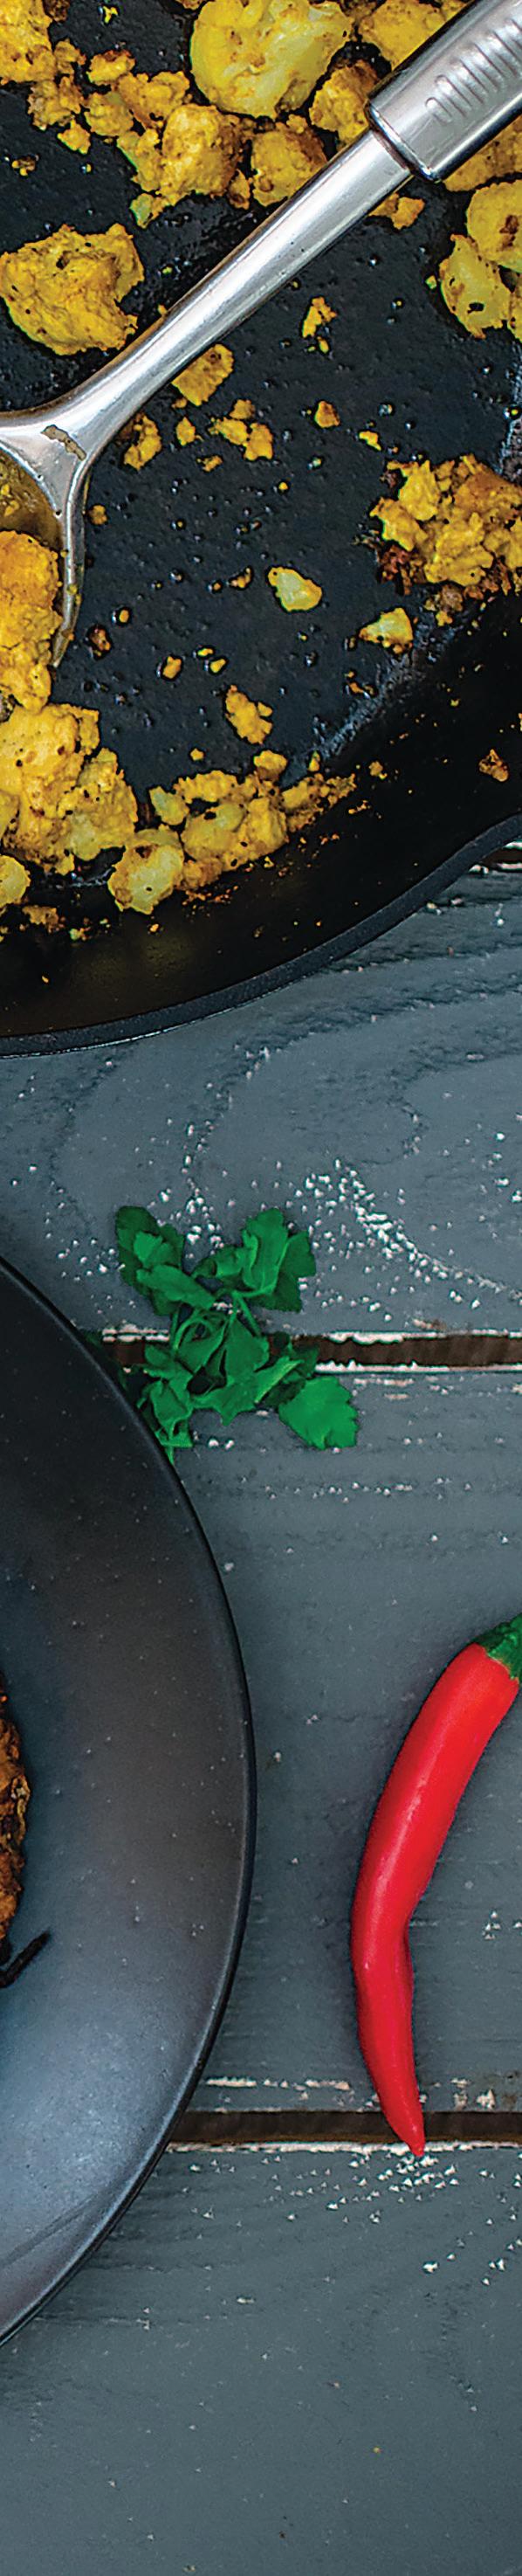
BY WICKED HEALTHY
A plant-based, online community by Derek & Chad Sarno, based in Austin, TX & London, UK WICKEDHEALTHY
This is a great choice to fill you up after a long run or workout session. Serve the scramble with this lush, shredded sweet potato and greens combo with a bit of garlic.
Serves 2-4
FOR THE SCRAMBLE
• 2 blocks firm tofu, rough crumbled, NOT little bits
• 1/2 head cauliflower, broken to the same size and blanched
• 3/4 tsp. black pepper
• 3/4 tsp. turmeric
• 1/2 tsp. smoked paprika
• 1/2 tsp. Kala Namak (black salt)
• 1/2 tsp. granulated onion
• 1/2 tsp. granulated garlic
• plant-based cheese (any kind, shredded or finely diced)
• 2–4 Tbsp. nutritional yeast
FOR THE HASHBROWNS
• Potatoes, shredded, soaked in water, then drained and pressed until dry
• olive oil
• salt
FOR THE GREENS
• Your choice of greens – kale, spinach, collards etc.
• A few pinches of salt
FOR THE SCRAMBLE
Toss all together in a big bowl. Heat oven to 400 F.
Get your pan wicked hot (cast iron is what we use.) Add a dollop of v-butter or oil then add your tofu mix, your choice of greens (spinach, collard, kale, etc.) and a few pinches of salt
Finish off in the oven for about 5–10 minutes, then add some of your fave v-cheese at this point. Take it out, add some nutritional yeast if you like, then serve it up with greens and hot potatoes and you’re good to go!
FOR THE HASHBROWNS
Add some olive oil to a cast iron pan, get it wicked hot over medium-high heat. Add potato shreds into the pan, form into a little disk by pressing down and making clean edges. Sprinkle with a little salt. Do not stir—allow to brown on one side. Flip when it’s firm enough to keep its shape. Allow to brown on the other side. Transfer to a plate to cool.
FOR THE GREENS
Set a steamer basket over a pot filled halfway with water over medium heat. You want it to fit snugly. Add the greens to the steamer basket and allow to slightly wilt, just a minute or two. Season with salt. Serve the scramble, hashbrowns and greens together on one plate and enjoy!
Nutrition facts per serving Calories 152; protein 15 g; fat 6 g; carbs 14 g.
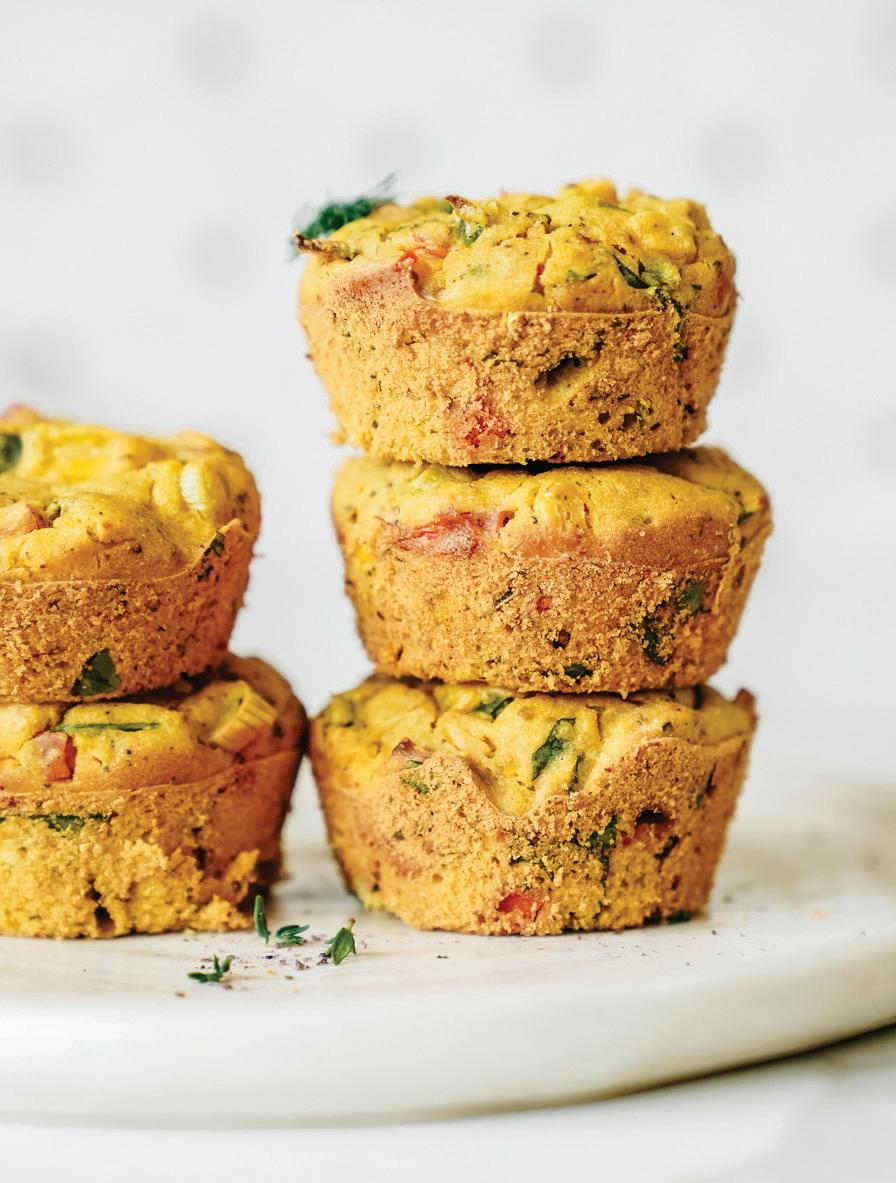

These savoury muffins are high in protein, vegan & gluten-free!
RECIPE AND PHOTOGRAPHY BY MARIA KOUTSOGIANNIS
Recipe developer & food blogger at FoodByMaria, and winner of Guy Fieri’s 2023 Food Network’s Flavourtown, from Calgary, AB. FOODBYMARIA FOODBYMARIAOFFICIAL
When you're rushing out the door, this recipe makes for the ideal snack or quick breakfast. For those constantly on the go, preparing meals or snacks isn't always the most convenient option, leading you to grab junk food that neither satisfies nor nourishes. That's where this recipe steps in—a delicious, wholesome alternative, and one of my favourite ways to use chickpea flour, perfect for staying fueled without sacrificing nutrition.
Prep Time – 15 minutes
Cook Time – 30 minutes
Makes 12 Muffins
DRY INGREDIENTS
• 1 1/2 cups chickpea and fava bean flour
• 3 Tbsp. nutritional yeast
• 1 tsp. sea salt
• 1/2 tsp. black salt, optional
• 1/2 tsp. black pepper
• 1 tsp. baking powder
• 1 tsp. onion powder
• 1 tsp. oregano
• 1 tsp. dried basil
WET INGREDIENTS
• 1 1/2 cups of water or oat milk
• 1 Tbsp. olive oil
• 1/2 cup shredded vegan cheddar
• 1/2 cup red bell pepper, finely chopped
• 1/2 cup jalapeno pepper, finely chopped
• 1/2 cup fresh tomato, finely chopped
• 1/2 cup fresh spinach, finely chopped
• 1/2 cup fresh corn
• 1/4 cup green onion, finely chopped
• 1 garlic clove, grated
• Garnish: Black salt, hot sauce and fresh chopped avocado
1. Preheat oven to 375° F and grease a muffin tin well (no need to grease a non-stick muffin tin).
2. To a large mixing bowl, add all the dry ingredients and stir until completely well-combined.
3. To the bowl, add the water and stir until your mixture becomes pancake-batter-like. Add more water if your mixture is a bit too clumpy; only add 1 Tbsp. of water at a time.
4. Add the remaining ingredients to the bowl and stir until well combined. Do not over-stir.
5. Using a 1/4 cup measure, begin dolloping the mixture into each muffin tin.
6. Bake for around 30 minutes and remove from oven. Let cool for 10 minutes before removing from tins.
7. Enjoy with more black salt, hot sauce and fresh avocado!
NOTE:
This vegan recipe is incredibly versatile. You can swap out any of the veggies I used with the ones you have available on hand. You can also switch up the recipe flavour themes. For example, my version is a bit more Mexican-inspired, but why not make these with an Italian twist by utilizing tomatoes and fresh herbs like basil. You could also go to Greece by adding olives. Get creative!
Nutrition facts per serving Calories 100; protein 3 g; fat 5 g; carbs 11 g.
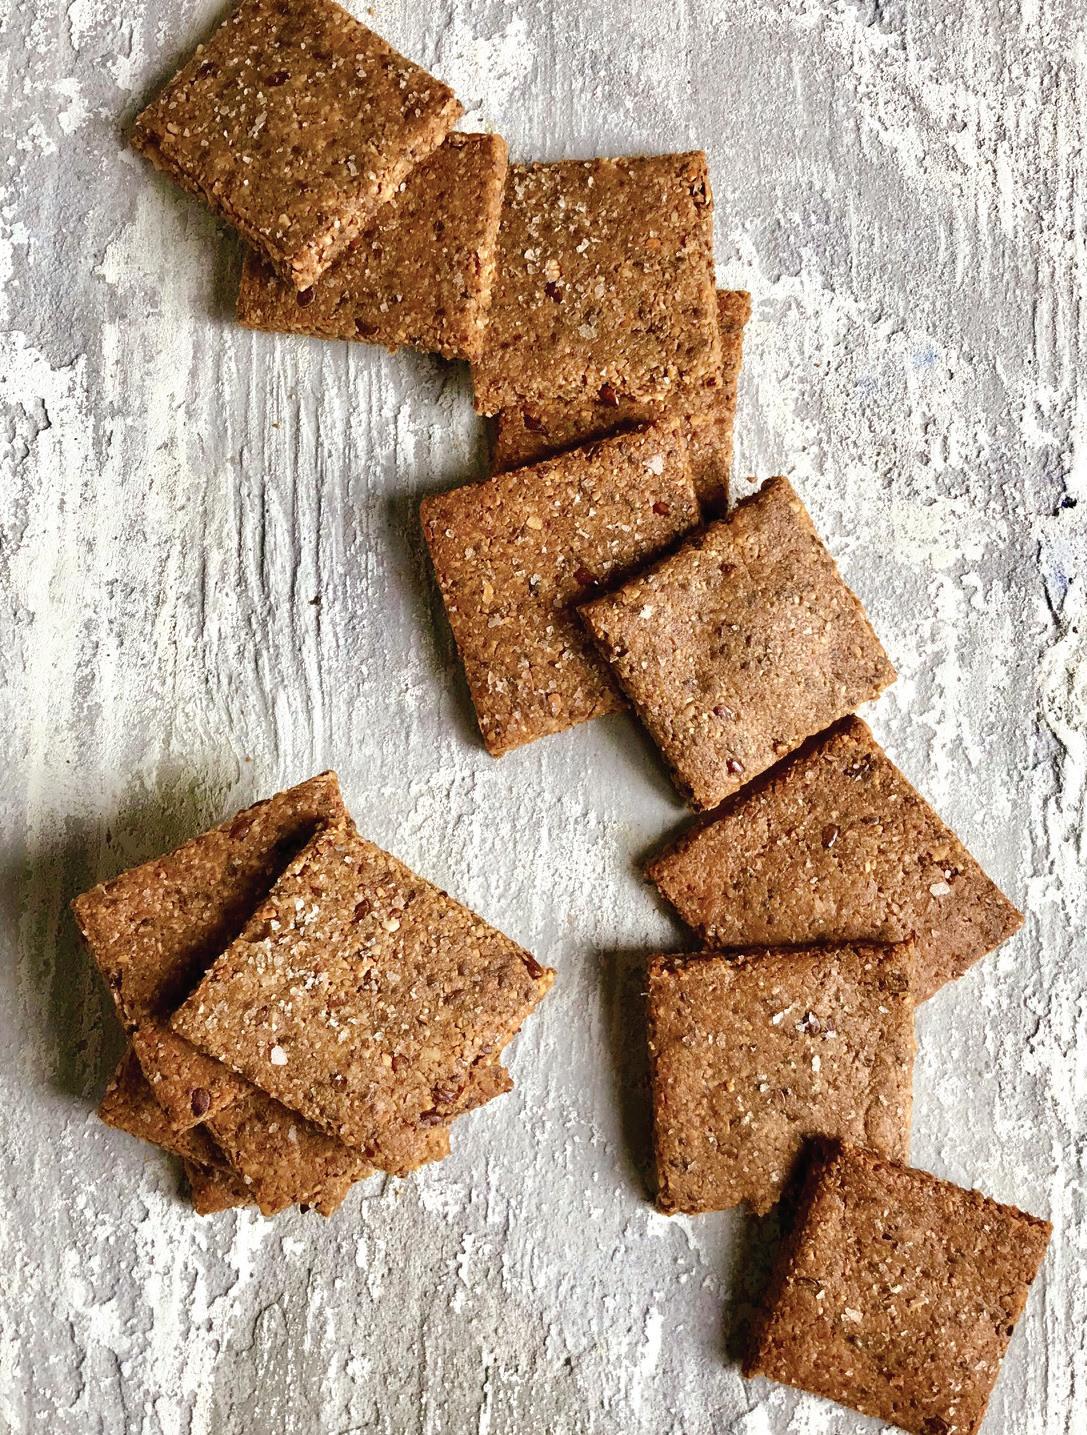
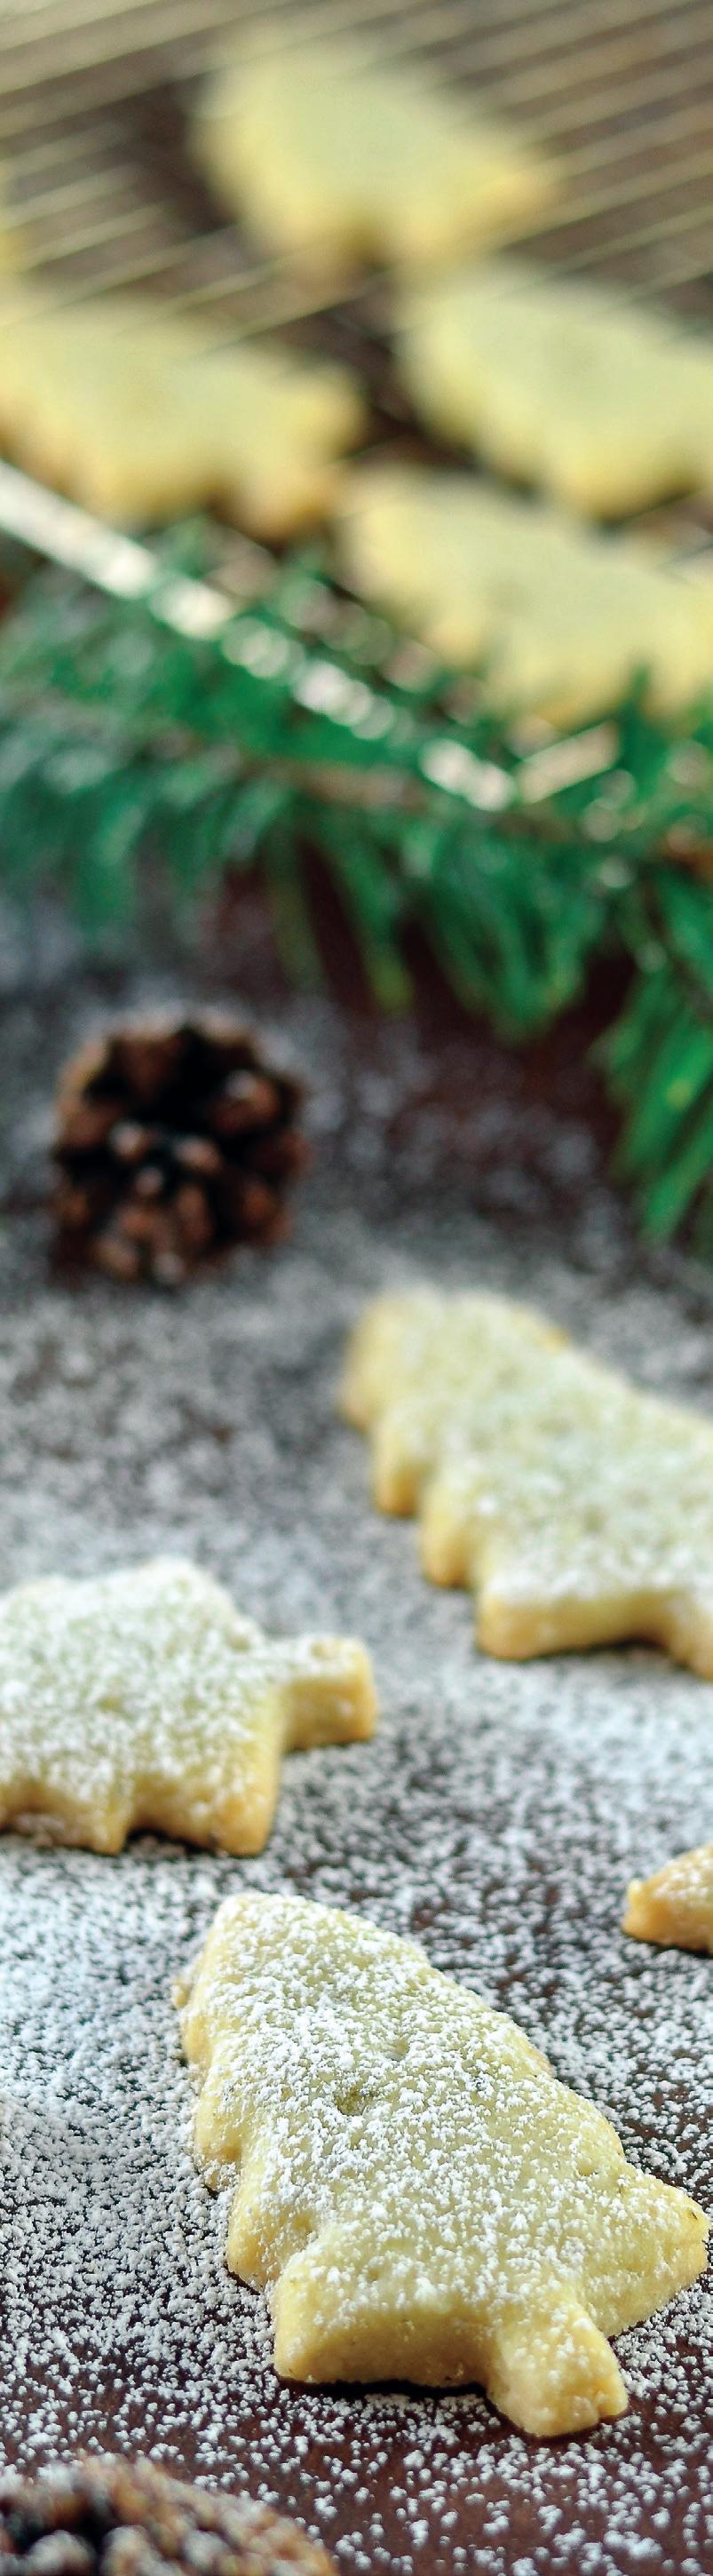
Celebrate the season with these holiday-inspired crackers, perfect for snacking or sharing!
RECIPE AND PHOTOGRAPHY BY CAROL DUDAR
Freelance food stylist and recipe contributor from Toronto, ON. CAROLDUDAR
There’s something magical about the holidays that makes every bite feel special, and these nut and seed crackers are no exception. Packed with wholesome ingredients and a delightful crunch, they’re a versatile addition to your festive table. Whether you’re serving them as a base for creamy dips, pairing them with sweet spreads, or simply enjoying them on their own, these crackers bring a perfect balance of flavour and texture. Easy to make and even easier to love, they’re a crowdpleasing snack that adds a touch of homemade charm to your holiday celebrations.
Prep Time – 25 minutes
Cook Time – 40 minutes
Refrigeration Time - 1 hour and 15 minutes
Makes 40 crackers
• 3/4 cup raw cashews
• 1/2 cup raw almonds
• 1/2 cup walnut pieces
• 1/4 cup raw pumpkin seeds (pepitas)
• 2 Tbsp. chia seeds
• 1/4 cup warm water
• 2 Tbsp. sunflower seeds
• 2 Tbsp. flax seeds
• 1/4 cup water
• 3 Tbsp. extra virgin olive oil
• 1 tsp. kosher salt
• 1/2 tsp. fresh ground black pepper
• 1/4 tsp. red chili flakes
• 1 tsp. nutritional yeast flakes
Nutrition facts per serving
Calories 295; protein 8.8 g; fat 22.6 g; carbs 17.5 g.
1. Preheat oven to 400° F.
2. On a baking sheet, put the cashews, almonds and walnuts and bake for 15 minutes or until golden brown, tossing occasionally.
3. In a small baking sheet or frying pan, toast the pumpkin seeds for 5-10 minutes or until lightly golden brown.
4. In a small bowl, soak the chia seeds in the 1/4 cup of water for 5 minutes, and add to a food processor.
5. Once all the nuts are cooled, transfer to a food processor, add the sunflower, flax seeds, salt, black pepper, red chili flakes, nutritional yeast flakes, olive oil, and soaked chia seeds.
6. Process until the mixture comes together into a ball with a finely ground texture.
7. Transfer the mixture to a large piece of parchment and cover with an equal size piece of parchment.
8. Using a rolling pin, roll out the dough to an even, thin layer, about 1/4” thick.
9. With a large knife, score the crackers into the size you want - ideally 1.5” x 1.5” square. Lightly sprinkle with more salt if you like.
10. Cut the irregular ragged pieces off and set aside.
11. Slide the parchment paper with the crackers onto a baking sheet, and bake for 15 minutes.
12. Turn the baking sheet half a turn and bake again for another 10 to 15 minutes being careful not to over-bake. Allow the crackers to cool completely on the baking sheet on a cooling rack.
13. Meanwhile, roll out the remaining scraps of the cracker mixture, and repeat. The edges will be more irregular on these scraps.
14. Bake the remaining crackers.
15. Once completely cool, transfer to an airtight container.
Bet you can’t just eat one bite of this bad boy!
RECIPE AND PHOTOGRAPHY BY MARIA KOUTSOGIANNIS
Recipe developer & food blogger at FoodByMaria in Calgary, AB FOODBYMARIA
Did somebody say vegan cheese ball? You bet, and this one is damn delicious! This easy, vegan cream cheese ball is a healthy, great appetizer for the holiday season and perfect for almost all dietary restrictions. Serve on a charcuterie board or as an appetizer on toast or crackers. It’s raw – so no cooking required.
Makes: 2 cheese balls
INGREDIENTS
• 450 g vegan, soft cream cheese
• 100 g vegan, soft cheddar cheese
• 3 packets vegan tuna, rinsed and squeezed
• 1 Tbsp. garlic powder
• 1 Tbsp. onion powder
• 1 Tbsp. olive oil
• 3 tsp. apple cider vinegar
• 1 tsp. sea salt
• ½ tsp. black pepper
• 2/3 cup finely chopped sweet onion
• 2/3 cup finely chopped herbs such as cilantro, parsley, thyme, dill, sage and oregano
• 3 large garlic cloves, pressed
CHEESE BALL TOPPINGS (OPTIONAL)
• Fresh herbs
• Crushed walnuts
DIRECTIONS
1. Add the oats, dates, sunflower seeds, hemp hearts, sunflower seed butter and vanilla to a food processor. Process until combined. The mixture will be crumbly.
2. Add water (or coconut oil), one tablespoon at a time and process until the mixture sticks together when pressed. You might not need all three tablespoons if your dates are softer and stickier.
3. Chop your chocolate into small-medium chunks and add to the food processor. Pulse a few times to incorporate into the mixture.
4. Press the mixture at the bottom of a small dish. Keep covered in the fridge or freezer. They're great when eaten straight out of the freezer!
NOTE:
Cheese balls will last up to 10 days in the fridge, wrapped.
Nutrition facts per serving Calories 348; protein 20 g; fat 27.5 g; carbs 6 g.
RECIPE & PHOTOGRAPHY BY LAUREN TOYOTA
Author of Vegan Comfort Classics: 101 Recipes To Feed Your Face in Toronto, ON HOTFORFOOD HOTFORFOODBLOG
There are a lot of vegan crab cake recipes made from artichokes or hearts of palm floating around the internet, and while they’re all pretty delicious, ours has been tried and tested by many former seafood addicts who claim they’d rather eat this than the real thing!
Makes 10 cakes INGREDIENTS
CRABLESS CAKES
• 2 cups drained marinated artichoke hearts, finely chopped, plus 2 Tbsp. liquid
• ¼ cup finely chopped shallot
• ½ cup finely chopped celery
• 1 tsp. freshly squeezed lemon juice
• ½ cup chickpea flour
• 2 tsp. coconut sugar or brown sugar
• 1 tsp. Old Bay seasoning
• ¼ tsp. sea salt
• ¼ tsp. ground pepper
• 1 to 2 cups vegetable oil, for frying
BREADING
• ¼ cup chickpea flour
• 1 ¼ cups multigrain bread crumbs
• ½ cup unsweetened nondairy milk
CRABLESS CAKES
Place all the Crabless Cake ingredients except the oil and aioli in a large bowl. Combine well with a fork. It’s important that the artichokes, shallots and celery are very small and uniformly chopped so the cakes will stick together while frying. You should have a ½ inch of vegetable oil in a large cast-iron skillet or other heavy-bottomed pan for frying. Heat it to 350 F.
BREADING
To make the breading, place the chickpea flour in a wide, shallow dish. Use another shallow dish for the bread crumbs and a bowl for the milk.
Take ¼ cup of the crabless cake mixture and press and form it into a thick patty with your hands. Gently place the cake in the chickpea flour and coat all sides evenly. Quickly submerge it in milk and make sure all the flour looks wet. Remove it from the milk and place in the bread crumbs. Using your hands, coat all sides of the cake well in the bread crumbs, then lightly shake off any excess. Set the coated cakes on a plate or baking sheet. Once they’re all assembled, immediately deep-fry in batches. Delicately place 2 or 3 cakes in the hot oil. Fry for about 4 minutes until golden brown, flipping halfway through. Gently remove the cakes with a slotted frying spoon and place on paper towels to absorb any excess oil. Serve immediately with the aioli. Leftovers can be heated over medium heat in a pan lightly coated with vegetable oil.
Nutrition facts per serving (including aioli) Calories 384; protein 6 g; fat 31 g; carbs 23 g.
Makes about ⅔ cup
INGREDIENTS
• ⅔ cup vegan mayonnaise
• 1 Tbsp. vegan horseradish
• 1 Tbsp. fresh lemon juice
• 1 Tbsp. finely chopped fresh dill
• ¼ tsp. ground pepper
Stir all the ingredients in a bowl until well combined.


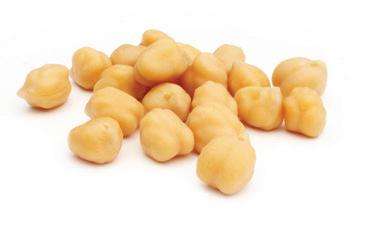
Chickpeas and rice add protein to this simple and satisfying winter vegetable soup
RECIPE AND PHOTOGRAPHY BY HEIDI RICHTER
Food photographer and recipe developer on Vancouver Island, B.C. THE_SIMPLE_GREEN THESIMPLEGREEN
Parsnips and celery seed create a subtle earthy sweetness in the broth, which makes this soup taste divine. Top with fresh parsley and serve with a slice of rye bread for a hearty comforting meal on any cold day. This winter vegetable soup is vegan and gluten-free.
Prep Time – 10 minutes
Cook Time – 35 minutes
Serves 4
• 2 Tbsp. olive oil
• 1 yellow onion, diced
• 3 cloves garlic, chopped
• 1 large carrot, diced
• 1 stalk celery, diced
• 1 medium parsnip, diced
• 1 medium leek sliced, white part only
• A good splash of sherry cooking wine or white wine
• ½ cup wild rice, uncooked
• ½ tsp. whole celery seed
• 1 bay leaf
• Sea salt & fresh black pepper to taste
• 6 cups vegetable broth
• 1 ½ cups cooked chickpeas
• Fresh chopped parsley
• DIRECTIONS
1. Heat the olive oil in a medium pot. Add the diced onion, garlic, carrot, celery, parsnip and leek and cook, stirring frequently, over medium-high heat, or until the vegetables are tender and slightly browned (about 5 minutes).
2. Deglaze the pot with a splash of sherry cooking wine. Stir in the wild rice, celery seed and bay leaf. Add the vegetable broth and stir to combine.
3. Bring to a boil. Reduce the heat and allow to simmer for 30-35 minutes, stirring occasionally, until the rice is cooked. Stir in the chickpeas and season with salt and pepper to taste.
4. Serve with a generous helping of chopped fresh parsley, spinach or kale.
NOTE:
Parsnip can be exchanged for either additional carrot or diced new potatoes.
Wild rice can be substituted for white or brown rice; however, cooking times will need to be adjusted to compensate. Use the package instructions for directions to estimate cooking times for your particular type of rice.
Nutrition facts per serving
Calories 287; protein 11 g; fat 8 g; carbs 38 g.
BY ZUZANA FAJKUSOVA & NIKKI LEFLER DARINA KOPCOK
Personal wellness coaches & vegan authors in Vancouver, B.C.
ACTIVEVEGETARIAN ACTIVEVEG ACTIVEVEGETARIAN
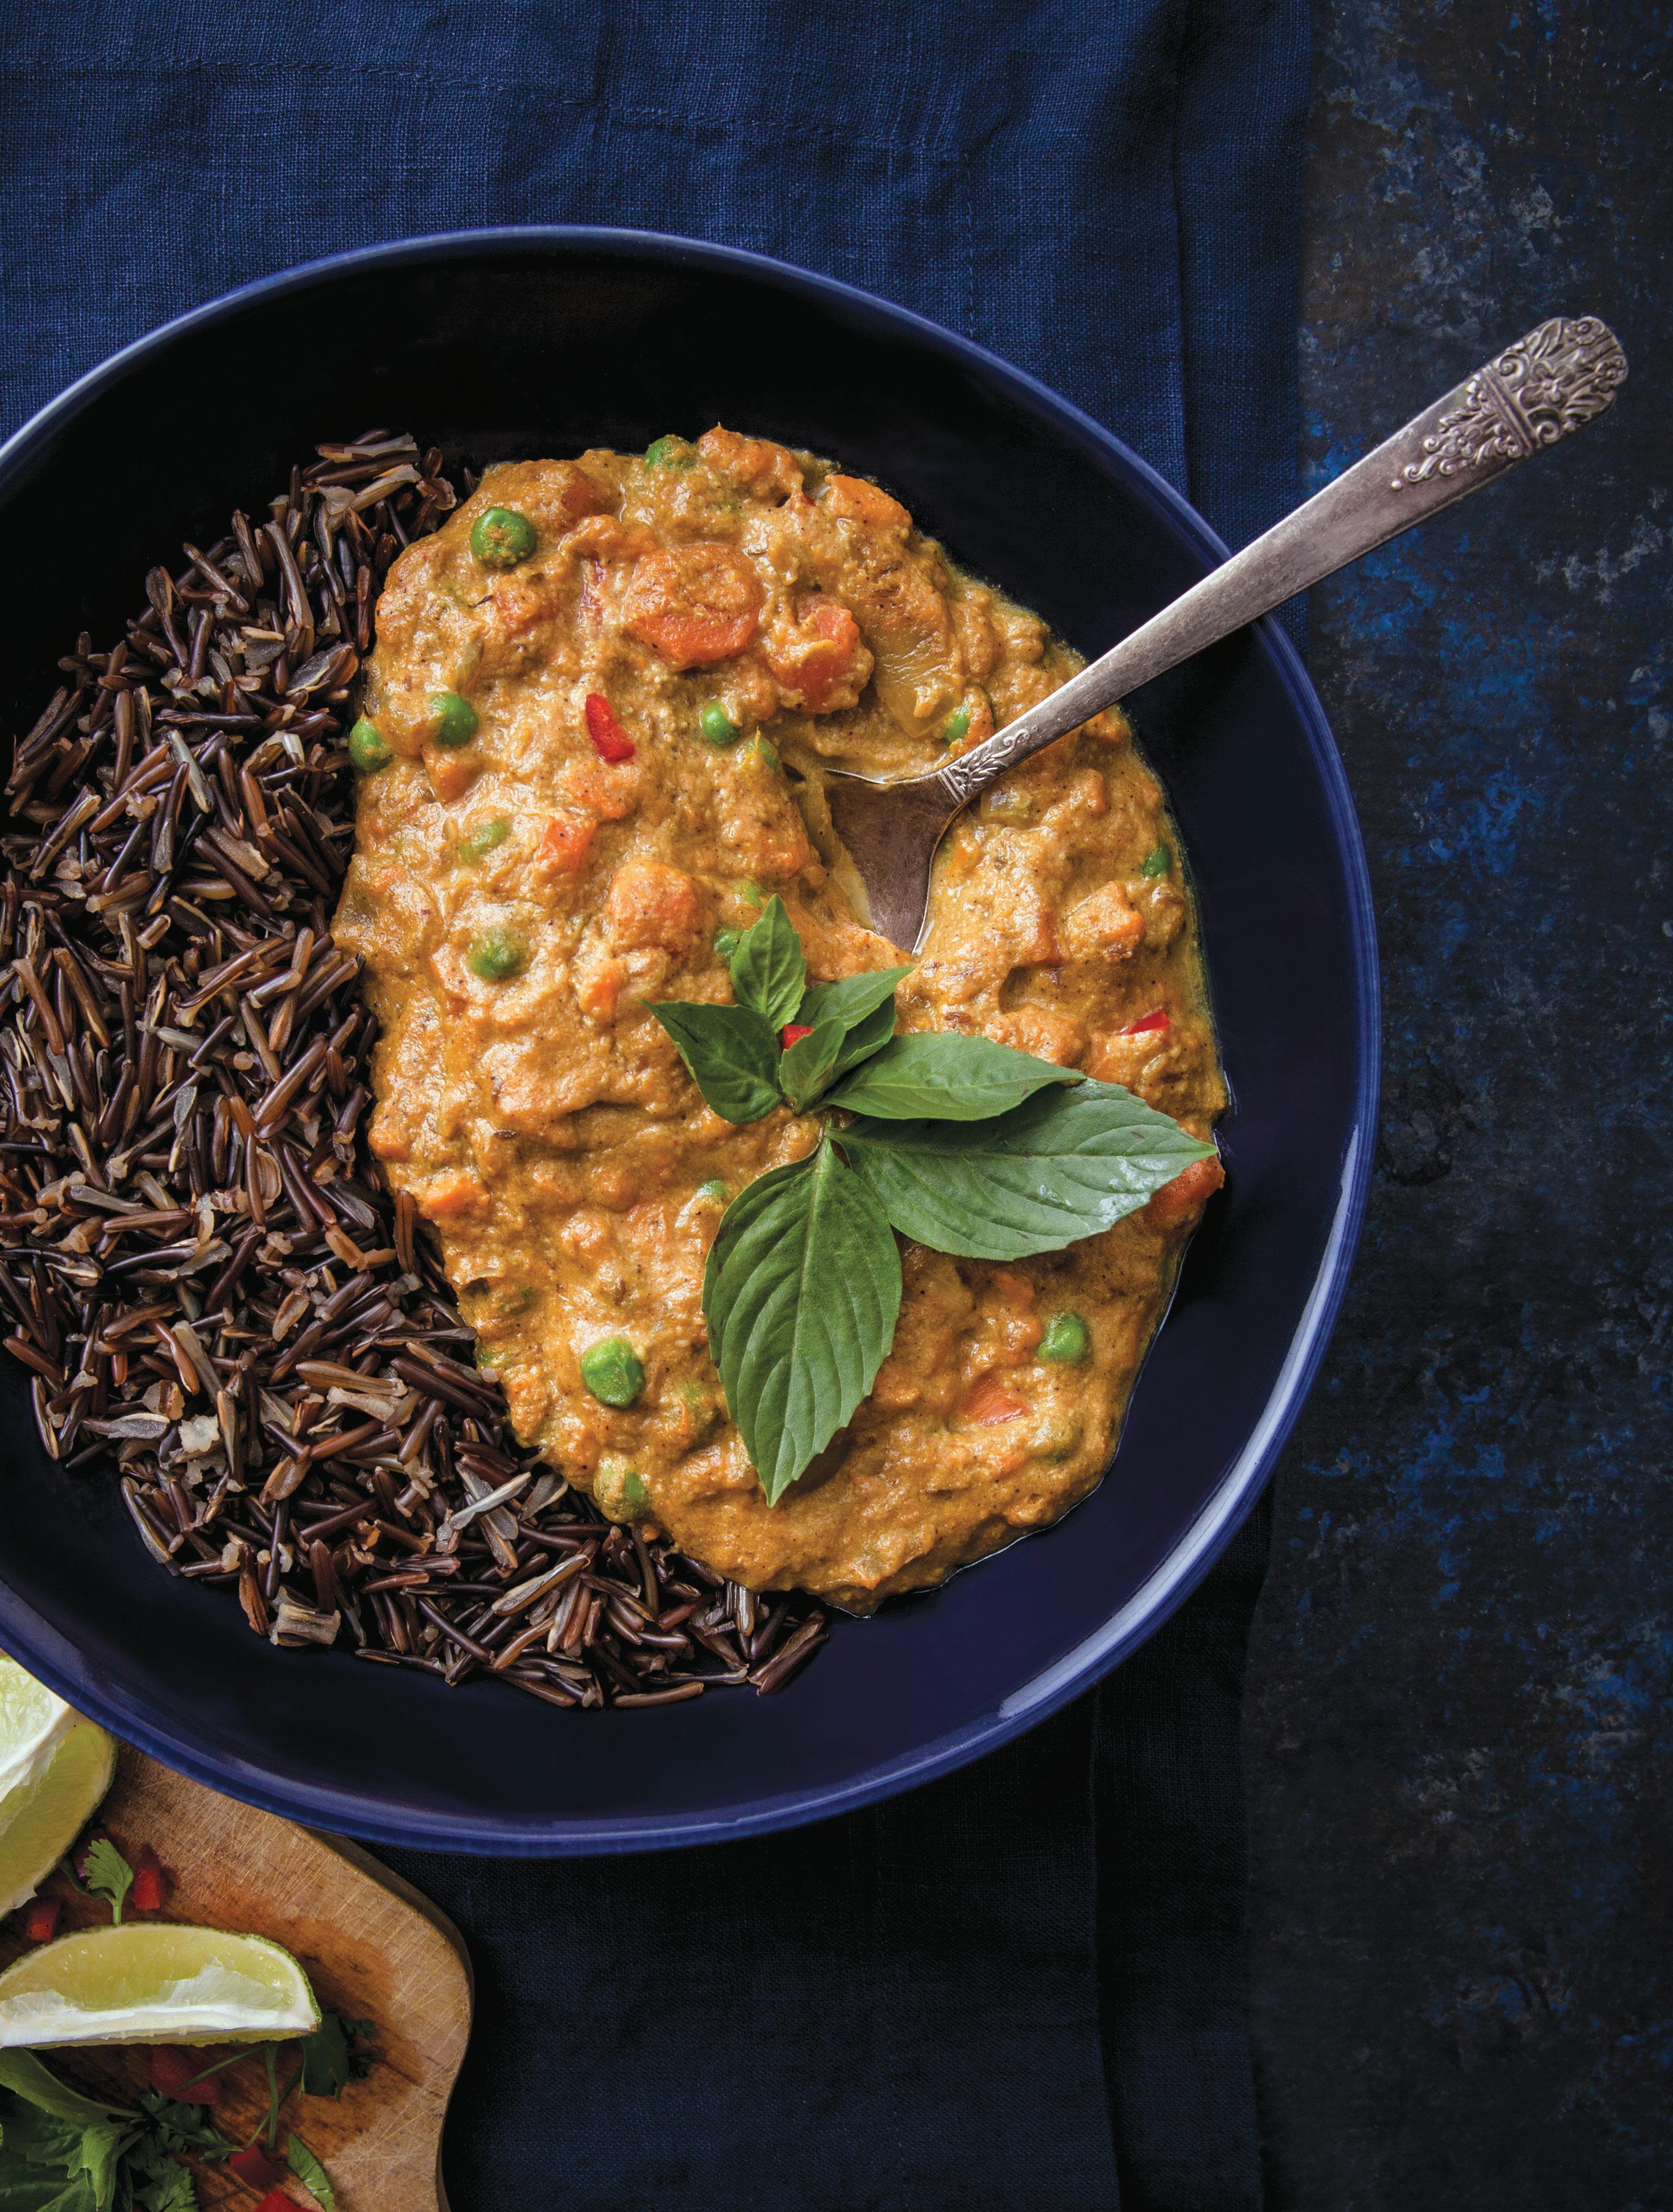
This delicious curry dish comes with several health benefits. First, it’s packed full of wonderful vegetables that are essential for healthy digestion. The next benefit comes from the coconut — both coconut oil and milk are high in medium chain triglycerides, fatty acids that have shown to boost metabolism and promote healthy weight loss. The sweet potatoes and carrots will provide you with the sense of satisfaction and keep your energy at an ideal level. An awesome homemade Thai curry, made entirely from scratch — no packaged curry pastes required! This yellow curry is rich and flavourful. Leftovers make perfect weekday lunches.
Serves 2-3
• 2 Tbsp. (30 ml) coconut oil
• ¼ tsp. turmeric
• 1 Tbsp. (5g) cumin seeds
• 1 large onion, sliced
• 3 garlic cloves, minced
• 3-inch (7 cm) piece of ginger, peeled, grated and minced
• ½ tsp. ground cinnamon
• ½ tsp. ground cardamom
• ½ tsp. ground cloves
• ¼-½ tsp. cayenne pepper
• ¾ tsp. Himalayan sea salt
• 2 large carrots, peeled and sliced
• 2 medium sweet potatoes, peeled and cubed
• 1 (13.5 oz.) can coconut milk
• 1 cup water
• 1 cup fresh or frozen green peas
• 1 red bell pepper, seeded and chopped
• ⅓ cup tahini
• 1 Tbsp. maple syrup (or stevia to taste)
Heat the oil in large skillet over medium heat. Add the turmeric and cumin seeds and cook until the seeds sizzle, about 30 seconds. Add the onion and cook until caramelized, about 5 minutes, stirring occasionally. Add the garlic and ginger and cook another 2 to 3 minutes, again keeping an eye on it and stirring as needed. Add the cinnamon, cardamom, cloves, cayenne, salt, carrots, potatoes, coconut milk, and water. Reduce heat to low and simmer for 15 minutes, covered. Add the peas and red pepper. Continue to simmer, covered, for an additional 10 minutes or until the vegetables are tender. Remove from the burner and stir in the tahini and maple syrup. Serve with basic green salad or on a bed of wild rice.
Nutrition facts per serving Calories 969; protein 25 g; fat 73 g; carbs 50 g.
Courtesy of Vegan Weight Loss Manifesto, An 8-Week Plan to Change Your Mindset, Lose Weight and Thrive by Zuzana Fajkusova & Nikki Lefler © 2020 Reprinted with permission.

RECIPE & PHOTOGRAPHY BY
MARIA KOUTSOGIANNIS
Recipe developer & food blogger at FoodByMaria in Calgary, AB FOODBYMARIA FOODBYMARIA2014
This recipe is the perfect refuel for long distance runners and intense trainers. It is packed full of nutrients and carbs to keep you energized and on top of your training. It's vegan, but I bet you didn't expect these bad boys to have 22 g of protein per portion… well they do! This meal will also be popular at your next family gathering, even for your little ones and those pesky picky eaters.
Serves 4
• 2 Tbsp. extra-virgin olive oil
• 2 Tbsp. vegan butter
• 1 medium sweet white onion, finely chopped
• 5 cups mushrooms, thinly sliced (crimini, white button, shittake)
• 3 garlic cloves, pressed
• 1 vegetable stock cube
• 2 sprigs of thyme, removed from stem and finely chopped
• 1 Tbsp. tamari or soy sauce
• 1 Tbsp. nutritional yeast
• 1 Tbsp. onion powder
• 1 Tbsp. coconut sugar
• ¼ tsp. cumin
• ¼ tsp. cloves
• dash of chili or chili flakes
• 2-3 Tbsp. lemon juice
• 2 Tbsp. corn starch or flour
• 1 ¾ cups coconut cream
• 2 cups steamed white potatoes, (with skins) cut into chunks
• 2 sheets puff pastry - thawed in fridge
• Meltable vegan cheese of choice

Start by steaming the potatoes. I like leaving the skins on and cutting them into bit size pieces. Cook until soft.
Add oil and butter to a large pot on medium-low heat for about 30 seconds. Add onion and brown for about 5-7 minutes or until golden and soft. Stir occasionally to avoid burning.
Add garlic and mushrooms to the pot and cook them down until reduced by ⅓ or until soft. This should take another 5 minutes. Once the mushrooms are cooked can add the stock cube, seasoning, soy sauce, nutritional yeast and spices. Stir this mixture until well combined.
Add the lemon juice and corn starch. Using a spatula, stir aggressively to make sure the flour is well combined and coated to the onions and mushrooms. If you spot clumps, use a fork to break them apart.
Turn heat to high, add coconut cream and bring this mixture to a boil. Stir often to watch the consistency change and to avoid burning. Once the mixture is bubbling, turn heat to low, add steamed potatoes and simmer for around 5 minutes.
Preheat oven to 400 F, line a baking sheet with parchment paper and set aside. Grab your mini dutch oven pots, grease them with oil and set aside.
Cut each puff pastry sheet into 4 and place a little sheet on the base of each mini pot. Keep the corner of each sheet pulled over the pot so when filled with with the mixture and covered with the other puffed pastry sheet, it acts as a little pinch pocket.
Once all your pots are lined with the pastry, add in the potato-and-mushroom mixture. Fill to the top and grate some of your favourite cheese on top.
Cover with the other puff pastry sheet and pinch the sides. Brush with oil or melted butter before cooking on baking sheet for 20 minutes.
Nutrition facts per serving Calories 962; protein 22 g; fat 51 g; carbs 112 g.
Sinful, delicious, & as comforting as one could imagine
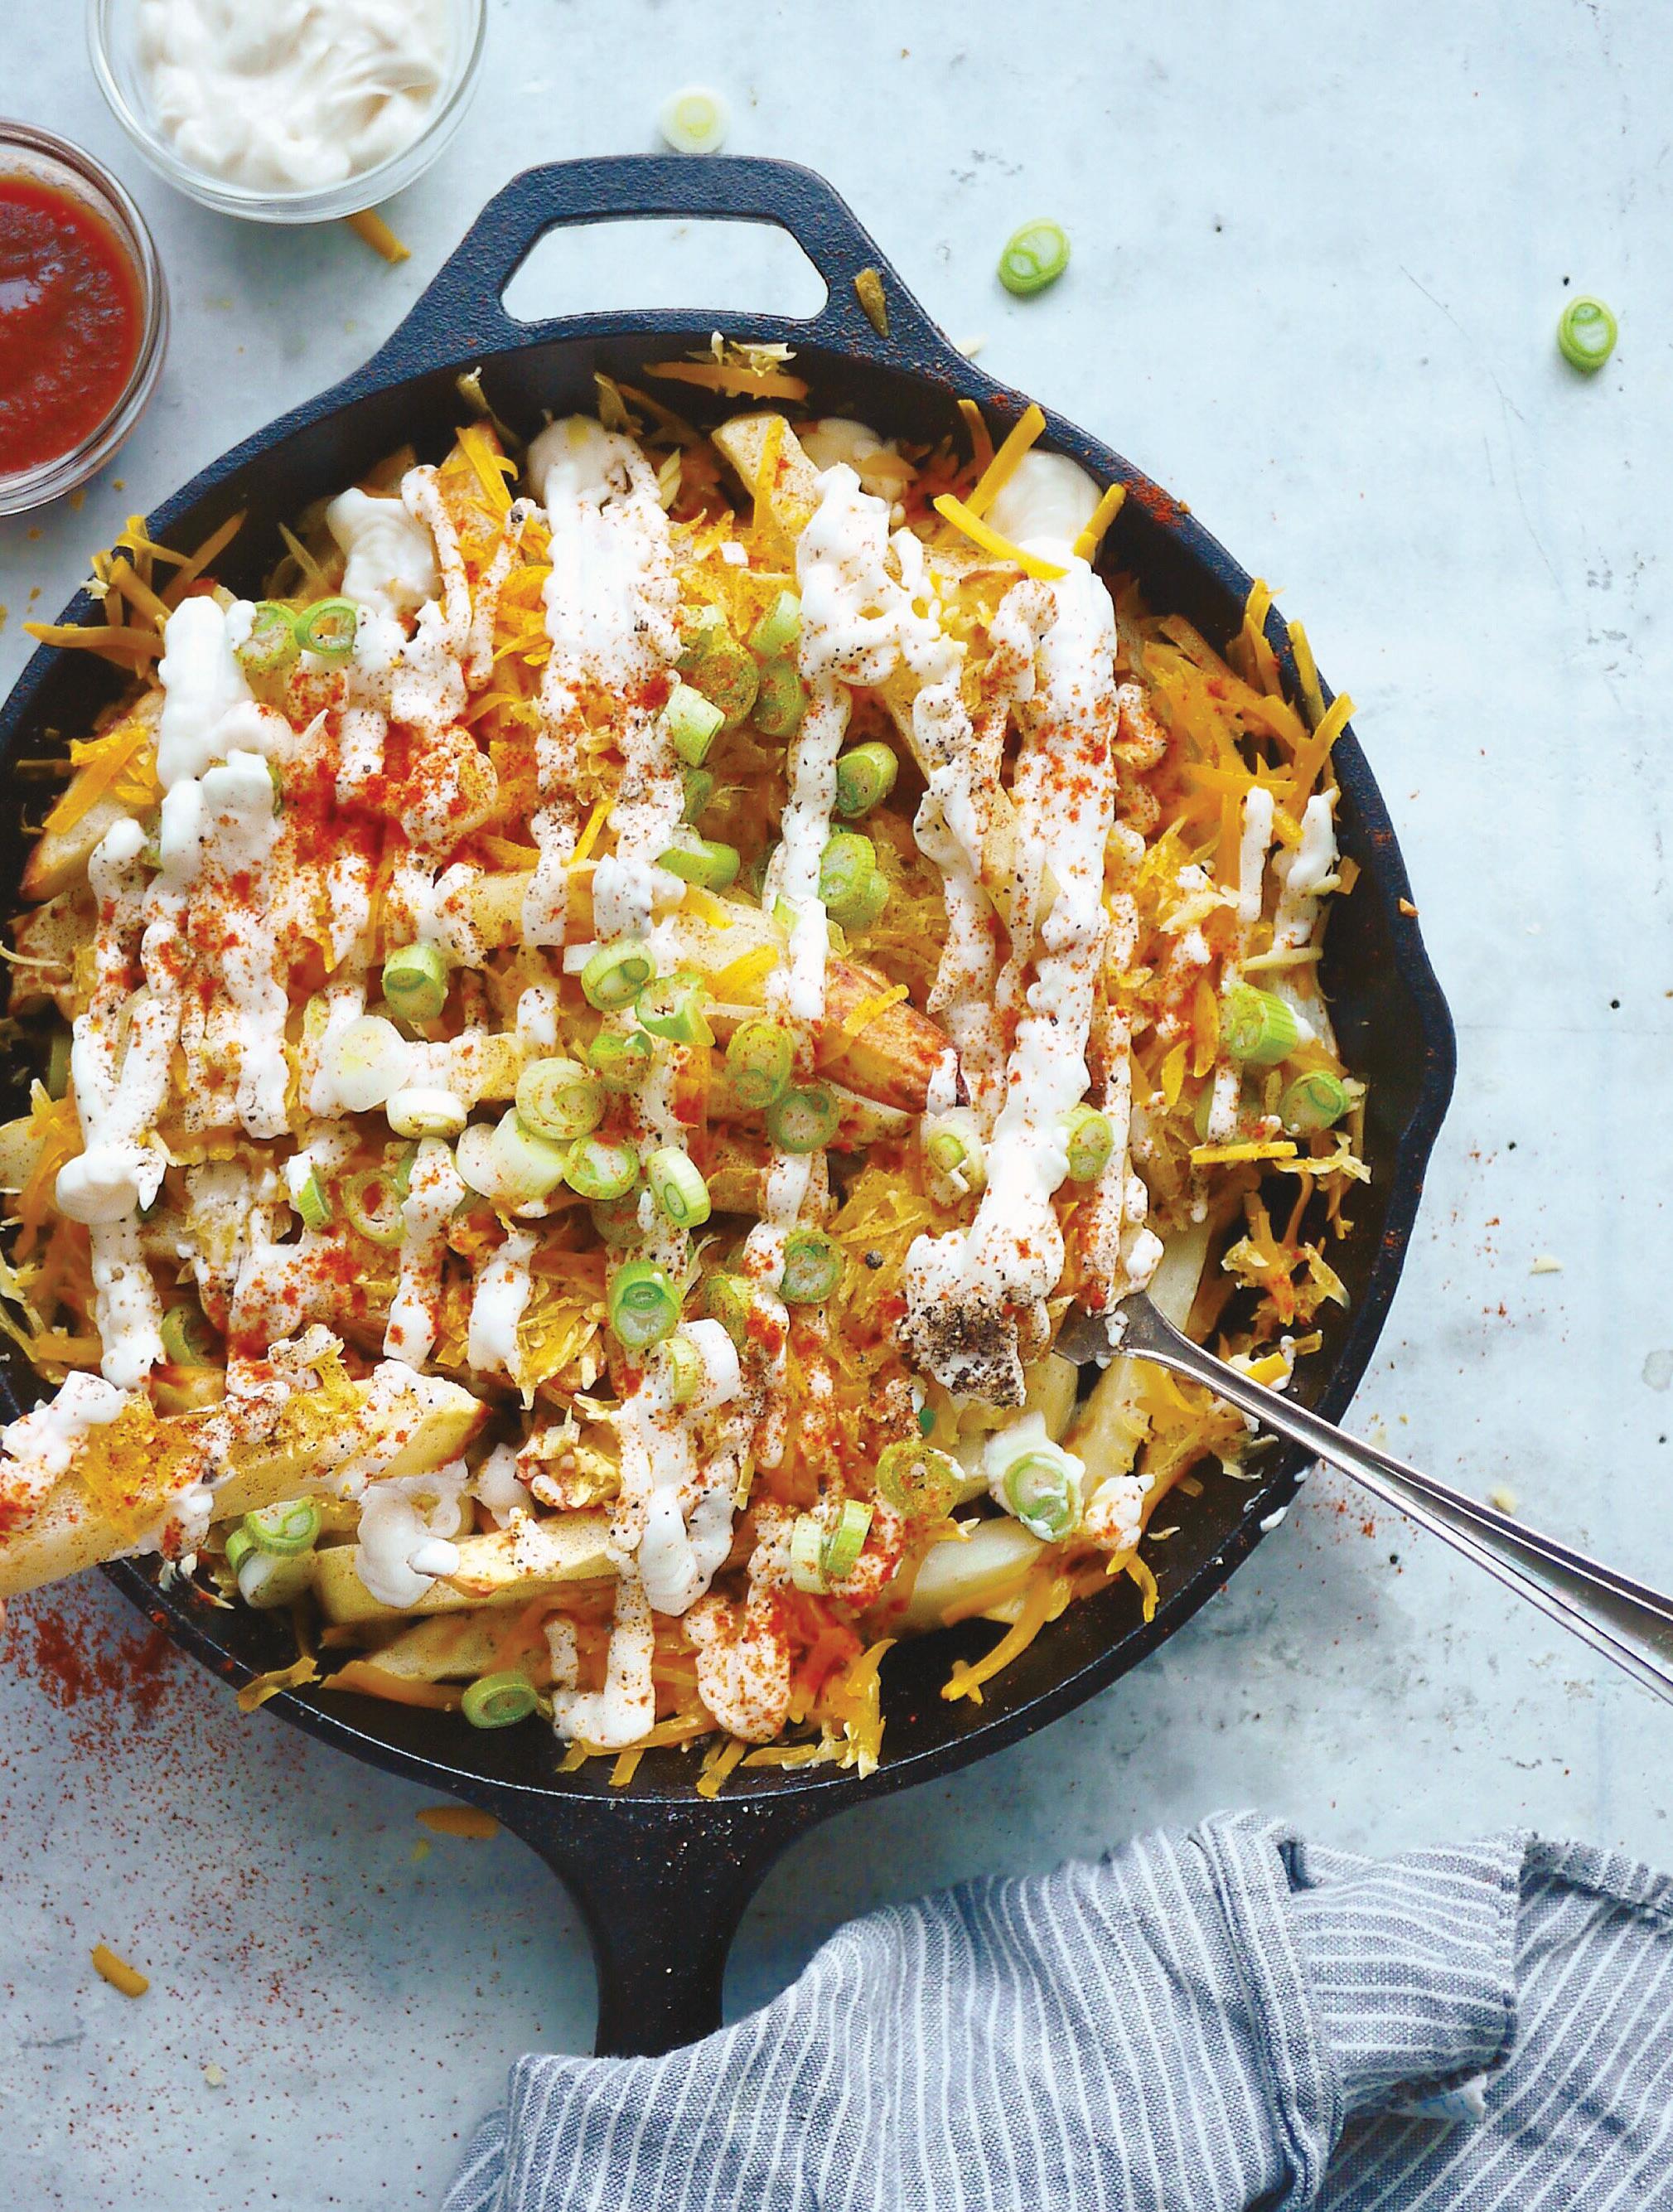
RECIPE & PHOTOGRAPHY BY ERIN IRELAND
Founder of It's To Die For food blog one of IMPACT Magazine's Top Vegan Influencers
f rom Vancouver, B.C.
ERINIRELAND ERINYVR
Serves 6
INGREDIENTS
• 7 russet potatoes
• 4 large garlic cloves (minced)
• 3 Tbsp. olive oil
• 1 tsp. Mexican chili powder
• ½ tsp. paprika
• 1 ½ tsp. Himalayan salt
• 1 tsp. fresh-ground pepper
• ½ cup vegan mayonnaise
• 1 bunch green onions
• 1 cup grated vegan cheese
• ½ cup ketchup (for dipping)
• Malt vinegar (optional, but highly recommended)
Preheat oven to 400F and line two baking sheets with parchment paper. Chop potatoes into medium-sized ‘fry-like’ strips and divide evenly onto your baking sheets. Sprinkle each sheet of potatoes evenly with garlic, olive oil, chili powder, paprika, salt and pepper. Toss evenly to coat fries. Bake for about 35 minutes or until golden. At the 20 minute mark, give them a flip. Remove from oven and add a third of the fries to a large iron skillet. Sprinkle with vegan cheese. Add another ⅓ of your fries and more cheese. Repeat this step one more time and place skillet back in oven so the cheese can melt (about 10 minutes). Once cheese is melted, remove from oven and garnish with a generous drizzle of mayonnaise, handful of chopped green onions, sprinkle of chili powder, salt and malt vinegar.
Nutrition facts per serving Calories 600; protein 11 g; fat 16 g; carbs 79 g.

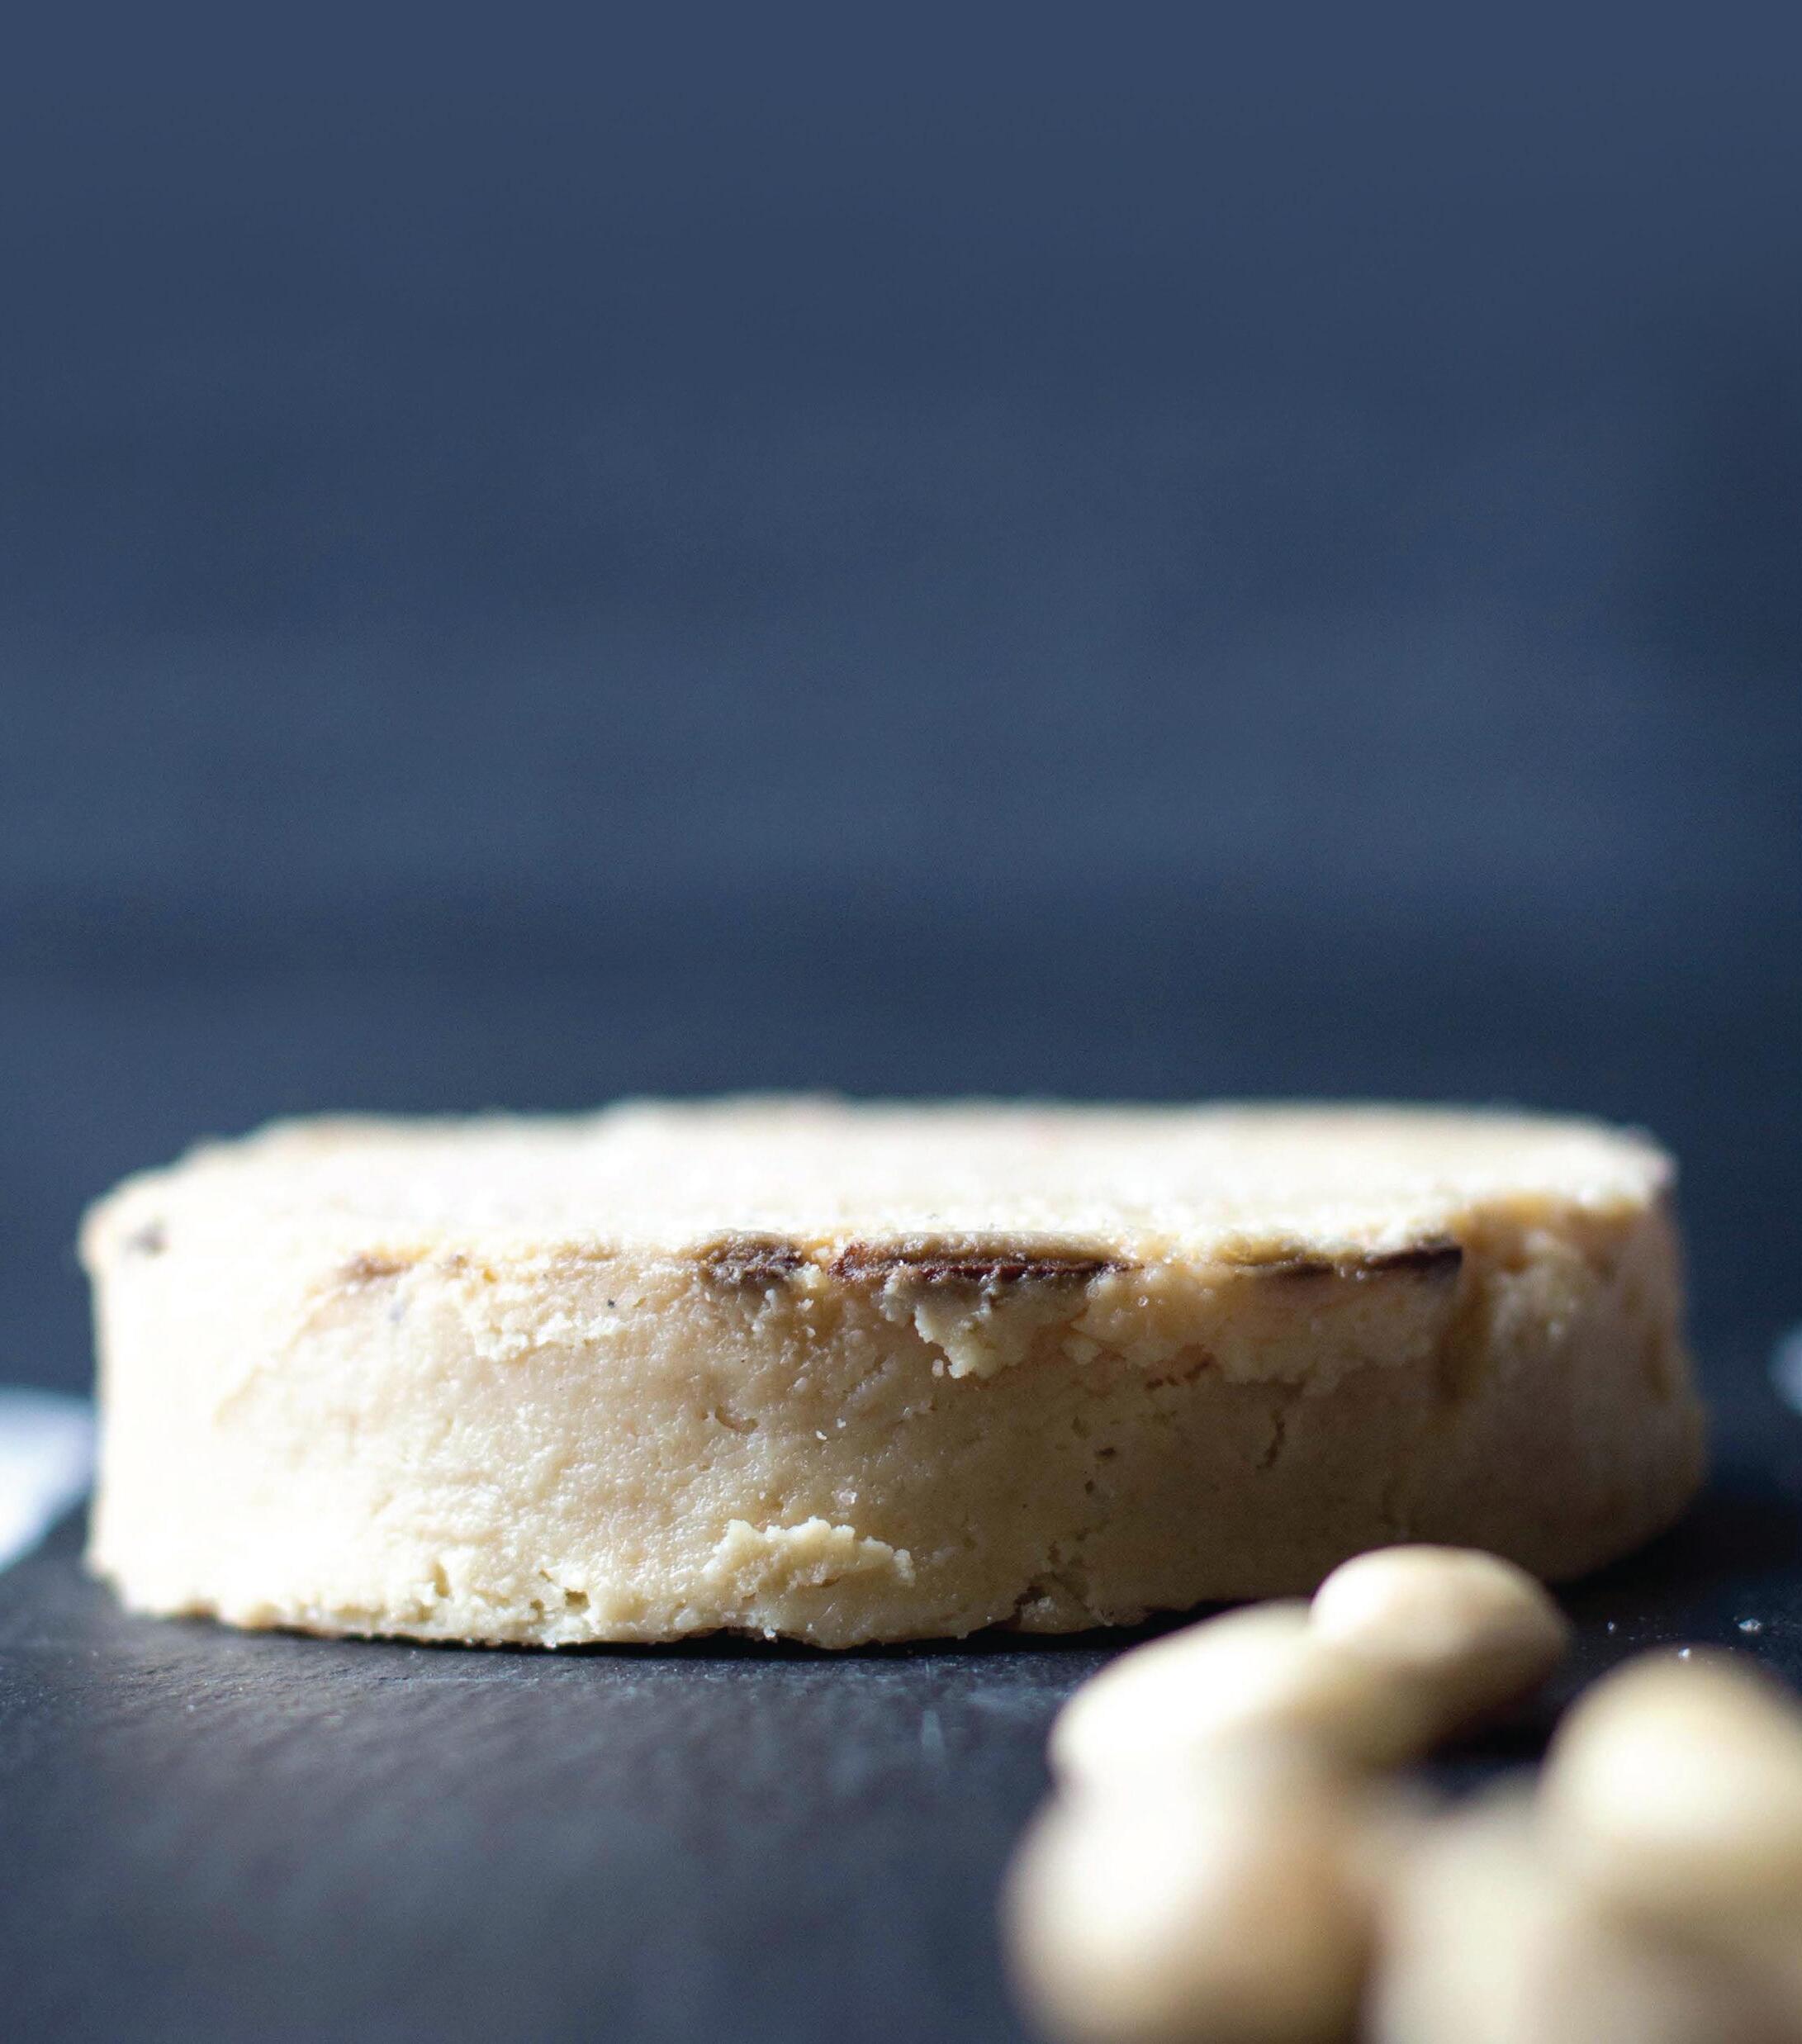
BY JULIE PIATT LEIA VITA MARASOVICH
Vegan
Serves 8
• 2 cups raw cashews
• 2 Tbsp. unrefined coconut oil, plus more for greasing the pan
• ¾ cup aquafaba (liquid from canned garbanzo beans)
• ½ tsp. Celtic sea salt
• 1 tsp. white truffle oil
Easy Prep: Place the cashews in filtered water in a small bowl. Cover and refrigerate overnight.
Lightly oil a 4 x 2-inch pan with coconut oil. Drain the cashews. In the pitcher of a Vitamix, place the cashews, aquafaba, salt, coconut oil, and truffle oil. Process first on medium speed, using the plunger to evenly distribute the mixture. Gradually increase the speed, stopping intermittently to redistribute the mixture until the it is smooth. Transfer the mixture to the prepared pan and smooth out the top with a rubber spatula. and cover with a round of parchment paper cut to fit the pan. Dehydrate for 24 hours at 90F. Transfer to the refrigerator for 24 hours.
Run a sharp knife around the edges of the mold. Turn the cheese out onto a cutting board and remove the sides. Using the wide flat side of a large knife, run the flat edge under the metal round, pressing upwards to separate the round from the cheese. Smooth the cheese surfaces with rubber spatula. If desired, place in a humidifier for 1 to 3 weeks. Rub fine sea salt over your cheese after a few days and then repeat every few days or so to prevent black mold from appearing.
Nutrition facts per serving Calories 199; protein 5 g; fat 16 g; carbs 9 g.
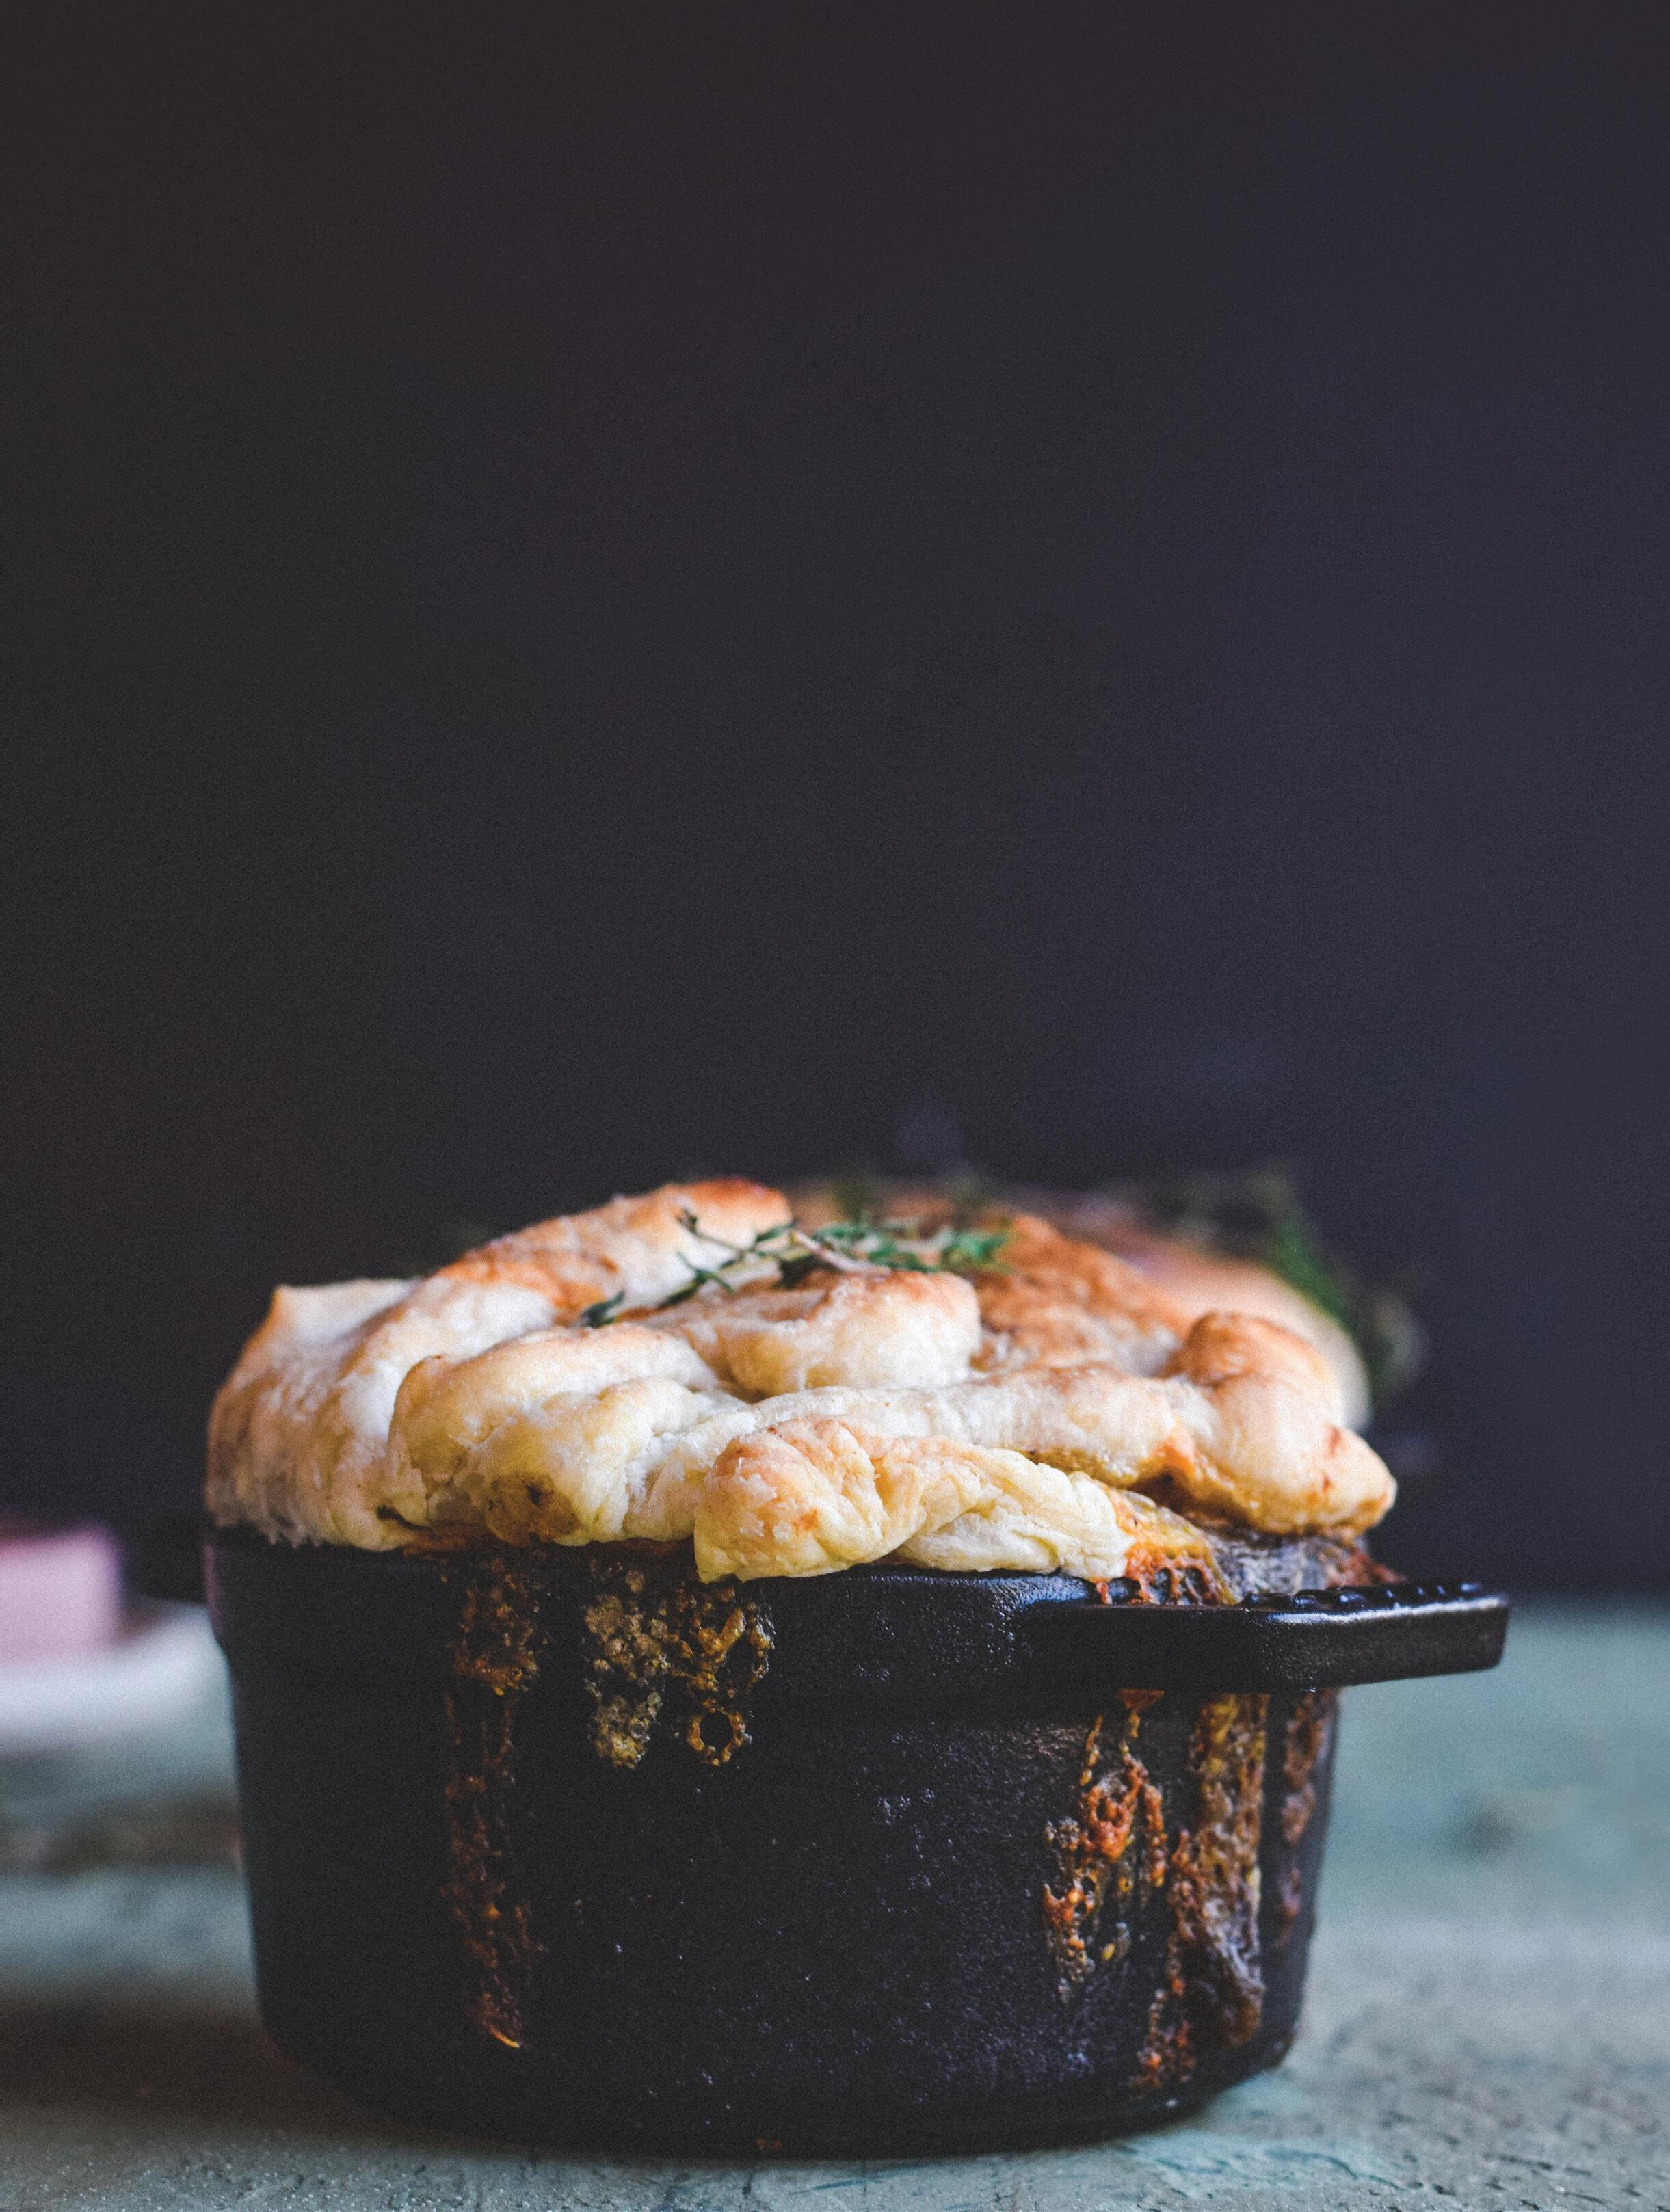
BY JORDAN WAGMAN ANDREW HIORTH
James Beard-nominated chef & author of five cookbooks based in Toronto, ON.
CHEFJORDANWAGMAN
TCHEFJORDANWAGMAN
his main course will impress your friends and family during any holiday season. Filling and delicious, this is a satisfying choice.
Serves 4
• Buttercup, pumpkin or sugar mama squash, about 2 1/2 -3 lbs, cleaned and dry
• 2 red peppers, rinsed and dried*
• 6 shallots, whole, unpeeled
• 1 lb oyster mushrooms, roughly chopped*
• 1 lbs chanterelle mushrooms, cleaned and cut in half lengthwise*
• 6 sprigs fresh thyme
• 6 leaves fresh basil
• 1 Tbsp. sea salt
• 3 Tbsp. olive oil, divided
CHEF JORDAN’S TIPS*
To save time, you could use quality store-bought roasted red peppers. Any mushroom will work in this recipe but my favorites are chanterelles, morels, oyster and cremini mushrooms.
Preheat oven to (convection bake) 275 F. Place squash on a baking sheet and place in oven. Bake until a knife easily pierces the top of the squash, about one hour. Remove squash from heat and cool to room temperature.
Using a sharp knife cut a ‘lid’, about 3 inches in diameter, exposing the inner flesh. Using a spoon, remove and discard the seeds from the inside of the squash and around the lid. Place the cover back onto the squash and set aside. Place red peppers in a sauté pan and drizzle with 1 Tbsp. olive oil. Toss well to coat and heat oven to 400 F. Roast the peppers, turning often, until skins are separating from the flesh, about 35-45 minutes. Remove from heat and transfer to a bowl to cool to room temperature. Place a strainer over a bowl and remove the skins from the flesh. Discard skins and seeds and combine remaining juice with peppers and set aside. Place shallots in an oven-proof pan and cover with a tight fitting lid. Cook at 400 F until soft to the touch, about 35-45 minutes.
Remove from heat and cool. Remove outer skins and set aside.
Warm a large sauté pan over high heat. Add remaining olive oil, mushrooms and fresh thyme and toss to coat in oil. Turn heat to medium and sauté mushrooms until soft, about 5 minutes. Season with 1 tsp. of salt and mix. Discard thyme sprigs and set aside.
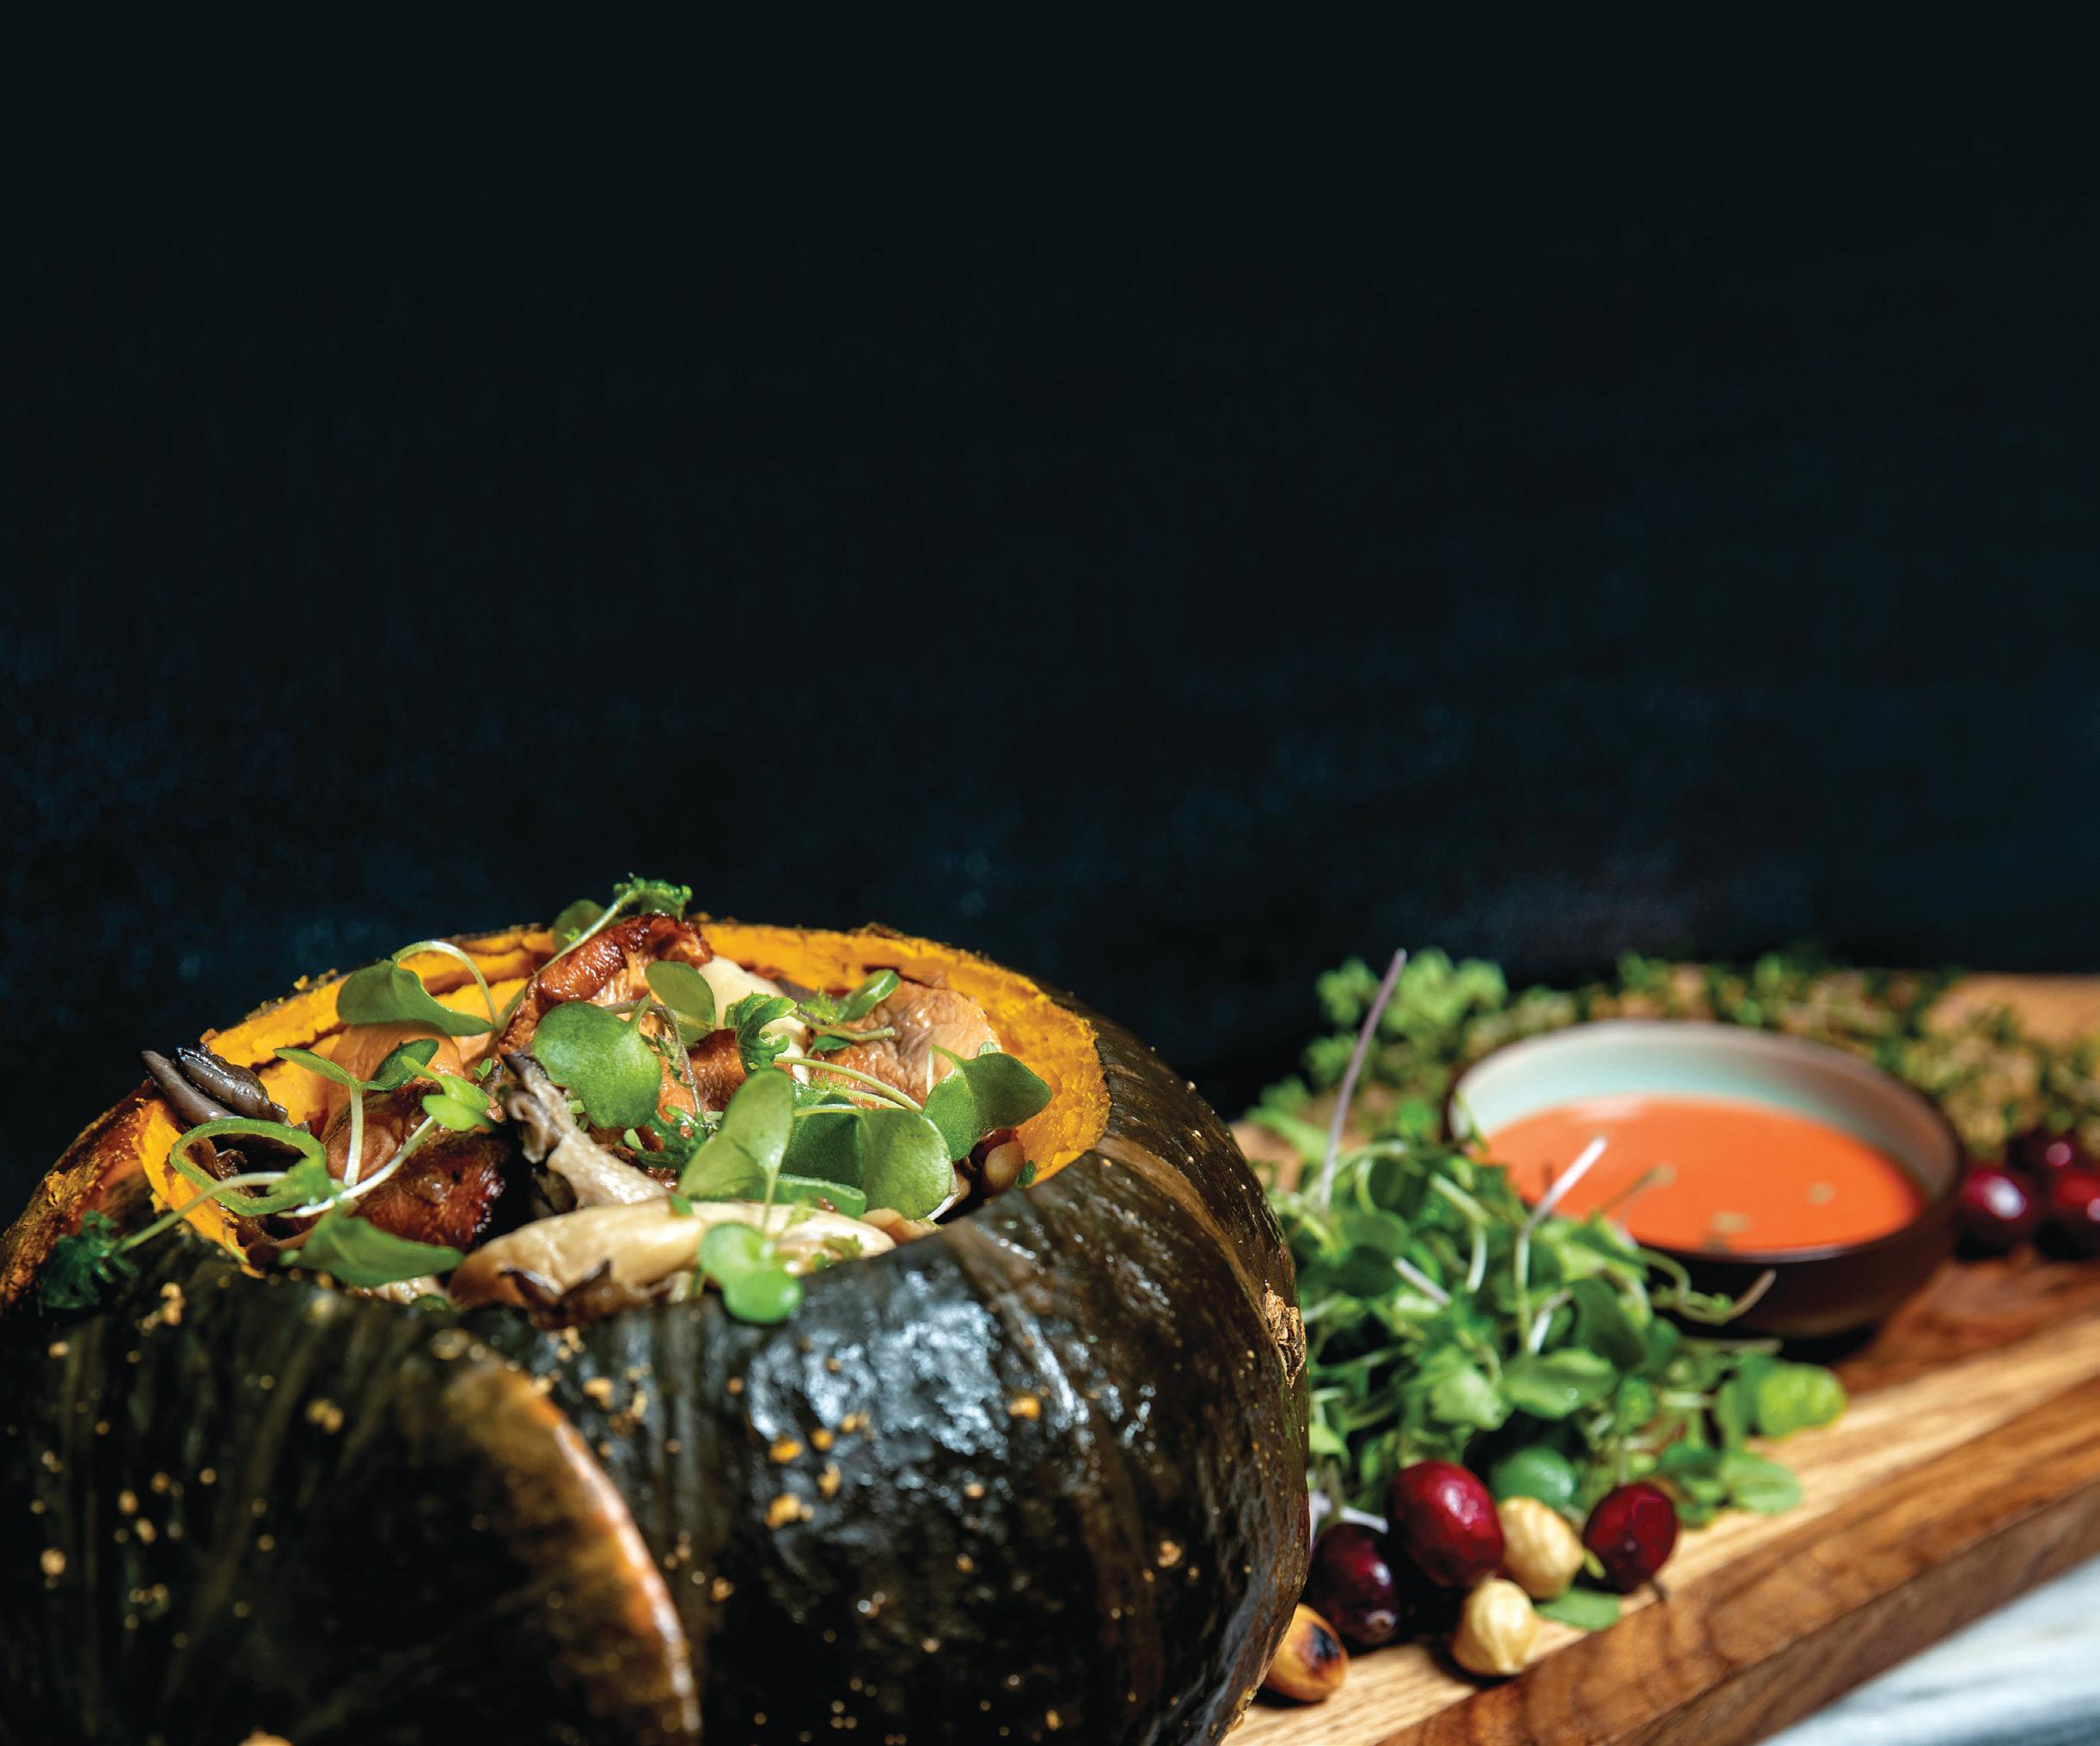
To assemble, place peeled shallots and any residual liquid in the bottom of the squash. Evenly spread the shallots to create a layer, and season with 1 tsp. of salt. Next, evenly spread the roasted peppers to cover the shallots and season with remaining salt. Pour residual juice onto the peppers. Lastly, place mushrooms into the squash and cover with the lid. Place squash in oven at 350 F until warmed through, about 30-40 minutes. Remove lid and garnish with fresh basil. Serve immediately.
Nutrition facts per serving Calories 988; protein 64 g; fat 10 g; carbs 137 g.
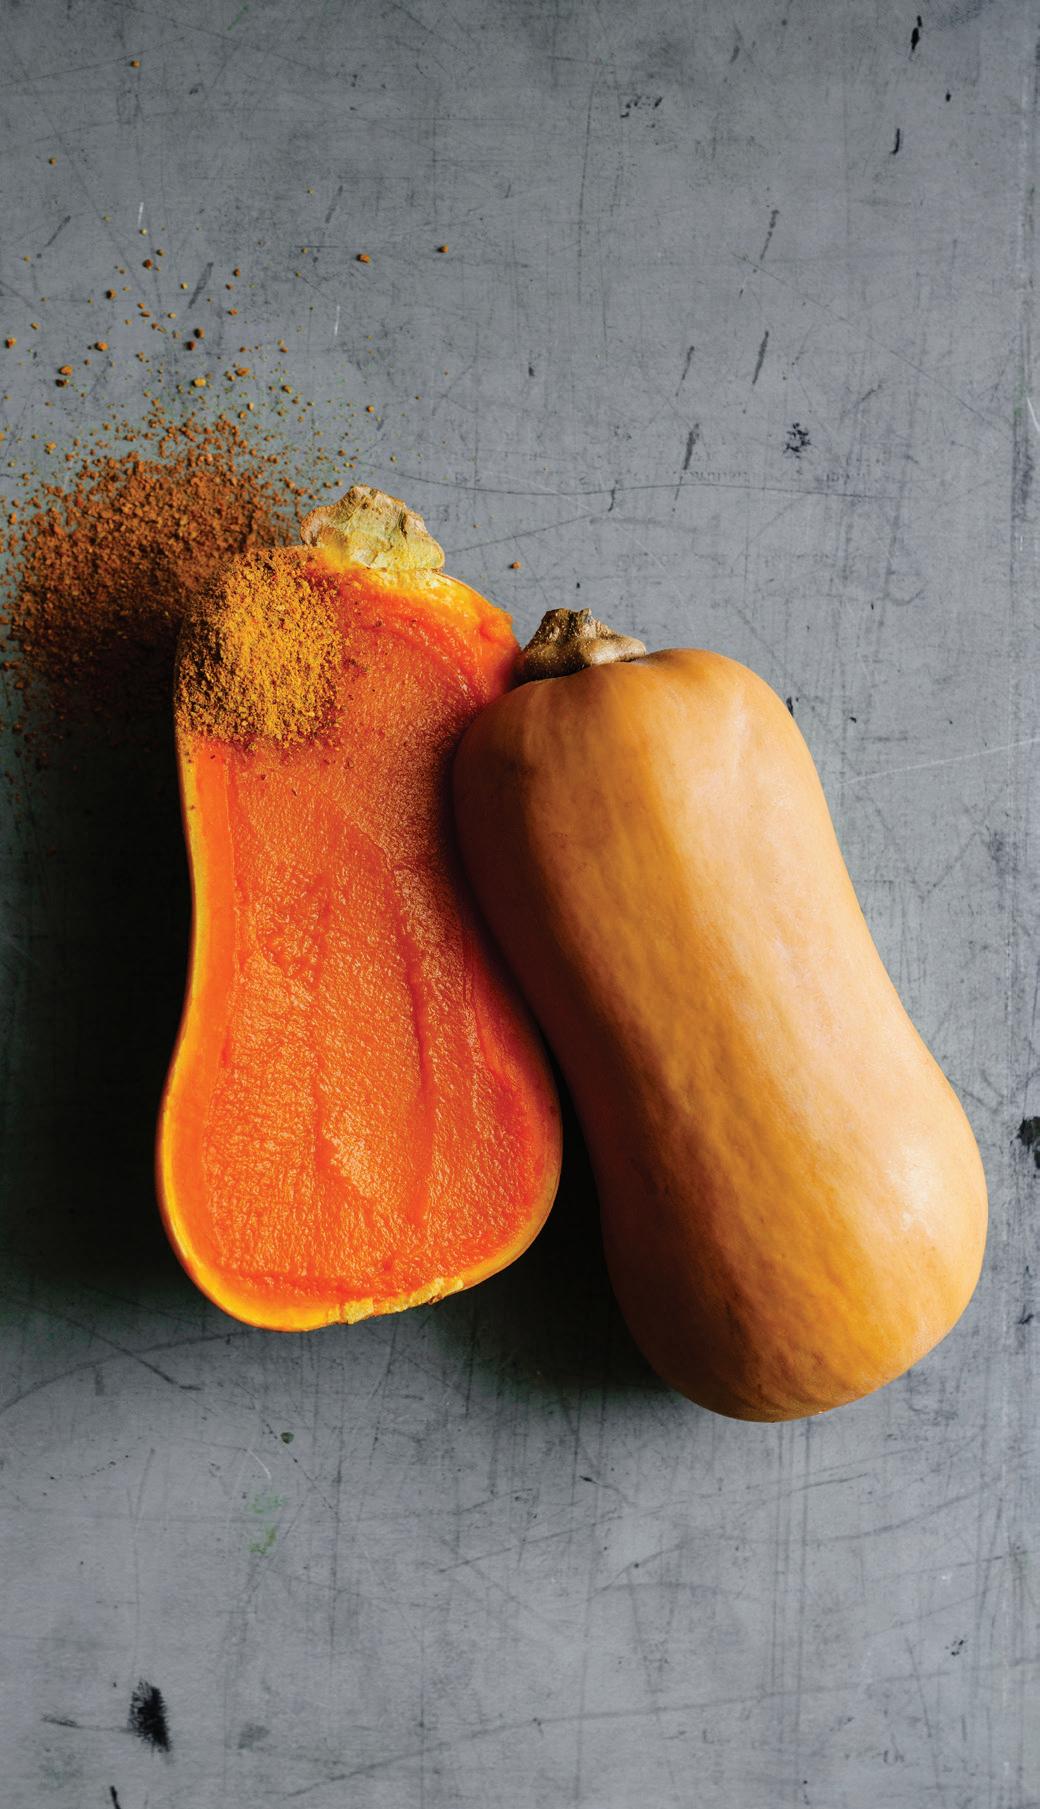
BY CHEF DAN BARBER – Co-owner of Blue Hill Restaurant at Stone Barns, and co-founder
of Row 7 ROW7SEEDS ROW7SEEDS ROW7SEEDS
This recipe features Row 7 Seed Company’s #898 Squash grown from Row 7 seeds - bred to reimagine the workaday butternut squash, but any squash will do!
Servers 10
INGREDIENTS
• 4 squash ( butternut recommended)
• 1 Tbsp. olive oil or vegetable oil
• Salt and pepper
DIRECTIONS
Squash Puree
1. Preheat oven to 375 F.
2. Cut the squash in half lengthwise. Using a spoon, remove the seeds.
3. Lay the squash halves, cut-side up, on a baking tray. Lightly drizzle or brush with the oil, and season with salt.
4. Roast the squash, uncovered, in the oven for about 50 minutes, until the flesh is very tender. Remove from the oven.
5. When cool enough to handle, scoop out the flesh of the squash using a spoon. Reserve the skins.
6. Place the squash in a bowl and mash with a fork. Or, for a smoother texture, transfer the squash to a blender and puree. Adjust seasoning with salt and pepper as needed.
7. Serve puree with squash skin crumble.
Squash Skin Crumble
1. Preheat an oven to its lowest setting—150 F is ideal.
2. Transfer the reserved roasted squash skins to a parchment-lined baking tray. Place the tray in the oven for 8-10 hours, or until the squash skins are completely dry and brittle.
3. Remove tray from the oven and allow to cool.
4. Transfer the dried skins into a blender or food processor and blend to a medium-fine crumble consistency. Season with salt to taste.
Nutrition facts per serving
Calories 210 protein 5 g; fat 1 g; carbs 51 g.
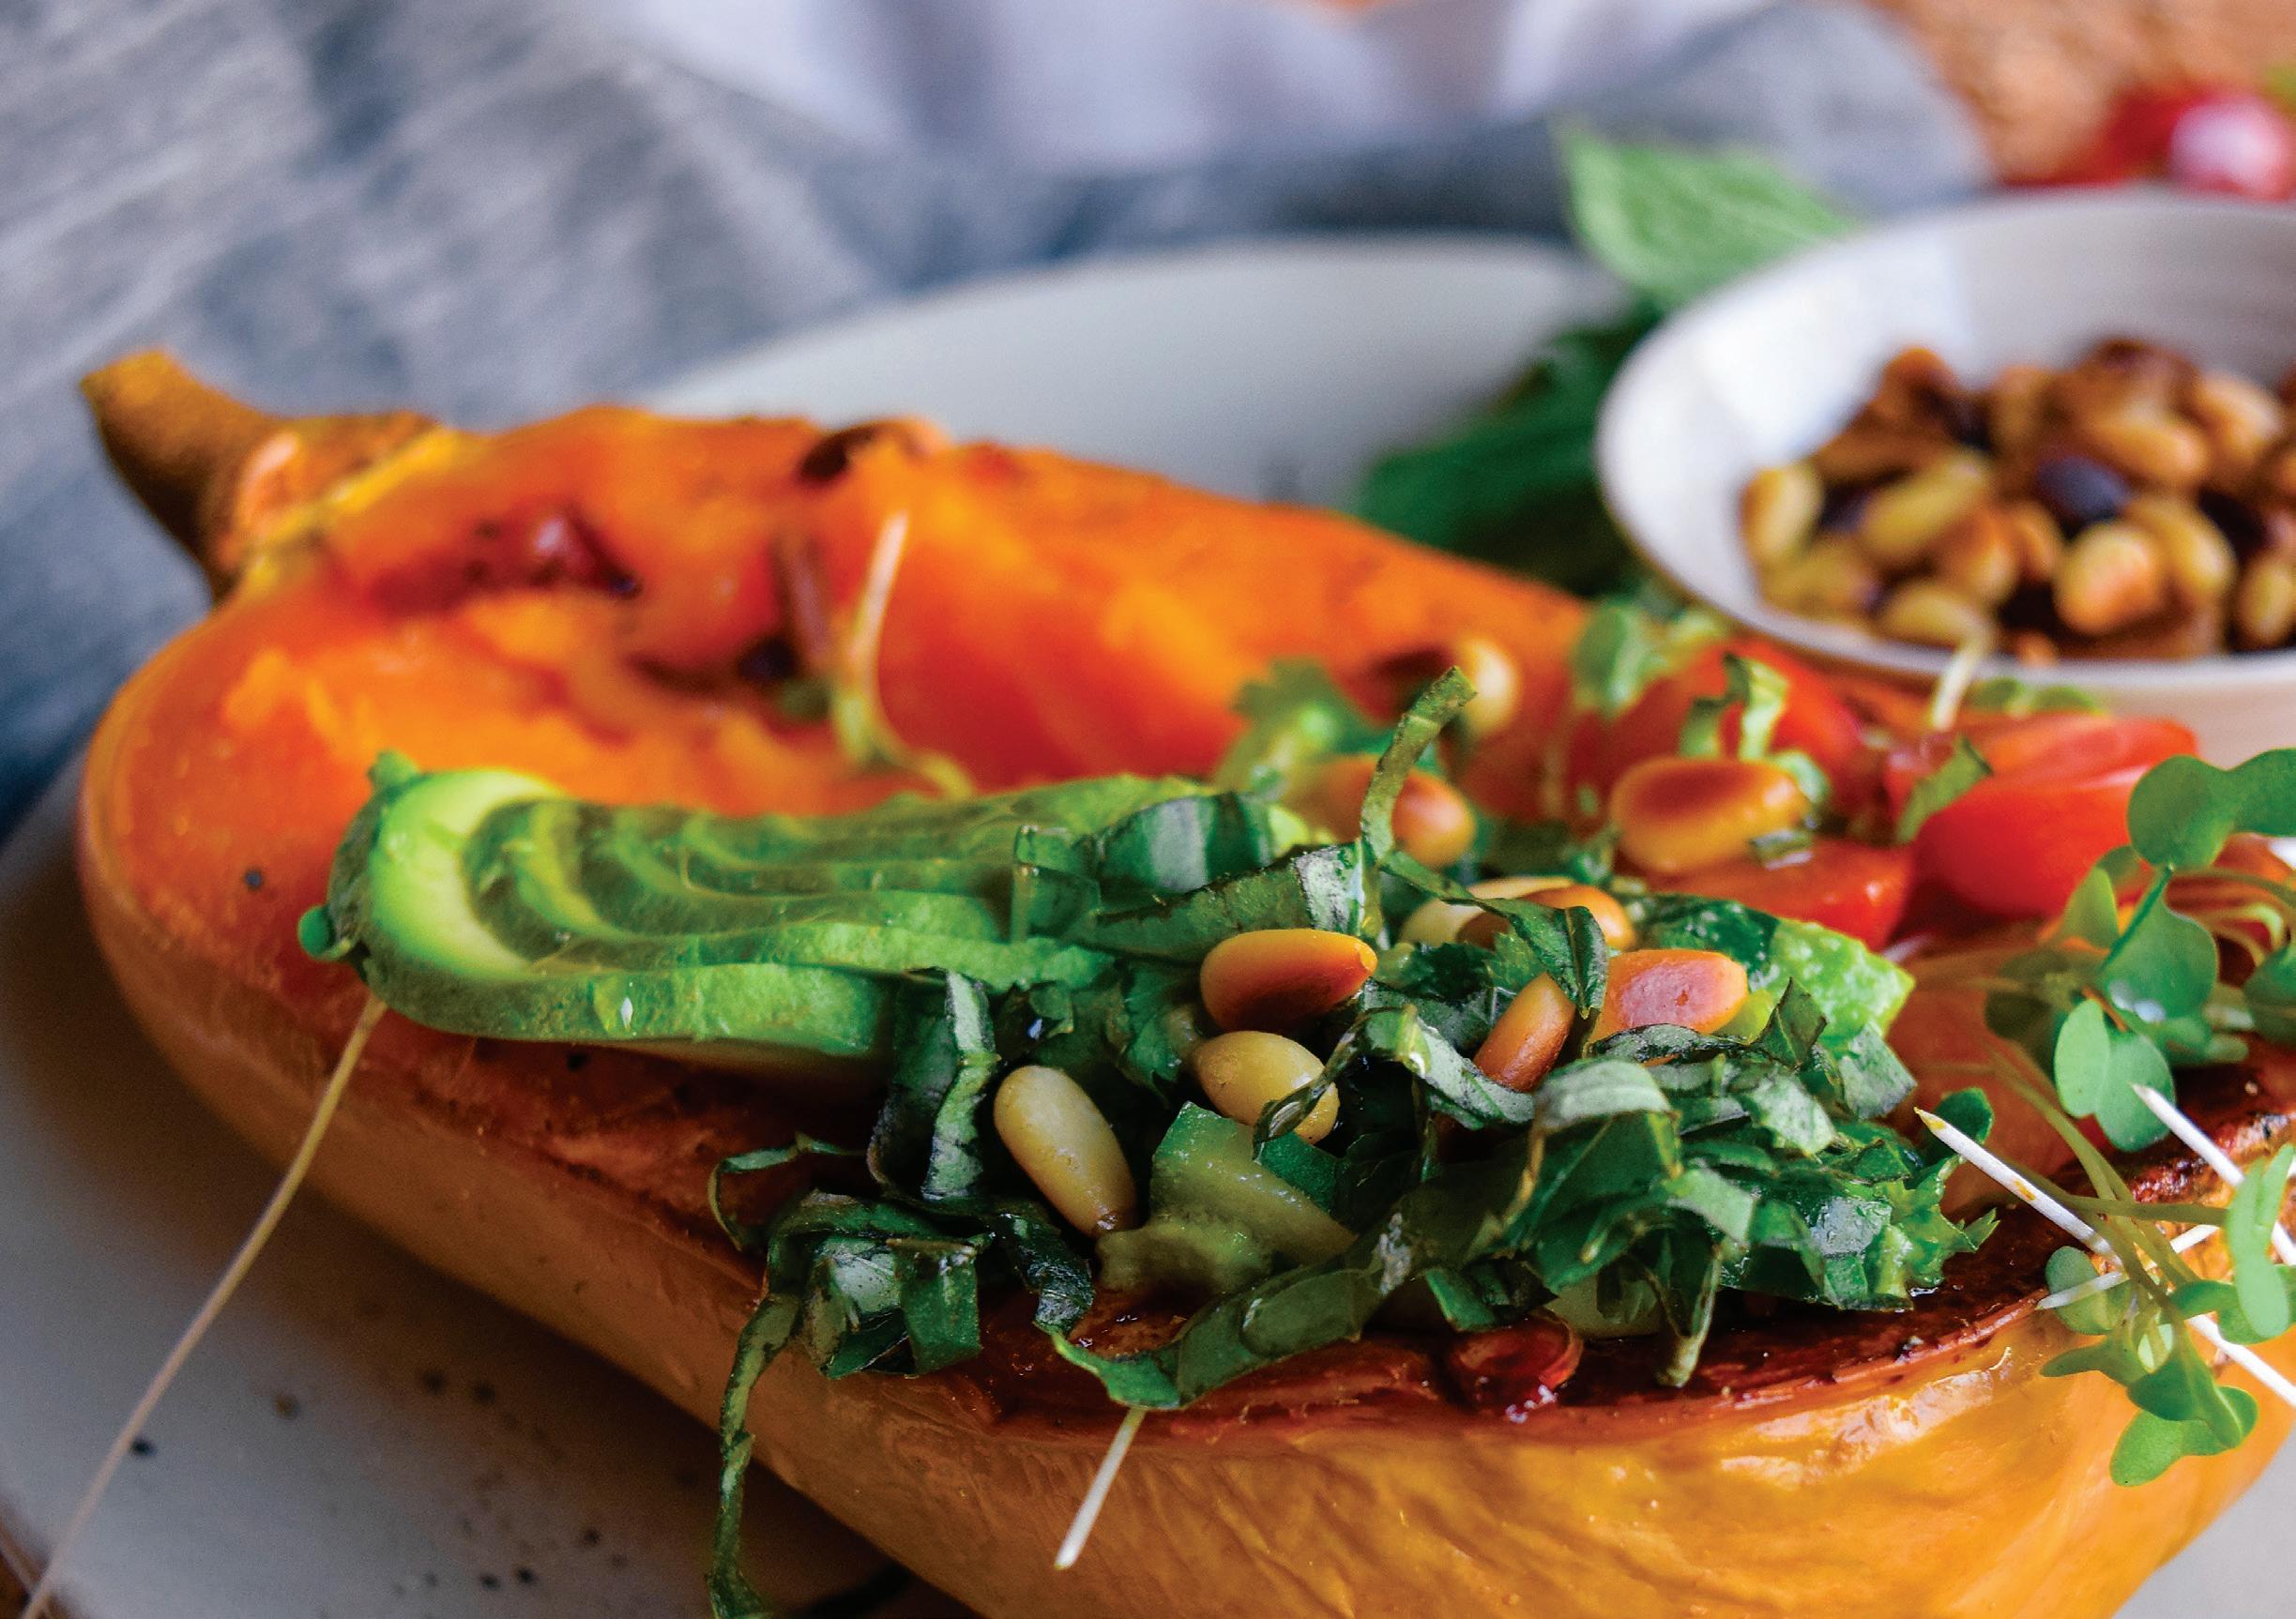
A quick & delicious pick for any night of the week
RECIPE & PHOTOGRAPHY BY
MARIA KOUTSOGIANNIS
Recipe developer & food blogger at FoodByMaria in Calgary, AB
FOODBYMARIA FOODBYMARIA2014
Serves 2
• 1 medium sized butternut squash
• 1 Tbsp. Extra-virgin olive oil
SALAD
• 2 avocados, cubed
• ½ cup cucumber, cubed
• juice from 1 lemon
• 2 Tbsp. Extra-virgin olive oil
• 1 cup cherry tomatoes, halved
• handful of microgreens
• salt and pepper to taste
DRESSING
• 1 Tbsp. vegan mayo
• 1 tsp. Dijon mustard
• Dash of lemon juice
• Salt and pepper to taste
TOPPINGS
• Pine nuts, toasted in cast iron skillet for 4-5 minutes
Preheat oven to 375F. Cut squash in half (length-wise). Add olive oil to a pan and set squash cut side down. Bake for approximately 35 minutes (baking time will vary depending on size of the squash).
Prepare salad by adding all ingredients to a bowl and tossing gently. Add all dressing ingredients to a bowl and stir until well combined.
Once squash is cooked, remove from oven and assemble your meal by adding the salad, dressing and pine nuts! Let the squash cool for around 10 minutes prepare plating.
Nutrition facts per serving
Calories 310; protein 7 g; fat 14 g; carbs 24 g.
Set your festive table with plant-based goodness
RECIPE & PHOTOGRAPHY BY RICH ROLL & JULIE PIATT – Vegan athlete & chef, authors of The Plantpower Way in Malibu, CA @RICHROLL / @SRIMATI @RICHROLL / @SRIMATI
This stuffing has lively, aromatic notes with fresh herbs, crisp celery, seaweed and hearty mushrooms. It’s an earthy stu ffi ng with textures of the forest and a hint of the sea, buttressed by plenty of antioxidants.
Nutrition facts per serving Calories 250; protein 8 g; fat 12 g; carbs 27 g.
• 2 loaves gluten-free bread
• ½ shallot, finely chopped
• 2 garlic cloves, peeled and finely chopped
• 1 Tbsp. Macadamia nut oil or olive oil
• 4 celery stalks, with leaves, chopped
• 2 cups wild mushrooms, washed and stems removed
• ½ small lemon
• 1 Tbsp. gluten-free tamari
• 1 Tbsp. chopped fresh sage
• 1 Tbsp. chopped fresh thyme
• ¼ cup premium Atlantic organic seaweed, finely chopped
• 1 tsp. large-grain Celtic sea salt (optional)
Preheat the oven to 350 F. Cut the glutenfree bread loaves into ½-inch cubes. Spread them out evenly in a flat rectangular baking dish. Set aside. In a large saucepan, sauté the shallot and garlic in the oil over medium heat for 30 seconds, add the chopped celery and stir until the colour brightens. Add mushrooms and continue to sauté until brown and the juices have made a nice broth in the pan. Squeeze in the lemon, add the tamari and stir again. Turn the sautéed mixture out over the bread cubes. Sprinkle with the fresh herbs and seaweed and mix well. If needed, add the sea salt.
Courtesy of The Plantpower Way by Rich Roll & Julie Piatt / Avery Books, a member of Penguin Group (USA) LLC, A Penguin Random House Company © 2015. Reprinted with permission.
• 1 cup filtered water
Transfer to a large flat casserole dish. Add ½ cup of the filtered water. Cover the dish with aluminum foil or lid and bake for 30 minutes, until moist and heated through. Add the remaining ½ cup water, if needed.
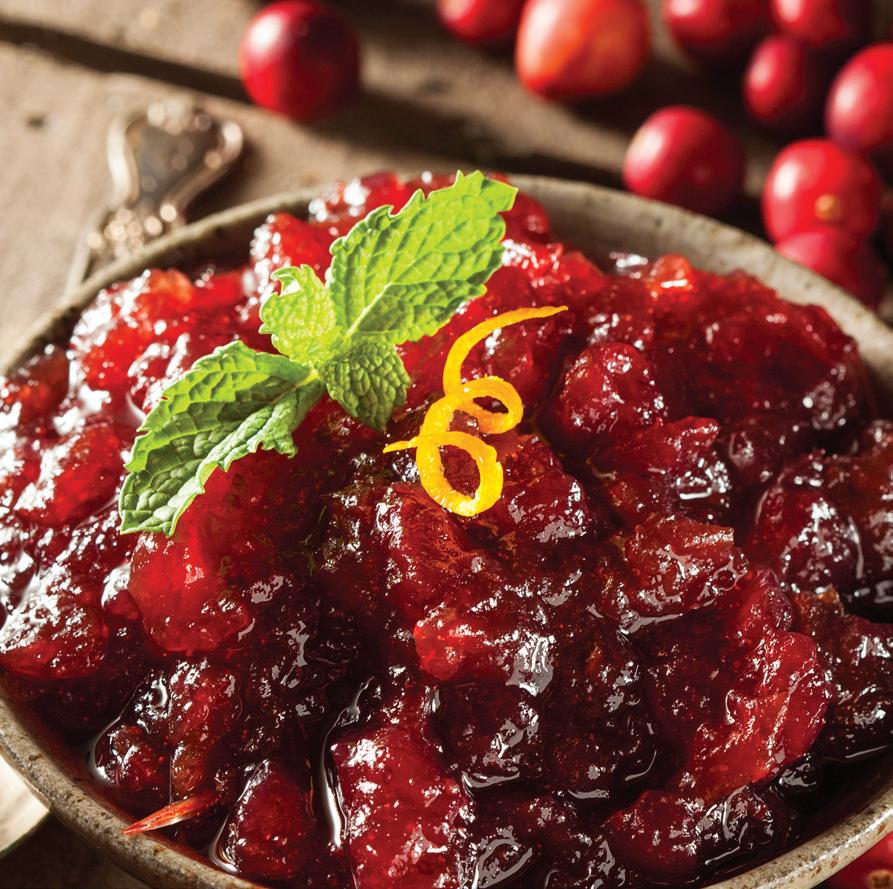
The aromatic ginger combined with cranberries makes this an exotic, lively twist on the traditional cranberry sauce.
Serves 10
• 2 (12-ounce) packages fresh cranberries
• ¼ cup filtered water
• 8 dates, soaked in filtered water for 30 minutes and pitted
• 1 cup candied ginger cubes
• Dash cinnamon
DIRECTIONS
In a small saucepan, simmer all the ingredients over medium heat until the cranberries and dates break down to form a sauce. Adjust the sweetness to taste. Cool and serve.
Nutrition facts per serving Calories 88; protein 1 g; fat 0 g; carbs 23 g.
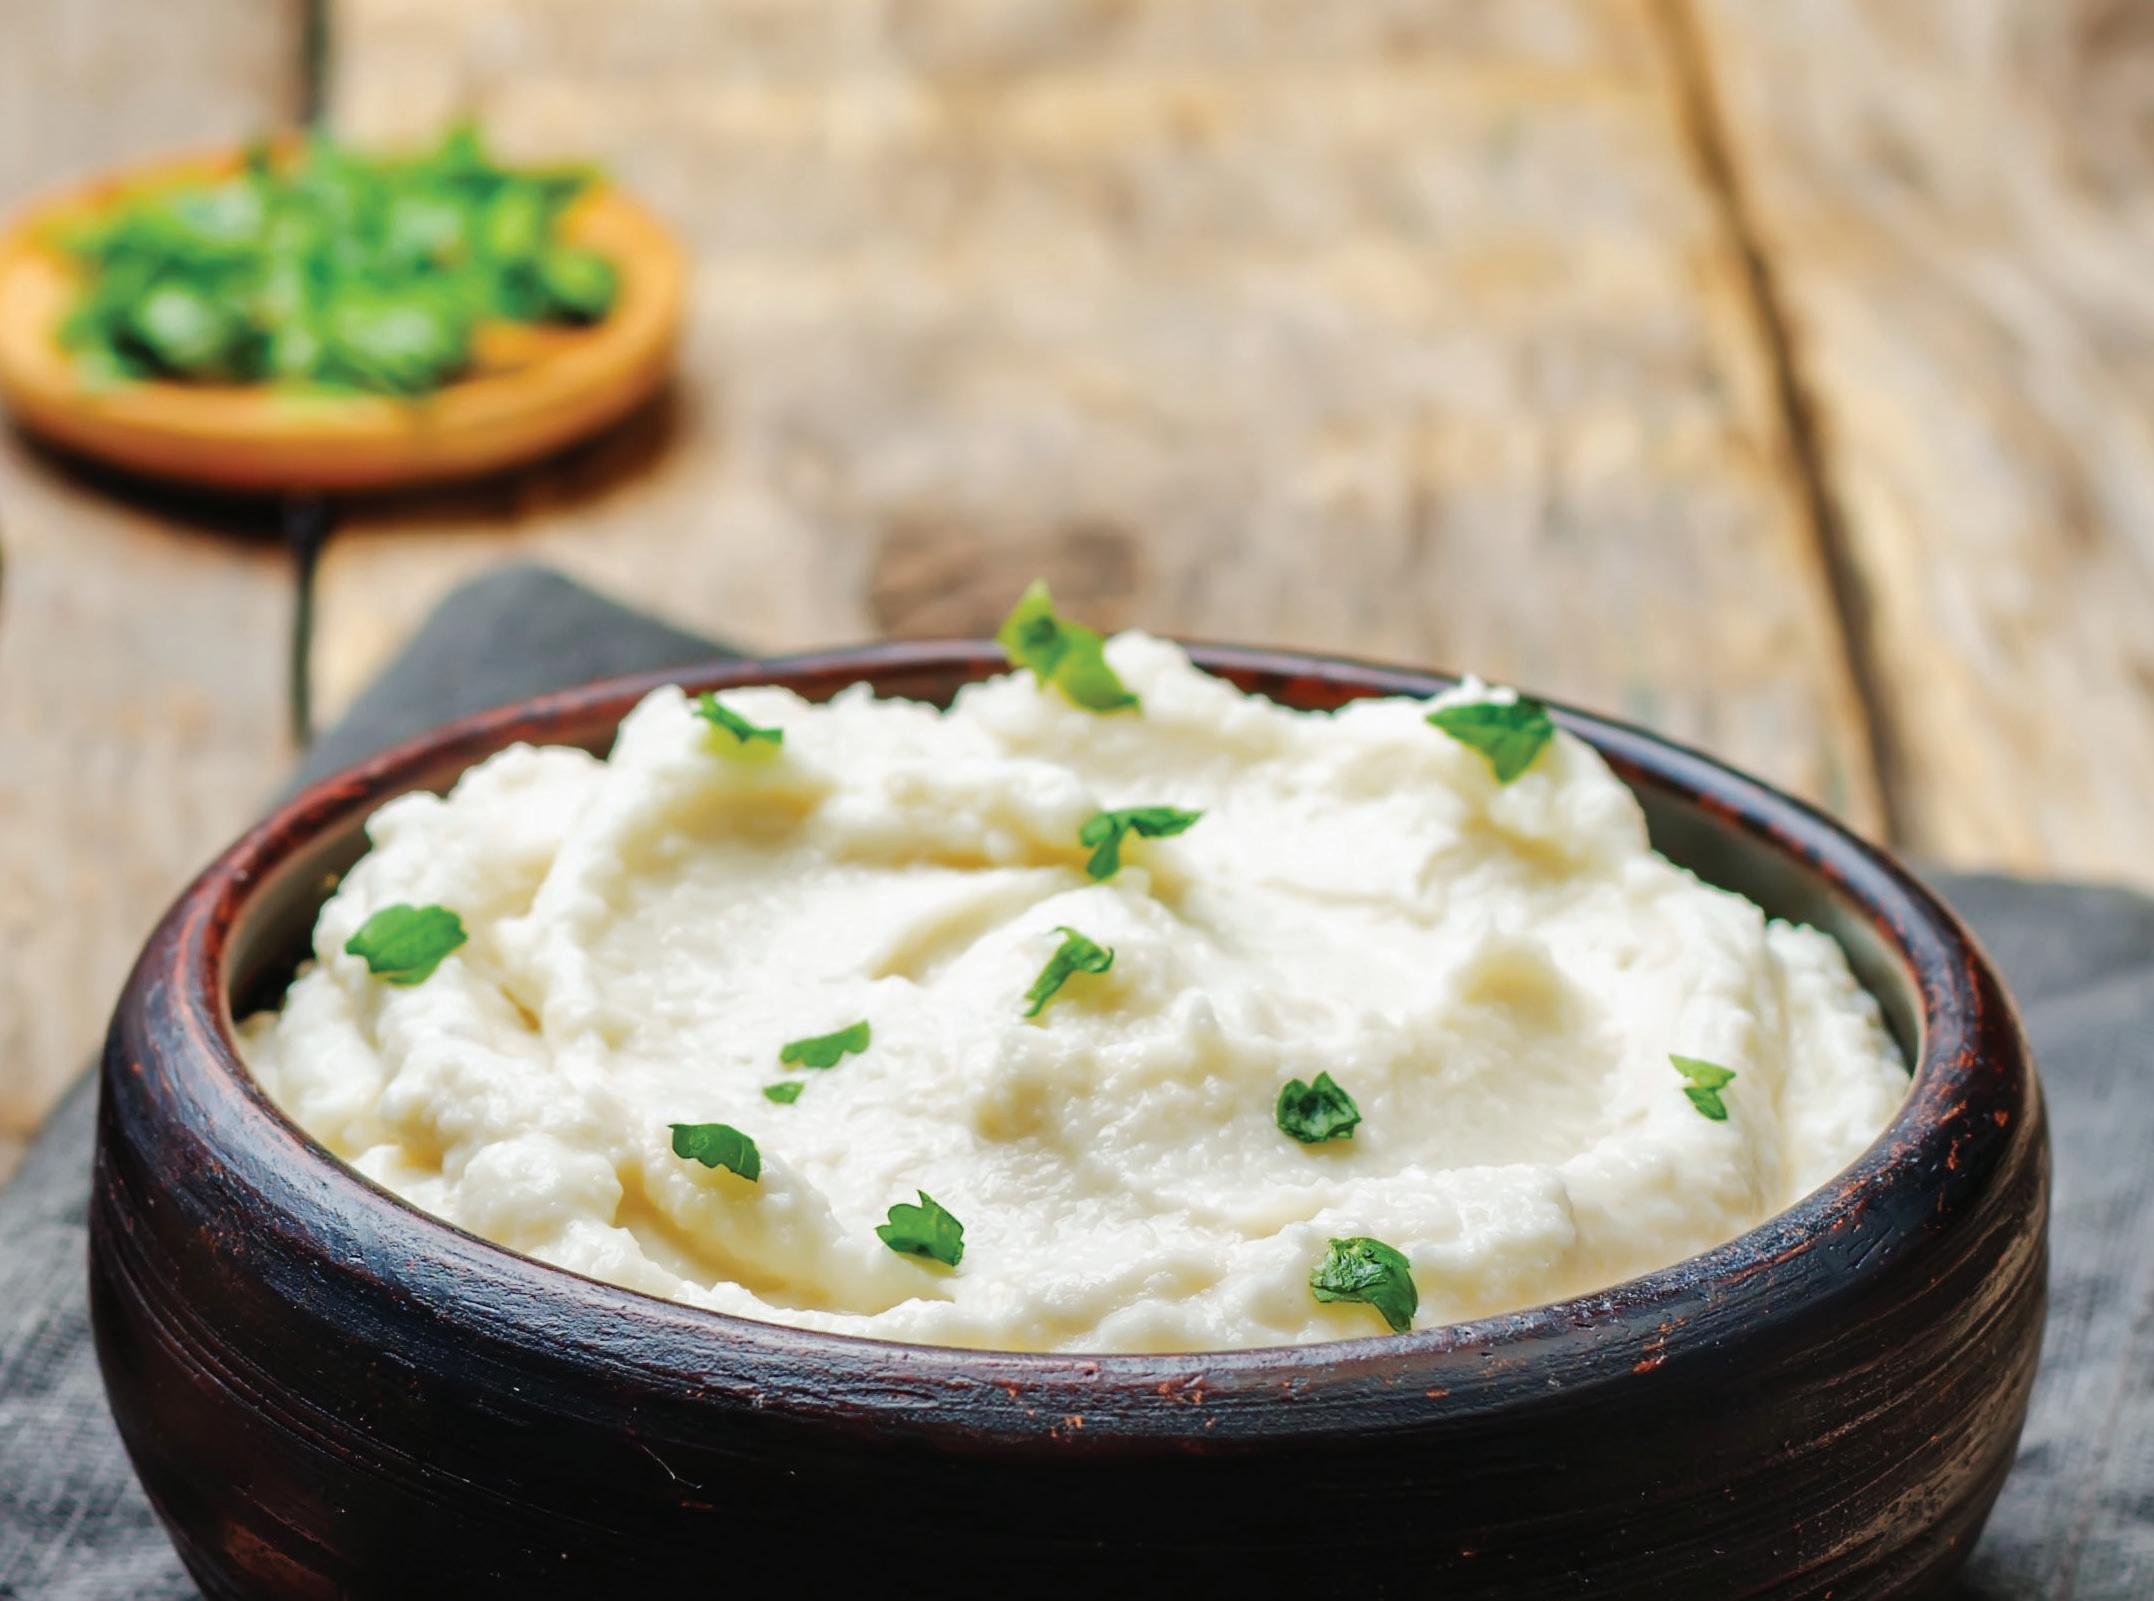
Cauliflower is an anti-inflammatory, heart-healthy fl owering vegetable, incredibly nutritious, versatile and quite sweet. If you want to eat higher-quality, more nutritionally dense plants, then this is your kind of mashed.
Serves 10
INGREDIENTS
• 1 head cauli flower
• 5 pounds red potatoes
• ¼ cup chickpea, brown rice, or soybased miso paste, plus more if needed
• ¼ cup nutritional yeast
• 1 tsp. large-grain Celtic sea salt
• ⅛ tsp. fresh ground black pepper
In a large steamer pot, steam the cauli flower until it’s tender, about 25 minutes. When ready, the colour will become a bit translucent and a knife will easily loosen the florets. You want the cauli flower to be soft enough to mash, so don’t understeam it, or you will have crunchy pieces in your mashed potatoes. While the cauli flower is steaming, boil the potatoes in water until a fork inserted slides in easily. Drain the potatoes and return to the pot. With the heat on low to draw any excess moisture out of potatoes, add the miso paste and start to cut the potatoes with a large knife crosswise repeatedly until all are cut in small sections. Turn off the heat and add the steamed cauli flower. Keep cutting crosswise in all directions until the cauli flower is well incorporated with the potatoes. Fold in the nutritional yeast, salt and pepper. Mix well and adjust for seasoning, adding more miso paste, if needed.
Nutrition facts per serving Calories 317; protein 18 g; fat 2 g; carbs 60 g.

RECIPE & PHOTOGRAPHY BY LAUREN TOYOTA – Author of Vegan Comfort Classics: 101 Recipes To Feed Your Face & creator of the hot for food blog in Toronto, ON HOTFORFOOD HOTFORFOODBLOG
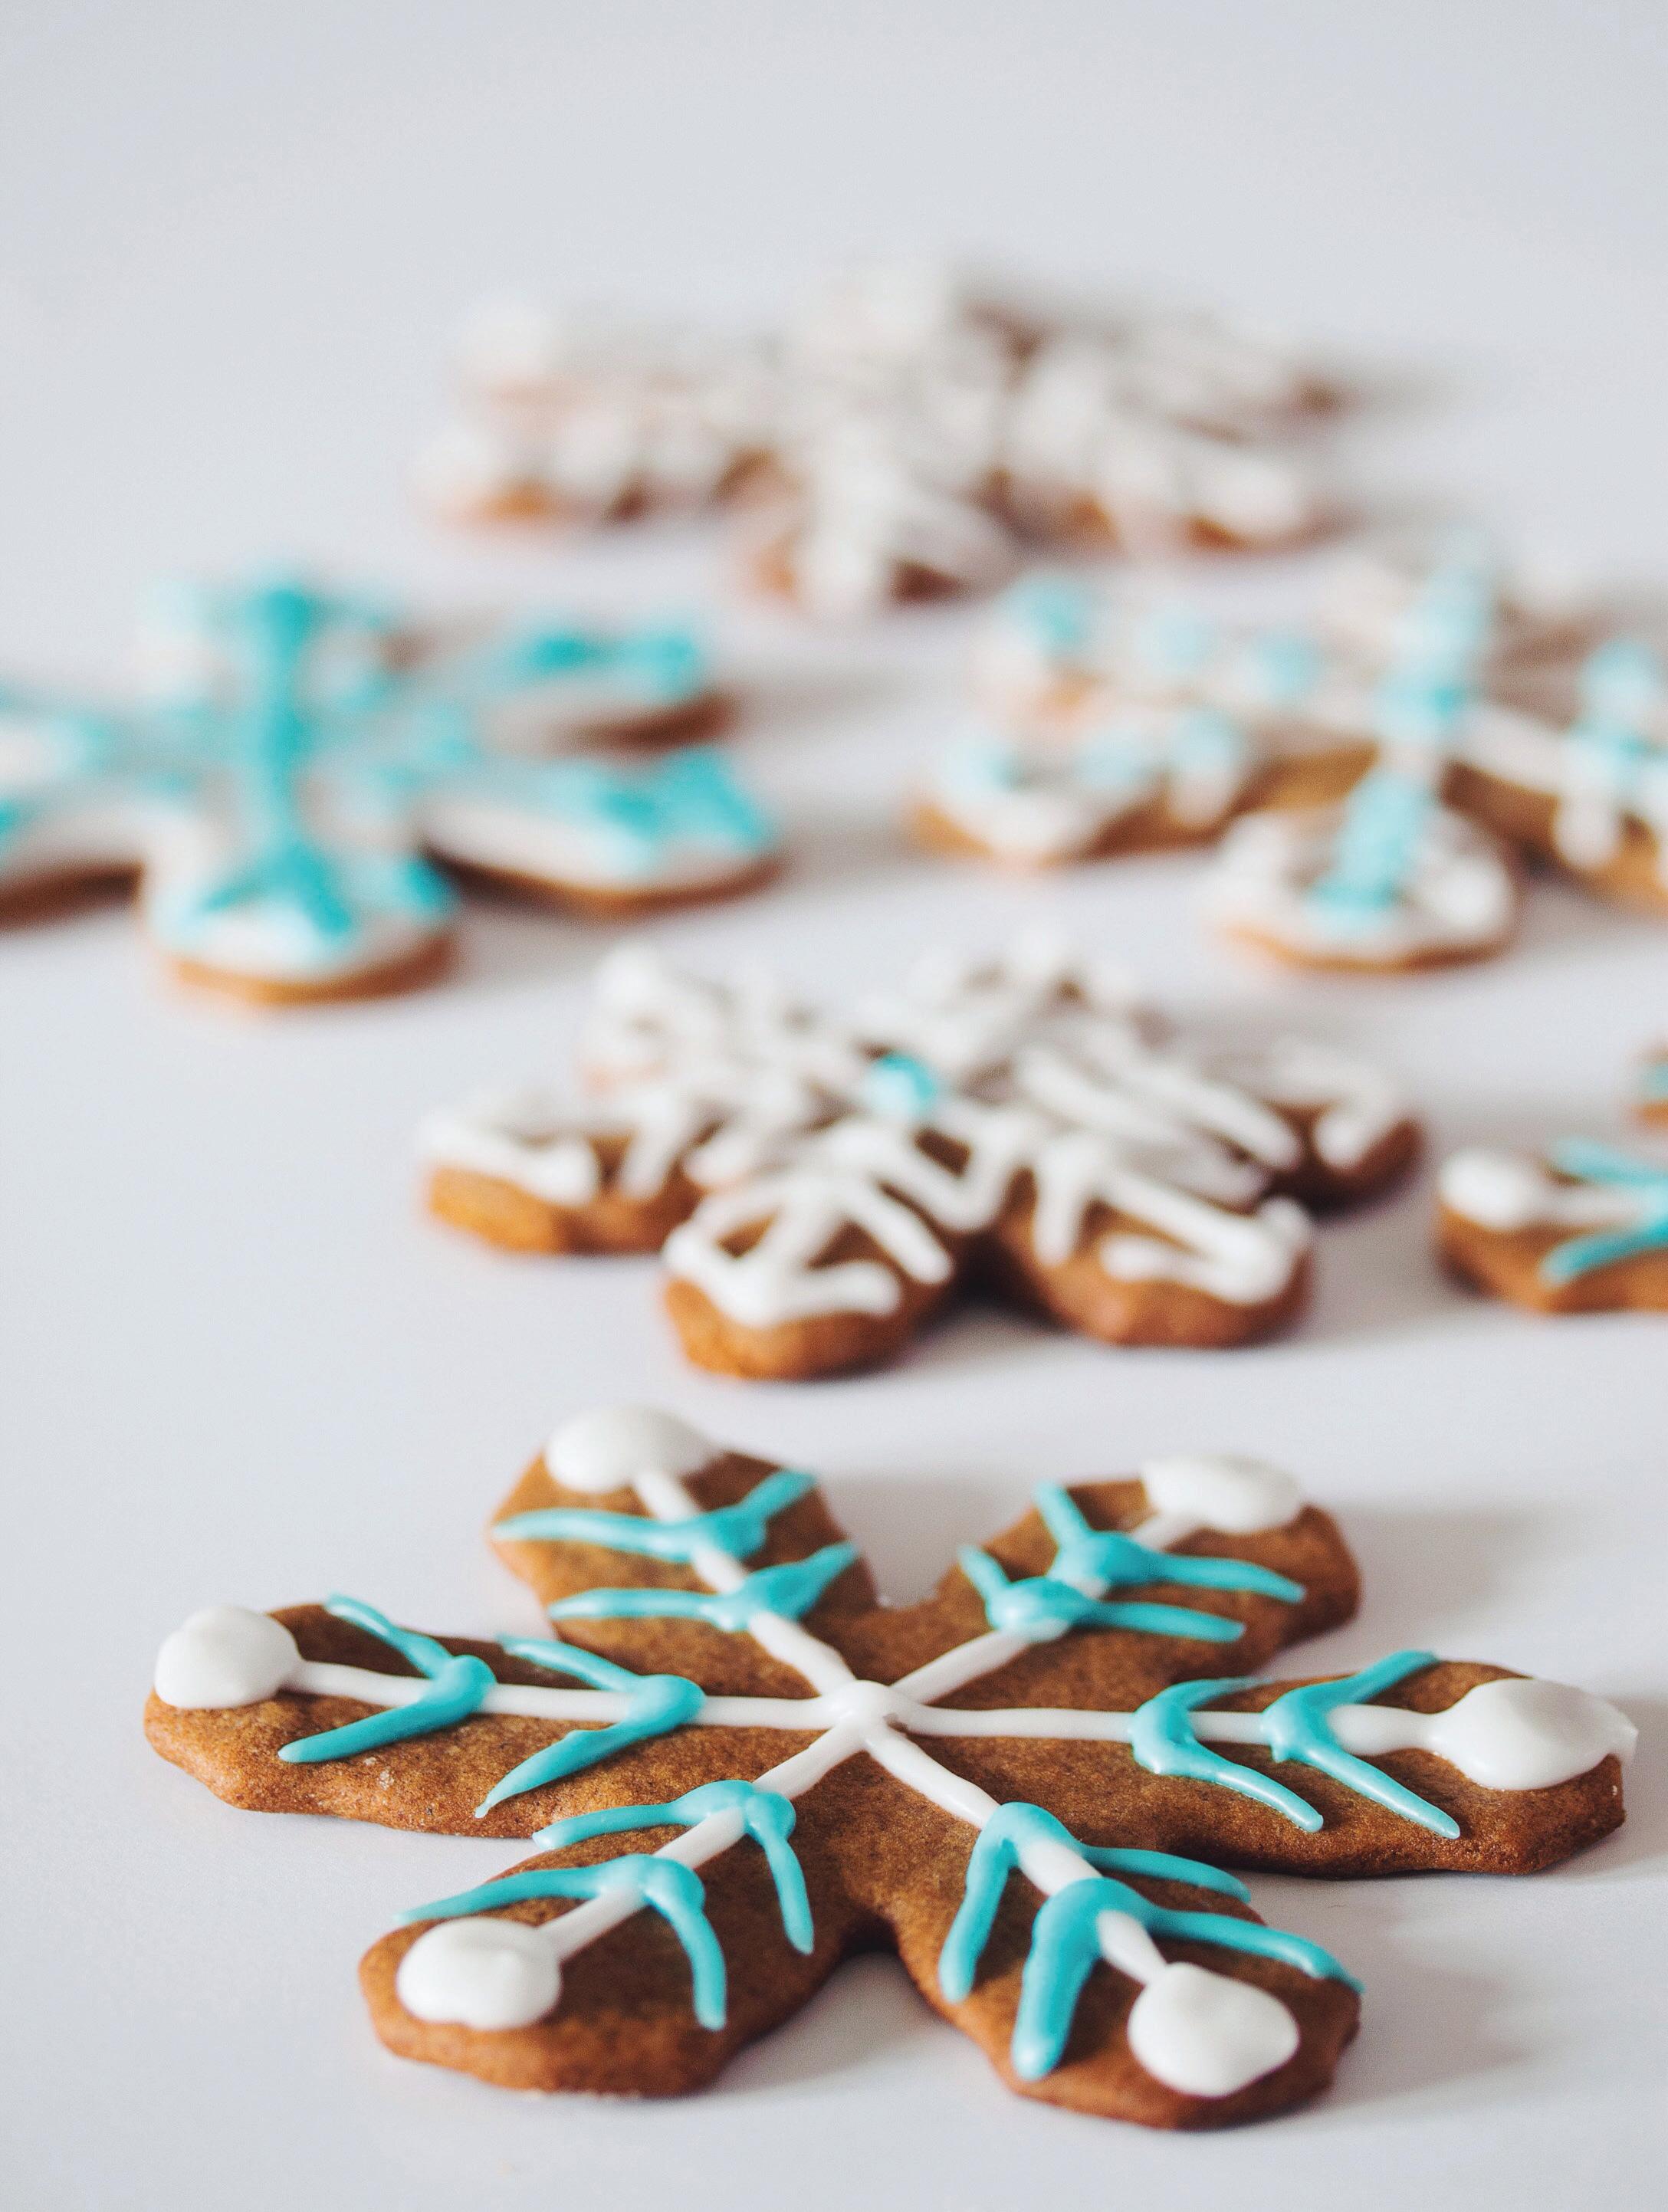
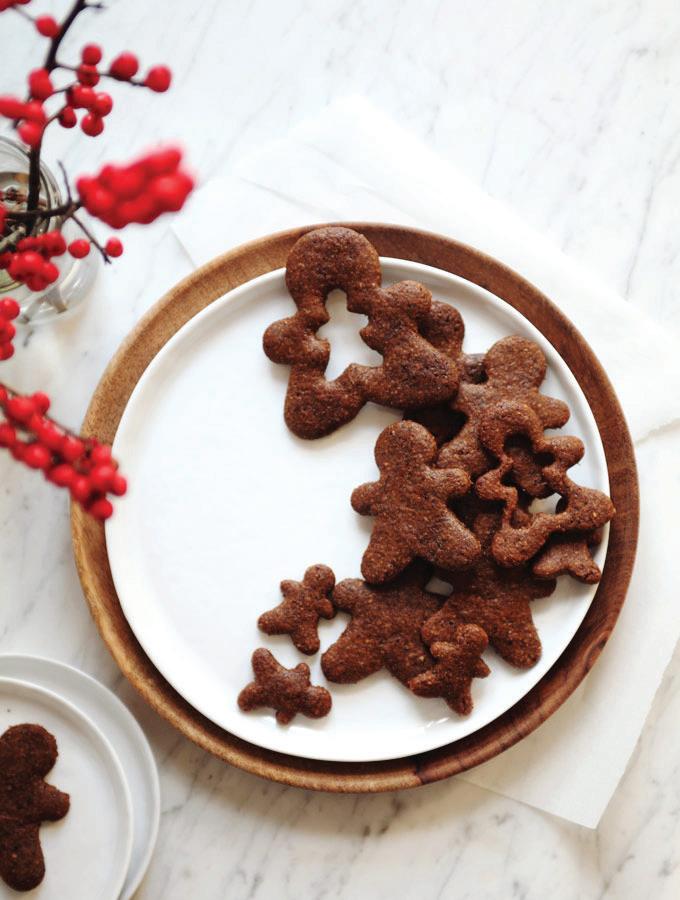
GINGERBREAD
• 2 cups all-purpose flour
• 1 tsp. baking soda
• 3 tsp. ground ginger
• 2 tsp. ground cinnamon
• 1 tsp. ground cloves
• ½ cup vegan butter or margarine (room temperature)
• ¼ cup unsulphured molasses
• ¼ cup non-dairy milk
• 1 cup light brown sugar, packed
• ⅓ cup all-purpose flour (for rolling out the dough)
ROYAL ICING
• 2 ¼ cups powdered sugar
• 3 Tbsp. warm water
GINGERBREAD
Sift two cups of all-purpose flour with baking soda and spices into a large mixing bowl. Stir with a fork to combine.
In a separate mixing bowl cream the vegan butter and brown sugar with a hand mixer until fluffy. Add molasses and non-dairy milk and beat with a hand mixer until well combined. Fold the wet ingredients into the dry ingredients and mix well. Form the dough into a ball and wrap in plastic wrap. Refrigerate for one to two hours.
Remove dough from the fridge and plastic wrap. Have ⅓ cup of all-purpose flour standing by in a bowl. Flour your rolling surface and rolling pin well and roll out the dough until it’s approx. ⅛-¼-inch thick.
Start cutting out your snowflakes or desired cookie shape. Lift the cut-out cookies from the counter with a lightly floured spatula and place on parchmentlined baking sheets. Continue to flour your rolling surface and rolling pin, roll out the excess dough and cut more cookies until there’s none left.
Bake the cookies for 6-8 minutes in an oven preheated to 350F. Allow cookies to cook completely before icing them.
ROYAL ICING
Sift powdered sugar into a mixing bowl. Using a hand mixer, beat in the warm water until well combined. This will be your piping icing. Transfer to a piping bag or squeeze bottle and decorate as desired. You can pipe icing as the outline to your cookies then flood the cookies with the icing by adding 1 Tbsp. more of warm water and mixing well. Allow the frosting to dry before placing in cookie tins or containers.
Nutrition facts per serving Calories 229; protein 3 g; fat 10 g; carbs 34 g.
RECIPE & PHOTOGRAPHY BY SARAH BRITTON
Cookbook author, Holistic Nutritionist, Certified Nutritional Practitioner & creator of My New Roots blog in Toronto, ON MYNEWROOTS
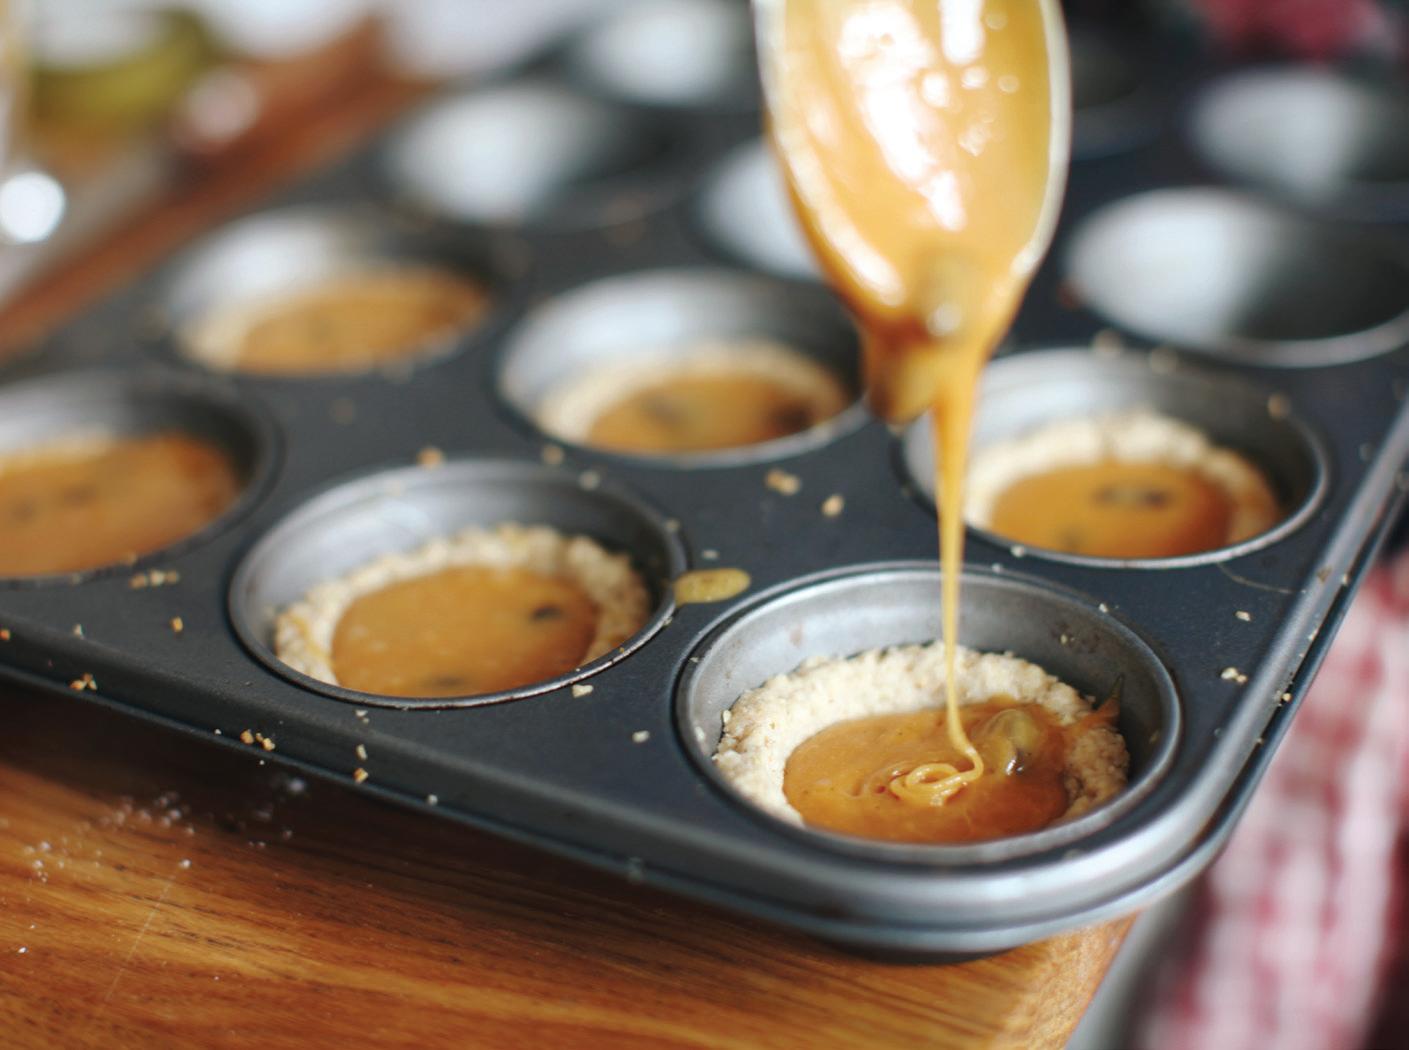
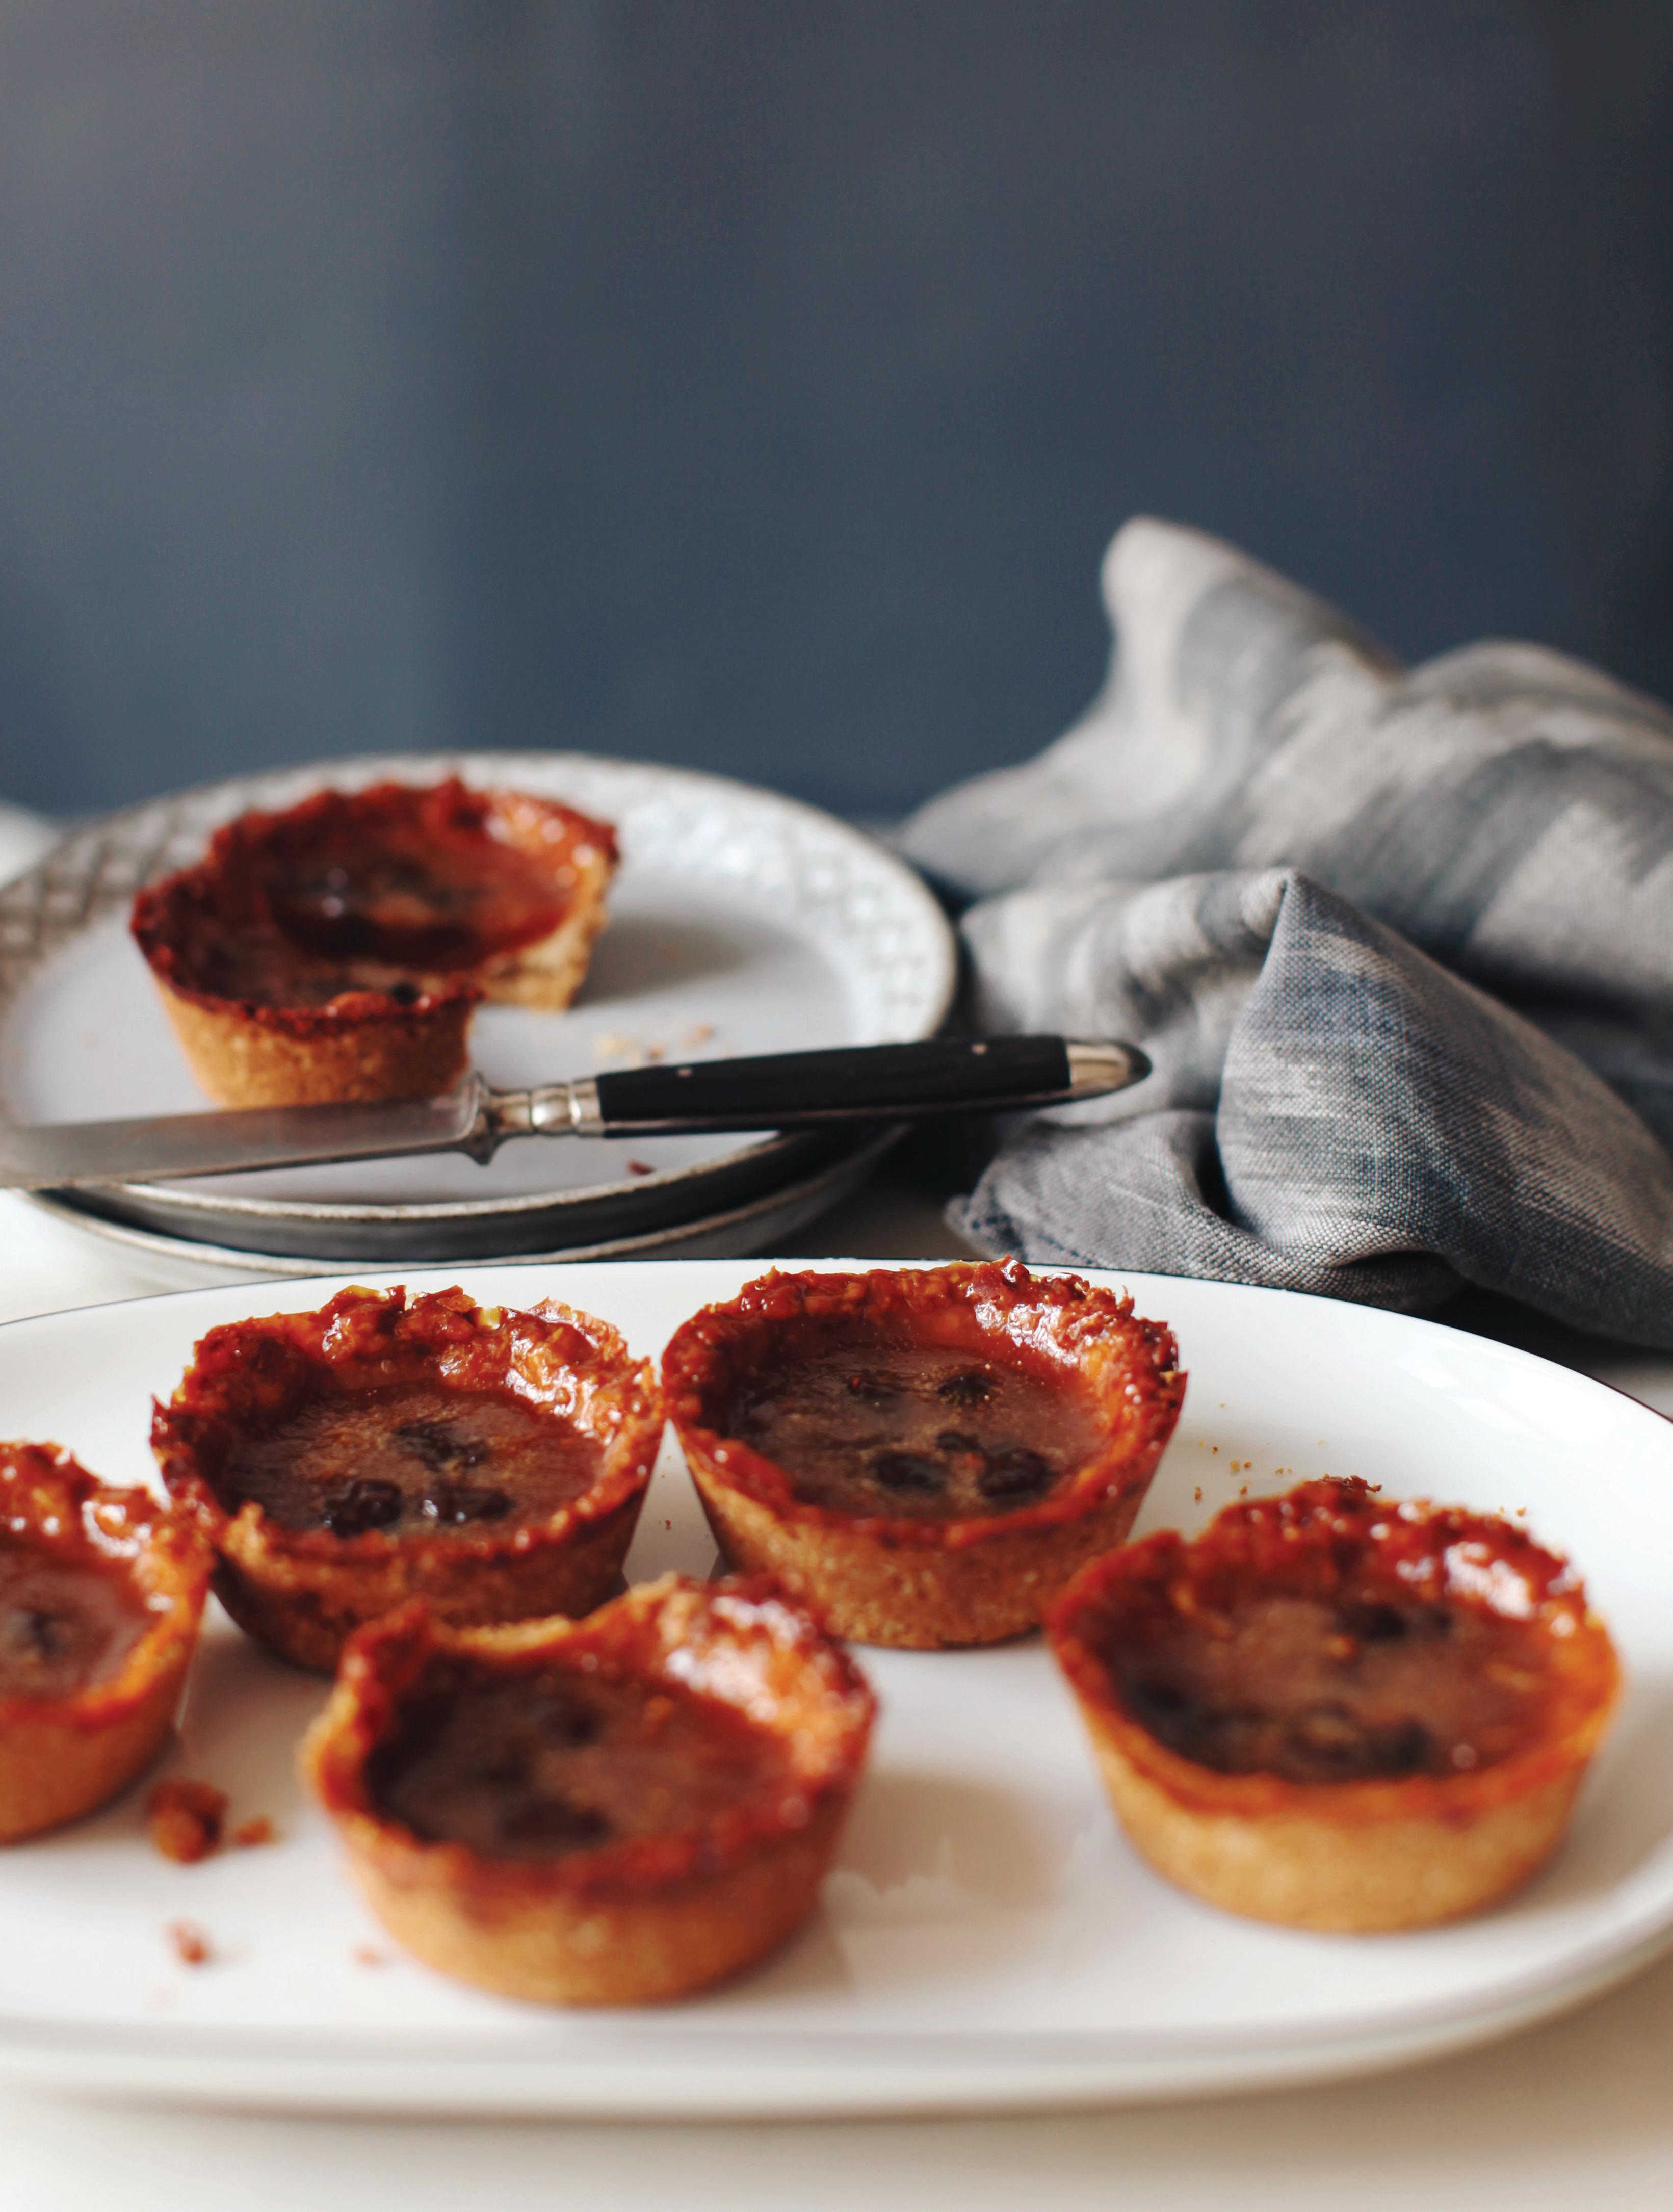
According to my mom, “Butter tarts are a truly Canadian thing. Like peacekeeping! And Tim Hortons!” This version has replaced the white flour and lard but still retains the ooey, gooey, caramelly goodness.
Serves 12
CRUST
• 2 cups rolled oats (gluten-free, if possible)
• 1 cup brown rice flour
• 1/2 tsp. sea salt
• 6 Tbsp. brown rice syrup
• 5 Tbsp. coconut oil, melted
FILLING
• 1/2 cup brown rice syrup
• 1/4 cup barley malt
• 2 Tbsp. arrowroot powder
• 2 Tbsp. vegan butter, melted (or coconut oil)
• 1 vanilla bean, seeds scraped
• 1/4 tsp. baking powder
• 2 pinches sea salt
• 1/3 cup organic raisins (optional)
DIRECTIONS
Preheat oven to 325°F.
Crust: in a food processor, blend the rolled oats on high until you have a coarse flour. In a large mixing bowl, combine oat flour with brown rice flour and salt. In a small saucepan, melt the coconut oil and brown rice syrup together, pour it over the dry ingredients and mix with a spoon until everything is incorporated. You may need to use your hands to knead the dough. In a standard muffin pan, press a golf ball-sized amount of dough very firmly into each form, press them high up the sides.
Tip: the thinner the crust, the better; they puff up when baked.
Bake shells for 10 minutes or until edges are a light golden colour. Cool.
Filling: melt the ghee in a small saucepan over low heat. Add seeds of one vanilla bean pod.
In a medium bowl, measure the brown rice syrup and barley malt. Pour in the melted ghee, whisk to combine with the sweeteners. Sift in the arrowroot and baking powder, add salt (unless you are using salted butter) and whisk until completely smooth. Fold in the raisins.
Fill each baked shell to just below the rim of the crust. Bake 20 minutes or until the filling is bubbling and brown around the edges. Remove and let rest, then refrigerate until completely chilled. This is
an important step because it will crystallize the sugars, making removal of the tarts very easy.
Using a very sharp knife, insert the tip of the blade down along the side of each tart breaking the sugar seal, if necessary –they should pop out of the mold very easily. If not, pierce the sugar seal in a couple places until you can remove them. If they are stubborn, keep them in the fridge until colder. Once removed from their molds you can keep the tarts at room temperature in a tightly sealed container and warm them a little before serving, if desired. Keeps fresh for a week.
Nutrition facts per serving Calories 284; protein 3 g; fat 0 g; carbs 47 g.
RECIPE AND PHOTOGRAPHY BY SARAH BRITTON
Cookbook author, host of Food Network Canada’s The Substitute Baker, creator of My New Roots Grow, Holistic Nutritionist & Certified Nutritional Practitioner in Toronto, ON.
MYNEWROOTS MY NEW ROOTS
Makes at least 2 dozen medium-sized cookies
• 2 ½ cups whole spelt flour
• ¼ tsp. fine grain sea salt
• ½ tsp. baking powder
• 1 Tbsp. ground ginger (or less if you prefer more mild gingerbread)
• 1 ½ tsp. ground cinnamon
• ½ tsp. ground cloves
• ½ tsp. freshly grated nutmeg
• 5 Tbsp. coconut oil, melted
• ½ cup coconut sugar
• ½ cup unsulfured blackstrap molasses
• 3 Tbsp. unsweetened applesauce
• 1 tsp. vanilla extract
1. Sift the dry ingredients together.
2. In a small saucepan, melt the coconut oil, then whisk in the molasses, applesauce, and vanilla.
3. Pour the wet ingredients over the dry, and fold to combine – you may need to use your hands to mix this, but don’t overwork the dough. Fold just until the ingredients come together evenly. Turn the dough out onto a piece of plastic wrap, make a ball, then flatten into a large disc. Wrap and place in the fridge for at least 1 hour.
4. Preheat oven to 350 F. Remove the dough from the fridge, unwrap and cut in half. Wrap one half and return it to the fridge. Place the other half of the dough between two pieces of baking paper and roll out (if it is very stiff, you may need to let it warm up just slightly). Remove the top half of the paper and cut out desired shapes with a cookie cutter or a knife. Slide a knife or thin egg lifter under each shape and place on a lined baking sheet. Ball up the scraps of dough, roll it out between the parchment and start again. Once the dough becomes too warm, return it to the fridge and repeat the entire process with the other half of the chilled dough.
5. Place cookie sheet in the oven and bake for 7-10 minutes (7 minutes produces a softer, chewier cookie, while 10 minutes produces a crispier one). Remove from oven and let cool on pan. Decorate with the Cashew Cacao Icing if desired.
Makes about ¾ cup
• ½ cup cashews
• a few pinches of sea salt
• 3 Tbsp. cacao butter, melted
• 1 ½ Tbsp. liquid sweetener of your choice
• ½ vanilla bean, seeds scraped
• 3 Tbsp. hot water
1. Soak cashews with sea salt for four hours, or overnight.
2. Drain, rinse and place cashews in the most powerful blender you have along with all other ingredients. Blend on high until as smooth as possible.
3. Pour into a piping bag and store in the fridge until it firms up, about 2 hours, then use. Store leftovers in the fridge or freezer. If you do not have a piping bag, you can also use sandwich bag with a teeny corner snipped off, which is what I did! also use sandwich bag with a teeny corner snipped off, which is what I did!
Nutrition facts per serving
Calories 137; protein 2 g; fat 6 g; carbs 20 g.
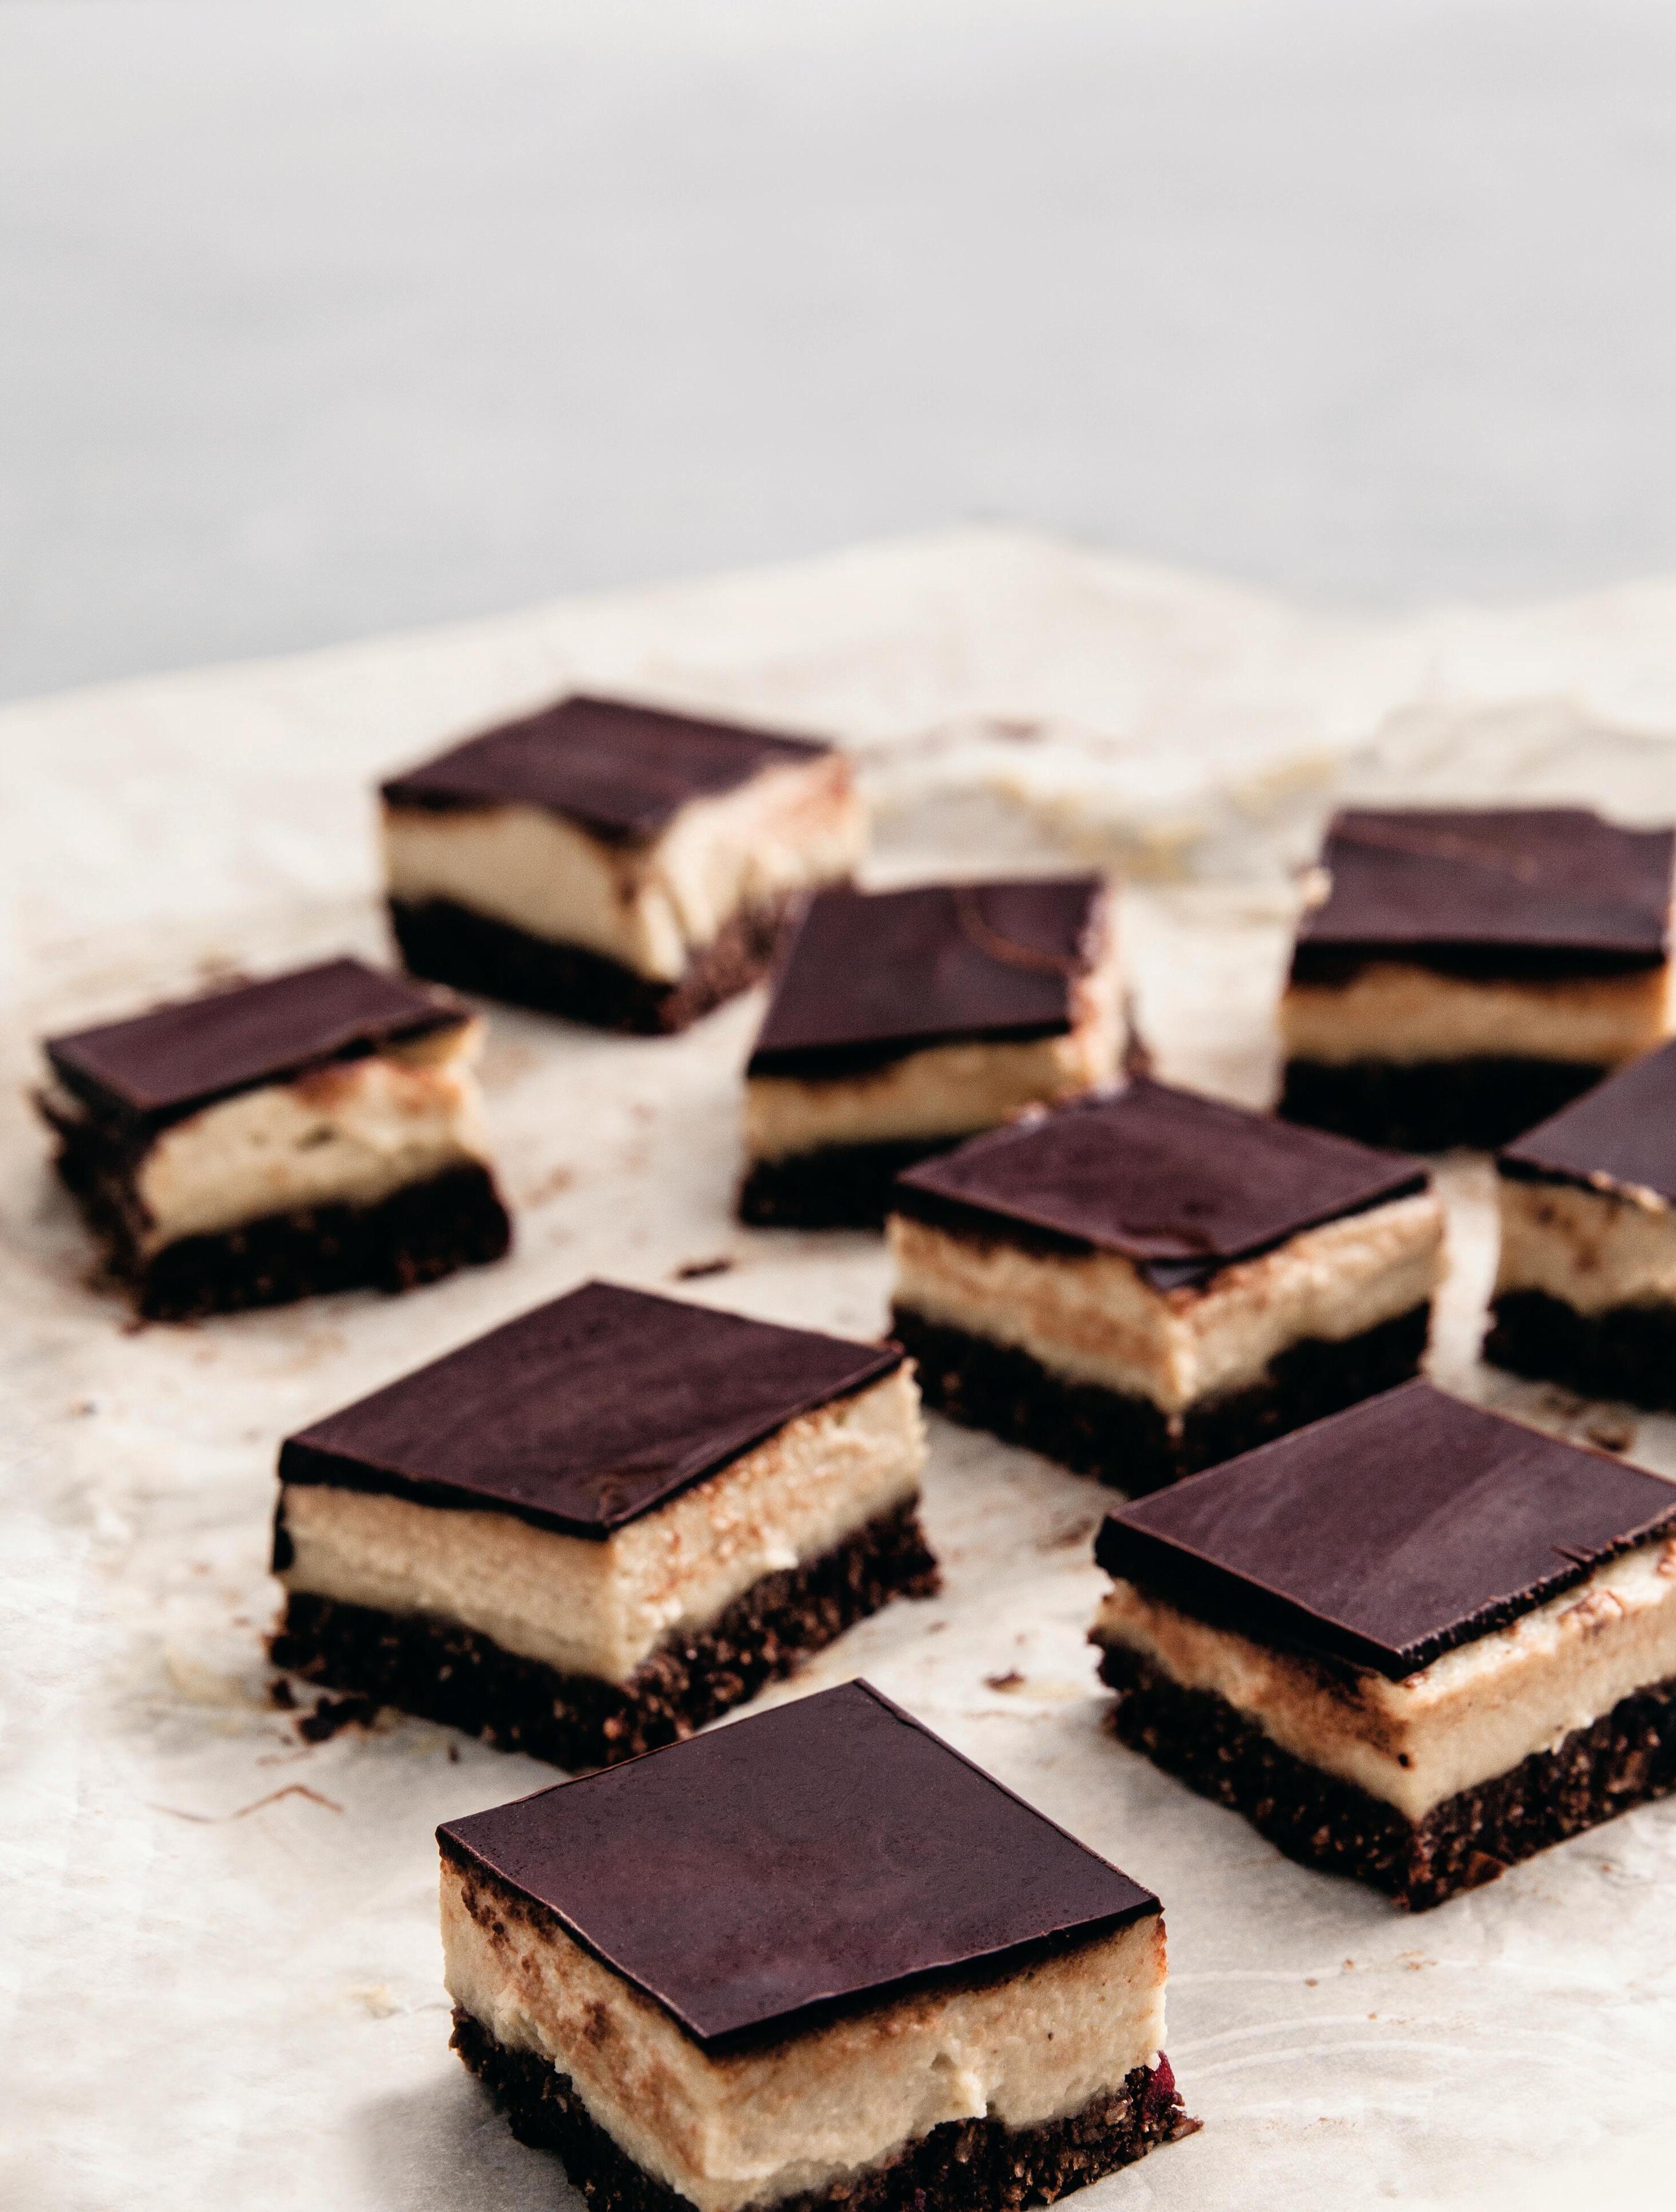
As two proud Canadians, we decided to give the traditional rich B.C. treat a healthy vegan makeover.
BY ZUZANA FAJKUSOVA & NIKKI LEFLER DARINA KOPCOK
Personal wellness coaches & vegan authors in Vancouver, B.C. ACTIVEVEGETARIAN ACTIVEVEG
Makes 12 bars
BOTTOM LAYER
• 1 cup shredded coconut
• 1/2 cup dates
• 1/2 cup dried cranberries
• 1/2 cup almonds, soaked for 12 hours or overnight
• 1/4 cup raw cacao powder, unsweetened
MIDDLE LAYER
• 2 cups raw cashews, soaked 4 to 6 hours or overnight
• 1/4 cup maple syrup
• 2 Tbsp. coconut oil, melted
• 4 Tbsp. lemon juice
• 2 tsp. pure vanilla extract
TOP LAYER
• 1 80-85 per cent dark vegan chocolate bar (preferably raw)
• 2 Tbsp. coconut oil
• 3 Tbsp. cacao nibs
DIRECTIONS
Coat a 9" x 9" cake pan with coconut oil or line with parchment paper.
Bottom layer: combine all ingredients in a food processor fitted with the S-blade. Process until the mixture is broken down and begins to stick together. Scrape down the sides of the food processor as needed. Press the crust into the bottom of prepared pan using a spatula. Cool in the fridge.
Middle layer: rinse the soaked cashews and blend all of the middle layer ingredients in a clean food processor until you have a smooth cream filling (8 to 10 minutes). Spread the cream evenly on the top of the base and return to the fridge.
Top layer: place the vegan dark chocolate and coconut oil in a small pot and melt down over low heat. Mix continuously so it doesn’t burn.
Pour chocolate layer over the middle layer and sprinkle with cacao nibs. Cool.
Allow the chocolate and the bars to firm up for about 3 hours (or overnight) before slicing. Keep bars in the refrigerator for 3 to 5 days.
NOTE: These are very rich; eat in moderation.
Nutrition facts per bar
Calories 405; protein 5 g; fat 35 g; carbs 21g.

These raw, chocolate balls will satisfy your chocolate cravings, guilt-free!
BY JULIE ZEITLHUBER – Nutritionist, scientist & foodie at Ready To Nourish in Vancouver, B.C.
These little gems are packed with good fats, fibre (2.5g in a 13g ball) and flavour. Cocoa makes them chocolatey, but they are not too sweet. They are quite filling due to the fat. The sunflower seed butter is high in unsaturated fats, magnesium, zinc, iron and vitamin E. A big plus is that due to the low carb content it doesn't spike your insulin levels. I used to melt dark chocolate to use as a glaze for all kinds of goodies. What I do now is simply combine melted coconut oil and raw cocoa powder, a splash of maple syrup and a pinch of salt and it works just as well. That way you can better control the sweetness.
Makes 16 balls
BALLS
• 2 oz. coconut flour
• 2 Tbsp. sunflower seed butter
• 1 Tbsp. coconut oil
• 2 Tbsp. maple syrup
• 1/2 cup raw whole almonds
• 1 Tbsp. cocoa powder
• 1 pinch of sea salt
• coconut shreds for topping
GLAZE
• 2 Tbsp. coconut oil
• 1 Tbsp. raw cocoa powder
• 1 tsp. maple syrup
• 1 pinch of sea salt
Put ball ingredients into a food processor and blend until combined. Add a splash of water if it doesn't come together. Roll pieces of dough in your hands until balls form (approx. 16 pieces). Set aside.
For the glaze, melt coconut oil, add the rest of the ingredients and stir until dissolved and smooth. Dip balls in glaze then roll in coconut shreds or chopped nuts.
Nutrition facts per ball
Calories 63; protein 2 g; fat 4 g; carbs 5 g.
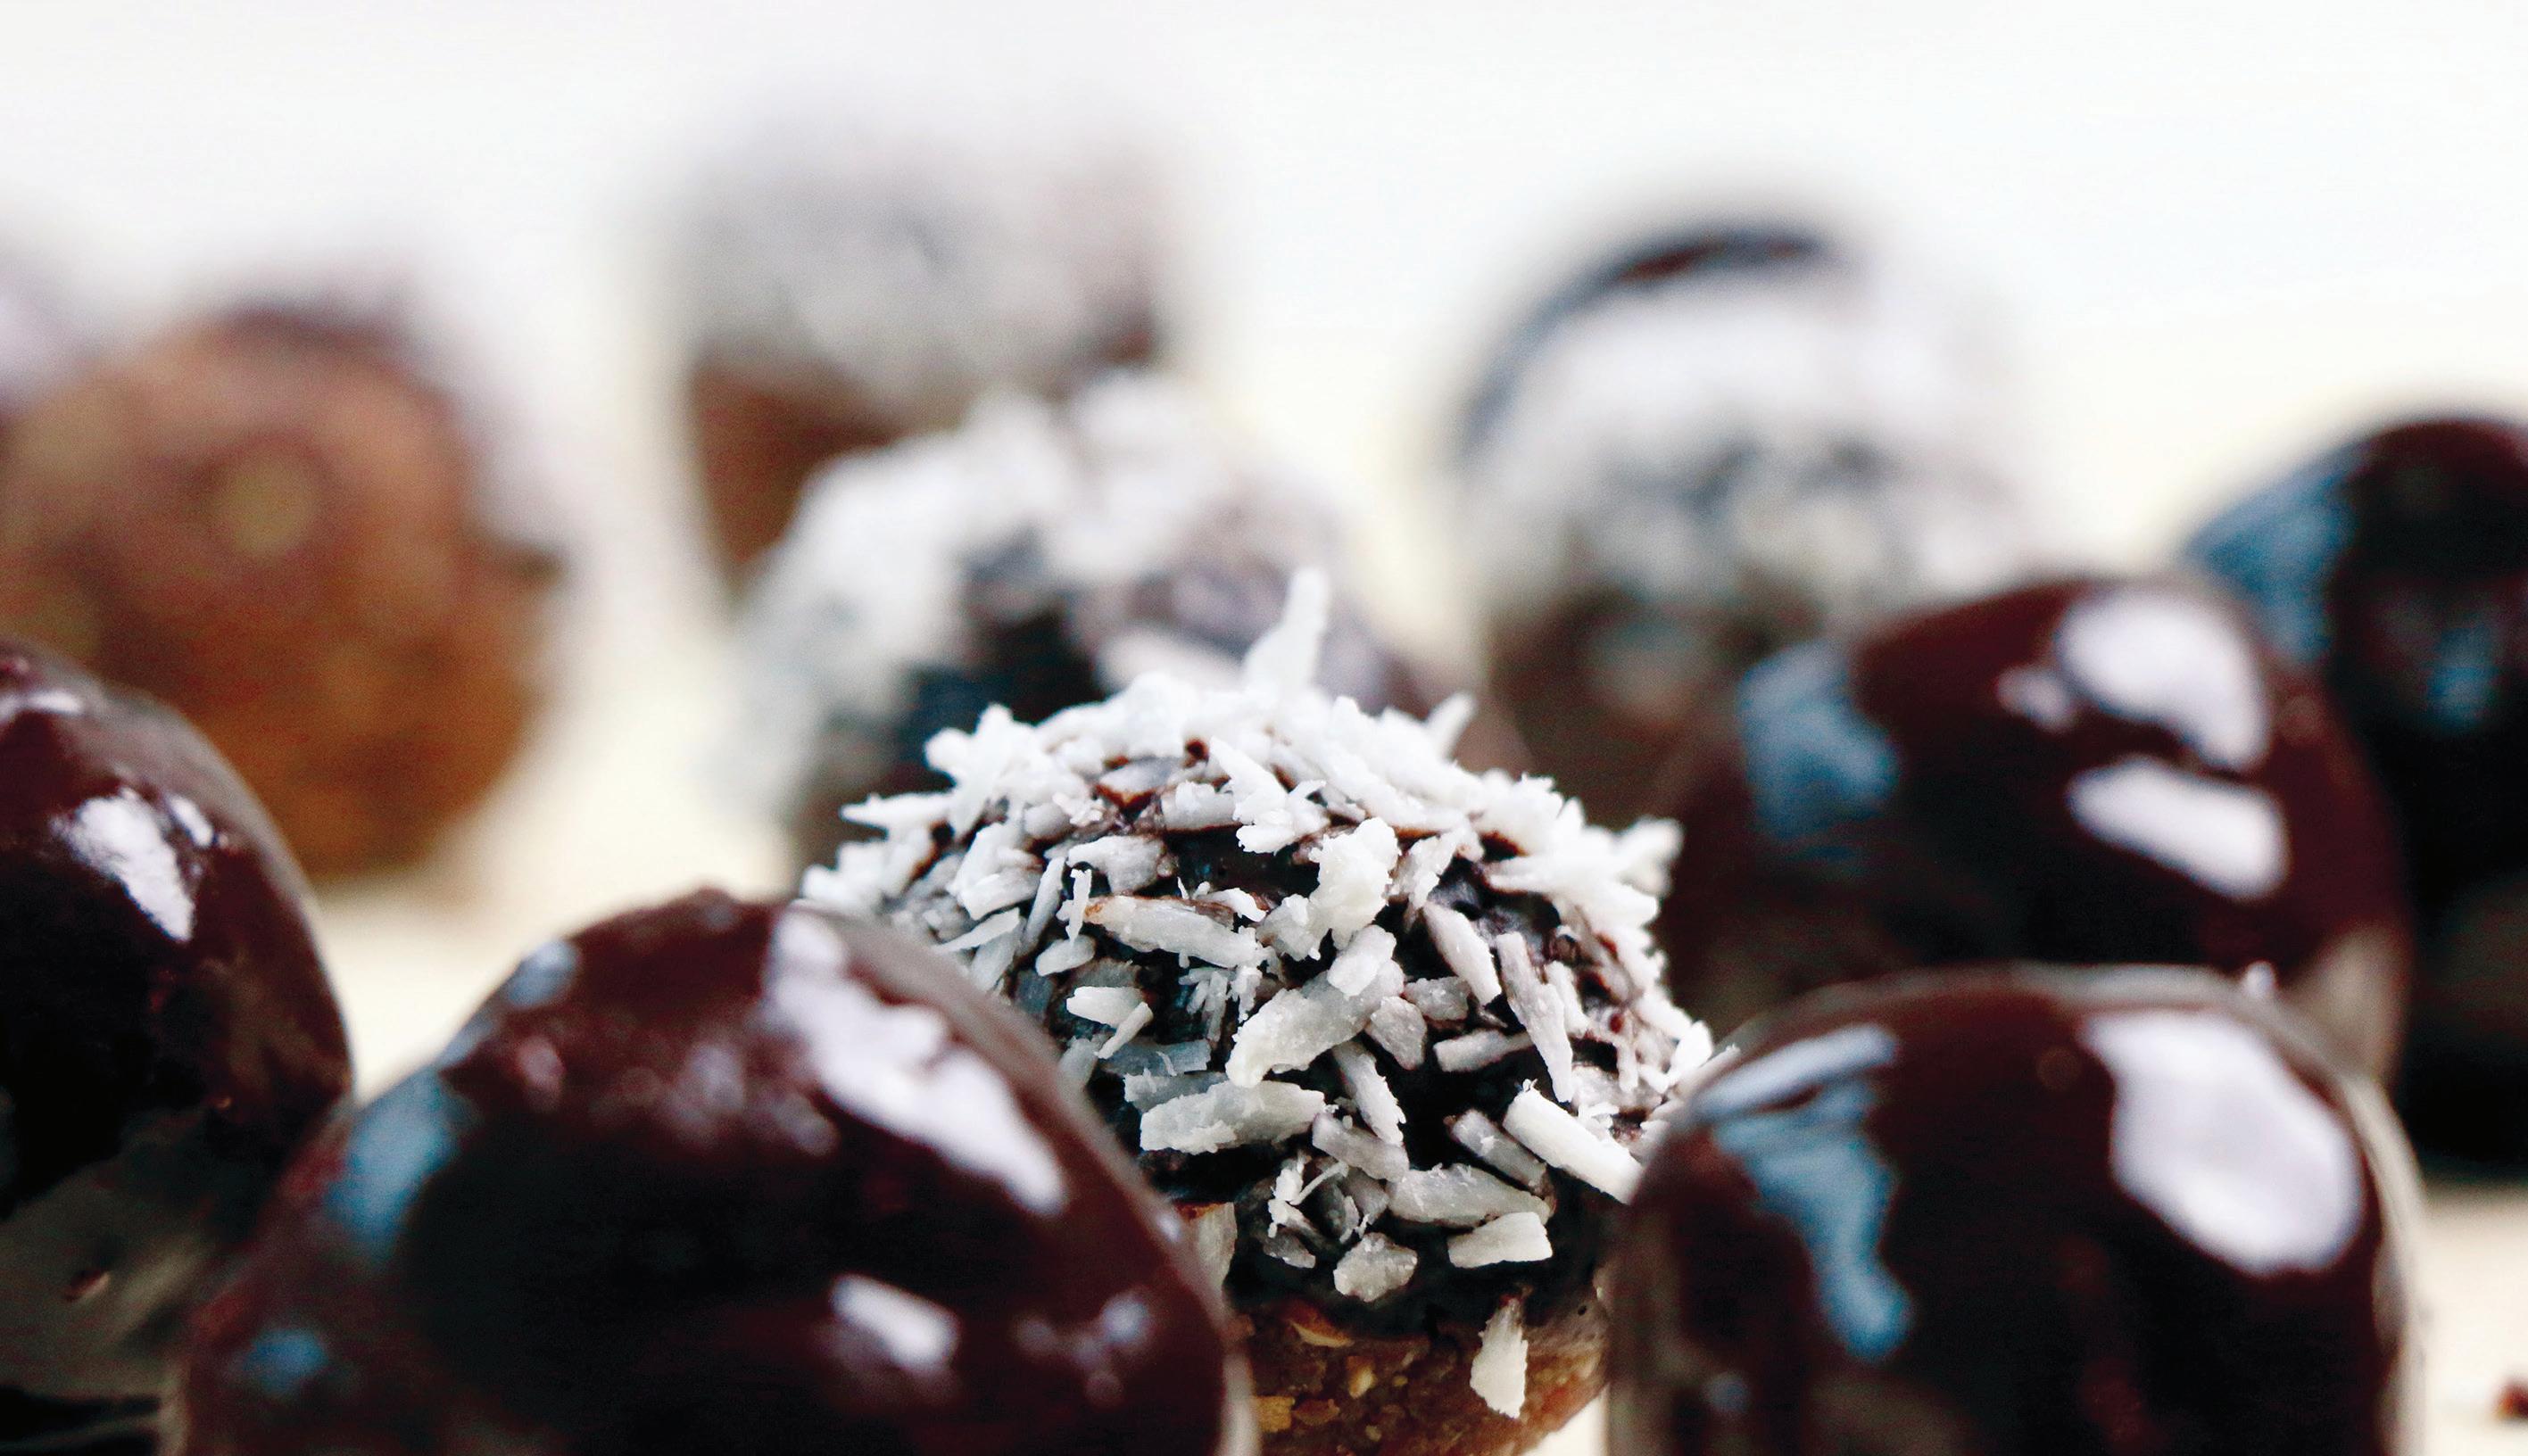
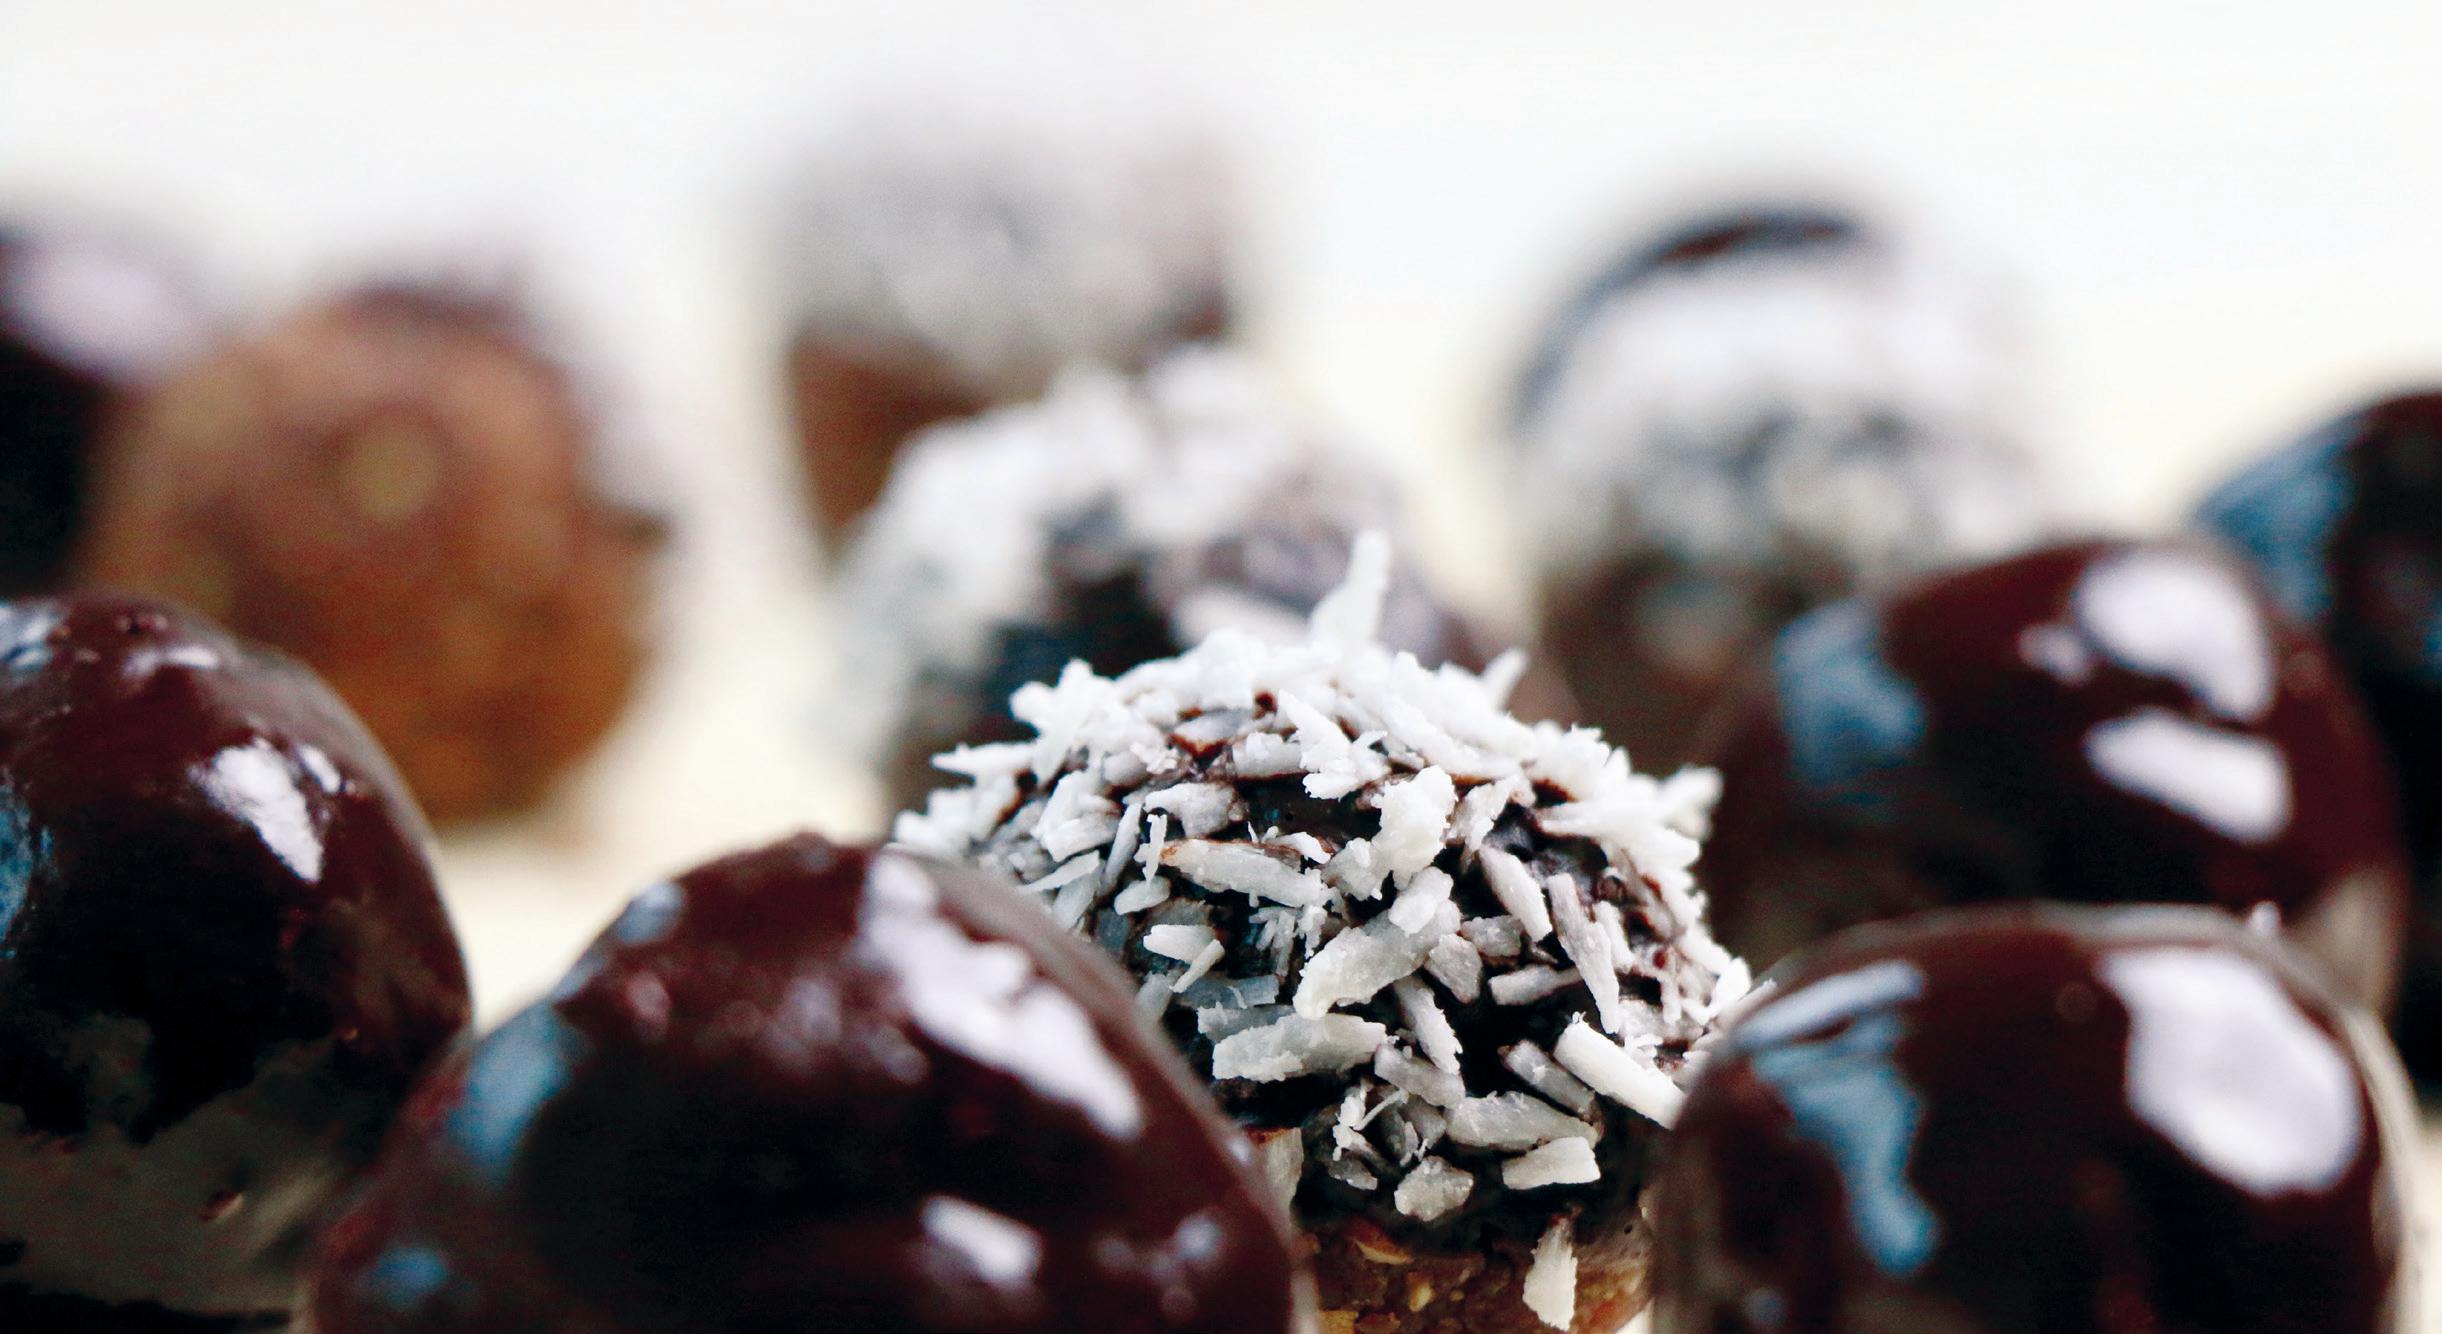
BY BRENDAN BRAZIER KEVIN CLARK Founder of Vega, pro triathlete & author of
the
Thrive book series. BRENDANBRAZIER BRENDAN_BRAZIER BRENDANBRAZIER
Makes 12 cups
CRUST
• 3 cups almonds
• 1 cup walnuts
• ¼ cup cacao nibs
• 6 Medjool dates, pitted, chopped, and soaked
• 3 Tbsp. agave, coconut nectar, or maple syrup
FILLING
• 1/3 cup virgin coconut oil, melted
• 1/3 cup almond butter
• 1/3 cup agave nectar, maple syrup, or coconut nectar
• ¼ cup almond milk
• 1 tsp. pure vanilla extract
GARNISH
• ¼ cup sliced almonds
• ¼ cup cacao nibs
• Chocolate sauce if desired
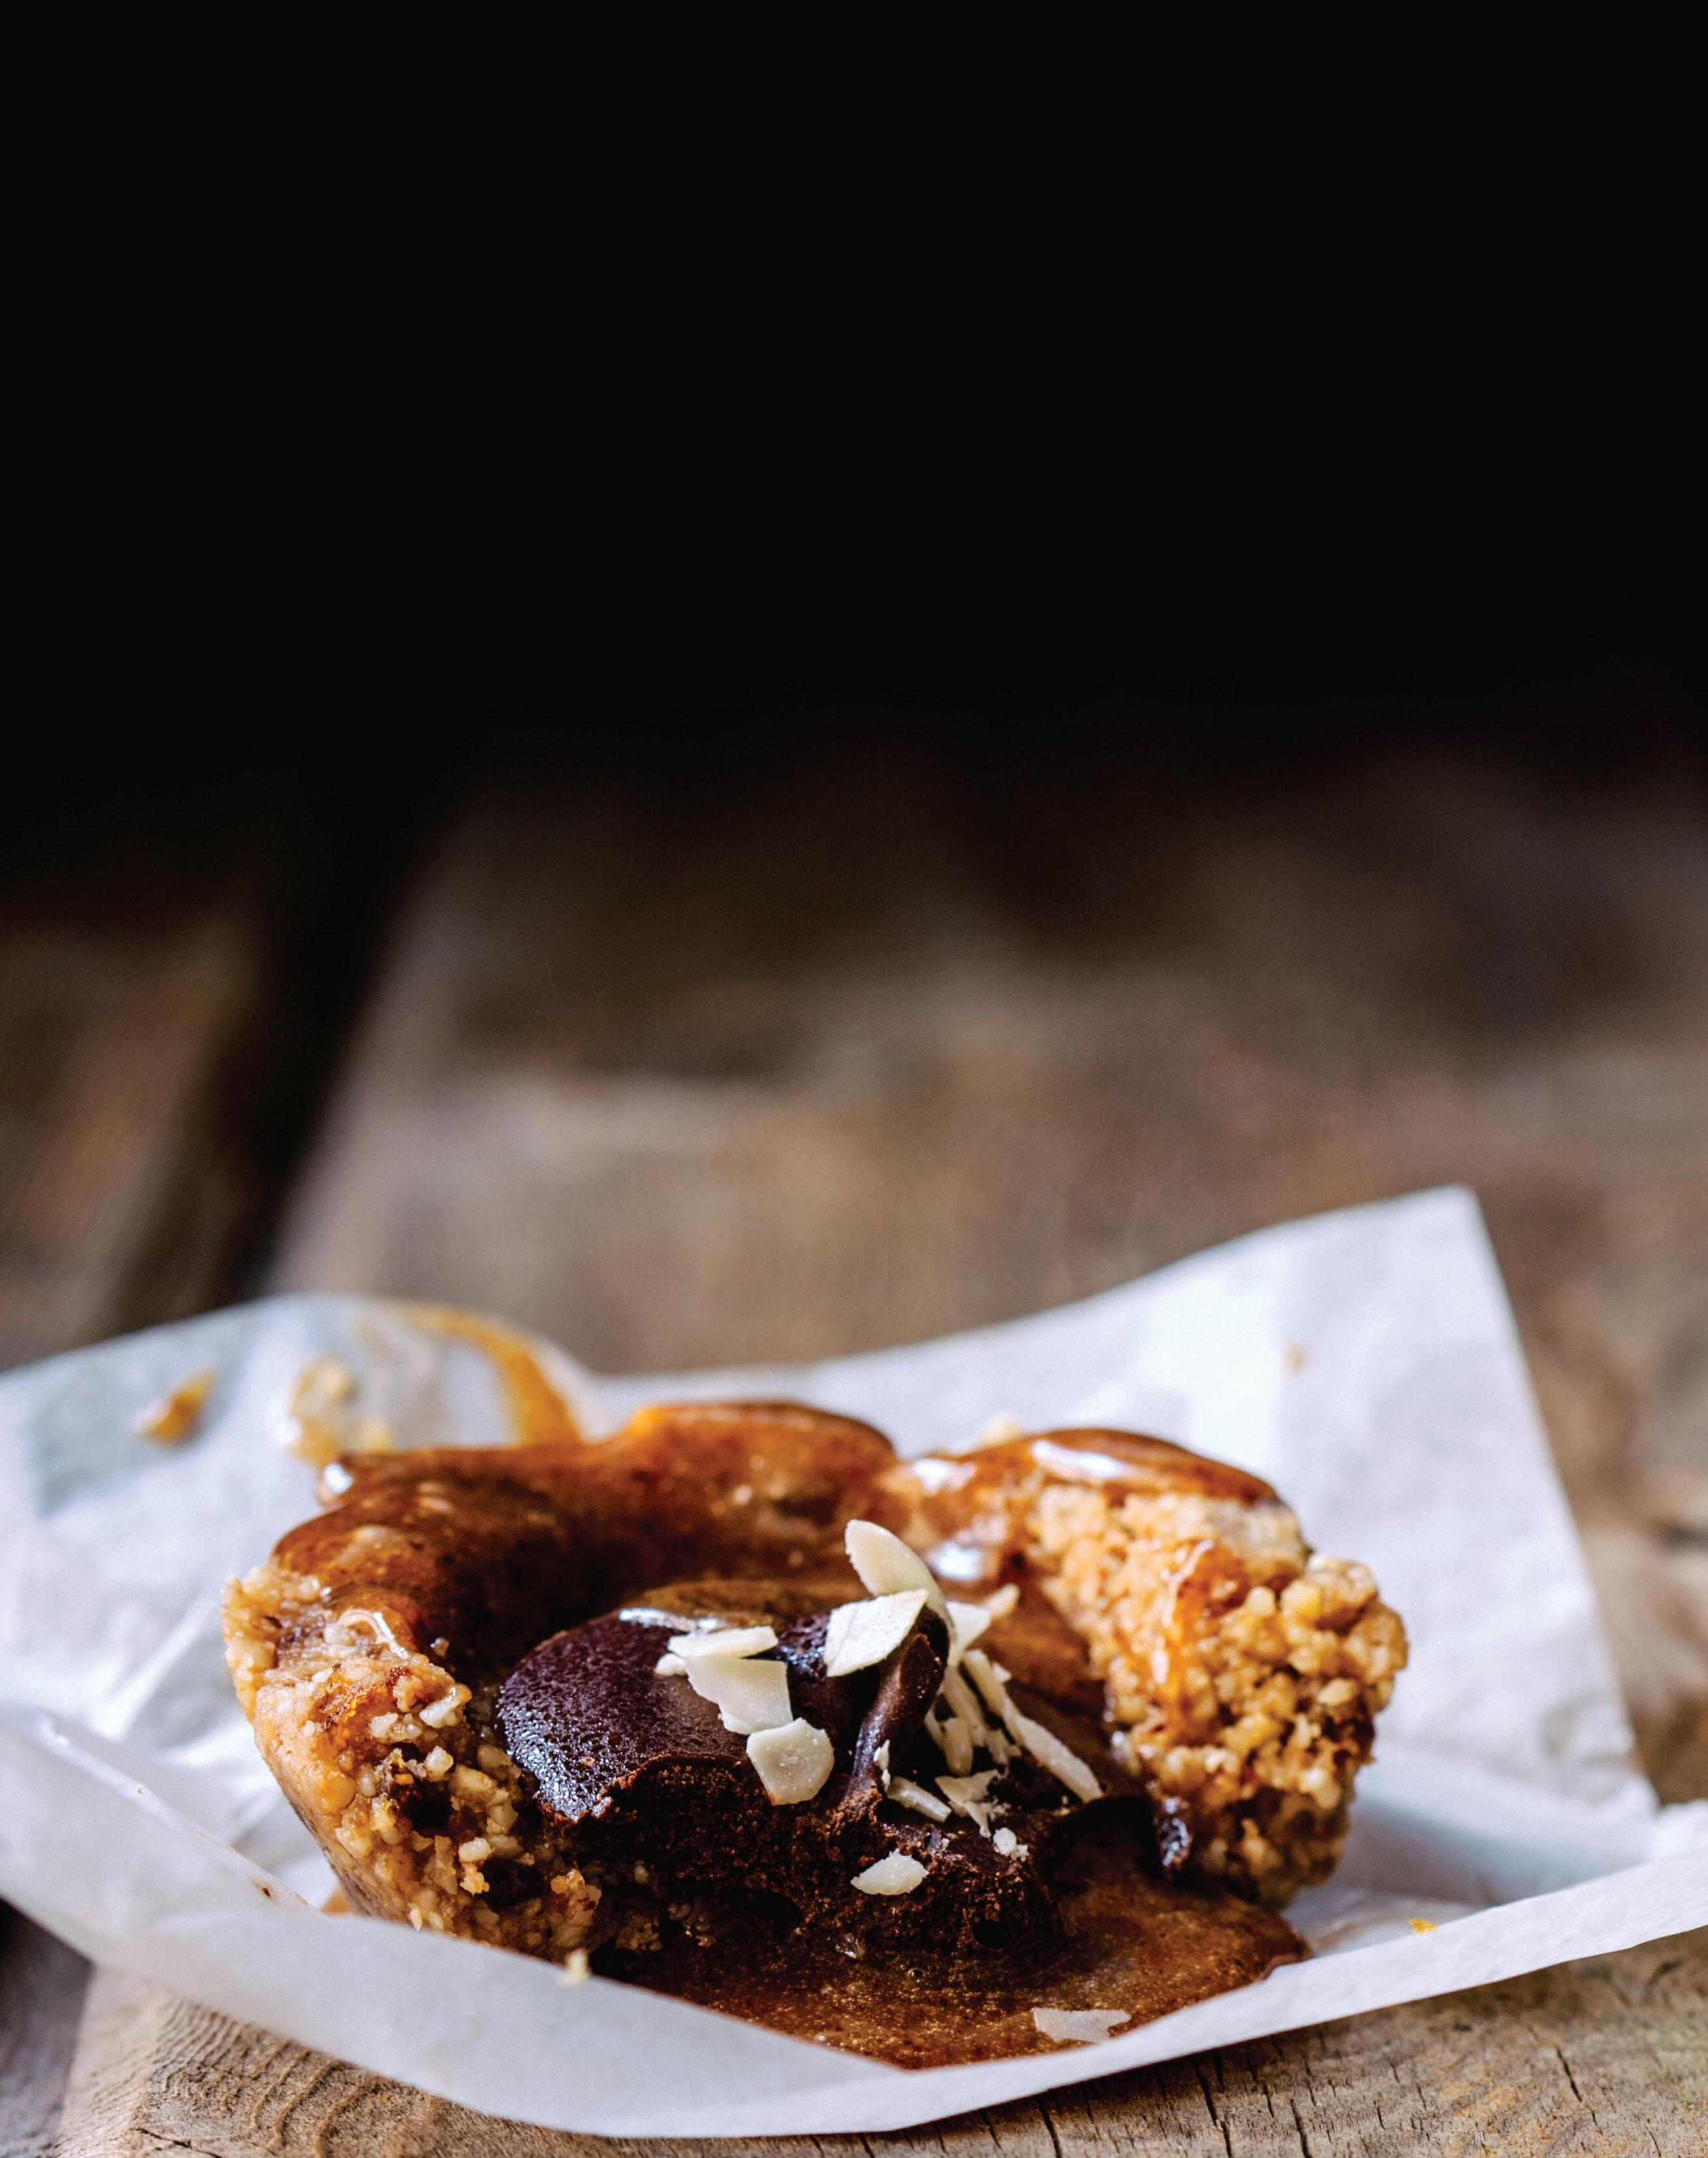
Crust: in food processor, combine almonds, walnuts. Process until nuts are very small. Add cacao nibs; pulse until same size as nuts. Add dates and agave; pulse until dough forms. Press dough into bottom and up sides of silicone cupcake molds, keeping dough thin. Set aside.
Filling: in blender combine all ingredients. Process until smooth. Divide filling among molds. Refrigerate 1 hour. Spoon topping over molds. Garnish with sliced almonds and cacao nibs.
Nutrition facts per serving Calories 388; protein 9 g; fat 8 g; carbs 26 g.
Courtesy of Thrive Energy Cookbook: 150 Functional, Plant-Based Whole Food Recipes by Brendan Brazier. / Penguin Books,an imprint of Penguin Random House LLC. © 2014 Reprinted with permission.
Cherish this dessert made without cheese
RECIPE & PHOTOGRAPHY BY LAUREN TOYOTA
Author of Vegan Comfort Classics: 101 Recipes To Feed Your Face & creator of the hot for food blog in Toronto, ON HOTFORFOOD HOTFORFOODBLOG
Making a vegan cheesecake that is indistinguishable from a cheese-cake made from actual cheese is no easy feat. But this is The One, guaranteed. Cherish it! I had all the biggest vegan skeptics I know try it just to be sure, and they didn’t even realize it was vegan. You can serve this tangy, creamy cake with any kind of fruit compote you want, but I’ll always have a soft spot for blueberries.
Serves 10
INGREDIENTS
CRUST
• 1 cup rolled oats (not quick cooking)
• ½ cup packed brown sugar
• ½ tsp. sea salt
• 2 Tbsp. vegan butter, melted
FILLING
• 1 cup raw cashews, soaked in hot water for 20 minutes
• 1 cup soft tofu
• 1 cup vegan cream cheese
• 1 cup granulated sugar
• ¼ tsp. grated lemon zest
• ¼ cup freshly squeezed lemon juice
BLUEBERRY TOPPING
• 2 cups fresh or frozen blueberries
• 2 Tbsp. freshly squeezed lemon juice
• ¼ cup granulated sugar
Courtesy of Hot for Food Vegan Comfort Classics by Lauren Toyota / Published by Penguin Canada, a division of Penguin Random House Canada Limited. © 2018 Reprinted with permission.
Preheat the oven to 350F.
To make the crust, in a food processor, pulse the rolled oats into a flour. This should be a very fine mixture with no large pieces of oats. Add the brown sugar, salt, and melted butter and pulse until the mixture comes together. It should press together when you pinch it. Press the mixture in an even layer into the bottom of a 7 or 8-inch springform pan. You can also press it into an 8-inch square baking dish. You can line the dish with parchment paper for easy removal or you can serve the baked cheesecake directly from the dish.
To make the filling, drain and rinse the cashews. Place in a high-powered blender with the remaining ingredients and blend until very smooth. Pour the filling on top of the crust. Bake for 45 minutes until the edges of the cheesecake are light golden brown. The centre might look a bit soft, but it will firm up upon cooling.
Allow the cheesecake to cool completely. Refrigerate it for at least four hours or overnight. Once the cheesecake has chilled completely, remove the sides of the springform pan. Let the cake sit at room temperature for 30 minutes before serving.
To make the topping, combine all the ingredients in a saucepan over medium heat. Simmer for six minutes. Let cool before serving over the cheesecake. There is enough blueberry compote to put a good portion on top of the cheesecake and have some extra to add to individual servings.
Nutrition facts per serving Calories 365; protein 9 g; fat 14 g; carbs 52 g.

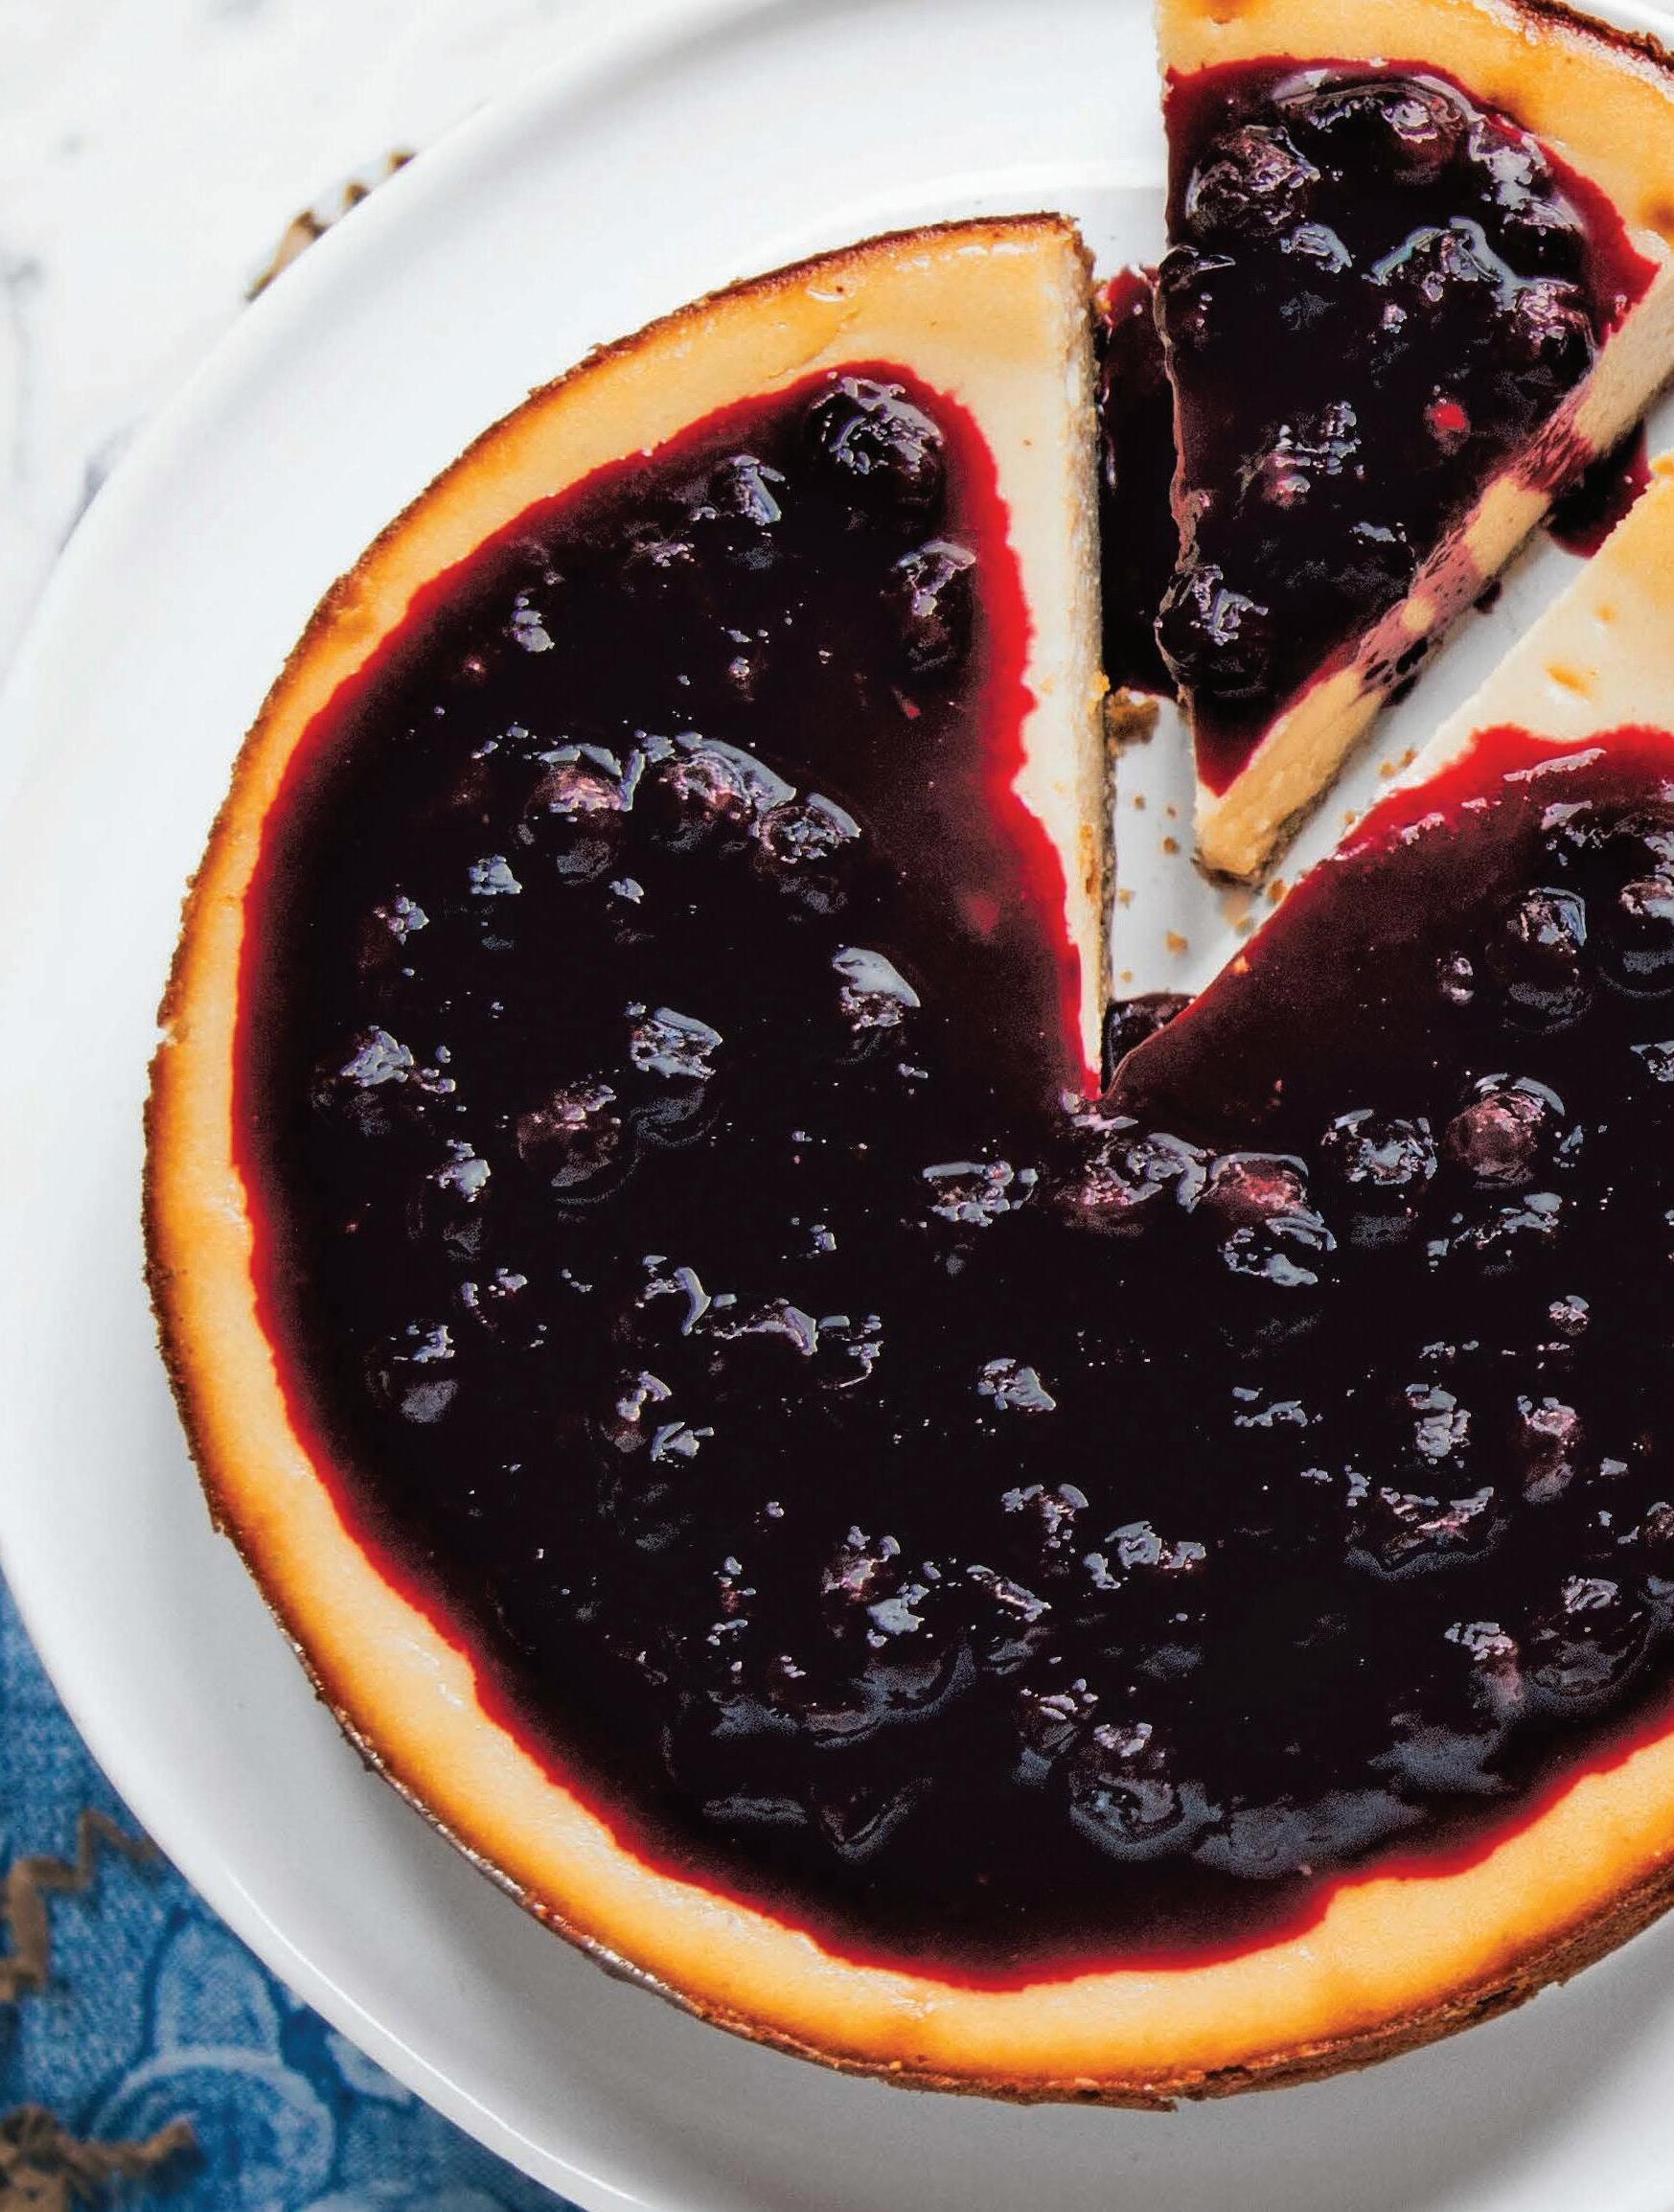
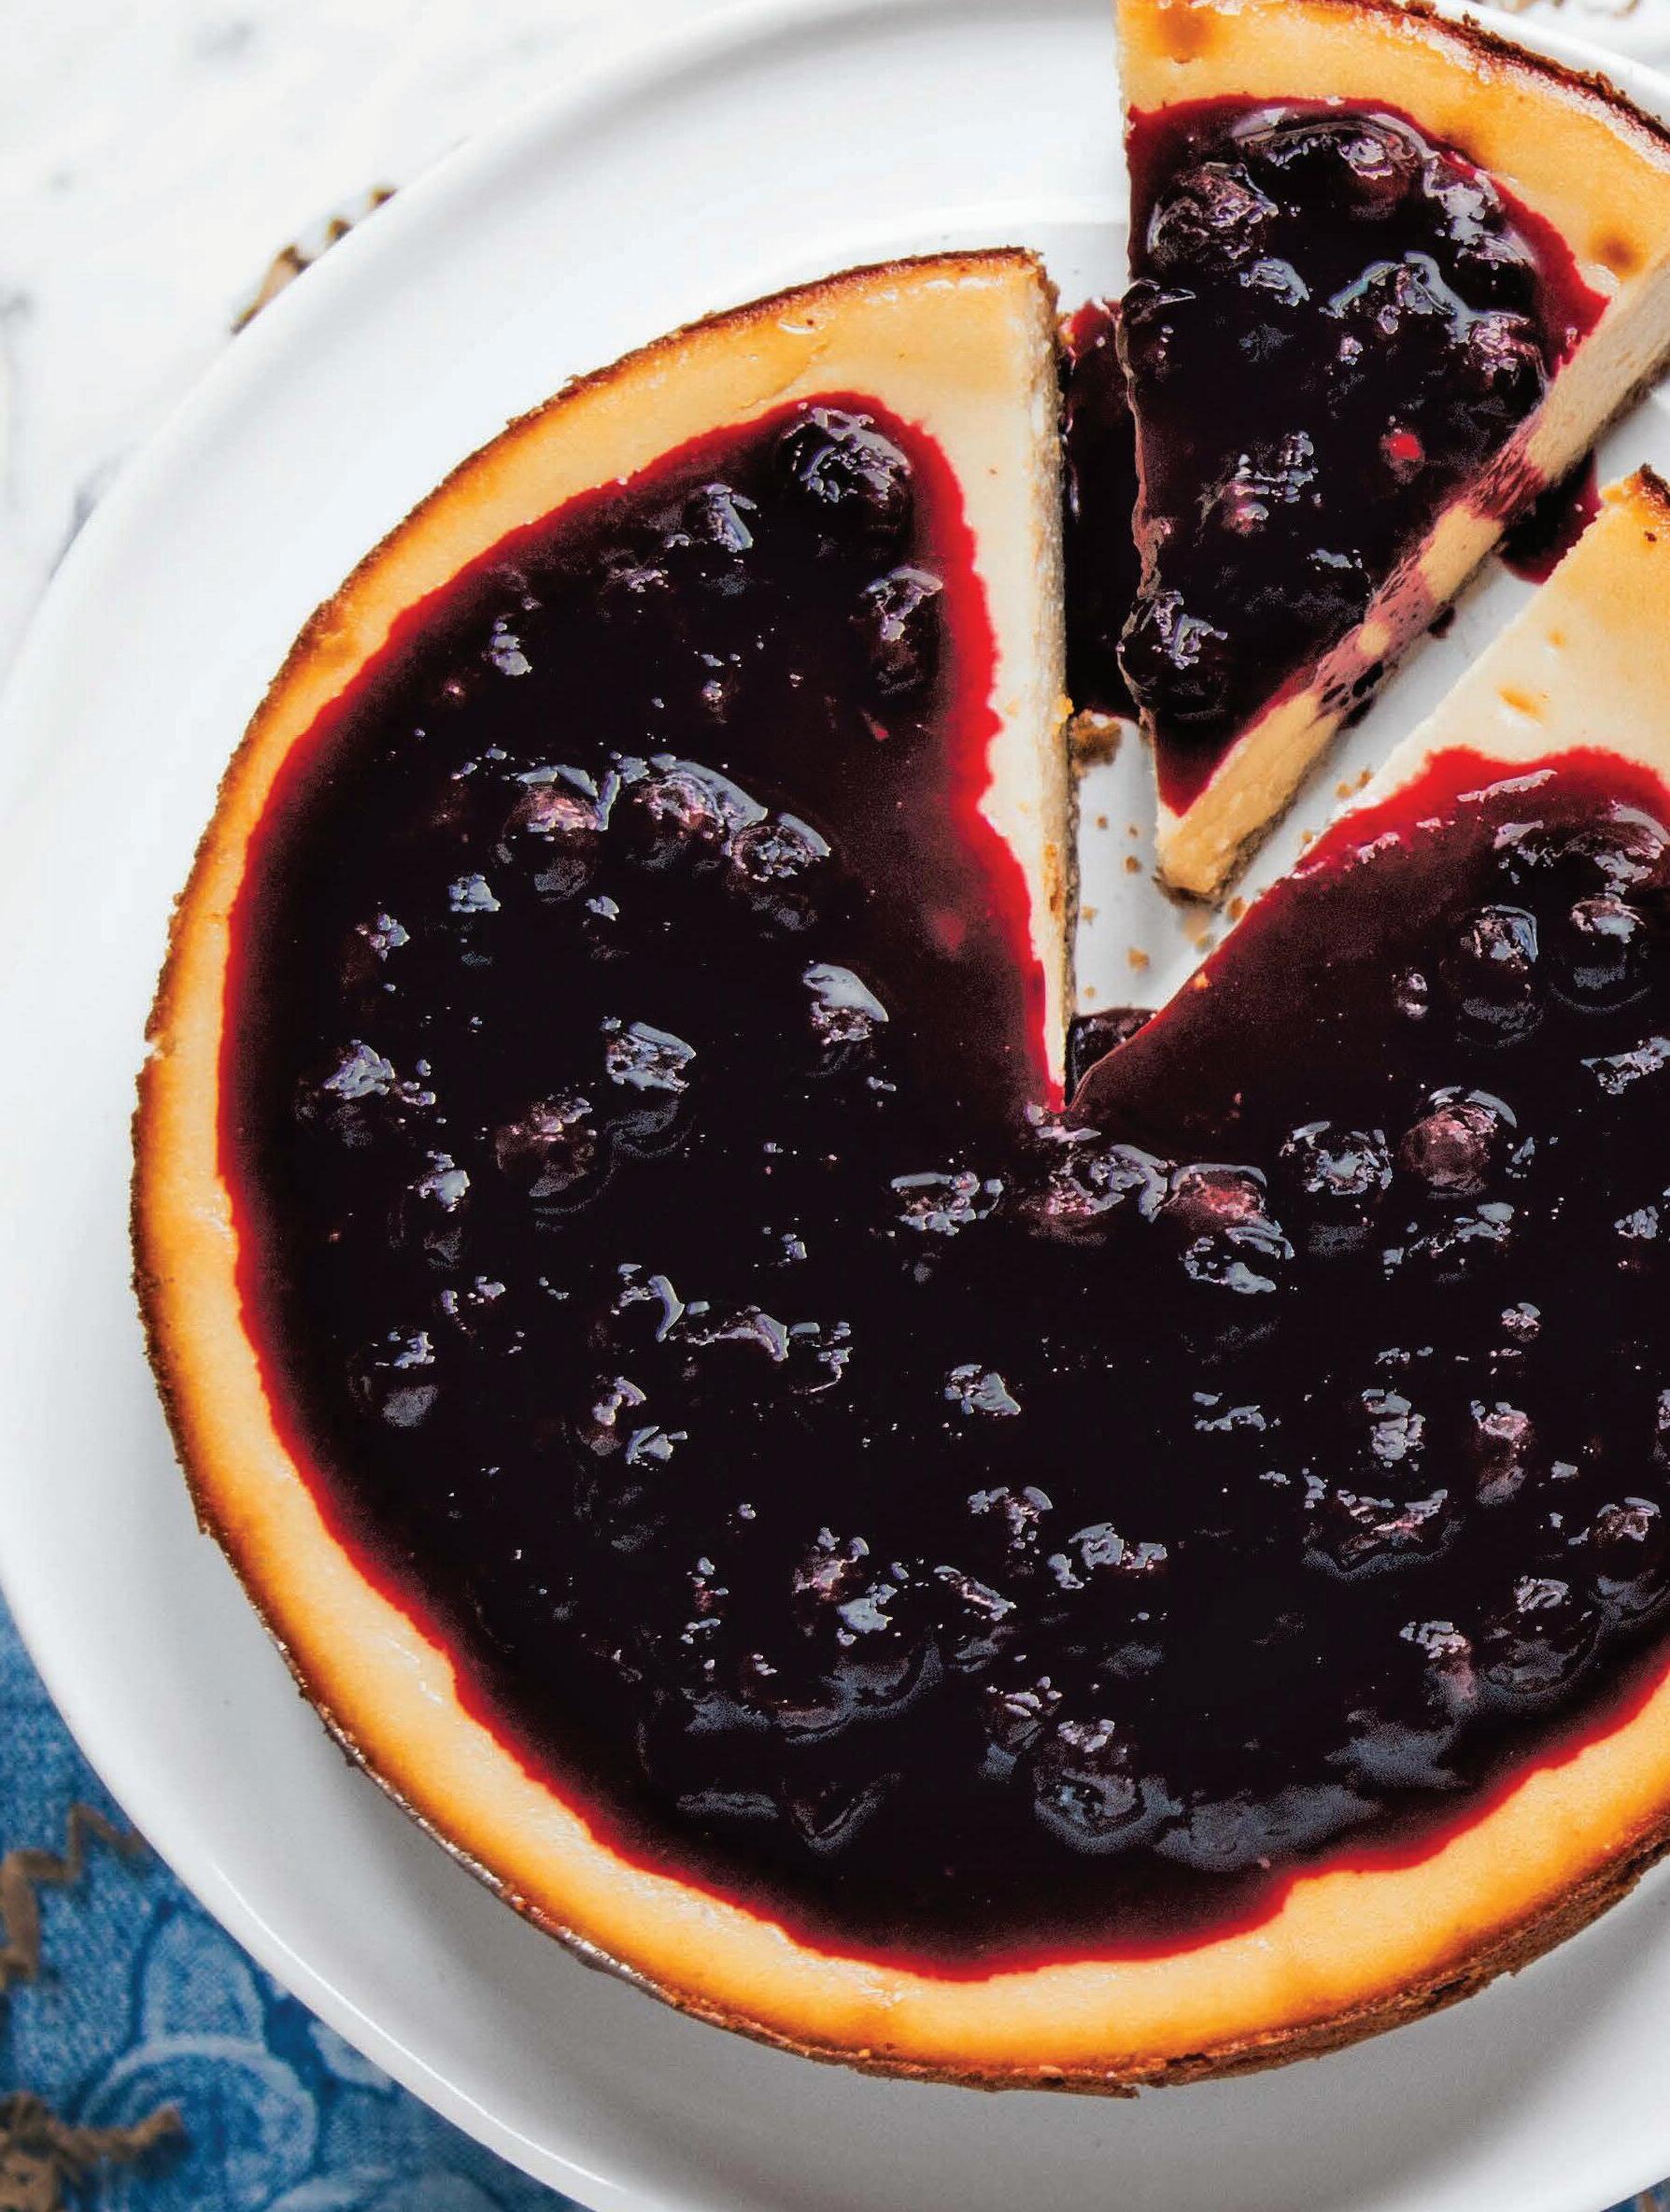
RECIPE & PHOTOGRAPHY BY EMILY VON EUW
Best-selling author & award-winning food blogger at This Rawsome Life in Vancouver, B.C. THISRAWSOMEVEGANLIFE RAWSOMEVEGAN THISRAWSOMEVEGANLIFE
The Holidays are a popular time for pumpkin spice. This hazelnut-based crust sweetened with dates is balanced and surprising. Each tart is filled with a luscious custard and topped off with whipped coconut cream. For added decadence, drizzle with a low-sugar salted caramel sauce.
INGREDIENTS
HAZELNUT CRUST
• 3/4 cup hazelnuts
• 1/4 cup rolled oats
• 1/3 cup raisins
• 1/3 cup dates
• 1 tsp. vanilla extract
• Pinch sea salt
PUMPKIN FILLING
• 1 3/4 cups (1 can) pumpkin purée
• 1/4 cup melted coconut oil (or cacao butter for firmer results)
• 1/4 cup coconut milk
• 1 tsp. vanilla extract
• 1/4 tsp sea salt
• 1/4 cup dried cranberries
• 1/4 cup dates
• 1/4 cup coconut sugar
• 1 heaping Tbsp. pumpkin pie spice
COCONUT WHIPPED CREAM
• 1 can full-fat coconut cream
• 1/2 tsp. vanilla powder
• 1 tsp. maple syrup
Crust: in a food processor grind the hazelnuts and oats into flour. Add the rest of the ingredients and process until the dough is slightly sticky, crumbly and can hold its shape when pressed between two fingers. If it's too crumbly, add more dates or a splash of water or coconut milk. If it's too moist, add a spoonful or two of ground flax seed or oats. Press the crust evenly into lined or oiled tart tins and cool in the fridge.
Filling: blend all ingredients until smooth. Pour evenly into your tart crusts and set in the fridge overnight (minimum 5 hours).
Coconut whipped cream: open the can and scoop the solid white fat off the top. Whip the cream with the vanilla and maple syrup in a chilled bowl until it's the consistency of whipped cream. Scoop onto tarts, decorate with extra chopped hazelnuts and coconut shreds.
Nutrition facts per half cup Calories 155; protein 2 g; fat 6 g; carbs 26 g.

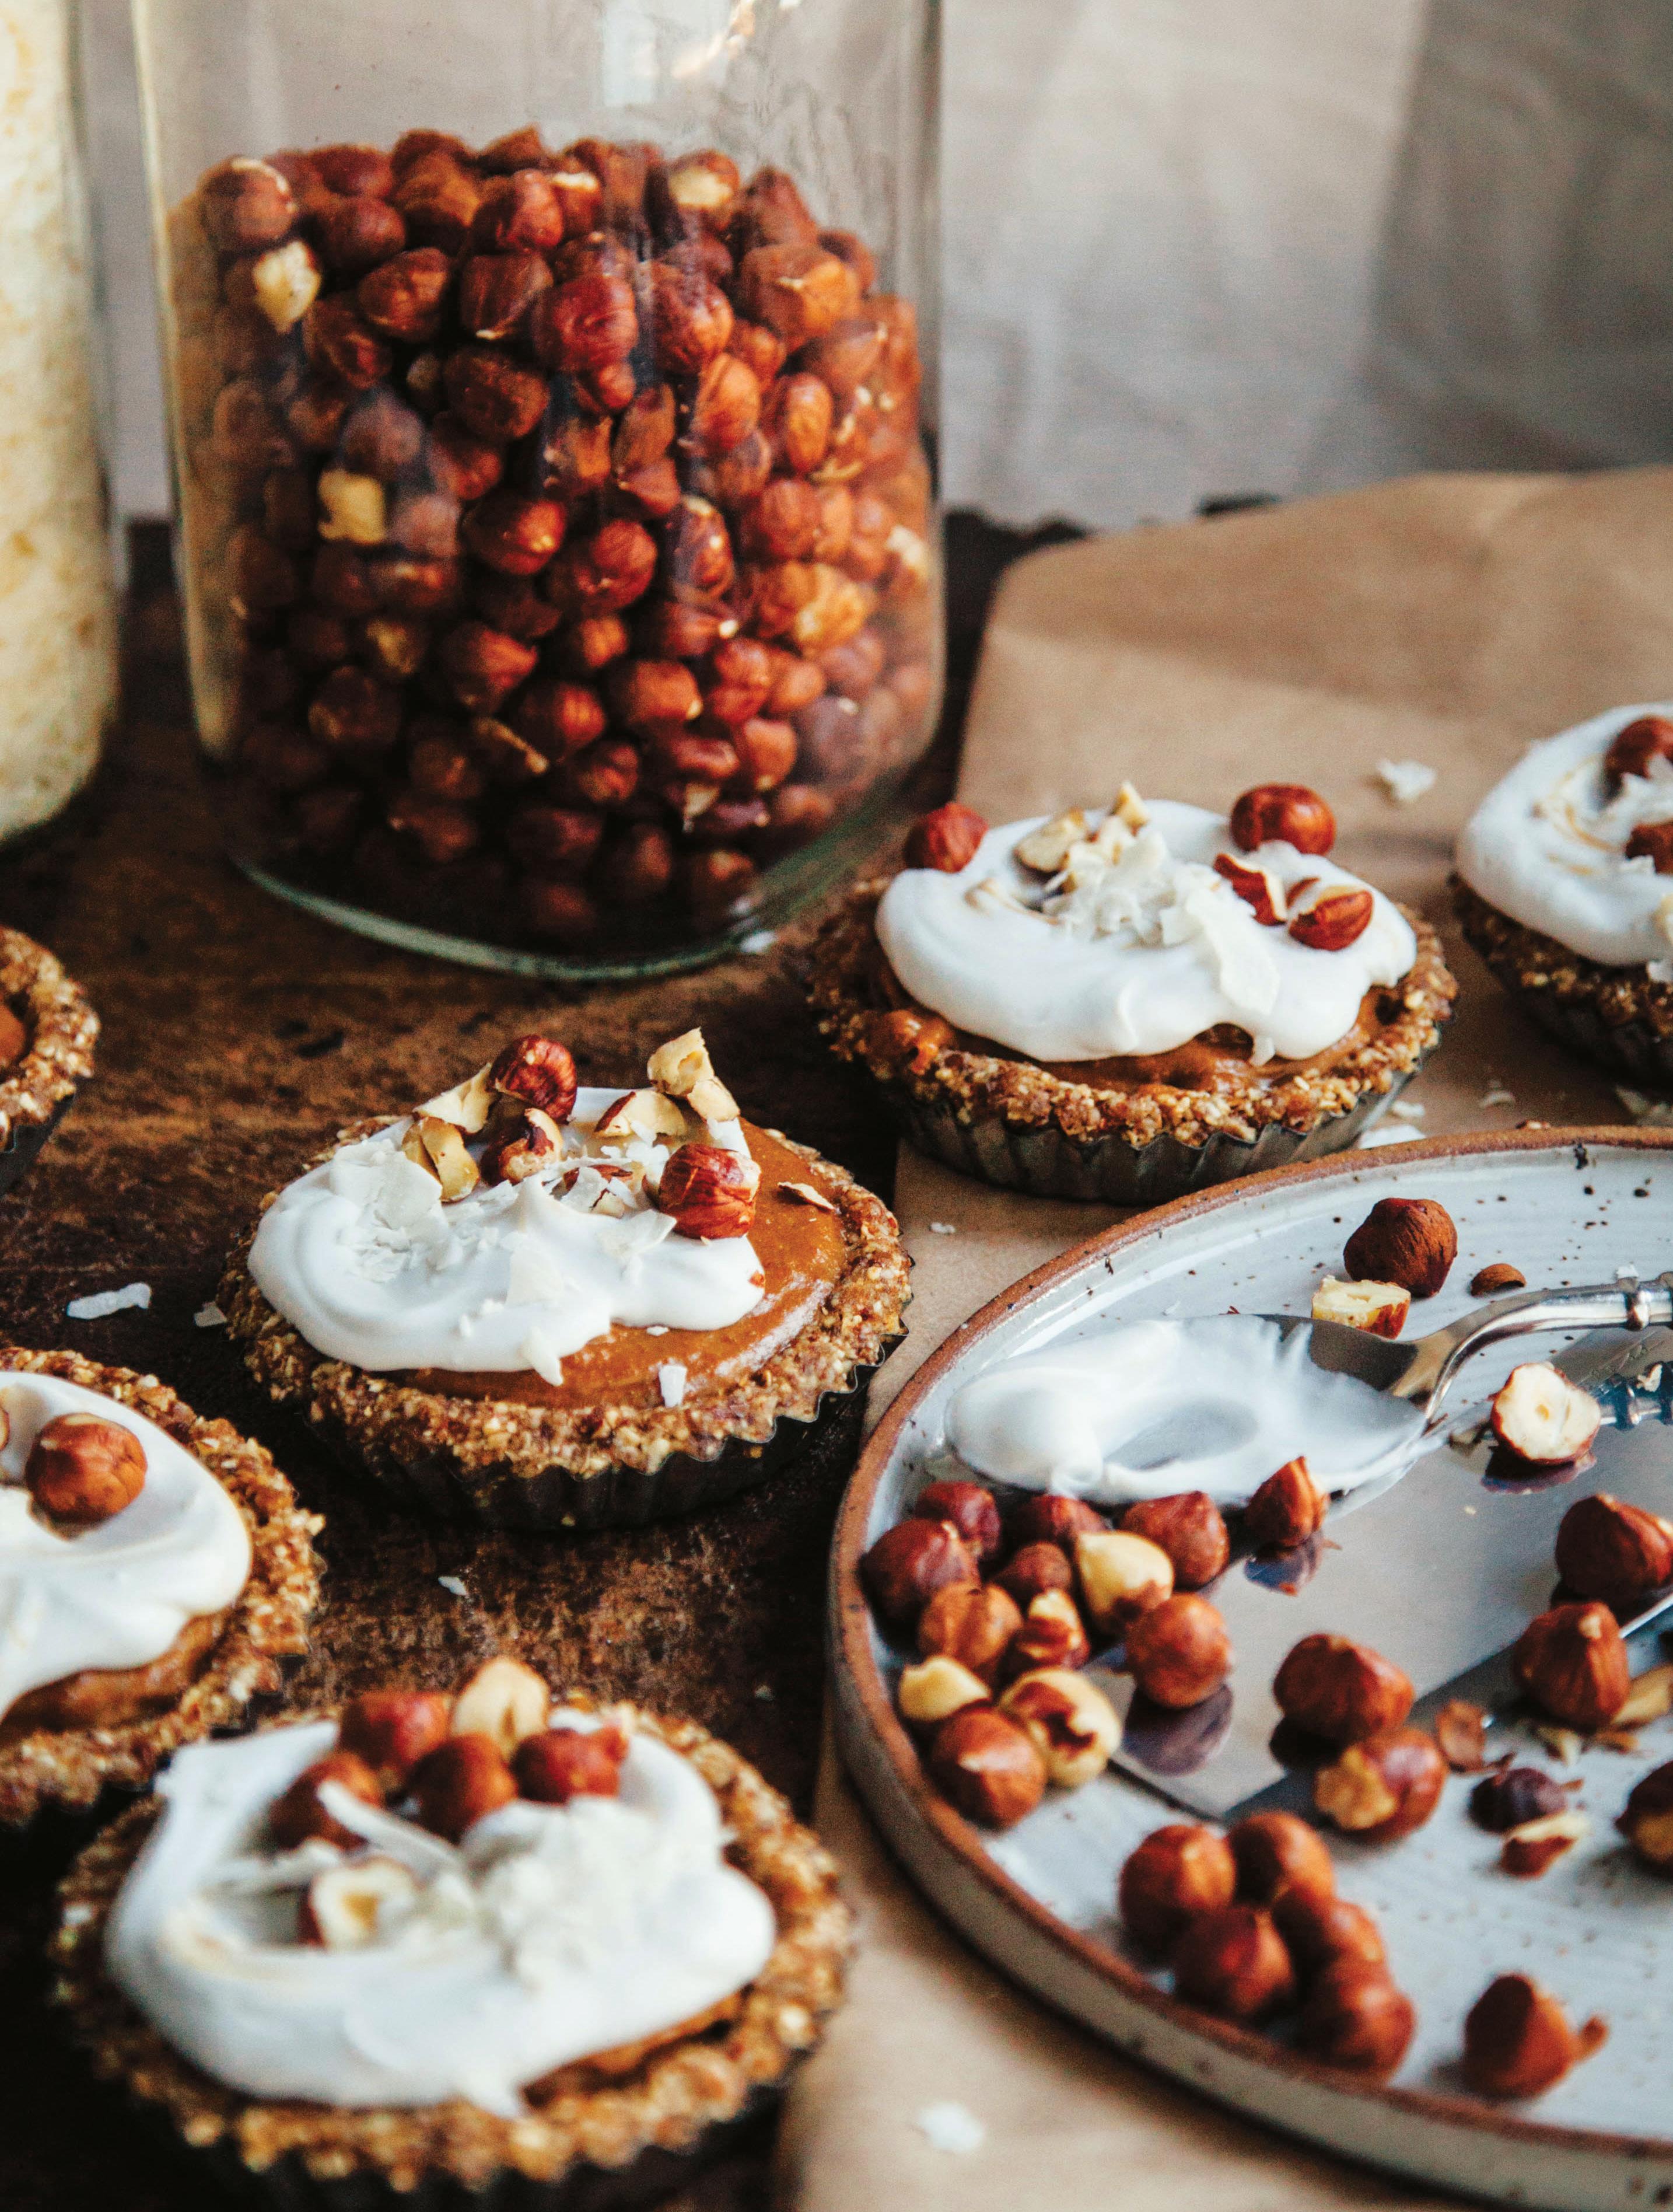
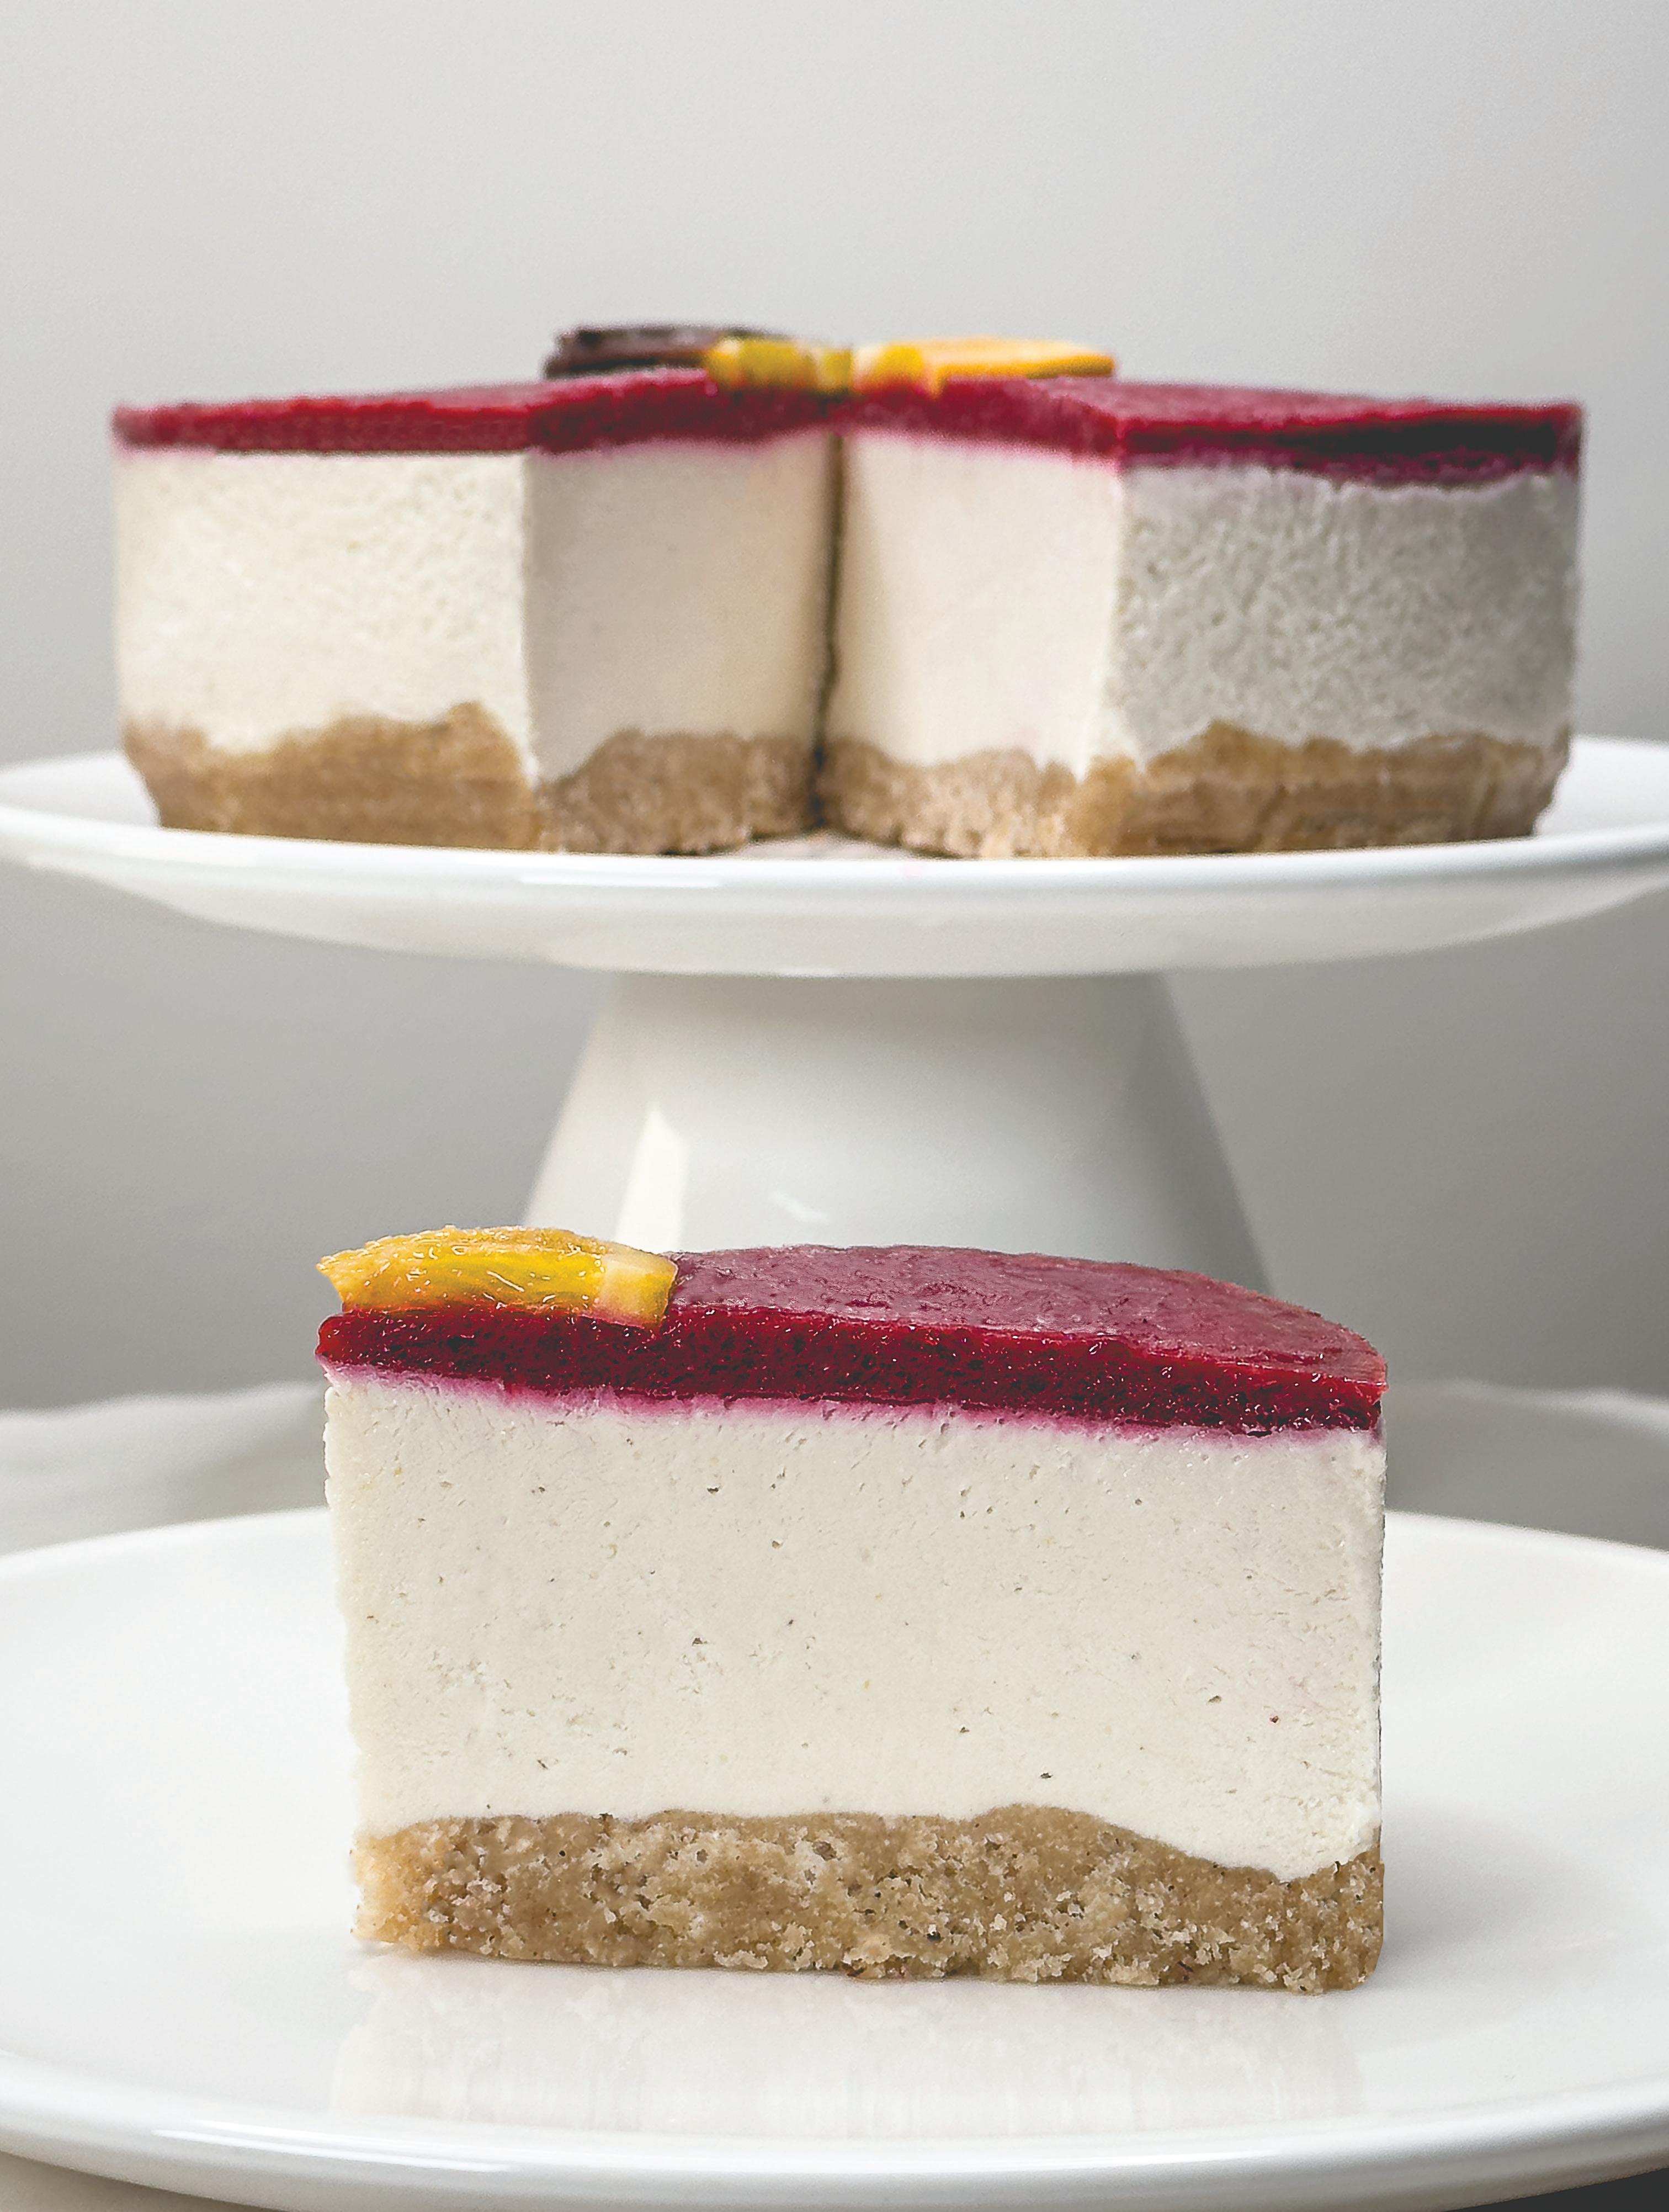
Indulge in the dreamy, creamy decadence of this lemon dessert
RECIPE AND PHOTOGRAPHY BY JOSIE BOULDING
Nutritionist, and former TV personality from Courtenay, B.C., Josie is the co-founder of Restless Josie Cooks with her husband Ryan Stuart, and they have just released their first cookbook: Habit.
RESTLESSJOSIE JOSIE.BOULDING
Does it count as dessert if it is good for you? Don’t waste too much time pondering this philosophical question and just savour this incredibly tasty and healthy play on a vegan cheesecake. That’s right, no dairy and low carb and little sugar. It’s even raw. Yet it’s still rich, indulgent and a little intense—just like any good cheesecake should be.
Prep Time – 30 minutes
Cook Time – 1 hour
Serves 12
INGREDIENTS
Crust
• 2 cups almond meal
• 1 tsp. cinnamon
• 1/8 tsp. salt
• 3 Tbsp. coconut oil
• 2 Tbsp. cold water
• 1 Tbsp. maple syrup
Filling
• 2 cups raw cashews
• ¾ cup cold water
• ¼ cup white chocolate chips
• 4 lemon slices from Lemon Preserve
• 1/4 cup and 1 Tbsp. xylitol or sugar
• 1 tsp. guar gum or corn starch
• 1 tsp. vanilla
• ¼ tsp. salt
Raspberry Coulis
• 2 cups frozen raspberries, thawed
• ¼ cup maple syrup
• 1 tsp. vanilla extract
• 3 Tbsp. lemon juice (about one lemon)
• 2 tsp. guar gum or corn starch
Nutrition facts per serving
Calories 186; protein 3 g; fat 11 g; carbs 21 g.
1. Start by preparing the cashews. In a bowl or measuring cup, combine cashews, water and salt. Leave to soak for 30 minutes.
2. For the crust, combine all the dry crust ingredients in a big bowl and add the water and oil. Mix with your hands until you can make the dough into a big ball. If it is too dry, add more water, a half teaspoon at a time.
3. In a 9-inch diameter cheesecake pan, or similar sized cake pan, add the crust mixture and smooth it flat with your hands until it covers the bottom of the pan.
4. Place white chocolate chips in a microwave safe dish. Microwave for 30 seconds, stir and add 15 more seconds until it turns to liquid.
5. To a food processor or blender, pour in the soaked cashews and water. Blend on high, mashing and scraping as needed. You’re aiming for a smooth and creamy texture that just barely pours. If it’s too thick, add extra water, one teaspoon at a time. If it’s too runny, add a tablespoon of cashew pieces and blend again.
6. To the blender, add the Lemon Preserve, melted white chocolate chips, sugar, vanilla and salt. Continue blending with the cashews until well combined and creamy.
7. Pour the lemon-cashew filling into the crust. Use a spatula to smooth it out.
8. Place the cheesecake in the freezer for an hour to allow it to set.
9. Start the coulis. After cleaning the blender, add all the raspberry coulis ingredients. Blend on high until smooth.
10. Transfer the coulis to a microwave safe dish. Heat in a microwave for 30 seconds to activate the guar gum (or corn starch). Stir well. Return to the microwave for another 30 seconds.
11. Refrigerate the coulis.
12. 15 minutes before serving, remove the cheesecake from the freezer and the coulis from the fridge to let them warm and soften.
13. Use the coulis like an icing and smother over the whole surface or just pour over individual pieces.
NOTE:
These are very rich; eat in moderation.
cookies
RECIPE AND PHOTOGRAPHY BY HANNAH SUNDERANI
Founder and creator of Two Spoons in Toronto, ON. TWOSPOONS.CA TWO SPOONS
This is an easy vegan shortbread cookie recipe made with only seven ingredients, which you likely already have in your pantry.
Prep Time: 30 minutes
Cook Time: 15 minutes
Total Time: 45 minutes
Serving: makes 16 cookies
INGREDIENTS
• 1 1/4 cup all-purpose flour (more if needed)
• 1/4 cup icing sugar
• 1/4 cup almond flour (ground blanched almonds)
• 1/8 tsp. sea salt, finely ground
• 1/2 cup vegan butter, cold
• 2 Tbsp. agave
• 1/2 tsp. vanilla extract
FOR THE GLAZE
• 3/4 cup icing sugar
• 1-2 Tbsp. almond milk (splashes more if needed)
• dried rose petals (optional for garnish)
• candied sprinkles (optional for garnish)
1. Sift the flour, icing sugar, almond flour and salt into a large mixing bowl. Chop the vegan butter into chunks and add to the bowl. Massage together with your hands to form a shaggy dough.
2. Pour in the agave and vanilla extract and mix to combine. Turn the dough onto a clean work surface and bring together to form a dough ball. (If the dough seems too wet, add up to 2 tablespoons more flour and knead to combine. See notes for my preferred vegan butter brand). Cover the dough with reusable wrap (or plastic wrap) and chill for at least 1 hour.
3. Preheat oven to 350 F. Line two baking sheets with parchment paper. Sprinkle the work surface with flour and roll the dough into a sheet, 1/4-inch thick. Cut round circles into the dough using a round cookie cutter (I used a 2½-inch/ 6½ cm cutter).
4. Place the cookies onto the baking sheets and pop back in the fridge. Gather the dough scraps together to reform a dough ball, and roll out one more time, 1/4-inch thick. Cut out more cookies with cookie cutter. Place onto the baking sheets.
5. Bake the cookies for 12 minutes, or until the cookies are lightly golden in colour. Let cool slightly, then transfer to a wire rack to cool completely.
6. Make the glaze by sifting the icing sugar into a mixing bowl. Add the almond milk, a tablespoon at a time, and whisk together. (Add more almond milk, a teaspoon at a time, if desired for your preferred glaze consistency).
7. Turn the cookies upside-down and dip into frosting to coat the tops. Place back on the baking tray, icing side up. Garnish with dried rose petals and candied sprinkles. Enjoy as is, or place the cookies in fridge until icing has hardened (about 2 hours).
NOTE: Cookies will keep in the fridge for up to one week. Store in an airtight container. They can also be frozen for up to 2 months.
If you don't have a round cookie cutter, you can also use a juice cup turned upside down.
For this recipe, I used the vegan butter brand Miyokos. It's very similar to butter in taste and texture, and results in a light and crumbly cookie. If using a softer, more margarine style vegan butter, you'll likely need to add more flour to this recipe. Sprinkle the dough with up to 2 Tbsp. more flour as you knead into a dough ball in step 2, if the dough seems too wet to handle. Cover and chill in the fridge to harden.
This recipe can easily be doubled to make 32 cookies.

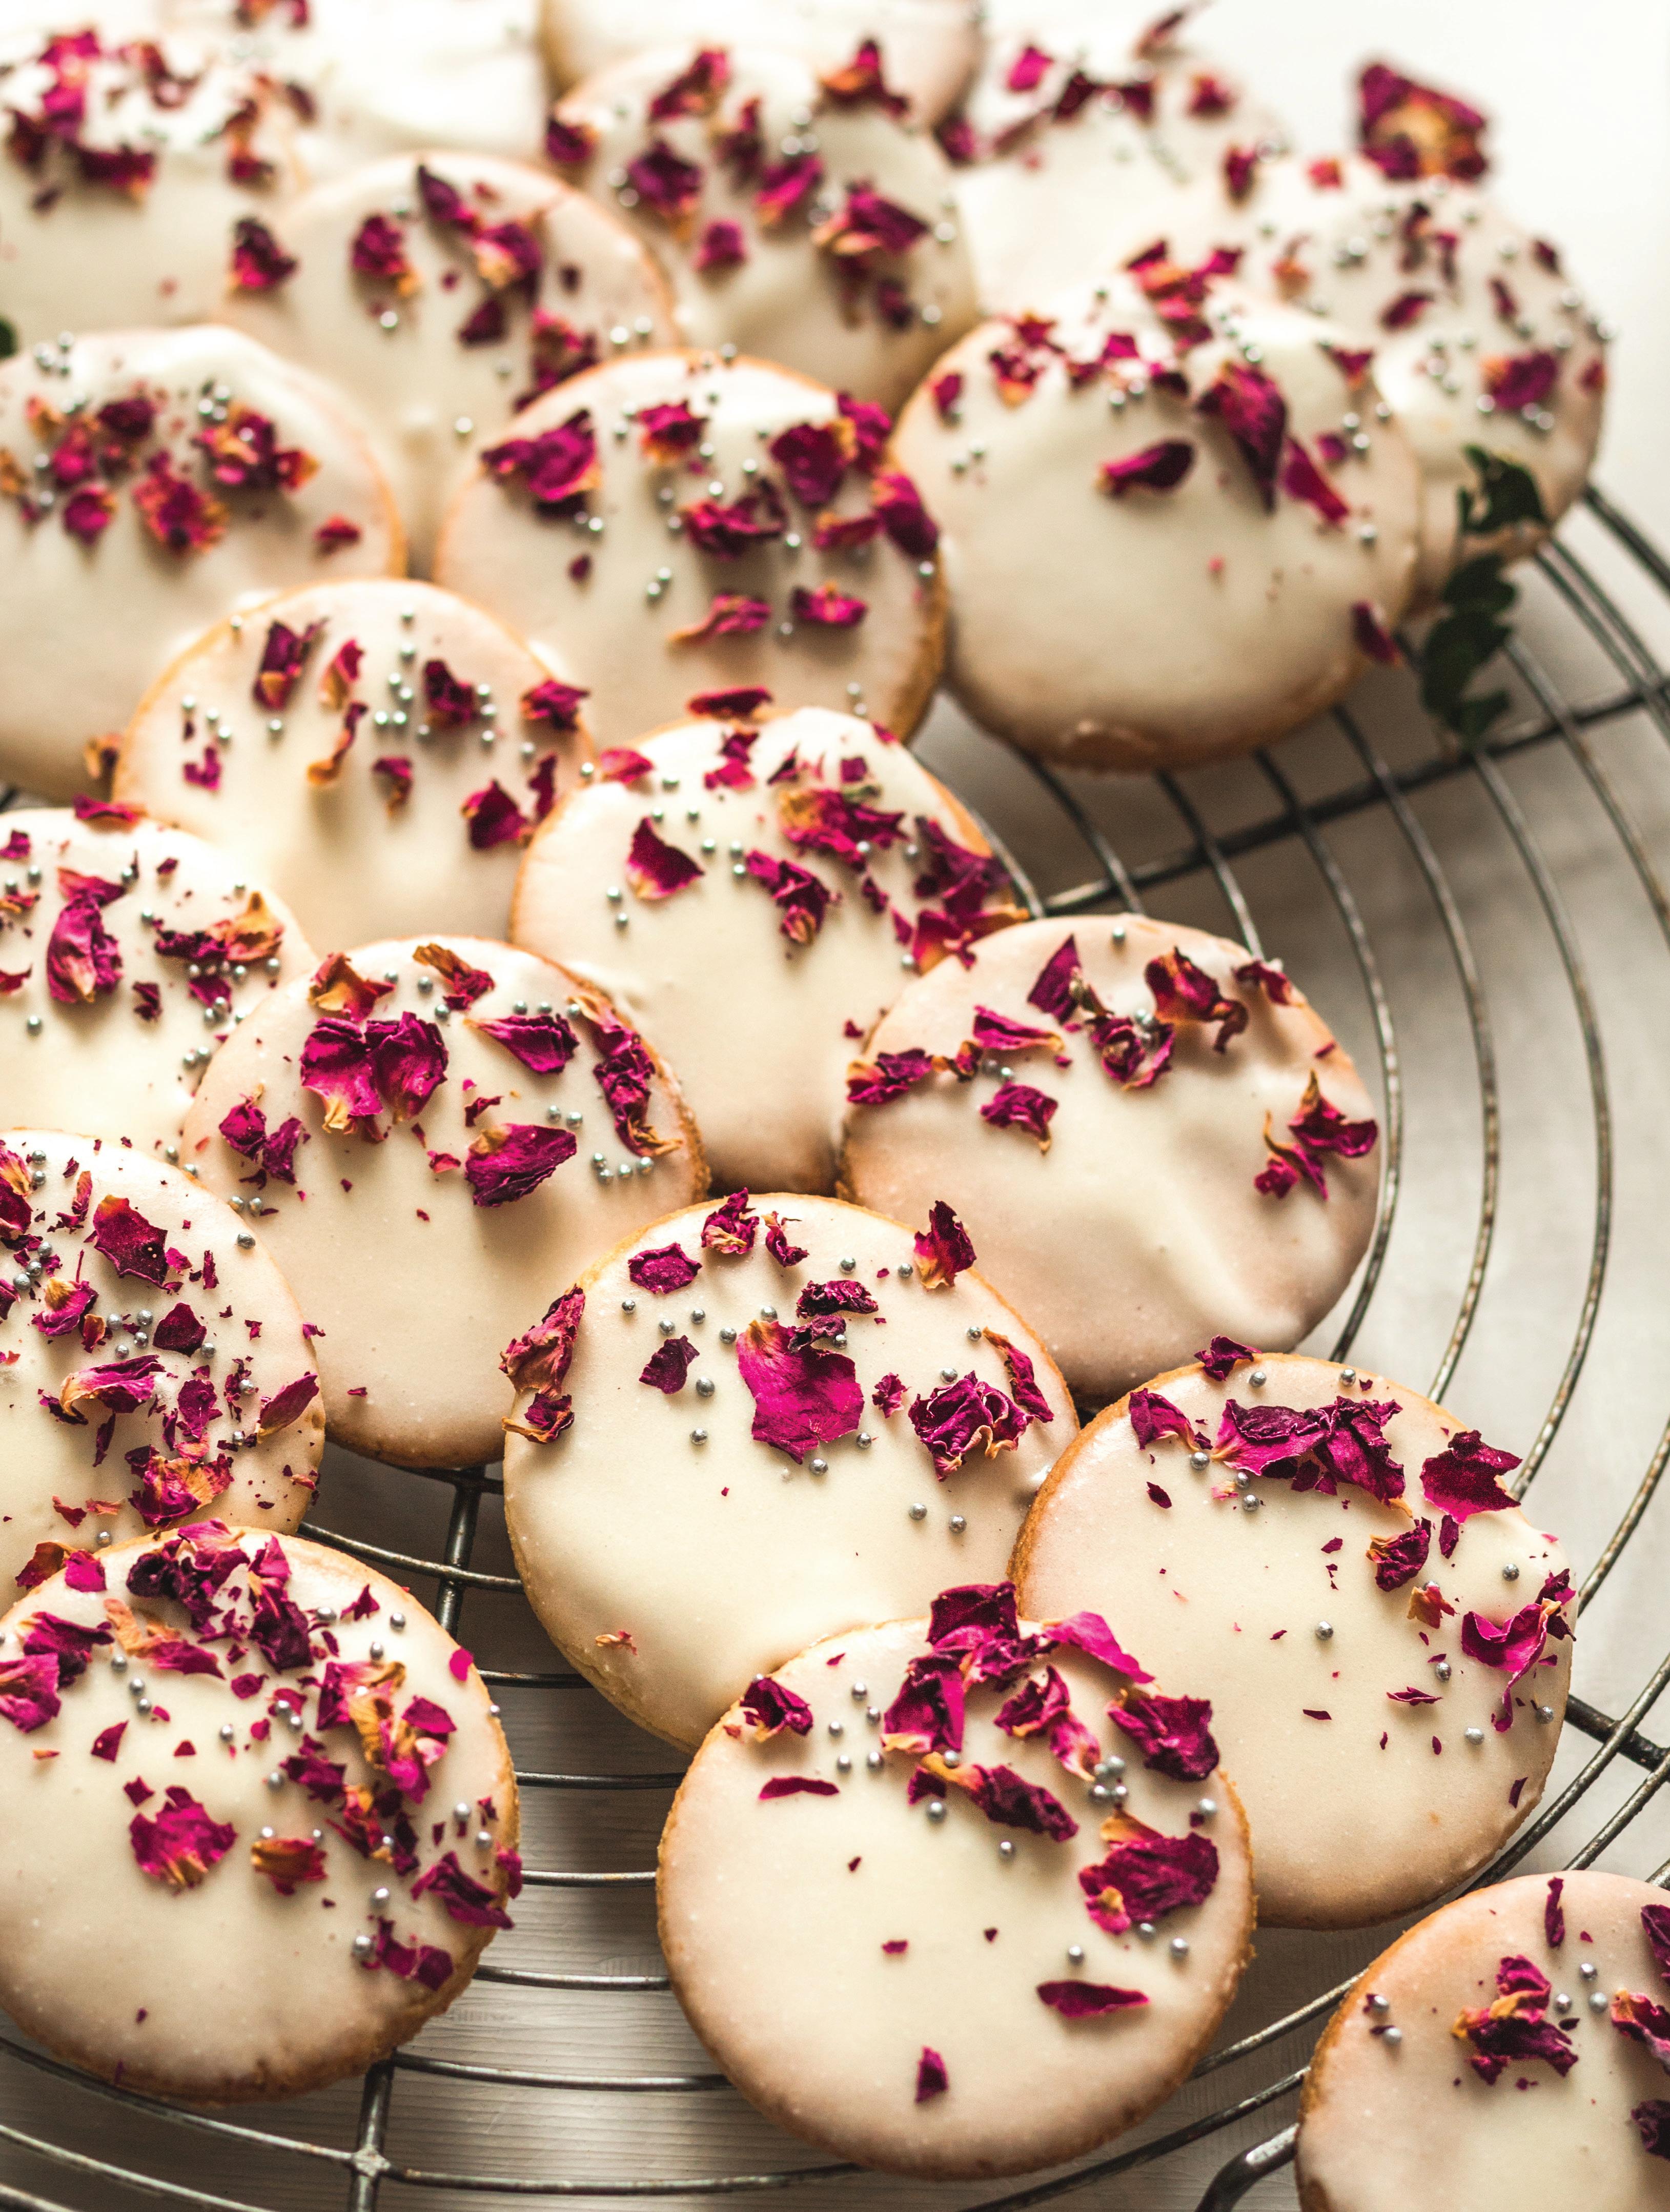
RECIPE AND PHOTOGRAPHY BY HEIDI RICHTER
Heidi Richter is a Vancouver Island, B.C.-based recipe developer, food writer and photographer. She is the author behind the award-nominated blog, The Simple Green, which shares vegetarian and vegan recipes inspired by fresh, seasonal ingredients.
This vegan peach thumbprint cookie recipe is a twist on the traditional Swedish hallongrotta. They are slightly crunchy, perfectly textured and lightly flavoured courtesy of an almond coating, and filled with your favourite peach preserves. Great for any occasion but extra special during the holidays.

Prep Time – 2 hours, 30 minutes
Cook Time – 22 minutes
Makes 24 cookies
• 1 cup unsalted dairy-free butter, softened
• ½ cup organic cane sugar
• 1 tsp. vanilla extract
• 1 ½ cups all-purpose flour
• ½ cup whole wheat flour
• ⅛ tsp. salt
• 1 cup blanched almonds
• ½ cup peach preserves
1. In a large bowl, beat the butter until light and fluffy. Beat in the sugar and vanilla extract. Add the flours and salt to the butter mixture and beat until the mixture resembles coarse wet sand (it should stick together when pressed). Using your hands, press and form the dough into one large mass. Cover and place in the fridge for 1 hour to chill.
2. Meanwhile, add the blanched almonds to a 3-cup food chopper or a small food processor. Pulse the almonds approximately 6-8 times, or until finely chopped. Pour the chopped almonds into a shallow dish and set aside.
3. Preheat the oven to 350° F. Remove the chilled dough from the fridge and, using your hands or a 1-inch cookie scoop, portion and roll the dough into 1-inch rounds. Roll each dough ball in the chopped almonds and place 2 inches apart on a baking sheet.
4. Using your thumb or a small spoon, gently press a well in the centre of each dough ball. The dough may crack, which is okay. If you prefer, you can press each dough ball back together while continuing to create a well in the centre with your thumbs.
5. Fill each well with a ¼ - ½ tsp. of peach preserve. Bake in the preheated oven for 18-22 minutes, or until slightly golden brown around the edges. Remove from the oven and let cool for 10 minutes on the baking tray before transferring them to a rack to cool completely.
Nutrition facts per serving Calories 167; protein 2 g; fat 10 g; carbs 18 g.
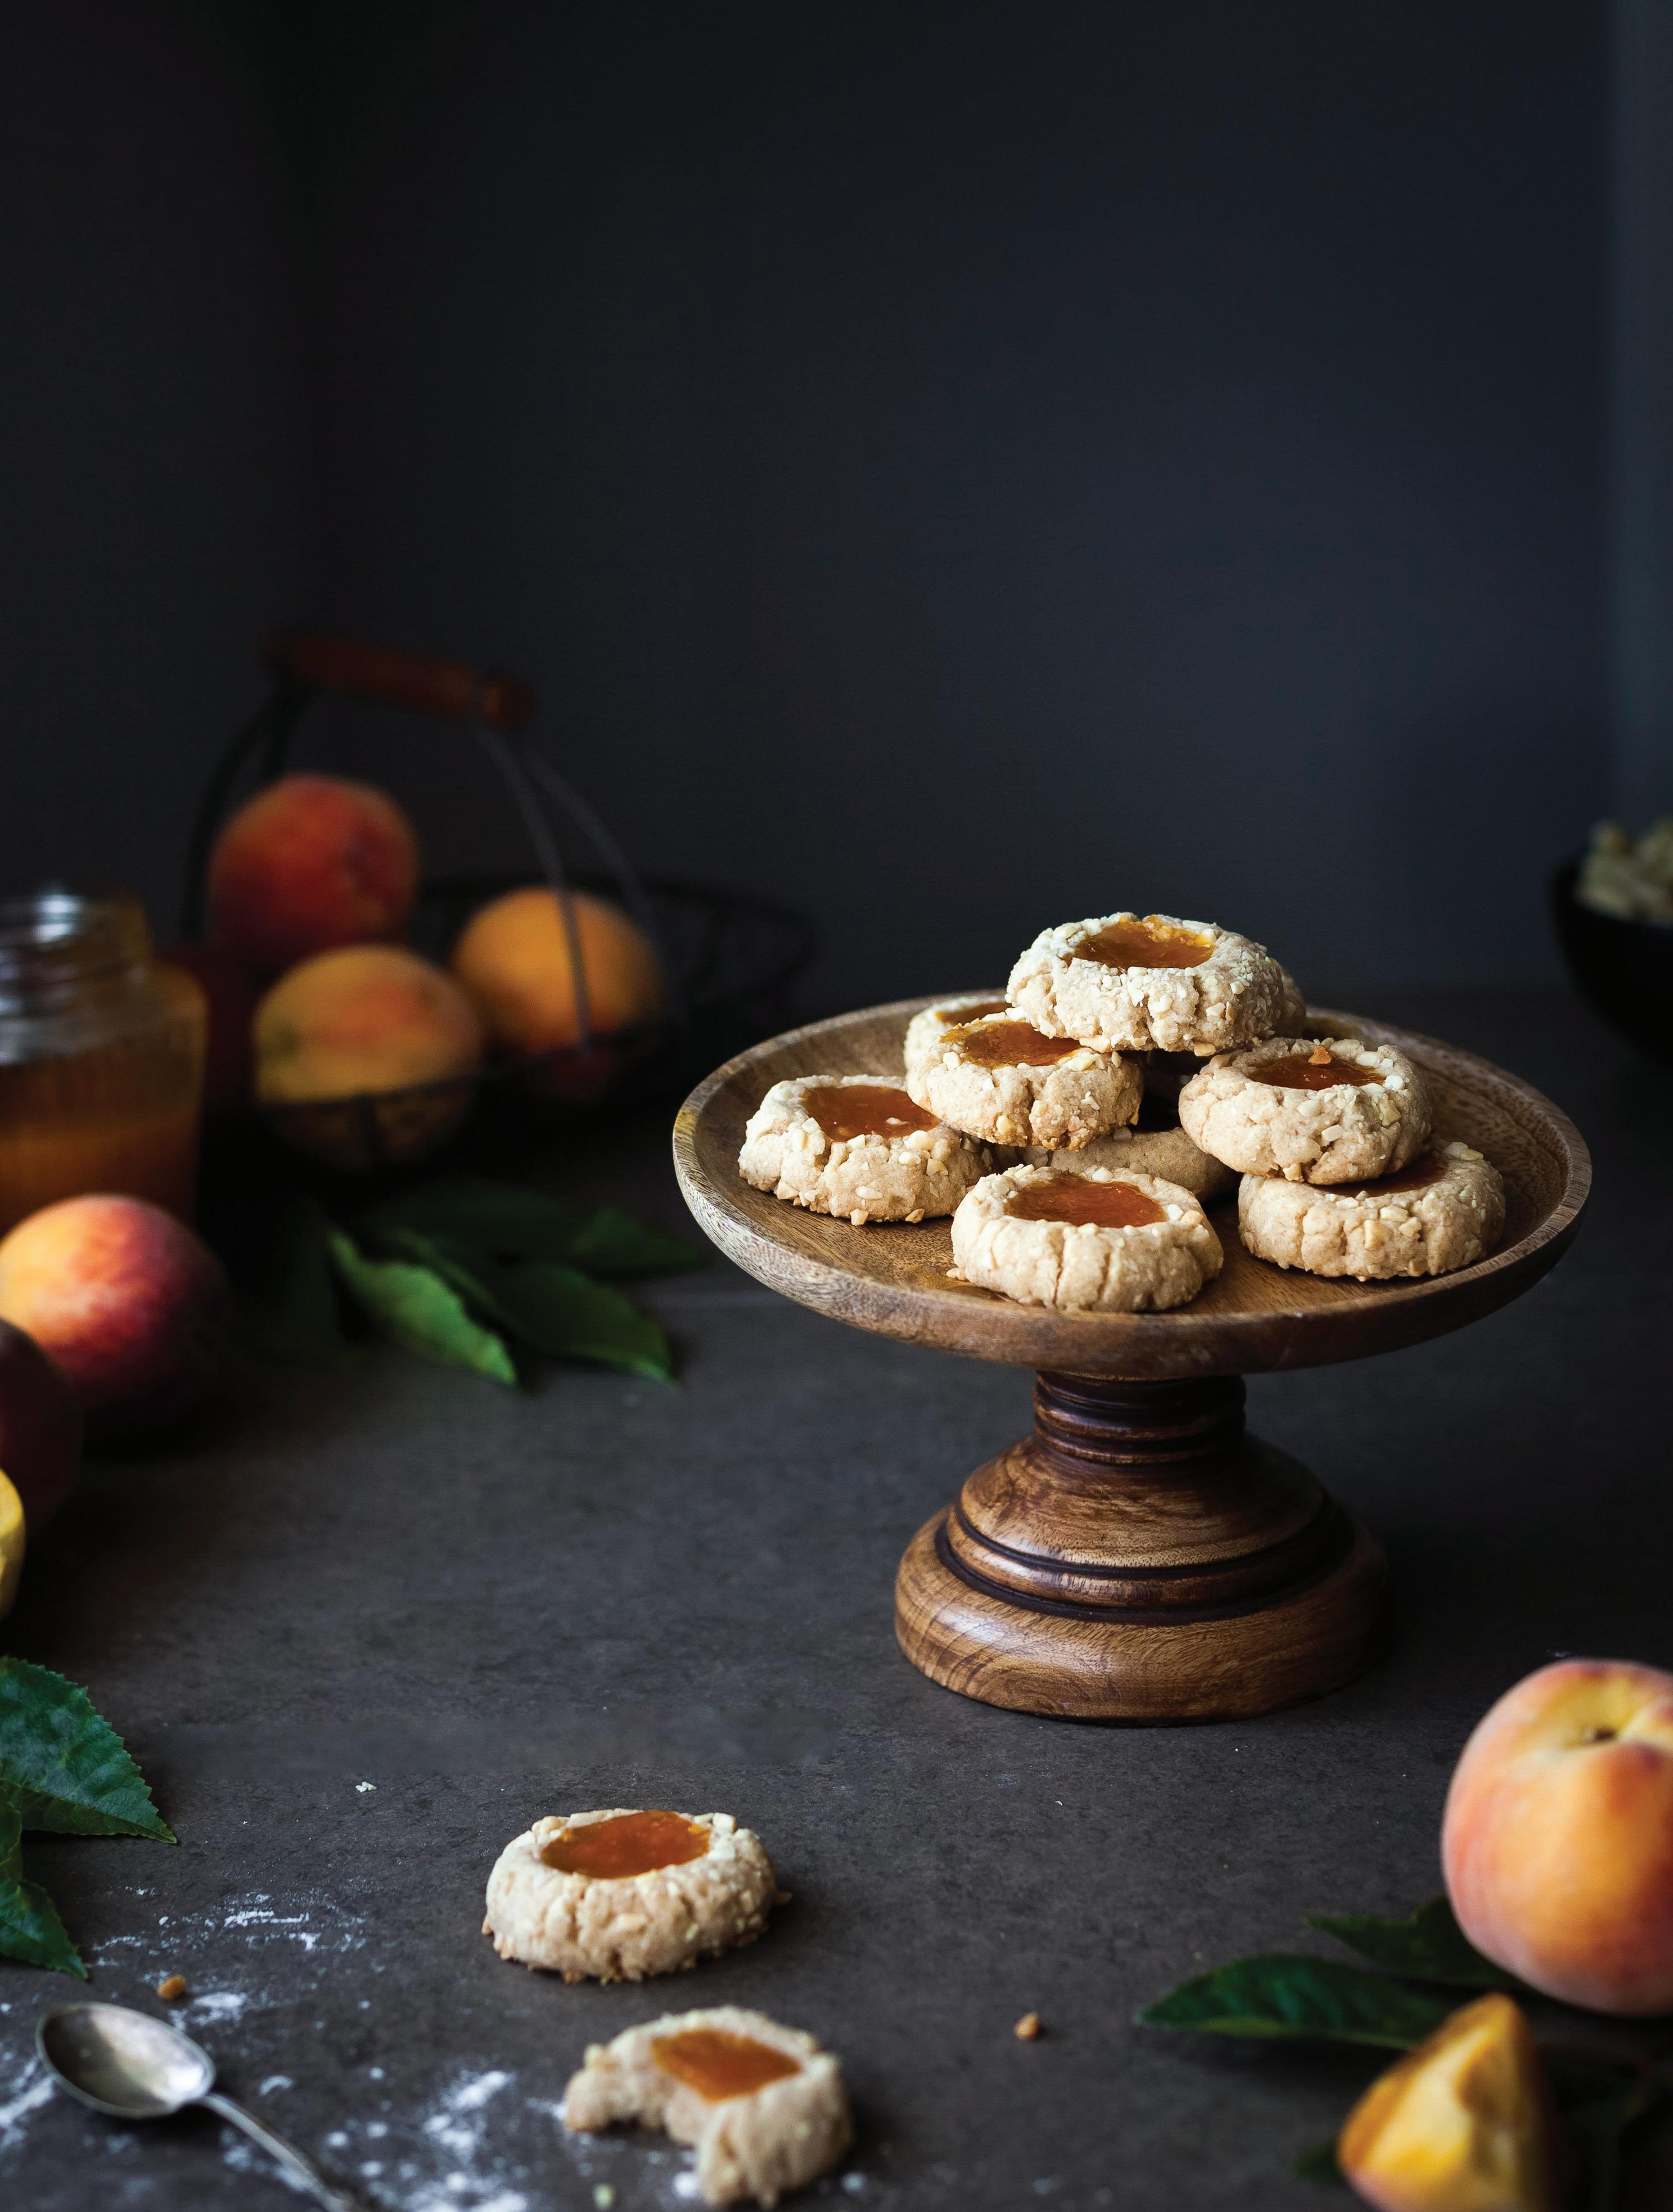
RECIPE AND PHOTOGRAPHY BY CAROLINE DOUCET
Caroline is a registered dietician based in Vancouver, B.C. She has a private practice helping clients eat more plants and improve their relationship with food. She also shares simple vegan recipes at www.nourishedbycaroline.ca. NOURISHEDBYCAROLINE NOURISHEDBYCARO
If you’re a fan of matcha (and holiday cookies), this recipe is for you. These delicious sugar cookies contain a small amount of matcha for a beautiful green color and a hint of flavour. The matcha pairs perfectly with the sweet and buttery cookies. And don’t worry, the matcha is not overpowering. They hold their shape and are perfect for decorating.
Servings: 24
• ¾ cup vegan butter, softened
• ¾ cup granulated sugar
• 2 Tbsp. oat milk, plain and unsweetened
• 1 Tbsp. cornstarch
• 1 tsp. vanilla extract
• 2 cups + 2 Tbsp. all-purpose white flour, spoon and leveled
• ½ tsp. baking powder
• ½ tsp. salt
• ¾-1 tsp. matcha (see notes) ICING
• 3/4 cup icing sugar
• 1 1/2 Tbsp. oat milk, plain and unsweetened
• 1/4 tsp. vanilla extract
DIRECTIONS
1. In a medium-large bowl, add the vegan butter and granulated sugar. Use a stand-mixer or hand mixer if preferred. Cream together, then stir in the oat milk and vanilla extract.
2. In a different bowl, add the flour, cornstarch, baking powder, salt and matcha. Stir to combine.
3. Transfer the dry ingredients to the wet ingredients and combine. Use your hands if needed. The dough will be dry, but it should hold together when pressed. Place a large piece of parchment paper on a clean surface and add a small amount
of flour. Place the cookie dough on the parchment paper and roll out the dough to approximately ¼ inch thick. Cover and transfer the dough to the refrigerator to chill for 1 hour.
4. When you’re ready to bake the cookies, preheat oven to 350 F. Line a large baking sheet with parchment paper. Remove the cookies from the refrigerator while the oven preheats.
5. Cut the dough into your desired shape. You should get about 24 cookies, depending on the size of your cookie cutter. Gently place the cookies on the prepared baking sheet.
6. Bake for 8-10 minutes at 350 F. Let them cool completely before decorating them with icing.
7. To prepare the icing: whisk icing sugar, oat milk and vanilla extract together in a bowl.
8. Decorate the cookies as desired. Enjoy!
NOTE:
Looking for a classic sugar cookie recipe? You can easily skip the matcha! I use Becel vegan for my vegan butter. This vegan butter is always soft. If yours is hard, let it soften at room temperature before using.
Nutrition facts per serving Calories 109; protein 1.2 g; fat 5.2 g; carbs 14.7 g.
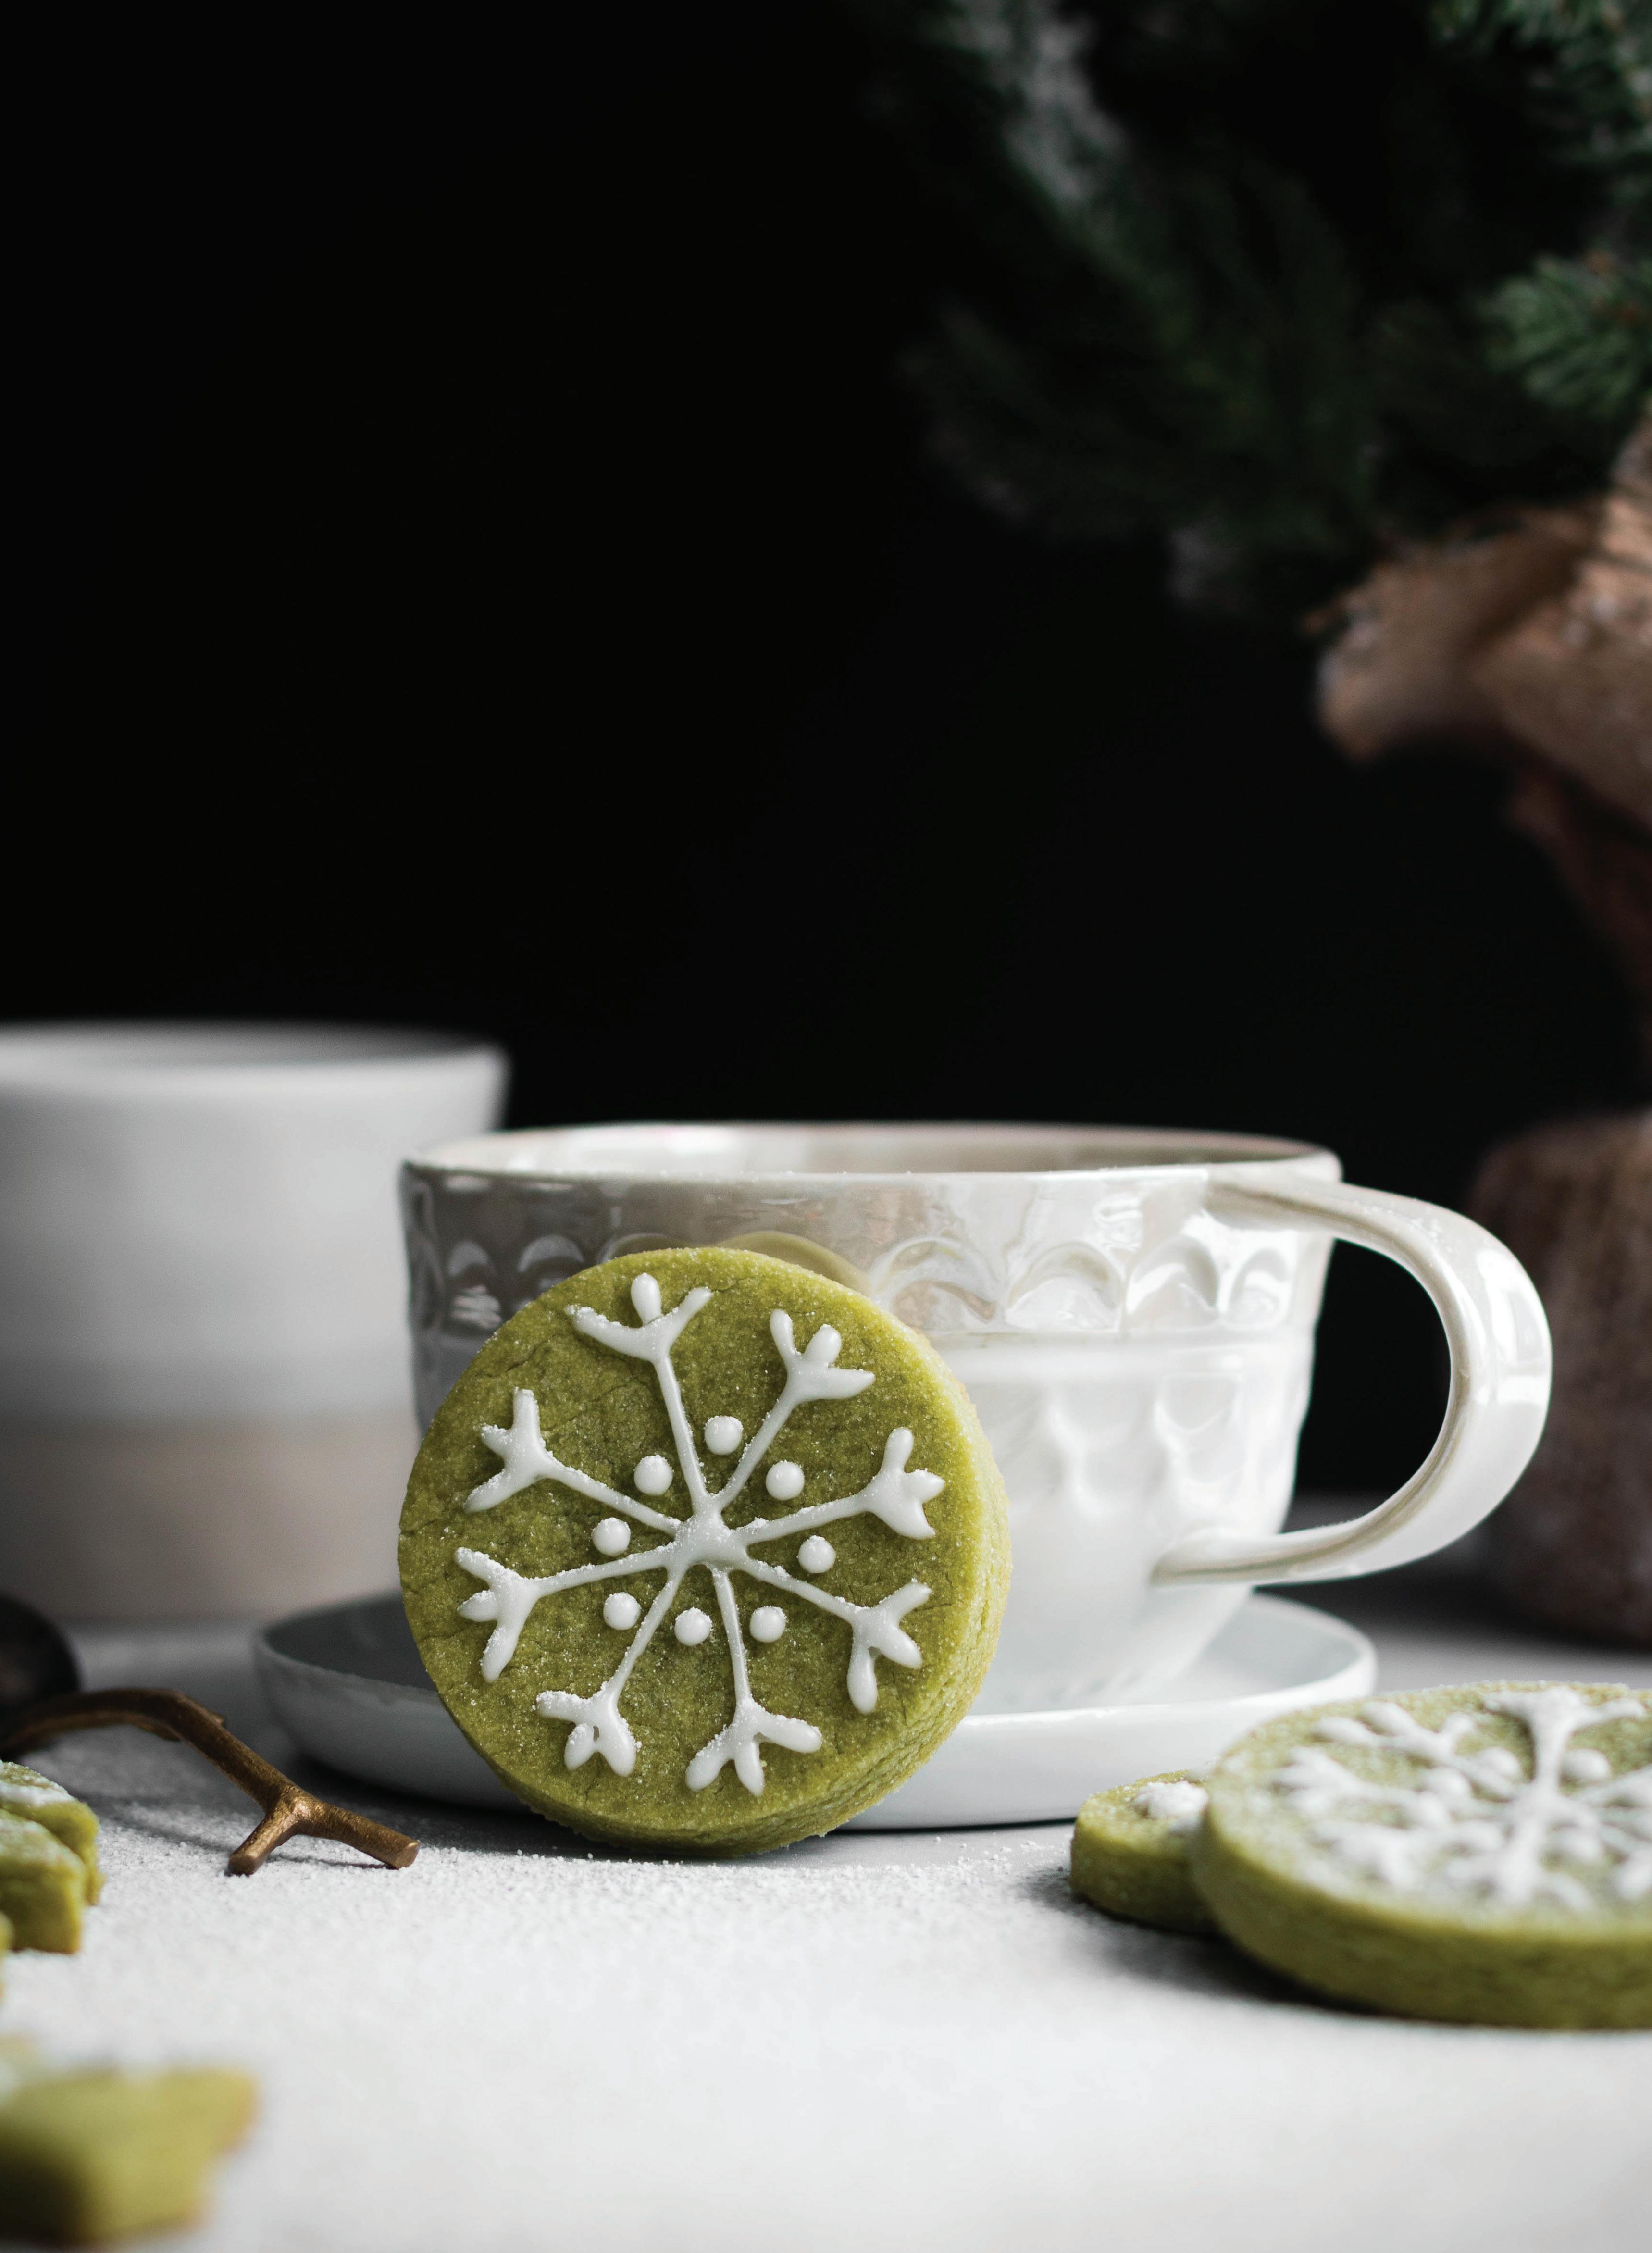
I scream, you scream, we all scream for eggnog ice cream!
RECIPE AND PHOTOGRAPHY BY ARIANNE JONES
Canadian Olympian, chef & holistic nutritional consultant in Calgary, AB. ARIANNEJONES JONESLUGE
This recipe from Jones’s ebook Feel Good Treats is a creamy, rich, and guilt-free dessert! Gluten-free, vegan and refined-sugar-free, a whole bowl of this plant-based ice cream is sure to curb your cravings.
Makes 1 Litre
Eggnog
• 2 heaping cups of cashews, soaked
• 2 ripe medium-sized bananas
• 1 vanilla bean OR 1 tsp. of vanilla extract
• 1 tsp. freshly squeezed lemon juice
• ½ cup maple syrup
• 1 ¼ tsp. freshly grated nutmeg, to taste
• ½ tsp. ground cinnamon, to taste
• Pinch of sea salt
1. Place cashews in a medium bowl and cover with filtered water. Soak for a minimum of 4 hours or overnight. Drain and rinse well.
2. Combine cashews (soaked and drained) and all other ingredients in a high speed blender and blend until completely smooth. Transfer the ice cream mixture into a covered container and place in the freezer for 4 hours or overnight to set.
3. Thaw for 10-15 minutes before serving. Enjoy!
NOTE
• If you forgot to soak your cashews overnight, here is a quick soaking hack: Place your cashews into a pot, cover with water, and bring to a boil. Remove from heat, cover, and let sit for about 15 minutes. Drain and rinse. They should be softened right up.
Makes 20 cookies
Cookies
• 2 ½ cups rolled oats
• ½ cup coconut sugar
• 1 tsp. ground cinnamon
• 1 ½ Tbsp. ground ginger
• ½ tsp. baking soda
• 1 tsp. baking powder
• ½ tsp. sea salt
• ⅓ cup coconut oil
• ⅓ cup brown rice syrup
• 2 Tbsp. water
• 1 tsp. vanilla extract
1. Preheat the oven to 350 F (175 C). Prepare two baking sheets with parchment paper.
2. In a food processor blend your oats to a rough flour mixture (a few oats can still be visible). Add to a large bowl and mix with coconut sugar, cinnamon, ginger, baking soda, baking powder and salt. Combine.
3. In a small saucepan over medium low heat, melt the coconut oil. Once melted, whisk in brown rice syrup*, water and vanilla until the mixture is loose and well combined.
4. Pour the wet ingredients into the large bowl of dry ingredients and combine well.
5. Scoop dough with spoon. Place dough balls on the sheet, giving ample room between as they will expand a lot!
6. Depending on how big you want your ice cream sandwiches to be: 1 Tbsp. balls will be 8-10 cm (3-4") in diameter, 1 tsp. sized balls will give you 3-4 cm (1-2") cookies for mini sandwiches.
7. Bake for 8-12 minutes depending on their size and let rest for 5-10 minutes before removing from the baking sheet as they will harden once cooled. Don’t be tempted to touch them right out of the oven.
8. Store in a tightly sealed container with parchment paper between layers for up to a week.
*Brown rice syrup is incredibly sticky and the dough can be hard to work with. Pro tip: coat your spoon or measuring cup with coconut oil before dipping it into the syrup and scooping the dough.
To assemble the sandwiches:
1. Since the cookies are so fragile, it is easier to assemble them while the ice cream is soft, as pressing down on the cookie will cause it to crack.
2. If ice cream is fully frozen, let thaw to a soft serve consistency before assembling. 3. Scoop ice cream onto one cookie. Place another cookie on top and gently press to set.
4. Place sandwiches in the freezer to fully set for 4 hours.
5. When you’re ready to enjoy, let thaw for 5 minutes before eating.
• Sandwiches will keep in the freezer for about a month.
• The cookies will get a bit tacky and lose their crunch the longer they are stored, as they will absorb the moisture of the ice cream.
• Store in a sealed container so they do not absorb the smells of the freezer.
Nutrition facts per Ice Cream Sandwich Calories 287; protein 5g; fat 13 g, carbs 25 g.

BY BARB SHELDON-THOMAS MEGAN PETERSON
Whole food culinary instructor, chef and owner of Lemon & Ladle in Calgary, AB.
REALFOODGODDESS
When it comes time to make your treats, raw cacao is key to creating this can't-miss peppermint bark, full of potent antioxidants.
Serves 8
INGREDIENTS
• ½ cup raw, fermented cacao powder
• ½ cup raw cacao butter
• ¼ cup favorite sweetener in liquid form (raw honey, liquid coconut sugar, raw agave etc)*
• 1 tsp. vanilla powder or caviar from one to two vanilla beans
• 5 drops organic peppermint essential oil
• Pinch Himalayan rock salt
OPTIONAL
• Handful of finely chopped fresh mint leaves, raw coconut flakes, dried goji berries, raw hemp seeds, etc.
NOTE
The amount of sweetener you use depends on your own taste. Begin by pouring the sweetener in the blender as it mixes and taste as you go, until desired flavour is achieved.
In a double boiler, place raw cacao butter in a glass container. Melt over low heat, making sure no water comes in contact with the cacao. While the butter is melting, measure out ingredients.
Once butter has melted, place in highspeed blender on low. Add vanilla powder
and blend on low. Add salt and sweetener and continue to blend on low.
Once combined, add cacao powder. Finally, add peppermint oil, one drop at a time, tasting as you go to ensure the right amount of oil for your taste. Pour mixture into a flat pan and sprinkle bark with coconut, goji berries etc. Place in freezer for 10 minutes, until chocolate is firm and cracks easily. Store in fridge.


Enjoy A sweet morning treat
BY AMBER ROMANIUK JENNIFER BRAZIL
Certified Holistic Nutritional Consultant & founder of Amber Approved in Calgary, AB AMBERAFFIRMED AMBERAPPROVED
Serves 2
INGREDIENTS
• 2 crushed gluten-free graham crackers
• 1 tsp. dark chocolate chips (for the topping)
• ¼ cup dark chocolate chips
• ¼ cup goji berries
• ½ cup Dandies vegan mini marshmallows
• ¼ cup gluten-free oats
• ¼ cup unsweetened coconut yogurt (or Vanilla or Chocolate)
In a medium size jar add bottom layer of crushed graham crackers. Add layers of ¼ cup oats, ¼ cup dark chocolate chips, gluten-free oats, goji berries, marshmallows and coconut yogurt. Finish off by topping with 1 tsp. chocolate chips, marshmallows and leftover graham crackers. Mix and let sit for 10-15 minutes and enjoy! A great treat while camping. Makes 1 medium jar or 2 small jars.
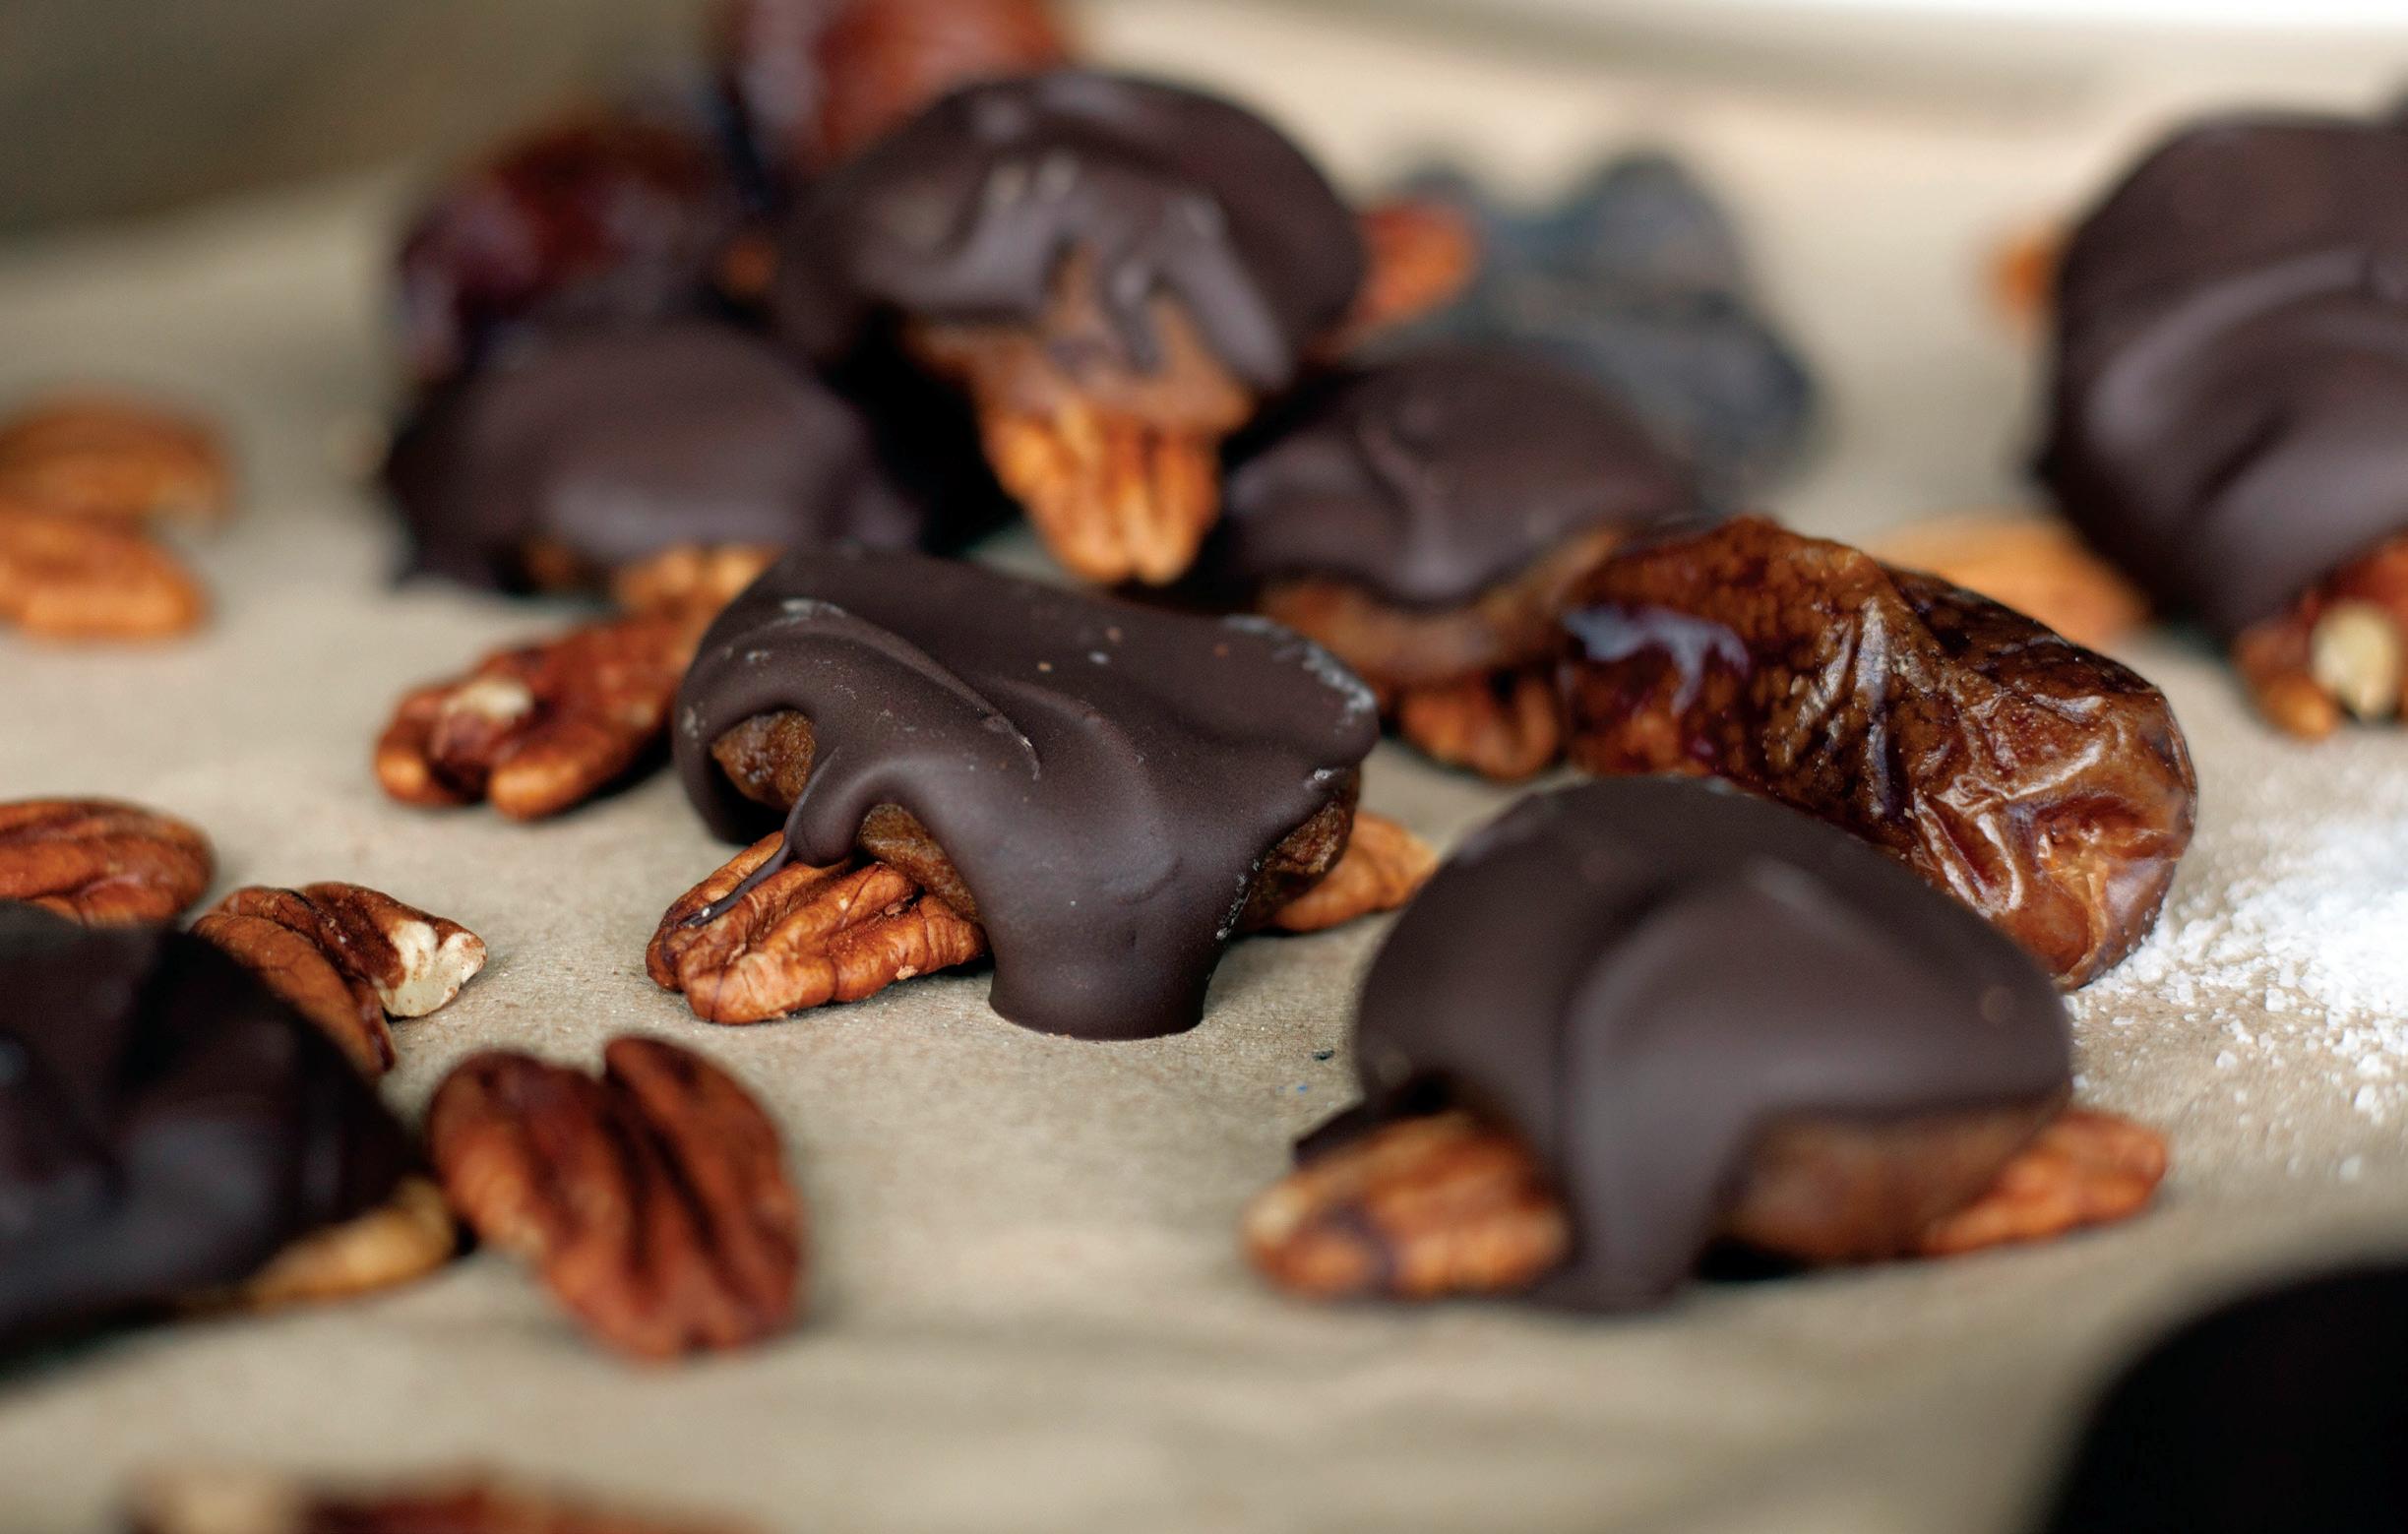
RECIPE & PHOTOGRAPHY BY CANDICE HUTCHINGS
Author of The Edgy Veg: Carnivore-approved Vegan Recipes & creator of the vegan blog The Edgy Veg in Toronto, ON EDGYVEG THEEDGYVEG
Pitted dates stuffed with almond butter taste just like the real thing, but without all the crazy dairy and sugar and makes the most amazing base for these vegan chocolate-covered 'turtles'.
Makes 12
• 1 ½ cups Medjool dates, pitted and tightly packed
• ½ tsp. Himalayan rock salt
• 2 cups roasted pecans, whole
• 2 cups roughly chopped chocolate or chocolate chips, melted
To make caramel: add dates to food processor, pulse until they form a loose and sticky dough. If dates are a bit dry and not quite combining, drizzle warm water one teaspoon at a time.
Pulse and scrape down the sides as needed. Once the dough is a ball, add in salt and mix.
Taste the caramel and add more salt if desired. Line a bowl with plastic wrap and add caramel dough, place in the freezer for 2-3 hours.
To make turtles: once chilled and hardened, roll caramel dough into 1.5-2 inch balls.Press three pecans into each ball of caramel and flatten. Place the turtle morsels on a cooling rack or parchment paper-lined baking sheet, place in the freezer for 30 minutes or until hardened.
To make coating: while you are waiting for the turtles to harden, melt chocolate over a double boiler. Remove flattened caramels from the freezer.
Using a spoon, carefully cover each caramel with chocolate; use the back of the spoon to spread the chocolate from the caramel onto the ‘legs’ a little bit, allowing them to peak out.
Carefully place the cooling rack or baking sheet in the freezer, cool until the chocolate shells are hardened.
Store turtles in the fridge or freezer until ready to serve. Serve chilled.
Nutrition facts per serving
Calories 306; protein 4 g; fat 18 g; carbs 35 g.
RECIPE & PHOTOGRAPHY BY
MELANIE M c DONALD
Cookbook author & creator of vegan food blog A Virtual Vegan living in Victoria, B.C. AVIRTUALVEGAN
Atwist on an old favourite with just a hint of piney, citrusy flavour. Delicate, delicious and sure to impress!
All varieties of pine needle are edible except Norfolk Island Pine, Ponderosa Pine and Yew trees. Avoid these varieties and be sure to stick to the traditional, short, cylindrical, pointy needles.
Makes 25 cookies
• ⅓ cup natural powdered sugar
• ½ cup coconut oil, hard and cold
• 1/4 - 1/2 tsp. salt (to taste)
• 1 Tbsp. pine needles (wash gently while attached to the twig, dry, then strip from the twig so only the loose needles remain)
• 1 cup + 2 Tbsp. all-purpose flour
• powdered sugar (for sprinkling)
Nutrition facts per cookie
Calories 68; protein 1 g; fat 4 g; carbs 6 g.
Preheat oven to 350°F and prep cookie sheet with parchment paper.
Combine flour and pine needles in a blender. Blend until pine needles are uniform pieces throughout the flour. Don't be alarmed by the really strong pine smell. Once cooked it becomes very subtle. Using a blender and flour is the easiest method for chopping the pine needles. Combine the powdered sugar, salt and coconut oil in a bowl. Use a fork to mash together very well until you can no longer see any powdered sugar and batter is light and fluffy. Pour in the flour and pine needle mixture.
Mix by hand until everything is combined. Do not over mix or use electric beaters. Too much mixing will affect the texture of the finished shortbread.
It should be slightly crumbly but hold together when squeezed in your hand. The drier you can get away with keeping the dough the better the texture of your shortbread; you should not need to add any liquid at all.
If the dough is starting to get a bit soft, stop and place in the fridge for 20 minutes before continuing to firm it up again.
Lightly dust a surface with flour and shape your dough into a ball. Roll out to about 3-4 mm thick, use a cookie cutter or mason jar lid/rim of a glass to cut into shapes and place gently onto a cookie sheet.
Bake for 10-12 minutes. They will turn golden around the edges and on the bottom when done but still slightly soft in the middle. Cool to firm on a cooling rack.