StepByShiplapCeiling_EDIT.qxp_Layout 1 11/28/20 4:06 PM Page 46
texture of vintage rustic barn wood. The boards are also consistently sized to eliminate any sorting or guesswork during installation.
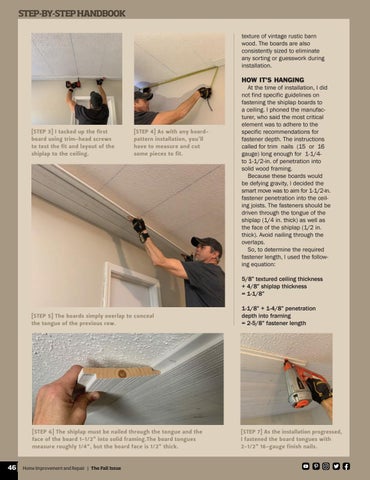
[STEP 3] I tacked up the first board using trim-head screws to test the fit and layout of the shiplap to the ceiling.
[STEP 4] As with any boardpattern installation, you’ll have to measure and cut some pieces to fit.
HOW IT’S HANGING At the time of installation, I did not find specific guidelines on fastening the shiplap boards to a ceiling. I phoned the manufacturer, who said the most critical element was to adhere to the specific recommendations for fastener depth. The instructions called for trim nails (15 or 16 gauge) long enough for 1-1/4to 1-1/2-in. of penetration into solid wood framing. Because these boards would be defying gravity, I decided the smart move was to aim for 1-1/2-in. fastener penetration into the ceiling joists. The fasteners should be driven through the tongue of the shiplap (1/4 in. thick) as well as the face of the shiplap (1/2 in. thick). Avoid nailing through the overlaps. So, to determine the required fastener length, I used the following equation: 5/8” textured ceiling thickness + 4/8” shiplap thickness = 1-1/8”
46
[STEP 5] The boards simply overlap to conceal the tongue of the previous row.
1-1/8” + 1-4/8” penetration depth into framing = 2-5/8” fastener length
[STEP 6] The shiplap must be nailed through the tongue and the face of the board 1-1/2” into solid framing.The board tongues measure roughly 1/4“, but the board face is 1/2” thick.
[STEP 7] As the installation progressed, I fastened the board tongues with 2-1/2” 16-gauge finish nails.
Home Improvement and Repair | The Fall Issue