1 minute read
Cleaning the after cooler
4 Maintenance
Cleaning the after cooler
If the performance of the engine decreases this can be caused by a dirty heat exchanger in the after cooler.
The heat exchanger must then be cleaned.

2 1
Caution
The heat exchanger element in the after cooler is very vulnerable!
55 Take out heat exchanger
• Stop the engine, close the sea cock and drain the system.
VD01202
1 2
VD00703
• Loosen the hose clamps for the raw water (IN and OUT) and take the hoses (2) off the hose connection points.
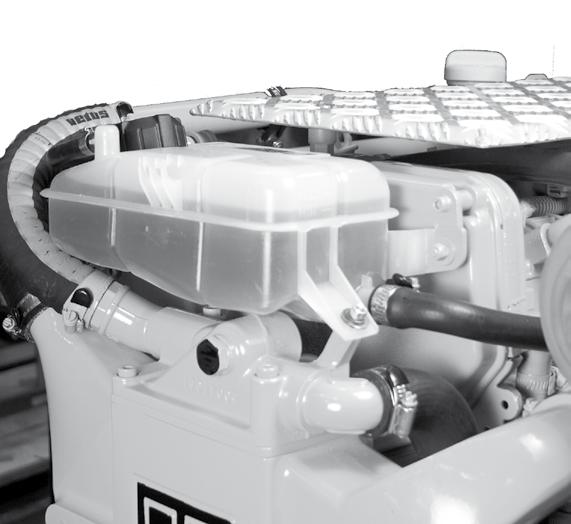
• Drain the coolant system and remove the hoses from the expansion tank.
• Remove the expansion tank (1). • Loosen the bolts (3) and remove the covers at the top and bottom of the after cooler. Be careful with the red silicone gaskets
• Take the heat exchanger out of the after cooler housing. Prevent damage from occurring to the fins and the O-ring.
4 Maintenance
Caution
Handle with care, avoid shoves during assembly – disassembly that could damage the tube bundle and the cooling fins.
VD00700
56 Cleaning the heat exchanger
• Clean the pipes of the heat exchanger; use a pipe brush and fresh water to remove any growth in the pipes.
• Then rinse the heat exchanger pipes with clean water.
• Clean the fins using petrol and compressed air, maximum pressure 2 bar (28 psi) to prevent damage to the fins. • Make sure there is no dirt on either of the covers to the after cooler housing.
Cleaning the after cooler
57 Replacing the heat exchanger
• Put the heat exchanger back in exactly the same position in the after cooler housing.
• Clean the seatings for the silicone gaskets and the O-rings.
• Put the covers back in place.
• Use compressed air (2 bar, 28 psi) to check the seals for tightness to prevent leaks.
• Reconnect the cooling water hoses and fit the expansion tank back in place.


