7 minute read
Controls


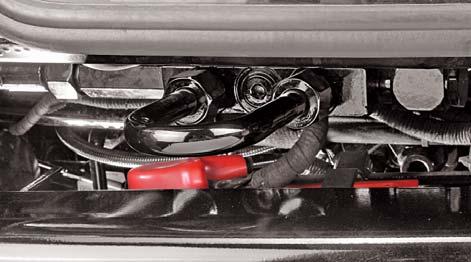
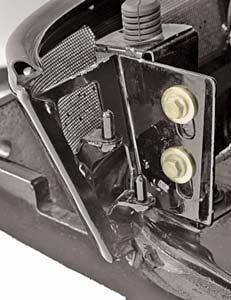
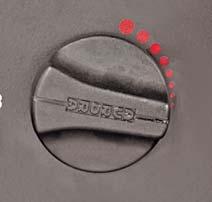
Loader
An easy option of connecting the loader valve is provided and the same can be connected as follows :
1.Remove the U-Tube (A) from elbows (B) and (C).
2.Connect pressure line of Loader valve to elbow (B).
3.Connect High Pressure Carry-Over line (HPCO) of Loader valve to elbow (C).
4.Remove the plug from adapter (D). Connect tank line of Loader valve to adapter (D).
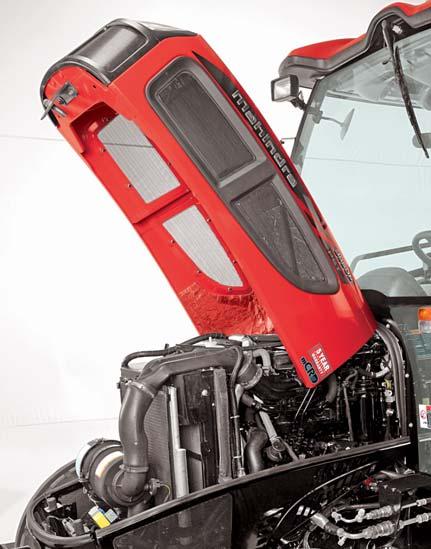
Opening the Hood
Hood is hinged at rear side, near the fire wall (at junction of bonnet and firewall) and opens towards operator as follows:
1.Pull the knob (E). The hood will unlock.
2.Lift the hood upwards by hand. A gas spring provided inside will assist in minimising the effort for lifting.


Closing the Hood
1.Ensure that side panels are properly locked.
2.Press the hood downwards till it gets locked.
Removing The Side Panels
1.Open the hood.
2.Lift the side panels gently out of locating front and rear pins.
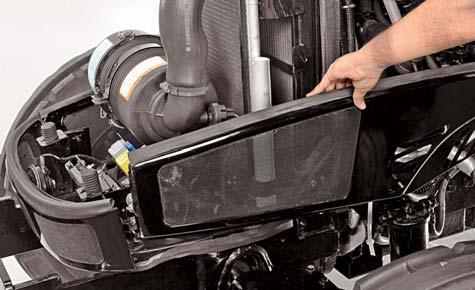
Assembling The Side Panels
Locate the side panels in front and rear locating pins.
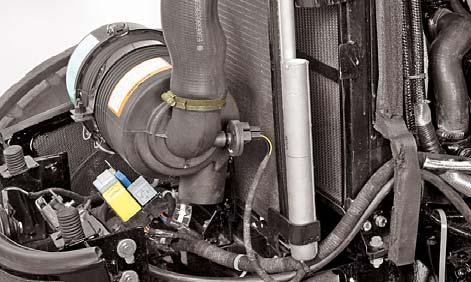
Air Cleaner Clog Indicator
Air Clog Indicator is fitted on air cleaner outlet to air intake manifold. This is a electronic Indicator set to 65 mili-bar vacuum in intake system. When the 65 mili bar vacuum is reached then it will give indication to instrument cluster unit. At this stage air cleaner has to be cleaned/Serviced. After servicing, Air clog indicator on Instrument cluster will get OFF.
Hydraulic Remote (Auxiliary Valve) Operation
The hydraulic remote is a single spool, double acting type hydraulic control valve. It is provided with an operating lever which is located towards the right side of the operator seat. The lever has three positions.
1.To direct the hydraulic oil flow to ‘A’ Port, move the lever in the forward direction (F).
2.To direct the hydraulic oil flow to ‘B’ Port, move the lever in the backward direction (B).
3.The lever will return to neutral position (N) when it is released at forward or backward position.


Keys
Your Mahindra Tractor comes with four keys (Two for cabin door lock and two for tractor). The key operates all locks in your tractor including the cabin doors and ignition. We advise you to keep one of these keys at a safe place for emergency use (but not in the tractor cabin).
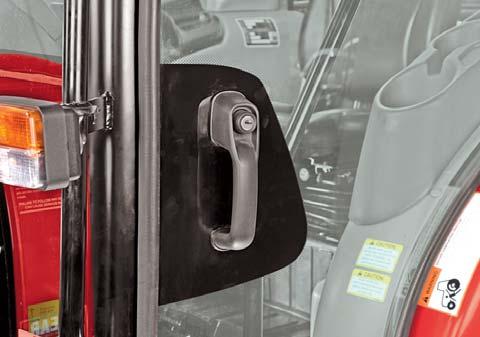
Opening the Doors from outside
Unlock the door using the keys provided. Press the inner knob and pull the grab handle lever.
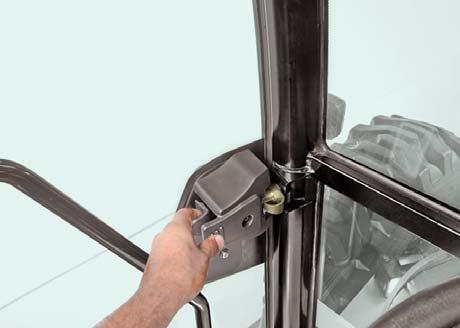
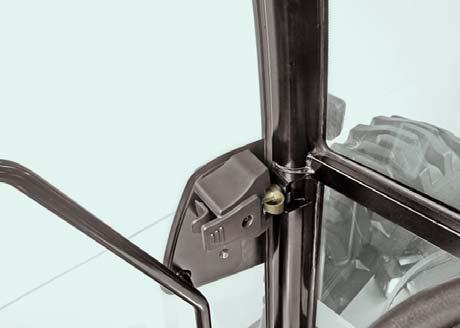
Do not leave the ignition key in your tractor. Never leave children and pet animals unattended in the tractor cabin.
Opening the Doors from inside
Press the door lock and push the door.
Rear View Mirrors
External Rear View Mirrors (A)
For adjusting the mirror, push it or slightly twist it in the desired direction until you can clearly see the road behind.
Mirror folding
Mirror can be folded flat, where it is needed, against the vehicle when pushed towards it.
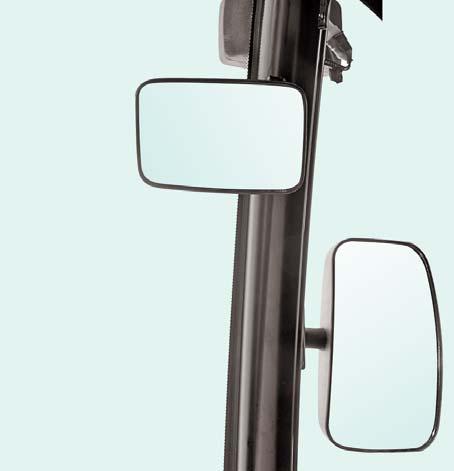
Internal Rear View Mirror (B)
Adjust the internal rear view mirror, in the day position, by slightly turning or twisting it until you see the road behind clearly through the rear glass.
Rear Window
Rear window (A) provides a large exit path if cab door is blocked in an emergency situation.
Rear window can be opened from inside ONLY. To open rear window, turn handle (B) upward and slowly push the window away from the operator.
Objects in the mirror look smaller and appear further away than they actually are. Do not overestimate the distance of the objects seen in the mirror.
Do not adjust the mirror while the vehicle is moving. If doing so may cause the driver to mishandle the vehicle and may result in loss of vehicle control.
Do not drive the vehicle with the outside rear view mirrors folded backward.
Always adjust the outside mirror to the driver's convenient position before driving the vehicle.

Windshield Wiper / Washer System Controls
These switches are used to clean the front and rear windows. These switches are located inside the cabin top right side viewing from operator’s seat. These switches functions can be activated with the ignition key at the ignition position.
Windshield Wiper and Washer System has three Switches:
A.Front Windshield Wiper Switch
B.Washer Switch for Front Windshield
C.Rear Windshield Wiper/Washer Switch (Optional)
A.Front Windshield Wiper Switch
Press this switch to operate the front windshield wiper. This switch has three positions. i.e. Off, Slow and High.
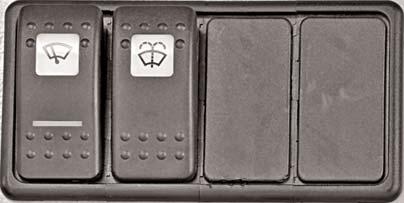
B.Washer Switch for Front Windshield
Press this switch to sprinkle water for the front windshield.
C.Rear Windshield Wiper/Washer Switch (Optional)
This Switch has three Positions :
Position 1 :Off
Position 2 :Press switch to operate the rear window wiper.
Position 3 :Further pressing the switch to sprinkle water for rear windshield.
Do not operate the wipers when the windshield is dry. It may scratch the glass. In freezing or very hot conditions, ensure that the blades are not frozen or stuck to the glass. In winter, remove any snow or ice from around the arms and blades, including the wiped area of the glass.
Adding Suitable Anti-freeze Solution to Water in Reservoir
Using windshield washer in freezing temperatures could be dangerous. The washer fluid could freeze on the windshield and may block your vision which will result in an accident.
Add a suitable anti-freeze solution to water in reservoir (A) from fill neck (B) to prevent damage to the system if temperature drops below freezing point.
Washer switch for front and rear wiper are spring back type. Do not press the switch ON for more than 30 seconds.
Heater and Air Conditioning Controls
Heater and Air Conditioning controls located on RH side of B post and controls are as follows:

A.Blower Fan Speed Control Regulator
B.Heater Regulator
C.Cooling Regulator
D.AC ON/OFF Switch
E.Fresh / Recirculation Air Selector Switch
A.Blower Speed Control Regulator
Blower speed can be regulated by turning the blower speed control regulator (A) as per the positions shown:
0 Off
1 Slow
2 Medium
3 Fast
4 Very Fast
B.Heater Regulator
Heating is variable by means of the heater regulator (B). For Heating ON, turn regulator anti clock wise from horizontal position to vertical position.
Always keep the AC switch in OFF position while operating heater regulator switch. In heating mode, taking air flow directly on face is not safe and operator may feel suffocated. Fig. shows heater OFF position.
C.Cooling Regulator
Regulate the cooling by means of the cooling regulator (C). The cooling is increased by turning the regulator clockwise. Fig. shows cooling OFF position.
Always keep the heater regulator in OFF position while operating cooling regulator or AC ON condition.
D.AC ON/OFF Switch
This has two positions: a. ON – When pressed ON compressor operates. b. OFF – Compressor stop when pressed OFF.
E.Fresh / Recirculation Air Selector Switch
This switch is used to select fresh air from outside or recirculating within the cabin.
To change the air intake mode, (Fresh or Recirculation mode) press the switch.
c.Fresh Air Mode d.Recirculation Air Mode
Fresh Air Mode
With the FRESH air mode selected, the air enters the vehicle through the filter from outside and is cooled / heated according to the function selected. Fresh air mode is preferable when HVAC is in heating mode.
Recirculation Air Mode
With the RECIRCULATION air mode selected, the air from within the compartment will be drawn through the filter and is cooled / heated according to the function selected. Also some amount of outside fresh air will enter the system to avoid suffocation of operator.
CAB Worklight Switches
The worklights can be switched ON and OFF using these cabin worklight switches as shown here. These switches located inside the cabin rear upholstery, right side viewing from operator’s seat. These switches functions can be activated with the ignition key at the ignition position.
A.Switch Front Roof Worklights
B.Switch Rear Roof Worklights
A.Front Roof Worklights Switch
It (A) operates the front roof working lamps when pressed.
B.Rear Roof Worklights Switch
It (B) operates the rear roof working lamps when pressed.
Air conditioning system will be activated when blower switch, cooling regulator switch and AC ON / OFF switch are in ON position.
B.Cabin Lamp / Dome Lamp
This light is fitted inside cabin LH side of B post. This light has three positions are as follows:
1. OFF : Switch to this position to turn the light OFF.
2. Centre : In this position light will glow when LH side door is opened. This light goes OFF when LH door is closed.
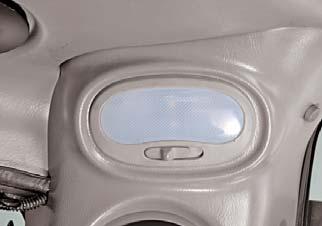
3. ON : Switch to this position to keep the light ON always.
Power Socket Unit
This Tractor is equipped with power socket unit, located at the left console. It consists of:

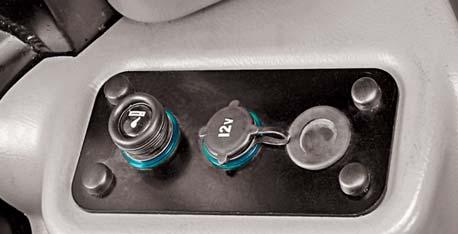
A.Cigarette Lighter Socket
B.3-Terminal Power Socket
C.Optional Power Socket
Cigarette Lighter
Press the lighter (A) in to heat it up. When the element reaches the required temperature, the element will partially eject and disconnect the power supply to the element. The lighter can then be withdrawn immediately for use. These function will directly operate on Battery even if ignition key in OFF condition.
3-Terminal Power Socket
3-Terminal Power Outlet Socket (B) is used to connect electrical equipment such as mobile charger, display units etc. These function will directly operate on Battery even if ignition key in OFF condition.
Optional Power Socket
An optional power socket port (C) is provided which can be used by operator as per the requirements.
Maximum allowable load upto 120 Wattage for terminal and power socket.
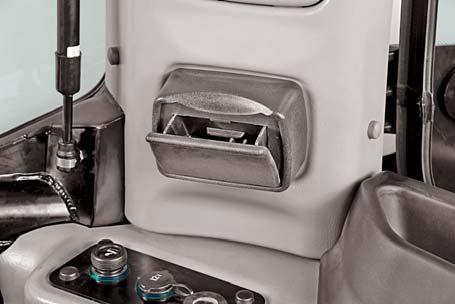
Ashtray
Ashtray is located inside the cabin LH side of B post. Ashtray is provided for disposing ash and cigarette butts.
To use, open the flap of ashtray.
To empty, press down and take it out.
To fit it back, just press the ashtray gently on its location. Keep the ashtray clean by emptying them regularly.
Can Holder cum Glove Box
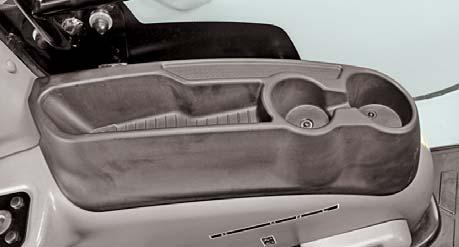
A Can holder is located on LH side of fender. A small utility box provide on can holder at rear side.
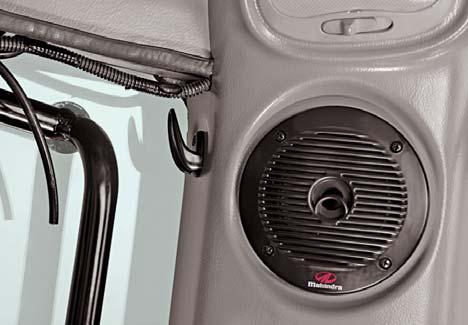
Coat Hook

A Coat Hook is located on LH B post top rear side.
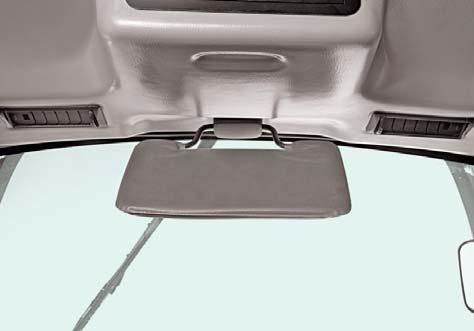
Sun-visor
A sun-visor is located at front on inner roof. It can be adjusted as per the need and convenience of operator.
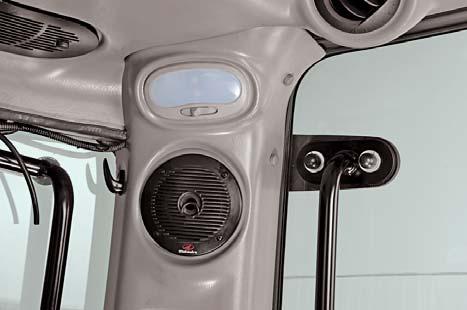
Audio System
Audio system installation provision given for cab tractors. Dealer installed audio system is available for your tractors with cab. See your Mahindra dealer for more information and installation of an aftermarket audio system.