3 minute read
FUEL SYSTEM


Service Specifications
Fuel Filter Cup Service Interval……………………………………………………… Every 10 Hours Fuel Filter Element Change……………………… Replace when loss of power or misfiring occurs
This type of filter cannot be cleaned. Change the filter when the engine is misfiring or a loss of power is evident. It is necessary to remove the air from the system after each replacement. Only a filter recommended by your Dealer should be used to be sure that it is both effective and capable of withstanding the required suction or pressure without damage to the filter element. Fill the fuel tank at the end of each day to reduce condensation.
NOTE: Do not fill the fuel tank to its full capacity. Space is required for vapor expansion in the event of a temperature change. A tank filled to capacity may overflow if exposed to a rise in temperature or direct sunlight.
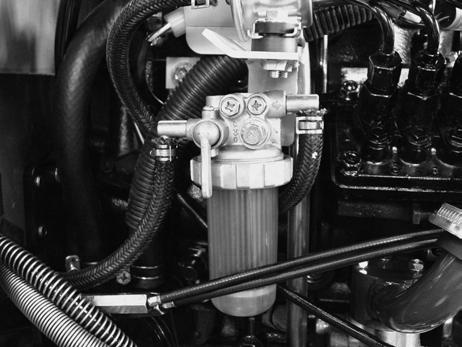
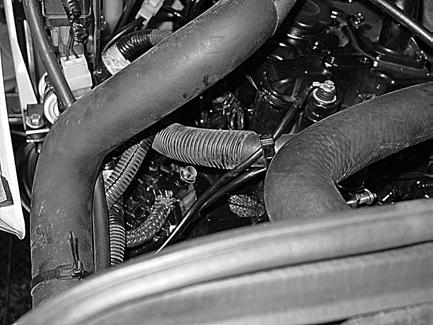
Water Removal from the Filter Cup
Before starting each day’s work, check for water or sediment in the filter cup. If water or sediment is in the cup, close the fuel shut-off valve, remove filter cup, clean and reinstall.
NOTE: Be careful not to allow dirt, water and other foreign materials to get into the filter when cleaning the cup.
Diesel Fuel Specifications
Use a good grade of Number Two Diesel Fuel in your Diesel Engine. Do not use other types of fuel. The use of other fuels will result in loss of engine power and high fuel consumption.
NOTE: When the temperature is very cold, the use of a mixture of Number one and number Two Diesel Fuel is permitted for a short period of time. See your fuel Dealer for winter fuel requirements in your area.
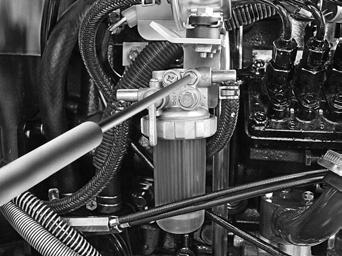
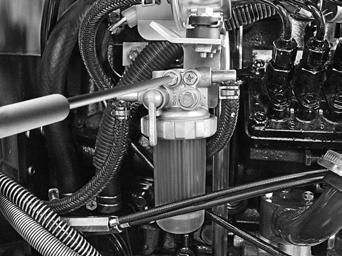
Fuel Filter Element Replacement
To replace the filter element, use following procedure:
Close the fuel shut-off valve.
Install new filter element. Assemble filter cup and retaining nut to filter body.
NOTE: Be sure O-ring is in place on the filter body and filter cup.
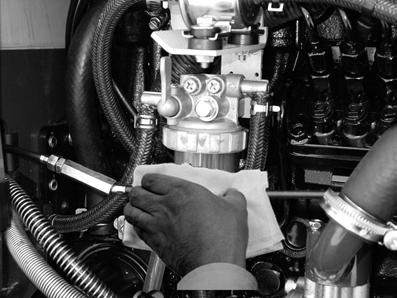
Clean the outside of the filter body and cup to prevent dirt or foreign materials from entering into the system.
Open the fuel shut-off valve and vent the fuel system. See Fuel System Air removal in this manual.
STEP 6
Clean off the fuel from the engine. Start the engine to check for fuel leaks around the filter, lines and fittings.

Loosen the filter cup-retaining nut. Remove filter cup. Remove old filter element and clean inside of filter cup.
NOTE: If the engine does not have power with a full load after you have done the filter service and removed the air from the system, see your Dealer to find and correct the cause.
Fuel System Air Removal
AIR MUST BE REMOVED FROM THE FUEL SYSTEM. AIR CAN ENTER THE FUEL SYSTEM WHEN:
1. The engine stopped caused from lack of fuel.
2. The fuel filter has been replaced or the filter cup has been cleaned.
3. Any connections between the injection pump and fuel tank have been loosened or disconnected for any reason.
4. The tractor has not been operated for an extended for an extended period of time.
5. The fuel pump has not operated correctly.
NOTE: If the tractor dose not have fuel, it is possible to put fuel in the tank and start the engine without doing the air removal procedure, but a small amount of air can be in the filters. Air in the system will cause loss of power and stall the engine when a load is applied.
To remove air from the fuel system, turn off the engine and use the following procedures:
Loosen the No.2 air vent screw until the fuel flowing is free of air bubbles. Tighten the No.2 air vent screw.
Loosen the No.1 air vent screw on the fuel filter until the fuel flowing from the fuel filter is free of air bubbles. Tighten the No.1 air vent screw.
Loosen the air vent screw on the injection pump and turn the key switch "ON" position until the fuel flowing from the pump is free of air bubbles. Tighten the air vent screw.
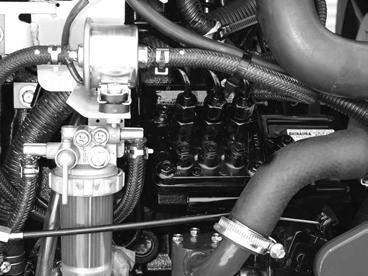
Fuel Injection Pump and Nozzle Check
NOTE:Figure of the engine Unit
The fuel injection pump and nozzles are precision units and must be serviced only by your dealer.
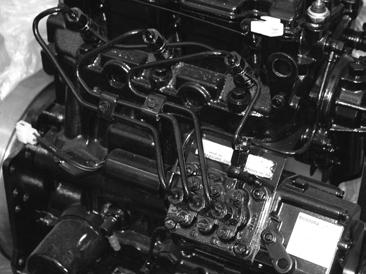
The injection pump is correctly set and sealed at the factory and should not require an adjustment. Whenever adjustment or repairs are necessary, see your dealer. Do not tamper with any of the pump units.
Hydraulic oil or diesel fuel leaking under pressure can penetrate the skin and cause injection or other injury.
To Prevent Personal Injury: Relieve all pressure, before disconnecting fluid lines. Before applying pressure, make sure all connections are tight and components are in good condition. Never use your hand to check for suspected leaks under pressure. Use a piece of cardboard or wood for this purpose. If injured by leaking fluid, see your doctor immediately.