1 minute read
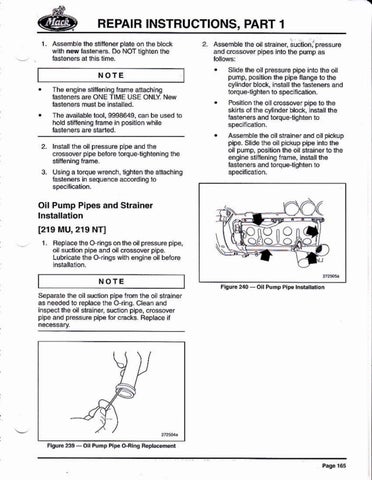
REPAIR INSTBUCTIONS, PART 2


4. Fém@lhescrews secur¡ng lhe unit ¡hjecior ha.nss lié bar lo the cylinder head. Slide lhe lié bar outward to prwldé suficient deaEn@ lor lhe lalve steh height m@surcmenr qauge ro be insialled orer rhe Él@ springs. Do nol d sconnecl lhe harness únnecio6 lrom ttu un¡t iniéclors o¡ cul the lie st€ps lhat secu€ the hanó$ b
6. Plae lhe valve slem helqk rigadlrcmáff oause (loor No. 85112461) der the vatue spring ol the vatué lo bé measu@d_ Make sue lhe lool is lully seabd on a clean
Mak€ sur6 lhéE aB no parlicles ol a¡y k¡nd bébveen the bottom of lhé valvé slem height measuremenl gauge and the eyllndei head sul@8. Parlicl$ belween lhe qauge and lhe cylinder hed súlacé r$olls in an i¡mnlé
5. Set lhe doplh m cromálér b A.l0 mm (0,319 lnch) ro meas!rc slem pfot¡usron-
FiqJE4_seD4üjMi@mder