8 minute read
General Information


• Before mounting or operating the outboard motor, completely read manual and labels. Reading them will give you a good understanding of the motor and its operation.
• Before operating the boat, read any owner's or operator's manuals supplied with it and all labels. Be sure you understand all items from the boat manual as well as this engine manual before operating.
• Do not over power the boat with this outboard motor. Overpowering the boat could result in damage to the boat and injury to all occupants. The rated power of the outboard should be equal to or less than the rated horsepower capacity of the boat. If the rated horsepower capacity of the boat is unknown, consult the dealer or boat manufacturer.
• Do not attempt to modify the outboard. Modifications could make the motor unsafe to use and will void the warranty. Incorrect propeller selection and incorrect use may not only cause engine damage, but also adversely affect fuel consumption. Consult your dealer for correct use.
• Never operate after drinking alcohol or taking drugs. About 50% of all boating fatalities involve intoxication.
• Have an approved personal flotation device (PFD) on board for every occupant. It is a good idea to wear a PFD whenever boating. Children and non-swimmers should always wear PFD's, and every one should wear PFD's when there are potentially hazardous boating conditions.
• Propane is highly flammable, and its vapors are flammable and explosive. Handle and store propane carefully. Make sure there are no fumes or leaking fuel before starting the engine.
• This product emits exhaust gases which contain carbon monoxide, a colorless, odorless gas which may cause brain damage or death when inhaled. Symptoms include nausea, dizziness, and drowsiness. Keep cockpit and cabin areas well ventilated. Avoid blocking exhaust outlets.
• Check throttle, shift, and steering for proper operation before starting the engine.
• Attach the engine stop switch lanyard cord to a secure place on your clothing, or your arm or leg while operating. If you accidentally leave the helm, the cord will pull from the switch, stopping the engine.
• Know the marine laws and regulations where you will be boating and obey them.
• Know about the weather forecast. Check weather before boating. Avoid boating in hazardous weather.
• Tell some one where you are going: leave a Float Plan with a responsible person. Be sure to cancel the Float Plan when you return.
• Be aware, alert, and use good judgment when boating. Know your abilities, and be familiar with how your boat handles under the different boating conditions you may encounter. Operate within your limits, and the limits of your boat. Always operate at safe speeds, and watch carefully for obstacles and other traffic.
• Always watch carefully for swimmers.
• Stay away from swimming areas.
• When a swimmer is in the water near you shift into neutral and shut off the engine.
• Do not illegally discard empty containers used to replace or replenish oil. For the correct processing of empty containers ,consult the dealer where you purchased the oil.
• When replacing oils used to lubricate the product (engine or gear oil), be sure to wipe away any spilled oil. Never pour oil without using a funnel or similar device. If necessary, verify the necessary replacement procedure with the dealer.
• Never illegally discard (dump) disposable propane tanks. Consult your local city recycling center on discarding empty propane tanks.
GENERAL INFORMATION
SERIAL NUMBER EMISSIONS LABEL WARNING LABEL
The outboard motor serial number is stamped on the label attached to the clamp bracket. Record your outboard motor serial number, you will need it when ordering spare parts from your LEHR dealer or for reference if your outboard motor is stolen.
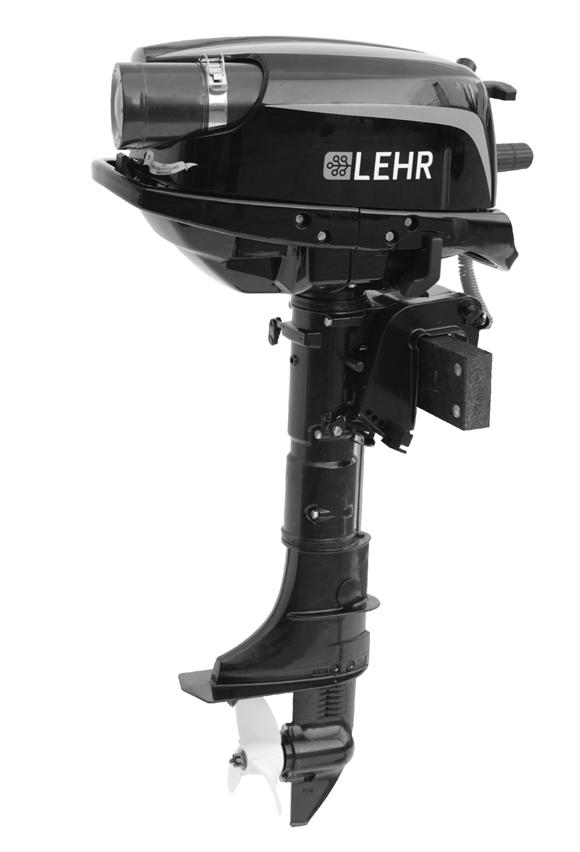
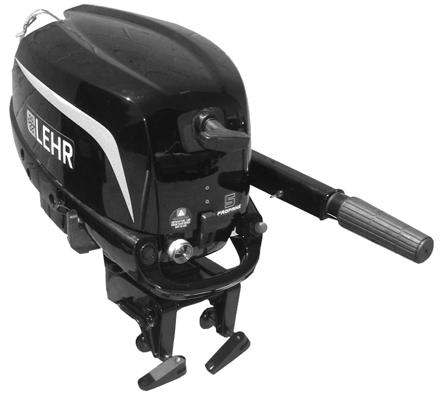
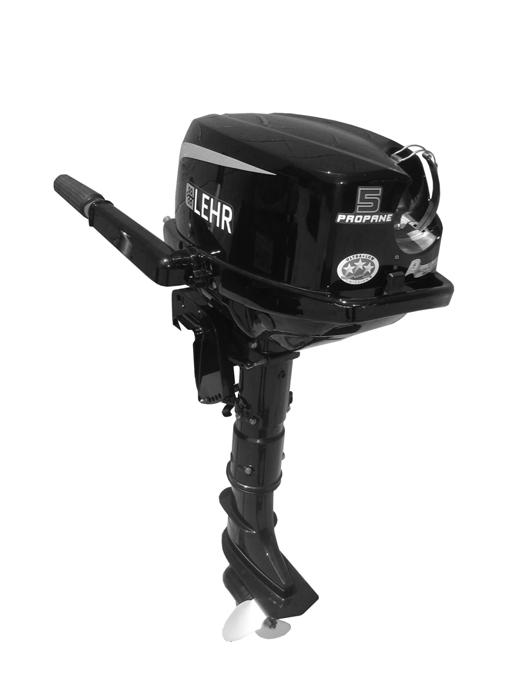
BASIC COMPONENTS
NOTE: May not be exactly as shown, also may not be included as standard equipment on all models.
11 1 19
12
9
8
7 4
5
6 2
3
19
15
17 13
10
14
20
16
1. TOP COVER 2. TOP COVER LOCK LEVER 3. CARRYING HANDLE 4. STEERING FRICTION SCREW 5. ANTI-CAVITATION PLATE 6. PROPELLER 7. COOLING WATER INLET 8. TRIM ROD 9. CLAMP BRACKET 10. THROTTLE FRICTION ADJUSTER 11. THROTTLE LEVER / TILLER HANDLE 12. BOTTLE BRACKET CLAMP 13. PULL START HANDLE 14. ENGINE SHUT-OFF SWITCH 15. REMOTE PROPANE CONNECTOR 16. CLAMP SCREWS 17. ROPE ATTACHMENT 18. GEAR SHIFT LEVER 19. RUBBER TANK PLUG 20. BRASS CONNECTOR PLUG
GENERAL INFORMATION
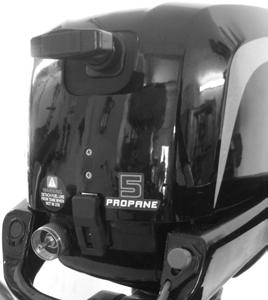
FUEL TANK
Use a standard 16.4 oz. (1 lb.) propane canister connected to the rear propane tank position or any larger DOT approved propane tank connected to the remote propane connector with an approved high pressure propane hose. Do not use a hose assembly that includes a pressure regulator.
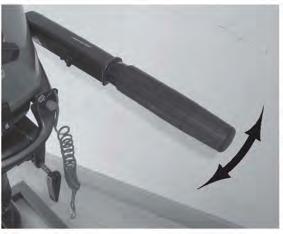
TILLER HANDLE
16.4 OUNCE 1 LB. / 465 GRAMS
REMOTE PROPANE TANK
To change direction, move the tiller handle to the left or right as necessary.
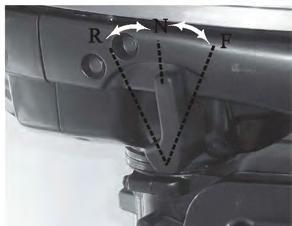
GEAR SHIFT LEVER
Your outboard has two gear shift positions to provide operation: Forward(F), Neutral(N), and Reverse(R). Reduce throttle speed to idle speed. Always shift outboard into gear with a quick motion.
THROTTLE GRIP
The throttle grip is on the tiller handle. Turn the grip counterclockwise to increase speed and clockwise to decrease speed.
THROTTLE GRIP
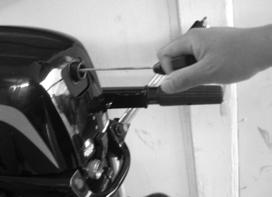
THROTTLE FRICTION ADJUSTER
A friction device provides adjustable resistance to movement of the throttle grip or the remote control lever, and can be set according to operator preference. To increase resistance, turn the adjuster clockwise. To decrease resistance, turn the adjuster counterclockwise.
THROTTLE FRICTION ADJUSTER

GENERAL INFORMATION
WARNING: Do not overtighten the throttle friction adjuster. If there is too much resistance, it could be difficult to move throttle lever or grip, which could result in an accident. When constant speed is desired, tighten the adjuster just enough to maintain the desired throttle setting.
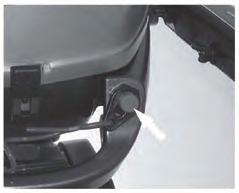
ENGINE STOP SWITCH
The stop switch lock must be attached to the engine stop switch for the engine to run. The hook should be attached to a secure place on the operators clothing, or arm or leg. Should the operator fall over board or leave the helm, the hook will pull out the stop switch lock, stopping ignition to the engine. This will prevent the boat from running away under power.
WARNING: Attach the engine stop switch hook to a secure place on your clothing, or your arm or leg while operating. Do not attach the hook to clothing that could tear loose. Do not route the lanyard where it could be come entangled, preventing it from functioning. Avoid accidentally pulling the lanyard during normal operation. Loss of engine power means the loss of most steering control. Also, without engine power, the boat could slow rapidly. This could cause people and objects in the boat to be thrown forward.
NOTE: The engine cannot be started with the stop switch lock removed.
ENGINE STOP SWITCH LANYARD ENGINE STOP SWITCH
ENGINE STOP SWITCH LOCK
HOOK
ENGINE STOP BUTTON
To stop the engine, push and hold this button or pull the lanyard out from the switch.
MANUAL STARTER HANDLE
ENGINE STOP BUTTON
To start the engine, first gently pull the handle out until resistance is felt. From that position, then pull the handle straight out quickly to crank the engine.
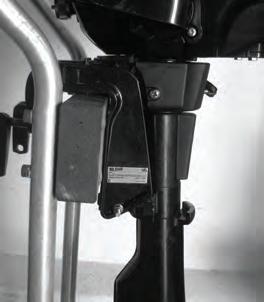
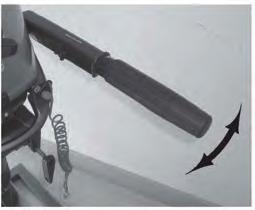
STEERING FRICTION ADJUSTER
A friction device provides adjustable resistance to the steering mechanism, and can be set according to operator preference. An adjusting screw or bolt is located on the swivel bracket.
To increase resistance, turn the adjuster clockwise. To decrease resistance, turn the adjuster counterclockwise.
WARNING: Do not overtighten the friction adjuster. If there is too much resistance, it could be difficult to steer, which could result in an accident.
GENERAL INFORMATION
TRIM ROD
The position of the trim rod determines the angle of the outboard motor in relation to the transom.
TILT LOCK MECHANISM
The tilt support lock keeps the outboard motor in the tilted up position. If the outboard engine needs to be tilted up out of the water or to get the propeller higher than the bottom of the boat, push down on the tiller handle while lifting up in the rear carrying handle. Once the engine is all the way up, the tilt lock mechanism will engage and lock the engine in the up position. To release the lock to lower the engine pull up on the rear carrying handle to lift the engine up as far as it will go. While the engine is all the way up, lift up on the lock lever to disengage it while lowering the engine.
WARNING: Do not use the tilt support bar when trailering the boat. The outboard motor could shake loose from the tilt support and fall. If the motor cannot be trailered in the normal running position, use an additional support device to secure it in the tilt position.
TILT LOCK LEVER
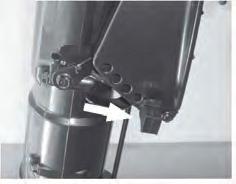
TOP COVER LOCK LEVER
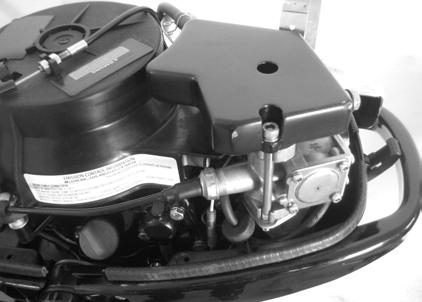
To remove the engine top cover, remove the 1 lb. propane tank or rubber plug. Pull the lock levers upwards from the bottom and unhook from the top cover. Then lift the cover. When installing the cover, check to be sure it fits properly on the rubber seal. Then lock the cover by moving the levers downward.

LOCK LEVER
CARRYING HANDLES
Carrying handles are provided on the front and rear of the outboard motor. The handles enable you to carry the outboard motor easily with two hands.
FRONT CARRYING HANDLE
REAR CARRYING HANDLE