1 minute read
Maintenance – Annually / every 250 operating hours

from Dynapac DRP45DX Reversible plate Operating & Maintenance Instruction Manual DL820706 - PDF DOWNLOAD

8.9.8 Replacing the starter rope
Protective equipment: n Working clothes n Protective gloves
1. Park the machine in secured condition ÄChapter 6.4 ‘Parking the machine in secured condition’ on page 59
2. Allow the engine to cool down.
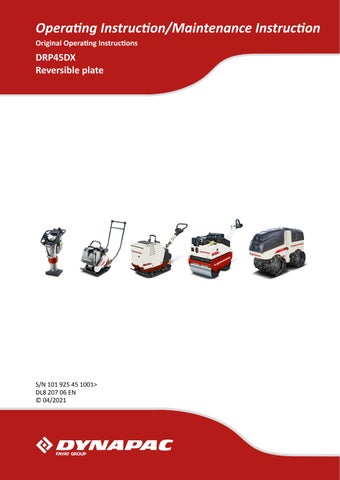
3. Unscrew the fastening screws (1) and disassemble the recoil starter (2).
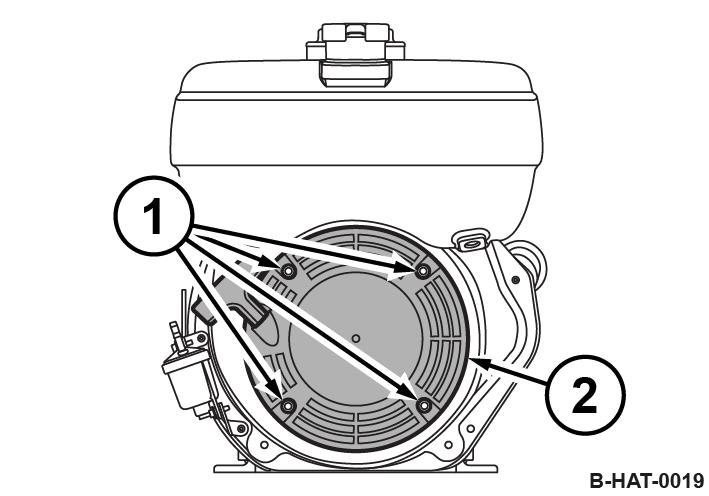
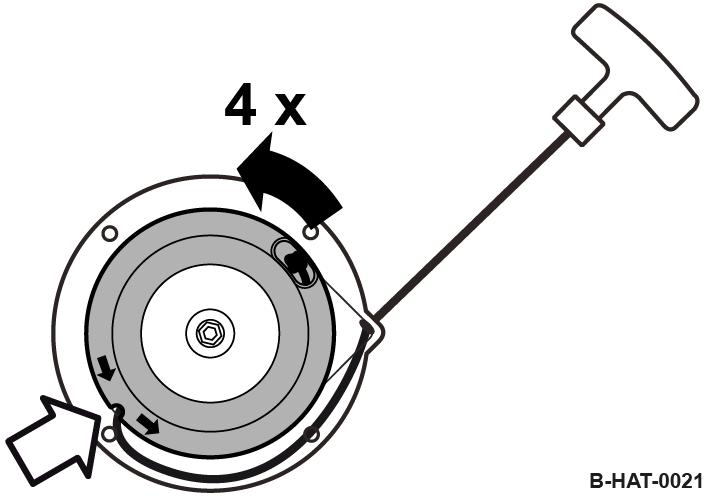
4. Pull the starter rope with the starter handle (1) out completely.
5. Secure the coil (2) against winding up.

6. Loosen the knot (3) in the starter rope and remove the old starter rope.
7. Carefully turn the coil back, until the recoil spring is relieved.
8. Thread in the new starter rope and fix it with knots on both ends .
A = 15 mm (0.6 in)
9. Pre-tension the coil by approx. 4 rotations in direction of arrow.
Thereby place the starter rope into the recess in the coil .
10.
CAUTION!
Danger of injury caused by the starter handle hitting against your body! –Do not let the starter handle hit back.
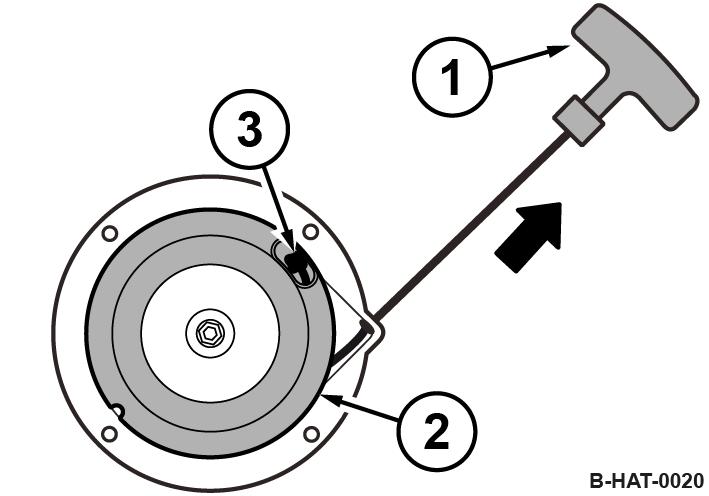
Slowly guide the starter handle back to initial position .
11. Pull the starter handle to check the function and light movement of the recoil starter.
12. Assemble the recoil starter (2) with fastening screws (1).
Maintenance – Annually / every 250 operating hours
8.9.9 Lubricating the machine
Protective equipment: n Working clothes n Safety shoes n Protective gloves
1. Park the machine safely ÄChapter 6.4 ‘Parking the machine in secured condition’ on page 59
2. Unscrew the four fastening screws (1) and remove the cover (2).
3.
NOTICE!
Inadequate lubrication will cause damage to components!
–Use only grease of the permitted specification. (Spare parts number of lubrication grease: 924 109 63)
Grease the mechanical parts between the fork head (1), lever (2) and bolt (3).
4. Fasten the cover (2) with four fastening screws, tightening torque: 10 Nm (7.5 ft lbf).
8.10
Maintenance – Every 2 years/every 500 operating hours
Every 2 years/every 500 operating hours
8.10.1 Changing the hydraulic oil
Protective equipment: n Working clothes n Safety shoes n Protective gloves
1. Park the machine safely ÄChapter 6.4 ‘Parking the machine in secured condition’ on page 59
2. Adjust the steering rod using the height adjustment so that the area with the filler screw is horizontal.
3. Unscrew the filler screw.
4. Press the handle forward against the stop and secure it in this position using suitable means.
5. Unscrew the bleeding screw and collect any oil running out.
6. Screw in the bleeding screw.