3 minute read
OPERATING INSTRUCTIONS 6015 / RH40E Inspection and servicing


Replacing a defective Xenon-lamp
Read and observe the: „Xenon floodlight projector, replacing the lamp, Safety instructions“.
Switch off the projector, shut off the engine and cut out the battery main switch.
Wait until the housing of the floodlight projector has cooled down.
Withdraw the power supply connector from the projector.
Remove four screws (1, Fig. 3-42) and withdraw the reflector (2) from the projector housing.
Withdraw connector (Fig. 3-43) from Xenon lamp socket
Unscrew Xenon lamp holding clamp (Fig. 3-44).
Remove the defective Xenon lamp and replace by a new one. Do not touch the glass bulb of the lamp.
Reinstall the new lamp. Screw lamp holding clamp back in place.
Plug the power supply connector onto the lamp.
Re-assemble the housing.
Lighting systems in LED technonogy, instructions
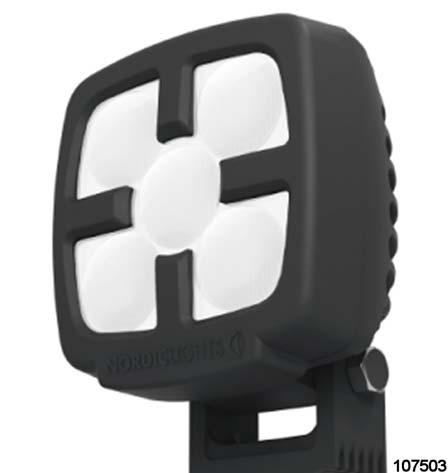
The lights of the maintenance lighting system (Fig. 3-45) as well as the working floodlights (Fig. 3-46) are equipped with lamps in LED technology (lightemitting diodes).
High-performance LEDs ensure the emission of light with high luminance. If the light is allowed to shine directly into the eyes from a short distance and over prolonged periods, there is a risk of injury to the retina.
Do not look for a prolonged period into the light cones of the LEDs.
Adjust the lights in such way that they do not shine directly into the eyes and that you are not blinded by the glare.
The lights become hot in operation. The heat is dispersed via the ribbed metal housing.
For this reason, the housings must not be covered up and cleaning rags or similar things placed over them.
The high-performance LEDs in these lights have a very long service life and can therefore not be replaced. If one or more of these LEDs fail, the light can remain in service if the remaining luminance is still sufficient.
Battery Warning!
Battery Posts, terminals and related accessories contain lead and lead compounds, chemicals known to cause cancer and reproductive harm. Wash hands after handling.
Checking the battery fluid level
(Not applicable in case of maintenance-free batteries)
Unscrew caps (Fig. 3-47:).
If checking inserts are provided, the battery acid must reach up to their bottom.
If no checking inserts are provided, insert a clean wooden rod into the battery until it contacts the upper edge of the cell plates. The rod must be moistened over at least 10 mm / 0.4 in.
If the fluid level is too low, top up with distilled water only
Checking battery charge
The acid temperature must be 20 ° C / 68° F.
Unscrew caps of the battery
Measure the acid density of the battery using a commercial acid tester
The acid density measured is in direct correlation with the battery charge.
Acid density
Charging batteries inside the machine, safety instructions
Explosion hazard.
Battery gases are highly flammable. Keep any potential ignition sources, such as unshielded lights or burning cigarettes, away from the batteries.
Risk of injury from acid splashes and battery gases.
Wear safety goggles or a face protection shield and acid proof protective gloves.
Do not lean over the batteries while charging.
The batteries of the machine can also be charged while installed in the machine.
For this purpose, the battery compartment (Fig. 3-48:) is equipped with a socket outlet for a charging cable.
Risk of fire
Do not use the socket outlet (Fig. 3-48:) for jump-starting of the engines.
The connectors and the cables are not designed for the high currents flowing during the starting phase.
Check before charging why the batteries are discharged and replace the batteries if they are defective.
Check the connecting cables of the battery set for damage, corrosion and tight fit.
Never charge the batteries while they are frozen. Warm them up beforehand and check for proper functioning.
Do not charge the batteries when they are warmer than "warm to the touch" (45 °C / 113 °F).
Use only approved chargers for 24 volts DC. Read and observe the instructions for the charger.
The charging cable must have a conductor crosssection of at least 70 mm2
Charging the batteries
Cut out the battery main switch.
For battery ventilation unscrew the cover of the battery cabinet.
Connect the charging cable to the socket outlet (Fig. 3-48:).
Switch on the charger and watch the charging process.
Stop the charging process:
if the batteries are getting hot,
if acid escapes from the batteries,
if the charge current is still insignificantly low even after 15 minutes of charging.
Before starting a new charging cycle, check the batteries and the connecting cable thoroughly and replace any damaged components. It may be necessary to remove the batteries and to charge them one by one.
When the batteries are full:
Shut off the charger first before withdrawing the charging cable from the socket outlet.
Read the instructions of the charger in order to know when the charging cycle has ended.
The batteries are fully charged, if
the charging current and voltage remain constant (for voltage-controlled chargers);
the charging current does not any rise longer for two hours (current-controlled chargers);
the charger shuts off or switches over to trickle charge (automatic chargers).