6 minute read
TRANSMISSION


Template Date: 1994_04_29Template Name: OM_1_col
TRIM THIS EDGE
Oil Level
Procedure to Check the Condition of the Hydraulic Filters
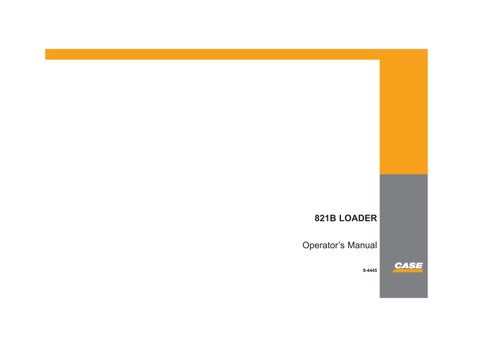
Check the oil level of the hydraulic reservoir every 50 hours of operation. To check the oil level do the following:
1. Park the machine on a level surface and lower the loader bucket to the ground.
2. Make sure that the engine is stopped.
3. Check the oil level in the sight gauge. If the oil is cold, the level is correct when you see oil in the lower 1/4 of the sight gauge. If the oil is at operating temperature, 50˚C (120˚F) the oil level must be in the upper 1/4 of the sight gauge. Do not overfill (see Hydraulic System in this manual for the correct oil).
4. When adding oil to the reservoir:
A. Clean the area around the filler cap. B. Remove the air from the reservoir by slowly removing the reservoir filler cap. C. After you have added oil to the reservoir, inspect the seal on the reservoir filler cap. Replace the seal if damaged. D. Install the filler cap and hand tighten.
FLUID LEVEL SIGHT GAUGE FILLER CAP
A27178
1. Start the engine and increase the temperature of the hydraulic oil to operating temperature of 50˚C (120˚F). To increase the temperature of the hydraulic oil do the following: A. Roll back the loader bucket and hold the control lever in the ROLLBACK position for 15 seconds.
B. After 15 seconds, move the control lever to the HOLD position. C. Repeat this procedure until the side of the hydraulic reservoir feels very warm. 2. Increase the engine speed to full throttle.
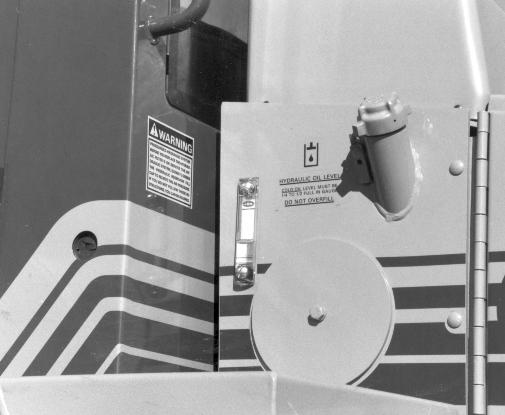
If the warning lamp for the hydraulic oil filters illuminates, replace both filters.
HYDRAULIC OIL FILTER INDICATOR LAMP
RD97D051
114
TRIM THIS EDGE
LEFT PAGE
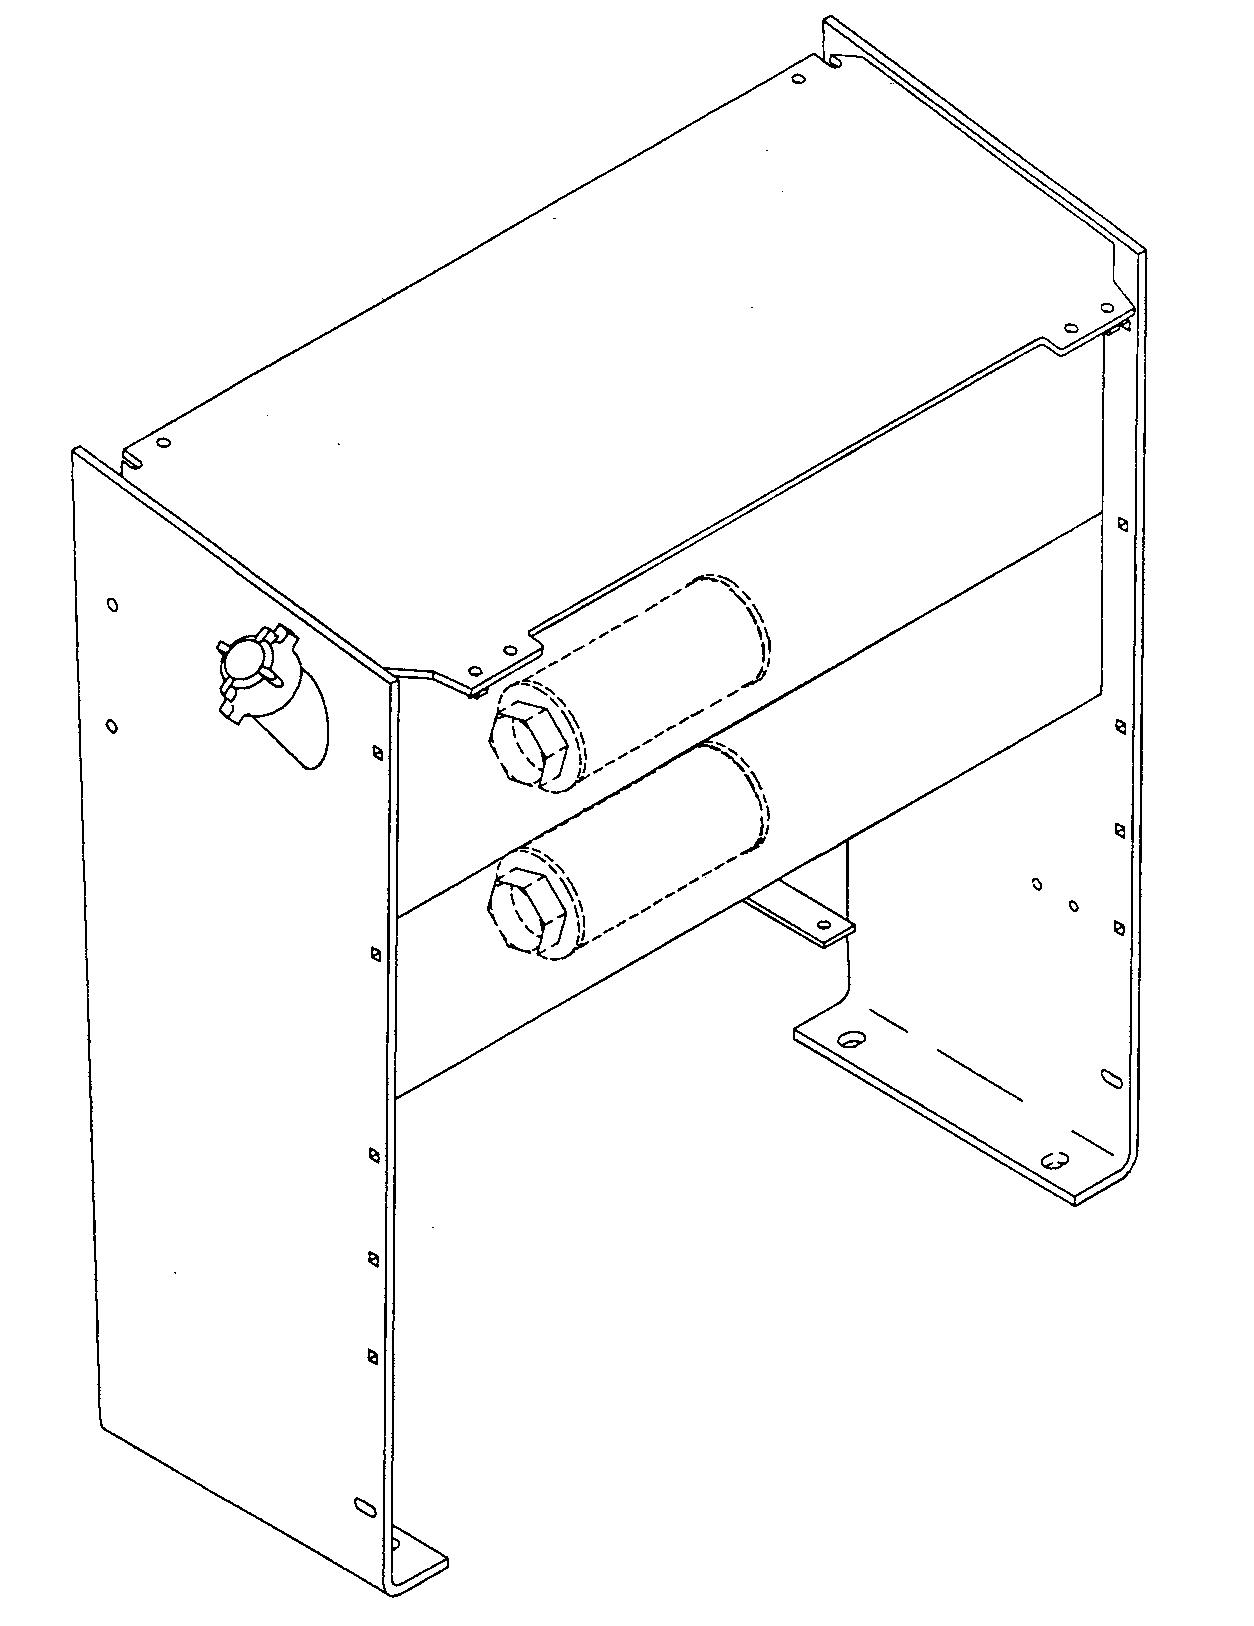
Replacing the Hydraulic Oil Filters
Replace the two hydraulic filters every 1000 hours of operation or if the hydraulic oil filter indicator lamp illuminates. 3. Remove the filter cover.
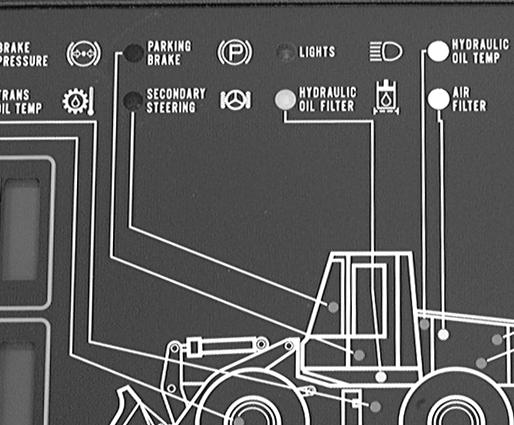
4. Use a strap wrench to remove the old filters. Turn the filters counterclockwise to remove.
5. Lubricate the gasket on each new filter with Case TCH fluid. Turn each new filter clockwise until the gasket contacts the head of the filter assembly. Continue to tighten the filter 1/2 to 3/4 turn by hand.
HYDRAULIC FILTERS
A17870 NOTE: Side plate removed only to show filter location
IMPORTANT: Always replace both filters at the same time.
1. Lower the loader bucket to the ground and stop the engine.
2. Clean the area around the filler cap and slowly loosen the filler cap of the reservoir. This will relieve the air pressure from the reservoir. IMPORTANT: Do not use a strap wrench to install the new filters. An oil leak can occur if the filters are dented by the strap wrench.
6. Tighten the reservoir filler cap.
7. Start the engine and run at 1000 rpm. Check for oil leaks around each filter.
8. Stop the engine and check the hydraulic oil level.
9. Install the side plate and filter cover. TRIM THIS EDGE
115
TRIM THIS EDGE
RIGHT PAGE
Template Name: OM_1_colTemplate Date: 1994_04_29
Template Date: 1994_04_29Template Name: OM_1_col
Hydraulic/Brake Oil Change
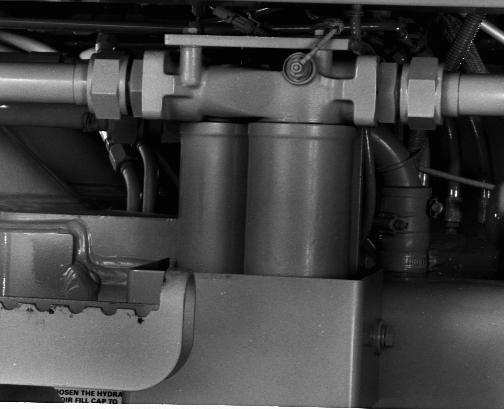
FILLER CAP ACCESS COVER
TRIM THIS EDGE
SUCTION SCREENS
Change the hydraulic/brake oil every 2000 hours of operation or one time each year, or when ambient operating temperatures requires, whichever occurs first. When changing the hydraulic oil also replace both hydraulic oil filters and clean the suction screen.
1. Make sure the hydraulic oil is at operating temperature. 2. Lower the loader bucket to the ground and apply the brake. Stop the engine. Put a DO NOT OPERATE tag on the steering wheel.
3. Make sure the accumulators are completely discharged. Push down and release one of the brake pedals a minimum of 30 times.
4. Clean the area around the filler cap and access cover. Slowly remove the filler cap of the reservoir. This will remove the air pressure from the reservoir.
272L93
116
TRIM THIS EDGE
LEFT PAGE
5. Remove the plug from the drain valve and install a hose on the drain valve.
6. Put the other end of the drain hose into a container that will hold 25 gallons (94.6 litres).
7. Open the drain valve.
8. Replace the hydraulic oil filters (see Page 116).
9. Remove the access cover from the hydraulic reservoir and remove the suction screen. Turn the suction screen counterclockwise to remove.
10. Clean the inside of the hydraulic reservoir with clean cloths.
11. Clean the suction screen in solvent and dry the suction screen with compressed air. Install the suction screen.
12. Turn the reservoir drain valve to OFF.
Remove the drain hose and install the plug in the drain valve (see Page 113 for the correct type and quantity of hydraulic oil). Put new oil into the reservoir.
NOTE: Fill the reservoir with the correct oil for your ambient temperature operating range. 13. Install the access cover with a new seal and tighten the mounting bolt.
14. Install the reservoir filler cap.
15. Start the engine and run at 1000 rpm.
Check for oil leaks around the filters, access cover and the drain plug. When the balance pressure warning buzzer stops making noise, run the engine at 1500 rpm.
16. Bleed the brake system to remove old oil from the system. Remove a minimum of 1
Liter of oil from each bleed screw to make sure all old oil is removed from the system (See Bleeding the brake system in this manual).
17. Operate the loader controls several times to remove any air in the lines.
18. Lower the loader bucket to the ground and stop the engine. Check the hydraulic oil level.
19. Add oil as required TRIM THIS EDGE
117
TRIM THIS EDGE
RIGHT PAGE
Template Name: OM_1_colTemplate Date: 1994_04_29
Template Date: 1994_04_29Template Name: OM_1_col
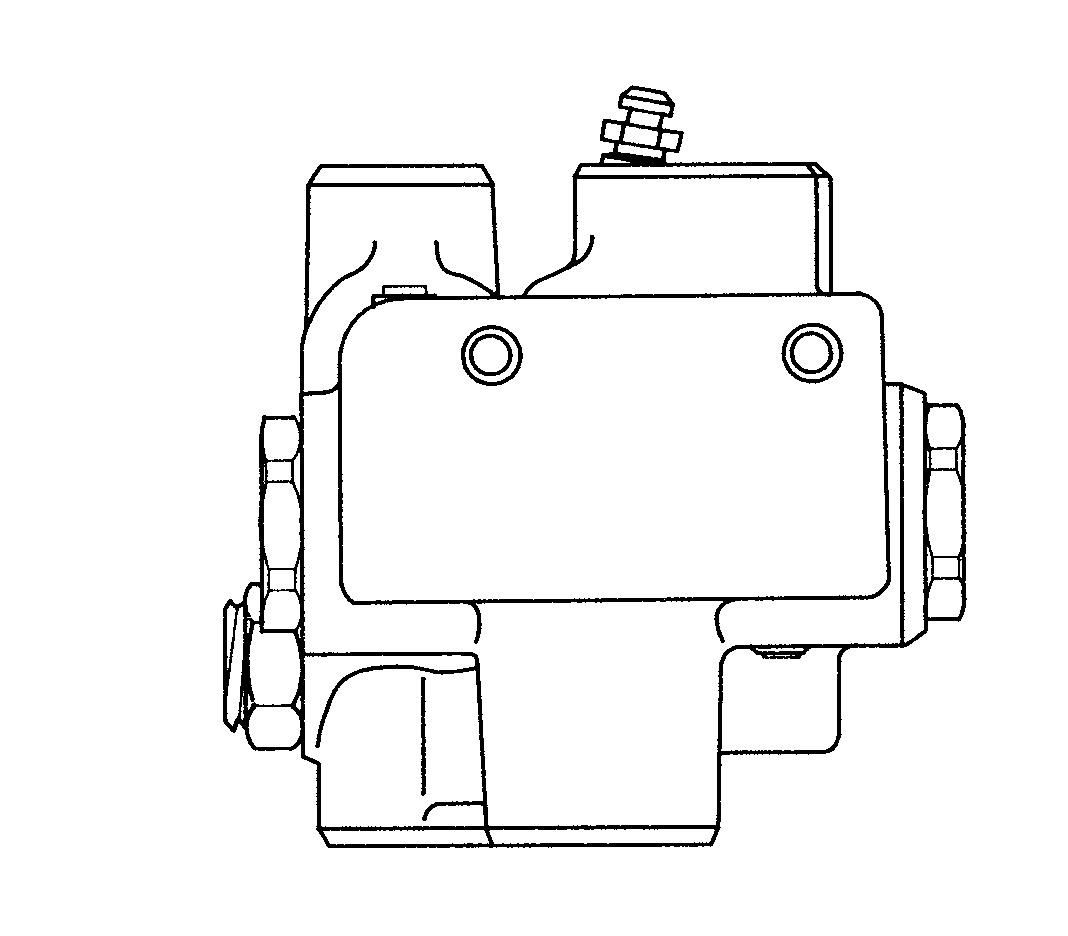
Bleeding the Brake System
BLEED SCREW
TRIM THIS EDGE
980L92
1. Start and run the engine at idle. Open the bleed screw on the accumulator charge valve.
When there are no air bubbles in the oil that is flowing, close the bleed screw.
NOTE: If any lines have been opened between the reservoir and the accumulator charge valve, immediately open the bleed screw after starting the engine.
2. Stop the engine. Open the left bleed screw on the front axle.
3. Slowly push down on the brake pedal until oil begins to flow from the bleed screw. Hold the brake pedal in position until 1 liter of oil has been bled and no air bubbles in the oil flowing from the bleed screw. Close the bleed screw and release the brake pedal.
IMPORTANT: DO NOT push the brake pedal farther than necessary to cause the oil to flow from the bleed screw. The farther you push the pedal the higher the pressure in the brake circuit. High pressure can cause injury or damage.
4. Open the right bleed screw on the front axle.
5. Start and run the engine at idle for 2 minutes.
6. Stop the engine. Open the left bleed screw on the rear axle. Repeat step 3.
7. Open the right bleed screw on the rear axle. Repeat step 3. 118
TRIM THIS EDGE
LEFT PAGE