6 minute read
ENGINE COOLING SYSTEM


Cleaning Cooling System
Check the cooling system every day to prevent overheating, loss of performance or engine damage.
• When fluids are under pressure.
• Flying debris or loose material is present.
• Engine is running.
• Tools are being used.
Wear safety glasses to prevent eye injury when any of the following conditions exist: W–2019–1285
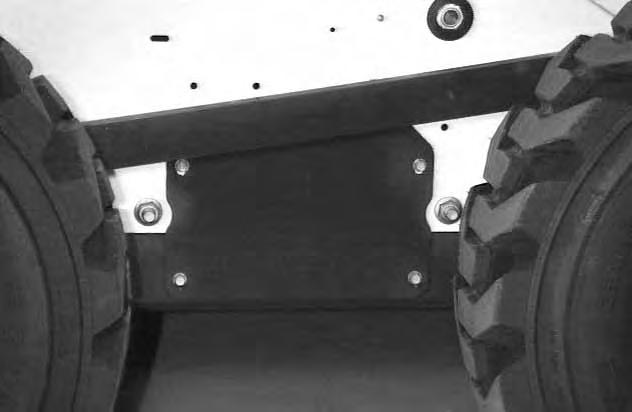
Remove the rear grill. (See REAR GRILL Page 51.)
Use air pressure or water pressure to clean the top of the oil cooler [A]
Remove the hair pin (Item 1) [B] (both sides) from the oil cooler.

ENGINE COOLING SYSTEM (Cont’d)
Cleaning The Cooling System (Cont’d)
Raise the oil cooler [A].
Use air pressure or water pressure to clean the top of the engine oil cooler.
NOTE:The access cover (both sides) must be in place to ensure proper air flow through the oil cooler which will ensure correct cooling for the engine/hydraulic system [B].

Alternator Belt
Adjusting The Alternator Belt
Stop the engine.
Loosen the alternator mounting and adjustment bolts (Item 1) [C]
Move the alternator until the belt has 5/16 inch (8,0 mm) movement at the middle of the belt span with 15 lbs. (66 N) of force (Item 2) [C]
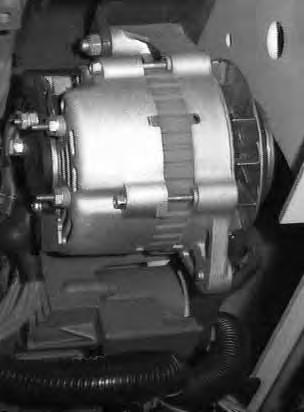
Tighten the adjustment and mounting bolts.

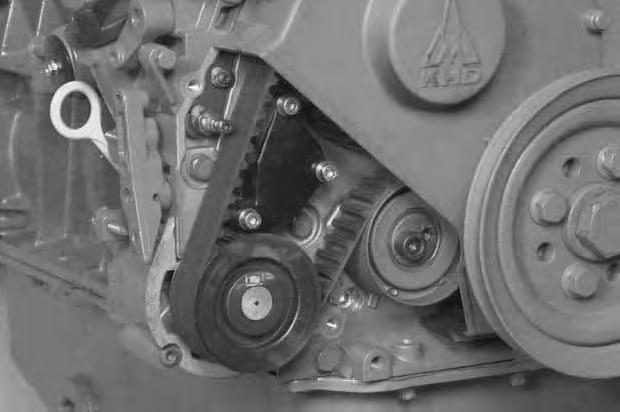
Timing Belt
The timing belt (Item 1) [A] MUST be replaced every 3,000 hours or every 5 years.
Electrical System
Description
The loader has a 12 volt, negative ground alternator charging system. The electrical system is protected by fuses located in the engine compartment. The fuses will protect the electrical system when there is an electrical overload. The reason for the overload must be found before starting the engine again.
Electrical System Maintenance
The battery cables must be clean and tight. Check the water level in the battery. (See the SERVICE SCHEDULE Page 39 for correct interval.) Remove any acid or corrosion from the battery and cables with a sodium bicarbonate (baking soda) and water solution [B].
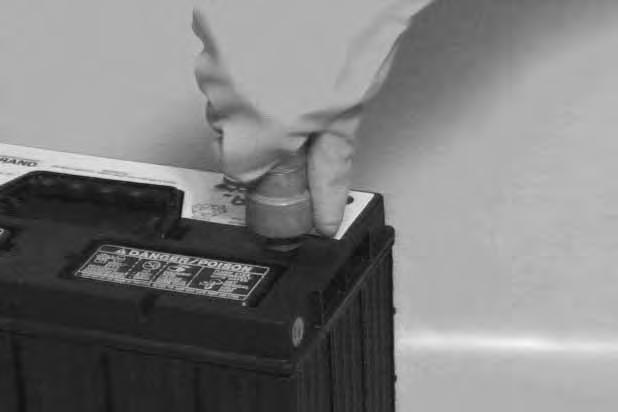
Put Battery Saver (6664458) or grease on the battery terminals and cable ends to prevent corrosion.
Batteries contain acid which burns eyes and skin on contact. Wear goggles, protective clothing and rubber gloves to keep acid off body.
In case of acid contact, wash immediately with water. In case of eye contact get prompt medical attention and wash eye with clean, cool water for at least 15 minutes.
If electrolyte is taken internally drink large quantities of water or milk! DO NOT induce vomiting. Get prompt medical attention.
W–2065–1296
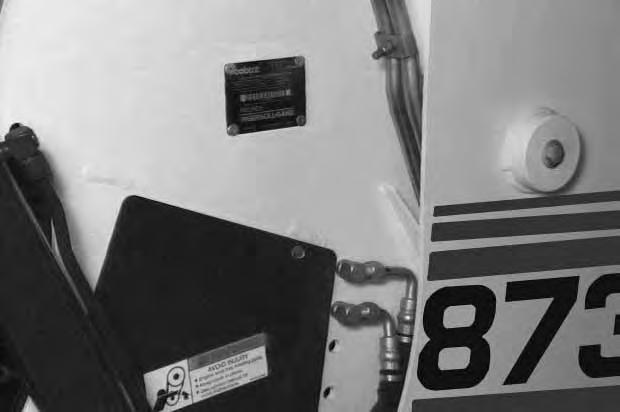
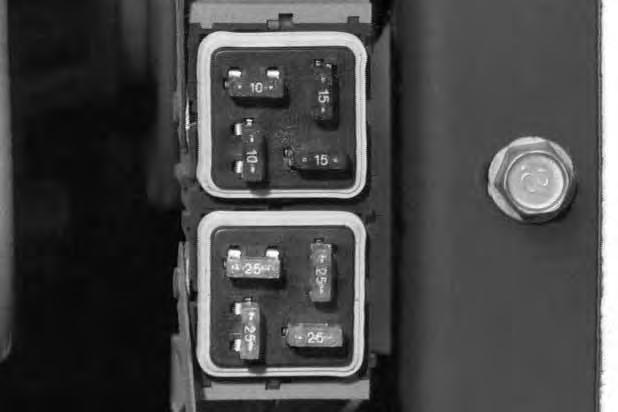
Fuse Location
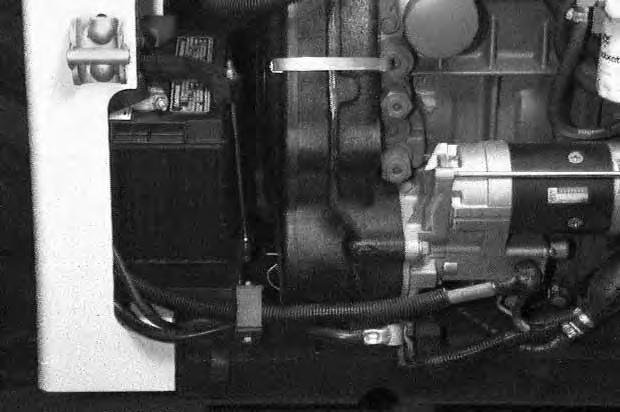
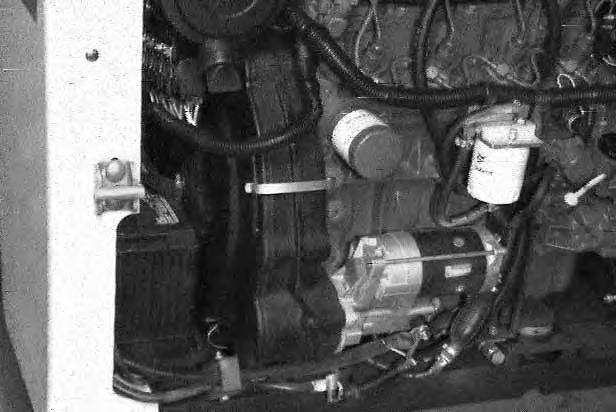
The electrical system for this model loader is protected by fuses (Item 1) [A] located at the right side of the engine.
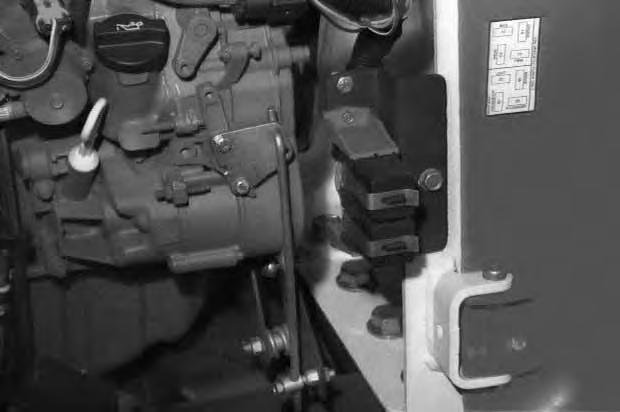
The fuse capacity and circuits are shown on the decal (Item 2) [A] and below.
ELECTRICAL SYSTEM (Cont’d)
Using A Booster Battery (Jump Starting)
If it is necessary to use a booster battery to start the engine, BE CAREFUL! There must be one person in the operator’s seat and one person to connect and disconnect the battery cables.
Batteries contain acid which burns eyes and skin on contact. Wear goggles, protective clothing and rubber gloves to keep acid off body.
In case of acid contact, wash immediately with water. In case of eye contact get prompt medical attention and wash eye with clean, cool water for at least 15 minutes.
If electrolyte is taken internally drink large quantities of water or milk. DO NOT induce vomiting. Get prompt medical attention.
Keep arcs, sparks, flames and lighted tobacco away from batteries. When jumping from booster battery make final connection (negative) at engine frame.
Do not jump start or charge a frozen or damaged battery. Warm battery to 60oF. (16oC.) before connecting to a charger. Unplug charger before connecting or disconnecting cables to battery. Never lean over battery while boosting, testing or charging.
Battery gas can explode and cause serious injury.
Damage to the alternator can occur if:
W–2066–1296
The ignition must be in the OFF position. The booster battery to be used must be 12 volt.
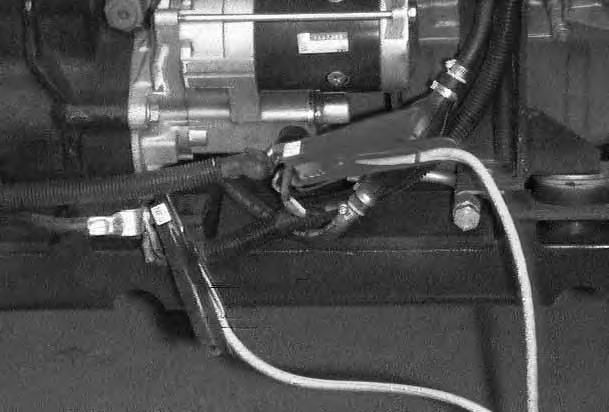
Connect the end of the first cable (Item 1 [A] to the positive (+) terminal of the booster battery. Connect the other end of the same cable (Item 2) [A] to the positive terminal on the starter.
Connect the end of the second cable (item 3) [A] to the negative (–) terminal of the booster battery. Connect the other end of the same cable (Item 4) [A] to the ground cable connection on the engine mounting bracket.
Keep the cables away from moving parts. Start the engine. (See STARTING THE ENGINE, Cold Temperature Starting Page 20 or 22.
After the engine has started, remove the ground (–) cable (Item 4) [A] first.
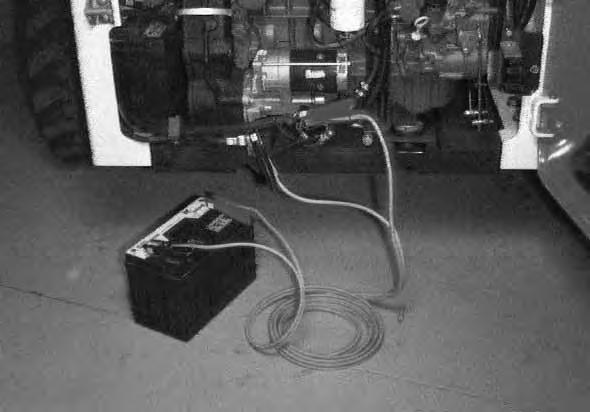
Remove the cable from the starter.
• Engine is operated with battery cables disconnected.
• Battery cables are connected when using a fast charger or when welding on the loader (Remove both cables from the battery).
• Extra battery cables (booster cables) are connected wrong.
I–2023–1285
ELECTRICAL SYSTEM (Cont’d)
Removing And Installing The Battery
Batteries contain acid which burns eyes and skin on contact. Wear goggles, protective clothing and rubber gloves to keep acid off body.
In case of acid contact, wash immediately with water. In case of eye contact get prompt medical attention and wash eye with clean, cool water for at least 15 minutes.
If electrolyte is taken internally drink large quantities of water or milk. DO NOT induce vomiting. Get prompt medical attention.
Open the rear door.
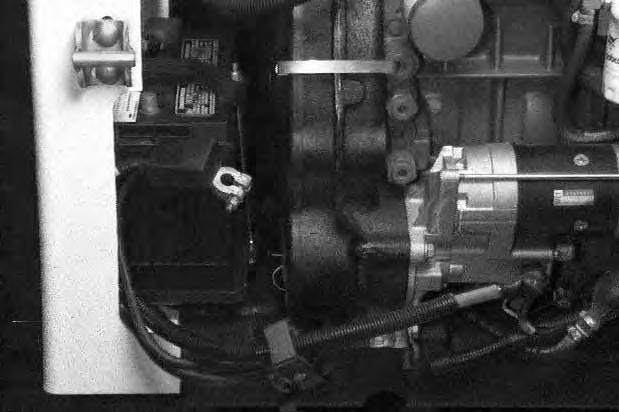
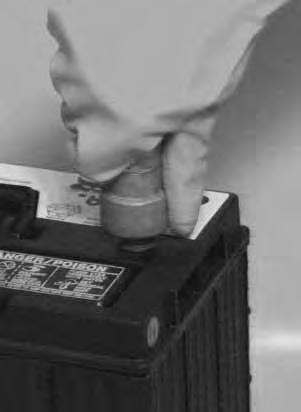
Disconnect the negative (–) cable (Item 1) [A] from the battery.
Disconnect the main frame ground bolt and cable clamp (Item 2) [A]
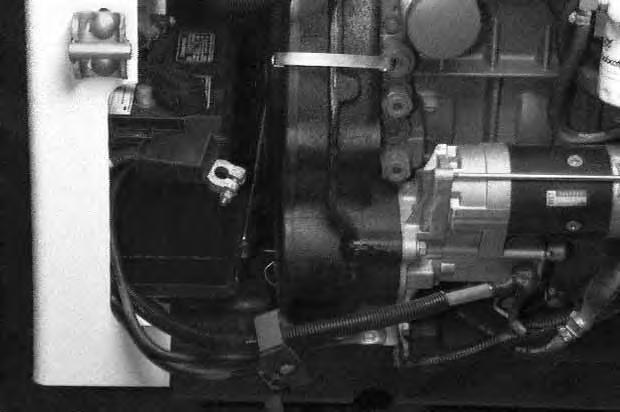
Remove the battery hold down clamp (Item 1) [B]
Disconnect the positive (+) cable (Item 1) [C] from the battery.
Remove the battery from the loader.
ELECTRICAL SYSTEM (Cont’d)
Removing And Installing The Battery (Cont’d)
Always clean the terminals and cable ends when installing a new battery [A]
When installing the battery in the loader, do not touch any metal parts with the battery terminals.
Connect and tighten the battery cables.
Install cable clamp and ground bolt (Item 1)[B] as shown for correct ground and cable routing.

Connect the negative (–) cable last to prevent sparks.
Keep arcs, sparks, flames and lighted tobacco away from batteries. When jumping from booster battery make final connection (negative) at engine frame.
Do not jump start or charge a frozen or damaged battery. Warm battery to 60°F. (16°C.) before connecting to a charger. Unplug charger before connecting or disconnecting cables to battery. Never lean over battery while boosting, testing or charging.
Battery gas can explode and cause serious injury.
W–2066–1296
HYDRAULIC/HYDROSTATIC SYSTEM
Checking And Adding Fluid
5.
Use only recommended fluid in the hydraulic system. (See SPECIFICATIONS Page 89.)
Put the Bobcat loader on a level surface. Lower the lift arms and tilt the Bob–Tach fully back.
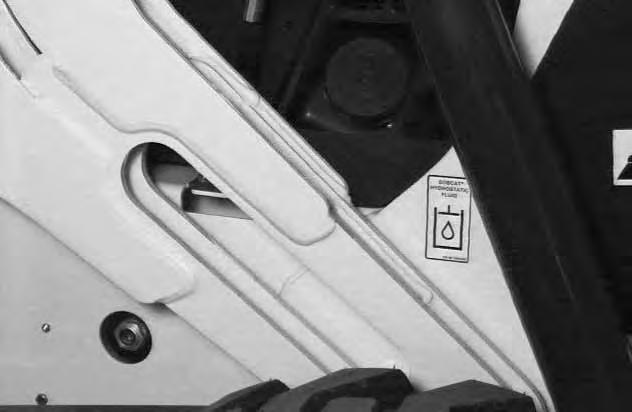
Check the fluid level at the sight gauge[C]. The fluid level must show in the sight gauge.
If fluid is needed, remove the fill cap (Item 1) [D].
Add the fluid as needed to bring the level to the sight gauge.
NOTE:Before installing the fill cap, make sure the rubber gasket is installed on the fill cap [D].
Install the fill cap [D].
HYDRAULIC/HYDROSTATIC SYSTEM (Cont’d)
Replacing Hydraulic Fluid
When replacing the hydraulic fluid, always replace the hydraulic/hydrostatic filter (See Replacing Hydraulic/Hydrostatic Filter Page 64) and also clean the hydraulic fill screen and the case drain filters

See the SERVICE SCHEDULE Page 39 for the correct service interval.
Replace the fluid if it becomes contaminated or after major repair.

Remove the fill cap and raise the operator cab. (See Raising The Operator Cab Page 42.)
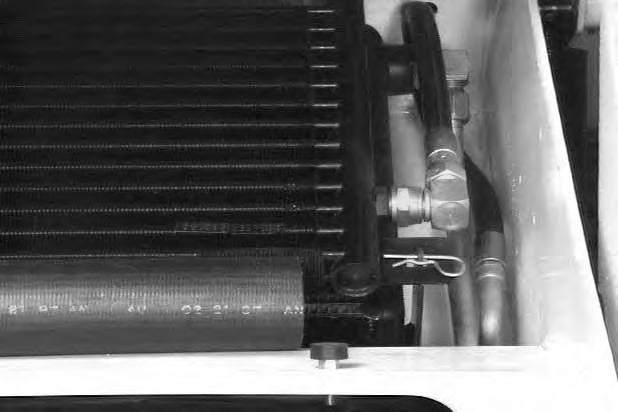
Hydraulic Fill Screen
Remove two hose clamps and remove the hose (Item 1) [A]
Remove the hydraulic fill screen (Item 1) [B] and use clean solvent to remove any contamination from the screen.
Use air pressure to dry the screen.
Install screen, hose and hose clamps.
Case Drain Filters
Remove the hydrostatic motor covers (Item 1) [C]. (Both sides.)
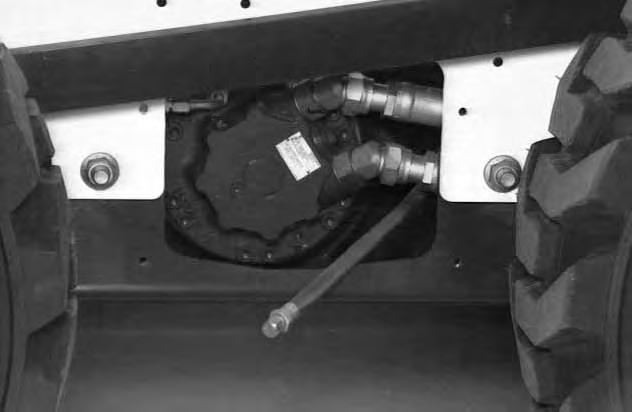
Pull the reservoir drain hose [D] out the left motor cover hole. Remove the plug (Item 1) and drain the fluid into a container.
Always clean up spilled fuel or oil. Keep heat, flames, sparks or lighted tobacco away from fuel and oil. Failure to use care around combustibles can cause explosion or fire which can result in injury or death.
W–2103–1285
HYDRAULIC/HYDROSTATIC SYSTEM (Cont’d)
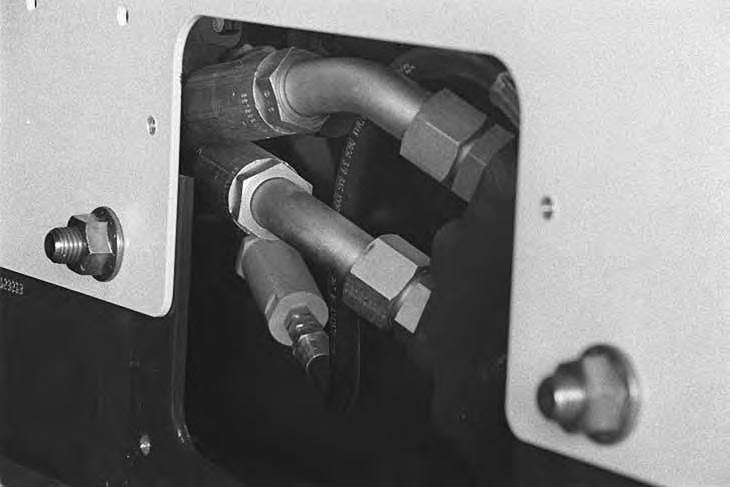
Case Drain Filters (Cont’d)
Disconnect the hoses from the hydrostatic motor case drain filter (Item 1) [A] and [B]
Remove the case drain filters (Item 1) [A] and [B] and clean thoroughly with clean solvent.
Install the case drain filters and tighten the hoses.
Install the plug in the reservoir drain hose and tighten. Install the motor covers. (Both sides.)
Add the correct fluid to the reservoir until the fluid level is at the sight gauge. (SeeChecking And Adding Fluid Page 62.)
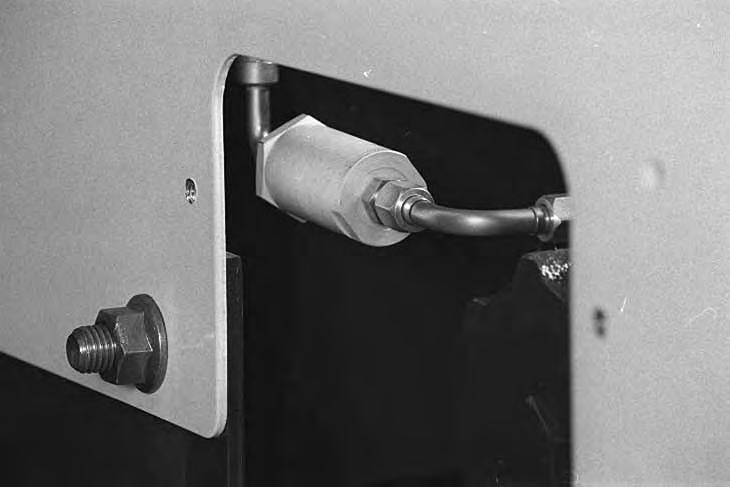
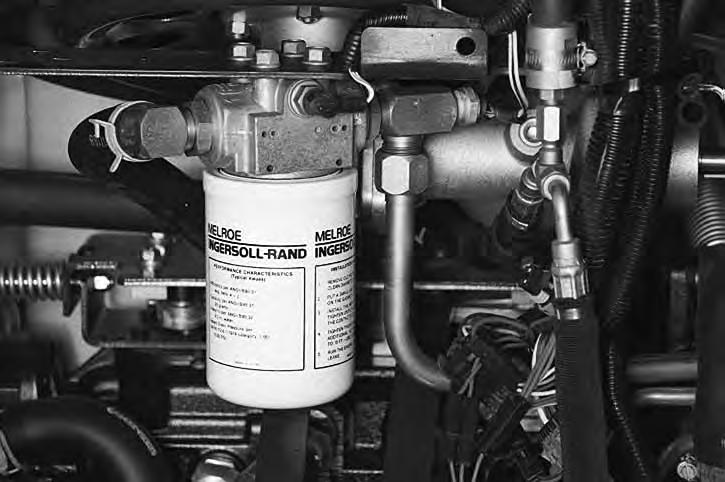
Replacing Hydraulic/Hydrostatic Filter 6.
See the SERVICE SCHEDULE Page 39 for the correct service interval.
Raise the operator cab (See Raising The Operator Cab Page 42.)
Remove the filter (Item 1) [C]
Clean the surface of the filter housing where theelement seal contacts the housing. Put clean oil onthe rubber seal of the filter element.
Install and hand tighten the filter element.
Diesel fuel or hydraulic fluid under pressure can penetrate skin or eyes causing serious injury. Fluid leaks under pressure may not be visible. Use a piece of cardboard or wood to find leaks. Do not use your bare hand. Wear safety goggles. If fluid enters skin or eyes, get immediate medical attention.
W–2074–1285
Always clean up spilled fuel or oil. Keep heat, flames, sparks or lighted tobacco away from fuel and oil. Failure to use care around combustibles can cause explosion or fire which can result in injury or death.
W–2103–1285
Lower the operator cab. Start the engine and operate the loader hydraulic controls. Stop the engine. Check for leaks. Check the fluid level in the reservoir and add as needed.