30 minute read
ONAN


3.Attach the choke shaft lever (Item 15) to the choke shaft with its hex nut (Item 16). Position the lever as marked at time of disassembly. Securely tighten the nut. 4.With the carburetor inverted, replace the pipe plug (Item 21), adjustment screw locknut (Item 12) and adjustment screw (Item 13). Turn the adjustment screw in against its seat, then back it out two turns. 5.With the flange of the carburetor up, place the venturi (Item 4) into the throttle bore with the side hole in line with the screw hole in the main body and secure the venturi with its retaining screw (Item 11). 6.Place the throttle shaft seals (Item 3) into the seal retainers (Item 2) and assemble the seals and retainers into the counterbores of the main body. 7.Insert the throttle shaft and lever (Item 10) through the seals so the throttle stop screw is in contact with the stop pin when the throttle plate is in closed position. Attach the throttle plate (Item 6) to the shaft. Leave the screws loose. Align the throttle plate to the match marks. Close the throttle and align the plate for best closing. Tighten the screws. 8.Place the spring on the idle needle valve (Item 8) and install the idle needle and spring. Turn the needle valve in lightly against its seat. Back out the needle valve 1–1/4 turns.
VAPORIZER – PRIMARY REGULATOR SERVICE
The vaporizer (Fig. 72) consists of a high pressure regulator and vaporizer combined into a single unit. The high pressure regulator reduces LPG fuel tank pressure to a uniform outlet pressure. The vaporizer section vaporizes the liquid gas.
To disassemble the vaporizer: Refer to figure 73 for parts identification and follow the steps outlined below. 1.To remove the corrugated heat exchanger, clamp the vaporizer in a vise and remove the 1–1/4 inch brass nut (Item 24) with a thin wall socket wrench.
2.Remove the inlet orifice retainer (Item 11) and aluminum washer (Item 12) from the inlet bore.
3.Loosen the locknut (Item 3) on the adjusting screw (Item 2) and turn the screw all the way down to depress the inlet valve seat. The valve seat in its normal position interferes with the removal of the inlet orifice (Item 13).
4.Turn a 1/4 inch –20 screw into the inlet orifice block and remove the block (Item 13).
5.Remove the pressure adjusting screw (Item 2) and spring (Item 4).
6.Remove the six diaphragm cover screws (Item 5) and the diaphragm cover (Item 6).
Fuel Inlet
Vaporizer Heat Exchanger
A–01820 Fig. 72 Vaporizer – Primary Regulator
2
4
6
8
9
19
12 17
15
14
11 13
21
The spring loaded inlet valve seat must be fully pressed in during this operation to prevent damage to both the seat and orifice block.
I–2147–1297 22
23
24
B–01225
7.Lift the rubber diaphragm (Item 9) with the assembled piston from the bore.
Remove the screw (Item 7) that secures the diaphragm and retainer to the piston and discard the diaphragm.
8.Invert the vaporizer assembly (Item 15) and remove the inlet valve seat and retainer, spring and valve cap (Items 16 thru 19).
9.Remove the large O–ring (Item 21) from its groove on the outside of the vaporizer housing.
To reassemble the vaporizer:
1.Position a new diaphragm (Item 9) over the piston (Item 20) and lay the retainer (flange up) on the diaphragm. Secure the parts with the diaphragm screw, but do not tighten at this time.
2.Check the condition of the inlet orifice (Item 13). If it is damaged at the orifice shoulder, replace this part.
3.Insert the inlet orifice block into its bore temporarily. This part has a slot and rides on a dowel pin located in the bore to prevent the part from being installed improperly.
4.Position the assembled diaphragm and piston into the bore (Fig. 74) so that the piston straddles the inlet orifice block without rubbing against it.
5.Align the six screw holes of the diaphragm with the holes in the vaporizer head and tighten the diaphragm screw (Fig. 74). Hold the diaphragm and retainer to keep them from moving when tightening the screw.
6.Remove the assembled diaphragm and piston and the inlet orifice block from their respective bores after proper alignment has been determined.
7.Check the inlet valve seat. If the neoprene disc is damaged or badly worn, replace entire unit.
8.Place the button (Item 17) on the spring (Item 16) and insert the button end of the spring into the inlet valve seat (Item 18). Install these parts into the bore (Fig. 75).
9.Install the assembled diaphragm and piston into the bore after replacing the
O–ring on the piston. Coat the seal with a light film of oil for easier installation.
Recheck the piston alignment by looking into the inlet orifice bore. The yoke of the piston should line up with the inlet orifice bore, and the six diaphragm holes should align with the holes in the top of the vaporizer. 10.Replace the cover over the diaphragm and secure it with the six cover screws. Place the adjustment screw spring (Item 4) into the bore through the top of the cover and install the adjusting screw and lock nut (Items 2 & 3). 11.Turn the adjusting screw all the way in to depress the inlet seat.
12.Install a new fiber washer on the inlet orifice block and insert the block in the bore using the slot as a guide. Remove the 1/4 inch – 20 screw from the assembled valve. 13.Place a new aluminum washer into the orifice bore. Thread the inlet orifice retainer into the bore and tighten. Install a new large O–ring into the groove on the outside of the vaporizer assembly.
Align Screw Holes Align Piston To Straddle Inlet Orifice Block
A–01822 Fig. 74 Aligning Piston to Body
A–01821 Fig. 75 Inserting Button & Spring
14.Install a new O–ring on the heat exchanger and install the heat exchanger into the vaporizer head. Install the fiber washer and 1.250 inch brass nut.
Tighten it securely using a thin wall socket.
To adjust the vaporizer:
1.Place the assembly in a vise or suitable clamp. Secure an air hose which will supply approximately 75 PSI to the inlet connection (Fig. 76).
2.Connect a 0 to 30 or a 0 to 50 PSI pressure gauge to the outlet.
3.Back off the vapor adjusting screw until only one or two threads are holding the screw in the cover. Apply air pressure to the unit.
4.Turn the pressure adjusting screw in slowly until a reading not over 12 PSI shows on the gauge
5.With everything connected and adjusted as above, smear soap film over the vent hole in the diaphragm cover. Bubbles will appear if the diaphragm is leaking.
6.After the proper adjustment has been made, tighten the locknut on the pressure adjusting screw. Turn off the air pressure and disconnect the gauge and air line.
NOTE: The vaporizer assembly must be adjusted for a working pressure of not more than 12 PSI (Gauge Pressure) at each overhaul and at any time the pressure adjusting screw is moved.
NOTE: To obtain an accurate gauge reading it may be necessary to unscrew the gauge partially to bleed off some of the air. Retighten the gauge and readjust for not over 12 PSI. If the gauge reading remains steady, the valve is not leaking. If the pressure reading creeps up, it indicates a leaking valve. It will be necessary to check for incorrect assembly, or replace valve parts as necessary.
SECONDARY REGULATOR SERVICE
A–01835 Fig. 76 Checking Working Pressure
To disassemble the regulator (Fig. 77):
1.Remove both diaphragm assemblies (Item 2) by turning to the left, counterclockwise.
2.Remove the inlet orifice (Item 6).
3.Remove the regulator adjusting screw (Item 10). 4.Remove both leaf spring retaining screws (Item 8).
5.Remove the valve block and spring assembly (Item 5). Do not take this assembly apart.
To clean the parts: 1.Clean all parts except the diaphragms with isopropyl alcohol.
Clean the diaphragm covers by wiping with a cloth.
2
3 4 5 6 7
3 2
8
1 10 9
8
B–01224
2.Check the diaphragm for leaks. Remove the screen (or screens) from the vent opening in the diaphragm cover. Blow into the vent opening to extend the plunger, then seal the opening with your thumb. Press on the extended plunger. If the diaphragm is leaking, the plunger can be pressed in and will stay in. If resistance is felt, and the plunger springs back out upon being released, the diaphragm is not leaking. 3.Discard all worn or damaged parts.
To reassemble the regulator: 1.Install a new regulator valve seat (Item 7). 2.Insert the block, spring and valve assembly into the regulator body, making sure that the ends of the leaf springs enter their respective slots in the regulator body and are visible through the leaf spring retainer screw holes. 3.Install and tighten the inlet orifice (Item 6).
4.With the O–ring seal lightly lubricated, use finger pressure only to screw the regulator adjusting screw (Item 10) into the regulator body.
5.Seat the adjusting screw, lightly with a screwdriver. It will need a final setting after assembly is complete. 6.Insert the left spring gauge set (Fig. 78). Hold them in position while installing and tightening the leaf spring lock screws. Do not tighten them excessively. 7.Install and thoroughly tighten by hand both diaphragm assemblies. Use new cover–to–body gaskets (Item 3).
If resistance is felt, it indicates that the round valve rod has not entered the hole in the regulator adjusting screw. In this event, remove the regulator adjusting screw and try again until the screw can be turned in by hand until the slotted head is almost flush with the body.
W–2287–0198
To test for a leaking valve: 1.Connect air or gas (at not over 12 PSI) to the regulator inlet.
NOTE: A previously adjusted vaporizer–primary regulator can be used as a source of air or gas at not over 12 PSI.
2.Smear a bubble film over the regulator outlet. A leaking regulator valve will be indicated by an expanding bubble at the outlet. 3.If the regulator valve leaks, disassemble the regulator and clean or replace valve parts as needed. Recheck for leaks.
Following is a procedure for setting the regulator valve to open at approximately 0.500 inch water vacuum:
1.Connect the air or gas (at not over 12 PSI) to the regulator inlet.
Leaf Spring Gauge Set
Leaf Spring
Lock Screws PI–01272 Fig. 78 Leaf Spring Gauge Set
3.Cover the regulator outlet with a bubble film. Slowly back out the regulator adjusting screw by turning it counterclockwise, until the regulator just begins to leak. Point of leak will be indicated by a slowly expanding bubble at the regulator outlet. 4.Find the point of leak and turn the regulator adjusting screw to the right (Clockwise) 3/4 to one turn from this position. 5.After setting as indicated above, blow sharply into the diaphragm breather hole. This will open and reseat the inlet valve. Repeat this several times.
Recheck the setting, following steps 3 and 4.
LP FUEL FILTER LOCK
To replace the filter element: 1.Close the hand valve on the tank.
2.Remove the filter assembly from the fuel tank.
NOTE: When you will be cleaning the filter, remove the entire solenoid section first to keep accumulated dirt and scale from entering the solenoid section.
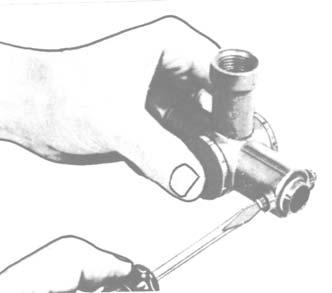
3.Remove the solenoid by clamping the filter housing (Fig. 79, Item 9) in a vise and carefully loosening the 5/8 inch hex brass body (Item 1). Carefully remove the solenoid section, including all items 1 through 7, 13 and 14. 4.Hold the filter housing (Item 9) in a vise and unscrew the filter inlet (Item 12). It has a 3/4 inch square nut. 5.Remove the filter element and clean any deposits out of the filter housing. Clean the element (Item 10) by blowing compressed air through it, from the inside out.
Inspect the O–ring (Item 11) for any cuts or damage.
1 (Valve Body) 2 (Copper Spacer) 3 (End Plate) 4 (Coil Housing) 5 (Coil)
13 (Grounding Screw) 14 (Grommet)
Fig. 79 LP Fuel Filter Lock
6.Replace the cleaned or new filter element in the recess inside the filter element. Be sure it is seated. Lubricate the O–ring with a light mineral oil.
Carefully turn the filter inlet completely in by hand then tighten it to 30–40 ft.–lbs. torque. 7.Reassemble the solenoid section to the filter housing using a maximum of 18 ft.–lbs. torque. Oil the O–ring (Item 8) on the filter housing to keep it from being damaged.
6 (Valve Plunger) 7 (Plunger Return Spring) 8 (Valve Sealing O–Ring) 9 (Filter Housing) 10 (Micronbon Filter)
12 (Filter Inlet) 11 (Inlet Sealing O–Ring)
B–01171
Centerline Mark Of No. 1 Cylinder C.L. 1 & 3 Cyl. Banks C.L. 2 & 4 Cyl. Banks
IGNITION TIMING
27°
DC
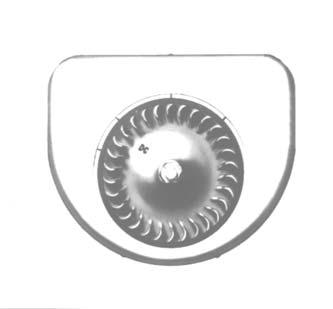
Marked Air Vane On Flywheel
Locate the DC timing notch on the rotating flywheel screen and make certain that it is located in line with the large DC letters which are stamped on the flywheel proper (behind the screen). Connect the timing light in series with the No. 1 spark plug. With the engine operating at 1800 RPM or over, allow the flash from neon light to illuminate the leading edge of the notch.
Running Spark Advance Timing Mark For Checking With Neon Light
Fig. 79A Timing The Engine
The DC timing notch should line up with the running spark advance timing mark on the flywheel shroud (Fig. 79A); If the notch does not line up correctly loosen the spark advance arm clamp screw and turn the distributor body by hand until the notch matches the proper marking (Fig. 80). Be sure to retighten the advance arm clamp screw.
1.Turn the engine over by hand until the breaker arm rubbing block is on a high point of the cam. 2.Loosen the stationary contact locknut and screw the fixed contact in or out, until the correct gap is achieved.
3.Tighten the locknut and recheck the gap.
If the engine is running below 1800 RPM when checking timing, the automatic adjustment in the distributor will not be at earliest point. Wrong timing can cause permanent damage to the engine when operating at high speeds.
I–2152–1297
DISTRIBUTOR MAINTENANCE
The firing order for the VF4D engine is 1–3–4–2. The distributor breaker point gap should be 0.018 to 0.022 inches. To readjust the breaker point gap:
The distributor should be periodically lubricated and inspected for external conditions which could affect its operation. Every 50 hours of operation, the oiler on the side of the distributor base should have 3 to 5 drops of medium engine oil added. Every 100 hours, apply 3 to 5 drops of medium engine oil to the felt in the top of the cam sleeve. Do not over–lubricate.
SPARK PLUG
The spark plug gap should be 0.030 inch. Plugs should be kept clean both inside and out (Fig. 81). If the porcelain insulator is cracked, replace with a new plug of correct heat range. The spark plug thread is 18 millimeter. Be sure to use a good gasket under the spark plug. Tighten the spark plugs to 25–30 ft.–lbs. torque.
HIGH TEMPERATURE SAFETY SWITCH
As a safety precaution some engines have high temperature safety switches mounted on the cylinder heads near the No. 4 and No. 3 spark plugs. The switches will automatically stop the engine when head temperatures are too high. The switches are set by the manufacturer to operate at the correct temperature. If the cylinder head temperature reaches 570°F, the switch will automatically short out the distributor and stop the engine. A waiting period of about 7 minutes will be required before the switch has cooled off sufficiently to permit re–starting the engine. An overheated engine will score the cylinder walls, burn out connecting rod and crankshaft bearings and warp pistons and valves. The cause of the overheating condition will need to be remedied before re–starting the engine. The wire from the high temperature safety switch must be connected to the same terminal on the distributor as the wire from the negative terminal of the ignition coil.
A–01836 Fig. 80 Loosening Advance Arm Clamp
Spark Plug
Fig. 81 Spark Plug Gap A–01825
When ordering engine parts, include the engine specification number. Engine repairs should be made only by a mechanic who has had experience in such work. When disassembling the engine it is advisable to have several boxes available so that parts belonging to certain groups can be kept together. Capscrews of various lengths are used in the engine, therefore great care must be exercised in reassembly, so the right screw will be used in the various places. Otherwise, damage may result. Tighten the cap screws and nuts of the manifolds, cylinder heads, gear cover, oil pan, connecting rods, cylinder block, main bearing plate and the spark plugs to the specified torque readings indicated in the following paragraphs of reassembly. While the engine is partly or fully dismantled, all the parts should be thoroughly cleaned. Remove all accumulated dirt between the fins.
Follow this order in disassembling the engine: To reassemble, reverse the order.
ACCESSORIES
Remove the engine oil filter, starter, hydraulic pump, variable speed sheave and any other attaching parts first.
Flywheel
Fig. 82 Removing Flywheel A–01823
FLYWHEEL
Remove the flywheel screen. Remove the flywheel nut and washer. The flywheel is mounted to a taper on the crankshaft. Take a firm hold of the fins and pull outward. At the same time, strike the end of the crankshaft with a soft hammer (Fig. 82). The flywheel will slide off the taper of the crankshaft and bearings. When reassembling the flywheel, be sure the Woodruff key is in position on the shaft and the keyway in the flywheel is lined up accurately with the key.
AIR SHROUDING
To disassemble air shrouding, first remove the cylinder head covers (Fig. 83) and the screws mounting the flywheel shroud to the lower cylinder shrouds and cylinder heat deflectors. Then remove the screws holding the flywheel shroud to the gear cover.
Cylinder Head Covers Flywheel Shroud
Fig. 83 Removing Shrouding A–01841
Manifold
CARBURETOR & MANIFOLDS
The carburetor and manifolds can be removed in sections (Fig. 84). In reassembly tighten the nuts for mounting the manifolds to 14 to 18 ft.–lbs. torque on model VF4 engines and 18 to 23 ft.–lbs. torque on model VH4 engines.
CYLINDER HEAD
Fig. 84 Removing Manifolds A–01830
Dowel Pin
The cylinder head must be removed if it is necessary to regrind valves, or to do work on the piston rings or connecting rods. All of the cylinder head screws are plainly in view and can be easily removed. Screws of different lengths are used but these can be properly reassembled according to the various lengths of cylinder head bosses. Before reassembling the cylinder heads, remove all carbon and lead deposits. Use new cylinder head gaskets in reassembly, as the old gasket will be so compressed and hard, they may not seal properly. Use a mixture of graphite and oil on the cylinder head screws to prevent them from rusting tight against the cylinder block. Tighten cylinder head screws to 22 to 24 ft.–lbs. torque. After the initial run–in, retorque the head screws.
Gear Cover
A–01838
Disconnect the governor linkage before removing the gear cover, since the same mounting screws are used for the governor housing and gear cover. Remove the gear cover screws and drive out the two dowel pins (Fig. 85). You can then remove the cover, exposing the timing gears (Fig. 86). In reassembly, tighten the cap screws to 14–18 ft.–lbs. torque.
CAMSHAFT GEAR
Remove the three cap screws and lock washers which hold the gear to the end of the camshaft (Fig. 86). Note that the camshaft gear has offset holes to provide accurate assembly for valve timing.
IDLER GEAR AND SHAFT
Remove the socket head (Allen–head) set screw that locks the idler shaft in place (Fig. 87). The screw is located in the side of the crankcase behind the distributor mounting flange. Remove the idler gear and shaft using a gear puller. When reassembling, be sure the oil groove in the shaft is facing up. Drive the shaft into the crankcase with a soft metal hammer. Maintain a 0.0015 to 0.0035 inch clearance between the idler gear and the shoulder of the shaft.
OIL PAN
The engine can now be inverted so the supports and oil pan can be removed (Fig. 88). In reassembly, tighten the oil pan mounting screws to 6–9 ft.–lbs. torque.
OIL PUMP
Remove the lock nut and pump driver gear from the shaft. If the gear is too tight to remove by hand, use a puller. Hammering on the end of the shaft to loosen the gear will damage the pump. Remove the slotted pipe plug from the bottom of the crankcase (Fig. 89). Using a 5/32 inch Allen wrench, remove the lock screw from the pipe plug hole. Withdraw the oil pump from inside the crankcase. If the pump fits too tight to remove by hand, tap the front of the pump housing (not the shaft) with a hammer and brass rod.
In reassembly, be sure the lockscrew seat in the pump housing lines up with the lockscrew hole in the crankcase.
PISTONS AND CONNECTING RODS
Using a 1/2 inch socket wrench, loosen and remove the hex locknuts from the connecting rod bolts. By tapping the ends of the bolts, lightly, the connecting rod cap will release from the bolts. Scrape off all carbon deposits that might interfere with removal of the position from the upper end of the cylinder. Turn the crankshaft until the piston is at the top of its stroke. Push the connecting rod and piston assembly upward and out through the top of the cylinder. Be careful not to scrape the crank pin by allowing the rod bolts to strike or scrape across it. Place the cap on the connecting rod immediately to prevent mismatching in reassembly. Be sure any shims are in place before putting the cap on.
NOTE: These models of engines were originally furnished with babbitt cast connecting rod bearings. Shell bearing rods are being used for current production engines. The shell bearing rods are interchangeable with babbitt bearing rods for service replacement. Camshaft Gear
A–01824 Fig. 86 Removing Camshaft Gear
Idle Gear Gear Puller
Set Screw Gear Cover
Fig. 87 Removing Idler Gear A–01842
Oil Pan
Fig. 88 Removing the Oil Pan A–01834
Pipe Plug
Oil Pump
Lockscrew
A–01831 Fig. 89 Removing Oil Pump Lockscrew
Be careful, in reassembly, to mount the bearings properly. The cap should be assembled to the rod so the locating lugs of the bearing halves are both toward the same side (Fig. 90). Refer to the chart (Fig. 95) for clearance between the bearing and crank pin. When reassembling the piston to the engine, the wide section of the piston skirt must be toward the maximum thrust side (opposite the crankshaft rotation, (Fig. 91)). The clearance between the piston skirt and cylinder must be measured in the center of the thrust face at the bottom of the piston skirt. Refer to Specification Chart for proper skirt clearance.
In reassembly, be sure the piston and connecting rod assemblies are put back into the same bore from which they are removed. Use a suitable ring compressor and stagger the piston rings gaps 90° apart around the piston. Oil the pistons, rings, wrist pins, rod bearings and cylinder walls before assembly.
Location Lugs Shell Bearing
A–01847
Fig. 90 Bearing Locating Lugs
IMPORTANT
Identical numbers are stamped on the side of the rod and its corresponding cap. These numbers must be on the same side of the connecting rod when installed in the engine. Be sure the hole in the connecting rod cap is facing toward the oil spray nozzle (Fig. 92). Install new nuts on the connecting rod bolts.
I–2146–1297
Manifold
Valve
Piston
Split–Skirt Piston
Split Toward Direction Of Crankshaft Rotation Cam–Ground Piston
Wide Thrust Face Opposite Crankshaft Rotation
Valve Tappet
PISTON RINGS
If a ring expander tool is not available, install rings by placing the open end of the ring on the piston first (Fig. 93). Spread the ring only far enough to slip over the piston and into the correct groove, being careful not to distort the ring. Install the bottom ring first. Work toward the head of the piston, installing the top ring last.
Each piston has two compression rings, a scraper ring and an oil ring (Fig. 94). The outer diameter of the top compression ring is chrome plated. Mount the scraper ring with the scraper edge down, otherwise oil pumping and excessive oil consumption will result.
Connecting Rod
Oil Spray Nozzle
Fig. 91 Engine Cutaway
Gasoline Strainer
Oil Filler And Breather Cap
Oil Saber
Oil FIlter
Oil Drain Plug
PI–01436
Oil Hole
CYLINDER BLOCKS
Clean all dirt and foreign deposits from between the cylinder fins and manifold ports.
The cylinder blocks do not need to be removed unless the cylinder bore is scored, out–of–round, or worn oversize more than 0.005 inch. In this event, the blocks will need to be removed, rebored and fitted with oversize piston and rings. In reassembly, tighten the four cylinder block mounting nuts to 40–50 ft.–lbs. torque.
Oil Spray Nozzle
A–01859
MM INCHES
Piston to Cylinder at Piston Skirt (Thrust Face) 0,089–0,10 0.0035–0.004 Piston Ring Gap 0,25–0,51 0.010–0.020 Piston Ring Side Clearance in Groove
Top Ring 0,051–0,089 0.002–0.0035 2nd & 3rd Rings 0,025–0,064 0.001–0.0025
Oil Ring 0,064–0,10 0.0025–0.004 Piston Pin to Connecting Rod Bushing 0,013–0,028 0.0005–0.0011 Piston Pin to Piston 0–0,02 0.0000–0.0008 tight
Connecting Rod to Crank Pin–Side
Clearance 0,023–0,46 0.009–0.018
Connecting Rod Shell Bearing to Crank
Pin Diameter (Vertical) 0,03–0,07 0.0012–0.0034 Connecting Rod Babbitt Bearing to
Crank Pin 0,02–0,051 0.0007–0.0020
VALVES & SEAT INSERTS
Remove the valve tappet inspection plate and compress the valve springs with a standard automotive type valve lifter (Fig. 96). Insert a rag into the opening at the bottom of the valve chamber so the retaining locks do not fall into the the engine crankcase. Remove the retaining lock, seats, springs and valves and clean these, as well as the ports and guides, of all carbon and gum deposits. Tag each valve so that in reassembly they will be mounted in the same guide they were removed from. Replace valves that are burned or pitted. The exhaust valve face and replaceable exhaust seat inserts are of stellite material. A positive type valve rotator is furnished as standard equipment on the exhaust valves. Clean and inspect operation of the rotor.
The inlet and exhaust valve inserts can be removed, when replacement becomes necessary by using an insert puller. Before grinding valves, inspect the valve guides for possible replacement. The valve face is ground at a 45° angle to the vertical centerline of the valve stem. The valve seat insert should also be ground at a 45° angle. After grinding, lap valves in place until a uniform ring will show entirely around the face of the valve. Clean the valves. Wash the block thoroughly with a hot solution of soap and water. Wipe the cylinder walls with clean, lint free rags and light engine oil, especially if the cylinders were rebored and honed. Valve guides in the cylinder block are replaceable. The valve stem has a clearance of .003 to .005 inch in the guide. When the clearance becomes .007 inch, the guide should be driven out and a new pressed into place.
Fig. 93 Installing Rings A–01826
Upper End Of Piston
Compression Rings Scraper Ring Oil Ring
Fig. 94 Ring Sequence A–01844
1 8 R.
1.751 1.750 1.130 1.125
Dia. Grind Length
PI–01441D Fig. 95 Model VF4 Crankshaft
Exhaust Valve Valve Lifter
Valve Spring Valve Seat
A–01827
To remove the crankshaft (Fig. 97), take out the six capscrews in the main bearing plate at the take–off end. Pry the plate off and remove the crankshaft from the end of the crankcase. In reassembly, use the same quantity and thickness bearing plate gaskets and shims as were removed. They are necessary to provide end play for the tapered roller crankshaft bearings.
NOTE: End play should be 0.002 to 0.004 inch when the engine is cold.
There is practically no wear in these bearings, so readjustment is seldom necessary after proper assembly.
The mounting holes in the main bearing plate are offset so the plate will be correctly mounted for main bearing lubrication. Tighten the main bearing cap screws to 25 – 30 ft.–lbs. torque.
Main Bearing Plate
A–01843 Fig. 97 Removing the Camshaft
Camshaft
In reassembly, the timing marks on the crankshaft gear and camshaft gear must be aligned (Fig. 86), or the engine will not operate properly. If timing is off considerably, the engine will not run at all. W–2288–0198
CAMSHAFT
The camshaft must be removed from the flywheel end of the engine (Fig. 98). When replacing, be sure the spring and plunger are in place in the end of the camshaft, as they hold the camshaft in position endwise.
VALVE TAPPETS
Take the valve tappets out after the camshaft is removed. In reassembly, the tappets must be inserted in their proper position in the crankcase before the camshaft is installed.
After the cylinder blocks have been assembled to the crankcase, adjust the valve tappets (Fig. 99). With the tappets in their lowest positions (engine cold) the clearance should be 0.008 inch for the inlet and 0.016 inch for the exhaust, with or without stellite valves.
Valve
Tappets A–01846 Fig. 98 Withdrawing the Camshaft
A–01828 Fig. 99 Adjusting Valve Tappets
TECHNICAL DATA (Wisconsin) FITS & CLEARANCES
Breaker Point Gap 0.018–0.022 . . . . . . . . . . . . . . . . . . . . . . . . . . . . . . . . . . . . . . . . Spark Plug Gap 0.030 . . . . . . . . . . . . . . . . . . . . . . . . . . . . . . . . . . . . . . . . . . . . . . . . Idler Gear to Shaft Collar Clearance 0.0015–0.0035 . . . . . . . . . . . . . . . . . . . . . . Piston to Cylinder at Piston Skirt (Thrust Face) 0.0035–0.004 . . . . . . . . . . . . . . Piston Ring Gap 0.0035–0.004 . . . . . . . . . . . . . . . . . . . . . . . . . . . . . . . . . . . . . . . . . Piston Ring Side Clearance in Grooves:
Top Ring 0.002–0.0035 . . . . . . . . . . . . . . . . . . . . . . . . . . . . . . . . . . . . . . . . . . . . . . 2nd Ring 0.001–0.0025 . . . . . . . . . . . . . . . . . . . . . . . . . . . . . . . . . . . . . . . . . . . . . . 3rd Ring 0.001–0.0025 . . . . . . . . . . . . . . . . . . . . . . . . . . . . . . . . . . . . . . . . . . . . . .
Oil Ring 0.0025–0.004 . . . . . . . . . . . . . . . . . . . . . . . . . . . . . . . . . . . . . . . . . . . . . . Piston Pin to Connecting Rod Bushing 0.0005–0.0011 . . . . . . . . . . . . . . . . . . . . Piston Pin to Piston 0.0000–0.0008 . . . . . . . . . . . . . . . . . . . . . . . . . . . . . . . . . . . . . Connecting Rod to Crank Pin – Side Clearance 0.009–0.018 . . . . . . . . . . . . . . . Connecting Rod Shell Bearing to Crank Pin Diameter 0.0012–0.0034 . . . . . . . Connecting Rod Babbitt Bearing to Crank Pin Diameter 0.0007–0.0020 . . . . . . Crank Pin Diameter VF4 Engine 1.751–1.750 . . . . . . . . . . . . . . . . . . . . . . . . . . . . Crank Pin Length VF4 Engine 1.130–1.125 . . . . . . . . . . . . . . . . . . . . . . . . . . . . . . Valve Stem Clearance in Guide 0.003–0.005 . . . . . . . . . . . . . . . . . . . . . . . . . . . . Valve Stem Clearance in Guide (Maximum Permissible) 0.007 . . . . . . . . . . . . . Crankshaft End Play (Cold) 0.002–0.004 . . . . . . . . . . . . . . . . . . . . . . . . . . . . . . . . Valve Tappets:
Inlet 0.008 . . . . . . . . . . . . . . . . . . . . . . . . . . . . . . . . . . . . . . . . . . . . . . . . . . . . . . . . . Exhaust 0.016 . . . . . . . . . . . . . . . . . . . . . . . . . . . . . . . . . . . . . . . . . . . . . . . . . . . . .
TORQUE VALUES
Spark Plugs 25–30 ft.–lbs. . . . . . . . . . . . . . . . . . . . . . . . . . . . . . . . . . . . . . . . . . . . . Cylinder Head Screws 22–24 ft.–lbs. . . . . . . . . . . . . . . . . . . . . . . . . . . . . . . . . . . . Gear Cover Screws 14–18 ft.–lbs. . . . . . . . . . . . . . . . . . . . . . . . . . . . . . . . . . . . . . . Oil Pan Mounting Screws 6–9 ft.–lbs. . . . . . . . . . . . . . . . . . . . . . . . . . . . . . . . . . . . Connecting Rod Nuts 22–28 ft.–lbs. . . . . . . . . . . . . . . . . . . . . . . . . . . . . . . . . . . . . Cylinder Block Mounting Nut 40–50 ft.–lbs. . . . . . . . . . . . . . . . . . . . . . . . . . . . . . . Main Bearing Plate Capscrews 25–30 ft.–lbs. . . . . . . . . . . . . . . . . . . . . . . . . . . . . Manifold Mounting Nuts VF4 Engine 14–18 ft.–lbs. . . . . . . . . . . . . . . . . . . . . . . .