1 minute read
Belt tensioning adjustment


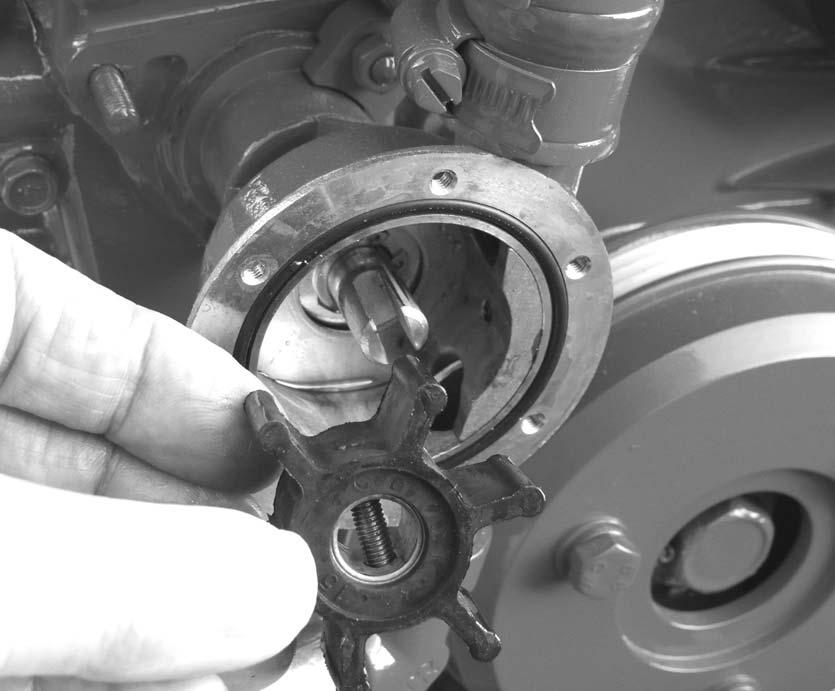
Note: If any pieces of rubber impeller are missing then they must be found as they are most likely to be trapped in the entrance to the heat exchanger cooling stack. See ‘Cleaning Tube Stack’. 4) Re-assemble using new ‘O’ rings. Do not over tighten end cap bolts and make sure the tube stack is the right way round for end cap location. 5) Re-fill engine with coolant (water/anti-freeze solution) and run engine up to temperature to check for leaks.
32 33
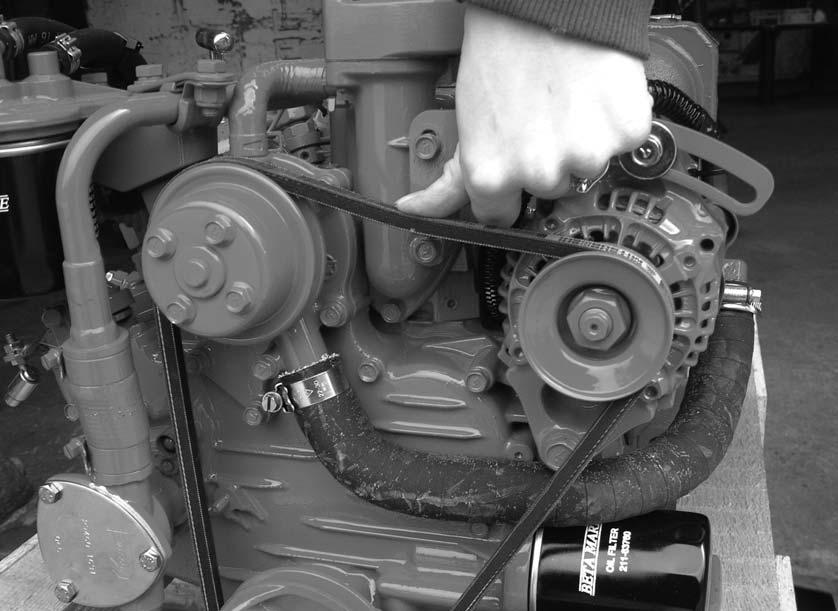
Belt Tension

Warning: Belt tension must only be checked with the engine switched off.
These engines are fitted as standard with a single belt that drives both the 40 Amp battery charging alternator and the fresh water /engine coolant circulating pump.
40 Amp alternator (heat exchanger cooled)
(1) The belt tension is adjusted by swinging the alternator outboard as it pivots on its support bolts. See photo 34. (2) With the engine stopped, loosen the support bolts and the link adjusting bolt. (3) Push alternator outboard by hand to tension the belt, then tighten link bolt. Check that the depression of the belt (at position shown) is approximately 1/2 ” or 12 mm when pushed down firmly by thumb. Tighten support bolts. See photo 35. (4) Belt tension should be regularly checked especially during the first 20 hours of running in a new belt, as stretching occurs.
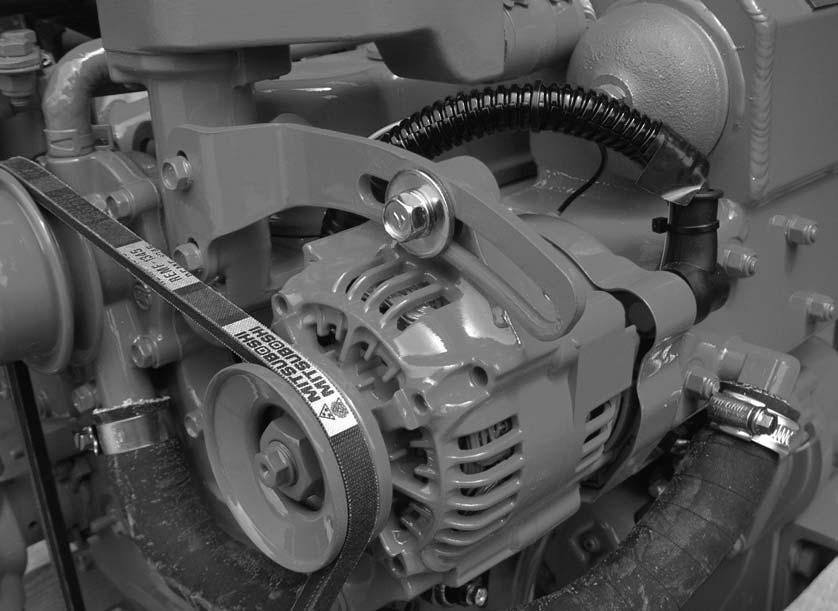
70 Amp alternator (option)
The same method applies as outlined above with the ‘polyvee’ flat belt, but final tensioning must be by hand only. Over tensioning will cause premature failure of components.
34 Adjuster bolt 35