1 minute read
Removing the LCD Brackets and FPC Cable


1. Remove the LCD Bezel. See “Removing the LCD Bezel” on page 43. 2. Disconnect the MIC cable. See “Removing the MIC Board” on page 45. 3. Remove the five (5) securing screws from the LCD Module.
4. Grasp the left hinge and pivot down before pulling up. 5. Remove it from its housing well.
Step
Size LCD Panel M2*4 (NL) 5 Quantity Screw Type

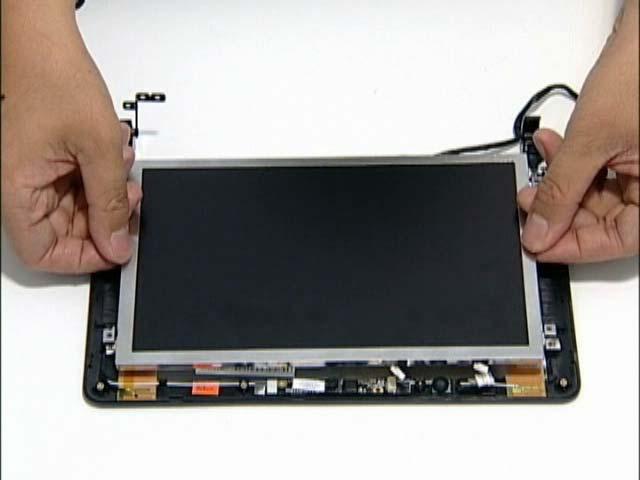
1. Remove the LCD Panel. See “Removing the LCD Panel” on page 46. 2. Turn the LCD panel over on a clean surface. Remove the adhesive strips securing the LCD cable.
3. Disconnect the LCD cable from its connector as shown.