1 minute read
Removing the Fingerprint/Button and Touchpad Boards


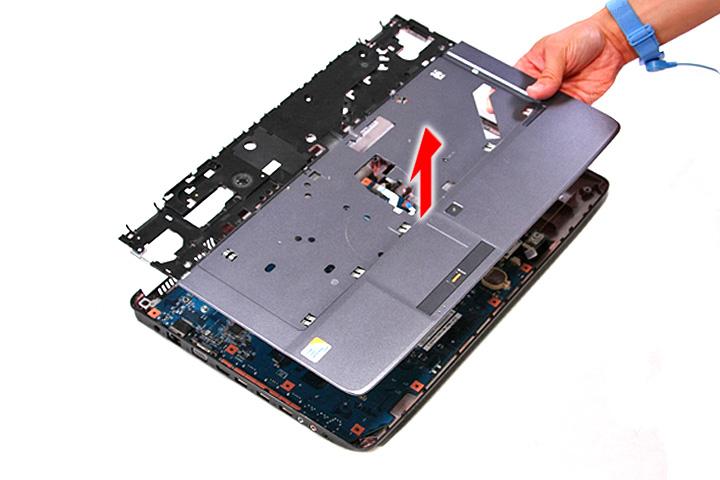
1. See “Removing the SD Dummy Card” on page 44. 2. See “Removing the Battery Pack” on page 45. 3. See “Removing the Back Cover” on page 46. 4. See “Removing the Hard Disk Drive Module” on page 48. 5. See “Removing the Wireless LAN Card” on page 50. 6. See “Removing the DIMM Module” on page 51. 7. See “Removing the Heatsink Module” on page 52. 8. See “Removing the CPU” on page 54. 9. See “Removing the Optical Drive Module” on page 55. 10. See “Removing the Middle Cover” on page 58. 11. See “Removing the Keyboard” on page 60. 12. See “Removing the LCD Module” on page 61. 13. See “Separating the Upper Case from the Lower Case” on page 63. 14. Release the latch (a) and disconnect the fingerprint/ button cable (b) from the fingerprint/ button board.
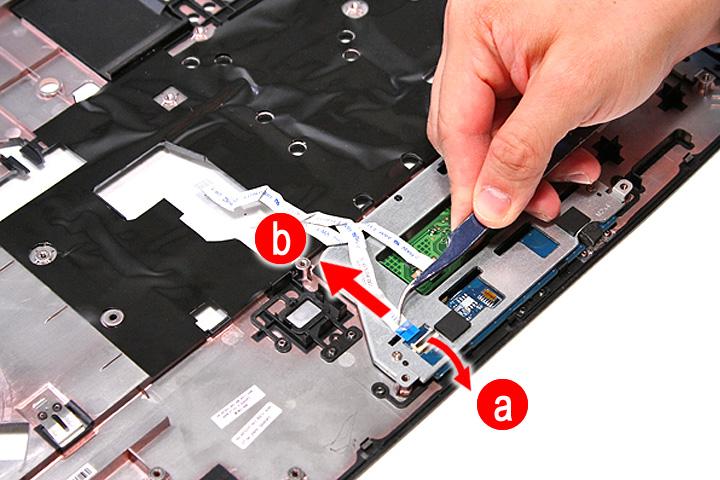
16. Release the latch (a) and disconnect the touchpad cable (b) from the touchpad board.
17. Remove the two screws (B) securing the touchpad and fingerprint/button bracket to the upper case.
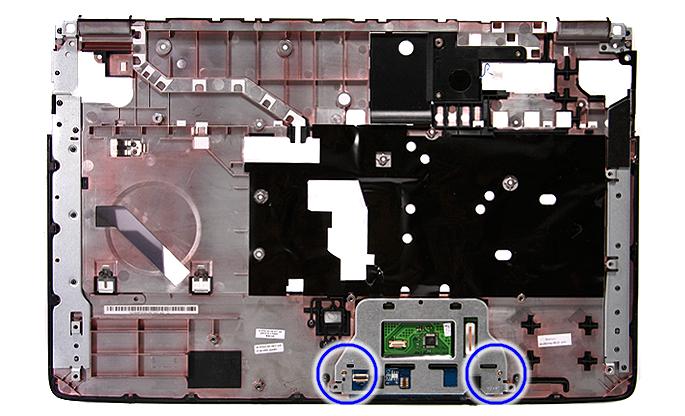
Size (Quantity) Color Torque Part No.
M2 x L4 (2) Silver 1.6 kgf-cm 86.9A552.4R0
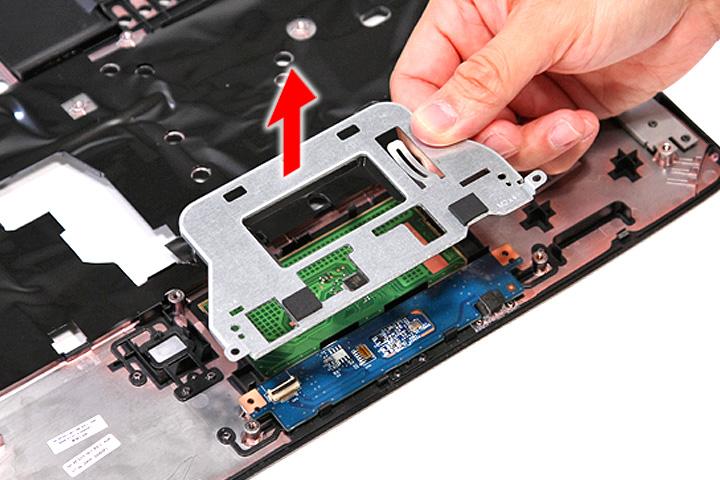
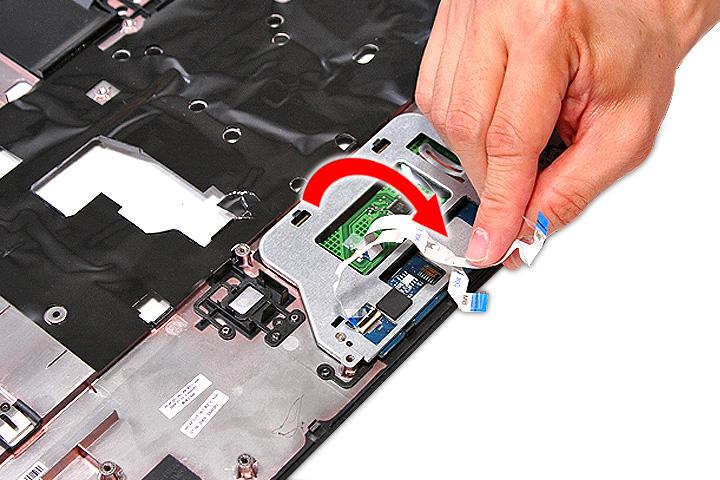
19. Detach the fingerprint/button board.
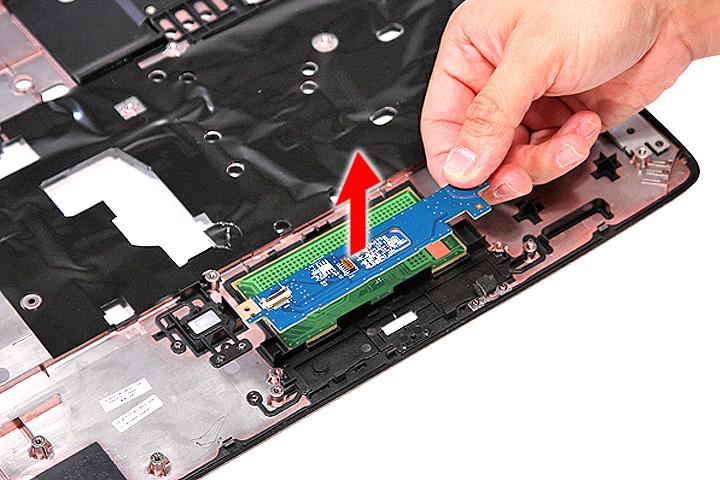
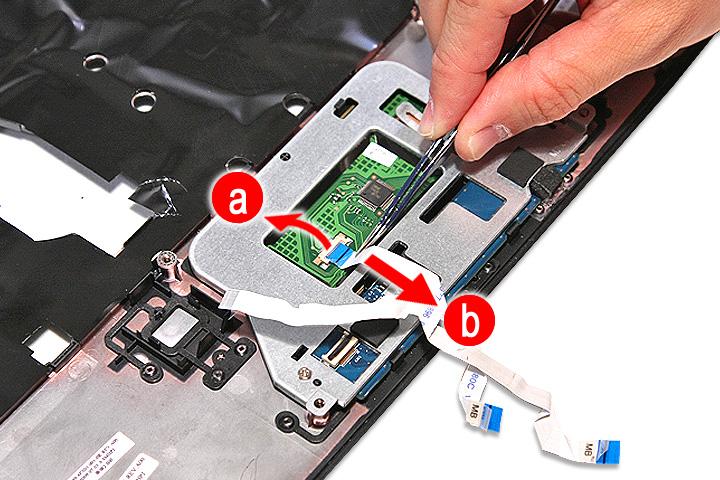
20. Pry to loosen the touchpad board and detach the touchpad board from the upper case.
WARNING: The touchpad board is glued to the upper case, only remove the touchpad board if it is defective.
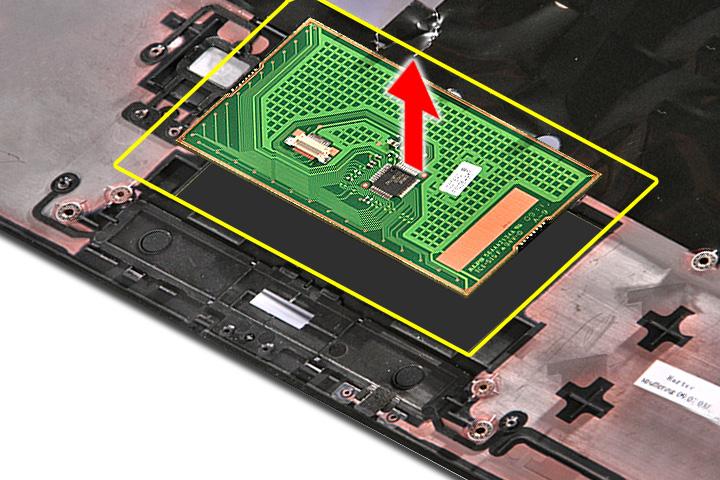
Note: Circuit boards > 10cm2 has been highlighted with the yellow square as shown in the figure above. Please detach the circuit boards and follow the local regulations for disposal.


