1 minute read
Removing the FPC Cable
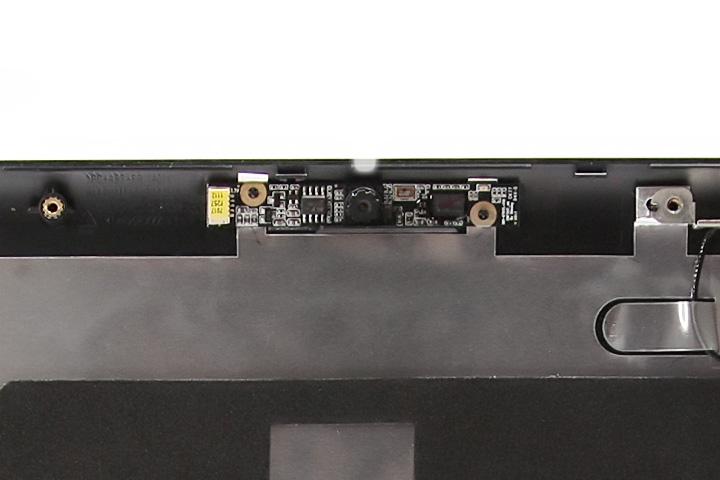
11. See “Removing the Keyboard” on page 60. 12. See “Removing the LCD Module” on page 61. 13. See “Removing the LCD Bezel” on page 78. 14. See “Removing the LCD panel with the Brackets” on page 79. 15. Pry to remove the web camera module from the LCD bezel.
WARNING: The web camera module is glued to the LCD module back cover, only remove the web camera module if it is defective.
1. See “Removing the SD Dummy Card” on page 44. 2. See “Removing the Battery Pack” on page 45. 3. See “Removing the Back Cover” on page 46. 4. See “Removing the Hard Disk Drive Module” on page 48. 5. See “Removing the Wireless LAN Card” on page 50. 6. See “Removing the DIMM Module” on page 51. 7. See “Removing the Heatsink Module” on page 52. 8. See “Removing the CPU” on page 54. 9. See “Removing the Optical Drive Module” on page 55. 10. See “Removing the Middle Cover” on page 58. 11. See “Removing the Keyboard” on page 60. 12. See “Removing the LCD Module” on page 61. 13. See “Removing the LCD Bezel” on page 78. 14. See “Removing the LCD panel with the Brackets” on page 79.

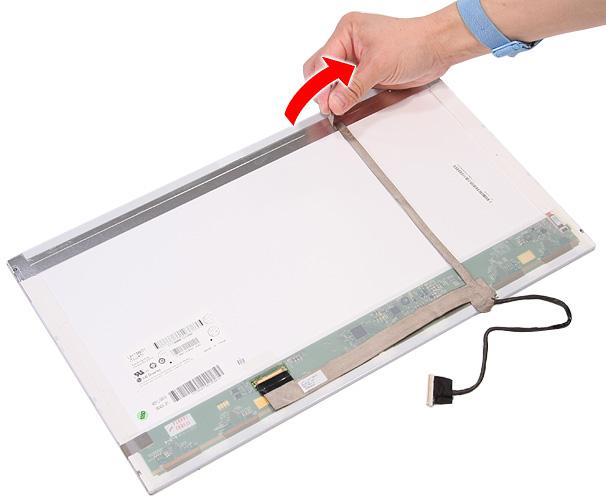
16. Detach the FPC cable from its connector on the back of the LCD panel.

17. Disconnect the FPC cable from the LCD panel.


