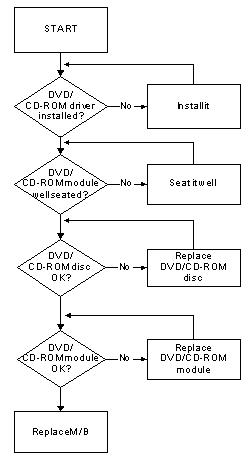
1 minute read
Replacing the Thermal Module


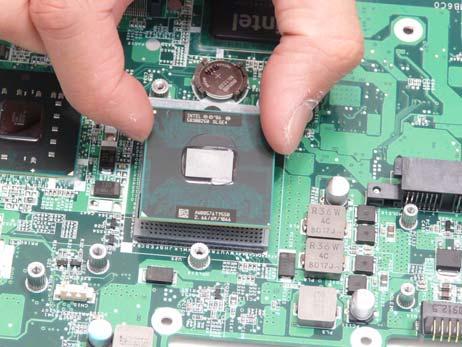
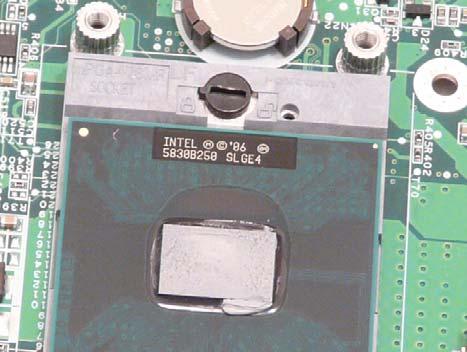
The following thermal compounds are approved for use: • Eapus XR-PE 1. Remove all traces of thermal grease or pad adhesive from the Thermal Module using a lint-free cloth or cotton swab and Isopropyl Alcohol, Acetone, or other approved cleaning agent. 2. Apply a small amount of thermal grease or the supplied thermal pad to the centre of the heat sink. There is no need to spread grease manually, the force used during the installation of the Thermal Module is sufficient. 3. Place the CPU into the socket. Take note of the Pin 1 locator in the image below.
4. Turn the CPU socket latch 180 degrees clockwise to the Lock position.
IMPORTANT:Ensure all thermal pads are in place before replacing the Thermal Module.
The following thermal pads are approved for use: • Silmore GP50 • Honeywell • Jet Motor 7762
The following thermal compounds are approved for use: • Eapus XR-PE 1. Remove all traces of thermal grease or pad adhesive from the Graphics Card and CPU using a lint-free cloth or cotton swab and Isopropyl Alcohol, Acetone, or other approved cleaning agent.
2. Apply a small amount of thermal grease or the supplied thermal pad to the center of the heat sink and the indicated locations for the Graphics card. If using Thermal Grease, there is no need to spread it manually, the force used during the installation of the Thermal Module is sufficient


WARNING:To prevent damage to the Thermal Module or the CPU, place the Thermal Module onto the mainboard with both hands. 3. Hold the module on both sides and place it onto the Mainboard.

4. Replace the four screws to secure the Thermal Module to the mainboard.

Step
CPU Thermal Module
Size
M2.5*3 4