1 minute read
DOS Flash Utility


Perform the following steps to use the DOS Flash Utility: 1. Press F2 during boot to enter the Setup Menu. 2. Select Boot Menu to modify the boot priority order, for example, if using USB HDD to Update BIOS, move
USB HDD to position 1.
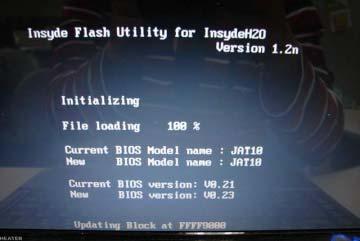
3. Execute the IFLASH.BAT batch file to update BIOS. The flash process begins as shown.
PhoenixBIOS Setup Utility Information Main Advanced Security Power Boot AMD Exit Item Specific Help
Boot priority order: Use <↑> or <↓> to
1. IDE0 : Hitachi HTS542525K9SA00- (S select a device, then
2. IDE1 : Slimtype DVD A DS8A2S- (S2 press <F6> to move it
3. PCI LAN: MBA v11.0.3 Slot 0600 up the List, or <F5>
4. USB HDD : to move it down the
5. USB FDD : list. Press <Esc> to
6. USB KEY : 7. USB CD/DVD ROM : escape the menu.
F1 Help ↑↓ Select Item F5/F6 Change Item F9 Setup Default ESC Exit ←→ Select Menu Enter Select Submenu F10 Save and Exit
4. In flash BIOS, the message Please do not remove AC Power Source displays. NOTE: If the AC power is not connected, the following message displays.
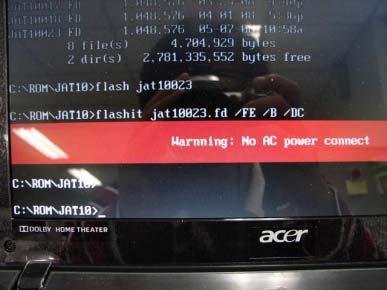
Plug in the AC power to continue. 5. Flash is complete when the message Flash programming complete displays.