1 minute read
Removing the Microphone


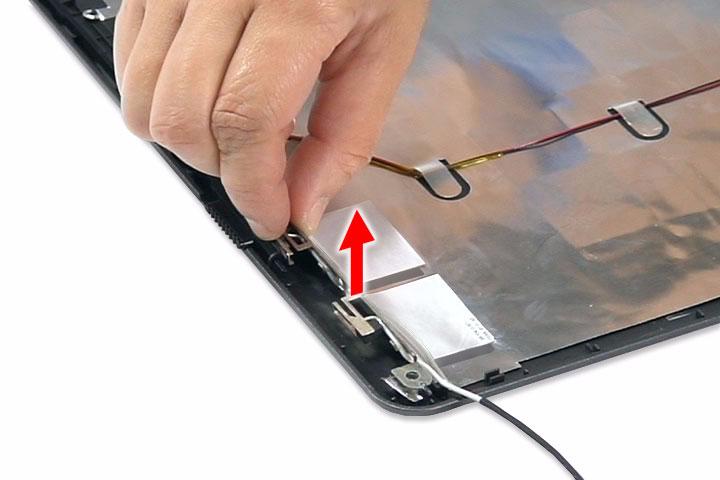
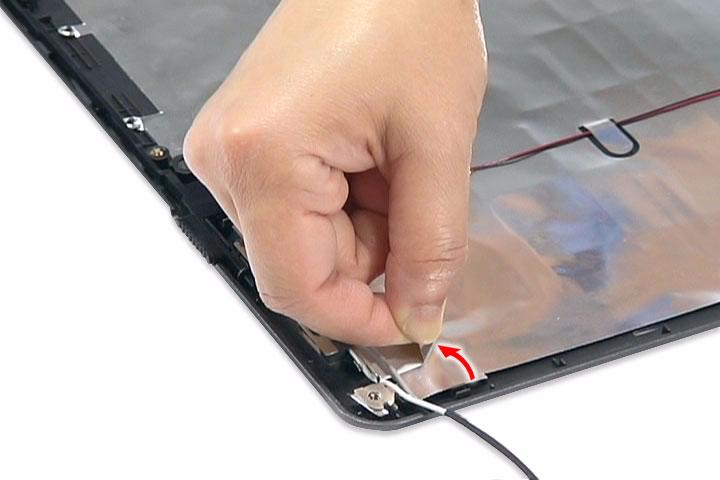
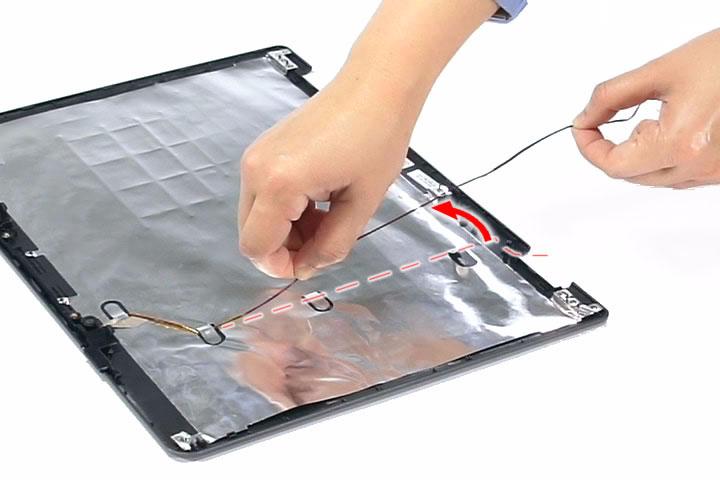
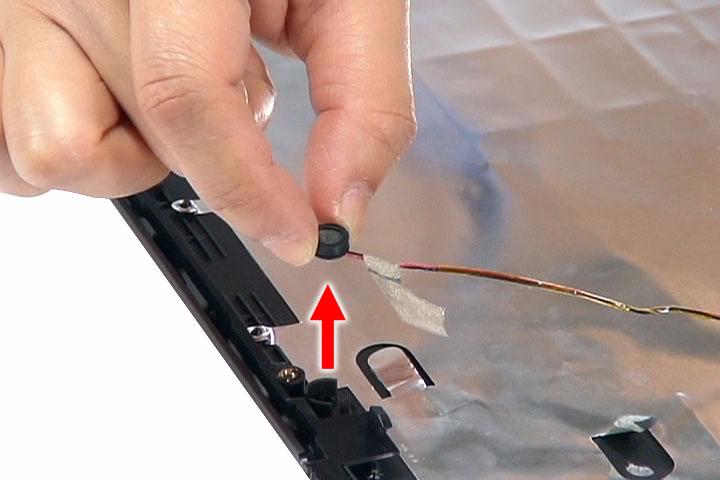
1. See “Removing the Battery Pack” on page 51. 2. See “Removing the SD Dummy Card” on page 51. 3. See “Removing the Express Dummy Card” on page 52. 4. See “Removing the Lower Cover” on page 53. 5. See “Removing the Fan Module” on page 60. 6. See “Removing the CPU Heatsink Module” on page 61. 7. See “Removing the CPU” on page 62. 8. See “Removing the Middle Cover” on page 64. 9. See “Removing the Keyboard” on page 65. 10. See “Removing the LCD Module” on page 66. 11. See “Removing the LCD Bezel” on page 82. 12. See “Removing the Inverter Board” on page 83. 13. See “Removing the LCD with Brackets” on page 84. 14. See “Removing the Antennas” on page 88. 15. Carefully remove the microphone cable from underneath the adhesive aluminum foil.
Troubleshooting
Use the following procedure as a guide for computer problems. NOTE: The diagnostic tests are intended to test only Acer products. Non-Acer products, prototype cards, or modified options can give false errors and invalid system responses. 1. Obtain the failing symptoms in as much detail as possible. 2. Verify the symptoms by attempting to recreate the failure by running the diagnostic tests or repeating the same operation. 3. Do not use any power sources when performing an assembly or disassembly procedures. 4. If any problems occur, you can perform the following visual inspection before you continue. Power cords are properly connected and secured. There are no obvious shorts or opens. There are no burned or heated components. All components appear normal.

