
4 minute read
Acer OrbiCam


The Acer OrbiCam is a 1.3 megapixel CMOS camera appropriately mounted on top of the LCD panel. The camera’s 225-degree ergonomic rotation allows you to capture high-resolution photos or videos up front or at the back of the LCD panel. The Acer OrbiCam fully supports the Acer Video Conference technology so you transmit the best video conference quality over an instant messenger service.
Front View
1 23
# Item
# Item
# Item
1 Lens 2 Power indicator 3 Rubber grip
Rotating the Acer OrbiCam
The Acer OrbiCam rotates 225 degrees counterclockwise to achieve the desired angle. Refer to the illustrations below:
Note: Do NOT rotate the camera clockwise to prevent damage to the device. For your convenience, the camera snaps 45 degrees to match the position of your face in front or at the back of the LCD panel.
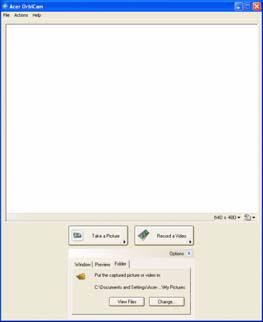
To launch the Acer OrbiCam, double-click on the Acer OrbiCam icon on the screen, or Click Start > All Programs > Acer > Acer OrbiCam. The Acer OrbiCam capture window will appear as below.
Changing the Acer OrbiCam Settings
Resolution
To change the capture resolution, click the displayed resolution at the bottom right corner of the capture window, then select the desired resolution.
Note: Setting the camera resolution to 640 x 480 or larger does not change the capture window size.

Options
Click Options to display the Window, Preview, and Folder tabs. Use the options to change the capture window size, preview settings, and the folder for captured photos or videos.
Camera Settings
Basic Settings Click the Camera Settings icon on the bottom right corner of the capture display, then select Camera Settings from the pop-up menu. You can adjust the Video, Audio, and Zoom/Face tracking options from this window.

Capture Settings From the Camera Settings window, click the Driver Settings button. The Properties window will appear.
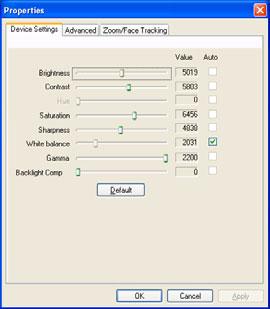
Device Settings allows you to change the camera brightness, contrast, hue, saturation, sharpness, etc. Advanced Settings allows you to achieve gain control, implement image mirror, select image enhancements and anti-flicker settings, and turn on/off the camera indicator. Zoom/Face Track Settings allows you to adjust the zoom level and turn the face tracking feature on or off.
Capturing Photos or Videos
To capture a photo or a video clip, rotate the Acer OrbiCam to get the desired angle, then click the Take a Picture or Record a Video button. The Windows Picture and Fax Viewer or the Windows Media Player automatically launches to display or play a preview of the photo or video clip.
Note: By default, all photos and videos are saved in the My Pictures and My Videos folder.
The Acer OrbiCam is automatically selected as the capture device of any instant messenger (IM) application. To use the Acer OrbiCam as a webcam, open the IM service, then select the video/ webcam feature. You can now broadcast from your location to an IM partner anywhere in the world.
Enabling the Acer VisageON
The Acer VisageON technology comes with two features: Face tracking and Video effects. The Face Tracking feature tracks your head movement and automatically centers your face in the capture window. The video effects feature allows you to select and apply an effect to your video transmissions.
Note: The face tracking feature is not capable of centering your face beyond the capture window frame. Minimal head movements are tracked more efficiently. Please follow the steps below to enable the Acer VisageON. 1. Right click on this icon, then select VisageON from the pop-up menu.

The VisageON window will appear as below:

2. Select and apply a video effect in the left section of the VisageON window. Change the face tracking settings and options in the right section.
Using the Face Tracking Feature
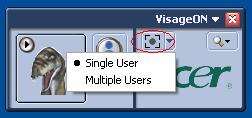
To use the face tracking feature: 1. Click the left icon down arrow button, then select Single User or Multiple Users from the pop-up menu.
For multiple users, the face tracking feature automatically centers all the users’ face in the capture window, otherwise the utility centers the face of the user closest to the camera.
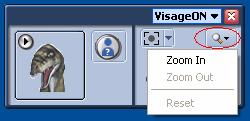
2. Click the right icon to zoom in/out or reset the current view.
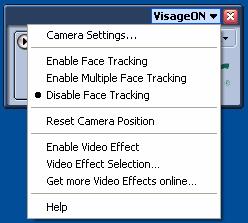
3. Click VisageON to display a menu that allows to change the configuration of the camera, face tracking and video effects settings.
Using Video Effects (selected models only)
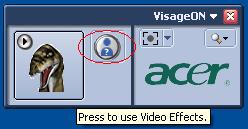
The Video Settings section allows you to select an avatar or accessory video effect from the list. To select an effect: 1. Click the encircled icon to display the available video effects. The Video Effect Selection window will appear as below.
2. Click on a video effect to use. The selected effect appears in the video effects section of the VisageON window.
Note: 1. When using avatars, you may have to calibrate the face points to achieve better tracking. Follow screen instructions in the VisageON window to continue. 2. You may use video effects when using the camera for IM chat/video sessions or call conferences.


