
3 minute read
Index of Symptom-to-FRU Error Message


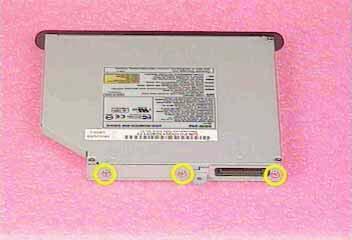
1. Reattach the bracket. 2. Secure the combo with three screws.
Troubleshooting
Use the following procedure as a guide for computer problems. NOTE: The diagnostic tests are intended to test this model. Non-Acer products, prototype cards, or modified options can give false errors and invalid system responses. 1. Duplicate symptom and obtain the failing symptoms in as much detail as possible. 2. Distinguish symptom. Verify the symptoms by attempting to re-create the failure by running the diagnostic test or by repeating the same operation. 3. Disassemble and assemble the unit without any power sources. 4. If any problem occurs, you can perform visual inspection before you fellow this chapter’s instructions. You can check the following: power cords are properly connected and secured; there are no obvious shorts or opens; there are no obviously burned or heated components; all components appear normal. 5. Use the following table with the verified symptom to determine which page to go to.
Symptoms (Verified) Power failure. (The power indicator does not go on or stay on.) POST does not complete. No beep or error codes are indicated.
POST detects an error and displayed messages on screen. The diagnostic test detected an error and displayed a FRU code. Other symptoms (i.e. LCD display problems or others). Symptoms cannot be re-created (intermittent problems). Go To “Power System Check” on page 9.
“Power-On Self-Test (POST) Error Message” on page 11 “Undetermined Problems” on page 19 “Error Message List” on page 12
“System Diagnostic Diskette” on page 43
“Power-On Self-Test (POST) Error Message” on page 11 Use the customer-reported symptoms and go to “Power-On Self-Test (POST) Error Message” on page 11 “Intermittent Problems” on page 18 “Undetermined Problems” on page 19
External Diskette Drive Check
Do the following to isolate the problem to a controller, driver, or diskette. A write-enabled, diagnostic diskette is required. NOTE: Make sure that the diskette does not have more than one label attached to it. Multiple labels can cause damage to the drive or cause the drive to fail. Do the following to select the test device. See “System Diagnostic Diskette” on page 43 for details. 1. Boot from the diagnostics diskette and start the diagnostics program (see “System Diagnostic Diskette” on page 43). 2. See if FDD Test is passed as the program runs to FDD Test. 3. Follow the instructions in the message window. If an error occurs with the internal diskette drive, reconnect the diskette connector on the system board. If the error still remains: 1. Reconnect the external diskette drive/DVD-ROM module. 2. Replace the external diskette drive/CD-ROM module. 3. Replace the main board.
External CD-ROM Drive Check
Do the following to isolate the problem to a controller, drive, or CD-ROM. Make sure that the CD-ROM does not have any label attached to it. The label can cause damage to the drive or can cause the drive to fail. Do the following to select the test device: 1. Boot from the diagnostics diskette and start the diagnostics program (refer to “System Diagnostic
Diskette” on page 43. 2. See if CD-ROM Test is passed when the program runs to CD-ROM Test. 3. Follow the instructions in the message window. If an error occurs, reconnect the connector on the System board. If the error still remains: 1. Reconnect the external diskette drive/CD-ROM module. 2. Replace the external diskette drive/CD-ROM module. 3. Replace the main board.
Keyboard or Auxiliary Input Device Check
Remove the external keyboard if the internal keyboard is to be tested. If the internal keyboard does not work or an unexpected character appears, make sure that the flexible cable extending from the keyboard is correctly seated in the connector on the system board. If the keyboard cable connection is correct, run the Keyboard Test. See “System Diagnostic Diskette” on page 43 for details. If the tests detect a keyboard problem, do the following one at a time to correct the problem. Do not replace a non-defective FRU: 1. Reconnect the keyboard cables. 2. Replace the keyboard. 3. Replace the main board.
The following auxiliary input devices are supported by this computer: Numeric keypad


