

DENTAL SOLUTIONS
MAY / JUN 2024
02 CONTENTS - CLICK CATEGORY TO VIEW BUSINESS SOLUTIONS 4 PRACTICE GREEN 3 COSMETIC & RESTORATIVE 10 PREVENTATIVE 26 HANDPIECES & INSTRUMENTS 58 SURGICAL 54 ENDODONTICS 46 PAIN CONTROL 36 EQUIPMENT 68
AN UPDATE ON HENRY SCHEIN AUSTRALIA’S SUPPLY CHAIN SUSTAINABILITY INITIATIVES 2024
In the fourth quarter of 2023, Henry Schein made significant changes in its sustainability initiatives, in line with Henry Schein’s membership with the Australian Packaging Covenant Organisation (APCO) Henry Schein are continually reviewing all packaging consumption.
Henry Schein initially had five different box sizes; the smallest two brown boxes are made from 100% recycled content. The larger three sizes are white boxes and by partnering with the supplier, HS were able to explore the optimal recycled content for these boxes.
After the successful completion of a trial in February 2024 Henry Schein introduced a new extra-small box (box size 0) made entirely from 100% recycled materials. This smaller box design not only aligns with sustainability goals but also offers an ecofriendlier packaging solution.
Through various trials conducted, the Henry Schein Supply Chain team concluded that 77% recycled content is the appropriate make up for larger boxes to ensure safety and durability within the Supply Chain. The new boxes will be introduced from May 2024 onwards.
Looking ahead in 2024, Henry Schein has plans to further enhance its sustainability efforts, exploring alternative packaging options that align with eco-friendly principles.

Starting with a trial of paper-based honeycomb style satchels for small customer orders. Following this a paper tape trial. Ensuring we focus on the successful implementation of each initiative individually demonstrates Henry Schein's dedication to ensuring the success and seamless integration of sustainable practices throughout their packaging processes. Overall, these initiatives support Henry Schein's proactive role in driving positive environmental change within the industry.
What is Practice Green?
At Henry Schein we are working to reduce our environmental impact and promote responsible business practices in our own operations and supply chain, in collaboration with our suppliers, partners, and customers. We are committed to climate action and transparency by continuously strengthening our approach to measuring, monitoring, and reporting on our carbon emissions and other environmental impacts. Through Practice Green we will be reviewing all aspects of our business and our partners to ensure that we are collaborating on sustainability and making considerable steps to meet our objectives.
For more information on Henry Schein’s Environmental Social, and Governance (ESG) initiatives, visit henryschein.com.au/practice-green


03 1300 65 88 22
MARKING 10 YEARS OF INNOVATION


As Dentally, the market leading cloud enabled practice management software proudly celebrates its 10th anniversary this year - we take a moment to reflect on the journey of evolution which has demonstrated a constant commitment to dentists and making their lives easier. Let’s take a look at a decade of milestones.
Founding vision
Dentally co-founders, Nick Davies and James Harker, envisioned a practice management solution for dental practices that would alleviate the stress of IT and the burden of admin, and help them deliver exceptional patient care. Leveraging the power of being cloud native from day one, and with collaboration with dentists, Dentally was born.
Customer focused
At the heart of Dentally is an unwavering commitment to our customers. Our customer’s voices shape our software, through their valuable insights and feedback. We are focused on providing practitioners with the solution they need, now and in the future.
First steps and launch
The first step to developing Dentally was ensuring that the software had an intuitive user interface. Recognising the complexity of some of the existing solutions on the market, the team focused on removing the barriers to users and developing a system that could easily be learned and used by users, whatever level of IT skills they had. Beta testing in 2013, led to an official launch into the UK in 2014.
10 years of changes
In the past 10 years, dentistry has changed dramatically and continues to be transformed in many different ways by external factors such as:
1. Technological advancements with the rise of digital dentistry, 3D printing and imaging.
2. Regulatory changes.
3. Shifts in patient expectations.
4. Renewed focus on preventive care.
5. Staffing changes with the introduction of therapists and changes in roles to hygienists.
6. Growing awareness of Environmental issues and how to sustainably minimise the impact of single use plastics and adopting paper less admin.
7. Integration of AI into our everyday lives and its growing influence of diagnostics.
8. Global pandemic and the ongoing impact and ramifications of COVID-19.
9. Impact of conflict and impact on utilities.
10. Financial markets and inflation concerns.
All of these continue to shape our own day-to-day lives and the world of dentistry. In that time Dentally has continued its commitment to innovation and supporting its users to navigate the challenges they face every day.
Key product milestones
In software development, 10 years is a significant period of time and so we aren’t able to cover all of the new features that have been added to Dentally. However, we have identified just a few key milestones that have shaped Dentally, that we believe show some of the ways our software has adapted to support dental practices deliver patient care and grow their businesses.
04 BUSINESS SOLUTIONS
NHS Certification: In late 2013 in the UK with NHS England certification passed and the first NHS claim was submitted with a Beta test customer on the 13th of November 2013 and a response received three days later. In 2014, Dentally officially launched with its first practice live on the 22nd of April.
2015 was all about the release of the new version of Dentally! The team retired the ‘Classic’ Dentally interface following lots of early customer feedback, and brought a new improved version of the software, with an improved chart and countless new features.
Postcode finder was a game changer for reception teams, with its introduction in December 2015enabling practices to find patient addresses with ease.
Calendar updates, email attachments and a new iPad app for forms. In 2016, the calendar became even better as you could see all the patient details from this screen including their contact details and appointment information. Plus the ability to navigate the previous week on the calendar with a simple click. We also added the ability to add email attachments to patient comms and developed a new iPad app for digital forms for patients upon arrival..
2017 was all about clinical notes and Dentally Mail! Clinical notes and treatment plans were the focus, improving the way notes could be saved, edited and the duplication of treatment plan options - helped for a seamless experience of the clinician and improved treatment adoption. We also introduced Dentally Mail, as a new way of sending paper mail to patients.
Xero integration: In February 2017 we announced our first big integration partner, with Xero, the online accounting software to support dental practices with their accounts.
2018, new additions: We became an approved software supplier for NHS Scotland, and in the same year acquired Goodteith, welcoming their team and practices to Dentally.
Reporting was a key focus in 2019, with extensive new patient reports added to the software, along with Waiting Lists functionality and flexible recalls.
COVID-19 Toolkit: 2020 was a year of change, as we all learned to navigate COVID-19. Our team introduced a huge number of changes, as dentists had to learn to work differently, to protect their staff and deliver much needed patient care. We introduced a number of new features including outbound telephone calling, tasks list, contactless reception tools, medical history links; plus, we connected remote teams with Dentally chat and helped practices stay in touch with patients through automated comms.
Our Patient Portal initially became part of the Dentally story in 2019, when a developer built an integration with Dentally using our open API, we worked closely with their team and later they became part of family, as we recognised the importance of a seamless patient experience. In 2021 we gave Dentally Portal a face lift, with a new precision login and empowering your patients to take care of their oral health, and help you deliver an effortless patient experience. Our open API is an important part of our story, enabling our users to build one eco system with seamless integrations with third party solution to optimise their workflows and business growth, whether they are looking to integrate with accounting software, patient review platforms or marketing lead generation tools.
2021 marked the start of a global adventure on the other side of the globe! We launched in Australia following 12 months of research and product development in collaboration with local Australian dentists to ensure we provided them with a simple secure cloud solution, with powerful automation tools and fully integrated with HICAPS for their claims process.
New perio exam: In 2022 we introduced a new look to the perio exam, with clear teeth icons, exam comparisons, improved workflow settings configured to the individual practitioner and enhanced graphical representation.
Introducing Dentally Vision: In 2023, we launched our cloud imaging solution, Dentally Vision, allowing you to acquire, manage and access images and x-rays completely in the cloud.
2024 and beyond
As we celebrate a decade of innovation, we are of course looking to the future. This year, we have even more innovative ideas that we can’t wait to share with you but for now from all the Dentally team, thank you to all our users for their continued support.

05 henryschein.com.au BUSINESS SOLUTIONS
UNLOCKING DENTAL RECRUITMENT SUCCESS
HIRING EFFICIENCY FOR QUALITY CANDIDATES

Have you ever felt frustrated by the lack of industryspecific, affordable recruitment assistance?
Jobs4Dental Australia is a job board that was created by the dental industry, for the dental industry - with the goal of creating a collaborative marketplace to showcase the profession as a whole. The job board aims to ease the burden of recruitment by supplying employers with a platform to post their job openings, allowing employees with a direct interest in those positions to apply. This gives more autonomy to both the employer and employee, resulting in higher job satisfaction and staff retention as both parties are sourcing a great match for their needs.
Cost benefits can be clearly identified between traditional recruitment methods versus utilising an industry specific jobs board, and these benefits should most definitely not be overlooked; however, it is also interesting to consider alternative benefits of streamlining your hiring processes. In addition to reducing upfront recruitment costs, the depletion in administrative hours required is significant. While the cost benefits of advertising vs recruitment agency costs are obvious, another cost-saving aspect that practices rarely factor in is the hundreds of dollars of lost time reviewing underqualified or otherwise unsuitable candidates - often making up the bulk of responses received from generalist job boards, i.e., Seek & Indeed.
Curating a high quality advert and uploading to a designated dental industry recruitment platform will ensure high-quality, relevant leads that are ready to be interviewed. When you talk to your management team, they’ll tell you there is nothing more frustrating than scouring through dozens of resumes with no relevance to the advertised position.
We actively encourage our clients to incorporate their business’ branding and ethos into the job specifications. This advertises not only the job role details, but the culture of your clinic to prospective candidates. For example, if the messaging includes
keywords that indicate the clinics’ approach to patient care, it is more likely to attract like-minded candidates that share your core values. While this might not increase the volume of applicants, experience shows it does increase the quality and likely fit of applicants, increasing your chances of hiring as well as retaining those individuals long term.
A common misconception in the recruitment industry is that a high volume of applicants results in the most suitable candidate. However, it is often the case that the higher the volume of applicants, the more likely it is that a majority are underqualified or otherwise unsuitable for the role. While it’s great to receive dozens of responses, and it appears to paint the impression of success, it is more efficient to receive a smaller number of high calibre candidates that are worth interviewing. The Jobs4Dental job board is tackling this issue by offering a dedicated platform for qualified dental professionals - so all applicants are ticking off that qualification requirement!
When competitive isn’t competitive… Let's take a look at the pro’s and con’s when it comes to excluding a statement of salary or even a salary range. Job adverts without salary information, or those stating the salary is “competitive” on average receive up to 50% fewer applications. It is vital to consider candidate perceptions of what “competitive” may be to the applicant in comparison to the employer. Often, the candidate's perception is that “competitive” is a buzzword that doesn’t suggest a higher than industry standard offer - or even that the exclusion of the salary information is indicative of a sub-par offer.
This can discourage applicants, even if there may be inclusions from your offer that they would be interested in otherwise! Lower salary offers that are supported by great career development and training will often resonate with the right candidates that are keen to learn and progress their dental career, but stating your salary range will usually garner a greater response than adverts without.
06 BUSINESS SOLUTIONS
Our recommended “ideal” job ad would look something like this:
Jobs4Dental Australia is on the lookout for an OFFICE MANAGER superstar to add to our growing team!
This role will suit an outgoing, organised, self-motivated individual that is interested in expanding their role as we grow. Our ideal candidate would have 3+ years in administrative management, or 5+ years without prior management experience. Our team is currently growing within their roles so we are looking for our missing puzzle piece to bring us all together and keep us in line!
Now that we’ve asked for attributes from you, let’s detail what we offer in return:
- Salary $70 000, with opportunity for team performance based bonuses
- 9 day fortnight to manage that work/life balance
- Ongoing training opportunities
- Team travel opportunities
- Quarterly staff functions for team bonding
- Great team that is ready to welcome a brand new office manager
If this sounds right up your alley, we’d love to hear from you. Click the Apply Now button below, fill out your contact details, attach your resume and we will get back to you shortly!


07 1300 65 88 22 BUSINESS SOLUTIONS
APPLY NOW
THE WHY AND THE WHEN
With the development of adhesive techniques and the increase in aesthetic demands, composite resins (CRs) have become the material of choice for the direct restoration of the posterior tooth. Since the introduction of CRs in the 1960’s, there have been significant developments in their optical, mechanical and polymerisation shrinkage properties (Lassila et al., 2020). However, further developments are necessary to improve their use when placed in high stressbearing regions such as for cuspal replacements.
The survival of posterior CRs strongly correlates to its size. Bernardo et al., reported that when comparing the annual failure rate of a single surface restoration to a four or more surface restoration, there was nearly ten times increase from 0.95% to 9.43% (Bernardo et al., 2007). The decreased longevity of large restorations was strongly correlated with fracture-related failures (Opdam et al., 2007a; Van Nieuwenhuysen et al., 2003) which can be attributed to poor strength-related properties of the material, and patient factors like bruxism (Brunthaler et al., 2003; Opdam et al., 2007b). Furthermore, with increased size of the cavity, control of polymerisation shrinkage stress is paramount for margin integrity, with breakdown resulting in microleakage, caries, post-operative sensitivity and pulpal pathology.
Looking to address some of these causes of failure, everX Flow (GC, Japan), a short fibre reinforced composite (SRFC) has emerged as a promising material, aiming to structurally mimic dentine (Garoushi et al., 2015). In particular, it has been proposed that SFRC’s ability to influence failures away from unrepairable fractures is a key benefit (Magne & Milani., 2023). It is a combination of:
• Organic resin matrix: containing cross-linked Bis-MEPP, UDMA and TEGDMA, forming a polymer matrix which provides good bonding properties and increased toughness
• Inorganic short E-glass fibres: effectively silanised, the orientation of fibres control polymerisation shrinkage stress thereby marginal microleakage is reduced compared with conventional CRs (Garoushi et al., 2008)
• Inorganic filler particles: mostly barium glass. The total filler rate is 70% in weight
With these advantages, SFRC’s have emerged as a dentine-replacing material used with an enamel replacing material of either conventional CR or an indirect restoration. This can be considered a biomimetic bi-structured restoration. These have displayed promising characteristics surrounding the parameters of microleakage and load-bearing capacity (Garoushi et al., 2015).

08
EVERX FLOW
COSMETIC & RESTORATIVE
This is a single visit case where everX flow was utilised as part of the immediate dentine sealing (IDS) and resin coat process beneath CAD/CAM Initial® LiSi block HT A3.

Initial situation.

Caries removal, tooth preparation finalised. Application of bonding agent.

Final restoration.
View products online
VIEW PRODUCTS

Initial depth reduction and restoration removal.

Immediate dentine sealing and dentine buld up using everX Flow.
Reference
1. Brunthaler, A., König, F., Lucas, T., Sperr, W., & Schedle, A. (2003). Longevity of direct resin composite restorations in posterior teeth: a review. Clinical oral investigations, 7, 63-70.
2. Garoushi, S. K., Hatem, M., Lassila, L. V., & Vallittu, P. K. (2015). The effect of short fiber composite base on microleakage and load- bearing capacity of posterior restorations. Acta biomaterialia odontologica Scandinavica, 1(1), 6-12.
3. Garoushi, S., Vallittu, P. K., Watts, D. C., & Lassila, L. V. (2008). Polymerization shrinkage of experimental short glass fiber-reinforced composite with semi-inter penetrating polymer network matrix. Dental Materials, 24(2), 211-215.
4. Lassila, L., Säilynoja, E., Prinssi, R., Vallittu, P. K., & Garoushi, S. (2020). Fracture behavior of Bi-structure fiber-reinforced composite restorations. Journal of the Mechanical Behavior of Biomedical Materials, 101, 103444.
5. Magne, P., & Milani, T. (2023). Short-fiber Reinforced MOD Restorations of Molars with Severely Undermined Cusps. The Journal of Adhesive Dentistry, 25(1), 99-106.

09 1300 65 88 22
SELENA LIU Sydney
DR.
COSMETIC & RESTORATIVE
G-ÆNIAL UNIVERSAL INJECTABLE CLEAR ALIGNER PARTNER

G-ænial Universal Injectable is a high strength injectable composite resin. This is ideal for creating clear aligner attachments with excellent clinical outcomes (exceptional aesthetics, no flash, ideal flow without being runny, high strength and no porosities) and most importantly a significant reduction in application time helping further improve the cost effectiveness of the aligner treatment procedure.

Initial presentation, prior to aligner attachment placement.


Attachments in position after template removal.


After applying resin adhesive, the template is placed in the mouth and the G-aenial Universal Injectable is light cured for 20 seconds and the template is removed.


10 COSMETIC & RESTORATIVE
final
Completed clear aligner attachments after
polishing.
Images courtesy of Dr Bharat Agrawal, Gold Coast.
VIEW PRODUCTS View products online DR BHARAT AGRAWAL Gold Coast
G-aenial Universal Injectable enamel shade JE (Junior Enamel), used to fill the attachment space.
EVERX FLOW
FIBRE-REINFORCED FLOWABLE COMPOSITE, WHERE CORE STRENGTH MATTERS.

everX Flow is a highly fracture tough, reinforcing composite substructure incorporating unique micro-fibre and full silane coverage technologies. To help you achieve stronger and more durable posterior restorations place everX Flow as a dentine replacement under composite or use as a core under indirect prosthesis.
Clinical Case – Management of the endodontically treated tooth


11 henryschein.com.au COSMETIC & RESTORATIVE
Images courtesy of Dr Lucile Dahan, France
1. Cavity preparation.
2. Application of adhesive.
3. Application of everX Flow, Translucent shade.
4. Covering everX Flow with G-ænial® Universal Injectable, Shade A3.
5. Final layer using G-ænial® Universal Injectable, Shade A3.
View products online VIEW PRODUCT
6. Post-operative situation.

ANTERIOR CASE WITH CLEARFIL MAJESTY™
Case Background
A healthy systemically ASA I classified 30-year-old male presented to my service for esthetic options relative to tooth 2.1. This tooth had been impacted in a bike accident at 16 years of age in South Africa, where the individual high-sided and traumatized the tooth. Since then, it has progressed through specialist endodontist intervention 7 years prior.
Soft tissue clinical examination revealed a band of localized moderate marginal erythema affecting his upper anterior sextant, with no periodontal pockets of significance, with the likely etiology mouth breathing, for which nasal breathing was reinforced. Clinical dental examination revealed tooth 2.1 with significantly lower value than the contralateral teeth with visible margins of the old acid-etched bonded composite restoration on the MIDBP surfaces. There was an oblique crack affecting the distal marginal ridge extending centro-obliquely. A small enamel fracture was noted on the 11MI angle also. Radiographic examination revealed no apical rarefying osteitis and no caries affecting the teeth in view, however the distal marginal ridge incomplete fracture was visible and extended to a cervical level possibly violating the biologic width.
Restorative Procedure
Internal bleaching was discussed with the patient as a structure-conservative first option for lifting the chroma and value especially in the cervical aspect where the enamel volume is the thinnest and can range from less than 0.3-0.5mm (6).
The risks inherent to this procedure involve a 15.1% lifetime risk of External Cervical Resorption (ECR) and with internal bleaching an increased risk to 10.6% of teeth involved. (1)
The patient was anesthetized with 1.5 carpules of 2% Lignocaine with 1:100,000 epinephrine via buccal and lingual infiltration as possible biologic width violation was possible as dissecting out the fracture line to recreate a well-bonded periphery for hermetic enclosure of the walking bleach. Rubber dam isolation was achieved initially but abandoned as the fracture line descended to a significant subgingival level distogingivally and thus required surgical access to be dissected out in its entirety. Following the construction of the distal marginal ridge, the rubber dam was dropped to a crestal level and a small plug of temporary filling placed superficial to this to seal off the obturation.
A slurry of sodium perborate and 16% carbamide peroxide was applied to the access opening and a bonded approach using a contrast shade flowable composite applied to the palatal aspect.
This was removed on a weekly basis for 2 iterations before restoration of the access cavity with a glass ionomer restoration for a 10-day minimum standdown period before any bonded restorative procedures.
In actuality a 5-week standdown period eventuated due to scheduling congestion. This period is to allow oxygen leaching from the tooth that can interfere negatively with composite polymerization reactions (5).
Shade selection was completed as the first step of the restorative process especially as dehydration sets in quickly and changes the opacity and value of the tooth if the tooth is not maintained in a hydrated state due to topical and local anesthetic application lag. Composite shade tabs of both CLEARFIL MAJESTY™ ES-2 Premium (Kuraray Noritake Dental Inc.) A1D and A1E were applied, along with the Blue and Clear shades. The shade tabs were polymerized to express any inherent color shift before taking a photograph, although there is virtually no color shift post-curing with CLEARFIL MAJESTY™ ES-2.
Procedurally, the patient was isolated using a split dam rubber dam approach to ensure adequate cervical access on the day of preparation. No local anesthetic was required, and the old restoration was excavated from the tooth.
012
COSMETIC & RESTORATIVE
ES-2 PREMIUM


A serrated metal strip was placed surrounding the tooth to protect the adjacent teeth from the effects of the micro air abrasion using 27-micron aluminum oxide.
A total etch procedure was staged with a 15 second etch on enamel before a 5-10 second dwell on dentin and the preparation thoroughly rinsed and puff air dried.
A 2% chlorhexidine solution was scrubbed into the dentin for 30 seconds before again blot dried to a moist dentin state before application of a single step 10-MDPbased self-etching adhesive, CLEARFIL™ UNIVERSAL BOND Quick.
Without waiting time after the application, the bond layer was air thinned and carrier evaporated before curing using a 2000mW/cm2 polywave curing light unit (Pencure 2000, J.Morita Corporation).
A pre-crimped Mylar matrix strip was placed to guide the freehand placement of the lingual shelf, a 0.3mm thick layer composed purely of A1E Enamel (CLEARFIL MAJESTY™ ES-2 Premium). Following this, the join line was occluded using two successive layers of shade of A1D Dentin (CLEARFIL MAJESTY™ ES-2 Premium) and the dentin mamelon incisal details characterized using a dental instrument.
Next, Blue Translucent effects were placed (CLEARFIL MAJESTY™ ES-2 Premium) on the proximoincisal corners to accentuate the opalescence of the enamel and a Trans shade was applied to the mid-incisal area. White tint was used to characterize the tips of the dentin mamelons before a final layer of A1E Enamel was sculpted to final form in preparation for finishing and polishing procedures.


Primary anatomy was completed focusing on incisal embrasures, cervical embrasures and line angles.
Secondary anatomy characterized facial anatomy and lobe detail.
Final reassessment of the case shows excellent optical and functional integration of an esthetically complex case that would have been an equa challenge for an indirect approach however with greater reduction of tooth structure.
Rationale for Material Choice
An indirect approach using laminate porcelain restorations would have necessitated the removal of a minimal of 0.3mm of enamel cervically, which often is the maximal volume of the rigid enamel shell in the cervical third of upper anterior teeth (1).
This acts to compound negatively with the reduced flexural strength of a tooth that not only has previously been endodontically-treated but features existing palato-oblique fractures. Preservation of a maximal volume of tooth structure is key to preserving a maximal long-term prognosis.
Part of the preservation effort is not only macroscopic, but importantly on a microscopic level. By limiting the phosphoric acid etch’s effect on dentin and especially deep dentin, there is a maximal volume of hydroxyapatite crystal volume remaining, which not only bolsters residual flexural strength but allows both super dentin and super enamel development through use of a 10-MDP-based acidic monomer, which has the ability to nanolayer calcium in pattern
013 1300 65 88 22 COSMETIC & RESTORATIVE
1 2 3 4
creating phenotypically a very acid-base-resistant layer, measuring 1000-1200nm in thickness (3, 4). The adhesive selected contains a novel amide monomer, which also increases both hydrophilicity and penetration potential relative to HEMA but is more resistant to hydrolytic degradation. (2)
CLEARFIL MAJESTY™ ES-2 Premium is the only VITA approved shade (VITA Zahnfabrik , Bad Sackingen, Germany) composite system in the world. It features a buttery, no-slump, non-sticky consistency which is a remarkable benefit for universal applications but especially sculpted direct anterior cases. It features an excellent optical refraction index very similar to tooth structure.
Often, the filler to resin matrix in anterior composites leaves the composite sticky, with the subsequent need to use wetting resin (bis-GMA, TEGDMA) to handle the material, which can often dilute the intended chemistry and affect ultimate performance if not used sparingly.
CLEARFIL MAJESTY™ ES-2 Premium features a very unique Light Diffusion Technology (LDT) which allows applications in thinner layers to achieve the same degree of optical refraction as in other composite systems.
This translates to need for less tooth preparation, which is ideal from a responsible esthetics standpoint. With 15 shades in total, it is a slick and tech-smart armamentarium that will be able to tackle any challenge head on in your minimally-invasive daily practice.
References
1. Heithersay GS. Invasive cervical resorption following trauma. Aust Endod J. 1999 Aug;25(2):79-85. doi: 10.1111/j.1747-4477.1999.tb00094.x. PMID: 11411085.
2. Kuno Y, Hosaka K, Nakajima M, Ikeda M, Klein Junior CA, Foxton RM, Tagami J. Incorporation of a hydrophilic amide monomer into a one-step self-etch adhesive to increase dentin bond strength: Effect of application time. Dent Mater J. 2019 Dec 1;38(6):892-899. doi: 10.4012/dmj.2018-286. Epub 2019 Aug 1. PMID: 31366768.
3. Nikaido T, Takagaki T, Sato T, Burrow MF, Tagami J. The concept of super enamel formation -Relationship between chemical interaction and enamel acid-base resistant zone at the self-etch adhesive/enamel interface. Dent Mater J. 2020 Aug 2;39(4):534-538. doi: 10.4012/dmj.2020-165. Epub 2020 Jul 4. PMID: 32624553.
4. Nikaido, T., Takagaki, T., Sato, T., Burrow, M. F., & Tagami, J. (2021). Fluoride-Releasing Self-Etch Adhesives Create Thick ABRZ at the Interface. BioMed research international, 2021, 9731280. https://doi.org/10.1155/2021/9731280
5. Topcu, F. T., Erdemir, U., Ozel, E., Tiryaki, M., Oktay, E. A., & Yildiz, E. (2017). Influence of Bleaching Regimen and Time Elapsed on Microtensile Bond Strength of Resin Composite to Enamel. Contemporary clinical dentistry, 8(3), 451–458. https://doi.org/10.4103/ccd.ccd_234_17
6. Yu H, Zhao Y, Li J, Luo T, Gao J, Liu H, Liu W, Liu F, Zhao K, Liu F, Ma C, Setz JM, Liang S, Fan L, Gao S, Zhu Z, Shen J, Wang J, Zhu Z, Zhou X. Minimal invasive microscopic tooth preparation in esthetic restoration: a specialist consensus. Int J Oral Sci. 2019 Oct 2;11(3):31. doi: 10.1038/s41368-019-0057-y. PMID: 31575850; PMCID: PMC6802612.
Clarence is originally from Toronto, Canada, where she completed her Doctor of Dental Surgery and General Practice Residency at the University of Western Ontario and the University of Toronto, respectively.
Clarence’s practice is limited to cosmetic and restorative dentistry and she is well-published to both the local and international dental press, writing articles, reviewing and developing prototype products and techniques in clinical dentistry. She frequently and continually lectures internationally. Clarence is the Past Chairperson and Director of the New Zealand Academy of Cosmetic Dentistry. She is currently one of two individuals in Australasia to hold Board-Certified Accredited Member Status with the American Academy of Cosmetic Dentistry. Clarence is an Opinion Leader for multinational dental companies Kuraray Noritake Dental Inc., J Morita Corp., Henry Schein NZ, Ivoclar Vivadent, Dentsply Sirona, 3M, Kerr, GC Australasia, SDI and Coltene and is the only Voco Fellow in Australia and New Zealand. She holds Fellowship status with the International Academy for DentoFacial Esthetics and is a passionate and approachable individual, committed to having an interactive approach with patients in all of her cases to maximize predictability.
DR CLARENCE TAM
HBSc, DDS, FIADFE, AAACD
Auckland, New Zealand

014 COSMETIC & RESTORATIVE
DISSOLVABLE TEETH WHITENING STRIPS


Cardiff Dental School Teeth Whitening Study
• Study carried out by Prof J. S. Rees and Dr A. Alamri from Cardiff Dental School
• In vitro assessment of 6% peroxide dissolving strips vs competitor products
• Evaluate the tooth whitening capabilitiesInvestigate effect of bleaching on enamel surface hardness
• Human teeth model used5 stained and 5 unstained tooth specimens tested
• Vita Classical Shade Guide used to determine shade of teeth before and during study Shade change measured over 14 days.
Cardiff Dental School Teeth Whitening Study – Post Study claims
EFFECTIVE
• Whitens up to 6 shades after 14 days
• Increased whitening and faster acting than competitor products
• Noticeable whitening observed after just 1 day
CONVENIENT
• Use on the go
• Easy to apply, comfortable and non-slip
• Quickly and completely dissolves with no residue
SAFE
• Kind to enamel
• Doesn’t cause tooth or gum sensitivity Antibacterial
• Freshens breath


015 1300 65 88 22 COSMETIC & RESTORATIVE

CHOOSE PANAVIA™ VENEER LC
AND VENEER CEMENTATION BECOMES A SUCCESS


Prosthodontic treatment concepts have evolved over the past decades. While some time ago, porcelainfused-to-metal crowns and bridges were placed wherever a defect was too large for a direct restoration, the current trend is toward less invasive therapies with highly aesthetic, tooth-coloured materials.
These modern treatment concepts can lead to predictable outcomes when a high-performance resin cement system is used that establishes a durably strong bond to tooth structure on one side and the restoration on the other. The reason is that less invasive often means that restorations have minimal or no retentive elements and extremely thin walls, and a strong chemical bond is a mechanism that holds them in place over time. Depending on the type of restoration and area in the mouth, aesthetic properties of the cementation system are also extremely important, as the typically highly translucent, thin restorations tend to reveal the appearance of the structures underneath to a certain extent.
Universal cements
In the context of striving toward the streamlining of clinical procedures in restorative dentistry, several manufacturers have developed resin cements that work with fewer components and are suitable for a large number of indications. PANAVIA™ SA Cement Universal is a popular example. The self-adhesive, dual-cure resin cement is the only product of its category that works as a standalone solution even on glass ceramics (without the need for a separate primer).
The need for specialists
There are specific clinical situations, however, that require more working time than a dual-cure resin cement can offer. This is the case whenever multiple non-retentive restorations are to be placed simultaneously, a technique that is recommended for veneers. The greatest benefits of placing the thin and highly aesthetic restorations at once lie in the proper positioning of the restorations and in the minimized risk of contamination: When the veneers are placed one after the other, a slightly malpositioned and already fixed veneer might hinder proper positioning of the adjacent restorations and haemorrhage occurring in the context of excess cement removal or finishing of the margin might contaminate the working field. When all veneers are placed simultaneously, repositioning is possible, while excess removal and polishing are accomplished in a moment when blood and debris will no longer endanger the integrity of the restorations, which increases the security during the whole procedure. This task is best fulfilled by a light-curing veneer specialist.
Required properties of veneers cements
Undoubtedly, the key feature of a specialist resin cement system is a long working time sufficient for simultaneous cementation of multiple restorations. In addition, its consistency and handling properties are also important as they can help users overcome the challenge of accurate positioning and reduce the time and effort involved in veneer placement. And finally, the system needs to provide excellent bond strength over time and support long-lasting aesthetics, properties valuable for every kind of resin cement, but the latter being particularly important for thin restorations in the aesthetic zone. Luckily, PANAVIA™ Veneer LC offers all those features.
The system consists of PANAVIA™ V5 Tooth Primer that establishes a strong bond to enamel and dentine, PANAVIA™ Veneer LC Paste as the cement and the CLEARFIL™ CERAMIC PRIMER PLUS that has been part of PANAVIA™ V5 cementation system. The latter is responsible for a high bond strength to all types of restorative materials.
Mastering the working time challenge
The light-curing cement paste offers a long working time of 200 seconds* due to its excellent stability under ambient light. As a consequence, dental practitioners may place multiple veneers simultaneously without having to race against setting. Polymerization may be started whenever the user is ready for it. The one-component self-etching tooth primer (PANAVIA™ V5 Tooth Primer) does not contain any photo initiators and does not cure alone. When applied, it etches and penetrates into the tooth surface for 20 seconds and is ready to bond strongly to PANAVIA™ Veneer LC Paste. The integrated touch-cure technology is the key feature safeguarding a high bond strength to tooth structure without shortening the working time.
Providing for precise placement
In order to streamline the clinical seating procedure from cement application to polishing, PANAVIA™ Veneer LC has been equipped with a set of well-balanced handling properties. Newly developed spherical silica fillers in the cement provide that it stays put where applied, but flows well when the veneer is seated on the tooth – for easy placement without drifting or sagging.
016
COSMETIC & RESTORATIVE
During application across the intaglio surface, the resin cement does not stick to the application tip, a property achieved by the addition of nanocluster filler technology. The special design of the syringe’s application tip optimises control over the amount of cement applied.
New filler technology


5 μm
* Not a trademark of KURARAY CO., LTD
Hiding the margins
And last but not least, excess cement may be easily removed in one piece using an explorer after a onesecond tack-cure, while polishing of the margins is quickly accomplished.
Spherical silica filler
Flow and formability (not runny) combined
Excellent polishability & gloss durability
Nano Cluster Filler
Reduction of stringing (Good handling)

5 μm

5 μm
Valiolink Esthetic LC
Measured at 15 kV acceleration voltage and 10000 magnification.
Source: Kuraray Noritake Dental Inc.
Being extremely thin, highly translucent and mainly used to restore teeth in the exposed anterior region of the maxilla, veneers have to be placed with a cement that is and remains undetectable underneath the restoration and at its margins. PANAVIA™ Veneer LC is available in four highly aesthetic shades with matching try-in pastes, so that a precise shade match with the restoration can be achieved and verified in the patient’s mouth.
Additional features contributing to undetectable margins are the resin cement’s flowability and low film thickness: They enable users to easily produce an evenly distributed, thin cement layer for aesthetic outcomes. For those afraid that coffee, tea, acidic drinks or constant tooth brushing might reveal the margins over time, there is good news as well: PANAVIA™ Veneer LC offers a high polish retention and colour stability over time. The wellbalanced formulation and the touch-cure technology are responsible for this resistance to discolouration
Trusted expertise
All these beneficial features make PANAVIA™ Veneer LC worth testing. Additional arguments are the fact that its primers are tried and tested components of the highly popular PANAVIA™ V5 system and that Kuraray Noritake Dental Inc. is a proven expert on adhesive products. Kuraray Noritake Dental developed the original MDP Monomer in 1981 and introduced the first adhesive resin cement containing this monomer in 1983.
Since then, the company has improved existing formulations and technologies that ultimately resulted in the current line-up of cementation solutions for every need and indication.
Excellent gloss retention is one of the properties providing for undetectable margins over time.
TEST CONDITIONS: Specimen ø10mm, thickness 2mm. After smoothing the surface with water-resistant abrasive paper of #1000 to #2500, final polishing with lapping film.
• Initial value (measure the gloss level after polishing*)
• Toothbrush wear (measured after 40,000 strokes with 250g load, 30 strokes/minute, 10 wt% toothpaste*)
* Measured with a glossmeter VG 2000 (Nippon Denshoku Kogyo) at an angle of 60°
NOTE: Values may vary depending on measuring conditions.
SOURCE: Kuraray Noritake Dental Inc.
017 1300 65 88 22
& RESTORATIVE
COSMETIC
PANAVIA™ Veneer LC Paste
RelyX Veneer (3M)*
(Ivoclar)*
Gloss retention PANAVIA™ Veneer LC (%) 10,000 20,000 0 40,000 TOOTHBRUSH WEAR
UNIVERSAL ADHESIVES
RATIONALISING CLINICAL PROCEDURES


Rationalising clinical workflows: This is the main reason for the use of universal products in adhesive dentistry. They are suitable for a wide range of indications and different application techniques, fulfil their tasks with fewer components than conventional systems and often involve fewer steps in the clinical procedure. Universal adhesives are a prominent example.
How do universal adhesives contribute to a streamlining of workflows?
When restoring teeth with resin composite, the restorative material will undergo volumetric shrinkage upon curing. By bonding the restorative to the tooth structure with an adhesive, the negative consequences of this shrinkage – marginal gap formation, marginal leakage and staining, hypersensitivity issues and the development of secondary caries – are prevented.
The first bonding systems available on the dental market were etch-and-rinse adhesives, which typically consisted of three components: an acid etchant, a primer and a separate adhesive. Later generations combined the primer and the adhesive in one bottle, or were two or one-bottle self-etch adhesives. Universal adhesives (also referred to as multi-mode adhesives) may be used with or without a separate phosphoric acid etchant.
Which technique to choose depends on the indication and the clinical situation. In most cases, the best outcomes are obtained after selective etching of the enamel1. Bonding to enamel is generally found more effective when the enamel is etched with phosphoric acid, while the application of phosphoric acid on large areas of dentine involves the risk of etching deeper than the adhesive is able to hybridize. When the cavity is small, however, selective application of the phosphoric acid etchant to the enamel surface may not be possible, so that a total-etch approach is most appropriate.

Finally, in the context of repair, the self-etch approach may be the first choice, as phosphoric acid might impair the bond strength of certain restorative materials by blocking the binding sites. By using a universal adhesive, all these cases may be treated appropriately, as the best suitable etching technique can be selected in every situation.
Apart from the differences related to the use or non-use of phosphoric acid etchant on the enamel or enamel-and-dentine bonding surface, the clinical procedure is always similar with the same universal adhesive. The following clinical case is used to illustrate how to proceed with CLEARFIL™ Universal Bond Quick (Kuraray Noritake Dental Inc.) in the selective enamel etch mode, and it includes some details about the underlying mechanism of adhesion.
018
COSMETIC & RESTORATIVE
Figure 1: Volumetric shrinkage of resin composite restoratives and its clinical consequences.
How to proceed with selective enamel etching?
A clinical example
This patient presented with a fractured maxillary lateral incisor, luckily bringing the fragment with him. Hence, it was decided to adhesively lute the fragment to the tooth with an aesthetic flowable resin composite.


As proper isolation of the working field makes the dental practitioner’s life easier, a rubber dam was placed using the split-dam technique. It works well in the anterior region of the maxilla, as the risk of contamination with saliva from the palate is minimal. Once the rubber dam was placed, the bonding surfaces needed to be slightly roughened to refresh the dentine.
As the surfaces were also slightly contaminated with blood and it is important to have a completely clean surface for bonding, KATANA™ Cleaner was subsequently applied to the tooth structure,
rubbed into the surfaces for ten seconds and then rinsed off. The cleaning agent contains MDP salt with surface-active characteristics that remove all the organic substances from the substrate. The fragment was fixed on a ball-shaped plugger with (polymerised) composite and also cleaned with KATANA™ Cleaner.

What followed was selective etching of the enamel on the tooth and the fragment for 15 seconds. Whenever selective enamel etching is the aim, it is essential to select an etchant with a stable (non-runny) consistency – a property that is offered by K-ETCHANT Syringe (Kuraray Noritake Dental Inc.). Both surfaces were thoroughly rinsed and lightly dried before applying CLEARFIL™ Universal Bond Quick with a rubbing motion. This adhesive is really quick: Study results show that the bond established immediately after application is as strong and durable as after extensive rubbing into the tooth structure for 20 seconds.2,3 The adhesive layer was carefully air-dried to a very thin layer and finally polymerized – on the tooth and on the fragment.
019 1300 65 88 22 COSMETIC & RESTORATIVE
Figure 2: Patient with a fractured maxillary lateral incisor.
Figure 3: Close-up of the fractured tooth.
Figure 4: Working field isolated with rubber dam.
Figure 5: Cleaning of the tooth …
Figure 6: … and the fragment with KATANA™ Cleaner.


What happens to dentine in the selective enamel etch (or self-etch) mode?
After surface preparation or roughening, there is a smear layer on the dentine surface that occludes the dentinal tubules, forms smear plugs that protect the pulp and prevents liquor from affecting the bond. When self-etching the dentine with a universal adhesive, this smear layer is infiltrated and partially dissolved by the mild self-etch formulation (pH > 2) of the universal adhesive. At the same time, the adhesive infiltrates and demineralizes the peritubular dentine. The acid attacks the hydroxyapatite at the collagen fibrils, dissolves calcium and phosphate and hence enlarges the surface. Then, the 10-MDP contained in the formulation reacts with the positively loaded calcium (and phosphate) ions. This
ionic interaction is responsible for linking the dentine with the methacrylate and thus for the formation of the hybrid layer4,5
In the total-etch mode, the phosphoric acid is responsible for dissolving the smear layer and demineralising the hydroxyapatite. This leads to a collapsing of the collagen fibrils, which need to be rehydrated by the universal adhesive that is applied in the next step. Whenever the acid penetrates deeper into the structures than the adhesive, the collagen fibrils will remain collapsed. This will most likely result in clinical issues including post-operative sensitivity6
020
COSMETIC & RESTORATIVE
Figure 7: Selective etching of the enamel of the tooth …
Figure 8: … and the fragment with phosphoric acid etchant.
Figure 9: Application …
Figure 11: Polymerization of the ultra-thin adhesive layer on the tooth …
Figure 10: … of the universal bonding agent.
Figure 12: … and the fragment.
When applying the adhesive system, a dental practitioner rarely thinks about what is happening at the interface7. However, every user of a universal adhesive should be aware of the fact that a lot is happening there.
Bonding mechanism on dentine (self-etch or selective etch)

In the present case, the tooth and the fragment now needed to be reconnected. For this purpose, CLEARFIL MAJESTY™ ES-Flow (A2 Low) was applied to the tooth structure. The fragment was then repositioned with a silicone index, held in the right position with a plier and light cured. To obtain a smooth margin and glossy surface, the restoration was merely polished. The patient presented after 1.5 years for a recall and the restoration was still in a perfect condition.


This is why it is so important to use a high-performance material with well-balanced properties and strictly adhere to the recommended protocols.
Bonding mechanism on dentine (self-etch or selective etch)

Why is it important to adhere to the product-specific protocols?
Universal adhesives contain lots of different technologies in a single bottle. While this fact indeed allows users to rationalize their clinical procedures, it also requires some special attention. As every highly developed material, universal adhesives need to be used according to the protocols recommended by the manufacturer. In general, materials may only be expected to work well on absolutely clean surfaces, while contamination with blood and saliva is likely to decrease the bond strength significantly.
Depending on the type of universal adhesive, active application is similarly important, as is proper air-drying and polymerization of the adhesive layer. In addition, care must be taken to use the material in its original state, which means that it needs to be applied directly from the bottle to avoid premature solvent evaporation or chemical reactions. When adhering to these rules, universal adhesives offer several benefits from streamlined procedures to simplified order management and increased sustainability, as fewer bottles are needed and likely to expire before use.
References upon request
DR. JOSE IGNACIO ZORZIN
Dr. med. dent.)

021 1300 65 88 22 COSMETIC & RESTORATIVE
Figure 13: Schematic representation of dentine after tooth preparation: The smear layer on top with its smear plugs occluding the dentinal tubules protects the pulp and prevents liquor from being released into the cavity.
Figure 15: Reconnecting the fragment with the tooth structure.
Figure 16: Treatment outcome.
Figure 14: Schematic representation of dentine after the application of a universal adhesive containing 10-MDP: The mild self-etch formulation partially dissolves and infiltrates the smear layer, while at the same time demineralizing and infiltrating the peritubular dentine5
POLA RAPID
ADVANCED TOOTH WHITENING SYSTEM
• 150% Faster Treatment Time
• Enhanced Blue Gel For Faster Application
• Built In Desensitisers
Clinical Case Studies
SUPER. FAST. WHITENING. Pola Rapid is the new in office whitening treatment that safely whitens teeth in just 24 minutes. Pola Rapid is the new in office whitening treatment that safely whitens teeth in just 24 minutes.


“I find Pola Rapid a beautiful, easy-to-use product. It is simple to apply and remove with its non-stick and enhanced blue gel formula.
A great product to use by clinicians for in-chair whitening with minimal chair time and patient sensitivity, but reliable and immediate results.”
DR SAM KOH BDSc Melb (Hons) Melbourne, Australia

Pola Rapid 38%

CLINICAL CASE STUDIES
“Pola Rapid has exceptional colour saturation for enhanced visibility during intraoral application. The new non-stick bleaching gel stays where you apply it, and easily wipes away clean with no mess.


"I find Pola Rapid a beautiful, easy-to-use product. It is simple to apply and remove with its non-stick and enhanced blue gel formula. A great product to use by clinicians for in-chair whitening with minimal chair time and patient sensitivity, but reliable and immediate results.”
I found the new system fast, reliable to use with minimal sensitivity for patients”
DR MILES CONE Fellow American College of Prosthodontists
AFTER BEFORE
Diplomate Americn Board of Prosthodontics, Nuance Dental Specialist, Portland, Maine USA

Pola Rapid 38%
“Pola Rapid has exceptional colour saturation for enhanced visibility during intraoral application. The new non-stick bleaching gel stays where you apply it, and easily wipes away clean with no mess. I found the new system fast, reliable to use with
COSMETIC & RESTORATIVE
FASTER TREATMENT TIME ENHANCED
BUILT IN
FLUORIDE RELEASING
SUPER. FAST. WHITENING. 150%
BLUE GEL FOR FASTER APPLICATION
DESENSITISERS
TO STRENGTHEN TEETH
Sam Koh BDSc Melb (Hons) Melbourne, Australia
022
19 CLINICAL EVALUATORS
TOTAL USES 56
CLINICAL RATING 92%
CLINICAL EVALUATION
Key features: In-office whitening system l 38% Hydrogen Peroxide
Pola Rapid
l Dual-barrel syringe dispenser with brush-tip applicato

Clinical Tips
Use a surgical suction to remove the whitening gel between applications for fast and precise removal.
SDI sdi.com/au/au
Description
Pola Rapid is an advanced in-office tooth whitening system:
Key features
• Whitens teeth with an incredibly fast 24-minute application time.
• Features built-in desensitizers and fluoride.
• In-office whitening system 38% Hydrogen Peroxide
• Uses a 38% hydrogen peroxide formulation.
• Simple and precise application.
Indication
19 CLINICAL EVALUATORS
• Dual-barrel syringe dispenser with brush-tip appl icator
TOTAL USES 56
• In-office teeth whitening.
Description
Unique Attributes
CLINICAL RATING 92%
• Blue gel makes for easy application and visibility.
Pola Rapid is an advanced in-office tooth whitening system:
Key features: In-office whitening system
• Faster system - this material only requires 24 minutes of treatment, significantly reducing patient time in the chair.
• Features built-in desensitisers and fluoride.
l Dual-barrel syringe dispenser with brush-tip applicato
• The brush tip allows you to place very easily.
Description
• Light is not necessary; however, the light can be used with the whitening attachment and the Pola Stand.
• Uses a 38% hydrogen peroxide formulation.

• Simple and precise application.
Pola Rapid is an advanced in-office tooth whitening system:
Double check the barrier between each application and make sure there are no areas of leakage.
Clinical Tips
• Use a surgical suction to remove the whitening gel between applications for fast and precise removal.
Make the time to take before and after photos. It really shows the patient the difference. Even I did not realize there was such a big difference for a couple of patients until I looked at the photos later.
“GOOD RESULTS, EASY TO USE, AND NO LIGHT NEEDED.”
• Double check the barrier between each application and make sure there are no areas of leakage.
Evaluators’ Comments
“Instructions were easy to follow and time for the procedure was excellent.”
Clinical Tips
“I really liked the brush tip and simplicity of the packaging.”
• Make the time to take before and after photos. It really shows the patient the difference. Even I did not realise there was such a big difference for a couple of patients until I looked at the photos later
Use a surgical suction to remove the whitening gel between applications for fast and precise removal.
“Easy application.”
Double check the barrier between each application and make sure there are no areas of leakage.
Indication
• Features built-in desensitizers and fluoride.
• In-office teeth whitening.
• Uses a 38% hydrogen peroxide formulation.
• Simple and precise application.
• Whitens teeth with an incredibly fast 24-minute application time.
Indication
Unique Attributes
• In-office teeth whitening.
Unique Attributes
• Blue gel makes for easy application and visibility.

• Blue gel makes for easy application and visibility.
• Faster system - this material only requires 24 minutes of treatment, significantly reducing patient time in the chair.
• Faster system - this material only requires 24 minutes of treatment, significantly reducing patient time in the chair.

• The brush tip allows you to place very easily.
• The brush tip allows you to place very easily.
• Light is not necessary; however, the light can be used with the whitening attachment and the Pola Stand.
• Light is not necessary; however, the Radii Xpert light can be used with the whitening attachment and the Pola Stand.
Consultants who would:
“The quick chair time is amazing. I had patients who have had other brand name in-office whitening comment they this was so much faster and they got better results.”
Evaluator’s comments
“Color of the gel allowed easy visibility in placing.”
Make the time to take before and after photos. It really shows the patient the difference. Even I did not realize there was such a big difference for a couple of patients until I looked at the photos later.
“I feel that it worked well both with and without the Radii Xpert light.”
“GOOD RESULTS, EASY TO USE, AND NO LIGHT NEEDED.”
“Instructions were easy to follow and time for the procedure was excellent.”
“The brush applicator takes a little getting used to. It makes the applicator tip overall wider than you may be used to.”
“I really liked the brush tip and simplicity of the packaging.”
“Easy application.”
Evaluators’ Comments
“Worked nicely and didn’t drive sensitivity on root exposure patient - able to control application.”
“Instructions were easy to follow and time for the procedure was excellent.”
“The quick chair time is amazing. I had patients who have had other brand name in-office whitening comment they this was so much faster and they got better results.”
“I really liked the brush tip and simplicity of the packaging.”
When dispensing the first amount, it was difficult to get the mixing of material just right - seems like a lot wasted.”
“Easy application.”
“Color of the gel allowed easy visibility in placing.”
“I feel that it worked well both with and without the Radii Xpert light.”
Evaluation Summary: Compared to Competitive Products:
72% Recommend to a colleague

Consultants who would want to stock in their office:
Yes, instead of current product
Yes, in addition to current product
“The quick chair time is amazing. I had patients who have had other brand name in-office whitening comment they this was so much faster and they got better results.”
“The brush applicator takes a little getting used to. It makes the applicator tip overall wider than you may be used to.”
“Color of the gel allowed easy visibility in placing.”

“I feel that it worked well both with and without the Radii Xpert light.”
“Worked nicely and didn’t drive sensitivity on root exposure patient - able to control application.”
“The brush applicator takes a little getting used to. It makes the applicator tip overall wider than you may be used to.”
Worked nicely and didn’t drive sensitivity on root exposure patient - able to control application.”
“When dispensing the first amount, it was difficult to get the mixing of material just right - seems like a lot wasted.” Before After
“When dispensing the first amount, it was difficult to get the mixing of material just right - seems like a lot wasted.”
Evaluation Summary: Compared to Competitive Products:
COSMETIC & RESTORATIVE CLICK HERE dentaladvisor.com + + + + Good + + + DENTAL ADVISOR 3110 West Liberty, Ann Arbor, Michigan 48103 l (800) 347-1330 l connect@dentaladvisor.com l © 2021 Dental Consultants, Inc.
Consultants who would: 72% Recommend to a colleague Consultants who would want to stock in their office: 33% Yes, instead of current product 28% Yes, in addition to current product 28% I might want to order this product for certain cases AFTER Photos courtesy of Dr. Ona Erdt Pola Stand with Radii Xpert Light Unique application tip Excellent Very Good Good Fair Poor Viscosity of whitening gel Ease o applying whitening gel Color of whitening gel (visibility) Time requirement for procedure Lack of tooth sensitivity during procedure Lack of gingiva irritation dentaladvisor.com RATING SYSTEM: Excellent + + + + + Very Good + + + + Good + + + DENTAL ADVISOR 3110 West Liberty, Ann Arbor, Michigan 48103 l (800) 347-1330 l connect@dentaladvisor.com l © 2021 Dental Consultants, Inc.
SDI sdi.com/au/au CLINICAL EVALUATION
Pola Rapid
Photos
of
Pola Stand with Radii Xpert Light Unique application tip Excellent Very Good Viscosity of whitening gel applying whitening gel Color of whitening gel (visibility) Time requirement for procedure Lack of tooth sensitivity during procedure Lack of gingival irritation
I might want to order this product BEFORE AFTER
courtesy
Dr. Ona Erdt
023 henryschein.com.au
PRO-MATRIX CASE STUDY
DR JAMES ROBSON BDS
An 87 year old gentleman attended as a new patient and was unconcerned about aesthetics but wanted a functional solution to two teeth which had become fractured and had become symptomatic and were found to be carious. These were LL5 LL6 (lower left second premolar and first molar).
X-rays were recorded, LA delivered and the teeth were isolated with Unodent latex-free rubber dam, Hygienic clamp and Triodent V-ring wedges.The existing amalgam restorations and underlying caries were removed and the cavities were then sandblasted with 50μ aluminium oxide. This was rinsed off, VOCO Vococidacid etchant applied and agitated then rinsed once more.
The Pro Matrix was placed on LL6 and the wedges adapted (1). The band was burnished/shaped with an American Eagle teardrop to ensure good tight contacts and the VOCO Futurabond U applied then agitated, air thinned and cured with an Ultradent VALO curing light.
VOCO Grandio SO Flow flowable nanohybrid composite was applied to the box up to the band in a very thin layer then cured. VOCO Grandio SO nanohybrid composite was applied to each proximal contact


Dr James Robson BDS, qualified in Newcastle 1998
independently and cured on each occasion, converting the cavity into an occlusal (Black’s Class 1). The band was then removed and the stages were repeated on LL5. (2)
The tooth morphology was then restored on a cusp by cusp basis with American Eagle titanium nitride instruments and a VOCO Single Tim microapplicator, gently drawn up towards the cusp tips.
Basic shaping was then performed with an NSK X600L air turbine using fine diamond burs (yellow band) and polished with VOCO Dimanto points run at slow speed with water spray in an NSK Z25L. (3)
The rubber dam was then removed and occlusal checks performed with 40μ Dr Bausch articulating paper and final adjustments made. Contacts were cleared with floss and polished with GC Epitex tapes.


James has worked in private practice since 2004 and became a practice owner in 2010. James works with VOCO providing lectures and hands-on training for dentists, hygienists and therapists and enjoys writing for the dental or local press. He is most passionate about tooth coloured fillings, preventive care and the links between periodontal status and systemic health and wellbeing.
DR JAMES ROBSON BDS
PrincipalDentist, Identity Individual Dental Care

COSMETIC & RESTORATIVE 24
Fig 1
Fig 2
Fig 3
Fig 4
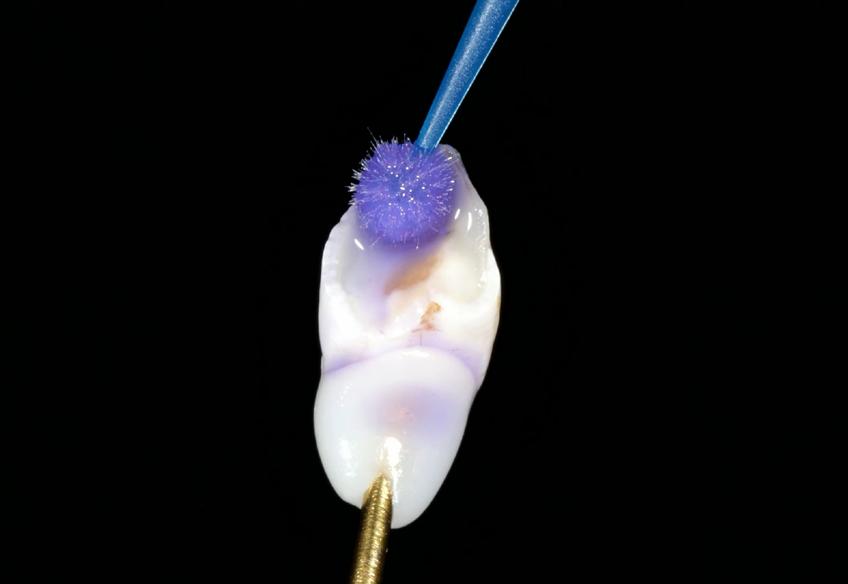
AQUACARE EXPERIENCE AS A USER

Minimally invasive dentistry (MID) advocates the maximum preservation of intact and repairable dental hard tissues through minimising the unnecessary alteration of healthy tooth structure. As an enthusiastic advocate of the application of the principles of MI dentistry in everyday dental care, the AquaCare has been a revelation in helping me to achieve improved outcomes for patients under my care.
The unit allows ease of use for polishing and abrasion techniques with a change in function at the turn of a switch. For polishing, surface stains are removed efficiently and selectively without damaging the underlying sound tooth structure. There is no heat generation or damage to soft tissues and the result is immediately pleasing to both clinician and patient. For air abrasion, the particles are emitted at high velocity within a fluid stream from an easy to use nozzle and are hence easily controlled and directed ensuring comfort for the patient as well as ease of vision for the operator.


The air abrasion particles remove adherent extrinsic surface stains and debris without vibration or heat generation, minimising the risk of pulpal damage. The lack of vibration also improves comfort for the patient.
Bioactive powders have the potential for remineralisation and will selectively remove damaged tooth structures with much greater precision than conventional mechanical techniques. Bonding to the cleaned tooth surface is also enhanced making this technique ideally suited to modern adhesive dentistry, particularly with regards to the repair and refurbishment of existing restorations, which is now such a key component of MID.
From being brought up in the age of the high-speed handpiece, the AquaCare Twin is now my go-to unit for cavity preparation and tooth repair. This is one of those pieces of kit that I can find further uses for every day and that the patients under my care much prefer compared to the conventional rotary handpiece.


25 henryschein.com.au
Images courtesy of Dr Lucile Dahan, France
COSMETIC & RESTORATIVE 1. Pre-operative 2. After wet air-abrasion 3. Final restoration (GC Essentia resin composite) View the Aquacare brochure
AN INTERVIEW WITH COLGATE SCIENTISTS
AN INSIGHT INTO R&D AND PRODUCT DEVELOPMENT
I’ve personally always been fascinated by the world of research and product development. How does an idea become a new product? For instance – How do companies come up with a new toothpaste formulation? How do they know the ingredients will stay stable and do what they’re supposed to do? How do you go from an idea to a finished product that can then be sold on shelves to a consumer? How do you know what you’ve made will work? To get some insight into some of these burning questions I had, I decided to go behind the scenes and interview a couple of scientists within the Colgate Clinical Research Group at the Colgate Global Technology Center: Dr Divino Rajah and Bernal Stewart
1. How does product development start? Does someone come up with a gap in the market, or an idea? Or is there perhaps a new formula/ compound developed, which you then see if you can incorporate into a toothpaste?
Colgate’s core process in R&D is centered around People Centricity. We assess what are the unmet oral health needs of our consumers around the globe and what are the largest oral health problems that everyday people face. We seek to enhance consumer experience by providing the best flavor, mouthfeel, delivery system, formula stability and quality. We include consumer testing and feedback, improving the product as a result. From there we use that as a stepping stone to assess what gaps and concerns people have. Colgate uses the vast knowledge of oral care experts, dental professionals, and historical know-how to see what we can incorporate in a new toothpaste or oral care product (mouthwash, dental floss and/or toothbrushes) that meet the needs of people with oral health issues. Whether it’s sensitivity, gum issues, cavity protection, or whitening we have a technology/offering that can help alleviate those conditions.
2. What are the steps in the R&D process? What are the general steps from idea to finished product and who is involved in the process?
New product development starts from the identification of new active ingredients, an unmet consumer need or scientific or technological advancement. At Colgate, our core process in R&D is centered around People Centricity to provide solutions to oral care conditions. Extensive preclinical testing followed by scientific studies is carried out to ensure our products are safe, efficacious and address the needs of our consumers. Our process has several steps which include:
Idea generation, conceptualization, bundle development, final validation and go to market.
This process involves several functional areas such as: Research and Innovation, Safety and Regulatory, Claims Support, Legal and Clinical Research. These teams co-develop products with our product development team taking into account patient preferences, dentist and hygienist inputs and state of the art preclinical science and scientific methods.
26 PREVENTATIVE

3. Can you explain how Colgate comes up with ingredients and formulas that you then introduce into new toothpastes? What do the Colgate scientists do to ensure the ingredient is then stable, effective, safe and works like it should clinically and in the real world? Do they need to be thoroughly tested and how does that happen?
Colgate has multiple departments that focus on new active ingredients, and formulas to ensure that they are stable, safe, efficacious and consumer friendly. These departments are composed of scientists, dental professionals and researchers that look at future technologies and how to make them a reality for our consumers. Additionally, all of these functions abide by specific guidelines outlined by regulatory agencies and industry standards. Our team of experts conduct a series of safety, laboratory, and scientific studies to ensure that our products address the needs of our customers.
4. How does Colgate stay a market leader in oral care? What keeps Colgate apart, continuing to innovate and lead the market?
Colgate is the market leader because we are constantly innovating and understanding the world's unmet oral care health needs. We are present in more than 200 countries and in up to 60% of all homes. Our internal teams are composed of top-notch scientists, experts and clinicians in oral care globally. Externally we work with key thought leaders, cutting-edge scientists and other partners. This comprehensive approach enables us to bring oral health innovations to professionals and consumers worldwide. We are always investing in the latest technologies that will take our excellent products to new heights. We hold ourselves to the highest standards. Lastly, we apply people’s centricity to truly understand our consumer needs both demographically and through their life journey.
5. How do you measure or test the efficacy of a product like a new toothpaste? eg. whitening toothpaste and how it whitens teeth.
To evaluate the effectiveness of a new toothpaste we use validated and accepted testing methods. These methods will be dependent on the technology that is being evaluated and potential benefits of this new product. For example: When it comes to tooth whitening, Colgate has in-vitro methods and also conducts in-vivo studies to evaluate stain removal and shade change.
Thank you so much for your time Dr Divino Rajah and Bernal Stewart! Such a valuable insight into the world of Colgate R&D, and so impressive to see the amount of work, and the people behind the scenes that are required to help Colgate develop a new product. It is also great to see how Colgate continues to innovate and lead the way globally for oral healthcare products to consumers!
View Colgate Advocates for Oral Health Articles here FIND
Bio
Dr Sam Koh is a general dentist in private practice, with special interests in Cosmetic Dentistry and Orthodontics. He is the principal dentist and director of Dental Boutique Mornington. Dr Koh has been awarded prestigious fellowships from the International Academy of Dentofacial Esthetics in New York, the Pierre Fauchard Academy in London, as well as a fellowship in Orthodontics. He is the co-founder of the Young Dentist Hub, a mentor for DentalX, and a speaker/Key Opinion Leader for several dental companies. Dr Koh is a founding member of the Colgate Advocates for Oral Health Editorial Community.
DR SAM KOH Dental Boutique Mornington

27 henryschein.com.au PREVENTATIVE
OUT MORE
MOUTHRINSES
A GUIDE FOR RECOMMENDING THE RIGHT RINSE FOR YOUR PATIENTS


The use and selection of mouthrinses or mouthwashes is one of the more common queries patients ask of their dental professional. There are many options available on the shelves of supermarkets and pharmacies which can be quite overwhelming not just for patients, but also for us clinicians. The following article may serve as a guide to better help you understand which mouthrinse you can recommend to your patients to support their oral health.
Mouthrinses are generally divided into 2 main categories - cosmetic and medicinal. Cosmetic mouthrinses can remove oral debris, temporarily suppress bad breath, reduce bacteria in the mouth and refresh the mouth with a pleasant taste. Mouthrinses classified as medicinal, on the other hand may have the benefits associated with a cosmetic rinse, but also have other therapeutic efficacy benefits. These mouthrinses contain active agents which have a therapeutic effect on the mouth, such as antiseptic or high levels of anti-cavity ingredients. These can help patients with caries risk management as well as gingivitis, and periodontitis.
Whilst the majority of mouthrinses can be purchased over the counter by patients, instructions for use are always recommended so patients get the best out of the product to support their oral health.
Alcohol vs Alcohol Free Rinses
Clinicians and patients may be aware that some mouthrinses contain alcohol whilst others are alcohol free. Some mouthrinses can contain anywhere between 5-27% alcoholic concentrations. Alcohol in mouthrinses is used for several reasons for example, as a solubiliser, stabiliser, preservative, anti-plaque efficacy enhancer and provides a distinctive flavour. Some patients may be concerned about the risks of alcohol containing mouthrinses being a risk of future oral cancer. However, studies show there is insufficient evidence to confirm that alcohol containing mouthrinses represent an independent risk factor for the development of head and neck cancer.1 Importantly, it is recommended that alcohol containing mouthrinses should be avoided for certain patient groups including young
children, pregnant and nursing women, and those who suffer from dry mouth. For these demographics, an alcohol free mouthrinse is ideal.
Preprocedural rinses
Preprocedural rinsing is considered to be one key infection control strategy that can be adopted by dental practices to reduce the extent of contamination to the dental team who are working in the contamination zone. The oral cavity is colonized by various oral microorganisms which become aerosolized during certain dental procedures. Preprocedural rinsing is undertaken to decrease the number of microorganisms in the dental aerosol.2,3
Patients with periodontal disease
Given periodontal disease is one the most common diseases that the global population suffers, the use of a mouthrinse can be effective to promote healthy periodontal tissues in conjunction with periodontal treatment. Gingivitis occurs after 2 to 3 weeks of undisturbed plaque accumulation alongside a shift in composition of subgingival bacteria from grampositive to gram-negative species. Chlorhexidine Gluconate has a biocidal action that is more effective against gram-negative bacteria given their cells have a larger negative charge.4 Following a course of periodontal treatment for patients with active periodontal disease, a chlorhexidine mouthrinse, containing 0.2% Chlorhexidine Gluconate, can be prescribed as a mouthrinse (10mL undiluted for 30 seconds twice daily for 2 weeks). Patients should also be advised that they may experience superficial staining from the prolonged use of Chlorhexidine mouthrinses, and patients should be assured that the stain can be removed.
28 PREVENTATIVE
Everyday Mouthrinse
If patients are looking for a daily mouthrinse to support their oral hygiene routines and promote healthy periodontium, clinicians can recommend the use of an anti-plaque mouthrinse such as Colgate Total Plaque Release Mouthwash. Colgate® Total Plaque Release Mouthwash is boosted with Zinc, a powerful mineral. It helps eliminate the bacteria that causes plaque and keeps working after rinsing to reduce heavy plaque build up 3X better**. Clinicians should instruct patients to rinse 20mL (fill to the cap line) for 30 seconds twice daily before spitting out.
Patients suffering from dry mouth (Xerostomia)
For patients who suffer from a chronic dry mouth due to reduced salivary flow (xerostomia), a mouthrinse can help to increase the moisture of the oral cavity providing some temporary relief. Specially formulated mouthrinses have been created with active moisturising agents which help to relieve mouth dryness. Aside from this, you can also recommend an alcohol free mouthrinse.
Patients with sensitive teeth
Patients who suffer from sensitive teeth because of exposed root surfaces from gingival recession or loss of enamel from tooth abrasion, abfraction or acid erosion will usually be already using some therapeutic agent to manage their sensitivity. For patients looking to use a mouthrinse to add to their sensitive toothpaste management, clinicians can recommend a mouthwash that helps to gently clean the mouth and gums. For example, Colgate Sensi Pro Mouthwash is formulated for use in sensitive mouths and can be used for 30 seconds after brushing and flossing twice daily.
Patients undergoing teeth whitening
Long term management of tooth discolouration either after or during any tooth whitening treatment is an important consideration for patients. Patients wishing to use a mouthrinse which will help promote a whiter smile, can use mouthrinses with active agents that are designed to remove surface stains and whiten teeth. These surface stains generally are caused by highly pigmented foods and drinks including coffee and wine. These mouthrinses provide a barrier on the surface of the enamel which reduces the chances of surface stains from forming. Colgate Optic White Mouthwash can be recommended to patients which uses a unique formula with an optic brightener that activates as it is swished to reflect light, leaving the teeth looking white instantly. Patients should rinse 20mL of mouthrinse for 30 seconds twice daily for best effects.
Patients with ulcers or post-extraction wounds
There are occasions where patients will present with ulcers intraorally either from stress, dehydration or from a traumatic injury of the soft tissues. Trauma can be experienced from hot foods or drinks or from biting the cheek, lip or tongue. Although oral ulcers are generally self-limiting to 10 days of when it initially formed, clinicians can suggest an antiseptic rinse such as Colgate Savacol Antiseptic Mouth & Throat Rinse* which may relieve the discomfort of mouth ulcers. As previously mentioned, be sure to warn patients of prolonged use of chlorhexidine mouthrinses beyond the 2 week period which can lead to extrinsic staining of teeth. For ulcers, Colgate Savacol Antiseptic Mouth & Throat Rinse* can be used three times daily during the period of the ulcer.
For patients who have recently undergone a dental extraction, promoting good healing of the postextraction socket and wound is pivotal to the postoperative experience of a patient. Especially in areas which can be difficult to keep clean post-operatively such as the posterior area following third molar extraction, an antiseptic rinse such a Savacol* can be prescribed for 2 weeks, instructing the patient to rinse for 30 seconds after meals. Reducing the bacterial load around the extraction socket and wounds can help promote good healing and reduce post-operative pain.3
Patients undergoing dental implant treatment
To aid healing and manage any postoperative infection following implant surgery, use of an antiseptic rinse for 7-14 days after surgery is advised.6
Patients with Medication Related Osteonecrosis of the Jaw (MRONJ)
In the 2015 NHS England Guidelines, there was a recommendation to prescribe a Chlorhexidine Gluconate mouthrinse, twice daily in the week before extractions and then post operatively for up to 2 months to facilitate healing. However, NHS England guidelines have since been superseded by Scottish guidelines, advising not to use Chlorhexidine Gluconate mouthwashes prior to extraction in patients categorised as either low or high risk of MRONJ, stating that there is insufficient evidence to support the use. Importantly, for patients that do develop MRONJ, the American Association of Oral and Maxillofacial Surgeons advise to use a Chlorhexidine Gluconate mouthrinse in the early phases of managing these conditions.6
29 henryschein.com.au PREVENTATIVE
Patients with Dental Caries and Children/ Adolescents
A frequent question from patients who are parents of children may ask if their child can use a mouthrinse. Children or adolescents with a higher caries risk or increased susceptibility to dental caries during orthodontic treatment can be prescribed a fluoride mouthrinse to prevent dental caries. Studies show the use of a fluoride mouthrinse twice daily, can reduce caries approximately 26% when used regularly. Importantly, only children above the age of 6 years should be recommended the use of a mouthrinse.9
This recommendation guide aims to simplify and demystify mouthrinses for clinicians so that you make the appropriate suggestions and prescriptions for your patients to help promote good oral health. Mouthrinses are a great adjunctive to include as part of a patient’s oral hygiene routines so they can continue to experience healthier teeth and gums.
References
1. Ustrell-Borràs M, Traboulsi-Garet B, Gay-Escoda C. Alcohol-based mouthwash as a risk factor of oral cancer: A systematic review. Med Oral Patol Oral Cir Bucal. 2020;25(1):e1-e12. Published 2020 Jan 1. doi:10.4317/ medoral.23085
2. Rautemaa R, Nordberg A, Wuolijoki-Saaristo K, Meurman JH. Bacterial aerosols in dental practice - a potential hospital infection problem? J Hosp Infect. 2006 Sep;64(1):76-81. doi: 10.1016/j.jhin.2006.04.011. Epub 2006 Jul 3. PMID: 16820249; PMCID: PMC7114873.
3. Vanessa Costa Marui, Maria Luisa Silveira Souto, Emanuel Silva Rovai, Giuseppe Alexandre Romito, Leandro Chambrone, Claudio Mendes Pannuti,Efficacy of preprocedural mouthrinses in the reduction of microorganisms in aerosol: A systematic review, The Journal of the American Dental Association, Volume 150, Issue 12, 2019, Pages 1015-1026.e1,ISSN 0002-8177,https://doi. org/10.1016/j.adaj.2019.06.024
4. Poppolo Deus F, Ouanounou A. Chlorhexidine in Dentistry: Pharmacology, Uses, and Adverse Effects. Int Dent J. 2022;72(3):269-277. doi:10.1016/j.identj.2022.01.005
5. Kolahi J, Soolari A. Rinsing with chlorhexidine gluconate solution after brushing and flossing teeth: a systematic review of effectiveness. Quintessence Int. 2006;37(8):605612
6. Llewelyn, J. A double-blind crossover trial on the effect of cetylpyridinium chloride 0.05 per cent (Merocet) on plaque accumulation. Br Dent J 148, 103–104 (1980). https://doi. org/10.1038/sj.bdj.4804396
7. Brookes ZLS, Bescos R, Belfield LA, Ali K, Roberts A. Current uses of chlorhexidine for management of oral disease: a narrative review. J Dent. 2020;103:103497. doi:10.1016/j.jdent.2020.103497
Bio
Dr Kaejenn Tchia is a recent graduate working in a corporate private practice in Darwin, Northern Territory. He is the current President of the Australian Dental Association NT Branch Inc. He has also served leadership positions for Bupa Dental Corporation including the Clinical Advisory Panel, Clinical Procurement Committee and currently the Graduate Committee. He is passionate about helping and collaborating with fellow dental colleagues, recently embarking on a new journey to help recent graduates eliminate burnout through a 6-step B.E.L.I.E.F System through his motivational coaching platform, The Limitless Dentist. Kaejenn is a member of the Colgate Advocates for Oral Health Editorial Community and hopes to use this platform to raise awareness of the importance of mental health in dentistry and provide mindset tools, which can help his colleagues unlock their next level of growth and success.
 DR KAEJENN TCHIA Darwin, Northern Territory
8. Marinho VC, Higgins JP, Sheiham A, Logan S. Fluoride toothpastes for preventing dental caries in children and adolescents. Cochrane Database Syst Rev. 2003;2003(1):CD002278. doi:10.1002/14651858. CD002278
9. How does mouthwash work?: Types and benefits. Colgate. com. Published November 24, 2022. Accessed October 31, 2023. https://www.colgate.com/en-gb/oral-health/selectingdental-products/how-does-mouthwash-work
10. Should you use a fluoride mouthwash? Com.au. Published January 18, 2023. Accessed October 31, 2023. https:// www.colgate.com.au/oral-health/fluoride/who-should-use-afluoride-mouth-rinse-and-why
11. Rama S. Lord of the rinse: Choosing the right mouthwash for you. The Dental Room. Published June 20, 2017. Accessed October 31, 2023. https://www.thedentalroom.com.au/lordrinse-choosing-right-mouthwash/
30 PREVENTATIVE
FIND OUT MORE
View Colgate Advocates for Oral Health Articles here
*Savacol Antiseptic Mouth & Throat Rinse (General Medicine)
Contains Chlorhexidine gluconate 0.12mg/mL or 2mg/mL
Antiseptic mouth and throat rinse. Reduces dental plaque and the incidence of gingivitis. Relieves the discomfort of mouth ulcers. Aids in the treatment of early gum disease. Prevention of oral candidiasis.
Savacol Antiseptic Mouth & Throat Rinse
Alcohol Free (General Medicine)
Contains Chlorhexidine gluconate 2mg/mL
Antiseptic mouth and throat rinse. Reduces dental plaque and the incidence of gingivitis. Aids in the treatment of gingivitis. May relieve the discomfort of mouth ulcers. Prevention of oral candidiasis.
Indications
Reduces dental plaque and the incidence of gingivitis. Aids in the treatment of gingivitis. May relieve the discomfort of mouth ulcers. Prevention of oral candidiasis.
Warnings
Savacol may lead to
• temporary change in taste perception,
• cause reversible staining of teeth and tooth-coloured restorations,
• lead to increased tartar production.
Savacol can cause severe allergic reactions.
Directions
Rinse or gargle for 1 full minute after meals. Spit out. Mouth ulcers: Rinse 3 times daily.
Dental Plaque and Gingivitis: Rinse 2 times daily. Post dental treatment: On dentist advice only.
Denture rinse: Rinse daily in addition to denture cleaning to prevent denture breath.
Dosage
Savacol 0.12mg/mL
Adults: Use 15 mL undiluted
Children under 10 years: Use 7.5 mL undiluted, under adult supervision
Savacol 0.2mg/mL
Adults: Use 10 mL undiluted
Children under 10 years: Use 5 mL undiluted, under adult supervision
Colgate-Palmolive Ltd. Auckland, New Zealand
Colgate-Palmolive Pty Ltd, Sydney, Australia
**with 4 weeks regular twice daily use vs cetylpyridinium chloride antibacterial mouthwash without zinc.

31 henryschein.com.au PREVENTATIVE
ICON PROXIMAL USE IN EARLY ENAMEL LESIONS
BY AHMED TADFI
Interproximal (IP) caries are cavities that develop in the tight spaces between teeth.
These areas can be difficult to clean thoroughly with a toothbrush, thus increasing the risk of caries formation. Icon is a minimally invasive procedure used to treat early-stage of IP lesions, particularly those in the E1 and E2 stages. Icon can be utilized for lesions that have not yet formed cavities and have an intact surface layer. The treatment involves the use of a specific resin to penetrate the affected enamel and seal the lesion, preventing further damage. The aim of the present article is to showcase the importance of icon infiltration in the treatment of an early enamel lesion.


32 PREVENTATIVE
Fig.1 A young male presented for a routine examination, upon taking bite wing radiographs, a number of IP lesions were detected. The X-Ray revealed E1 lesions on LR5 (distal) and LR7 (mesial), and E2 lesions on LR6 (mesial and distal).
Fig.2 Occlusal view of the initial situation.
Fig.3 Two days prior to the Icon treatment, an orthodontic band was placed to help separating the teeth.
Fig.4 To ensure a proper moisture control during icon treatment, isolation is achieved by placing a rubber dam, and an icon wedge to separate the dentition.


33 henryschein.com.au PREVENTATIVE
Fig.7 The Icon etch, which is 15% hydrochloric acid, was then applied using proximal tips and left on for 2 minutes.
Fig.8 After washing for 60 seconds and air drying.
Fig.9 The teeth were cleaned using ethanol (Icon dry), as shown in this image.
Fig.10 The ethanol was left to evaporate for 30-60 seconds before the application of Icon infiltrant using Icon proximal tip. In this case, the infiltrant was left for 10 minutes to ensure effective resin penetration within the lesion.
Fig.5 E2 lesion on LR6.
Fig.6 Prior to treatment, the teeth were cleaned using an ultrasonic scaler and air-abraded with 29μm aluminium oxide using Aquacare.
Fig.11 Before curing, the resin was dried with air.
Fig.12 Floss was used to clean the area between the contacts.


Conclusions
To prevent future cavities, patients should be reminded to maintain their regular oral hygiene. Regular check-ups are also essential to monitor the treated area with bite-wing radiographs and clinical examination. Icon proximal is an effective tool for managing early enamel lesions. Accurate diagnosis is critical, and patients should be monitored after treatment. This minimally invasive approach has huge advantages including painless dentistry without the requirement of local anaesthesia or drilling. The procedure is straightforward and easy to follow.
Bibliography
1. Cebula M, Göstemeyer G, Krois J, Pitchika V, Paris S, Schwendicke F, Effenberger S. Resin Infiltration of Non-Cavitated Proximal Caries Lesions in Primary and Permanent Teeth: A Systematic Review and Scenario Analysis of Randomized Controlled Trials. Journal of Clinical Medicine. 2023 Jan 16;12(2):727.
2. Elrashid AH, Alshaiji BS, Saleh SA, Zada KA, Baseer MA. Efficacy of resin infiltrate in noncavitated proximal carious lesions: a systematic review and meta-analysis. Journal of International Society of Preventive & Community Dentistry. 2019 May;9(3):211.


34
Fig.13 Curing for at least 40 seconds with a good light curing is crucial.
Fig.14 Polishing strip in use.
Fig.15 The steps of Icon infiltrant application were repeated, ensuring to cure for another 40 seconds. Finally, excess resin was removed, and the tooth surface was polished using a combination of floss, polishing strips, and a Gracey scaler to achieve a smooth and polished tooth surface.
PREVENTATIVE
Fig.16 Post-op after infiltration. The lesion mark will disappear once the gap closes.
AHMED TADFI
WA | SA | QLD | NSW
EVENTS & EDUCATION
DISCOVER DISCOVERMOREMORE
HOW TO GIVE A BETTER INJECTION
Step 1: The need to acknowledge that we have problem
I have been in practice of dentistry for over 35 years, and I never met a dentist who hasn’t told me he/she gives a “painless injection”. However, this contradicts one of the most widely reported findings in dentistry; that our patients have a very high-level of fear and anxiety related to receiving a dental injection. So, how can that be if we in the profession are giving these “painless injections”? The truth of the matter is, we are not. And I am here to tell you, it’s not your fault. It’s the fault of the device you are using, the traditional dental syringe. The fact is, if you are still using a standard dental syringe, you are using a piece of equipment that dates back to the late 1800’s. It is an antiquated technology that cannot control the most important variables when giving an injection. The good news however, is there are some innovative new devices available in dentistry that will vastly improve the way you give an injection and even allow you to finally give a “painless injection”.
The dental syringe you are using today dates to the 1850’s. I ask you what other instruments in your armamentarium dates to the turn-of-the-century? We have entered the age of digital dentistry. Everything from radiographs to impressions are performed with micro-processor driven technologies and for good reason. It introduces precision, ease-of-use, and a better way to control variables for a given task. That is exactly what a computer-controlled Local Anesthetic delivery (C-CLAD) device can do for you when performing a dental injection for your patients.
Digital Dentistry’s answer to an age-old problem
The Wand/STA System instrument represents the world’s first and only technology that uses the patented Dynamic Pressure Sensing Technology® (DPS) that accurately and safely performs a pressure regulated Intra-Ligamentary Periodontal dental injection.1 The Wand/STA System can also perform

all your traditional dental injection techniques i.e., Inferior Alveolar Block, Supra-periosteal infiltration, etc. However, these techniques are performed more efficiently, more effectively and virtually painlessly using the Wand/STA System.2,3 The system incorporates visual and audible real-time feedback giving clinicians an unprecedented level of control and information when performing a dental injection. It replaces a heavy, metal dental syringe with an ultra-light-weight disposable hand-piece weighing less then 10 grams for superior ergonomics and tactile control.4 The experience for both patient and dentist has also been shown to be significantly less stressful because patients are more comfortable and cooperative.5
The Wand/STA system is supported by decades of dental research and support the claims of eliminating and markedly reducing pain perception when performing a dental injection.6,7,8,9 This technology has undergone the rigors of being clinically testing in many leading universities and research centers throughout the world for more than two decade
Clinical research supports adoption of Computer controlled Local Anesthesia Systems today.
A series of clinical studies looking at performing single-tooth anesthesia using the Periodontal Ligament Injection (PDL) have found it to be a highly safe and effective alternative to the Inferior Alveolar Block.10,11,12,13,14,15,16 Garret-Bernardin and co-workers conducted a controlled study with a crossover split mouth design on 67 patients (aged 7 to 15 years).14
Each patient received both types of injections, one with the Wand/STA and one with the traditional syringe. Pain perception was assessed by a visual analog scale and the patient expressed his/her level of satisfaction on a scale from 1 to 10. The Wand/STA System resulted in significantly lower pain ratings versus the conventional syringe with a mean reduction of 1.09 VAS point with the Wand/ STA System compared with traditional syringe
036 PAIN CONTROL

(Þ = 0.0003). Patient level of satisfaction demonstrated higher satisfaction with the Wand/ STA System, compared with the traditional anesthesia. In conclusion the authors stated, “the Wand/STA system can provide less painful injections when compared to the conventional local anesthesia in patients and it was better tolerated compared to a traditional syringe”.
The Wand/STA System represents true innovation which your patients will appreciate as another advance in the realm of digital dentistry. A welcomed advance in technology for all your dental patients while providing value added options for newer techniques like the single-tooth injection technique. It provides a new level of safety, comfort, and predictability previously unattainable when compared to the manually driven conventional syringe. C-Clad instruments are the most advanced way to perform a painless injection to-date and that is something all patients will appreciate and agree on.

Author
Mark Hochman is the inventor of the Wand/STA System and currently clinical director of Milestone Scientific Inc. the manufacturer of the Wand/STA System.
References
1. Hochman MN. Single-Tooth Anesthesia:Pressure sensing technology provides innovative advancement in the field of dental local anesthesia. Compendium 2007;28(4):186-193.
2. Ferrari M, Cagidiaco MC, Vichi A, Goracci C. Efficacy of the Computer-Controlled Injection System STA, the Ligamaject, and the dental syringe for Intraligamentary anesthesia in restorative patients. Intern. Dent SA 2010;11:4-12.
3. Ashkenazi M, Blumer S, Eli I. Effect of computerized delivery intraligamental injection in primary molars on their corresponding permanent tooth buds. Intern. J of Paed Dent 2010;20:270-275.
4. Murphy D. Ergonomics and the Dental Care Worker. ISBN: 0-87553-0233-0. Washington DC, American Public Health Association. 1998.
5. Kudo M. Initial injection pressure for dental local anesthesia: effects on pain and anxiety. Anesth Prog 2005;52:95-101.
6. Ashkenazi M, Blumer S, Eli I. Effective of Computerized Delivery of Intrasulcular Anesthetic in Primary Molars. JADA, 2005;136:1418-1425.
7. Allen KD, Kotil D, Larzelere RE, Hutfless S, Beiraghi S. Comparison of a computerized anesthesia device with a traditional syringe in preschool children. Pediatr Dent. 2002;24:315-320.
8. Ram D, Kassirer J. Assessment of a palatal approachanterior superior alveolar (P-ASA) nerve block with the Wand in paediatric dental patients. Intern J of Paediatr Dent 2006;16:348-351.
9. Jalevik B, Klingberg G. Sensation of pain when using computerized injection technique, the Wand. IADR Pan Federation, Sept 13, 2006. Abstract # 0070.
10. Yogesh-Kumar TD, John JB, Asokan S, Geetha Priya PR, Punithavathy R, Praburajan V. Behavioral response and pain perception to computer controlled local anesthetic delivery system and cartridge syringe. J Indian Soc Pedod Prev Dent. 33(3):223-228, 2015.
11. Yogesh-Kumar TD, Asokan S, John BJ , PollachiRamakrishnan GP, Ramachandran P, Vilvanathan P . Cartridge syringe vs computer controlled local anesthetic delivery system: Pain related behaviour over two sequential visits – a randomized controlled trial. J Clin Exp Dent. 7(4): e513–e518, 2015.
12. Kwak EJ, Pang NS, Cho JH, Jung BY, Kim KD, Park W. Computer-controlled local anesthetic delivery for painless anesthesia: a literature review. J Dent Anesth Pain Med. 16(2):81-88, 2016.
13. Mittal M, Kumar A, Srivastava D, Sharma P, Sharma S. Pain Perception: Computerized versus Traditional Local Anesthesia in Pediatric Patients. Journal of Clinical Pediatric Dentistry. 39(5):470-474, 2015.
14. Garret-Bernardin A, Cantile T, D'Antò V, Galanakis A, Fauxpoint G, Ferrazzano GF, De Rosa S1, Vallogini G, Romeo U, Galeotti A. Pain Experience and Behavior Management in Pediatric Dentistry: A Comparison between Traditional Local Anesthesia and the Wand Computerized Delivery System. Pain Res Manag. Volume 2017, Article ID 7941238, 6 pages https://doi.org/10.1155/2017/7941238, 2017
15. Baghlaf K, Alamoudi N, Elashiry E, Farsi N, El Derwi DA, Abdullah AM. The pain-related behavior and pain perception associated with computerized anesthesia in pulpotomies of mandibular primary molars: A randomized controlled trial. Quintessence Int. 46(9):799-806, 2015.
16. Perugia C, Bartolino M, Docimo R. Comparison of single tooth anaesthesia by computer-controlled local anaesthetic delivery system (C-CLADS) with a supraperiosteal traditional syringe injection in paediatric dentistry. Euro J Paediatric Dentistry 18(3):221-225, 2017
037 henryschein.com.au PAIN CONTROL
PREVENTING NEEDLE STICK INJURY

Sharp’s injuries in dental practice remain a concern in 2024 even though dentistry adopted preventive practices in the 1980s. An Australian study found 27.7 per cent of dentists had experienced at least one sharps injury in the previous 12 months and 16.1 per cent of these involved a contaminated instrument that had been previously used on a patient. Furthermore, the most common devices to cause sharps injury in the previous 12 months were needles (14.4 per cent). (1) Hollow-bore needle injuries are of particular concern, since they are likely to contain residual blood and are associated with an increased risk for blood- borne virus transmission. Of the 57 documented cases of occupational HIV transmission to healthcare personnel reported to CDC from June 1995 to December 2002, 50 (88%) involve percutaneous exposure. Of these, 45 (90%) were caused by hollow- bore needles and half of these needles were used in a vein or an artery.(2)
The Risk
Blood-borne viruses that could potentially be transmitted by a sharps injury include hepatitis B and hepatitis C, as well as HIV. The risk of transmission following a skin puncture injury is dependent on;
• Whether the person who previously used the object had an infection,
• the level of virus in their blood,
• the amount of blood involved,
• the type of needle or syringe in question,
• the time that has elapsed since it was used, and the nature of the injury.
So, in dentistry, the most likely source of a bloodborne virus transmission is the local anaesthetic needle being hollow and injected into a vascular rich area. It is estimated that up to 14% of inferior dental nerve blocks result in an intravascular injection and with an infiltration may too puncture a blood vessel.(3)

The risks of acquiring other blood-borne viruses from a contaminated needle are considerably higher than the 0.23% for HIV with 6-30% Hepatitis B 1.8% for Hepatitis C.(4) Acquired hepatitis B and C cases have been report in Australia.(5, 6)
Following known exposure to blood borne virus, post-exposure prophylaxis (PEP) should be considered. PEP is known to be over 80% effective in preventing HIV from needle stick injuries and while oral health care workers are vaccinated against hepatitis B, there is no vaccination for Hepatitis C. Post exposure prophylaxis protocols are an essential part of everyday practice although is an expensive and time-consuming process with a considerable emotional toll. (7) It makes eminent sense for all dental operatories to adopt effective needle stick injury protocols and safety equipment. The criteria for local anaesthetic delivery should be;
• compatible with the existing local anaesthetic cartridge
• able to be used for all techniques for local anaesthesia
• single use or autoclavable
• proven to be effective in reducing or eliminating needle stick injury, and
• be cost effective
Prevention
A review of the availability of safety systems, including needleless systems, found that one system met the above criteria. The Ultra Safety Plus Twist (Septodont) system which does not require the re-sheathing or removal of a needle from its syringe and has been in my private practice for over 10 years and in that time there has been no cases on local anaesthetic needle stick injury.
38 PAIN CONTROL
Evaluating the system against the desirable criteria
Compatibility
The system uses the existing 2.2ml cartridges.
Technique
The system comes with preloaded 27 and 30 gauge needle in short and extra short and looks, feels and acts like the traditional dental injection.
Autoclavable
It comes in single use and if desired, an autoclavable plunger.
Effectiveness at reducing needle stick injury
Zakrzewska found that the number of avoidable needle stick injuries reduced from an average 11.8 per 1,00,00 hours work to zero in UK dental schools. Consequently it has been adopted by most dental school across the UK.(8-10)
Cost effectiveness
The University of Queensland found the cost of safety syringes was comparable to non-disposable syringes however the reduction in the cost of managing sharps injuries was substantial.(11)


Ultra Safety Plus Twist™ loaded syringe with autoclavable handle and needle exposed and covered.

Single use handle & sterilisable handle
The system works by sliding down a captive rigid sheath over the needle when loading up a new cartridge exposing the needle and cap. After injection, the sheath is moved up to the first click so that the needle can be uncovered for a second injection if required. At the end of the injection the sheath is slid up till the second click which is a one-way lock to permanently lock the sheath in place over the needle, preventing sharps injuries during changeover between patients.
Adopting sharp safe methods is essential in all dental practices. The Ultra Safety Plus Twist provides the dental team with the necessary tool to provide safe practice. If sharp safe habits are not expected of each team member, the risk of a sharp injury increases.
References
1. 1Leggat PA, Smith DR. Prevalence of percutaneous exposure incidents amongst dentists in Queensland. Aust Dent J. 2006;51(2):158-61.
2. CDC. Workbook for Designing, Implementing and Evaluating a Sharps Injury Prevention Program 14 Dec 2019]. Available from: https://www.cdc.gov/sharpssafety/part1TEXTONLY.htm.
3. Taghavi Zenouz A, Ebrahimi H, Mahdipour M, Pourshahidi S, Amini P, Vatankhah M. The Incidence of Intravascular Needle Entrance during Inferior Alveolar Nerve Block Injection. J Dent Res Dent Clin Dent Prospects. 2008;2(1):38-41.
4. CDC. Exposure to Blood :s What healthcare personnel need to know. National Center for Infectious Diseases Divison of Healthcare Quality Promotion and Division of Viral Hepatiti. 2003.
5. Haber PS, Young MM, Dorrington L, Jones A, Kaldor J, De Kanzow S, et al. Transmission of hepatitis C virus by needlestick injury in community settings. J Gastroenterol Hepatol. 2007;22(11):1882-5.
6. Res S, Bowden FJ. Acute hepatitis B infection following a community-acquired needlestick injury. J Infect. 2011;62(6):487-9.
7. McAllister J. Literature review for the national guidelines for post-exposure prophylaxis after non- occupational and occupational exposure to HIV (revised). National PEP Guidelines Expert Reference Group 2016;Australasian Society for HIV, Viral Hepatitis and Sexual Health Medicine.
8. Zakrzewska JM GIaJJ. Introducing safety syringes into a UK dental school – a controlled study. BrDent J 2001(190):188-92.
9. Zakrzewska JM BE. Use of dental safety syringes in British and Irishdental schools. . Br Dent J. 2003(195):207- 9.
10. Oliver G, David DA, Bell C, Robb N. An Investigation into Dental Local Anaesthesia Teaching in United Kingdom Dental Schools. SAAD Dig. 2016;32:7-13.
11. Walsh L. Sharps injuries during patient change-over: Are you getting the point. Australasian Dental Practice January/ February 2018:64-6.
DR GREGORY MAHONEY
BDSc, PhD, MSc(Dent), GradDipClinDent, FADI, FPFA.

39 henryschein.com.au
CONTROL
PAIN
SPECIAL PATIENT SERIES TREATING THE PAEDIATRIC PATIENT
Pain Management - Great oral health begins in childhood, but paediatric patients are a uniquely challenging group for dental professionals. This article aims to summarise the key oral health needs in paediatric patients, discuss best-practice guidelines for treatment, and present evidence-based strategies for overcoming the most common challenges.
Oral health in children
Dental caries remains the most common health condition afflicting children worldwide, with an estimated 514 million children suffering from caries of primary teeth.[1] Children are also especially vulnerable to dental injury, with one third of all pre-school children worldwide reported to have sustained a traumatic dental injury (TDI) to primary teeth, and a quarter of all school-aged children having sustained a TDI to permanent teeth.[2]
Preventing and treating dental caries, TDIs, and other common childhood oral health concerns presents significant challenges for the dental professional. One such challenge is the wide variation in the physiological characteristics of this age group, giving rise to important clinical considerations.
Clinical considerations in paediatric patients
Choice of local anaesthetic
When choosing a local anaesthetic for paediatric patients, pharmacokinetics and duration of action are prime considerations.
A child’s smaller body mass requires a lower dose to achieve an adequate but safe level of anaesthesia. Articaine is increasingly favoured in children aged four and older because it is rapidly metabolised, resulting in a short elimination half-life of about 20 minutes, thereby possessing a decreased potential for systemic toxicity.
Further, articaine diffuses through hard and soft tissues more reliably than other local anaesthetics. As a result, it may be possible to achieve palatal soft tissue anaesthesia using maxillary buccal infiltration rather than palatal injection, a painful and potentially traumatic procedure for young patients.
A long-acting anaesthetic, such as bupivacaine, can leave children vulnerable to self-inflicted soft tissue damage after treatment. It is therefore rarely indicated in the paediatric dental population.
Because the variation in body mass across this patient group is so wide, there is no one-size-fitsall approach to paediatric dosage. The maximum dosage should be calculated on a patient-to-patient basis according to the weight of the child, not to exceed 7 mg/kg for articaine. However, the clinician should always strive to use the lowest dose possible to achieve the treatment goal.
Use of epinephrine
Where possible, a local anaesthetic with a lower volume of epinephrine is preferable for paediatric patients. Higher epinephrine concentrations from partial intravascular injection can have a more pronounced effect on children, so careful aspiration is of the utmost importance.
In patients with contraindications like cardiovascular disease, an anaesthetic without epinephrine such as plain Mepivacaine is recommended for short procedures.
40 PAIN CONTROL
Administration method
Whenever possible, anaesthesia should be administered to children by intraligamentary injection (also known as periodontal ligament injection). The insertion pain is relatively low, it requires a lower dose of local anaesthetic as the anaesthesia is confined to a smaller area, and it resolves more quickly after treatment, making it an ideal method for paediatric patients.
Infiltration anaesthesia is suitable for many procedures in children. Up to the age of five or six, for example, it may be sufficient in the mandibular posterior region due to the less dense bone structure in younger children.
From the eruption of the permanent first molars, conduction anaesthesia of the inferior alveolar nerve at the mandibular foramen may be considered for surgical procedures in the mandible. It may be possible using an epinephrine-free anaesthetic.
Palatal injection is especially painful for children. It has been demonstrated that the buccal infiltration of articaine (1/2 to 2/3 of a cartridge in children) can provide successful palatal soft tissue anaesthesia without the need for a palatal injection.
Analgesics and antibiotics
The management of post-operative pain must also be taken into consideration. Paracetamol (acetaminophen) is considered the gold-standard analgesic and antipyretic for mild to moderate pain in children. Due to the association with a condition called Reye’s syndrome, medications containing aspirin should be advised against in children under 14.
Amoxicillin is typically the first-line antibiotic for post-operative infection control in children, but can be substituted with clindamycin in the case of a penicillin allergy. Tetracyclines should not be prescribed before the age of eight due to the risk of enamel discolouration.
Behavioural challenges in treating the paediatric patient
In addition to clinical considerations, there may be significant behavioural barriers relating to age, communication skills, cognitive ability, and attitudes towards dentistry.
While many children are able to manage their discomfort or apprehension, dental professionals often encounter children with a lower capacity for behavioural and emotional regulation. They may exhibit behaviours that make treatment stressful and potentially unsafe for both them and the patient, such as:
• Crying or screaming
• Shaking or trembling
• Flinching or cowering
• Fidgeting
• Complaining
• Passively or actively resisting
• Ignoring or failing to hear instructions
• Attempting to hide or flee
• Clinging to the caregiver
These behaviours are most often seen in very young children and those with developmental or behavioural disorders. This patient group, termed “pre-cooperative” or “lacking cooperative ability”, possesses underdeveloped cognitive abilities, attention spans, and/or coping strategies necessary to navigate potentially uncomfortable situations like dental visits.
Paediatric patients of all ages can demonstrate maladaptive behaviours due to their attitudes towards dental treatment. Up to 33% of children and adolescents are believed to suffer from dental anxiety, and many more experience apprehension or aversion that can cause challenging behaviours.[3]
A young patient’s attitude and behaviour at the dentist can be influenced by a number of factors, including:
• Previous experiences. A previous painful or traumatic dental visit can inspire fearful behaviour at future visits. In fact, many adults with dental anxiety attribute it to such an experience during childhood.[4]
• Parental attitudes. The way a parent discusses dental treatment can shape the child’s view. This might include a parent giving a well-intentioned “pep talk” that hints at an unpleasant experience ahead or expressing dread about their own dental appointments.
• Vicarious experiences. Children use the experiences of parents, siblings, peers, and even other patients in the waiting room to form expectations about treatment. They are also frequently exposed to negative portrayals of dentistry in popular media.
While the development of these factors is outside the control of the dentist, there are plenty of strategies for mitigating their impact. In the following sections, we will explore various behavioural management techniques, communication strategies, and clinical tools the dental professional can use in order to manage the needs of paediatric patients.
41 henryschein.com.au
CONTROL
PAIN
BEHAVIOURAL MANAGEMENT AND COMMUNICATION STRATEGIES
Positive pre-visit imagery
Positive dental imagery can show children what to expect and combat any negative preconceptions they may have about their dental experience. Provide or direct parents towards resources, like YouTube channels, story books, or virtual tours of your practice, that they can share with their children ahead of a visit.
Desensitisation
Desensitisation is a well-established method for diminishing negative emotional reactions associated with dental anxiety in paediatric patients, particularly neurodivergent children.[5] It involves exposing the child to the source of their fear in a controlled and gradual way, allowing them to become comfortable before moving on to the next stage. To illustrate, a sequence of desensitisation at the dental office may go as follows:
• Reading story books about the dentist with a parent.
• Watching a video of a dental check-up online.
• Coming to visit the practice after hours.
• Entering the operatory and looking at different tools.
• Sitting in the dental chair.
• Letting the dentist examine their teeth with a mirror.
Tell-show-do
The tell-show-do technique is an evidence-based method for reducing anxiety in paediatric patients. It removes fear of “the unknown”, helps to desensitise the child to fearful stimuli, and gives them a sense of control. It has been shown to be successful even in emergency paediatric dental treatment, where pain and anxiety are often heightened.[6] When used alongside other techniques like virtual and audiovisual distraction, its efficacy is shown to be even greater.[7][8]
The tell-show-do process, to be repeated at each step of the procedure, is as follows:
• Tell the child what you are about to do.
• Show them what it involves.
• Do the action exactly as you have explained it.
The “show” step should be interactive with a sensory component, e.g., demonstrating the sound a piece of equipment makes, showing the child the materials you will use, or letting them touch or hold an object before using it. For younger children, pretending to demonstrate actions on their doll or teddy bear first can also be helpful.
Positive reinforcement
In order to learn the appropriate way to behave in any environment, children require feedback and positive reinforcement of desired behaviours. The dental operatory is no exception. Incorporate the following actions to utilise this technique:
• Use descriptive praise to highlight specific behaviours, rather than general praise. For example, choose “Thank you for keeping still. You’re doing really well!” over “Good job!”
• Use non-verbal reinforcement, such as smiling, nodding, or a “thumbs up”.
• Reward them for positive behaviours with a post-appointment prize, such as a sticker, small toy, or voucher.
Distraction
Distraction is an effective method of diverting the child’s attention away from the discomfort, anxiety, or boredom of a dental visit.[7][8][9][10] It is also successfully used to manage pain; given the significant psychological component of pain perception, it is theorised that diverting attention away from the source of pain can reduce perception and therefore intensity.[10]
Distraction techniques can be as simple as providing toys and story books in the waiting area, to the use of more innovative technology like virtual reality (VR) glasses. VR has been shown to reduce anxiety and pain perception in paediatric patients, with success in clinical scenarios ranging from rubber dam placement to extractions.[10][11][12][13]
Other examples of distraction techniques include:
• Making plug sockets and USB ports readily available for mobile phone charging.
• Installing a ceiling-mounted TV in the operatory and playing the child’s choice of cartoons, YouTube videos, or music channels.
• Allowing older children to connect their phones to the office system and play their own music.
Modelling
Modelling uses another child as a “role model”. The patient watches a cooperative sibling or another paediatric patient who exhibits desirable behaviour during a dental treatment, and sees the behaviour being praised and rewarded. The child then learns and imitates this behaviour during their own treatment.
42
CONTROL
PAIN
Memory restructuring
Memory restructuring is especially helpful for reducing fear or anxiety in children who have had prior negative dental experiences.[14] Negative memories are turned into positive memories in a four-step process:
1. Visual reminders. The child is shown a “reminder" that they had a positive experience, such a photo of them smiling with their reward after the appointment.
2. Positive reinforcement. Verbalisation is used to reinforce the positive memory, e.g., “Do you remember how well you stayed still? You did such a great job!”
3. Sensory encoding. The child is asked to give a demonstration to add sensory context to the memory, e.g., “Show your dad how you stayed as still as a statue!”
4. Sense of accomplishment. The child is praised and feels a sense of accomplishment in relation to the memory.
5. Sensory-adapted dental environments (SADEs)
For children with anxiety or sensory processing difficulties, a sensory-adapted environment can greatly support relaxation and cooperation.[15][16]
Examples of sensory adaptations include:
• Dimmed lighting.
• Moving projections.
• Soothing music.
• Sensory toys, e.g., beads, fidget spinners, stress toys.
• Weighted compression blankets.
• Accompanying adults
For the safety of the young patient, it is vital that the dental professional is able to command their undivided attention. Parental interference — even well-intentioned encouragement — can be a distraction. If possible, encourage the accompanying adult to wait outside or stay quietly in the background for the duration of the treatment.
Remember that children take their behavioural cues from their parents, so any stress or anxiety shown by the caregiver can inspire the same feelings in the child. If the parent is uneasy, taking a moment to address their concerns can positively influence the child’s behaviour.
Enhanced control
Dental treatment can make children feel powerless and vulnerable. Enhancing control gives the child choices, or even just the perception of choices, to help the child feel some agency over the situation.
A common method of enhancing control is to establish a system of non-verbal communication signals the child can use to control the treatment, such as a raised hand for “stop”. This not only reduces the risk of the child using disruptive and potentially unsafe behaviours to pause treatment, it is also shown to reduce intra-operative pain perception.[17] Of course, it is important to respond to the signals quickly and consistently in order to maintain the child’s trust and compliance.
CLINICAL
STRATEGIES FOR MANAGING PAEDIATRIC PATIENTS
Examination techniques
For toddlers and babies, the knee-to-knee examination technique can provide safe restraint under which to conduct an examination. Parent and clinician sit facing each other and the child is laid across both laps, with the legs on the parent’s lap and the head resting on the clinician’s lap. Parents can also sit in the dental chair and position their child in front of them, comforting and restraining the child as necessary.
Complete analgesia
Pain is one of the most commonly cited reasons for dental anxiety and phobia, which often begin in childhood, so achieving complete analgesia should be a priority in paediatric patients.[4][18]
Local anaesthesia is the gold-standard for pain management, but the injection can be distressing in itself. The use of pre-injection topical anaesthesia is a safe, simple, and effective way to give a pain-free injection, potentially averting the onset of dental anxiety in the process.
Topical anaesthetic can also be used exclusively in minor procedures such as scaling, crown placement, or extraction of very loose teeth, eliminating the need for an injection altogether. However, topical anaesthesia should be used selectively over small areas in order to maintain control of plasma levels.
43 henryschein.com.au
CONTROL
PAIN

Minimally invasive techniques
In some cases of dental caries, cavities can be restored using the minimally invasive Atraumatic Restorative Treatment (ART) technique. Decay in the tooth is removed using a hand instrument as opposed to an electric drill, and no local anaesthetic is required, representing a much less traumatic experience for the child. Restorations typically use adhesive materials like glass ionomer cements, which demonstrate survival rates comparable to the those of conventional restoration materials.[19]
Sedation
Inhalation sedation using nitrous oxide and oxygen is a safe and effective option for children who need extra support to manage their anxiety, contain movement, suppress the gag reflex, or tolerate long treatments. It is also helpful in patients for whom adequate local anaesthesia cannot be achieved. It has a rapid onset and recovery, and can be easily titrated and reversed at the end of treatment. However, care must be taken when using inhalation sedation in conjunction with other sedative medications, and in children with certain medical conditions.
Cognitive behavioural therapy (CBT)
Researchers at The University of Sheffield have developed an approach based on the principles of Cognitive Behavioural Therapy (CBT), a therapeutic intervention that has had great success in patients with anxiety and phobias. They have published a number of resources for dental providers and parents to work through with young patients, consisting of simple activities that can be done at home and in the chair. You can find more information and resources here.
References
1. https://www.who.int/news-room/fact-sheets/detail/oralhealth
2. https://onlinelibrary.wiley.com/doi/10.1111/j.16009657.2008.00696.x
3. https://bmcoralhealth.biomedcentral.com/articles/10.1186/ s12903-018-0553-z
4. https://www.ncbi.nlm.nih.gov/pmc/articles/PMC5586885/
5. https://pubmed.ncbi.nlm.nih.gov/25470557/
6. https://www.tandfonline.com/doi/abs/10.1080/14635240.1 998.10806065
7. https://thejcdp.com/doi/JCDP/pdf/10.5005/jpjournals-10024-2381
8. https://pubmed.ncbi.nlm.nih.gov/33402623/
9. https://pubmed.ncbi.nlm.nih.gov/30362187/
10. https://bmcoralhealth.biomedcentral.com/articles/10.1186/ s12903-021-01602-3
11. https://www.sciencedirect.com/science/article/pii/ S0020653922001150
12. https://www.ncbi.nlm.nih.gov/pmc/articles/PMC6898869/
13. https://www.ncbi.nlm.nih.gov/pmc/articles/PMC6265341/
14. https://pubmed.ncbi.nlm.nih.gov/17935597/
15. https://pubmed.ncbi.nlm.nih.gov/25931290/
16. https://pubmed.ncbi.nlm.nih.gov/25871593/
17. https://journals.sagepub.com/doi/abs/10.1177/002203458 20610090701
18. https://www.ncbi.nlm.nih.gov/pmc/articles/PMC5504153/
19. https://www.who.int/publications/i/item/ending-childhooddental-caries-who-implementation-manual
44
CONTROL
PAIN

WEBINAR WEEK 6-9 MAY
YOUR FREE GO-TO RESOURCE FOR DENTAL EDUCATION & CPD
EVENTS & EDUCATION
DISCOVER MORE
HEAT-TREATED Q-SERIES
PROVEN BY VARIOUS TESTS AND STUDIES

FQ.
Unparalleled efficiency and durability.
FQ emerges as the winner from the latest Dental Advisor study
When performing an endodontic treatment, you put your trust in the performance of your instruments. A recent study by the Dental Advisor Biomaterials Research Center now reveals the yet to be matched reliability of Komet Dental FQ rotary files.
A game-changer when it comes to cutting speed
The data show remarkable results for FQ rotary files when it comes to cutting efficiency. FQ rotary files demonstrated an impressive cutting speed that is 24% faster than that of the competitors.1


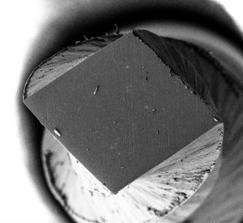
1
Cross-sectional views of FQ 20/.06 and competitor 20/.07rotary files sectioned at 8mm and 13mm from the tip. Competitor files feature a parallelogram design with a variable ~ 85-105° cutting edge. Komet Dental FQ rotary files feature a more acute cutting angle with ~110-130° cutting edges with 2 smooth lands in a S-Shape which function to reduce transportation, screw-in effect and aid in debris removal.
Groundbreaking in thorough treatments.
Effective debris removal is crucial for successful endodontic treatments, and Komet Dental FQ rotary files have demonstrated their superiority in this aspect. They excel in removing debris, surpassing their competitors by a significant margin.2 The pronounced grooves of FQ rotary files contribute to the creation of the long strips of debris, ensuring thorough elimination from the canals.


Performance built to last.
When it comes to cyclic fatigue resistance, FQ stands out as a true champion. The data reveals that these files exhibit a remarkable 110% to 228% increase in cyclic fatigue resistance compared to the competitor. What’s even more impressive is that all files survived beyond the challenging threshold of three canals, thus proving their unrivalled durability.
FQ sets new standards.
These findings highlight the exceptional performance and reliability of FQ rotary files, making them the preferred choice for dental professionals seeking high quality endodontic instruments.
1. Cowen, M., Powers, J.M. (2023). Laboratory Evaluation of FQ Rotary Endodontic Files. DENTAL ADVISOR, Biomaterials Research Results
2. cf.
046 ENDODONTICS
Fig.
Fig. 2
Comparative image of the files after debris removal to illustrate the difference in cutting perfomance.

PROCODILE Q. For a new sense of safety.
Flexibility beyond average.
Komet’s Procodile Q is the first heat-treated reciprocating file system with a variably tapered core. The heat treatment ensures pre-bendability while also creating a flexibility only few can match - for optimum preparation, even in curved canals.
As the University of Texas Health Science Center in Houston confirms: Procodile Q’s flexibility is by far higher than the one observed in the competitors files.1
Safer than ever before.
In terms of durability, Komet Dental Procodile Q is yet to be beaten. Data by the Dental Advisor Biomaterials Research Center confirms that Procodile Q’s cyclic fatigue resistance lasted between 197% and 325% longer than the competitor, which reduces the risk of fracture and thus increases safety during the procedure. 2
The Dental Advisor Biomaterials Research Center also detected that significant unwinding was found in all three sizes of the competitors files, but in only one size of Procodile Q (after three canals) which again emphasizes the durability of Procodile Q files. 3
Efficiency at its best.
The Dental Advisor data study also proves: With a cutting rate 16% faster than the competitor, Procodile Q files are the perfect fit for a fast and efficient preparation of the root canal.4 In addition, the tapered core helps to remove infected tissue effectively, extrude debris coronally, and thus can help to lower the risk of post-operative infections. 5
Cross-sectional views of #035 medium files

Fig. 1
1


Image shows Procodile Q after removing a large amount of debris.
Fig. 2.1
Shows Komet Procodile Q file, which features a more acute cutting angle with ~ 105° cutting edge.
Fig. 2.2
Shows competitor file, a parallelogram design with ~ 85° cutting edge resulting in more of a scraping mode of instrumentation.
Procodile Q is the stronger, faster, and more durable file.
These studies prove us right – with superior flexibility, longer durability, higher safety, and a variety of file sizes, Procodile Q masters all challenges of your work routine.
1. Beltran, A.S.M., Dadarkar, F. and Jaramillo, D.E. (2022). Comparison of Dentin Debris Extrusion After the Use of WaveOne Gold and Procodile Q NiTi File. Online Journal of Dentistry & Oral Health, 6(1), pp. 1-5
2. Cowen, M., Power, J.M., (2022). Laboratory Evaluation of Procodile Q Endodontic Files. DENTAL ADVISOR Biomaterials Research Results.
3. Cowen & Power, Laboratory Evaluation of Procodile Q Endodontic Files.
4. Cowen & Power, Laboratory Evaluation of Procodile Q Endodontic Files.Beltran et al. Comparison of Dentin Debris Extrusion.
WaveOne Gold® is a trademark of DENTSPLY SIRONA Inc.
047 henryschein.com.au ENDODONTICS
2.1
2.2
TRI AUTO ZX2+ ENDO. OPTIMISED.
Tri Auto ZX2+ The Future of Endodontic Treatment.
Experience the next level of reciprocation with Tri Auto ZX2+. Equipped with innovative OGP2 technology, a new generation reciprocating drive, this advanced motor significantly reduces the risk of file breakage within the canal.
With Tri Auto ZX2+, you can achieve unparalleled precision and efficiency in your endodontic treatment. This innovative motor is designed to provide patency, glide path establishment, and shaping, enabling you to complete treatments safely and efficiently. No more compromises, Tri Auto ZX2+ adapts to your current file system, accommodating all file sizes and cutting directions seamlessly.
The Tri Auto ZX2+ boasts Morita’s world-leading apex location system built into the motor, ensuring accurate and reliable measurements. Experience precise apex location for improved treatment outcomes.
Welcome to the future of endodontics. Tri Auto ZX2+ optimises your treatment, offering unmatched performance and convenience. Upgrade to Tri Auto ZX2+ and unlock a new era of endodontic excellence.

The new OGP2 mode
48 ENDODONTICS
CCW CW CW CCW Repeat × 4 cycles 150º 60º × 4 cycles 150º 60º


49 henryschein.com.au WE LOVE ENDO ENDODONTICS View product online CLICK HERE
VITAL PULP THERAPY
Q&A WITH DR. PAUL RENNER
How do you assess a patient before performing Vital pulp therapy?
• Visual: Does it look like a large/deep lesion
• Radiograph: A good quality PA radiograph will help to give an idea of the shape and position of the pulp chamber in relation to the carious lesion. It should also show the apex and any widening of the periodontal ligament at the apex, but this is not a contraindication to VPT. Look closely for pulp horns.
• Symptoms: Do your usual questions and tests to assess the state of the pulp and try and decide where on the continuum between healthy and necrotic the pulp lies. The closer to healthy the tooth is the less likely it will need VPT or worse. The closer to necrotic the more likely it will be beyond VPT.
Forget the description and definition of “irreversible pulpits” you have learned it is obsolete and will shortly be replaced. A pulp with “irreversible pulpits” is not necessarily irreversibly damaged. In my opinion, if a tooth reacts to cold there is some part of the pulp alive, so you should be prepared for VPT if an exposure occurs.
How long do you need to wait to ensure the procedure is successful?
Success of VPT is difficult to gauge. Reaction to cold and EPT are notoriously unreliable in posterior teeth with large restorations at the best of times, so I do not consider a negative reaction to cold to be a failure. For me I consider the therapy successful if the tooth is asymptomatic and if an x-ray is available no worsening of any PARL (I do not routinely review radiographically unless I am suspicious).
In my experience most failures are evident as pain within the first six months. However, I have discovered one after 18 months which had experienced no pain, but a PARL was evident in a radiograph taken to investigate another tooth.
Are there any contraindications to be aware of?
The contraindications are similar to those for any endodontics treatment. Is the tooth restorable, is the periodontal condition conducive to the mediumterm survival of the tooth. Also, you need to consider the risk of infection in immunocompromised patients, especially those severely compromised.
In my experience VPT is less successful in teeth where the pulpits have been caused by a crack rather than caries. In most of these cases I will do a full pulpotomy to expose the floor of the chamber to assess for a continuation of the crash across the pulpal floor.
While I don’t think there is any evidence for this the general consensus is that if the crack runs across the pulpal floor the tooth is doomed.
Can the treatment be influenced by age or gender?
It is however only recently (depending on your age) that we have realised the repair potential of mature pulps. All the studies on VPT have found no difference in success rate by age or gender.
How long would you set aside for an appointment where you suspect you might need to do VPT?
In my practice I am usually not doing VPT the first time I see the patient, so we have already explained the proposed procedure its likely success and what the patient wants if the pulp is not suitable for VPT so the first 15 minutes has already been done. For the actual VPT appointment I usually book a 45-minute appointment, but I am experienced and have experienced DAs, this is 15 minutes longer than I would book if it were simply restoring the tooth with composite. But we are also taking photographs which adds time.
So probably initially perhaps almost 30 minutes more than you would if you were restoring the tooth without VPT but as you become more experienced this time will come down.
50 ENDODONTICS
How soon would you consider placing an indirect restoration on a VPT tooth?
As I said in the answer on success, I start to feel successful after 2 years. So in my opinion if you are able to place good composite resins that lasted 2 years I feel there is no reason to place an indirect restoration. Composite resin lasts very well, I have plenty of examples of large composites in molars which are 25+ years old. Remember you are not root filing the tooth you are keeping it vital and moist.
Is it wrong or below standard if I did not take or save the final RCT X-ray?
No, I never take one immediately following VPT, I have one pretreatment I am interested in what it looks like 2+ years later and in most cases I don’t even take a periapical X-ray then. I probably take more follow up radiographs of VPT because I need them for lectures.
The reason we take an immediate post operative radiograph for an RCT is so that if it is not right we can easily get the Gutta Percha out before the sealer has set.
With all endodontic treatment we are moving to a more patient centered outcomes that if the tooth is asymptomatic functional and there are no signs of a frank infection we can consider the treatment a success.
Does Biodentine help create secondary dentine?
Firstly, there three types of dentine
• Primary Dentine: which is the initial dentine laid down before the tooth erupts which contains all the anatomical structures and chemicals we classically associate with dentine.
• Secondary Dentine: laid down after eruption and during the life of the tooth which has an anatomy very similar to the primary dentine, tubules, odontoblast processes etc.
• Tertiary or Reparative Dentine: which is laid down by the odontoblasts in response to some form of insult especially the caries process. This dentine does not contain dentinal tubules etc and can vary in its density and porosity.
If viable odontoblasts are present in the pulp, Biodentine and the other calcium silicates placed close to or against the pulp will help stimulate the laying down of Tertiary/Reparative dentine.
Biodentine is diffcult to handle, any tips?
Firstly, remember that Biodentine is a thixotropic material. Wikipedia describes these materials as such; “Thixotropy is a time-dependent shear thinning property. Certain gels or fluids that are thick or viscous under static conditions will flow (become thinner, less viscous) over time when shaken, agitated, shear-stressed, or otherwise stressed (time-dependent viscosity).
They then take a fixed time to return to a more viscous state.[1] Some non-Newtonian pseudoplastic fluids show a time-dependent change in viscosity; the longer the fluid undergoes shear stress, the lower its viscosity. A thixotropic fluid is a fluid which takes a finite time to attain equilibrium viscosity when introduced to a steep change in shear rate.”
Therefor the more you manipulate it the less viscous it becomes so unless you want it to flow try not to manipulate it too much. If you want to see this happen place your piezo electric scaler (with water turned off) against the outside of the capsule contains the Biodentine.
Some further tips
• Have everything ready before starting the restoration and the matrix in place and well stabilised.
• Not all casual mixers are equal, don’t use the fast and slow setting and use one that will mix for the full 30 seconds without stopping. The 3M Roto Mix capsual mixer needs less time to mix.
• When mixed place all the material in the shorter cream end of the capsule.
• Use an amalgam carrier to place it into the cavity.
• If a small area of pulp exposed with limited access use one of the MTA carriers designed for endo treatment, they are much finer.
• If there is some material smeared on the cavity margins place the light cured GIC set it and then clean the cavity margins with a high-speed diamond before beginning the bonding.
• Ensure you or the DA clean out the carrier before the material sets! It really does set and stick like cement.
Dr Renner was born in Nambour QLD where he completed his Bachelor of Dental science at the university of QLD and graduated in 1981, Paul completed ASID level IV accreditation in 1995. Paul has been dentist in charge at several hospitals in QLD, a member of the ADAQ council from 1992-2006, ADAQ President 19982004, a member of the Dental Board of QLD 2000-2003 and Chair of the boards of Complaints committee.
Paul authored and produced the original infection control manual for the ADAQ, awarded the FICD, awarded Associate Lecturer title at University of Queensland (UQ) in 2019 and lifetime membership at ADAQ in 2021. Paul has been in practice for 40 years including academic, general and government practice. His interests in cracked teeth and vital pulp therapy has seen Paul collate and research these topics in detail.
DR PAUL RENNER Queensland
51 henryschein.com.au ENDODONTICS
TRITON
ALL-IN-ONE IRRIGATION
Unlike traditional irrigants or other advanced 2:1 solution, Triton® works differently by avoiding the use of EDTA and CHX altogether.
The non-NaOCl components in Triton proactively dissolve the dentinal debris, allowing for a lower concentration of NaOCl to be exposed to organic debris without as much buffering.
Synergistic and simultaneous dissolution of organic and inorganic debris permits the clinician to use lower volumes of irrigation solution and ensure maximum clinical efficiency.
Triton all-in-one irrigation solutionEfficient and Effective
By using a lower concentration of NaOCl and a patentpending proprietary blend of surfactants and gentle chelating agents, Triton is the first irrigant to deliver all of the benefits of NaOCl, EDTA, and CHX in a single-step all-in-one irrigation solution. NaOCl is rapidly neutralised upon contact with EDTA (and inorganic dentinal debris). Triton maintains an effective NaOCl concentration for organic tissue dissolution while simultaneously allowing for inorganic debris removal in just one step.

052
SOLUTIONS & MEDICAMENTS
The efficacy of various irrigants against E. faecalis biofilm was investigated both with and without dentin chips present. In the presence of dentin chips, only Triton was able eliminate all E. faecalis, and Triton kills bacteria more quickly. In an ex vivo evaluation of live versus dead bacteria comparing three different irrigation protocols, Triton was more effective than 6% NaOCl + 17% EDTA in half the time.
Features and benefits at a glance
• Multifunctional single irrigation solution reduces chair time, procedural steps, and overall irrigation costs
• Simultaneous organic and inorganic debris removal
• Less cytotoxic than 6% NaOCl with EDTA
• More effective at smear layer removal versus NaOCl with EDTA
• Dissolves organic tissue up to 1.7x faster than traditional NaOCl
Tested and proven effective by endodontists, Triton has quickly become a preferred irrigation protocol because of its convenience and ease of use. It replaces all irrigants with a single, lower concentration NaOClbased solution and provides consistent cleaning with predictable outcomes.
Besides reducing chair time by eliminating the need for multiple irrigation solutions and sterile water rinses, Triton is also cost-effective. It reduces the number of singleuse disposable syringes and tips you will require. In some cases, Triton can cut your total irrigation cost per procedure in half.
Procedural Step and Irrigation Cost Comparison
The average US General Practioner does 155 root canal therapies a year, making the total annual irrigation cost with Triton only USD $362.25 in 2021.
Clinical consideration: A sterile water rinse is recommended before placing CHX or a CHX-containing “2-in-1” solution to avoid a para-chloroaniline (PCA) reaction.
Dr. Allen Ali Nasseh of Real-World Endo notes the benefits of Triton to his Boston, Massachusetts-based practice: “Triton addresses the most essential and fundamental needs of endodontic irrigation in one solution.
The sodium hypochlorite component provides tissue dissolution and disinfection while the novel combination of gentle chelating agents and surfactants simultaneously provide inorganic debris dissolution, saponification, and lubrication. Triton provides soft tissue digestion, surface disinfection, and demineralisation of the debris all at once, making it a truly synergistic solution that greatly simplifies the irrigation process.”
This information was provided by Brasseler USA®
053 1300 65 88 22
& MEDICAMENTS
SOLUTIONS
NaOCI+EDTA+CHZ NaOCI+EDTA 2:1 Solutions Triton Solutions used 3 2 2 1 Syringes used 3 2 3 1 Tips used 3 2 3 1 Water rinse required Yes Recommended Yes No Avg Tip+Syringe cost per procedure $3.84 $2.97 $3.84 $1.28 Irrigation solution cost per procedure $1.19 $0.85 $2.38 $1.87 Total irrigation cost per procedure $5.03 $3.82 $6.22 $3.15
Data on file – all costing in USD
LASER DENTISTRY IS BETTER THAN EVER
A DEEPER LOOK AT THE GEMINI™ DENTAL LASER FAMILY


Over the last couple of decades, there has been a surge in research in studies involving dental lasers. Even more exciting is that laser dentistry is showing significant promise as the latest form of dental care — especially considering the opportunity dental professionals have to manage pain with photobiomodulation (PBM).
So, what is laser dentistry? Put simply, laser dentistry is an innovative method used to perform many dental procedures with precision and more gently to help minimize pain and recovery time for patients. This revolutionary piece of equipment has improved many soft-tissue and hard-tissue procedures that dental offices regularly perform. Even procedures that were previously often referred out can now be easily performed in-office with a dental laser.
Common Laser Dentistry Procedures
Currently, there are four types of lasers used in dental offices: Diode laser, CO2 laser, Erbium laser, and Nd:YAG laser. Typically, the type of laser a dental professional uses depends on the procedure as well as personal preference. For dental purposes, the laser cuts or vaporizes tissue, coagulates, cauterizes nerve endings, kills bacteria, and has a photobiomodulation effect.
Both the Gemini and Gemini EVO lasers from Ultradent fall into the soft-tissue diode laser category.
Many soft-tissue procedures have become easier to perform with a dental laser resulting in gentler treatment of the patient. Not all dental lasers are purpose-made for soft-tissue procedures, so consider the type of laser your practice has before starting any procedure.
With the Gemini and Gemini EVO laser, some of the more common soft-tissue procedures include:
Surgical Procedures:
• Gingival troughing for crown impression
• Gingivectomy
• Gingival incision and excision
• Soft tissue crown lengthening
• Frenectomy
• Implant recovery
• Exposure of unerupted teeth
• Pulpotomy as an adjunct to root canal therapy
Periodontal/Hygiene Procedures:
• Reduction of bacterial level (decontamination) and inflammation
• Soft tissue curettage or Sulcular Debridement
• Removal of diseased, infected, inflamed, and necrosed tissue within the periodontal pocket. Removal of highly inflamed edematous tissue affected by bacteria penetration of the pocket lining and junctional epithelium.
Pain Therapy with Photobiomodulation (PBM):
• Topical heating for the purpose of elevating tissue temperature for a temporary relief of minor muscle and joint pain and stiffness, minor arthritis pain, or muscle spasm, minor sprains and strains, and minor muscular back pain, the temporary increase in local blood circulation; the temporary relaxation of muscle.
054 SURGICAL
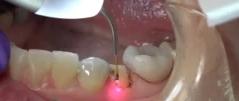


TOP PROCEDURES BY CATEGORY
NON-SURGICAL
Decontamination
Debridement
Aphthous Ulcer
Herepetic Ulcer
Hemostasis
SURGICAL PAIN RELIEF (PBM)*
Troughing
Gingivectomy
Frenectomy
Class V Gingivoplasty
Implant Recovery
Incision/Excision
Tooth exposure
TMJD
Post-surgical pain relief
Dentinal hypersensitivity
Reduce ortho treatment time
Promote wound healing
*Examples of possible use cases for PBMT
Pros and Cons of Laser Dentistry
Cost and return on investment (ROI), what types of dental procedures you’re interested in doing, and laser preference all weigh in when it comes to the pros and cons of purchasing a dental laser. Even though laser treatment options are expanding tremendously, dental professionals can find that they’re still limited in what they can do with a dental laser—especially with hard-tissue procedures.
Historically, it has been a challenge for some dental offices to afford the upfront cost of a dental laser, and for some procedures, a laser can actually be a little slower than the traditional scalpel or electrosurge. For example, if you’re removing a fibroma, you could generally complete the procedure with a scalpel faster than you could with a laser.
The good news is that the upsides to purchasing dental lasers such as the Gemini and Gemini EVO far outweigh the downsides. Dental professionals around the world find major improvements when it comes to working with patients that have a fear of dental drills. With soft-tissue procedures, a laser coagulates and cauterizes as it cuts, producing less bleeding, discomfort, and respecting oral tissues. Patients still typically experience less post-operative pain and will heal faster than if a scalpel were used. Not to mention, most patients are fearful of a procedure that requires a scalpel.
055 1300 65 88 22 SURGICAL
Troughing Crown Prep | How To Use the Gemini™ Laser
Gemini Clinical – Gingivectomy & Frenectomy combined
How To Use the Gemini Laser: Uncovering Implants
How To Use the Gemini Laser: Lower Anterior Frenectomy
DENTAL PROCEDURE COMPARISON
Efficient soft tissue removal
Excellent hemostasis
Generally safe around implants
Requires less anesthesia
Reduced post-operative pain
Less risk of gingival recession ?
Reduced swelling and discomfort
No surturing required
Decontaminates wound edges
Photobiomodulation
And let’s not forget about the benefits a dental laser has for hygiene treatments. Faster prophylaxis procedures, enhanced patient comfort, and overall better results are reported when using a dental laser, providing progressive and trustworthy solutions.
Another major benefit to using a laser is that no matter what procedure you are working on, the laser will help disinfect the procedure area. This helps reduce the risk of postoperative bacterial infections.
When running any business, you need to evaluate the ROI you would receive with an equipment purchase. With a dental laser, you own a piece of equipment that can build patient relationships and trust, as well as bring in money to your practice.
The Gemini Laser Family
Laser dentistry has never been easier than with the Gemini laser family. Both the Gemini and Gemini EVO lasers come ready to use with pre-programmed procedure settings. The dual-wavelength technology combines the optimal hemoglobin and melanin absorption of an 810 nanometer wavelength with the optimal water absorption of a 980 nanometer wavelength, making your procedures more efficient than ever before. With the Gemini EVO diode laser, guided Touch Interface with voice confirmation helps you make the proper selection with ease.
Both the Gemini and Gemini EVO lasers have convenient tip illumination to improve visibility at the surgical site and, to give you even greater control, variable intensity options allow you to adjust
illumination as needed. No matter the procedure, the Gemini laser family makes your dental laser experience faster, smoother, and more efficient.
Photobiomodulation (PBM) is taking great strides in the dental industry, and now PBM treatment options are available with both the Gemini and Gemini EVO diode lasers. Both options include pre-set pain relief procedures for ease of use. The Gemini EVO also features an easy-to-use PBM treatment calculator to help you determine the proper treatment time. All you need to do is select the appropriate tip for the treatment area, select the treatment time, and let the laser do the rest.

056 SURGICAL
BENEFITS SCALPEL ELECTROSURGE LASER
VIEW PRODUCTS View Gemini EVO online

057 1300 65 88 22
AUTOMATED HANDPIECE LUBRICATION FOR OPTIMAL PERFORMANCE OF HANDPIECES
Dental handpieces are a costly investment and every dental practice could benefit from having a simplified protocol to ensure the proper care and maintenance of their handpiece inventory.
Poorly maintained dental handpieces can compromise the quality of performance, lead to potential health and safety risks and can cause costly and time-consuming repairs.
It is important to follow the maintenance recommendations of the handpiece manufacturer but almost universally they recommend handpieces are lubricated, purged and chuck maintenance performed on both highspeed and speed increasing red band contra angle handpieces.
Automating handpiece maintenance provides precise and consistent lubrication and purging of handpieces which ensures optimal performance and longevity, increases efficiency as multiple handpieces can be lubricated in one cycle and can significantly reduce the amount of lubricant required.
Morita’s Lubrina 2, with programmable maintenance modes, can effectively and efficiently perform purging and lubrication of 4 handpieces (highspeed or contra angle), automatically.
The new Clean Air-Blow function with double conduit design, ensures residual water is removed from the handpiece prior to oiling, maximising lubrication results. The Clean Air-Blow also effectively removes any surplus oil prior to bagging and autoclaving your handpiece.
The Lubrina 2 is the cornerstone of a standardised, efficient and effective handpiece maintenance protocol for dental practices, minimising maintenance costs and maximising handpiece longevity.
• NEW Clean Air-Blow System
• Dedicated built-in, one touch, Chuck Maintenance port
• NEW Oil mist suction removal
• 20 second high speed handpiece maintenance
• Programmable maintenance modes for different handpiece types
• Maintains up to 4 handpieces in one cycle
• Multiple handpiece coupling options available
• Compatible for use with other manufacturer’s lubricant
• Quiet operation
• Simple unit maintenance
Disocver more
Lubrina 2 WATCH NOW
058 HANDPIECE & MAINTENANCE

059 henryschein.com.au HANDPIECE & MAINTENANCE
ULTRASONIC INSERTS: MAINTENANCE CHECKLIST

HOW TO PROPERLY CARE FOR YOUR ULTRASONIC INSERTS
Did you know a hygienist spends 2 hours per day on average power scaling? With so much usage and often a different insert for many procedures, you must regularly evaluate your inserts to ensure they continue functioning properly. Ultrasonic inserts combine the power, efficiency, and comfort you need to treat a wide range of patients, but they can also be delicate. Below is a checklist to help you properly use, care for, maintain and therefore extend the useful life of your Ultrasonic Inserts.First things first: let’s make sure you’re using the right instrument for the job.
1) Check Tip Condition
Just like your hand scalers, ultrasonic insert tips wear with use. Worn insert tips can significantly diminish your scaling efficiency. One millimeter of tip loss results in a 25% loss of efficiency. Two millimeters? That’s a 50% loss of efficiency.

When an insert tip is worn, the “sweep” of the instrument is reduced. The insert tip doesn’t travel as far on its’ optimal path. When using a worn tip, generally more pressure is applied, or generator power is increased to compensate for the efficiency loss—often leading to patient discomfort and increasing the possibility of tip bending/breakage. When using a worn insert tip, the clinician will likely feel the need to increase the power setting on the generator to facilitate debris removal. However, scaling efficiency will not increase, and more heat will be generated, especially if the power setting exceeds the recommendation for the insert tip. Using worn tips can result in inefficient scaling, inferior tip performance, handpiece overheating, and more discomfort for you and your patient. So, be sure to measure tip wear on a weekly basis and replace inserts as they wear and lose efficiency.
2) Evaluate Pressure Applied
When it comes to the amount of pressure one should use when ultrasonic scaling, light pressure is all you need to allow the tip of the insert to vibrate efficiently, this results in fracture or removal of deposits. Applying more pressure dampens the tip vibration, leading to poor deposit removal, operator hand fatigue, and patient discomfort. Ultrasonic inserts are designed to work with a light grasp and light lateral pressure – let the insert do the work for you.
3) Double Check Power Settings
Each ultrasonic insert has a recommended power range for optimal performance. Robust tips, such as the HuFriedyGroup #10, #1000, and Beavertail inserts, are intended to remove heavy debris and can be used on higher power settings. It is recommended that thinner tips, designed for effective deposit removal, be used on low to medium power. Thin inserts with water flow to the tip have narrower water flow channels. If used on high power, the water flow rate may not be enough to cool the insert tip—resulting in handpiece overheating. Use the lowest effective power settings for each insert for maximum scaling and patient comfort. It is highly recommended to adhere to the power ranges specified on the insert packaging for optimal effectiveness.
For a thorough step-by-step process
60 INSTRUMENTS
CLICK HERE

4) Match Insert Type to Clinical Application

Ultrasonic inserts are designed for specific applications since complex oral anatomy, and debris type/ location prohibit an effective “universal” insert. Robust inserts are for moderate to heavy/ tenacious deposits and stains in supragingival and accessible subgingival areas. Thin inserts allow enhanced access to narrow subgingival areas, tight pockets, interproximal concavities, and other difficult-to-access areas. Using thin inserts as “universal” inserts—particularly on moderate/heavy supragingival deposits—can result in excessive tip wear, inefficient deposit removal, and tip bending/ breakage. Much like using the correct power setting, matching the right insert to each clinical application is vital. And remember, more than one type of insert may be needed for each clinical procedure.
5) Don’t Compromise Instrument Shape
Bending or reshaping insert tips is not recommended. Aside from voiding the warranty, reshaping the tip can result in poor tip performance and make the tip susceptible to breakage. Insert tips are designed with precise bends to optimize the elliptical vibration path—bending the tips disrupts this vibration pattern, rendering the tip inefficient at debris removal.
6) Proper Sterilization and Maintenance
Sterilizing inserts in a cassette will protect them and extend their useful life. If your office uses sterilization pouches instead, always use caution when placing the insert in the ultrasonic bath or autoclave, as heavier instruments placed on top can cause bending/breakage of the tip and/or stack. Cassettes provide the best long-term protection for your ultrasonic inserts.
7) Prevent Overheating
Sometimes your handpiece can begin to feel warm. You may want to believe that it may cool down on its own, but sometimes it doesn’t. You may reach the point where you need to put it down to either change the ultrasonic insert or switch to hand instrumentation. Overheating can happen, and in addition to a couple of points mentioned earlier, there is more you can do to prevent such occurrences.
You may experience overheating due to air bubbles trapped in the handpiece. Trapped air can prevent water from contacting the vibrating stack—resulting in heat build-up. The entire insert stack must be completely submerged in water to operate efficiently. To eliminate/minimize trapped air, be sure the handpiece is filled to the top with water and held vertically when placing the insert. To further prevent trapped air, it is advisable to run water through the handpiece for at least 2 minutes at the start of each day and for 45 seconds each time you seat an insert into the handpiece.
Another reason for overheating may be that your waterline filter is clogged. Check the waterline that extends from the generator to the wall connection or the operatory unit. This waterline typically has a filter that should be monitored and changed routinely. A clogged filter will disrupt the water flow through the generator and result in less flow to the insert tip. Regularly changing the filter is an inexpensive, quick maintenance procedure that can help ensure unobstructed water flow.
Your practice makes an investment in its ultrasonic inserts. Any investment needs to be kept up to continue producing an ROI. If properly used and shown the proper care, your ultrasonic inserts will help keep you the Best in Practice no matter the patient or procedure.
For more helpful information, insights and resources for Ultrasonic Inserts CLICK HERE
61 henryschein.com.au INSTRUMENTS
DENTAL INSTRUMENT AUDIT

For hygienists, a crucial part of effective patient treatment is to examine your tools. This prevents you from discovering issues before they need to be addressed. The last thing you need is tools that cause your patients discomfort and slow down the flow of your work. Invest time to make sure you have the right instruments in your set-up, that they’re in good condition – and if not – that you can sharpen or replace them right away.
First things first: let’s make sure you’re using the right instrument for the job.
Make Sure You’re Using the Right Instruments
One of the smartest moves you can make as you begin your audit is to consider your patient population to foresee what new or different tools you can recommend to your dentist and/or office manager, ensuring your practice is providing the best care possible.
Conducting an Instrument Inventory
Consider how your daily procedural needs may have changed over the past year. Did you notice that your favorite 204s instrument could benefit from a longer handle to reach the interproximal areas of some patients? Or if you performed more debridements last year, it may be a good idea to add tools that make your already-complex procedures simpler. For example, adding a more robust shank or right and left ultrasonic inserts.
Taking Stock of Who You Serve
Timing and changing patient populations are considerations when conducting an instrumental audit. Perhaps you know a new senior care center is opening nearby. Do you have a reliable supply of tools needed for dentures and root canals to serve them? Or if you work for a recently consolidated practice you could inherit patients who have neglected their preventive visits and may need more acute care? If so, it could be time to ensure you have tools like implant drivers of various sizes that are up to the task.
Now that you have identified what instruments you may need for 2024, let’s take a look at the condition of the instruments you already have.
What to Look for in Evaluating Dental Instruments
Identify the Causes of Spots
Each instrument requires a different lens for evaluating what needs attention.
If you’re evaluating tools for diagnostic treatments, spotting reddish-brown or black spots could be signs of corrosion that could cause problems with sterilization, spread to other instruments, or be the catalyst for infection. In this case, remove these instruments from your set-up immediately.
Those spots on your instrument could also mean that bioburden was not adequately removed during the cleaning, disinfecting, or sterilizing processes. This calls for a further reprocessing – and possibly a closer look at your staff’s training or procedures.
Scratched Mirrors
Dental mirrors can get scratched for myriad reasons – with every incident they lose value. Scratched mirrors may feel like a minimal issue. But if the image isn’t reflecting enough light, or if it’s giving you an incomplete or distorted picture, you will likely have to continually readjust its angle which interrupts the flow of your procedure. Or worse, it may cause a less sound diagnosis.
Mirror heads are easily replaceable and worth the peace of mind you will find when you have a brighter, clearer, and more reflective source of truth alongside your chair.
HuFriedyGroup’s High-Definition Mouth Mirrors feature a proprietary coating that are more sensitively attuned to light and color that allow for increased visibility in whatever procedure you’re
62 INSTRUMENTS
performing. Tests of these HD mirrors found an 113% improvement for reflection than other front surface mirrors and was 50% brighter. The mirrors are scratch-resistant and come in single or doublesided versions.
The HD Black Line Mirror is the ultimate tool for reducing glare up to 80% with its Diamond Like Carbon coating that provides quicker and more accurate visibility of the mouth than the non-coated stainless-steel mirror head and handle.
Bent Probes
Accurate readings depend on probes that haven’t been bent. Since probes are used on virtually every patient, it’s common that they will be bent with frequent use, accidents, or mishandling. To detect if the dental probe’s tips has been bent beyond their inherent manufactured curve, examine the markings on the tool which are finely calibrated for precision.
Resin probe tips provide better visibility but require regular replacement as the markings fade over time.
HuFriedyGroup offers Qulix™ Probes for hygienists seeking more clarity, with laser-etched markings that don’t chip, flake or fade. Colorvue™ Probes also are made with vivid yellow tips with black markings for increased color contrast from intraoral structures and can be used for both natural and implant dentition. The twist-on design allows for easy replacement of worn tips. Colorvue™ Markings wear with normal use, so it’s recommended to replace tips about every 30 sterilization cycles.
Dull or Bent Explorers
Explorers are flexible and stronger than they may seem, but they still aren’t immune to damage and deformation especially caused during reprocessing. The edges of broken or deformed explorers can become blunt surfaces that may cause less tactile sensitivity and hinder adaptation to tooth surfaces and, more importantly, may cause discomfort for your patients.
HuFriedyGroup Explorers are hand-crafted from Duraspond steel, a metal alloy that is specially blended to provide flexibility and resilience to cater to even the most precise of diagnostic procedures.
Ultrasonic Scaling Insert Tips
We all know the frustration of worn insert tips. They significantly hamper your ability to remove deposits and plaque, impeding water delivery. The typical life of an ultrasonic scaling insert is 9-12 months, though it’s recommended to check monthly for signs of wear to ensure your scaling is as efficient as possible.
Suggestions for Evaluating Insert Tips
Using your loupe, fully rotate your insert tip to look for wear from every angle. For ultrasonic inserts, make sure to check that the leaf stock is nested – not bent or warped, which compromises the vibration.
Luckily, inserts from the same pack don’t always need replacing at once. Follow these guidelines to assess their wear and tear, and need to be replaced: For piezoelectric tips, if the tip:
• Extends beyond the blue line, it is at optimum efficiency. It can continue to be used.
• Touches the blue line, it is 25% less efficient. This is a sign that you need to reorder, ensuring enough time for replacements to arrive before the tip is no longer usable.
• Touches the red line, it has experienced a 50% efficiency loss. It should be discarded.
• For magneto strictive inserts, if the insert shows a:
• 1mm loss, it can result in a 25% less efficiency. Reorder now to get your replacements before the insert needs to be discarded.
• 2mm loss, it may result in 50% less efficiency and should be discarded.
Don’t forget to assess the O-ring seal for cracks and drying. Make sure you also look for water leaking from the handle and bends in the water delivery tube.
Scalers and Curettes
A curette’s very design is aimed at the comfort of patients undergoing subgingival scaling, so if a scaler is more than 20% worn, set it aside for recycling. Replacing the curette at this time is crucial because it is vulnerable to breaking during use which puts the patient, the clinician, and the practice at risk.
For testing your scalers and curettes accurately use specialized test sticks. HuFriedyGroup offers test sticks made from hardened acrylic plastic.
Scalers and curettes that are still usable may need sharpening, but the way they are sharpened is vital to their ability to be reused.
Keys to Proper Dental Instrument Maintenance
Proper maintenance of your dental instruments will keep the risk of infection at bay and allow you to place a renewed focus on patient care.
Keep Dental Scalers and Curettes Sharp
Sharpening your dental scalers and curettes is a multifaceted process, especially as many of those instruments have multiple bends in the shank. During sharpening, the blade angle requires the correct alignment, grit, lubrication, and proficiency to do the task at hand. Here’s how:
Use the Correct Angulation
The correct position for sharpening your scalers and curettes is achieved by placing the stone at an internal angle between 70° to 80°. The degree of the internal angle makes or breaks the quality of
63 henryschein.com.au INSTRUMENTS
the sharpening: if it’s less than 70°, there’s too much angulation, making the blade weak and prone to dulling quickly. An angle greater than 80° is insufficient and causes the blade to become bulky.
Choose the Right Grit
Depending on the sharpening needs of each blade, you will typically have three types of stones to choose from with a range of grits available.
Stone and grit selections include:
• Arkansas Stone - a natural stone with a fine grit
• India or “I” Stone - a synthetic stone made from aluminum oxide crystals with fine to coarse grits
• Ceramic Stone - a synthetic stone in either fine, medium, or coarse grits
• Diamond Sharpening Cards are available in extra fine to medium grits. They resist ditching and grooving and will not shatter if dropped.
Lubricate During Sharpening
Use oil when using Arkansas stones to sharpen your instrument. This will ensure that the tiny metal shavings float away instead of becoming embedded in the stone. Ceramic stones, “I” stones and diamond sharpening cards can be used dry or with water.
Practice Sharpening
The more skillful you are in sharpening blades, the more accurate your results.
As you practice, remember that scalers wear out over time – the tip gets thinner with each sharpening. Regularly used and sharpened scalers or curettes should be replaced every six to nine months.
To learn more about sharpening best practices, visit our Scaler Resources Library.
Protect Instruments with Cassettes
Properly cleaning, sterilizing, and securely storing your instruments is the surest way to lengthen their lifespan. Cassettes provide the perfect solution.
HuFriedyGroup’s cassette-based Instrument Management System keeps your vital tools sheltered and secure in a protective layer that prevents bending, breaking, or losing your instruments during the reprocessing cycle.
Extend the Life of Your Inserts
Ultrasonic inserts need special attention to maintain quality over time. In our article, “Ultrasonic Inserts: Tips for Best Results,” we offer suggestions:
• Giving yourself flexibility with a range of ultrasonic inserts that best fit the procedure – instead of relying on one insert that will wear more quickly and remove deposits inefficiently.
• Getting the longest life from your insert tips with frequent measurement helps you keep track of when a replacement is required.
• Leveraging best practices to extend the life of your ultrasonic tips, like taking advantage of instrument cassettes.
How Often Should You Audit?
Assessing your instruments during routine audits allows you to be one step ahead, knowing which instruments will soon need sharpening or replacing.
Refinement of audit procedures help make the process feel less burdensome. Defining the cadence of audits can be key. Depending on how busy your practice is, you may find that monthly audits are too frequent – but annually is too long to wait.
A good rule of thumb is to plan for a semi-annual audit, since some instruments need replacement twice a year depending on which variables are at play, including what patient populations you’re serving, and how you maintain your instruments, and how often you use them.
Make Sure to Audit Every Instrument, Every Time
Gather each and every one of your instruments together as you begin your audit. No matter how old your instrument is, never assume it’s in proper condition, and inspect it. For diagnostic instruments over a year old, we recommend performing a thorough assessment now. HuFriedyGroup instruments conveniently list the month and year they were manufactured on a stamped code.
As you carefully look your instruments over for wear, separate them into categories based on their condition to speed up next steps depending on whether they require reprocessing, sharpening, or replacement.
If you’re delaying your next instrumentation audit, keep in mind how it much easier your work feels when you have the right, high-quality instruments that are sharp and performing well. Regular audits help ensure peace of mind, knowing your tools are ready to perform at the same level of excellence that you expect of yourself. Your procedures will run more smoothly, leaving patients satisfied after their visit and encouraging them to come back regularly for the excellent care they deserve.
64
INSTRUMENTS
CLINICAL CASE: LUXATOR
The Luxator extraction instrument product range enhances the outstanding selection of high quality extraction instruments from Directa. Modern techniques as implants requires instruments and equipment offering possibilities to achieve fast healing and placement of direct implants after extraction.
“ I use the Luxator as a shoe horn - so easy and efficient.”- Frédéric Chiche


65 henryschein.com.au INSTRUMENTS
View products online CLICK HERE FRÉDÉRIC CHICHE
ADHESIVE REMOVER
WHAT’S IMPORTANT?
Agnes Rometh describes the steps she takes to remove bracket adhesive from enamel.
The removal of the brackets is the ‘bread and butter’ of every orthodontic practice. The treatment date for removing the orthodontic brackets, after months of therapy, is an absolute highlight for my patients.
The removal needs to be quick and without any complications. The patient’s primary hope is to find a smooth and undamaged tooth surface the first time they run their tongue over their teeth. These expectations can be met using the right instruments for removing adhesive residue, followed by polishing of the tooth surfaces.
In the interest of the patient and the practitioner it is essential that necessary steps are implemented efficiently and swiftly The adhesive residue removal, in particular, requires specialist instruments that remove the adhesive residues quickly, whilst protecting the enamel.
Whoever handles the instrument for the first time will realise that it provides a completely new way of working.
Firstly, I remove the brackets from the tooth, using the de-bracketing plier HSL 226-14 by Hammacher, which is aligned to the specific bracket. This usually separates the bond between the bracket and the glue, but not the adhesive residue from the tooth.
Adhesive residues remain on the tooth surface (Figure l); these will have to be removed using a rotary tungsten carbide instrument. For this process, I exclusively use the Komet Adhesive Remover.
The instrument needs to respect the shape of the teeth, operate with a low vibration and achieve perfectly smooth surfaces. We are able to confidently and successfully implement the final step of the bracket treatment by using the following instruments at our practice.
Vestibular tooth surfaces
For vestibular surfaces, I use the Adhesive Remover H23RA (Figures 2 and 4). Whoever handles the instrument for the first time will realise that it provides a completely new way of working. The H23RA is a lot more aggressive than conventional adhesive removers; the reduction of the adhesive residue is fast and precise, without the usual resistance. Therefore, the H23RA is particularly valuable and useful in the removal of large adhesive residues.
Lingualtooth surfaces
For lingual surfaces, I use the Adhesive Remover H379AGK (Figure 5). The egg shape of the instrument adapts perfectly to the shape of the tooth. The reduction / removal of the adhesive residue therefore is very targeted (in the exact place) without the formation of any grooves and without damaging the enamel.
Special AGK instruments, developed in conjunction with Professor Dr Ralf J Radlanski of Freie University Berlin, are technically refined, which makes them indispensable in our practice: the innovative blade geometry guarantees precise reduction/removal even at very low contact pressure an<l with no damage to the enamel.
To protect the gingiva, all adhesive removers are provided with smooth, non-cutting tips (tip without blades). Furthermore, the AGKs have a safety chamber at the head end, which eliminates the formation of grooves on the tooth surface. I always achieve a very smooth tooth surface when removing adhesive residues. For the final polish l use the prophylaxis polisher 9631.204.060 (Komet), as well as fluoridated polishing paste. In most cases, we also apply fluoridation with a tailor-made bar in order to truly appreciate the result together with the patient.
66 INSTRUMENTS


In summary
The biggest advantage that I can see, using the AGK Adhesive Residue Remover, is the precise and time saving cutting performance. This is very comforting for the patient and for me as the practitioner. The smooth running and low vibration of the AGK offers high treatment comfort.
The AGK Adhesive Residue Remover brings more expertise into routine treatments.
FOR FURTHER INFORMATION
email : info@kometdental.com
Article source:
Dr Agnes Rometh KN Kompendium 2015,S. 42-43, Oemus Media A!’.,Germany.
DR AGNES ROMETH Othodontist Germany

67 henryschein.com.au
Figure 1: Disruptive adhesive residue deposits after bracket removal
Figure 2:The solution:the fast and effective H23RA Adhesive Residue Remover (Komet)
Figure 3:The patient after successful treatment
Figure 4: H23RA Adhesive Residue Remover
Figure 5:H379AGK Adhesive Residue Remover
INSTRUMENTS
CHAIRSIDE IMPACT
CRYSTAL HD MOUTH MIRRORS BY ZIRC
I’m not sure if there’s anything more frustrating than attempting to perform meticulous hygiene instrumentation on a patient while battling an obstructed view.
Many of us use magnification loupes, bright overhead lights, and are conscious of our patient and operator positions to optimize our visualization, but none of those things matter if one small thing is below standard: our mouth mirror. For many years, I had the unfortunate experience of using mirrors that were badly scratched, cloudy, and dim on the reflective surface with prophy paste and disclosing solution caked around the edges. I always made sure to keep replacement heads close to my working area so that I could change out my mirror when I couldn’t stand the hazy view any longer, but that seemed to happen often. A few months ago, my hygiene mentor gave me some Zirc mirrors, and they have become the exam tool I didn’t know I needed.
Zirc’s Crystal HD mirrors have several characteristics that set them apart from the ordinary. Unlike traditional rhodium-coated mirrors, the Crystal HD mirror is made with multiple layers of metal oxides that provide a much higher reflective value, allowing for a significantly clearer, brighter image. This technology enables the mirror to illuminate your visual field in a way that other mirrors simply cannot.
Now that I’ve experienced the difference, rhodium mirrors remind me of the view I get when I look out my window on a foggy, overcast day, versus the clear, sunny display I get when I use my Crystal HD mirror. The difference is truly astounding.
Another feature I like about the Crystal HD mirror is how easy it is to keep clean while I’m using it intraorally. With most other mirrors, once I notice too much debris or saliva on its reflective face, I have to turn away from my patient, grab a 2x2 gauze, and thoroughly rub it clean before I can continue. In contrast, I’ve noticed that a simple swipe with my gloved thumb removes any accumulation on the Crystal HD mirror without leaving streaks or smudges.
It’s a small time-saver that makes me that much more efficient. The face of the mirror is also perfectly flush around the edges, so I never have to worry about debris accumulating with continued use.
The last thing I’d like to spotlight with the Crystal HD mirror is its resin casing. When comparing it to most mirrors with stainless steel components, the resin material provides a few advantages for both patients and clinicians. Aside from its lightweight feel and easy-to-grip handle, I don’t have to worry about patient injury if their teeth happen to contact the resin during examination.
It’s much softer on enamel, and there is no chance of galvanic shock when using around metal restorations. All mouth mirrors are not created equally. I have come to love and expect the quality, clarity, and brilliance of Zirc’s Crystal HD mirror and know that my assessment and instrumentation has improved with enhanced visualization. This product has become something I simply must have when I’m providing clinical care, and I would recommend it to any clinician who is looking for the best tools to have in their hygiene armamentarium. May your mirror— and your future—be clear and bright.

68
INSTRUMENTS

Bethany Montoya, RDH, is a practicing dental hygienist with nearly 10 years of experience. She has advanced knowledge and training in complex cosmetic dentistry, sleep-disordered breathing, TMJ disorders, and implant dentistry. She has achieved success in hygiene diagnosis and acceptance that far exceeds the industry standard. Montoya has devoted her most recent years to focusing on the personal and relationship aspects of dentistry through her latest project, Human RDH. She can be reached at humanrdh@outlook.com.

69 henryschein.com.au INSTRUMENTS
SIGNO T100
TECHNOLOGY MEETS AESTHETICS
The new Signo T100 is based on a clear architectural structure evolving from the Signo T500 premium model with an individual pantograph lifting mechanism seat design. The new Signo T100 represents an uncompromised result of the Morita DNA.
• Timeless design
• Sophisticated manufacturing quality
• Solidity, reliability and longevity
The new Signo T100 encompasses ideally the general design philosophy of Studio F. A. Porsche with the professional standards of Morita. It offers simple functionality and ease of maintenance, and its pure white body color blends in with the space and brings a sense of calmness.
Simplicity & Performance
• Pantograph Lift Mechanism
• Minimum 400 mm Height for Enhanced Safety
• Luna Vue TS for Optimal Visibility
• Easy-to-Clean Holders
• Easy-to-Use Foot Controller
• Headrest : Simple Design for Ease of Operabilit
• Table Moves Effortlessly
• Basin Cleaning Function
• Easy Maintenance
• Flushing device
• Vacuum Filter
• Sterilization Cartridges (Option)
070 EQUIPMENT

071 henryschein.com.au EQUIPMENT
OP 3D LX CBCT
IMAGING INNOVATION, EXPANDED


072 EQUIPMENT
The next generation of DEXIS cone beam technology
Built on OP 3D technology, this multimodality imaging platform expands your 3D diagnostic capabilities with a wide range of clinical applications that support your evolving practice and enhance diagnostic confidence.
Built to increase practice efficiency
The 2D and 3D imaging options built into the Orthopantomograph™ OP 3D™ LX unit cover a full spectrum of dental extraoral needs, from endodontics to complex surgical cases.

This next generation system offers flexible field of view (FOV) options ranging from 5 (H) x 5 (D) cm up to 15 (H) x 20 (D) cm – which is the largest view option available on a DEXIS OP 3D platform to date. With shorter scan times, the OP 3D LX captures the maxillofacial complex and large diagnostic areas in one non-stitched scan for fast workflows.
User interface
OP 3D LX offers an intuitive user interface that enables you to easily position the patient, visually choose the areas of interest with your 3D, panoramic or cephalometric settings and preview the X-ray image shortly after exposure without opening any image viewing software.
Intuitive accuracy
The intuitive user interface in the OP 3D LX system makes it easy to select your field of view and allows for accurate anatomy visualization, vertical adjustments, and bi-directional scout modifications to capture only structures of interest.
Re-engineered head support
The new head support design provides options to scan the patient without interfering with the patient’s soft tissue profile optimized for orthodontic and surgical applications.
Stitch-free scans
You can accurately diagnose, plan, and treat your patients with confidence using single pass capture with no stitching on every scan size.
Enhanced visibility
Enjoy the next generation of automated ICE* (Implant Contrast Enhancer) and MAR (Metal Artifact Reduction) to provide greater visibility of internal metal structures of existing implants, while minimizing the impact of metal and restorations.
Cloud-based service connectivity
This OP 3D LX feature simplifies service and maintenance for improved practice productivity and uptime.
073 henryschein.com.au EQUIPMENT
VISO G3 & G5
THE PINNACLE OF IMAGING
Planmeca Viso® is our flagship line of world-class CBCT imaging units. It is an ideal combination of premium image quality and high-end usability. The units represent an impressive step forward in the evolution of head and neck imaging.
Three units – same great features
The Planmeca Viso product family consists of three fantastic CBCT imaging units, all offering outstanding image quality to dental professionals. The main difference between the units is in the available volume sizes. The G5 supports volume sizes from 3 x 3 to 20 x 17 cm and Planmeca Viso® G3 from 3 x 3 to 20 x 10 cm.
Imaging for all clinical needs
Planmeca Viso offers a wide selection of volumes to cover all clinical needs – from a single tooth to a full skull. The sensor of the 3D units is also fully capable of 2D imaging.
Live virtual FOV positioning
Patient positioning is done directly from the unit’s control panel utilising integrated cameras and a live patient view, which allows seeing the patient live from the control panel for flexible and exact FOV positioning. The volume size can also be adjusted freely.
Detailed Planmeca ProFace® photos
Planmeca Viso 3D imaging units come with a unique way of capturing face photos with the Planmeca ProFace® option. The sensor of the units has four built-in cameras and LED light strips for capturing highly detailed 3D photographs. These can be combined with intraoral scans and CBCT images of your patient to enrich 3D treatment plans – creating a virtual patient.
Intelligent patient support
Planmeca Viso’s head support provides stability without compromising patient comfort. The clever support design of Planmeca Viso G5 and Planmeca Viso G7 does not cover the patient’s ears in a 3D
face photograph and can also be used without the chin cup thanks to the Planmeca CALM® movement artifact correction algorithm.
Movement artifact correction
Our intelligent Planmeca CALM movement correction algorithm for Planmeca 3D imaging units is excellent for imaging patients who have a difficult time remaining completely still. It eliminates the need for retakes by cancelling the effects of patient movement.
Ultra low dose imaging
All our CBCT units offer the unique and scientifically proven Planmeca Ultra Low Dose™ imaging protocol. It allows clinicians to acquire 3D images at significantly lower effective patient doses without a statistical reduction in image quality.
Cutting-edge endodontic imaging
Noise is often inherent to endodontic imaging due to the high resolution required to capture small details. Our AI-based 3D endodontic imaging mode for Planmeca Viso 3D units combats this issue and allows capturing clear and smooth CBCT images that are perfect for endodontics. In addition to new unit deliveries, the imaging mode is available for existing units with a software update.
Cutting edge endodontic imaging
Planmeca Viso’s 120 kV tube voltage enables optimised quality for challenging imaging cases –reducing artifacts and ensuring great image quality also when imaging patients with larger heads.
Cephalostat option
Planmeca Viso can be equipped with a Planmeca ProCeph™ one-shot cephalostat. One-shot ceph acquisition takes less than a second and eliminates the risk of patient movement. It is particularly beneficial when imaging young children and other patients that have a tendency to move during imaging.
074 EQUIPMENT

075 henryschein.com.au EQUIPMENT
henryschein.com.au