
Care Guide
SETTING UP, OPERATING AND CARING FOR YOUR G PLAN ERGO CHAIR
Contents
Caring for your
Setting up your furniture
Operating
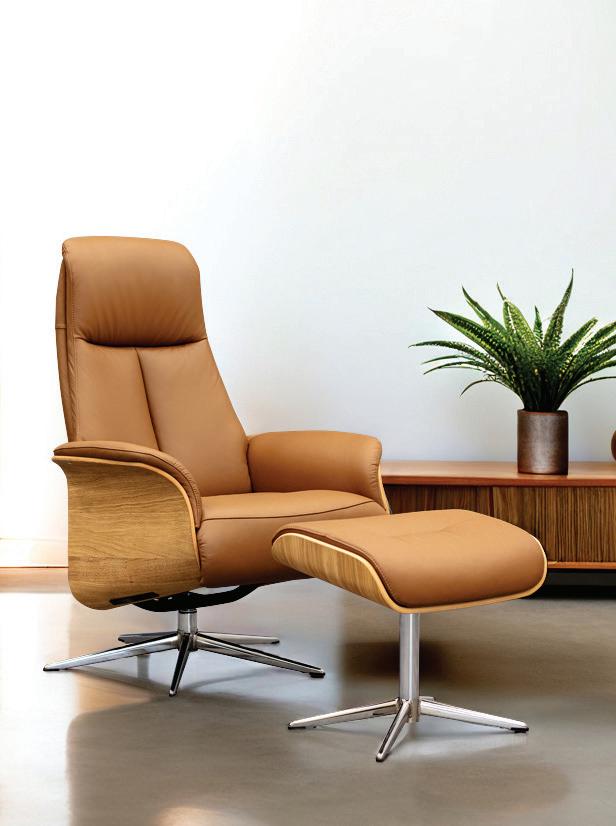
Thank you for choosing us
We hope that you’re delighted with your new purchase!
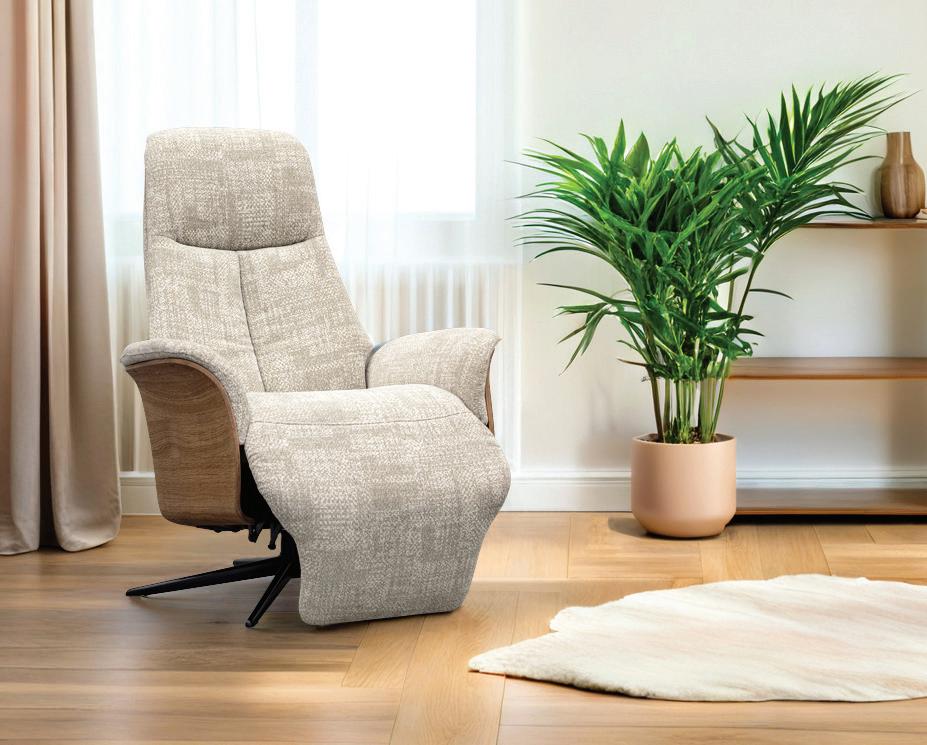
Over the years, we’ve perfected our craft so you can enjoy life’s little moments. Here at G Plan, we are continually looking at ways to evolve our much-loved products. Innovative design, premium materials and exceptional comfort are at the heart of our ethos.
This guide has been created to provide care and safety advice, to help you get the very best from your furniture. Please take a few minutes to read this information – it’s important, we promise.
If you have any queries or concerns about your furniture, please contact the store you purchased it from in the first instance. They will be happy to assist you and will contact G Plan where necessary to help facilitate your query.
Don’t forget to visit www.gplan.co.uk to register your furniture by clicking on the ‘Register your furniture’ button on the home page.

Caring for your furniture
What to avoid
Avoid sitting on upholstery with heavily soiled or non-colourfast clothes. Also, do not leave newspapers on your Chair as the ink can stain.
Direct sunlight can cause fading and cover deterioration, so protect furniture where possible by drawing curtains and blinds.
Keep furniture away from direct heat or air conditioning, as this can damage your upholstery.
Avoid sitting or standing on the arms of Chairs to prevent damage to the Fillings, Padding and Fabric.
Care should be taken with sharp-edged toys, buckles and jewellery. Take extra care when operating recliners with concealed buttons to avoid scratches and marks.
Trim off any loose threads with sharp scissors, as pulling a thread could leave a hole.
Keep pets off furniture to avoid scratches and marks.
Don’t over-wet leather when cleaning (See page 12).
Avoid dragging the furniture across exterior surfaces (paths, driveways etc.) as this can damage the feet and subsequently your flooring.
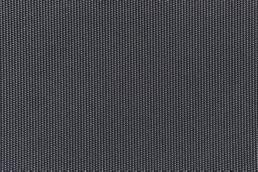
How to care for Fabric upholstery
There are several things you can do to keep your Chair looking in good condition.
If you have purchased a Fabric care treatment for your upholstery, please consult your care treatment provider for cleaning advice.
Chenille and velvet style Fabrics may change appearance after use. This is due to the pile in the Fabric moving in different directions as you sit on the upholstery, it is not a fault with the Fabric. By brushing the Fabric gently with a soft brush, you may be able to restore the pile to its original position.
A light steaming or gentle brushing in the direction of the pile will be beneficial and reduce pressure marking. Avoid heavy or hard brushing as this may damage the Fabric.
Lightly vacuum your upholstery once a week to prevent dust from building up. If you allow dust and dirt to accumulate, it can dull colours and speed up wear.
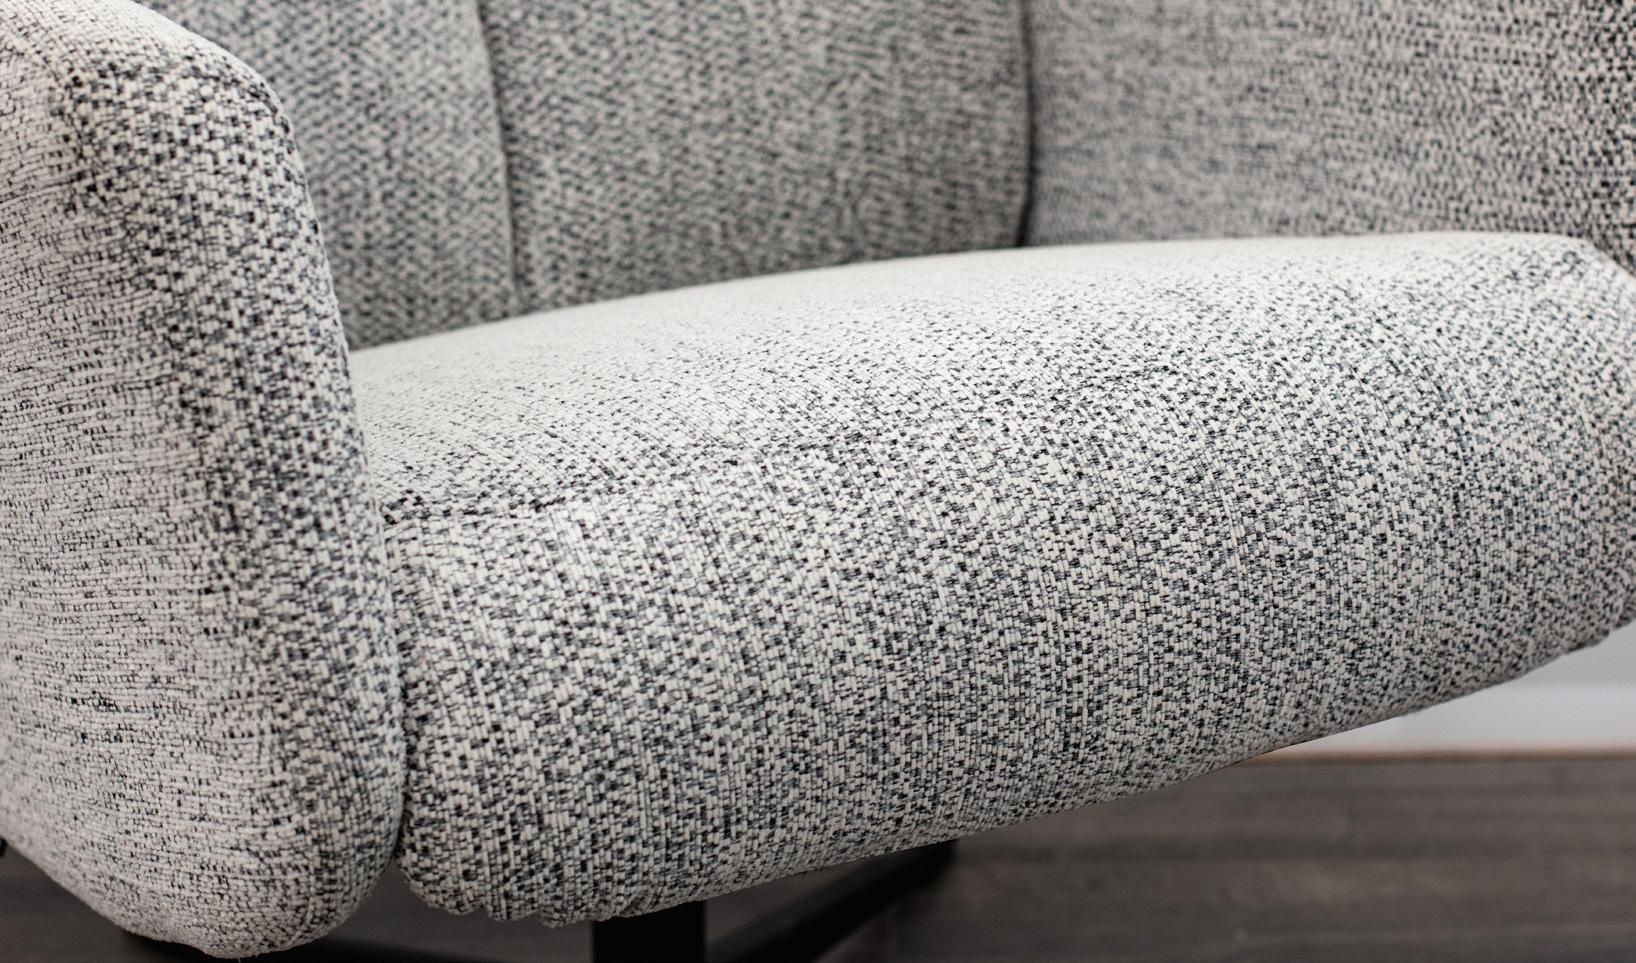

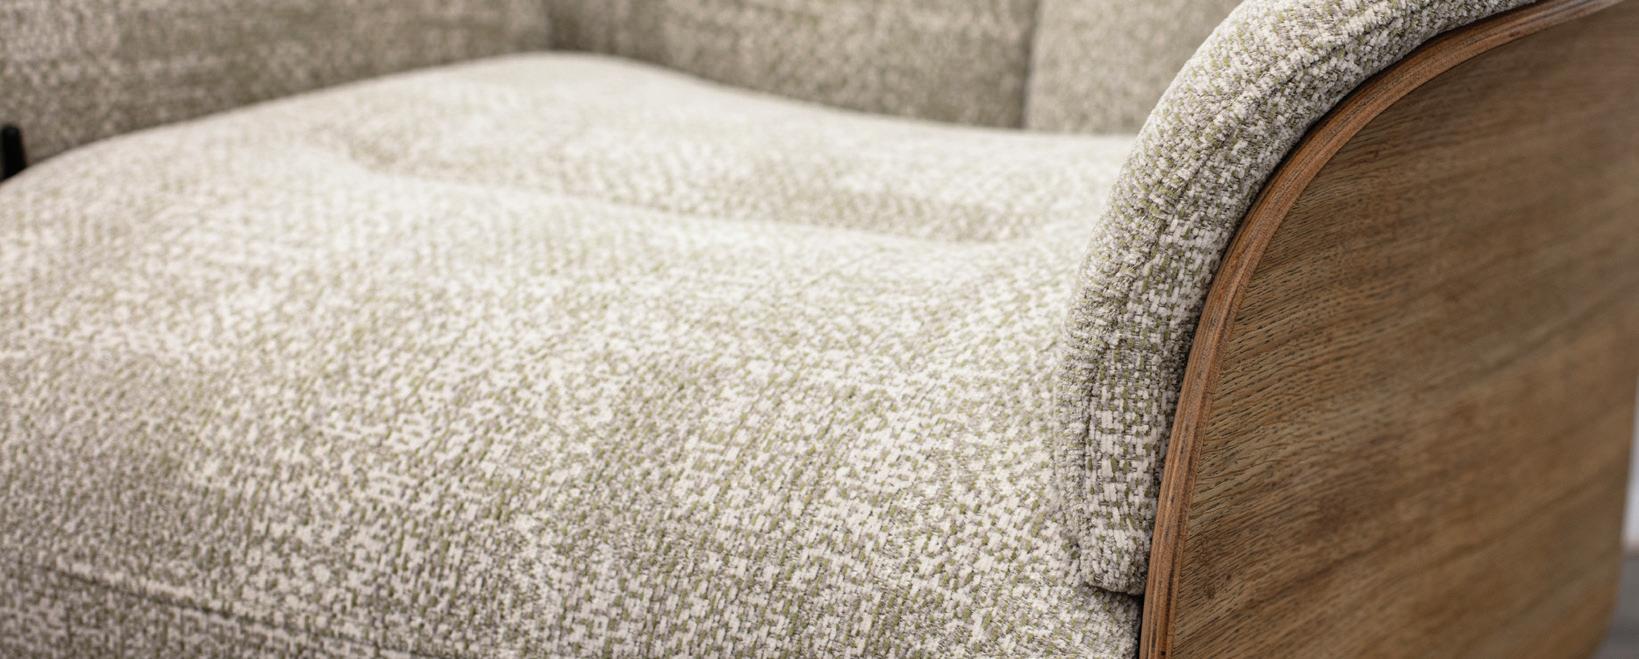
Caring for Chenille Fabrics
Chenille yarns consist of several strands of thread twisted together with short fibres running crossways trapped between them. It’s these short fibres that create the pile effect.
Chenille yarns are often used to create an uneven, random effect with a soft surface texture. The Fabric may then be tumbled to further add to the soft texture. Shading can occur across the piece due to the pile running in different directions. For example one arm may appear darker than the other.
Chenille Fabrics have more yarn joins which appear on the surface and are a natural characteristic, rather than a fault.
The thickness of chenille yarns tends to vary slightly giving a random unevenness to the surface. This may appear as slightly raised lines across the Fabric and should not be confused with rogue yarns which sometimes occur as faults in other Fabrics.
Chenilles can be subject to ‘pile movement’, particularly in areas of heavy use. This can create a shading look which is a natural characteristic and not a fault in the Fabric (please see our care section to minimise this). This is a feature of these types of Fabrics which means the character of the furniture builds as it is used. It can be compared with the signs of use that appear over time on good quality leather.
What to do if you spill something
In the event of a spillage, prompt action can reduce the likelihood of permanent staining.
Remove as much of the spillage as possible with a spoon or blunt palette knife.
Work towards the middle of the spillage to prevent spreading the stain.
Soak up liquids with a clean cloth, towel or kitchen paper without rubbing the stain.
Blot up as much of the spillage as possible using a damp cloth (not wet) with warm clean water, again without rubbing. We strongly advise against using any liquids or damp cloths to clean velvet-style Fabrics.
Seek specialist upholstery cleaning advice if required.
Cleaning your upholstery
Due to the variety of fibre and Fabric constructions used, G Plan recommends that you use a specialist upholstery cleaning company for your chair. If you have purchased a Fabric care treatment for your upholstery, please consult your care treatment provider for cleaning advice.
Covers should never be machine washed or dry cleaned by a launderette as this can damage the fire retardant treatment, fade colours and affect the finish of the Fabric. Where zips are fitted, this is often to assist ease of manufacture and does not necessarily mean that the cover is removable for cleaning.

G Plan ‘Worry Free Fabric’ cleaning and maintenance
G Plan Worry Free Fabrics with Aquaclean® Technology have an advanced protector, which covers every fibre of the Fabric with an invisible molecular layer, enabling the majority of household stains to be removed with just water.
Cleaning
It is best to clean stains as soon as possible and the following steps should be taken.
Remove any excess residue from the upholstery.
Apply water on the stain, either directly or using a damp cloth and wait a few seconds.
Press down over the stain with the damp cloth and rub gently over the Fabric using circular movements.
If the stain does not come off completely, repeat the process as required. For larger or tough stains seek professional upholstery cleaning advice.
Maintenance
For normal Chair maintenance we recommend that you vacuum the entire surface area regularly with a brush fitting.
Caring for Leather upholstery
Lightly vacuum your upholstery and dust with a soft brush weekly to prevent dirt from building up. If you allow dust and dirt to accumulate, it can dull colours and speed up wear.
All Leathers can also be wiped weekly with a damp cloth to remove any dirt. Please also do not allow hair products, bodily oils, hand creams/lotions, hand sanitiser or perspiration to settle as this could break down the finish over time. If you don’t carry out simple, yet gentle cleaning of your leather Chair on a weekly basis, it can reduce the life of your upholstery.

We do not recommend or endorse any Leather cleaning products as polishes, detergents, solvents, white spirit and stain remover may damage the Leather. Do not use baby wipes for cleaning your Leather upholstery.
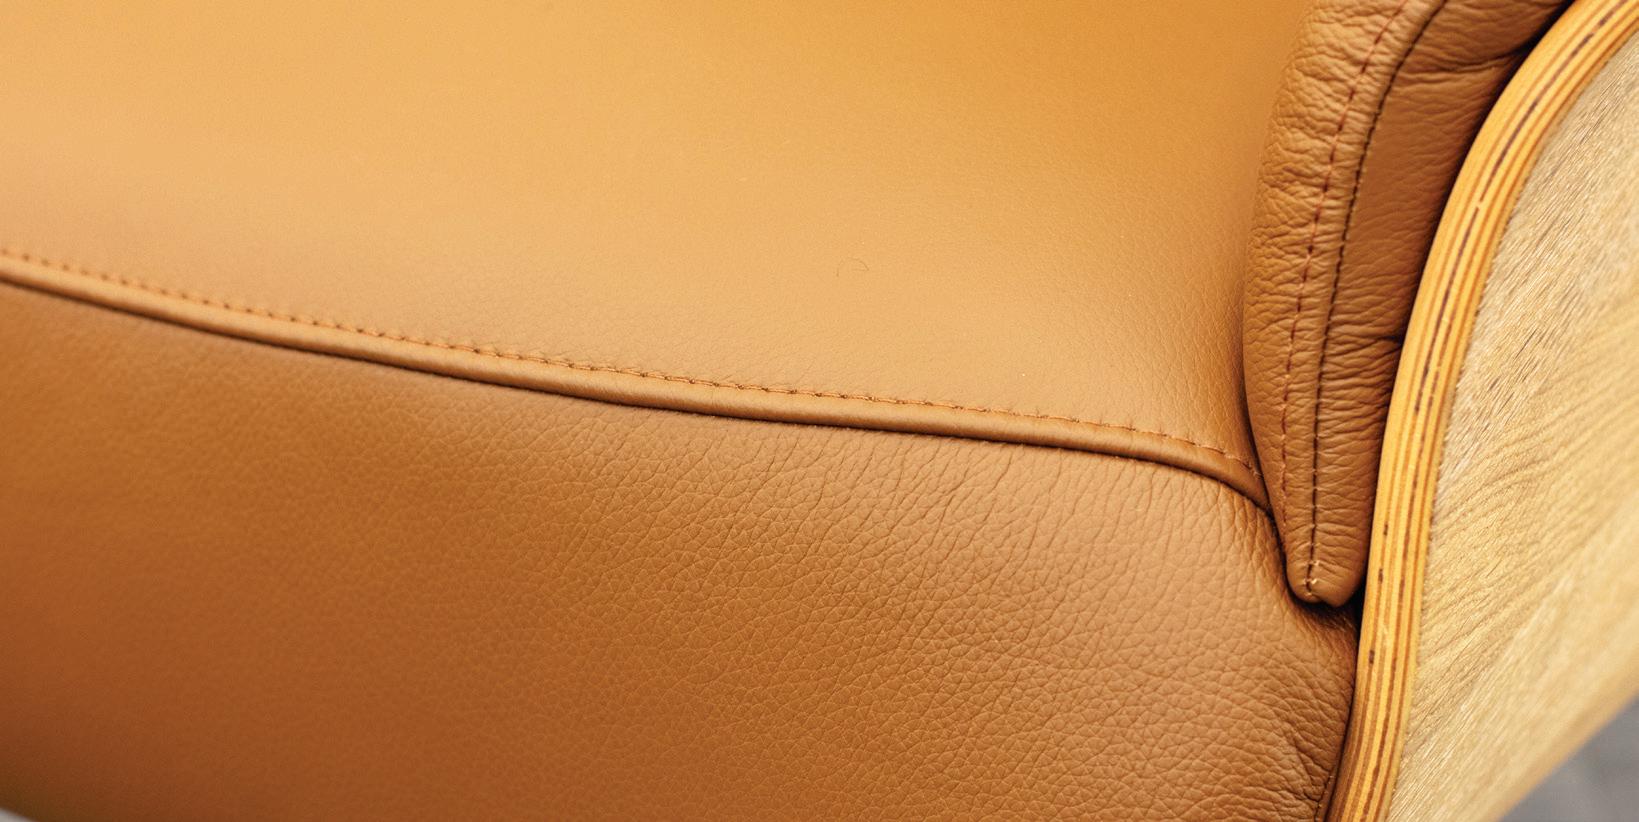
Cleaning of any wooden trim is best done with a soft clean cloth, dampened with water only. Furniture polish will not harm the wood but should be avoided to prevent soiling the Fabric or Leather cover. Any wood on show is manufactured from natural timber and so the grain and colour can vary.

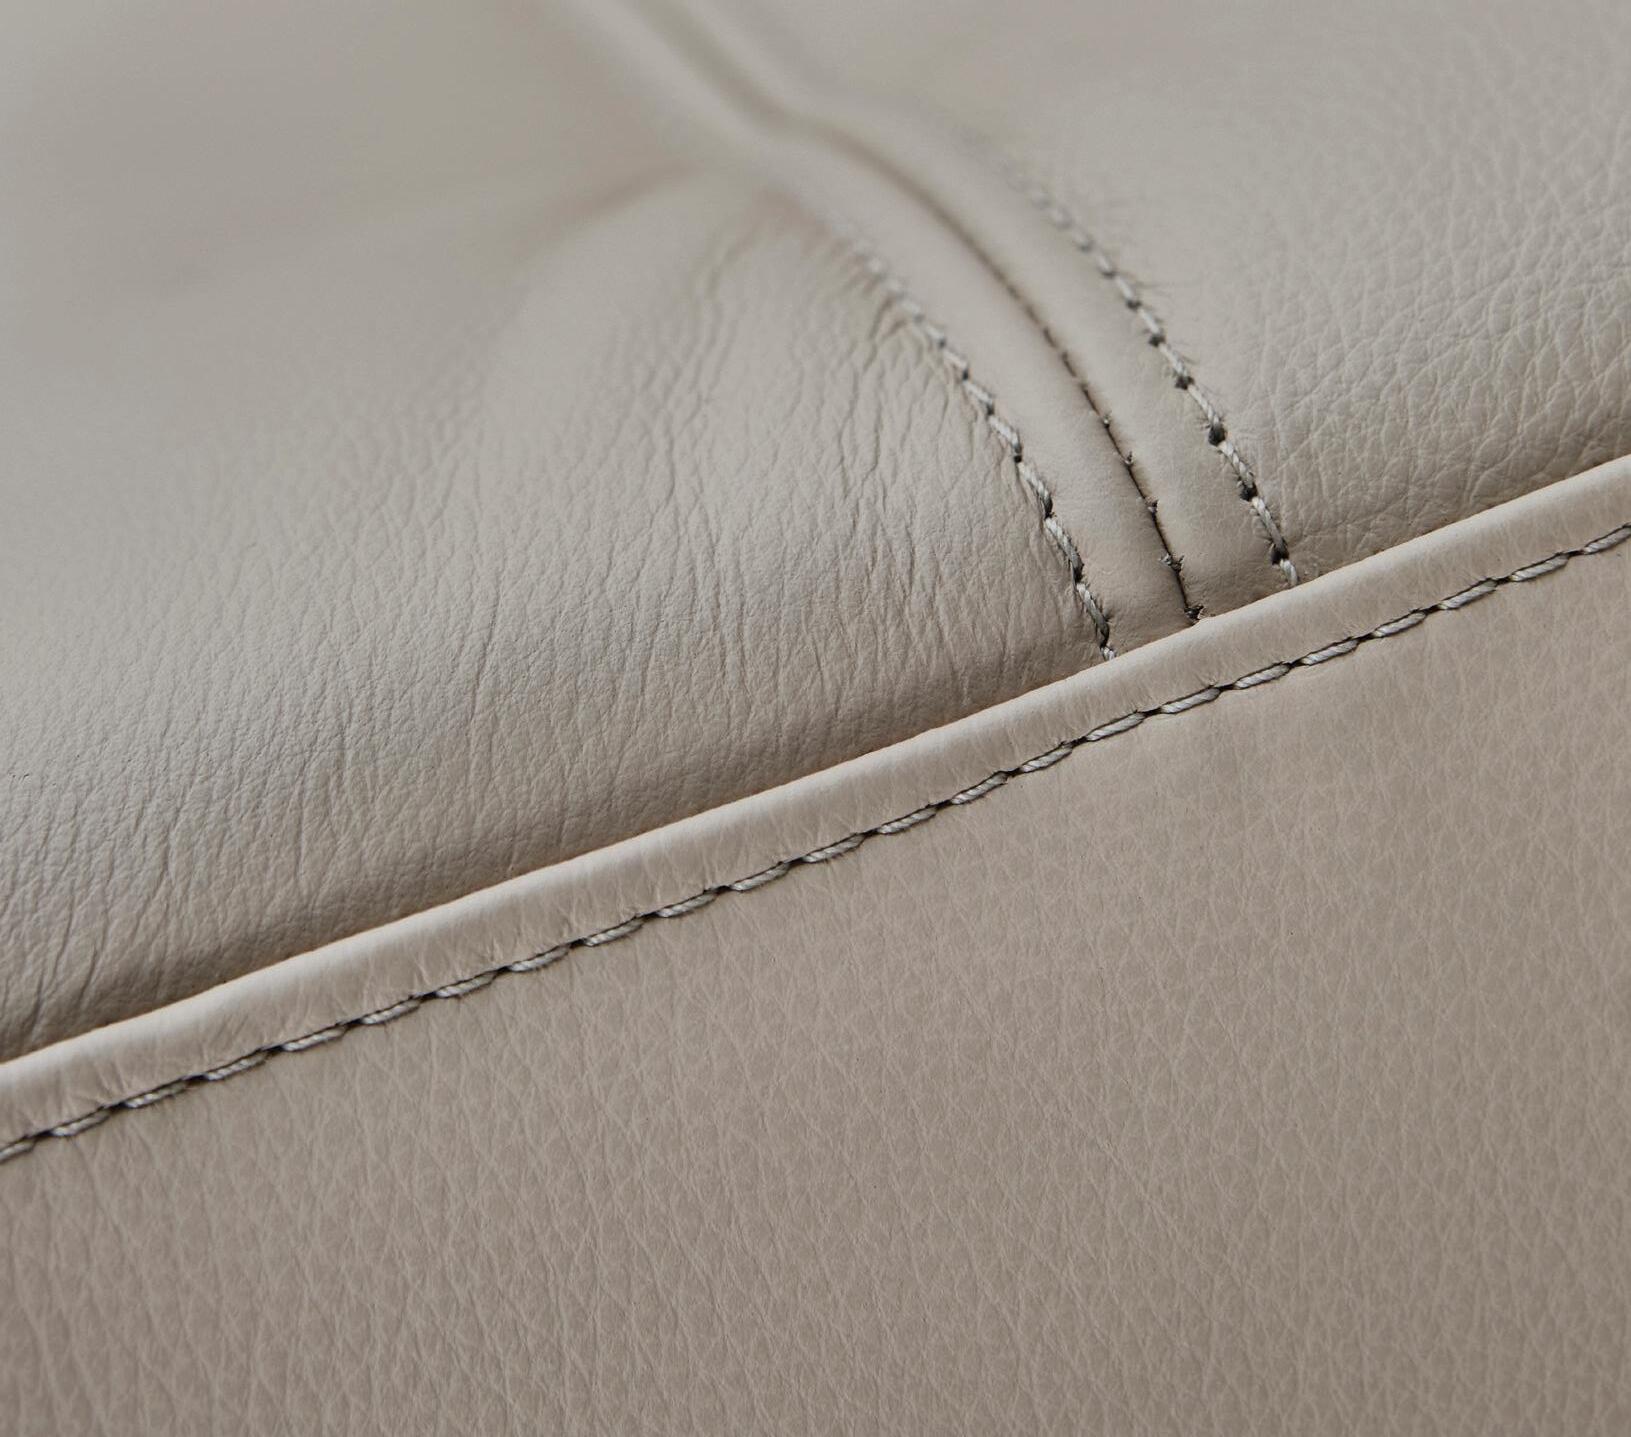
The natural characteristics of Leather
Leather is a natural material and some of the animal’s natural characteristics may feature on your furniture. Marks such as veining, creases, healed scars, tone and grain difference should be appreciated as a mark of authenticity. No two hides are alike, just as no two animals are alike.
If your furniture includes any of these features, please do not worry. These are natural characteristics of leather that help to make your piece of furniture completely unique.
When cutting Leather hides to make upholstery, the following general guidelines are applied to all leathers.
Front facing parts of the upholstery can include light natural markings and minor surface blemishes including a variation in grain.
Side and rear facing parts of the upholstery may show more visible natural marks including variation in grain.
Non-visible parts (for example under seat cushions or behind back cushions) may contain marking, blemishes and occasional light brand marks as long as they do not impact on the structural integrity of the Leather.
After a few weeks use, Leather will begin to ‘stretch’ and ‘give’ (much like a pair of leather shoes) forming a natural ‘sat in’ look with creases and folds developing as you use the furniture. These are quite normal and should not cause concern. They add to the soft inviting look that is inherent with Leather upholstered furniture.
various grades and finishes in order to suit your individual circumstances. All G Plan Leather is 100% top grain.
Texas
A semi-transparent pigment base coat provides good light-fastness, durability and stain resistance. Most of the natural markings and Leather variations are visible in the finished product.

Cambridge
A lightly pigmented finish provides good light fastness, durability and stain resistance. Most of the natural markings and Leather variations are visible in the finished product.

Durham
A semi-transparent pigment base coat provides good light-fastness, durability and stain resistance. Most of the natural markings and leather variations are visible in the finished product.

Setting up your furniture
Riba & Vaasa
Follow these instructions to assemble your Manual Recliner Chair. Assembly requires 2 people.
1. Put the post onto the central part of the 5 star base.
2. Put the Chair onto the post that is now in the stand.
3. Please ensure that the Chair and post are connected correctly and securely.
The post should be visible through the top of the connection, as shown in the ‘correct’ diagram.
If there is a gap as shown in the ‘incorrect’ diagram, this is wrong and needs to be adjusted.
4. Once your Chair is assembled, please sit down in the Chair to ensure all connections are firmly in place and stable.
Whilst seated, use your body weight to push back in the Chair to test the functionality of the recliner. This should be a smooth movement.
Lean forward for the Chair to move back into its original upright position.
Nysted & Falum
Follow these instructions to assemble your Manual Recliner Chair. Assembly requires 2 people.
3. Please ensure that the bolt is fully and securely hooked in. When in the correct position as shown in the diagram, you should hear a click.
1. Lift up the back of the Chair into an upright position.
2. Turn the Chair upside down and securely connect the back to the seat with the hooks shown in the diagram. (Left and right side).
4. Put the post onto the central part of the 5 star base.
5. Put the Chair onto the post that is now in the base.
6. Please ensure that the Chair and post are connected correctly and securely. The post should be visible through the top of the connection, as shown in the ‘correct’ diagram.
If there is a gap as show in the ‘incorrect’ diagram, this is wrong and needs to be adjusted.
7. Once your Chair is assembled, please sit down in the Chair to ensure all connections are firmly in place and stable.
Whilst seated, use your body weight to push back in the Chair to test the functionality of the recliner. This should be a smooth movement.
Lean forward for the Chair to move back into its original upright position.
Riba, Vaasa, Nysted, Skara & Falum
Follow these instructions to assemble the Stool that comes with your Manual Recliner Chair. Assembly requires 2 people.
1. Place the metal plate attached to the post, flat against the bottom of the Stool making sure the holes line up correctly.
2. Attach the plate securely to the seat of the Stool using the tool and fittings provided.
3. Turn the Stool over and place the post into the central part of the 4 star base, making sure that each end of the star base lines up with each corner of the Stool.
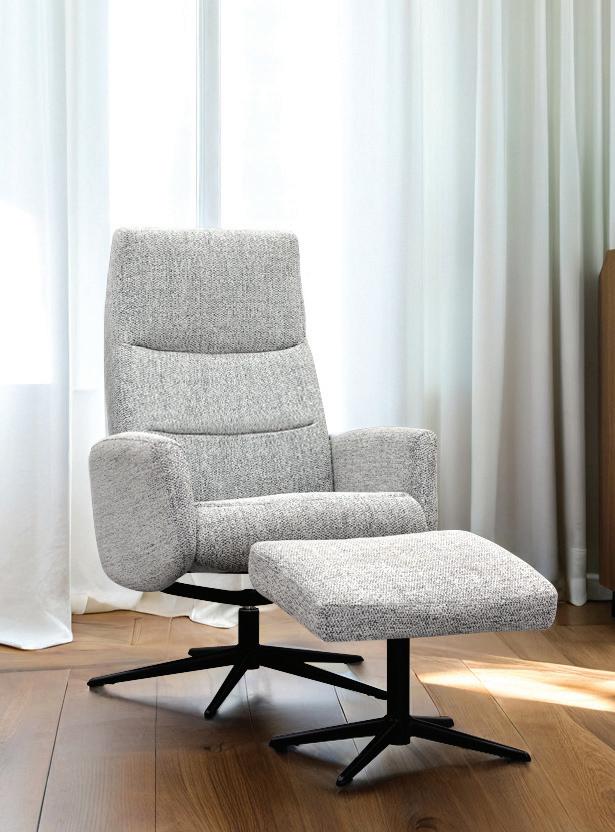
Visby, Skara & Halburg
Follow these instructions to set up your new Ergo Chair. Assembly requires 2 people.
To assemble your Skara Stool please refer to page 19.
Please note: If you have the Skara Chair, you will have seat A. Visby and Halburg will have seat B.
1. Put the post onto the central part of the 5 star base.
2. Put the seat of the Chair onto the post that is now in the stand.
3. Please ensure that the seat of the Chair and post are connected correctly and securely.
The post should be visible through the top of the connection, as shown in the ‘correct’ diagram.
If there is a gap as show in the ‘incorrect’ diagram, this incorrect and needs to be adjusted.
4. Remove the bolt and the clip as shown in the diagram, ready to begin attaching the back of the Chair.
5. Locate the fixing on the back of the Chair and line it up as shown in the diagram to the right.
6. Once the fittings are aligned, put the bolt and clip that you previously removed, back in place to secure the Chair back.
7. Locate the plastic clips on the left and right of the Chair seat as shown in the diagram and ensure they are positioned correctly as shown.
8. Move the Chair back up so that the bar on the Chair back meets the plastic clips.
9. Push the back of the Chair downwards to push the bar securely into the plastic clips.
10. Please ensure that these are connected correctly and securely. When in the correct position, you will hear the back click into place.
11. Once assembled, please sit in your Chair and test out the functions. If assembled correctly, all movement functions will be smooth.
Odense, Maribo, Cartmel & Kalmar
Follow these instructions to set up your new Ergo Chair. Assembly requires 2 people.
B
Please note: If you have the Odense or Maribo Chair, you will have post A. Cartmel and Kalmar will have post B.
1. Put the post onto the central part of the 5 star base.
2. Put the seat of the Chair onto the post that is now in the stand.
3. Please ensure that the seat of the Chair and post are connected correctly and securely.
The post should be visible through the top of the connection, as shown in the ‘correct’ diagram.
If there is a gap as show in the ‘incorrect’ diagram, this incorrect and needs to be adjusted.
4. Remove the bolt and the clip as shown in the diagram, ready to begin attaching the back of the Chair.
5. Locate the fixing on the back of the Chair and line it up as shown in the diagram to the right.
6. Once the fittings are aligned, put the bolt and clip that you previously removed, back in place to secure the Chair back and connect the plugs.
7. Locate the plastic clips on the left and right of the Chair seat as shown in the diagram and ensure they are positioned correctly as shown.
8. Move the Chair back up so that the bar on the Chair back meets the plastic clips.
Kalmar
Cartmel, Odense & Maribo
9. Push the back of the Chair downwards to push the bar securely into the plastic clips.
10. Please ensure that these are connected correctly and securely. When in the correct position, you will hear the back click into place.
12. Once your Chair is correctly assembled and secure, turn the Chair over so the underside of the Seat is visible.
11. Once assembled, please sit in your Chair and test out the functions. If assembled correctly, all movement functions will be smooth.
14. Connect the two cables by lining up the connections and firmly pushing them together. Ensure to close the safety clasp once the cables are attached.
13. Locate the power cables in the bracket on the left-hand side.
Solna
Follow these instructions to set up your new Ergo Chair. Assembly requires 2 people.
Please note: The reverse of the Chair back will look different depending on your Chair type. Power Recliner Chairs with Headrest & Lumbar functionality will look like illustration A. Power Recliner Chairs will look like illustration B. Power Recliner Chairs will also not have visible cables on the Chair base.
1. Place the Chair back (zip side facing inwards) on top of the base of the Chair and angle it towards the fixtures as shown.
2. Line up the bracket fixing on the back with the bracket fixing on the base of the Chair as shown. Please note: Power Recliner Chairs will not have cables.

3. Once bracket fixings are fully aligned, push the back of the Chair down to secure in place. If this is done correctly, you will hear a click.
4. If you have a Power Recliner Chair, secure the Fabric flap down using the velcro strip. If you have a Power Recliner Chair with Headrest & Lumbar functionality, lift the Fabric flap and locate the 4 cables.
5. Once you have located the cables on your Power Recliner Chair with Headrest & Lumbar functionality, connect the corresponding red and yellow cables together. Connect the two cables by lining up the connections and firmly pushing them together. Ensure to close the safety clasp once the cables are attached. Once connected secure the Fabric flap down using the velcro strip.
6. Take the Back Cushion and flip it over. Locate the zip that connects the Headrest to the main body of the Back Cushion and unzip, separating the Back Cushion into two sections as shown. This will make attaching the Back Cushion easier.
7. Place the main body of the Back Cushion in place as shown in the diagram. Attach the main body of the Back Cushion to the back of the Chair with the zip provided.
HEADREST
8. Once the main body of the Back Cushion is in place, reattach the Headrest to the main body of the Back Cushion with the same zip you used to seperate them. Then, attach the Headrest to the back of the Chair with the zip provided.
9. Once the Chair is fully assembled, sit comfortably in the Chair and test all functions - Recline, Power Footrest, 240̊ Swivel, Rocker function and Headrest & Lumbar functionality where relevant. All Chair functions should be smooth and seamless if the Chair has been assembled correctly.
CHAIR BACK
HEADREST
CHAIR BACK
General safety tips Operating your furniture
There are some sensible precautions that we would advise for all of our Chairs.
Ensure there is adequate room behind and in front of the Chair to allow the back to Recline and the Footrest to open.
Ensure the space underneath the Footrest is kept clear of objects and wires when in the open position, to ensure it can close and operate without obstruction.
Keep hands and fingers clear of all moving mechanism parts when operating the controls.
Always ensure your Recliner Furniture is fully closed before attempting to get up/reach out of the Furniture.
Ensure children or pets are not playing near to or lying in the way when the mechanism is operated.
Recliner mechanisms are not suitable for use by children.

Do not allow anyone to sit or stand on the Footrest when it is open as it could tip or damage your recliner.
Close the Footrest when not using the Chair to prevent people tripping over it.
In the case of Power Recliners, ensure the cable between the transformer and the plug is kept clear of the mechanism under the Chair.
Do not place fingers or body parts into accessible parts such as under the Footrest and underneath the mechanisms.
It is advised that all electrical furniture is switched off at the plug when not in use.
Never attempt to open or fix electrical components. If any components are no longer working, stop using the Chair and contact your retailer immediately.
Please note: G Plan do not endorse the use of Footstools as seating.
How to Operate your Manual Recliner with Tension Wheel
Riba, Nysted, Vaasa & Falum
To operate your Manual Recliner Chair, simply sit down and push back using your body weight, and the chair will recline.
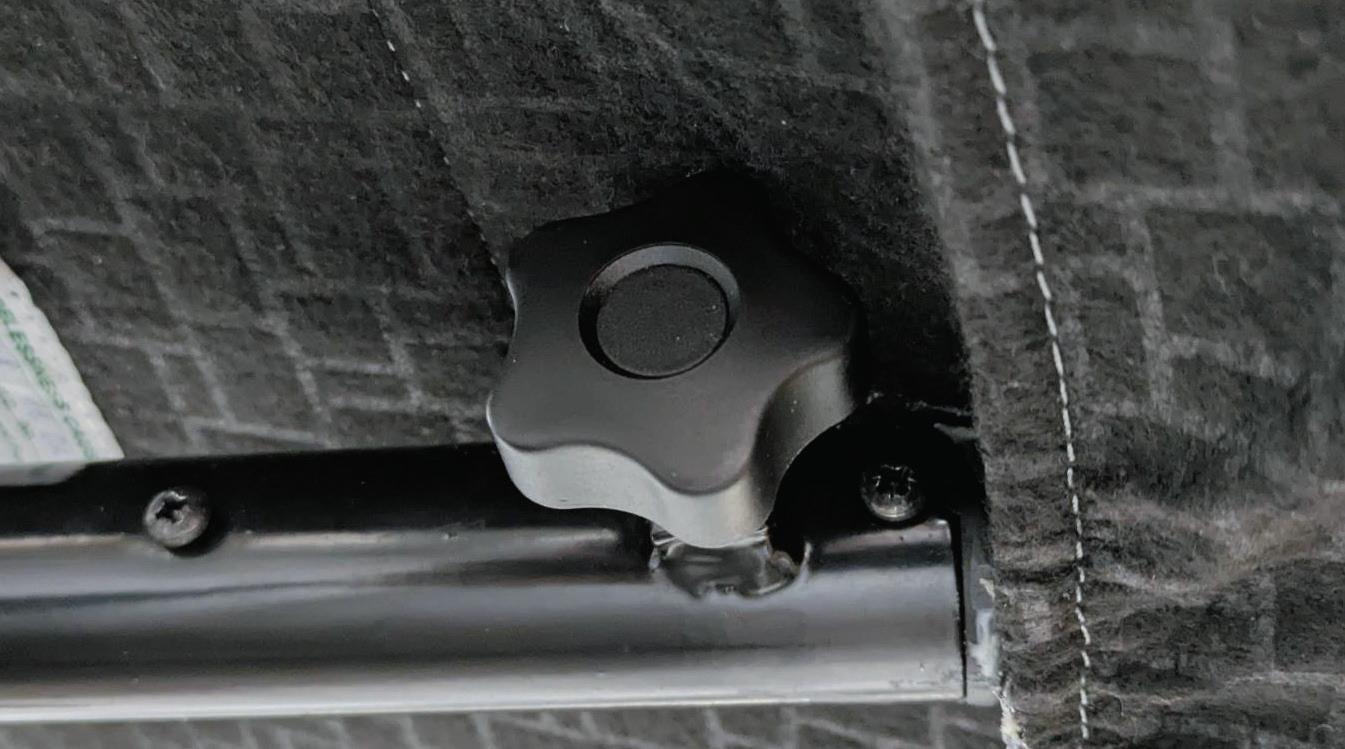
If you chair is not moving freely, you can adjust the tension with the Tension Wheel located underneath the front of the Chair.
To return the Chair to an upright position, simply sit forward and the Chair will reset to a sitting position.
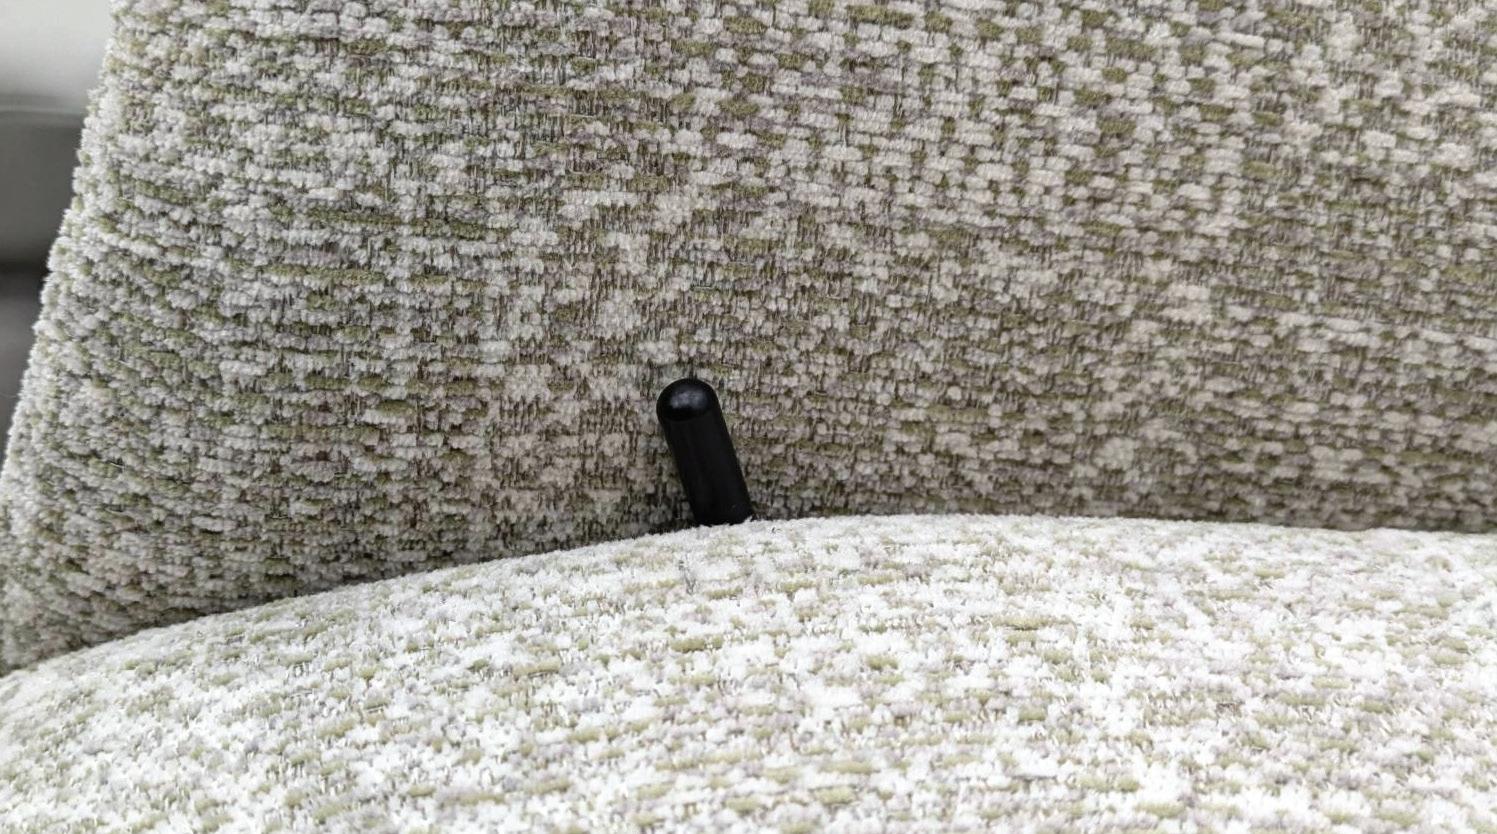
How to Operate your Manual Recliner Chair with Lever
Halburg, Skara & Visby
To operate your Manual Recliner Chair, simply sit down and pull the lever towards you and push back using your body weight. The backrest will recline first. Keep pushing back until the Footrest begins to raise.
Your Chair will remain in this position until the lever is used.
To return to an upright position, simply pull the lever towards you and sit forward. This will reset the backrest to a sitting position.
To return the Footrest to its starting position, push down with your legs and this will reset the Footrest to a sitting position.
How to operate your Power Recliner Chair
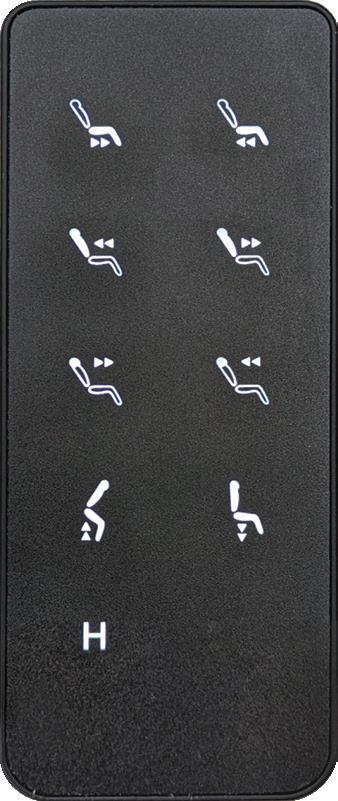
Kalmar
To operate your Power Recliner Chair, you will first need to locate your Wireless Remote on the magnetic plate on the left-hand facing side of the Chair.
The Wireless Remote must only be used when in sight of the Kalmar Chair.
Please Note: The Chair must not be operated by anyone other than the user sitting on the furniture.
Footrest
The Footrest is moved back to the starting position.
Backrest
The Backrest is moved back in to the starting position.
Headrest
The Headrest is moved back into the starting position.
To pair a new remote; single press the top two buttons simultaneously for 1 - 2 seconds and release. Connect the power in 10 seconds. You may then hear a click in the control box, indicating a successful connection.
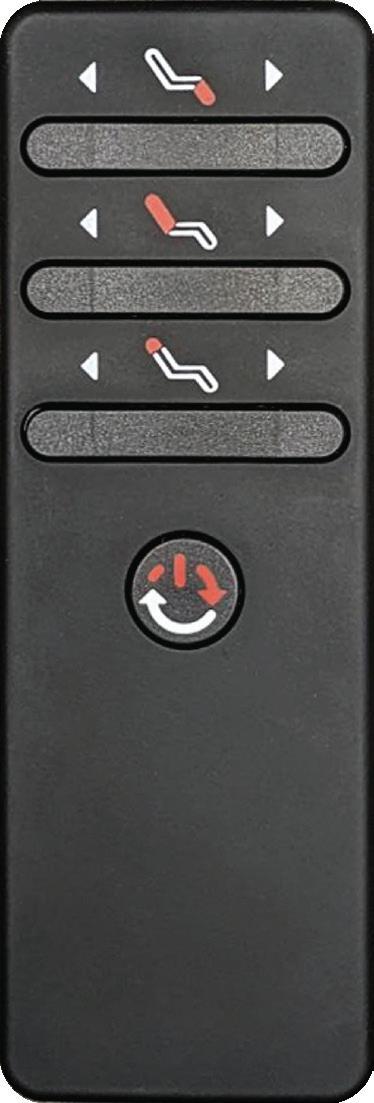
Footrest
The Footrest is raised to a position of your choice.
Backrest
The Backrest is moved to a recline position of your choice.
Headrest
The Headrest is adjusted to a position of your choice.
‘Wake Up’
To ‘wake up’ your Remote, hold the power button for 3 seconds. Once the remote is activated you can then use the power button to turn the remote on/off.
Odense & Maribo
To operate your Elevate Chair you will first need to locate your Wired Remote in the left-hand facing pocket.
Locate the power button on the side of the remote and press to turn on. The function buttons will then light up.
Please Note: The Chair must not be operated by anyone other than the user sitting on the furniture.
On/Off
This will power your Chair on and off.
Footrest
The Footrest is raised to a position of your choice.
Backrest
The Backrest is moved to a recline position of your choice.
Headrest
The Headrest is adjusted to a position of your choice.
Elevate
Elevate is activated, gently raising the Chair and allowing you to stand up more easily.
Home
Cartmel
Footrest
The Footrest is moved back to the starting position.
Backrest
The Backrest is moved back in to the starting position.
Headrest
The Headrest is moved back into the starting position.
Elevate
The Elevate Chair will gently move back down into the starting position.
Returns the Chair to the seated position, with the Footrest closed and the back upright.
To operate your Power Recliner Chair you will first need to locate the buttons on the lefthand facing side of the Chair.
Please Note: The Chair must not be operated by anyone other than the user sitting on the furniture.
Home
Returns the Chair to the seated position, with the Footrest closed and the back upright.
Headrest
The Headrest is adjusted to a position of your choice.
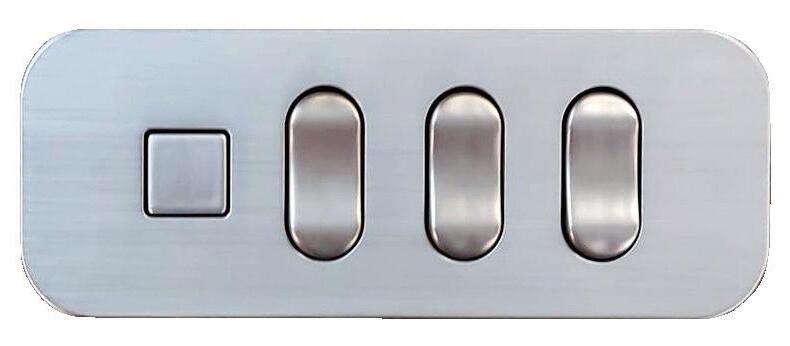
The Chair back is reclined to a position of your choice.
The Footrest is adjusted to a position of your choice.
Footrest
Solna
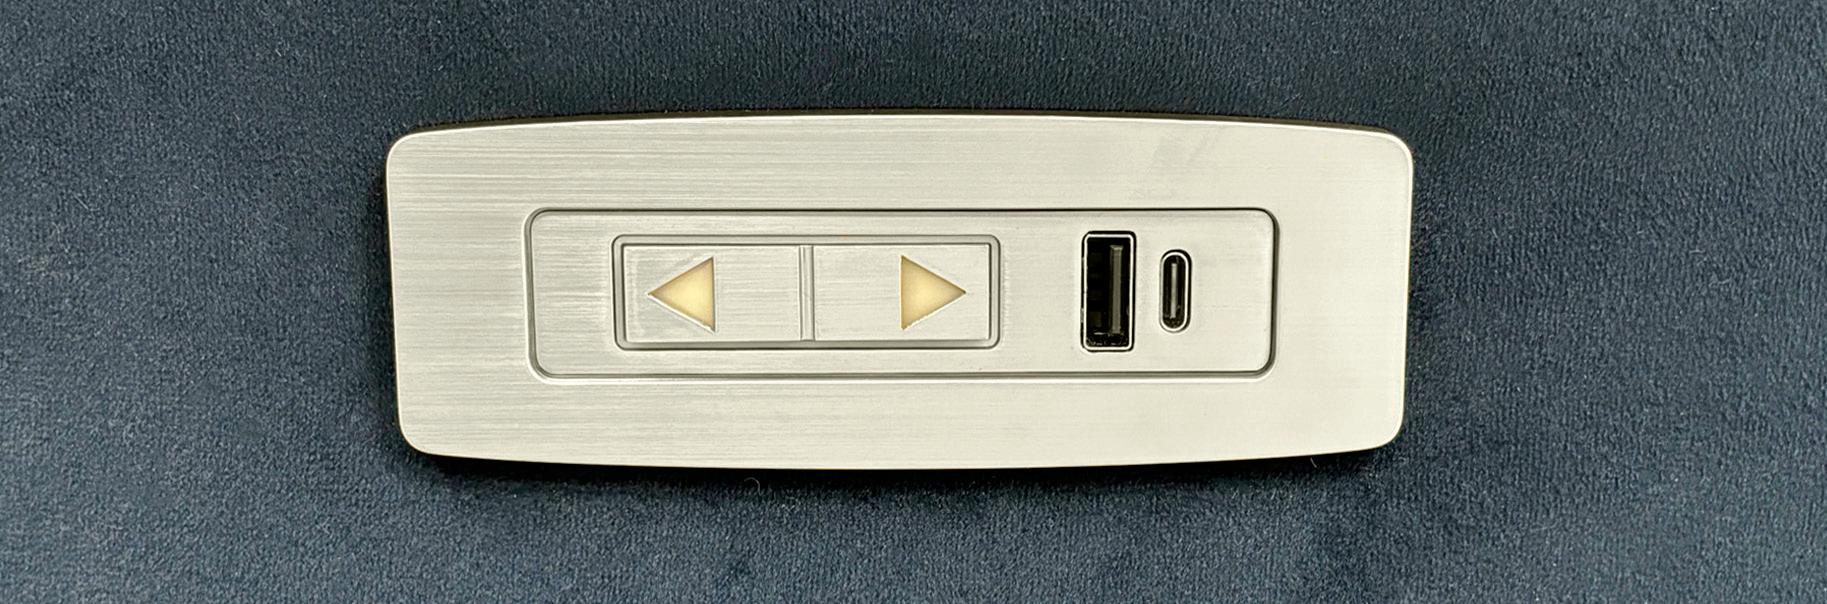
To operate your Solna Chair, you will first need to locate the function buttons on the left-hand facing side of the Chair.
Use the arrow buttons to activate the Footrest, Headrest & Lumbar functionality.
To activate the Heated Seats, simply press the round button. When the Heat Pad is active, the control button will turn red. When you’re done with lounging, simply hit the control button and the Heat Pad will turn off.
Please note; Power Packs are not available with the Solna Chair.
Solna USB operation and trouble-shooting
For your convenience, certain models are fitted with built in USB power outlet ports, to be able to charge your devices whilst sitting in comfort. The USB power outlet is low voltage; 5.1 V/2.1 Amps/10 Watts and must only be used to charge IT or mobile equipment. Do not place any other objects or cables into the USB outlet.
When fitting a USB cable, if you are unable to plug in the connection head; rotate the head by 180° and try again. Should your device not charge, please check all connections including the condition of your personal charging cable.
If your USB power outlet port is part of an electric recliner toggle switch, ensure the seat reclines. If the seat reclines, power will be present at the outlet. Please test your cable on another USB power outlet.
Do not leave USB cables plugged in to the USB ports for long periods of time, to avoid over heating.
If there are any concerns over the functionality of the USB power outlet, please contact your retailer.
It is possible that USB ports can warm up when they are in use, this is due to the charging device taking energy via the port, which is transferred into heat. This is a normal characteristic.
All USB ports in our furniture contain thermal protection devices which are designed to switch off when they reach a certain temperature, this is designed for thermal protection and is normal. If the USB does power down, leave it to cool and then you can reconnect, the USB will automatically reset and will be ready for use.
Ensure that all charging devices are kept on a hard surface and not on the upholstered product.
Never leave charging devices unattended, including overnight charging.
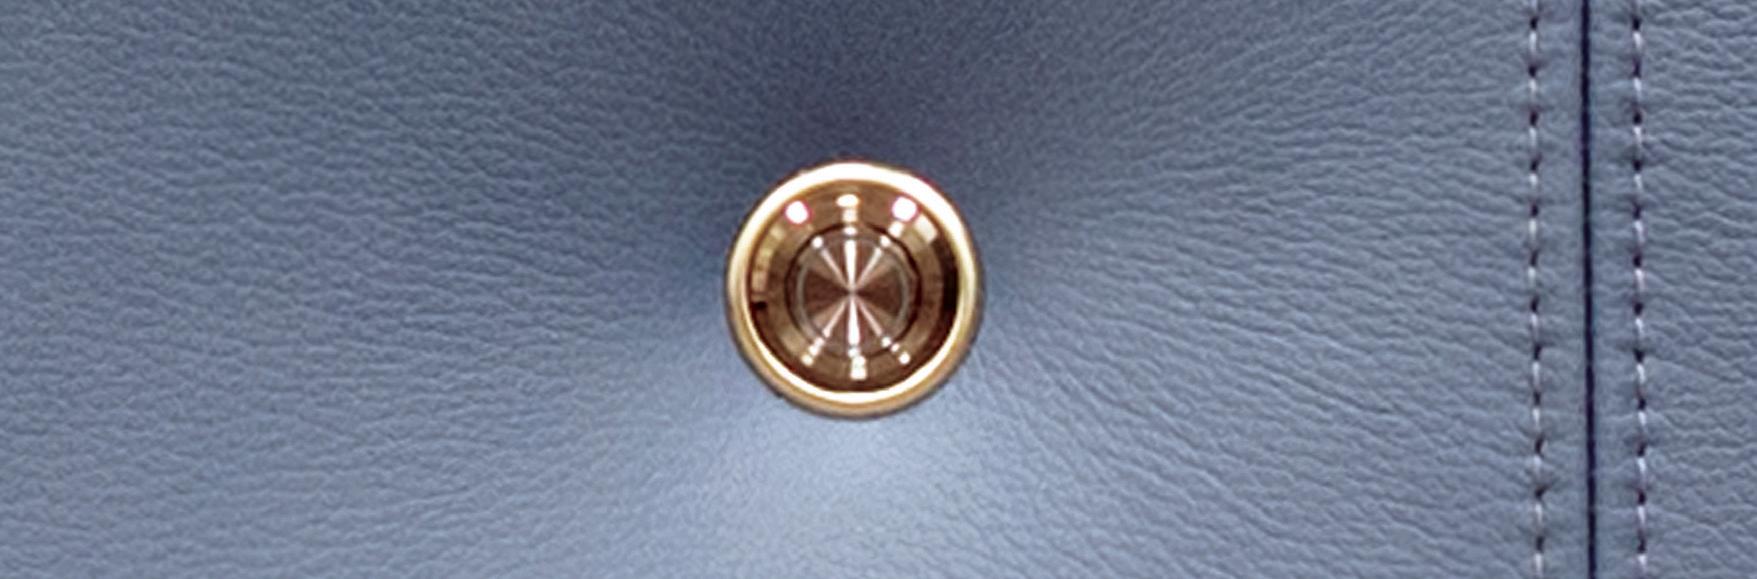
Solna Heated Seats
For your convenience, Solna is fitted with a built in Heated Seat.
At the touch of a button, the Heat Pad will run for a 60-minute cycle. The Heat Pad control button will turn red when active. With the temperature of the Heating Pad being monitored, the Heating Pad thermostat will stop the temperature from rising to an unsafe range and will keep the Heating Pad in a safe temperature range. To turn off the Heated Seat, press the control button once and the red light will turn off.
There are some sensible precautions that we would advise for all users of Heated products.
Care should be taken with sharp edged toys, buckles and jewellery as these could potentially pierce the Heat Pad.
DO NOT machine wash the Heat Pad (including immersion in water), if the Heat Pad becomes wet from a spillage, please ensure that the Heat Pad is disconnected immediately from the power supply. Please ensure Heat Pad is completely dry before reconnecting.
This appliance is not intended for use by children.
Children must not be left unsupervised or play with this product.
If the Heating functionality of this product ceases working, turn off the power supply and please contact your Retailer immediately.
Rechargeable power packs are not available on Chairs with Heat.
All Heat Pads come with a 2-Year Manufacturing Guarantee.
Warning - Heating appliances should never be left unattended or overnight.
Warning - Should the Heating become uncomfortably hot, switch off at the mains and contact your Retailer immediately.
Warning - Ensure the product is disconnected before cleaning up spillages.
Advice on rechargeable power packs and transformers
Before using the power pack, please carefully read the following instructions.
• Do not use extension cables or use the unit with a damaged cable or plug. Damaged parts have to be replaced immediately. Contact your upholstery stockist if any parts become damaged.
• All rechargeable batteries dissipate energy over a period of time even if they are not used. It is recommended that they are fully recharged at least every four weeks, or when a noticeable drop in power or operation of the recliner unit is noticed.
• For models which have a Swivel AND Recliner function powered by a rechargeable battery pack you must not use the Swivel/Recliner functions when charging the battery pack. Battery life will depend on use of these functions.
• Should you need to charge a cold battery (approx 5ºC or less) in a warm room, leave the battery for at least one hour inside the room and charge only after the battery has been warmed to room temperature (otherwise the battery may not fully recharge). Do not charge the power pack in temperatures below 0ºC.
• The transformer and power pack are specially coordinated. The transformer must not be used for any other equipment or tools. Never charge the power pack with another transformer/ charging unit other than the one supplied.
• The transformer and power pack are not designed for external use and must not be used in damp places.
• On separating the transformer from the wall socket please always grasp the plug to avoid damage to the cables or cable connections.
• Before cleaning the transformer/power pack, disconnect from the power supply and do not immerse in water. Cleaning should be done with a dry cloth or duster only.
• Do not store the transformer and power pack in rooms with a temperature of more than 35ºC or less than 0ºC.
• Never burn exhausted power packs; they may explode.
• Avoid mishandling and damage to the cable. Keep it away from extreme heat, naked flames and sharp implements.
• Always recharge the power pack in a well ventilated room. Never cover the transformer or power pack with textiles or other material during the charging process.
• Ensure that the transformer cable is routed to avoid causing a trip hazard.
• We recommend that it is put away when not in use. It should never be left under the recliner unit as it can be damaged by the mechanism.
• When used according to these instructions and guidelines the rechargeable power pack is supported with a two-year guarantee.
• Wires and batteries should be kept away from your recliner mechanism(s) to avoid damage and malfunction of electrical components.
• Please note - the transformer or rechargeable power pack should only be used with G Plan products.
Product warnings
These are the warning labels, which will appear on various products. Please read carefully.
IMPORTANT, READ CAREFULLY, RETAIN FOR FUTURE
REFERENCE:
G Plan SAFETY information for Manual and Electric recliners. (complies with BS8474:2013)
WARNING: This is an electrical item and should be treated with caution.
WARNING: Always ensure that there is nothing to obstruct the free movement of the Chair, for example children or pets, or solid objects, e.g. a wall.
WARNING: This Chair is not suitable for use by children. Any children in the vicinity must be supervised at all times.
WARNING: Take care when adjusting positions to avoid trapping or pinching of body parts.
WARNING: Do not sit on Footrest.
WARNING: Only the occupant or a responsible person should operate the Chair.
WARNING: Exercise care when lowering into the Chair as shock loads can severely damage the chair and the mechanism.
WIRELESS REMOTES
• Wireless Remotes MUST only be used by a responsible person and must not be used by children at any time.
• Wireless Remotes MUST only be used when the operator has a clear view of the Chair, so they can assess whether it is safe to change the positioning of the Chair.
• Using a Wireless Remote when the Chair is not in view could lead to serious injury — using the remote in this fashion will be deemed furniture misuse.
• Batteries MUST only be changed by a responsible person; the old battery must be disposed of responsibly.
BATTERY LIFE
• Wireless Remotes rely on batteries, which can drain quickly, especially with frequent use. Regular batter replacement is essential - the Bluetooth remote takes CR 2032 Coin Batteries 3V.
• Batteries are a choking hazard. Never allow children to touch or use the wireless remote.
• Recommended maximum load for safe operation of the recliner: 110kg/17.3 stone.
• Only operate movement of the Recliner with the controls provided.
• Recliners are only to be used once fully and correctly installed.
• When Recliners are not in use, always return them to the seated position.

Don’t forget to visit www.gplan.co.uk to register your furniture by clicking on the ‘Register your furniture’ button on the home page.
Our website is also home to a range of information on our product collection, materials and also an electronic copy of this guide.
Sign up to our newsletter to receive the latest updates on the G Plan brand, care information and details on our latest offers. If you do not have access to our website, please call 01225 700880 to register your sofa.
Our guarantees Register your furniture
We’re so confident and proud of the quality of our craftsmanship, we offer a range of different guarantees with your chair.
5-Year Steel Frame & Moulded Foam Guarantee on all our Ergo and ergoform chairs, which have been crafted in Europe to exacting G Plan standards, by our specialist manufacturing partner.
2-Year Guarantee on mechanisms.
2-Year Manufacturing Guarantee on motors and battery parts.
All G Plan guarantees cover claims by the first owner of products with normal use, purchased from our approved stockists only. They do not cover damage caused by abnormal use or storage conditions, accidents, negligence by you or a third party or any commercial or institutional use. Failure to follow the written instructions in the Care Guide or provided with the product will invalidate the claim. Any alterations or repairs carried out without our written permission will also invalidate the claim. We do not recommend or endorse any form of stain protection on our fabrics. Our guarantees do not affect your Statutory Rights.
If you require any more information please don’t hesitate to contact us.
www.gplan.co.uk
Telephone: 01225 700880
Email: customer.service@gplan.co.uk
Address: G Plan Upholstery Ltd, Hampton Park West, Melksham, Wiltshire SN12 6GU
If you are looking for inspiration on how to style your chair, visit our social media channels and blogs. For other information on how to assemble your furniture, operate your furniture, dress your furniture and more, scan the QR code below.
@designbygplan
@gplandesign
@gplandesign
gplan.co.uk/be-inspired

G Plan Upholstery Limited is registered by BM TRADA under the management systems of ISO 45001; Occupational Health and Safety and ISO 9001:2015; the International Standard for Quality.
Your furniture was designed and manufactured under the control of an Integrated Management System which has been independently assessed by BM TRADA for conformity to these standards.
July 2025