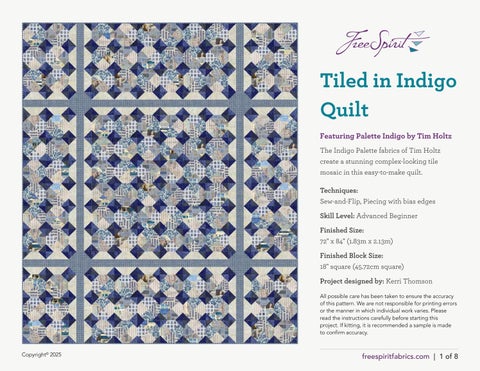
Tiled in Indigo Quilt
Featuring Palette Indigo by Tim Holtz
The Indigo Palette fabrics of Tim Holtz create a stunning complex-looking tile mosaic in this easy-to-make quilt.
Techniques:
Sew-and-Flip, Piecing with bias edges
Skill Level: Advanced Beginner
Finished Size: 72" x 84" (1.83m x 2.13m)
Finished Block Size: 18" square (45.72cm square)
Project designed by: Kerri Thomson
All possible care has been taken to ensure the accuracy of this pattern. We are not responsible for printing errors or the manner in which individual work varies. Please read the instructions carefully before starting this project. If kitting, it is recommended a sample is made to confirm accuracy.
Tiled in Indigo Quilt
FABRIC REQUIREMENTS (Tech edited by: Alison M. Schmidt)
Design
Color Item ID
A Indigo Collage Indigo
B Indigo Stamps Indigo
C Indigo Tickets Indigo
D Indigo Map Indigo
E Indigo Ledger Indigo
F Indigo Typography Indigo
G Indigo Tapestry Indigo
H Indigo Wallpaper Indigo
I Indigo Tiny Print Indigo
J Indigo Vintage Indigo
K Cracked Shadow Lapis
L Worn Croc Moonlit
M Provisions Indigo
N Sewing instructions Linen
PWTH290.INDIGO 7⁄8 yard (0.80m)
PWTH291.INDIGO 7⁄8 yard (0.80m)
PWTH292.INDIGO 7⁄8 yard (0.80m)
PWTH293.INDIGO 7⁄8 yard (0.80m)
PWTH294.INDIGO 11⁄8 yards (1.03m)
PWTH295.INDIGO 7⁄8 yard (0.80m)
PWTH296.INDIGO 2⁄3 yard (0.61m)
PWTH297.INDIGO 7⁄8 yard (0.80m)
PWTH298.INDIGO* 13⁄8 yards (1.26m)
PWTH299.INDIGO 2⁄3 yard (0.61m)
PWTH128.LAPIS 2⁄3 yard (0.61m)
PWTH020.MOONLIT 2⁄3 yard (0.61m)
PWTH115.INDIGO 2⁄3 yard (0.61m)
PWTH110.LINEN 7⁄8 yard (0.80m) *includes binding
Backing (Purchased Separately)
44" (1.12m) wide
Indigo Wallpaper Indigo
PWTH297.INDIGO 51⁄4 yards (4.80m) OR 108" (2.74m) wide
Receipt Aqua QBTH010.AQUA 21⁄4 yards (2.06m)
Swatches


ADDITIONAL REQUIREMENTS
• 100% cotton thread in colors to match
• 80" x 92" (2.03m x 2.34m) batting
Tiled in Indigo Quilt
CUTTING
WOF = Width of Fabric
This quilt is designed to give a scrappy vintage feel. To help with the scrappiness, more pieces are cut than required to allow for a wider variety of choices. If you would like an even greater variety, when cutting 71⁄4" and 21⁄2" squares, cut as many as possible from the final WOF strip, rather than the total listed.
Fabrics A, B, C, F and N, cut from each:
(4)71⁄4" x WOF; subcut
(17)71⁄4" squares, then cut on both diagonals for
(68)Quarter Square Triangles
Fabrics D and H, cut from each:
(4)71⁄4" x WOF; subcut
(18)71⁄4" squares, then cut on both diagonals for
(72)Quarter Square Triangles
Fabric E, cut:
(15)21⁄2" x WOF; subcut
(88)21⁄2" x 61⁄2" rectangles
Fabrics G, J, K, L and M, cut from each:
(9)21⁄2" x WOF; subcut
(135)21⁄2" squares
Fabric I, cut:
(1)61⁄2" x WOF; subcut
(4)61⁄2" squares
(1)21⁄2" x 121⁄2" rectangle
(16)21⁄2" x WOF; set aside (9) strips for binding, and then from remaining strips, subcut
(4)21⁄2" x 361⁄2" rectangles
(4)21⁄2" x 181⁄2" rectangles
(3)21⁄2" x 121⁄2" rectangles
INSTRUCTIONS
Notes:
• All seam allowances are 1⁄4" and pieces are sewn right sides together. Press the seams following the arrows in the diagrams.
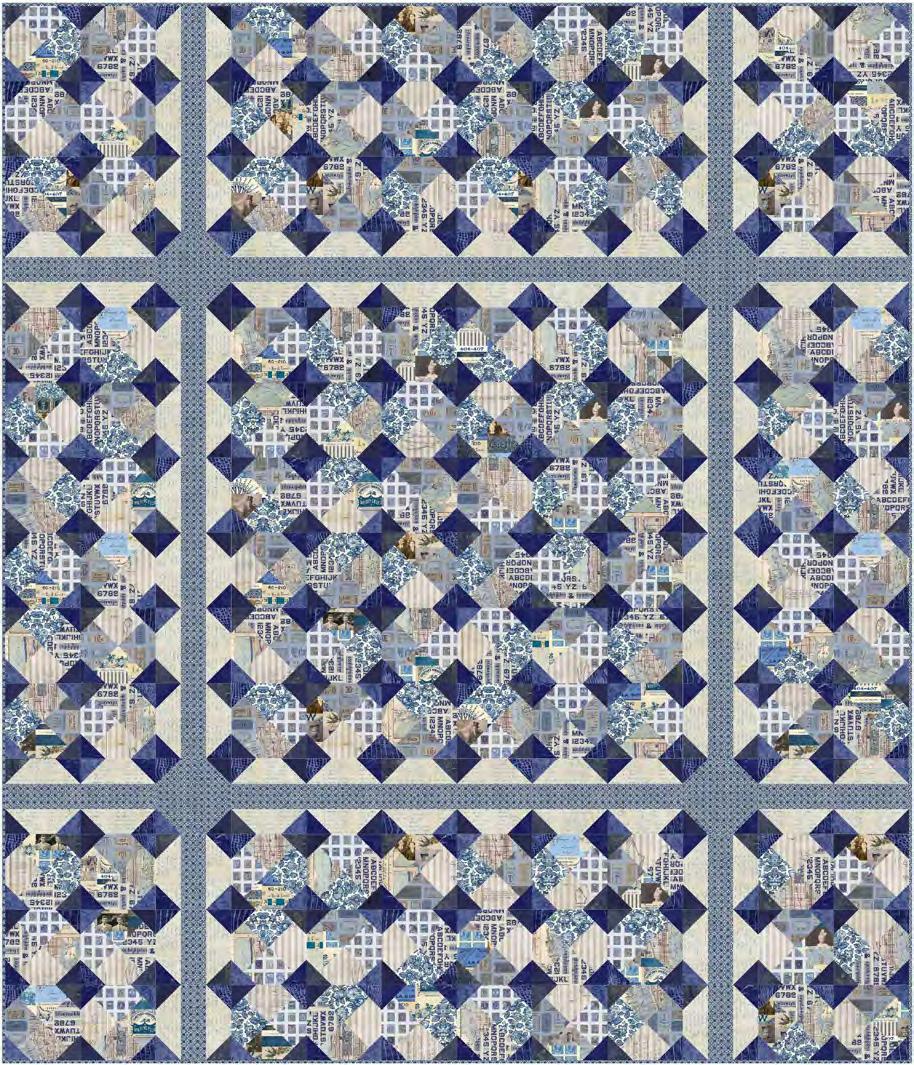
• Select fabric combinations that are pleasing to you for a unique quilt or use the Quilt Layout diagram (page 8) as a guide for fabric placement. There will be some unused triangles and squares of all but the Fabric E and I pieces.
• The Quarter Square Triangles have bias edges on the short sides, so handle with care to prevent stretching.
Block Construction
1 Select (4) each Quarter Square Triangles and 21⁄2" squares. Lay out (4) Quarter Square Triangles in a square. (Fig. 1) Sew the triangles together in pairs. Sew the pairs together to complete (1) QST Unit (61⁄2" square).
Tiled in Indigo Quilt
2 On the wrong side of each 21⁄2" square draw a line on one diagonal. Place (1) 21⁄2" square, right sides together, on the upper left corner of the QST Unit, with the line running across the corner. Sew along the drawn line. (Fig. 2) Trim to a 1⁄4" seam allowance outside the line and press the corner open. Repeat this process to add the remaining (3) 21⁄2" squares to the remaining corners of the QST Unit to complete Unit 1 (61⁄2" square).
3 Repeat Steps 1 and 2 to make a total of 120 of Unit 1.
Fig. 1 Fig. 1
Fig. 2
4 Lay out (9) Unit 1 in (3) rows of (3) units. (Fig. 3) Sew the units together in rows. Sew the rows together to complete (1)Tiled in Indigo Block (181⁄2" square). Make a total of (8) full Blocks.
3 Fig. 3
Tiled in Indigo Quilt
Sashing
6 Select (1) 21⁄2" x 61⁄2" Fabric E rectangle and (2) 21⁄2" squares. On the wrong side of both 21⁄2" squares, draw a line on one diagonal. Use the sew-and-flip method detailed in Step 2 to add 21⁄2" squares to the upper left and upper right corners of the Fabric E rectangle (Fig. 5), to complete (1)Unit 2 (21⁄2" x 61⁄2").
Fig. 5
5
Partial Blocks
5 Lay out (6) Unit 1 in (3) rows of (2) units. (Fig. 4) Sew the units together in rows. Sew the rows together to complete (1)Partial Block (121⁄2" x 181⁄2"). Make a total of (8) Partial Blocks.
Fig. 4
7 Repeat Step 6 to make (88) total of Unit 2.
8 Sew (6) Unit 2 together, end to end, to make (1) Unit 3 (21⁄2" x 361⁄2"). (Fig. 6) Repeat to make (8) Unit 3.
Fig. 6
Fig.
9 Sew (1) 21⁄2" x 361⁄2" Fabric I rectangle between (2) Unit 3 to complete (1) Sashing 1 (61⁄2" x 361⁄2"). (Fig. 7) Repeat to make (4) Sashing 1.
Fig. 7
10 Sew (3) Unit 2 together, end to end, to make (1) Unit 4 (21⁄2" x 181⁄2"). (Fig. 8) Repeat to make (8) Unit 4.
Fig. 8
Tiled in Indigo Quilt
11 Sew (1) 21⁄2" x 181⁄2" Fabric I rectangle between (2) Unit 4 to complete (1) Sashing 2 (61⁄2" x 181⁄2"). (Fig. 9) Repeat to make (4) Sashing 2.
Fig. 9
Fig. 9
Sashing 2 Make 4 I
12 Sew (2) Unit 2 together, end to end, to make (1) Unit 5 (21⁄2" x 121⁄2"). (Fig. 10) Repeat to make (8) Unit 5.
Fig. 10
Fig. 10 Unit 5 Make
13 Sew (1) 21⁄2" x 121⁄2" Fabric I rectangle between (2) Unit 5 to complete (1) Sashing 3 (61⁄2" x 121⁄2"). (Fig. 11) Repeat to make (4) Sashing 3.
11
14 Select (1) 61⁄2" Fabric I square and (4) 21⁄2" squares. On the wrong side of each 21⁄2" square draw a line on one diagonal.
Use the sew-and-flip method detailed in Step 2 to sew the 21⁄2" squares to each corner of the Fabric I square to complete (1) Corner Stone (61⁄2" square). (Fig. 12)
12
Tiled in Indigo Quilt
15 Repeat Step 14 to complete (4) Corner Stones.
QUILT TOP ASSEMBLY
Follow the Quilt Layout diagram (page 8) while assembling the quilt top.
16 Sew (2) Tiled in Indigo Blocks between (2) Sashing 2 and (2)Partial Blocks to complete (1) Top/Bottom Row (181⁄2" x 721⁄2"). Repeat to make (2) Top/Bottom Rows.
17 Sew (1) Sashing 1 between (2) Corner Stones and (2) Sashing 3 to complete (1) Sashing Row (61⁄2" x 721⁄2").
Repeat to make (2) Sashing Rows.
18 Lay out (4) Tiled in Indigo Blocks in (2) rows of (2) blocks. Sew the blocks together in rows. Sew the Rows together to complete the Center (361⁄2" square).
19 Sew a Sashing 1 to the left and right edges of the Center (481⁄2" x 361⁄2").
20 Sew (2) Partial Blocks together along the short edge. Sew to the left side of the section from Step 19. Repeat to sew (2)Partial Blocks together, then add to the right side to complete the Center Row (361⁄2" x 721⁄2").
21 Sew the Sashing Rows to the top and bottom of the Center Row, followed by the Top/Bottom Rows, to complete the Quilt Top (721⁄2" x 841⁄2").