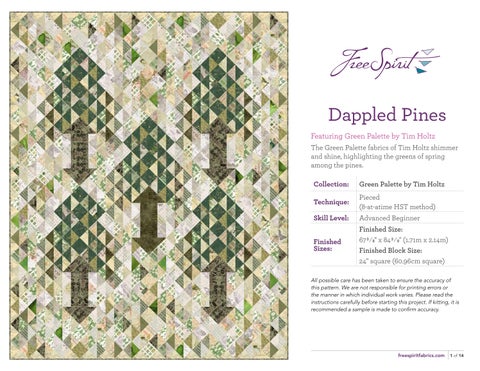
Dappled Pines
Featuring Green Palette by Tim Holtz
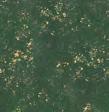
The Green Palette fabrics of Tim Holtz shimmer and shine, highlighting the greens of spring among the pines.
Collection: Green Palette by Tim Holtz
Technique: Pieced (8-at-atime HST method)
Skill Level: Advanced Beginner
Finished Size:
Finished Sizes:
Finished Block Size: 24" square (60.96cm square)
All possible care has been taken to ensure the accuracy of this pattern. We are not responsible for printing errors or the manner in which individual work varies. Please read the instructions carefully before starting this project. If kitting, it is recommended a sample is made to confirm accuracy.
Project designed by Kerri Thomson | Tech edited by Alison M. Schmidt
Fabric Requirements
DESIGN COLOR ITEM
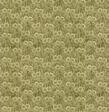
(A) Green Collage Green
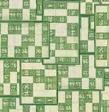
(B) Green Stamps Green
(C) Green Tickets Green
(D) Green Map Green
(E) Green Typography Green
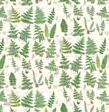
(F) Green Ferns Green
(G) Green Numbers Green
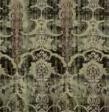
(H) Green Tapestry Green
(I) Green Tiny Print Green
(J) Green Vintage Green
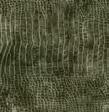
(K) Worn Croc Bayou
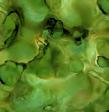
(L) Alchemy Elixir
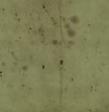
(M) Provisions Sage
(N) Butterflies Parchment
(O) Tailored Linen
(P) Model Aeroplanes Parchment
(Q) Cracked Shadow Quartz
(R) Botanical Multi
(S) Dictionary Neutral
(T) From Camden Multi
PWTH260.GREEN 3⁄8 yard (0.34m)
PWTH261.GREEN 3⁄8 yard (0.34m)
PWTH262.GREEN 3⁄8 yard (0.34m)
PWTH263.GREEN 11⁄8 yards (1.03m)
PWTH264.GREEN 3⁄8 yard (0.34m)
PWTH265.GREEN 1⁄2 yard (0.46m)
PWTH266.GREEN 1⁄2 yard (0.46m)
PWTH267.GREEN* 11⁄4 yards (1.14m)
PWTH268.GREEN 3⁄8 yard (0.34m)
PWTH269.GREEN 3⁄4 yard (0.69m)
PWTH020.BAYOU 1⁄3 yard (0.30m)
PWTH177.ELIXIR 1⁄3 yard (0.30m)
PWTH115.8SAGE 1⁄4 yard (0.23m)
PWTH004.PARCHMENT 3⁄8 yard (0.34m)
PWTH066.LINEN 1⁄2 yard (0.46m)
PWTH174.PARCHMENT 3⁄8 yard (0.34m)
PWTH128.QUARTZ 3⁄8 yard (0.34m)
PWTH028.8MULT 1⁄2 yard (0.46m)
PWTH008.NEUTR 1⁄2 yard (0.46m)
PWTH092.MULTI 1⁄2 yard (0.46m) continued...
Dappled Pines


Dappled Pines
Fabric Requirements (continued...)
DESIGN COLOR ITEM ID YARDAGE
(U) Multiplication Table Parchment
(V) Horticulture Aqua
(W) Rose Parcel Multi
* includes binding
Backing (Purchased Separately)
44" (1.12m) wide Green Tiny Print Green
PWTH106.PARCHMENT 1⁄2 yard (0.46m)
PWTH094.AQUAX 5⁄8 yard (0.57m)
PWTH035.8MULT 5⁄8 yard (0.57m)

PWTH268.GREEN 51⁄4 yards (4.80m) OR 108" (2.74m) wide Expedition Multi
Additional Recommendations
• 100% cotton thread in colors to match
• 76" x 93" (1.93m x 2.36m) batting
QBTH007.MULTI 21⁄8 yards (1.94m)

Cutting:
WOF = Width of Fabric
After cutting pieces listed below, keep the remaining fabric with the project, as some additional pieces will be cut as needed when making the blocks to continue building the scrappy look.
Fabrics A, C, E, N and P, cut from each:
(1) 8" x WOF; subcut
(5) 8" squares
Fabric B, cut:
(1) 8" x WOF; subcut
(4) 8" squares
(2) 31⁄2" squares
Fabric D, cut:
(2) 8" x WOF; subcut
(9) 8" squares
(3) 51⁄2" x WOF; subcut
(16) 51⁄2" squares, cut on both diagonal to make (64) Setting Triangles
(2) 51⁄8" squares, cut on one diagonal to make
(4) Corner Triangles
(4) 31⁄2" squares
Fabrics F and G, cut from each:
(2) 8" x WOF; subcut
(6) 8" squares
(2) 31⁄2" squares
Fabric H, cut:
(1) 8" x WOF; subcut
(3) 8" squares
(1) 7" x WOF; subcut
(4) 7" squares
(1) 43⁄4" x WOF; subcut
(4) 43⁄4" x 9" rectangles
(9) 21⁄2" x WOF for binding
Fabrics I and Q, cut from each:
(1) 8" x WOF; subcut
(5) 8" squares
(1) 31⁄2" x WOF; subcut
(2) 31⁄2" squares
Fabric J, cut:
(2) 8" x WOF; subcut
(10) 8" squares
(2) 31⁄2" x WOF; subcut (20) 31⁄2" squares
Fabric K, cut:
(1) 9" x WOF; subcut (1) 43⁄4" x 9" rectangle
(3) 8" squares
(1) 7" square
Fabric L, cut:
(1) 8" x WOF; subcut
(3) 8" squares
Dappled Pines
Fabric M, cut:
(1) 8" x WOF; subcut (2) 8" squares
Fabrics O and R, cut from each: (2) 8" x WOF; subcut
(6) 8" squares
Fabric S, cut:
(2) 8" x WOF; subcut (7) 8" squares
Fabric T, cut:
(2) 8" x WOF; subcut (8) 8" squares
(2) 31⁄2" squares
Fabric U, cut:
(2) 8" x WOF; subcut
(8) 8" squares
Fabrics V and W, cut from each:
(2) 8" x WOF; subcut
(7) 8" squares
(2) 31⁄2" squares
Dappled Pines
Instructions
• All seam allowances are 1⁄4" and pieces are sewn right sides together. Press following the arrows in the diagrams, or press open if no pressing direction is given.
• This quilt is designed to have a scrappy vintage feel. Fabrics are assigned for the Pine Branch half square triangle (HST) units and named for the (darker) fabric of the branch, e.g. Fabric J Pine Branch HST units. For the Background HST units, select fabric combinations that are pleasing to you for a unique quilt or use the Quilt Layout diagram as a guide for fabric placement.
HST Unit Construction
1. Select (1) Fabric A and (1) Fabric J 8" square. On the wrong side of the Fabric A square draw a line on both diagonals.
2. Place the (2) 8" squares right sides together and pin. Sew 1⁄4" on each side of the drawn lines. (Fig. 1)
3. Cut the sewn square in half vertically and horizontally. ( Fig. 2a) Cut along the drawn diagonal lines. Press the HST units open and square to 31⁄2" to make (8) Fabric J Pine Branch HST units. (Fig. 2b)
Fig. 1
Wrong side of Fabric A
Drawn lines Sew ¼" on each side of both drawn lines.
Right side of Fabric J
Fig. 2a Fig. 2a
Fig. 2b
Fig. 2b
Set of 8 J/A HST units 3” x 3” nished
Dappled Pines
4. Repeat the process in Steps 1 to 3 using the fabric pairs listed in the table below to make (80) Fabric J (including a second set of 8 with Fabric A), (24) Fabric H, (32) Fabric E and (24) Fabric K Pine Branch HST units. (Fig. 3)
Fig. 3
Pine Branch HST Units
Pine Branch Fabric 8" squares Background Fabric 8" squares Pine Branch HST units
(2) Fabric J squares (2) Fabric A squares (16) Fabric J HST units
(2) Fabric J squares (2) Fabric C squares (16) Fabric J HST units
(2) Fabric J squares (2) Fabric D squares (16) Fabric J HST units
(2) Fabric J squares (2) Fabric I squares (16) Fabric J HST units
(2) Fabric J squares (2) Fabric R squares (16) Fabric J HST units
(1) Fabric H square (1) Fabric G square (8) Fabric H HST units
(1) Fabric H square (1) Fabric T square (8) Fabric H HST units
(1) Fabric H square (1) Fabric W square (8) Fabric H HST units
(2) Fabric E squares (2) Fabric D squares (16) Fabric E HST units
(1) Fabric E square (1) Fabric T square (8) Fabric E HST units
(1) Fabric E square (1) Fabric W square (8) Fabric E HST units
(1) Fabric K square (1) Fabric G square (8) Fabric K HST units
(1) Fabric K square (1) Fabric T square (8) Fabric K HST units
(1) Fabric K square (1) Fabric W square (8) Fabric K HST units
5. Select (2) of the remaining 8" squares and repeat the process in Steps 1 to 3 to make (8) Background HST units. Repeat with your preferred remaining 8" squares to make a total of (368) Background HST units – there will be extra 8" squares left over. (Fig. 4)
4
3
8-at-a-time HST units
J/assorted: Make 80
E/assorted: Make 32
H/assorted and K/assorted: Make 24 each
Block Construction
Dappled Pine Blocks
6. Select (4) 31⁄2" Fabric J squares, (16) Fabric J, (6) Fabric K and (6) Fabric E Pine Branch HST units, (22) Background HST units, (1) 43⁄4" x 9" Fabric H rectangle and (1) 7" Fabric H square.
7. Lay out (10) Fabric J Pine Branch HST units, (2) Background HST units and the (4) 31⁄2" Fabric J squares into (4) rows of (4) elements, centered around the (4) 31⁄2" squares placed on the diagonal. (Fig. 5) Position the darker fabric side of the HST units away from the 31⁄2" squares. Sew the pieces into rows. Sew the rows together to complete the Tree Top (121⁄2" square).
Fig. 5
8-at-a-time Background HST units
Make 368
Fig.
Fig.
Dappled Pines
8. Lay out (3) each Fabric J, K and E Pine Branch HST units and (7) Background HST units into (4) rows of (4) HST units. (Fig. 6) Position the darker fabric side of all HST units towards the lower left corner.
Sew the HST units into rows. Sew the rows together to complete (1) Tree Branch (121⁄2" square). Repeat to make (2) Tree Branches.
6
Background HSTs
9. From the remaining fabric left after cutting, select three lighter fabrics that will add to the scrappy look of the background and cut (2) 37⁄8" squares, then cut in half once diagonally for (4) large triangles, and (2) 41⁄4" squares, cut in half on both diagonals for (8) small triangles.
10. Lay out (3) Background HST units and (1) large triangle cut in the previous step in (2) rows of (2) pieces. (Fig. 7) Position the darker fabric side of the HST units towards the lower left corner. Sew the pieces into rows. Sew the rows together and finally sew small triangles to the top and right-hand edges to complete (1) Trunk Background. Repeat to make (2) Trunk Backgrounds.
Fig. 7 Fig. 6
Tree Branches Make 2
11. Sew a Trunk Background to each side of a 43⁄4" x 9" Fabric H rectangle. (Fig. 8)
Fig. 8 Fig. 7
Large Triangle
Small Triangles
Trunk Background Make 2
Fig.
12. Cut the 7" Fabric H square in half once diagonally. Center and sew the triangles to the top and bottom of the unit from the previous step. (Fig. 9) Trim to 121⁄2" square to complete the Tree Trunk.
9
13. Lay out the Tree Top, (2) Tree Branches and the Tree Trunk in a four patch. ( Fig. 1 0 ) Sew the pieces together in rows. Sew the rows together to complete (1) Dappled Pine Block (241⁄2" square).
10
9
14. Repeat Steps 6 to 13 to make (4) Dappled Pine Blocks.
Dappled Pines
Pine Block
15. Select (4) 3 1⁄ 2" Fabric J squares, (16) Fabric J, (6) Fabric H and (6) Fabric E Pine Branch HST units, (22) Background HST units, (1) 43⁄4" x 9" Fabric K rectangle and (1) 7" Fabric K square.
16. Repeat the process in Steps 7 to 13 to make (1) Center Pine Block (241⁄2 2" square), swapping the placement of Fabrics H and K. (Fig. 11)
11
Fig.
H Fig. 8
Fig.
Fig.
H Tree Trunk Make 1
Center
Fig.
Dappled Pine Block Make 4
Dappled Pines
Background Units
Combine the remaining Tree Branch HST units with the Background HST units and treat them all as Background HST units for the following steps. There will be some extra to allow for variety when piecing together the background units.
From this point on, the 31⁄2" squares of Fabrics B, D, F, G, I, Q, T, V and W will all be referred to as 31⁄2" Background squares.
Background Unit 1
17. Select (2) 3 1⁄ 2" Background squares, (28) Background HST units, (10) Fabric D Setting Triangles and (1) Fabric D Corner Triangle.
18. Lay out the 31⁄2" Background squares and Background HST units in (5) rows, consisting of (1) row each of (2), (4), (6), (8) and (10) pieces. (Fig. 12) Position the darker fabric side of the HST units away from the 31⁄2" squares in the bottom 2 rows, and follow the same value placement in all other rows. Place a Fabric D Setting Triangle at both ends of each row. Sew the pieces into rows, making sure to keep the square corners of the setting triangles aligned with the bottom of the HST units. Trim off the Fabric D dog ears if desired.
Fig. 12 Fig. 11
19. Sew the rows together, centering them on top of each other, and matching the seam intersections. (Fig. 13) Sew the Fabric D Corner Triangle to the top to complete (1) Background Unit 1.
Fig. 13
Fig. 12
Note placement of squares in bottom 2 rows.
20. Repeat Steps 17 to 19 to make a second Background Unit 1.
Background Unit 2
21. Select (28) Background HST units and (8) Fabric D Setting Triangles.
22. Lay out the Background HST units in (7) rows, consisting of (1) row each of (1), (2), (3), (4), (5), (6) and (7) HST units. (Fig. 14) Position the darker fabric side of the HST units towards the left-hand end of the rows. Place a Fabric D Setting Triangle at the left-hand end of each row. Sew the pieces into rows.
14
13
Dappled Pines
23. Sew the rows together, keeping the right-hand ends even. (Fig. 15) Sew the remaining Fabric D Setting Triangle to the top to complete (1)Background Unit 2.
15
Fig.
Fig.
Background Unit 1 Make 2
Fig.
24. Repeat Steps 21 to 23 to make a second Background Unit 2.
Dappled Pines
Background Unit 3
25. Select (8) 31⁄2" Background squares, (52) Background HST units and (8) Fabric D Setting Triangles.
26. Lay out the 31⁄2" Background squares and Background HST units in (8)rows, consisting of (1) row each of (4), (5), (6), (7), (8), (9), (10) and (11) elements. (Fig. 16) Position the darker fabric side of the HST units towards the diagonal line of (6) 31⁄2" squares and away from the diagonal line of (2) 31⁄2" squares. Place a Fabric D Setting Triangle at right-hand end of each row. Sew the pieces into rows.
16 Fig. 15
27. Sew the rows together, keeping the left-hand ends even, to complete (1)Background Unit 3. (Fig. 17)
Fig. 17 Fig. 16
*Note placement of squares in all but top 2 rows.
28. Repeat Steps 25 to 27 to make a second Background Unit 3.
Fig.
Dappled Pines
Background Unit 4
29. Select (24) Background HST units, (6) Fabric D Setting Triangles and (1) Fabric D Corner Triangle.
30. Lay out the Background HST units in (5) rows, consisting of (1) row each of (2), (4), (5), (6) and (7) HST units. (Fig. 18) Position the darker fabric side of the HST units towards the right-hand end of the rows. Place a Fabric D Setting Triangle at the right-hand end of each row and at the left-hand end of the top row. Sew the pieces into rows.
18 Fig. 17
31. Sew the rows together, keeping the left-hand ends even. (Fig. 19) Sew the Fabric D Corner Triangle to the top to complete (1) Background Unit 4.
19

32. Repeat Steps 29 to 31 to make a second Background Unit 4. There will be some extra HST units.
Fig.
Fig.
Dappled Pines
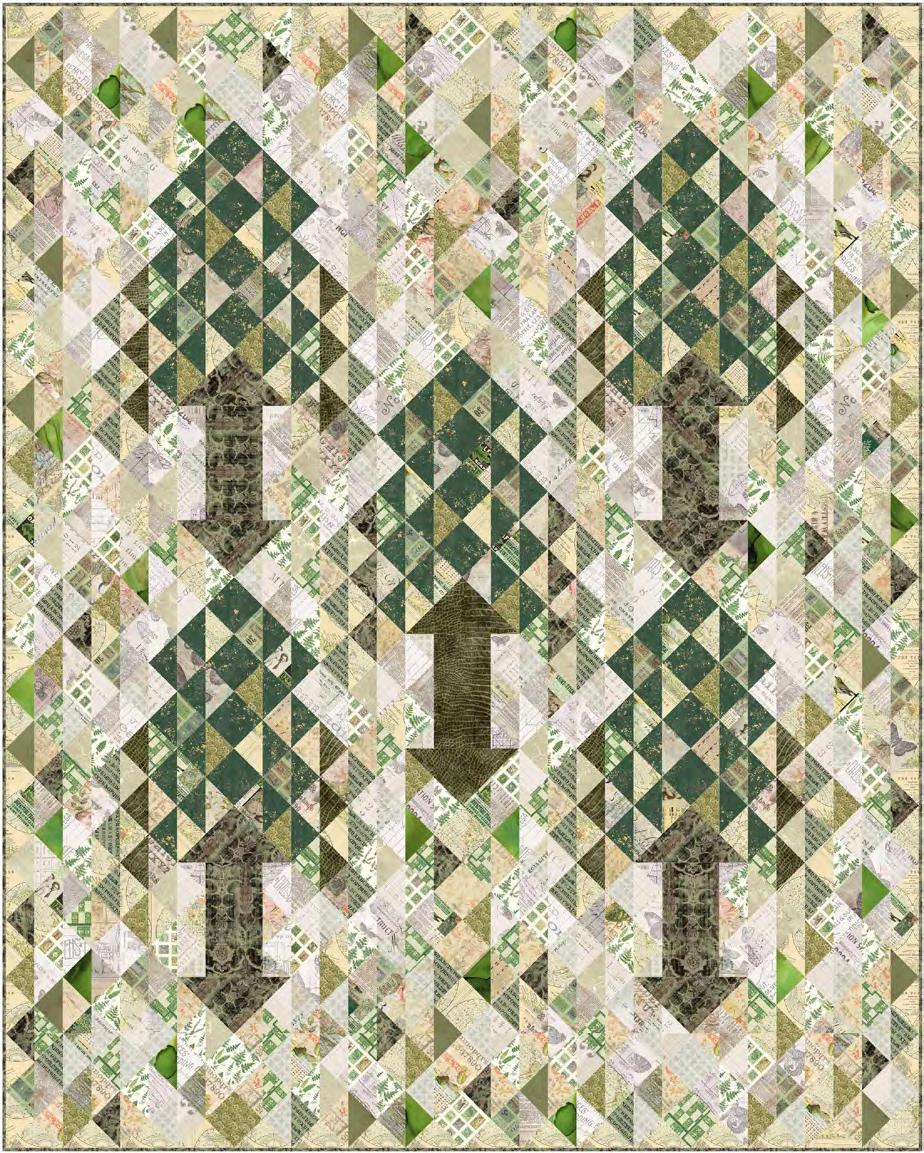
Quilt Top Assembly
Note: Follow the Quilt Layout diagram (page 14) while assembling the quilt.
33. Sew (1) Dappled Pine Block between (1) Background Unit 2 and (1) Background Unit 3, pinning to match seam intersections, to complete Row 1.
34. Sew the Center Pine Block between (2) Dappled Pine Blocks and (2) Background Unit 4 to complete Row 2.
35. Sew (1) Dappled Pine Block between (1) Background Unit 3 and (1) Background Unit 2 to complete Row 3.
36. Sew the Rows together in numerical order. Sew a Background Unit 1 to the upper left and lower right corners to complete the Quilt Top (683⁄8" x 853⁄8").
Finishing
37. Sew together the 2 1⁄ 2" Fabric H binding strips end to end using diagonal seams. Press seams open. Press the binding strip in half wrong sides together.
38. Layer backing (wrong side up), batting, and quilt top (right side up). Baste the layers together and quilt as desired. Trim excess batting and backing even with the top after quilting is completed.
39. Leaving an 8" tail of binding, sew the binding to the top of the quilt through all layers matching all raw edges. Miter corners. Stop approximately 12" from where you started. Lay both loose ends of binding flat along quilt edge. Where the loose ends meet, fold them back on themselves and press to form a crease. Using this crease as your stitching line, sew the two open ends of the binding right sides together. Trim seam to 1⁄4" and press open. Finish sewing binding to quilt.
40. Turn the binding to the back of quilt and hand-stitch in place.
Dappled Pines
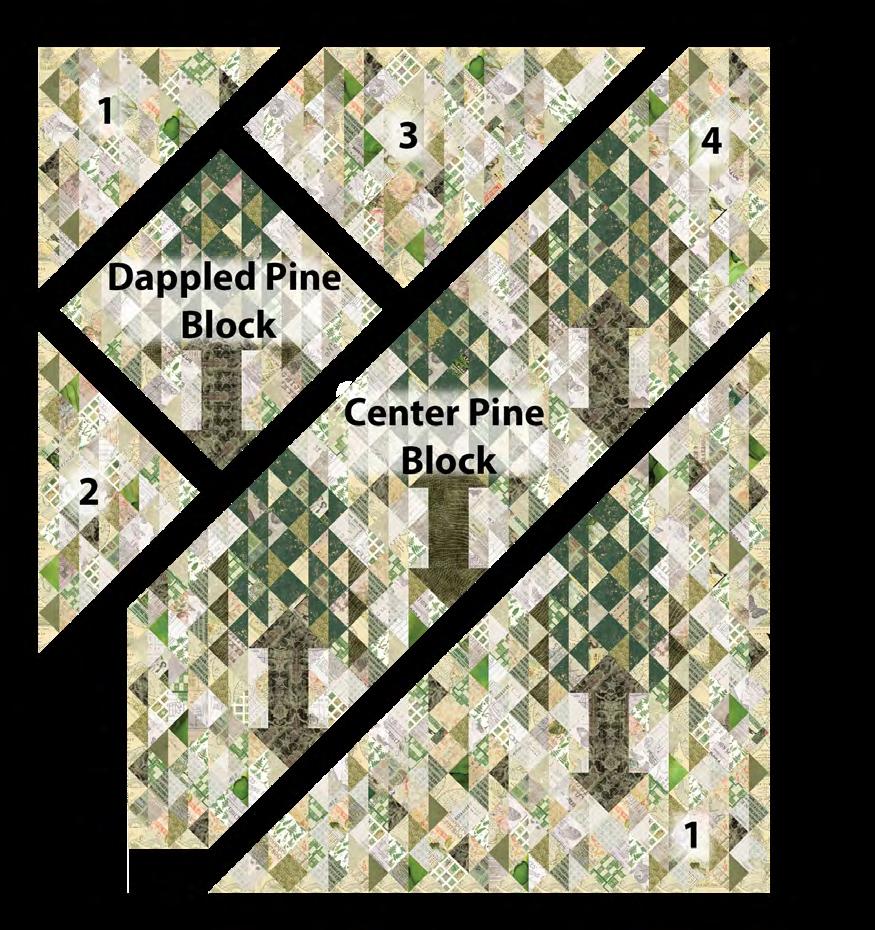
Quilt Layout