

Burnished Quilt
Featuring Orange Palette by Tim Holtz
Enjoy the warmth of Burnished, featuring Tim Holtz, Palette, Orange.
Collection: Tim Holtz, Palette, Orange
Technique: Pieced with fusible machine appliqué
Skill Level: Advanced Beginner
Finished Sizes:
Finished Size: 70" x 80" (1.77m x 2.03m)
Finished Block Size: 10" x 20" (25.4cm x 50.8cm)
All possible care has been taken to ensure the accuracy of this pattern. We are not responsible for printing errors or the manner in which individual work varies. Please read the instructions carefully before starting this project. If kitting, it is recommended a sample is made to confirm accuracy.
Project designed by Kerri Thomson | Tech edited by Alison M. Schmidt
Fabric Requirements
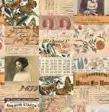
(A) Orange Collage Orange PWTH230.ORANGE
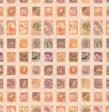
(B) Orange Stamps Orange
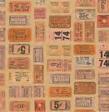
(C) Orange Tickets Orange
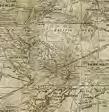
(D) Orange Map Orange PWTH233.ORANGE
(E) Orange Sketchbook Orange PWTH234.ORANGE
(F) Orange Ephemera Orange PWTH235.ORANGE
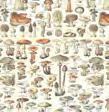
(G) Orange Toadstools Orange PWTH236.ORANGE
(H) Orange Botanical Orange PWTH237.ORANGE
(I) Orange Tiny Print Orange
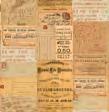
(J) Orange Vintage Orange
(K) Top Shop Multi
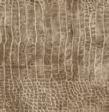
(L) Cracked Shadow Carnelian
(M) Scraped Layers Sienna
(N) Ticking Neutral
(O) Spellbound Orange
(P) Worn Croc Pebble
(Q) Du Theater Neutral
(R) Writing Specimen Sienna
PWTH238.ORANGE 1⁄2 yard (0.46m)
PWTH239.ORANGE 1⁄2 yard (0.46m)
PWTH024.MULTI* 1 yard (0.91m)
PWTH128.CARNELIAN 3⁄8 yard (0.34m)
PWTH144.SIENNA 1⁄3 yard (0.30m)
PWTH068.8NEUT 1⁄3 yard (0.30m)
PWTH148.ORANGE 2⁄3 yard (0.61m)
PWTH020.PEBBLE 2⁄3 yard (0.61m)
PWTH139.NEUTRAL 2⁄3 yard (0.61m)
PWTH135.SIENNA 2⁄3 yard (0.61m) * includes binding continued...
Burnished Quilt












Fabric Requirements (continued...)
(S) Expedition
(T) Cracked Shadow
PWTH016.MULTI
(U) Provisions Linen PWTH115.8LINE
Dictionary
(W) Eggs & Nest
PWTH031.8MULT
(X) From Camden Multi PWTH092.MULTI
(Y) Melange
Backing (Purchased Separately)
44" (1.12m) wide
Orange Tiny Print Orange
PWTH238.ORANGE 5 yards (4.57m) OR 108" (2.74m) wide Expedition Multi QBTH007.MULTI
Additional Recommendations
• 100% cotton thread in colors to match
• 78" x 88" (1.98m x 2.24m) batting
• 63⁄4 yards (6.17m) 20" (.51m) wide lightweight non-woven fusible interfacing
• Invisible or matching thread for machine appliqué
Burnished Quilt




Backing 44"

Backing 108"
Cutting:
WOF = Width of Fabric.
Fabric A, cut:
(1) 101⁄2" x WOF; subcut
(7) 51⁄2" x 101⁄2" rectangles
Fabrics B, C and J, cut from each:
(4) 4" x WOF strips; subcut
(11) 4" x 121⁄2" rectangles
Fabric D, cut:
(2) 101⁄2" x WOF; subcut
(9) 51⁄2" x 101⁄2" rectangles
Fabrics E and I, cut from each:
(4) 4" x WOF; subcut
(10) 4" x 121⁄2" rectangles
Fabric F, cut:
(2) 4" x WOF; subcut
(6) 4" x 121⁄2" rectangles
Fabric G, cut:
(3) 4" x WOF; subcut
(9) 4" x 121⁄2" rectangles
Fabric H, cut:
(2) 101⁄2" x WOF; subcut
(12) 51⁄2" x 101⁄2" rectangles
Fabric K, cut:
(3) 4" x WOF; subcut
(9) 4" x 121⁄2" rectangles
(8) 21⁄2" x WOF for Binding
Fabric L, cut:
(3) 4" x WOF; subcut
(8) 4" x 121⁄2" rectangles
Fabrics M and W, cut from each: (2) 4" x WOF; subcut
(5) 4" x 121⁄2" rectangles
Fabric N, cut:
(2) 4" x WOF; subcut
(4) 4" x 121⁄2" rectangles
Fabric O, cut:
(2) 101⁄2" x WOF; subcut
(10) 51⁄2" x 101⁄2" rectangles
Fabrics P, Q, R, S, X and Y, cut from each: (2) 101⁄2" x WOF; subcut
(8) 51⁄2" x 101⁄2" rectangles
Fabrics T, U and V, cut from each:
(1) 101⁄2" x WOF; subcut
(7) 51⁄2" x 101⁄2" rectangles
Lightweight Fusible Interfacing, cut: (19) 121⁄2" x 20"; subcut (94) 4" x 121⁄2" rectangles
Burnished Quilt
Instructions
• All seam allowances are 1⁄4" and pieces are sewn right sides together unless otherwise stated.
• When printing appliqué patterns (page 10-11), measure the 1" square to check that the printed patterns are the correct size.
• This quilt is pieced for a scrappy vintage feel. Fabrics are assigned for the left and right leaves and backgrounds, however not the leaf/background combinations. Select background and leaf fabric combinations that are pleasing to you for a unique quilt or use the Quilt Layout diagram (page 9) as a guide for fabric placement.
1. Sort the background 51⁄2" x 101⁄2" rectangles into two piles:
• Fabrics O, P, Q, R, V, W and Y for the Left Background; and
• Fabrics A, D, H, S, T, U and X for the Right Background.
Prepare Leaf Appliqué
Instructions and patterns are provided for finished-edge fusible appliqué. If you wish to use another appliqué technique, make a test block of each leaf to ensure the correct orientation of the leaves.
2. Center a 4"x 12 1 ⁄ 2 " lightweight fusible interfacing rectangle, non-fusible side up, on top of the Left Leaf template Page 10). Trace the template and mark the upper left and lower right corners. Repeat to trace (48) Left Leaves.
3. Place a traced Left Leaf, non-fusible side up, on top of the right side of a 4" x 121⁄2" Fabric B rectangle, matching the raw edges and pin. Sew along the traced line of the Leaf. (Fig. 1) Trim the outer seam allowance to 1⁄4" and clip the curves and corners to reduce the seam allowance bulk, being careful to not cut the seam. DO NOT press with an iron as the glue on the fusible side will be activated.
Fig. 1
Burnished Quilt
4. Separate the fusible interfacing from fabric and cut a slit in the center of the interfacing. Turn the Left Leaf right side out through the slit. (Fig. 2) Using a point turner or the end of a pair of scissors, gently push the seam allowance out to form the shape of the leaf to complete (1) Left Leaf. DO NOT press with an iron as the glue on the fusible side will be activated.
Fig. 2
2
Cut slit.
Wrong side of Fabric B
Non-fusible side of interfacing
5. Repeat Steps 3 and 4 to make (5) total Fabric B, (3) each Fabric C, J and L, (6) each Fabric E, G and I, and (4) each Fabric F, K, M and N Left Leaves.
Fig.
Left Leaf
Burnished Quilt
6. Repeat Step 2 to trace (46) Right Leaf templates (Page 11).
7. Repeat Steps 3 and 4 to make (5) each Fabric B and K, (8) each Fabric C , J and L, (4) each Fabric E and I, (2) Fabric F, (3) Fabric G, and (1) Fabric M Right Leaves.
(Fig. 3)
Fig. 3
Right Leaf
Burnished Blocks
8. Select (2) 5 1 ⁄ 2 " x 10 1 ⁄ 2 " Left Background rectangles, (2) Left Leaves, (2) 51⁄2" x 101⁄2" Right Background rectangles and (2) Right Leaves.
9. Mark a dot, 1⁄4" from both raw edges, in the upper left and lower right corners, on the right side of both Left Background rectangles. (Fig. 4)
Fig. 4
Fig. 4
Mark 1/4" from both edges.
Mark Left Background
Make 2
10. Place a Left Leaf, right side up on top of one Left Background rectangle, matching the upper left and lower right points of the leaf with the marked dots. (Fig. 5) Fuse in place. Stitch along the edge of the leaf using invisible thread, or use your favorite appliqué method, to secure to the background. Repeat with the second Left Leaf and Background.
Fig. 5
Upper left corner
Lower right corner
Left Leaf
Make 2
11. Mark a dot, 1⁄4" from both raw edges, in the upper right and lower left corners, on the right side of both Right Background rectangles. (Fig. 6)
Fig. 6
Fig. 6
Mark 1/4" from both edges.
Mark Right Background
Make 2
12. Place a Right Leaf, right side up on top of one Right Background rectangle, matching the upper right and lower left points of the leaf with the marked dots. (Fig. 7) Fuse in place. Appliqué the edge using the same applique method as the left leaves in step 10. Repeat with the second Right Leaf and Background.
Fig. 7
Fig. 7
Upper right corner
Lower left corner
Right Leaf
Make 2
13. Sew a Left and Right Leaf together, so the lower corner leaf points are in the center. (Fig. 8) Press seams open. Repeat with the second Left and Right Leaves.
Fig. 8
Fig. 8
Make 2
14. Sew the Leaf pairs together, rotating the lower pair so the inner points of all four leaves are toward the center, to complete (1) Burnished Block (101⁄2" x 201⁄2"). (Fig. 9) Press seams open.
9
9
18. Sew the Left Leaf and a Right Background rectangle together, so the Left Leaf lower corner leaf point is in the center. (Fig. 10) Sew together the remaining Left and Right Background rectangles, noting orientation shown. Sew the pairs together to complete (1) Left Partial Block (101⁄2" x 201⁄2"). Press seams open.
10
Burnished Quilt
22. Sew a Left Background rectangle and the Right Leaf together. The Right Leaf lower corner leaf point is in the center. (Fig. 11) Sew together the remaining Left and Right Background rectangles, noting orientation shown. Sew the pairs together to complete (1) Right Partial Block (101⁄2" x 201⁄2"). Press seams open.
Fig. 11
15. Repeat Steps 8 to 14 to make (22) Burnished Blocks. Partial Blocks
16. Select (1) Left Leaf and (2) each 51⁄2" x 101⁄2" Left and Right Background rectangles.
17. Repeat Steps 9 and 10 to appliqué the Left Leaf to one of the Left Background rectangles.
19. Repeat Steps 16 to 18 to make a total of (4) Left Partial Blocks.
20. Select (1) Right Leaf and (2) each 51⁄2" x 101⁄2" Left and Right Background rectangles.
21. Repeat Steps 11 and 12 to appliqué the Right Leaf to one of the Right Background rectangles.
23. Repeat Steps 20 to 22 to make a total of (2) Right Partial Blocks.
Fig.
Fig.
10
Partial Block
Burnished Quilt
Quilt Top
Note: Follow the Quilt Layout (page 9) diagram while assembling the quilt.
24. Lay out the Burnished and Partial Blocks, noting the orientation of the Partial Blocks, in (4) Rows of (7) Blocks.
25. Sew the Blocks of each Row together. Press the seams of the odd rows to the left and the even rows to the right.
26. Sew the Rows together to complete the Quilt Top (701⁄2" x 801⁄2").
Finishing
27. Sew together the 2 1⁄ 2" Fabric K binding strips end to end using diagonal seams. Press seams open. Press the binding strip in half wrong sides together.
28. Layer backing (wrong side up), batting, and quilt top (right side up). Baste the layers together and quilt as desired. Trim excess batting and backing even with the top after quilting is completed.
29. Leaving an 8" tail of binding, sew the binding to the top of the quilt through all layers matching all raw edges. Miter corners. Stop approximately 12" from where you started. Lay both loose ends of binding flat along quilt edge. Where the loose ends meet, fold them back on themselves and press to form a crease. Using this crease as your stitching line, sew the two open ends of the binding right sides together. Trim seam to 1⁄4" and press open. Finish sewing binding to quilt.
30. Turn the binding to the back of quilt and hand-stitch in place.
Burnished Quilt
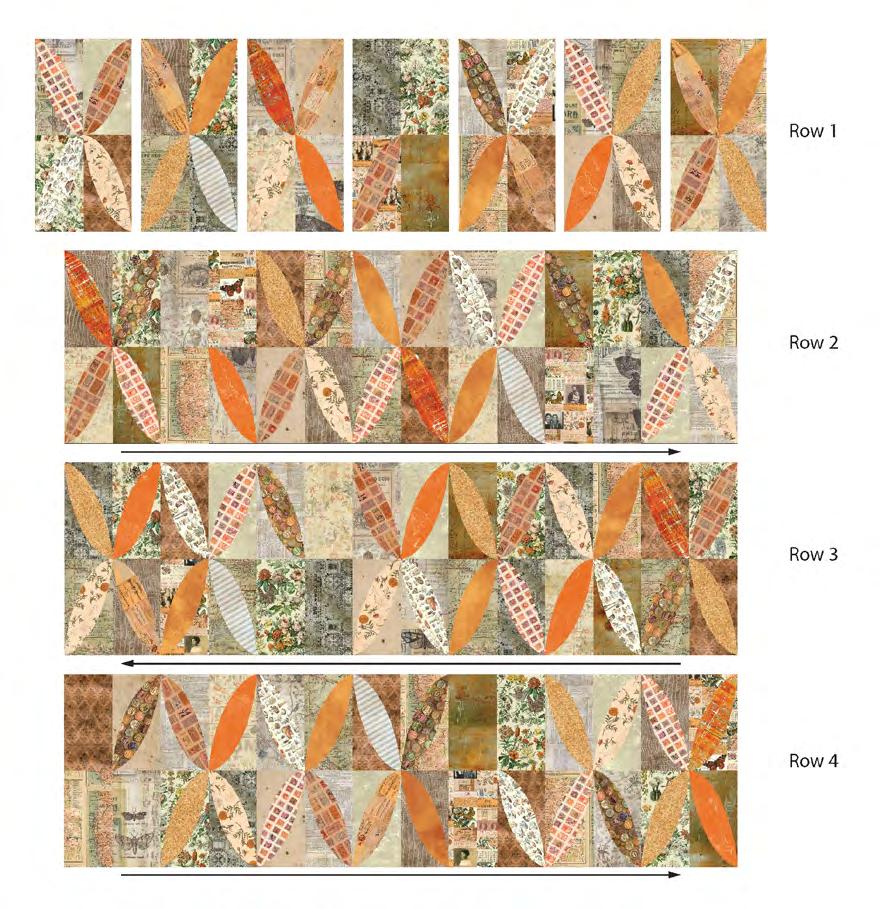
Quilt Layout
UpperLeftCorner
This square should measure 1" x 1" (2.54cm x 2.54cm) when printed.
*** Measure templates before cutting to confirm printing at 100%***
Burnished Left Leaf
Seam allowance not included.
Burnished Quilt
LowerRightCorner
Burnished Quilt
CornerRightUpper
This square should measure 1" x 1" (2.54cm x 2.54cm) when printed.
*** Measure templates before cutting to confirm printing at 100%***
Burnished Right Leaf
Seam allowance not included.
