9 minute read
How to open account in Exness in India

Opening a trading account with a reputable forex broker is the first step toward financial independence for many aspiring traders in India. Among the numerous brokers available, Exness stands out as a globally recognized platform offering competitive trading conditions, low spreads, and a user-friendly interface. If you’re an Indian resident looking to dive into forex or cryptocurrency trading, this comprehensive guide will walk you through the process of opening an account with Exness in India. From understanding the platform to completing the registration and verification process, we’ve got you covered.
💥 Trade with Exness now: Open An Account or Visit Brokers
In this article, we’ll explore everything you need to know about Exness, why it’s a great choice for Indian traders, and how to set up your account seamlessly. Whether you’re a beginner or an experienced trader, this guide is designed to provide actionable insights while adhering to India’s regulatory landscape. Let’s get started!
What is Exness and Why Choose It in India?
Before diving into the account-opening process, it’s essential to understand what Exness is and why it’s a preferred choice for Indian traders.
Overview of Exness
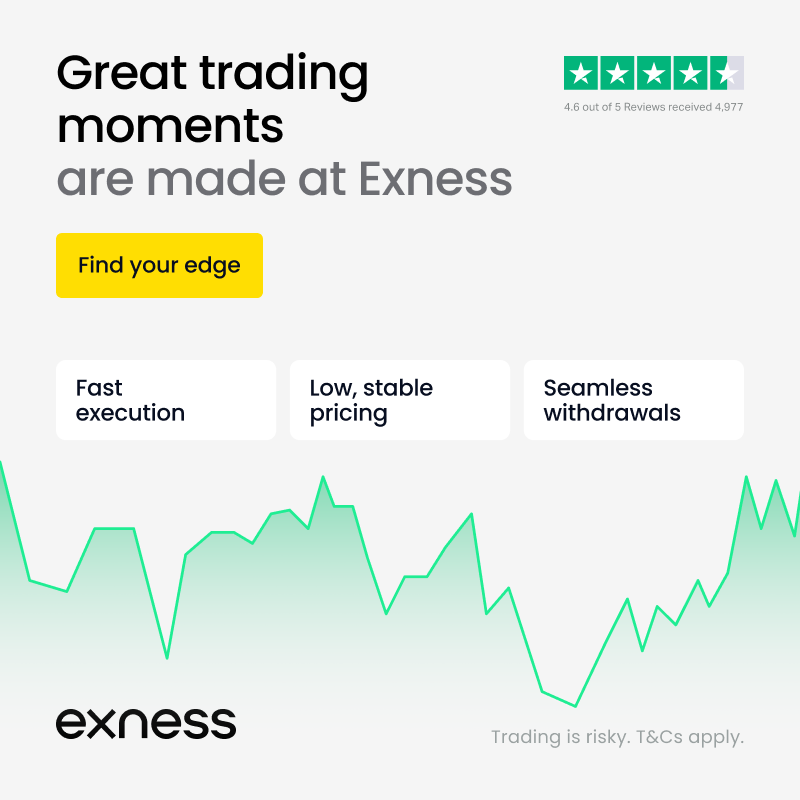
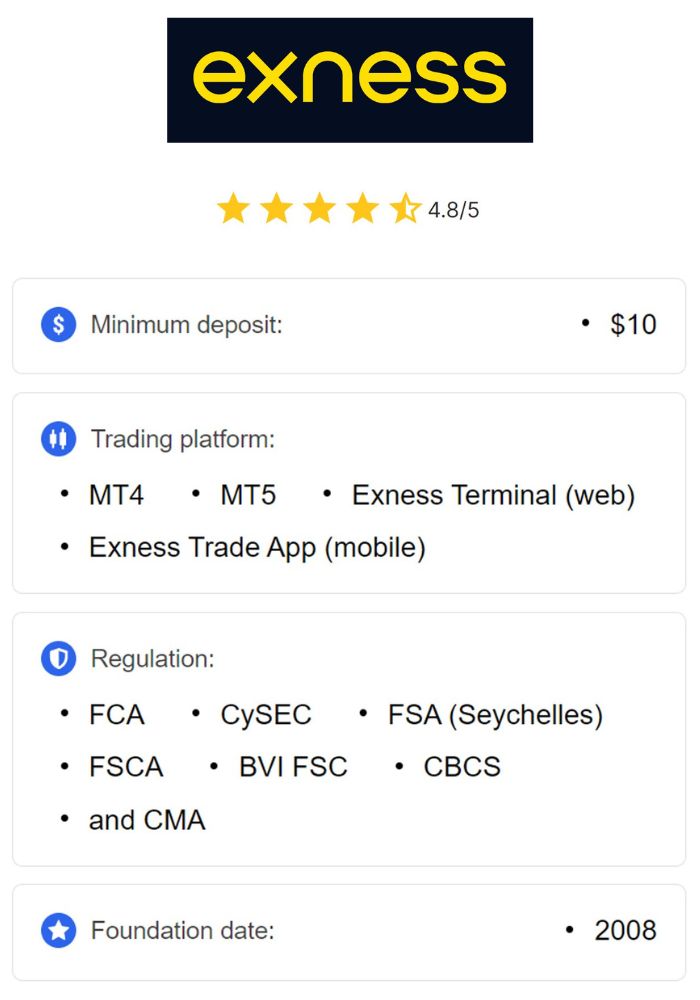
Exness is a globally renowned online trading broker founded in 2008. Headquartered in Cyprus, it operates under multiple regulatory licenses, including the Financial Conduct Authority (FCA) in the UK, the Cyprus Securities and Exchange Commission (CySEC), and the Financial Sector Conduct Authority (FSCA) in South Africa. With over a decade of experience, Exness has built a reputation for transparency, reliability, and innovation in the forex and CFD trading industry.
The platform offers access to a wide range of financial instruments, including forex pairs, cryptocurrencies, commodities, indices, and stocks. Its key features include ultra-low spreads, high leverage options, and lightning-fast execution speeds, making it a favorite among traders worldwide, including in India.
Why Indian Traders Prefer Exness
Exness has gained significant popularity in India due to its tailored offerings that align with the needs of local traders. Here’s why it stands out:
Low Minimum Deposit: Exness allows traders to start with as little as $1, making it accessible for beginners.
Rupee Support: While direct INR deposits may not always be available, Exness supports multiple payment methods that cater to Indian users.
High Leverage: Traders can access leverage up to 1:2000 (depending on account type and regulations), which is attractive for those looking to maximize returns.
Fast Withdrawals: Exness is known for its quick and hassle-free withdrawal process, a critical factor for Indian traders.
Regulation and Safety: Although forex trading regulations in India are strict, Exness operates under international licenses, ensuring the safety of funds.
Localized Support: Exness provides customer support in multiple languages, including Hindi and English, which is a bonus for Indian users.
With these advantages in mind, let’s move on to the step-by-step process of opening an Exness account in India.
Is Forex Trading Legal in India?
Before opening an account, it’s crucial to understand the legalities of forex trading in India. The Reserve Bank of India (RBI) regulates forex transactions under the Foreign Exchange Management Act (FEMA), 1999. Here’s a quick overview:
Retail Forex Trading: Indian residents cannot trade forex pairs freely with international brokers unless the broker is registered with the Securities and Exchange Board of India (SEBI). However, SEBI-registered brokers typically offer limited currency pairs (e.g., USD/INR, EUR/INR) through exchanges like the NSE or BSE.
International Brokers: Platforms like Exness operate outside India and are not SEBI-regulated. Indian traders can use such brokers, but they must comply with FEMA rules, such as using INR for funding and avoiding speculative trading in restricted pairs.
Permitted Use: Trading forex with international brokers is often considered a gray area. Many Indian traders use Exness for CFDs (Contracts for Difference) on commodities, indices, and cryptocurrencies, which are less restricted.
To stay compliant, consult a financial advisor or ensure your transactions align with FEMA guidelines. Now, let’s proceed with the account setup process.
How to open account in Exness in India
Opening an account with Exness is straightforward and can be completed in just a few minutes. Follow these steps to get started:
Step 1: Visit the Official Exness Website
The first step is to head to the official Exness website: Open An Account or Visit Brokers. Ensure you’re on the legitimate site to avoid phishing scams.
Pro Tip: Look for the padlock icon in the URL bar to confirm the site is secure (HTTPS).
Language Option: Once on the homepage, you can switch the language to English or Hindi for convenience.
Step 2: Complete the Registration Form
After clicking “Open Account,” you’ll be directed to a registration form. Here’s what you need to provide:
Country of Residence: Select “India” from the dropdown menu.
Email Address: Enter a valid email ID that you have access to.
Phone Number: Input your mobile number with the country code (+91 for India).
Password: Create a strong password with a mix of letters, numbers, and special characters.
Once you’ve filled in the details, click “Continue” or “Register.” Exness will send a verification email and/or SMS to confirm your identity.
Step 3: Verify Your Email and Phone Number
Check your inbox (and spam folder) for an email from Exness. It will contain a verification link—click it to confirm your email address. Similarly, you may receive an SMS with a code. Enter this code on the Exness website when prompted.
This step ensures your account is secure and linked to your contact details.
Step 4: Log In to Your Exness Personal Area
Once verified, return to the Exness homepage and click “Login.” Use your registered email and password to access your Personal Area—a dashboard where you’ll manage your account, deposits, and trading activities.
Step 5: Complete Your Profile
Before you can start trading, Exness requires you to complete your profile and submit verification documents. Here’s how:
Personal Details: Enter your full name, date of birth, and residential address as per your ID proof.
Identity Verification: Upload a government-issued ID. Acceptable documents for Indian residents include:
Aadhaar Card (mask the first eight digits for privacy).
Passport.
Voter ID.
Driver’s License.
Address Proof: Submit a utility bill (electricity, water, or gas), bank statement, or any official document showing your name and address. Ensure it’s dated within the last six months.
File Format: Upload clear scans or photos in JPG, PNG, or PDF format.
Processing Time: Verification typically takes 24-48 hours, though it may be faster.
Step 6: Choose Your Account Type
Exness offers several account types to suit different trading styles. Here’s a breakdown of the options available for Indian traders:
Standard Account:
Minimum Deposit: $1
Spreads: From 0.3 pips
Leverage: Up to 1:2000
Best For: Beginners and casual traders
Standard Cent Account:
Minimum Deposit: $1
Spreads: From 0.3 pips
Leverage: Up to 1:2000
Best For: Micro-trading with cents
Pro Account:
Minimum Deposit: $200
Spreads: From 0.1 pips
Leverage: Up to 1:2000
Best For: Experienced traders
Raw Spread Account:
Minimum Deposit: $200
Spreads: From 0.0 pips (with commission)
Leverage: Up to 1:2000
Best For: Scalpers and high-volume traders
Zero Account:
Minimum Deposit: $200
Spreads: 0.0 pips on select pairs
Leverage: Up to 1:2000
Best For: Precision trading
Select the account that aligns with your budget and trading goals. For beginners in India, the Standard Account is a great starting point due to its low entry barrier.
Step 7: Deposit Funds into Your Account
After verification, it’s time to fund your account. Exness supports multiple payment methods suitable for Indian traders:
Bank Cards: Visa, Mastercard (subject to availability in India).
E-Wallets: Skrill, Neteller, or Perfect Money.
Bank Transfer: Local bank transfers via Indian banks (check with Exness support for availability).
Cryptocurrency: Bitcoin, Ethereum, and USDT (Tether).
UPI: Unified Payments Interface (availability may vary).
How to Deposit:
Log in to your Personal Area.
Click “Deposit” and choose your preferred method.
Enter the amount (e.g., $10 or more) and follow the on-screen instructions.
Confirm the transaction.
Deposits are usually instant, except for bank transfers, which may take 1-3 business days.
Step 8: Download the Trading Platform
Exness supports multiple trading platforms. Choose one based on your preference:
MetaTrader 4 (MT4): Popular, user-friendly, and widely used.
MetaTrader 5 (MT5): Advanced features and more instruments.
Exness Web Terminal: Browser-based, no download required.
Exness Trader App: Mobile trading for Android and iOS.
Download the platform from the Exness website or app store, log in with your credentials, and start exploring the interface.
Step 9: Start Trading
With your account funded and platform set up, you’re ready to trade! Log in to your chosen platform, select your financial instrument (e.g., EUR/USD, gold, or Bitcoin), and place your first trade. Exness provides demo accounts if you’d like to practice before risking real money.
Tips for Indian Traders Using Exness
To maximize your experience with Exness, keep these tips in mind:
Start Small: Begin with a small deposit and low-risk trades to build confidence.
Use a Demo Account: Practice strategies without financial risk.
Monitor Leverage: High leverage (e.g., 1:2000) can amplify both profits and losses—use it wisely.
Stay Updated: Follow forex news and market trends to make informed decisions.
Contact Support: Exness offers 24/7 customer support via live chat, email, or phone—don’t hesitate to reach out.
Common Challenges and Solutions
While opening an account is simple, Indian traders may face a few hurdles. Here’s how to overcome them:
1. Payment Method Restrictions
Issue: Some Indian banks block international transactions.
Solution: Use e-wallets like Skrill or crypto options like USDT.
2. Verification Delays
Issue: Slow document approval.
Solution: Ensure uploads are clear and meet Exness requirements.
3. Regulatory Concerns
Issue: Uncertainty about FEMA compliance.
Solution: Limit trading to permitted instruments and consult a legal expert if needed.
Benefits of Trading with Exness in India
Trading with Exness offers several advantages for Indian users:
Accessibility: Low entry barriers make it beginner-friendly.
Flexibility: Multiple account types and platforms cater to all levels.
Global Reach: Trade international markets from India.
Transparency: No hidden fees and clear pricing.
Conclusion
Opening an account with Exness in India is a gateway to exploring the exciting world of online trading. By following the steps outlined in this guide—visiting the website, registering, verifying your identity, choosing an account type, and funding your account—you’ll be well on your way to trading forex, cryptocurrencies, and more. While forex trading regulations in India require careful consideration, Exness provides a reliable and feature-rich platform for those willing to navigate the landscape.
Read more: Exness App is Legal in India?