i
l
l
1
1
\
1 �
Turning Spa/ted WOod
Summer 1978,
$2.50
There's a -w ealth of infortnation and ideas in the back issues of Fine Woo d-working and the Biennial Design Book Readers tell us that Fine Woodworking is more than a magazine-it's a reference source they keep coming back to. Each issue contains timeless information that is hard or impossible to find elsewhere and won ' t be repeated in Fine Woodworking . You can have all this information, because the ten back issues are now available for your shop . The first Biennial Design Book is something else again. Composed of 600 photographs drawn from more than 8000 submit ted by readers, the book shows the great diversity of woodworking being done today. Some of the pieces are traditional, most are contemporary, and some skillfully blend the two. All are highly creative.
Winter 1975, Number 1
Art,
Spring 1977, Number 6
The Renwick Multiples, Checkered Bowls, Tramp Hand Planes, Carving Design, Decisions, Woodworking Thoughts, Marquetry Cutting, Which Three?, Library Ladders, A Serving Tray, Stamp Box, All in One, French Polishing, Birch Plywood, Bench Stones.
The Wood Butcher, Wood Threads, The Scraper. California Woodworking. Bent Lami· nations. Dry Kiln, Expanding Tables, Two Sucks. Stacked Plywood. Two Tools, Pricing Work, Going to Craft Fairs, Colonial COSts. Serving Cart. Woodworking Schools.
Spring 1976, Number 2
Cooperative Shop, Glues and Gluing, Winter Market. Three·Leglied Stool. Lute Roses, Bowl Turning, Wharton Esherick, Doweling, Spalted Wood. Antiqued Pine Furniture, Solar Kiln. Carving Fans. Bending a Tray, Two Meetings, Index to Volume One.
Summer 1976, Number 3
Wood, Mottise and Tenon. The Christian Tradition, Hand Shaping. Yankee Diversity, Plane Speaking, Desert Cabinetry, Hidden Drawers. Green Bowls. Queen Anne, Gate Leg Table, Turning Conference, Stroke Sander, Furnirure Plans.
Out West, Steam Bending. Triangle Marking. Painted Furniture, Chain·Saw Lumber· ing, Rip Chain, Getting Lumber. Sawing by Hand. Gaming Tables, Two Contemporary Tables, Wooden Clamps. Elegant Fakes, Aztec Drum, GOut Stool, Two Tools, Measur· ing Moisture. The Flageolet. Young Americans.
Fall 1976, Number 4
Winter 1977, Number 9
Mar q uetry Today, Split Turnings, Eagle Carvings, Hand Dovetails, Mechanical Desks, Textbook Mistakes, Antique Tools, Spiral Steps, Gustav Stickley, Oil/Varnish Mix, Shaker Lap Desk. Back to School.
Cabinetmaker's Notebook, Water and Wood, Hidden Beds, Exotic Woods. Veneer. Tackling Carving, Market Talk, Abstract Sculptures from Found Wood, Workbench. Ornamental Turning, Heat Treating, Mosaic Rosettes, Shaped Tambours, Buckeye Carv· ings, Hardwood Sources.
Winter 1976, Number 5
Stackin g , Design Considerations. Keysrone Carvers. Carcase Construction, Dealing With Plywood, Patch-Pad Cutting, Drying Wood. Gothic Tracery. Measured Drawings, Wood Invitational. Guitar Joinery. The Bowl Gouge. English Treen, Shaper Knives.
Summer 1977, Number 7 Fall 1977, Number 8
Repair and Restoration, Designing for Dining, Tall Chests. Entry Doors. The Right Way to Hang a Door, Drawer Bottoms. School Shop. Health Hazards in Woodworking, Basic Blacksmithing, Carving Cornucopia. Carving Lab. Routed Edge Joint. Shaker Round Stand, Cutting Corners. Small Turned Boxes. Unhinged.
Spring 1978, Number 10
Two New Schools, Wooden Clockworks, Hammer Veneering, Claw and Ball Feet, Block Front Transformed, Hot-Pipe Bending, Furniture Galleries, A Two-Way Hinge, lami nated Turnings, Chain-Saw Carving, Circular Saws, Louvered Doors, Small Workbench.
To order the back issues or the first Biennial Design Book, send us your name, address and payment along with a list of what you want. Each back issue is $2.50 postpaid. The first Biennial Design Book is $8 . 00 postpaid. Connecticut residents add 7% sales tax. Make your payments to the Taunton Press, Inc. and send to the address below.
1beThlUlton 2
ltess , 52 Church Hill Road, Box 355A, Newtown, CT 06470
Fine
Publisher
Paul Roman Editor
John Kelsey Art Director
Roger Barnes Contributing Editors
Tage Frid R. Bruce Hoadley Alastair A. Stair Consulting Editors
Wq
Summer 1978, Number 1 1
George Frank, A. W. Marlow Assistant Editors
Ruth Dobsevage Patrick). O'Connor
DEPARTMENTS
Production
JoAnn Muir, Manager Barbara Hannah, Darkroom Nancy Knapp, Typesetting Advertising
Janice A. Roman, Manager Lois Beck, Vivian Dorman Advertising Representative
Granville M. Fillmore Promotion Director
Philip Truitt Marketing Representative
John Grudzien Subscriptions
Carole E. Ando, Manager Gloria Carson, Cathy Kach Nancy Schoch Mailroom
Viney Merrill Business Manager
Irene Arfaras Co"espondents
Carol Bohdan, David Landen John Makepeace, Alan Marks Jim Richey, Rosanne Somerson Richard Starr, Colin Tipping Stanley N. Wellborn Illustrators
Christopher Clapp, Joe Esposito Stan Tkaczuk
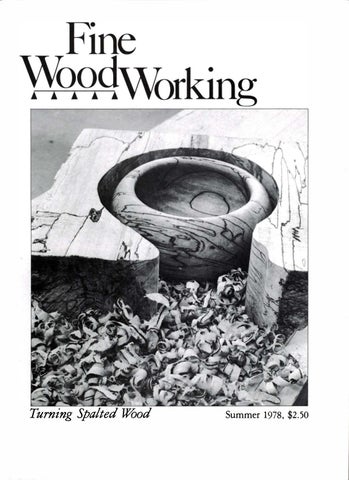
Cover: Bowl turnedfrom spalted wood, and the block from which it came. The detatl photo above was taken before turning. The delicate black network of zone lines marks the seasonal advance of van'ous fungi in the decaying wood. Such beauty has a pn'ce: The density ofthis wood van'es so much that tl is all but impossible to tum by conven tional methods. An unconventional ap proach is explained on page
54.
4 16 22 28 34 37 38 80 82 83
letters Methods of Work Questions & Answers Books Addenda, Errata Events The Woodcraft Scene by Stanley N . Wellborn: Harpsichords Tage Frid: Tool Cabinets Editor's Notebook : Sitka spruce, French antiques, carving gouges Sources of Supply : Schools and tools
AR TICLES
40 47 50 54 60 61 64 68 70 74 76 77 84
Spinning Wheels by Bud Kronenberg: The flyer / bobbin is tricky to make American Woodcarvers by Roger Bar nes: Traditional distinction is blurred Drawers by Adrian C. van Draanen : Logical assembly ensures proper fit Turning Spalted Wood by Mark Lindquist: Sanders, grinders are the key Scratch Beader by Henry T. Kramer : Simple tool makes intricate moldings leather on Wood by Sandy Cohen: How to inlay it and tool it with gold Notes on Finishing by Ian Kirby: Avoid the unseemly rush to glue up Building Green by David Adamusko: Native oak and pine shrink in place Parsons Tables by C. Edward Moore: Building and veneering them Hanging a Door by Willis N. Ryan III: Another way to get it right Pencil Gauges by Percy W. Blandford: A bag of tricks for marking wood Dulcimer Peg Box by Stanley Hess: Designer proposes one-sided solution Tiny Tools
Fine Woodworking
is published quarterly, March, June, Scplt�mber and December, by The Taunton Press. Inc., Newtown, CT 06470, Telephone (203) 426-8171. Second-class postage paid al Newtown, 06470 and additional mail ing offices. Postal Service Publication Number 105190. Copyright 1978 by The Taunton Press. Inc. No reproduction without permission of The Taunton Press. Inc. ISSN 0361·3453. United States and posses ions. $ 12 for one year, $22 for two years; Canada. $14 for one year. $26 for twO years (in U.S. dollars. please); other countries. $15 for one yea.r, $28 for two years (in U.S. dollars. please). Single copy. $2.50. For single copies outside U.S. and possessions. add 25< postage per issue. Send to Subscription Dept.. The Taunton Press. PO Box 355. ew(Own. CT 06470��United Kingdom. 50 for one year, payable to The Taunton Press. clo National Westminster Bank. PO Box 34. 15 Bishopsgate. London. EC2P 2AP. Address all to the appropriate department (Subscription. Editorial or Advertising). The Taunton Press. 52 Church Hill Road. PO Box 355. cw(Own. CT 06470. Send notice of undelivered copies on Form 3579 The Taunton Press. PO Box 355. Newtown, CT 06470.
cr
SlIhscnplion rales:
L7.
co"espondence
(0
Poslmaster:
3
mTTERs
__________________________________ =
our readers: I ' m pleased to announce that Fine Woodworking will be published six times a year instead of four , beginning with our next issue, Sept. ' 78 (No. 12). Many readers have been asking for more frequent publication ever since the magazine began in late 1975. But we waited until we were sure we could find enough good articles to increase our editorial content a full 50% with absolutely no loss in quality. The number of wood workers who wish to write about what they do and how they do it continues to astonish us, and because we' ll be able to cover more diverse topics in even greater detail, we're now sure that publishing more pages per year will make a better magazine. Of course, we' ll continue to use our present high quality paper and printing. Henceforth, we' l l be mailing Fine Woodworking in Sep tember , November , January, March, May and July. To offset in part the cost of more issues, our U . S . subscrip tion price has gone up from $9 a year to $12 a year , and to $22 for a two-year subscr iption . The Canadian rate is $14 a year in U . S . dollars. For all other countries, a one-year sub scription is $15, again in U . S . dollars. Subscriptions now in effect will be honored on a term basis, not on an issue basis. If you've paid through the end of 1979, for example, you ' ll still receive all the issues published between now and then, and thus you ' ll get some copies free. Our newsstand price will re main at $2. 50 a copy. -Paul Roman, publisher To
Mr. Hewitt's method of cutting compound-angled staves (Spring '78, p. 78) contains equations for bevel and miter angle settings that are only approximate. The correct equa-
tions are, using Hewitt's notation: Bevel Angle a= arcsin [sin a sin
W1 Miter Angle b = arctan [cos a tan W 1
where a= the angle between the side of the object and the table, and N= number of sides (or staves) . To illustrate the error of the approximation, consider a four-sided object, with a= 60°. By Hewitt ' s equations, a 39.0° and b= 22Y. By my equations, a= 37.8° and b 26. 6°, for a difference of and 4.1 ° respectively. For a large number N the approximation may suffice, but perhaps the difference between the two accounts at least in part for Hewitt' s statement that, "One stave may have to be adjusted to make all the joints close tightly . . . " The above equations work for all cases of a between and including 0° and 90°. -}. Paul Fennell, Topsfi'eld, Mass.
1T
. ..John Lor d in his ar ticle on "Wooden Clockworks" (Spring ' 78. pp. 44-51) should be commended on his treat ment of the subject. John's background however was evident in two areas. The first was in the discussion of the period of a pendulum. The formula given is the period of a simple or mathematical pendulum. This pendulum is defined as a par ticle suspended from a fixed point by a weightless, inexten sible cord. A clock pendulum fits a physical or real pendulum whose period is given by: t=rr
y! I1mgh
where I= moment of inertia, m= mass of the pendulum, g= acceleration of gravity (9. 78049 m / s2) and h= distance from the center of gravity to the pivot . A complex set of cal culations could be involved if an artistic design were used for
BUILD AN EXTRA PAIR OF HANDS Woodcraft's selection of Vise Hardware, Plans and Accesso ries help you build a quality bench to suit your style of work and your pocketbook. BENCH PLANS 40A40-BE 40A41-BE
Small Bench Large Bench
BENCH VISE HARDWARE, PLANS Me. Carlyle Lynch has scaled the dimensions of the Ulnia Workbenches (25A20-0 and 2 5A30-0) into detailed plans. In addition, Woodcraft offers the metal vise parts required to make the front and end vises. These vise parts come from the manufacturer without fastening screws or handles.
$10.00 $10.00
UNIVERSAL WOODWORKING VISE Ideal for instrument makers, cabinetmakers and woodcarvers. This rugged vise is designed to swivel 360 for convenient positioning of the work. Each jaw can also be swivelled to accommodate tapered or non-parallel pieces and can be set to grip outside or inside of the piece. The handle is comfortable and the screw slides smoothly and quickly. Maximum jaw opening is 6Y<i". 18AOI-O $173.90
°
SCANDINAVIAN BENCH SCREW This is the bench screw found in the front vise of the famous Scandinavian Work benches (see Fine Woodworking, Fall 1976 for plans). The design is unique because the swivel fixture, which accom modates a wooden jaw, will hold both parallel or tapered work. The screw is 32mm (1Y<i") in diameter. 250mm (10") in screw length, and 350mm (13%") in overall length. 17F71-EV $17.10
4
HARDWARE FOR SMALL BENCH A B C End vise slide and 1" diameter screw 17Dol-AW 12Y<i" 15" 4" Front vise with 1" diameter screw 17D03-AW 10" 13¥.i" 9"
$41.75 $45.45
HARDWARE FOR LARGE BENCH
B
C A End vise slide and 1 ¥.i" diameter screw 17D02-AW 18V2" 19%" 4" $67.45 Front vise with 1Y<i" diameter screw 17D04-AW 15V2" 19¥.i" 1O¥.i" $74.00
All Pri�es Incltlde Postage Mass. Res. add 5% Sales Tax Catalog SO¢. Free with order. Order by mail or call Toll Free 1-800-225-1153 (Ma.Res.I-800-842-1234) Master-Charge, Visa, Express welcome.
Am.
W<IDDCRAFT SUPPL Y CORP.
Dept. FW68 313 Montvale Ave. WOBURN. MASS. 01801
INTRODUCING • • • . . . a woodworking system that has become an INSTITUTION!
It's true! Shopsmith owners are so devoted to their Mark V's
that some have even demonstrated them at regular meetings of their local service clubs. Military personnel have taken their Mark V's with them when they change duty stations. Others have decided to make special trips to our factory, just to visit with us -- and you're invited to do the same at any time you choose.
What does this mean to
you?It means that we're a "family" of owners and employees who are extremely faithful to the Shop smith product. Ask our owners how they feel about the Mark V and they'll not only TELL you, they'll prob It's a Drill Press ably try to SELL you on why you with exclusive depth should own one! How many other prod control dial, ready ucts can you think of that command made jigs and the cor this kind of respect and dedication? rect speed for all types
16W'
of operations without time-consuming belt
The Mark V is not a "toy" or a "gimmick"!
changes.
Extreme accuracy is assured by Shopsmith's exclusive "borrowing" feature! W hen you set your Shopsmith up to operate as one tool, you can "borrow" features usually associated with the other four tools. For exam ple: The Rip Fence on the Table Saw works as a backstop when drilling dowel holes-or as a guide for parallel edge sanding with the Disc Sander-or as a "V-jig" for drilling into round stock or pipe. The "quill" motion of the Drill Press can help you achieve greater tool-to
If you think that by trying to do too much, the
It's a Horizontal Boring
Mark V will wind up doing nothing well, think
Machine,
again! The innovative engineering of the Mark V is so superior that it will outperform even the most costly Single se Tools it replaces!
Purpo
ideal
for
drilling into the edges of workpieces of un limited lengths. Ex
-
clusive Feed-Stop and rack-and-pinion table
5-tools-in-l versatility
adjustments assure ex
saves time,
treme accuracy in doweling operations.
space and money! Less than It's a
10" 3%" 48"
Table Saw
with a depth-of cut and ripping ca pacity for ripping,
big
34" 16%"
Lathe with a swing for
spindle and taper turn ing or metal spinning.
"Heirloom Quality" makes the Mark V a bargain ... at any price!
depe nda bility years from now, 'when you get ready to pass it on to your children or grand
tools!
dr far any
en! And when you consider that the Mark V
chil
costs
less than the five tools it replaces, you
can easily see that it's indeed a bargain...at price!
Normal change-overs take less than a minute-even for the inexperienced operator! A well-illustrated Tool Conversion Instruction quickly and easily. The objection of critics that changing operations takes too much time just isn't so! Shopsmith owner Fred Wescott says;
If you want "the best," you owe it to yourself to learn more about the amazing Shopsmith Mark V!
"I've heard these objections many times from people who do not own a Shopsmith, but I have
r------------
Manual shows you how to make every move It's a
the same angle you just sanded (all using the same set-up), the built-in precision never varies!
will still be delivering the same accuracy and
molding, tenoning,
grooving, rabbeting.
.. .sand the same angle you just sawed and drill
Because of the Mark V's rugged construction, it
a minute to change
crosscutting, mitering, beveling, dadoing,
workpiece precision on the Table Saw and Disc Sander. Because this exclusive "borrowing" feature lets you saw an angle, for example
Unique cup center ec centric permits con
never heard it from a Shopsmith owner!"
trolled offset for taper or oval turning.
If space is a problem, the Mark V is your solution!
TELL ME MORE! Find out why the Mark
V could easily be the best
tool investment you'll ever make... and learn how you can try it out in your own workshop under our exclusive 30·Day Money·Back Guar· antee.
It's a
12"
Disc Sander,
ideal for finishing du plicate pieces to exact dimensions, jointing the edges of plywood,
The Shopsmith Mark V requires less space
(12
than you would need to store a bicycle sq. ft.), while offering the full productive capabil
ity of the five major woodworking tools.
.
lO: Shopsmith. Inc.. Dept 1705 ,50 Center Drive Vandalia. Ohio 45377
NAME
bevel and angle sand ing, dowel pointing.
ADDRESS CITY ept. 1/0;) • 750 Center Drive.
D
Vandalia. Ohio
STATE
ZlP
-t53Ti
5
LETTERS (continued) a pendulum . For this reason, it is necessary to have the pen dulum length adjustable . The second area of apparent deficiency in background is in the discussion of gear tooth profiles. John is correct in that the cycloidal profile has been used in clocks for centuries, but the cycloidal design is not as efficient as the involute profile. The power requirements have nothing to do with the involute profile used in all modern gear designs . . . . The cycloidal de sign is noisier and shows greater tooth wear due to the con stantly changing pressure angle between mating gears. Sec ondly, and perhaps more important, the cycloidal design re quires that gears be operated at exactly the correct center dis tances or the contacting portions of the profiles will not be conjugate. The involute profile is more difficult to make but is relatively insensitive �o center distance variations and pro vides a constant angular velocity ratio regardless of load . . . -Keith R. Plossl, Saline, Mich. Re wooden clocks, has anyone thought of using stained glass or plastic sheet in the gears of the time train for a light display? Colors could be coordinated with the time of day. -Abraham Wechter, Kalamazoo, Mich. . . . Does M .] . Sheppard (Spring ' 78, p . 60) . . . actually think that " evolution" of his resembles anything but a television set with venetian blinds ? . . . I also wish to take you to task for publishing the letter on page from Henry Kramer . I would not mind being shot at if the man were right but he is not . This is not a matter open for opinion . . . . If you use oil in a screw hole that is close to the surface , the oil will seep through and cause unsightly spots under the finish , especially if it is light wood . Soap is
10
not only a poor lubricant but it is hygroscopic and will cause steel screws to r u s t , which will lead to other prob lems . . . . Also, while I am on the subject of rubbing it into Kramer , I cannot agree with his method of working glue into a crack. I use a piece of brass shim stock coming to a rounded point at about 60·. It carries the glue into the crack without the danger of leaving some of the paper behind . . . I would also like to put in a word regarding G . Frank's method of finishing a gunstock (p. 28). If it is going to hang over the mantelpiece his method is OK. However , if the gun is going outdoors in the wet weather , forget it. One scratch through that lacquer and the trouble starts. Also , re Frank' s reply to ] . A . Osborn (p. 28), there is only one good way to get grain to lie down and play dead. It is not a method to be suggested to a lazy man. There is no formula for the number of times it has to be done but the answer is to wet the wood and sand it with new, sharp, fine garnet paper the number of times it takes so that no raising of the grain is felt after you have sanded it for what you hopefully believe is the last time . I start sanding after the first wetting with 120 grit and end up with 280. Then the aniline stain may be applied and it will be found that very little sanding with the 280 grit will be necessary. This is good because it doesn ' t take much to cut through the aniline stain in some woods. I find it to have very poor penetration characteristics. -Charles Riordan, Dansville,
N. Y.
F.
In response to George Pilli ng's m ethod of steaming (Spring ' 78, p. 12), I'd like to pass on a yet simpler method which successfully steamed a pair of 1%6 in. square ash lon gerons (and later , a set of four % in . square spruce longerons) for my World War I airplane reproduction. The drawings
Here's A Better Way To Mill Difficult Lumber Exotic wood stock comes in a variety of challenging shapes and sizes. Milling this r ough stock has always been a prob lem. Now, Granberg Industries, manufacturer of chain saw equipment, has an accessory that makes the job easier and faster.
It's the Alaskan MK III, a versatile tool that clamps on the bar of the chain saw and fits bar lengths from to 56". MK III is easily adjusted upward or downward permitting any desired cut from to thick.
14"
ljz"
13"
MK III is a rugged, precision tool that will help specialty craftsmen mill those "almost impossible" pieces. It's avail able in a broad range of sizes.
Bob Stocksdale, widely known wood craftsman, uses a MK 111 to saw through a log of extremely hard, dried Black Acacia.
See your equipment dealer or write for new MKIII fold er describing applications and sizes Granberg Industries, Inc. South Garrard Blvd. Richmond, CA 94804 riRRNB£Rfj 204
1/11
.
6
Alaskan MK 111, Model 776-30.
r
Get Rockwell high-quality, carbide-tipped shaper cutters at under popular prices. Now, you can get Rockwell high-quality, carbide-tipped tools for less than you'd pay for competitive carbide
other popular decorative patterns The three-lip cutters
cutters. Rockwell produces cutters from tungsten carbide blanks, induction-brazed on pressure-molded steel bodies. This advanced manufacturing method combined with volume production provides high-quality cutters at lower cost to you. And you get famous
Tungsten carbide tips give you clean cuts for extended periods, in production cutting of hardwoods,
fit
Yz- and %-inch arbors.
particle boards, glue-bonded panels, plywood, laminates and plastics. And Rockwell's special cutter
raising, wedge tongue, quarter round, ogee, cove and bead, glue joint, straight and cabinet. Also offered are
design results in cool running without burning wood or overloading the shaper. Individual cutters and cutter sets are furnished in handy, specially designed storage cases for protection against damages. For more information on Rockwell carbide-tipped shaper cutters. contact: Rockwell International, Power
complete cove and bead sets, and cabinet sets, as well as a broad range of beading and fluting cutters and
Tool Division, Pa.
Rockwell dependability. Rockwell carbide-tipped cutters are available in popular standard profiles, including: door-lip, panel
33
15208.
400 North Lexington Avenue, Pittsburgh,
See these big shaper cutter values at your Rockwell distributor. Catalog No.
43-900 43-901 43-902 43-903 43-904 43-905 43-906 43-907 43-908 43-909
)4"
Catalog No.
Catalog No.
Door-Lip, Clockwise Rotation Rabbet Down Door-Lip, Counterclockwise Rabbet Down Panel Raising Wedge Tongue Wedge Groove and Or. Rd. Ogee Cove and Bead Molding Cove and Bead Molding RH Cabinet RH Female
}'2"
L.H.
43-9 1 0 43-9 1 1 43-9 1 2 43-9 1 3 43-9 1 4 43-915 43-9 1 6 43-917 43-918 43-9 1 9 43-920 43-925
Cabinet LH Female Glue Joint Straight Cabinet RH Male Cabinet LH Male Cove and Bead Cope R.H. Cove and Bead Cope H Straight (Cove and Bead Set) Straight (Cabinet Set) Cabinet Spacer Cove and Bead Spacer Bead
%"
X" X"
}'2"
L
43-926 43-927 43-928 43-929 43-930 43-931 43-932 43-933 43-950 43-951 43-952
}'2" Flute %" Bead %" Flute 1 " Bead 1" Flute 6" Hor. Panel Raiser
Stair Nose Cutters Drawer Joint Cove-0/,6" Or. Rd. 0/,6" Cove-'Ya" Bead and 'Ya" Or. Rd. -
}'2" %"
X" Bead
Rockwell International
.. where science gets down to business
7
LETTERS (continued)
UNDERSTANDING ORIGINAL HARDWARE Queen Anne 1710 -1735 Graceful lines and delicate carving marked the Ameri can furniture of the transitional style that carried the name of Queen Anne. Slow to gain popularity from its inception, production continued into the
1780's, and
in fact, did not start here until after Queen Anne's
1714. The hardware
death in
associated with the style
used intricate "openwork" instead of hand-chasing
for
decoration. The cast post and nut mounting replaced the weaker "snipe." "Spurs," or "ears," replaced the earlier "ball" center as decoration on the bails (the part that you pUll). By careful casting, the "open work" required little finishing, and the backplate size grew as brass became a less precious ·metal.
Our
new
(1978)
Aluminum downspout
catalog (mailed for
$4.00)
illustrates
II fine quality reproductions of the Queen Anne style.
BALI;ND BALL 463 West Lincoln Highway Exton, Pa.19341 . ( 215) 363·7330
called for a pair of ash strips to be bent up about a foot. I took a five-gallon gasoline can , thoroughly drained and cleaned it, filled it with water and put it on the stove. I put one longeron at a time in a piece of aluminum downspout pipe with a small piece of wood with holes at each end and steamed it for five hours. Then I rushed each piece downstairs and formed it on blocks nailed to the worktable , left it a day, and it sprang back only about two inches. -LeonardE. Opydycke, Poughkeepsie,
N. Y.
The pipe steamer suggested by George Pilling could be made a lot safer by incorporating a nipple and tee fitting so that the
?
� �
Existing pressure· cooker parts
Bring back the Early American look. Pressure cooker
safety relief weight of the pressure cooker is retained, in case the shut-off valve is accidentally closed. - William Eckhart, Chula Vista, Calt!
TUNG OIL
OANISH F=INISH
-
Inside many a piece of ordinary-looking furniture, there's a beautiful glowing, natural wood trying to get out. Now you can bring it out ...with Varathane® Tung Oil Danish Finish. Makes wood panelling look deep and rich. Lets prize antiques look their worth. Give all your wood that Early American look with the natural hand rubbed finish of VarathaneTung Oil Danish Finish.
H i� not Flecto, i� not \3rdtbane.
!Q
The Flec(o Company, Inc.
, .. P. O. Box 12955, Oakland, Ca., 94604
8
I am an admirer of your excellent magazine but I take except ion to the advertisement for a grinding j ig on p. 31 of the Spring ' 78 issue. " Do not sharpen your own chisels, let your wife do it with j ig below. " I wonder if it ever occurred to .the Rima Mfg. Co. that some of us wives might actually sharpen our own chisels for our woodworking uses. Or, should we let our husbands do it for us, if they' re good boys of course, while we get on with more demanding and important work? -Imelda Green, Toronto, ant. In response to "The Right Way to Hang a Door" by Tage Frid (Winter ' 77, p. 48), I think Tage is a fine craftsman and an excellent writer. I find most of his articles interesting and en lightening. However, the article on door hanging I find very misleading. In my three years as a carpenter and six years as a cabinet maker, I ' ve spent much time installing fine architectural woodwork and hanging many doors . . . . I have arguments on two of Frid's methods and a suggestion about fitting after the
18" Jigsaw
11" Bandsaw 6" Belt Sander 4" Jointer With the Shopsmith Belt This is the only 11" bandsaw The Shopsmith Jointer is the
available that offers unlimited cut-off capacity
on workpieces up to 3'l'a" wide, thanks to our exclusive reversible blade guides that let you twist the blade to a 30° angle from the frame.Our patented self-aligning pulley design eliminates the need for continual tracking adjustments ...and setting the blade tension is as simple as matching the indi cator on the tension gauge with the width blade you are using. There's no guesswork!
only jointer of fering individual blade leveling screws and a unique blade clamping wedge that eliminate the need for match-grinding all three
Sander, tension adjustments are automatic. Our exclusive tensioning knob releases the belt quickly for removal
blades to the same exact size. Now you can sharpen your own blades and make leveling adjustments while the blades are on the machine. The Shopsmith Jointer has the longest table surface (28") and the longest fence.in its class. The infeed table extends beyond the outfeed table for added support during rabbeting operations.
I
and returns to the proper setting AUTOMATICALLY. Tracking adjustments are also virtually automatic, thanks to Shopsmith's high crown drum design. The working table may be used across the belt, parallel to it on either side, or at any angle you decide! A single knob control lets you tilt the table from 20° toward the belt to a full 45° away from it!
The exclusive built-in blower directs a steady flow of air on the cutting line at all times to keep it free of sawdust. Another benefit of this feature is blade cooling, an important consideration when cutting plastics or metal. The Shopsmith Jigsaw will easily accept fine jeweler's saws which provide the thin, hair-line cuts so vital to the art of marquetry. By loosening a single locking screw, the tubular arm can be easily removed, converting the Jigsaw into a Sabre Saw with UNLIMITED capacity!
Discover T he Difference ... Get T he Complete Story On T he Tools T hat Make Woodworking
I __ �
Easier And More Convenient, Too! Send For More Information Today!
"
I
i Shopsmith,
. Iln. I Q...oPSP'i� .,-' --C !:;;;==============dJ I l!!!!!�!!! WORLO'S STANOARO IN WOOOWORKING EGUIPMENT 1706 • 750 Vandalia, Ohio 45377
Dept.
Center Drive.
I nc., Dept 1 706 Center Drive Ohio 45377
750 Vandalia,
I
Yes, want to Discover The Difference in Shopsmith Tools! Send
____ _ __ ____________
Name
Address City
i
1
1
I I ---------------more information (at no obligation) today!
State
Zip Code
9
Create a faIllily
treasure
Build an exquisite Grandfather clock of truly outstanding quality! For over half a century fine craftsmen have been producing each kit with painstaking care. The love and pride we put into our work is the hall· mark of every Kuempel clock. We do the hard part, yet the satisfaction of making a family heirloom can be yours using just the tools you already have around the house. These designs. in cherry, mahogany or walnut, combine the simplicity of yesteryear with stately elegance to enhance the decor of any home. Choose bright sounding tubular bell or resonant rod chimes. Hand· crafted Lady Florentine or Goddess Diana Lyre pendulums. Moon phase wheels painted by our artists are included with every bronze etched dial. Write for complete literature or send for plans of three clocks S 6 r re · · e Spirit of the a i e n r . . pl s
OUT
$2.50
C��t� ;� � d�;�; gt��; j�ii Lit� ����� �� �� , JtwN'n/w l riltime rilo()k 0)fm/r6 w:!}Jtttdio 21195 Minnetonka Blvd. • F-J8 • Excelsior, MN 55331
LETTERS (continued) door is hung. Top and bottom hinges should never be the same distance from the ends of the door. We use 5 or 6 inches from top of door to top of top hinge and 7 or 9 inches from bottom of door to bottom of bottom hinge. This allows less " pulling" on the top hinge and throws more weight on the bottom hinge , which is a " pushing" action that is easier for a hinge to bear. This will also eliminate most door droop . My other disagreement is on installation of all hard ware ... in hanging a new exterior door to an existing frame. When installing a new lock you have to make sure it does not interfere with the knob of an existing hung storm door. I ' ve heard of this mistake many times. My last point is some tricks in fitting the door. Fitting to an existing jam b , you must check the squareness of the head to the hinge side with a straightedge the length of the jamb and a framing square. You can now determine which way you have to shape the top of the door and whether the hinge side is bowed concave or convex. It's seldom straight. Also check your lock side for bow and measure the distance from joint to jamb for consistency. After the head and sides of your door are properly shaped , mortise the hinges into the door, then the j amb, and hang the door. Check the gaps at the hinge and lock side. If the gaps are not even, you can pack out the hinges to improve the fit. If you want the door to move closer to the lock side, pack out the barrel side of the hinge with strips of sandpaper about in. wide and the length of the hinge. If you want to pull the door closer to the hinge side, either mortise the hinge deeper, or pack out the door-stop side of the hinge. In closing, I ' d like to say that there will always be an argu ment when someone says the " right way" to do anything. Every craftsperson has different methods and tricks to achieve the same goal. Frederick A. Swope, Philadelphia, Pa.
if,.
EDITOR ' S
OTE:
For more on hanging doors, see page 74.
I enjoyed the excellent article by Wendell Smith on small turned boxes (Winter ' 7 7 , pp. 7 2- 74) . However, I believe his method of chucking a vertical-grain cylinder is mildly defi cient in that the fit must begin and remain perfect; otherwise wobble about the screw will develop and self-perpetuate. Workpiece
BRASS FINGER PLANES
Shown actual sIze Pat_ Pend. for the INSTRUMENTMAKER and CABINETMAKER The forefinger nestles in the whale's tail. Made from solid brass, ebony wedge and tool steel blade. IN THREE S IZES
(1-3/8" long, 3/8" blade) ........... $23 ea. (1-3/4" long, 1/2" blade) .. ... .... $25 ea. (2-1/8" long, 5/8" blade) ....... ... $28 ea. Set of 3 ..._____ . ____ ... .... ...... ... .. $70 Add $1.00 per order for postage and handling Make checks payable to: (R.I. residents add 6% sales tax) Small Medium Large
_.
OTNER-BOTNER
P.O. Box
10
6023, Providence, R.I. 02940
Wooden clamping ring
Two reusable hardwood chucks I believe to be superior are il lustrated here. John Heinrich, Santa Rosa, Calt!
T.
Thank you for being the medium through which Wendell Smith could share his technique for turning small round box es. My first attempt was a most satisfying success. The mask ing tape bit is ingenious. My only departure from the text was the method of attaching the work to the wood faceplate; I glued it instead of using the set screw. However, I ' ve been able to use the same wood faceplate over and over again by turning off the waste after each box. I have made boxes from American walnut, aromatic cedar, magnolia, cherry, ash , pecan, tulip gum, and dogwood-three with inlaid lids. Dogwood grows profusely in the East Texas pine woods . It is not a marketable wood as it grows too slowly, and the
With Elmer's Cabinetmaker's Contact Cement you don't need a pro's hands to give it the pro's touch.
Solvent- Elmer's type vs. Cabinetmaker's competitor Contact Cement 220°F. of
Elmer's® Cabinetmaker's Contact
It's a lot more convenient too, because it
In an accelerated aging test,
Cement has a unique, non- f1ammable*
cleans up with plain water before it dries.
test-oven heat for four days actually
acrylic latex formula. It not only gives you
(Try that with a solvent -type cement.) No
warped the laminate on the left and
fires or ventilation problems to worry
made the conventional contact cement
it goes on easier than solvent-type
about either, when you work with
cements ... and goes further. After appli
Elmer's.
let go. But Elmer's Cabinetmaker's Con�ct Cement held.
the strength and permanence
of acrylics,
cation, it even tells you it's ready to bond by turning from white to crystal clear.
*As defined by Federal Hazardous Substances Act.
Elmer's. When
results count.
•III! :I
®
Justreading our catalog could help make you a better craftsfDan.
You're only as good as your tools. And your tools are only as good as the company who sells them. That's why we've designed our catalog to be like no other hand tool catalog that you've ever seen. It's more than an ordinary listing of over 1,000 woodworking tools. Instead, it's a 108-page book with superb photographs, honest specifications and reliable descriptions of tools which cannot be bought in your average hardware store. And it's even more. You'll also find care and use information, special "how-to" sections with easy to understand drawings and other pointers which will add to your enjoyment and help increase your skills as a woodworker. From the first section on Chisels and Knives through the last section on Turning Tools, we've tried to have every page reflect the quality of our uncommon tools. It wasn't easy, but then again, nothing good is. So send us this coupon today. We want to make it easy for you to be as good as you can ger.
""I!'l::....-. . Garrett Company, Dept. FW-6-8 302 Fifth Ave., New York, N.Y. 1000 1 o on S S
••• __• ____ _______________ __________________________________________ Gendemen: Send me your ca<alog
.
hand tools. I have enclosed
I.
o Send me your catalog on INCA SWISS stationary power tools. Here's 1 for that as well. Naml� "
Addresss
City,
Total amount enclosed
State·
$,
---L. Zip.
'.
LETTERS (continued)
DOMESTIC & FOREIGN
HARDWOODS Quality stock for Cabinet Work
Most all sizes from
I" up to 4" in thickness
HARDWOODS ASH - BASSWOOD - BIRCH BUTTER EBO
UT - CHERRY - CHESTNUT
Y - MAPLE - OAK - POPLAR
ROSEWOOD - TEAK - WALN
T
Also hardwood p lywood s
natives prize its early-spring white blossoms. Most of lower East Texas is void of any large trees because some years ago an Eastern timber company rustled the trees-some, 1 4 in. in diameter-to ship back East to be made into shuttles for the weaving industry. It is quite dense, long-wearing and doesn ' t sliver to catch the loom yarn. I came b y a couple of 6-in. trees left by a surveying crew cutting a transit line on my property. They were sawn into boards and squares and air-dried in my shop overhead . The wood machines somewhat like myrtle and takes a beautiful polish. -Lyle E. Bohrer, Beaumont, Tex. Tage Frid's " Hammer Veneering" (Spring ' 78 , pp. 5 2 - 54) describes a technique for edge-matching at a veneer joint by slicing through two overlapping sheets of veneer. When such a cut is made, it appears to me that a small gap or at least a V·groove will be left open between the two veneer panels. How is such a problem handled? Does glue fill the void ? Or do I not understand the process ? have edge-joined veneer panels by squaring and straight ening the edges on a jointer, putting a bead of yellow glue on the edges, and pulling them together with masking tape while holding the panels against a flat surface. This works well except that the bond is fragile and sometimes the joint is slightly offset . The offset can be repaired by cutting the joint open with an X-acto blade. This usually happens only if there are ripples in the veneer. Anyway, my method avoids the pro blem of edge-joining with a veneer saw and having to deal with a gap. -Roland Norton, Shalimar, Fla.
I
SOFTWOODS
I
SUGAR PI NE - CYPRESS - CEDAR SPR
CE - DOUGLAS FIR etc.
MAURICE L. CONDON CO., INC. 248 FelTis Avenue, White Plains, N.Y. 10603 914-946-4 I I I Open Saturdays 8 AM unlil 2 PM
H.
If done right , there will be no gap between the two veneer panels. Remember, the veneer saw is sharpened like a knife, and the blade is very thin. Because the two pieces of veneer overlap, with glue between them, the top piece is wider than necessary, so when it is flattened down it makes up for the saw or knife cut . I have h'ad more problems with the top piece being too wide and having to force it down. FRill REPLIES:
I have two suggestions . . . . The first has to do with scrap hard wood . I have been fortunate in getting the shipping crates from sets, ranges, washing machines, dryers, freezers and refrigerators, which have been of scrap oak. I make small jewel chests from this material. After running through the planer I can have thicknesses of in . , 1J2 in. , % in . , and even in. to work with . My second suggestion is about removing the build-up on circular saws. I use Easy-Off oven cleaner in a well-ventilated area and the saws come clean in 1 5 minutes . . . . -Leslie A. Rohlf, Metaline Falls, Wash .
TV
Y4
A sophisticated line of tools for the serious woodcarver, handcrahed in the U.S.A. Wood Carving Tools. Lignum Vitae. Boxwood ane! Hickory Mallets. Wood Worker's Rasps. Adzes. Slip Stones. Handles and Benches.
Catalog 1.00 Sculpture House. Inc 38 East 30th Street, New York. N. V. 10016
.•
12
%
. . . Confusion about carbide saw prices and performance is very understandable. Although we at Huther Bros. pioneered the carbide-tipped saw in the late 1 9 30s, we are buying and reselling them now, except for specialty items. Our main sources of supply are Blade and Luxite. Both make very good blades at a reasonable price. I have been using carbide blades for over 2 5 years, and from my own experience I have found a lO-in. blade with 20 alternate top-bevel teeth to be the most versatile of all. It does a smooth job of ripping, and a satisfactory job of cross cutting, though not as smooth as a crosscut blade . A l O-in. 20-tooth saw blade from Blade (.08 3 body, . 1 2 5 kerf) is only $ 3 1 and would be my choice. A l O-in . , 24- tooth from Luxite ( . 093 body, . 1 3 5 kerf) is $49 and is probably a sturdier blade. For sawing plywood or Formica-faced plywood or chip board, I would recommend a l O-in. blade with either 40 or
LETTERS (continued)
Triple chip teeth
A l ternate t o p - be v e l teeth
60 teeth, with a triple-chip conformation-or high-low tooth. Every other tooth is straight across the top, and . 0 1 5 in. lower than the beveled teeth, which have a 4 5 ° bevel on both sides, leaving about one-third of the top straight. Nearly all carbide saws have a hollow grind from the periph ery to the base of the tip , as well as front-to-back side clear ance . The triple-chip tooth does a smooth job on Formica with a minimum of chipping. Blade makes a lO-in . , 60-tooth triple-chip for $93 and a thin-rim triple-chip for $96 . Because carbide blades should b e sharpened with a dia mond wheel , sharpening should be done by a qualified repair shop . They should never be ground with an emery wheel. -Eugene Roth, Rochester,
N. Y.
P O R C E LA I N CASTERS
Add a touch of elegance with fine quality, decorative white PORCELAIN CAST ERS with black die cast housings. Wheels are 1/2" wide x 1 1/8" in diameter. Ideal for small furniture. dry sinks, tables, carts, and antiques. Set .
of 4 . . . . . . . . . . . . . . . $7.98 ppd
Gene Roth works for a saw and knife manufacturer in Rochester, N . Y . , and also operates a part-time cabinet shop. He wrote about sharpening circular saws for Fine Woodworking(Spring ' 78 , p. 80) and sent the above letter in response to a reader' s inquiry. The brands he mentions, and many others, are available under " Saws" in the Yellow Pages, and Luxite also sells directly to individ uals (77-85-T Liberty Ave . , Jersey City, N .] . 07306) . Most of the mail-order woodworking suppliers carry carbide-tipped sawblades, as does Sears. EDITOR'S NOTE:
I believe I have come up with a method to overcome the ob jections toJohn Harra's " Routed Edge Joint" (Winter ' 7 7 , p. 66) . The objections said that the router bit needs a diameter of zero and the base should be concentric with the cutter. Refer to Harra ' s article now. When board is being cut, the nearest part of the cutter is doing the work and the farthest is hitting only air. When cutting board j ust the reverse is true. What is needed is to have the cutting portion of the cut ter the same distance from the fence for both and in order to make the cutter effectively zero in diameter. By hav ing two router bases, one whose diameter is greater by twice the cutter diameter, we can achieve this. First cut board using the smaller base (with board i n place, but its edge JUSt behind cutter) , following Harra's instructions for depth of cut and direction of cut. Now unclamp the fence and move board so that its edge is in. (as Harra says) past the cut ter, after having switched to the larger base first and having removed board Now reclamp the fence and make this cut, again following the correct direction for the router. For the two bases, Y4-in. plywood should be okay, but anything can be used, such as a hardwood or plastic, for more durability. In order that these two bases be concentric with the cutter (another of the objections) , use the collet as a pivot point for describing the circle of these bases. Use the regular router base as a template to mark the three screw holes on both pieces of plywood . Drill these holes and the center hole through which the bit protrudes . . . . Countersink the screw holes and attach one of the bases to the router proper. Place a shaft of diameter equal to your collet into the collet and secure it. Drill a hole into a board whose diameter is equal or maybe '/64 in. less than this shaft and then force this down over the shaft till it rests on the plywood. Use this as a base to attach a j igsaw. To cut this first base (say the smaller one) move the j igsaw along the board until it is about 1/4 in. beyond the router proper and cut the circle. The cut made like this might be rough and may be wavy, so finish it with a
A Al,
A
A
A
%6
Al.
Al
Al
BATTERY OPERATED CLOCK M O V E M E NT
Cordless electric battery move· ment has trim medium impact transparent plastic case. Oper· ates for 1 year on an ordinary size cell flashlight battery. Center fixation. Hand setting from front or rear. Includes hands. Unit is 2 3/8" wide x 3 1/4" high x 1 3/16" deep.
"c"
$10.95 ea. ppd CHECKERBOARD F A C E KITS
With this kit you are able to make a beautiful chess board. Includes 70·2 1 18" squares of light and dark veneers. Also included in the kit is a 1/2 pI. can of contact cement. a veneer roller, glue brush. veneer strips for the border and edges and complete instructions.
$6.95 ppd.
Best catalog·manual . . . a must for your workshop!
1 1 6 pages . Full color illustrations . Larger selection of superior quality items for the creative craftsman. Sent free with order . . $1 .00 separately
r--- - SATISFACTION 100% GUARANTEED! - - - - , Please rush me
@ $7 .98 @ $6.95 @ $ 1 .00
____ _ __________ _ ______ _____________ _ __ _______________�___ Casters (set of 4) Clock
@ $10.95
ea. ppd.
ea. ppd.
Checkerboard Kit
ppd.
New larger Catalog(s)
ea. ppd. (Free with order)
Name
Address
City
Zip
State
Minnesota
'Woodworkers .. Supply Company
Dept. 16S21801 Industrial Blvd., Rogers, MN 55374
,- - -- -------- -------� 13
LETTERS (continued) mini-grinder attached to the rotating board (make sure it is rigidly attached) , or you might try a j igsaw trick that I use . Place a wood block in. thick against the blade at the part without the teeth. Move the j igsaw closer to the center shaft by a little less than the thickness of the blade-any farther would impede the cut because the wood block would stop it-and make another pass to clean up the edge. Before you remove the finished base from the router, place a mark on it and another on the router, so that the base is always rein stalled in the position it was cut. Do the larger base the same way, but take extreme care that its finished diameter is exactly twice the router-bit diameter greater than the smaller base. -Blake Raines, Sp ringfie ld, Pa.
Y4
. . . I was appalled that you would print Henry Kramer' s sug gestion to ru b screw threads over soap. It's not good for the wood and it rusts steel screws. Beeswax is what you use . . . . Jim Sieburg ' s tip on trimming veneers (Spring ' 78 , pp. 1 6- 1 8) is interesting. I don ' t have a shaper, so I clamp veneers between two boards with C-clamps and run them across the jointer. Also, Stanley router bit #8 5430 (with the ball-bearing tip) perfectly trims veneer edges, just like Formica. -Lowell Holloway, Jr. , Longview, Tex.
SINCE 1925
•
B R I N K & COTT O N M FG. CO. 77 POLAND STREET, BRIDGEPORT, CONN., U.S.A. 06605
TH E
Now ava i l ab l e ag a i n . . .
THE FI N E ART OF CABI NETMAKING Now you can re·create Krenov's museum·quality cabinetry in your own work· room. In h i s own detailed way, this master woodworker covers everyt h i n g from choosing wood to coopering, doweling, and doveta i l ing - from frame and panel work to drawer latches, h i nges and h a n d l e s . Complete with over photos and deta i led drawings i l l ustrating h i s actual tec h n iques. pages, x
A CABINETMAKER'S NOTEBOOK
224
81h300 11, $14.95.
Also ava i la b l e : by James Krenov. Getting started, finding o n e ' s self i n one's work, making tools-all craftsmen w i l l identify with Krenov as h e e x p l a i n s not just the how but a l so the why of working and l iv i n g with wood. "What m a k e s a c a b i n e t m a k e r a true master? Y o u could read dozens of books on tools and tricks of t h e trade without ga i n i n g t h e insight this one book provides."-Workbench pages, iJlus.,
132
145
$13.50.
- - - - - - - 1 0-DAY F R E E EXAMINATION - - - - - - -
� �
Van Nostrand Reinhold
7625
E m p i re D ri ve . F l o r e n c e , K e n t u c k y
41 042
Please send me the following books by James Krenov for 10 days' free examina· tion. At the end of that time I w i l l either remit the amount of your i nvoice (in· e l ud i ng postage, hand l i ng, and my local sales tax) or return the book(s) and owe nothing. (Payment must accompany orders with P.O. box addresses. Offer good i n U.S.A. only, and subject to credit department approva l . )
_____________________________________________________ (24555·6) THE F I N E A R T OF CAB I N ETMAKING $14.95 (24551·3) A CAB I N ETMAKER'S NOTEBOOK $13.50
Name
A d d ress
Cily
Siale
Zip
SAVE ! E n c l o se p a y m e n t w i t h o r d e r a n d p u b l i s h e r pays poslage a n d h a n d l i n g . S a m e return-refu n d g u a r a n t e e . Y o u r l o c a l s a l e s t a x m u st be i n c l u d e d w i t h paym e n t .
F 7357
14
After reading about several ways of getting glue into cracks or under veneer to repair it, I want to share my solution. I use a hypodermic syringe, preferably with a long, large needle. Your family doctor may be able to supply you with a used one. I remove the plunger and fill the tube half-full with glue. Replace the plunger, and the long needle will put the glue J USt about anywhere you want it . Clean the syringe and use it over and over. The syringe can also be used empty , to blow air into the cracks to clean them. -Raymond R. Hunter, South Windsor, Conn. The mixture of methyl alcohol and benzene . . . for finish re moval is about as dangerous a concoction as could be devised . Vapors from both components of it are flammable over a wide range of concentrations and both are highly toxic. The maximum concentration of methyl alcohol in which it is safe to work for extended times has been established as 200 pans per million (ppm) , about two-thirds of a fluid ounce vaporized in a 2000-cu . -ft. shop. The odor threshold for methyl alcohol is also 200 ppm , so, if it can be smelled, the concentration is too high. Continued daily exposure to con centrations above 200 ppm can result in chronic toxicity with liver and central nervous system damage, impairment of vision and possible blindness. Higher concentrations may cause acute symptoms and could be fataL Benzene is even more toxic. Its threshold limit value (TLV) is 10 ppm . However, the Occupational Safety and Health Ad ministration has proposed a new TLV of l . 0 ppm. The odor threshold for benzene is about 50 ppm, so one can work in dangerous concentrations without smelling it. Chronic ben zene poisoning results in damage to the blood-forming organs, resulting in a frequently incurable anemia. Some in vestigators have linked benzene to leukemia. The best safeguard is not to use such materials, and I would not have benzene in my shop under any condition, but it would be impossible to do without methyl alcohol, or for that matter, acetone, methylene chloride, paint thinner, turpen tine, etc. all of which are flammable, toxic, or both. All of these can be used safely if there is adequate ventilation. None of them is safe without it. Ventilation is the best protection against toxic activity and the only safeguard against buildup of explosive or flammable vapor concentrations. -A. E. Hayward, Vienna, Va.
With Elmer 's Carpenter 's Wood Glue you don't need a pro's hands to give it the pro's touch.
Elmer's® Carpenter's Wood Glue is a
It's also better because it "grabs" imme
Elmer's Carpenter's Wood Glue is also
special wood glue for all your woodwork ing projects. It penetrates well in hard
diately and dries fast. Yet it allows
sandable, paintable and gumming re
realignment before it sets. So you can
sistant. Its non-toxic*, solvent-free for
and soft woods and forms a heat and
join surfaces as soon as it's applied.
mula and washes off your hands and
water resistant bond that's stronger than
project with water. So you won't get ligh"po� when you
the wood itself.
stain near glue joints.
Elmer's.
'As defined by Federal Hazardous Substances Act.
Send
Whe n resu lts count.
•1m111 :I
®
C RAFTSMAN STOCKS 44 VARIETIES of Choice Domestic and Imported WOO D
..
for your new 1 52 pagel
Everything you need for your wood proiects including Dremel and Stanley Power Tools at Big Discounts. Craftsman Serves you better!
«3 ;fJ i ti··�·'·'''':....
CATALOG - everything for your wood shop! OVER 4,000 ITEMS FOR TH E WOOD HOBBYIST
man now works a whole year ahead to lay in big stocks of more than 40 varieties. When you order your wood from Craftsman you count on choice quality and prompt ship ment! Craftsman's new 1978 "biggest ever" catalog is your complete one-stop source for everything in your shop from wood to hardware. Over 4000 items in stock . . . at lowest money saving prices. This is Craftsman's 48th year of service to the home craftsman, school shop and professional wood worker. Mail coupon today for your own personal copy of Craftsman's new 152 page catalog!
WE STOCK:
•
As fine hardwoods become more and more scarce . . . Crafts
Amaranth ' Coco Bolo ' Red O a k Benin Teak Vermilion Cherry Birds Eye Maple ' Black Ebony . se a u K o a Prima Vera Satinwood · Curly Maple Avodire Sycamore Bubinga African Zebra Honduras Ma hogany . American Walnut · Aromatic ' Red Cedar
• • • •• •
'::�� � � !����
esses from
Thickn
r------- -------- ----•
•
CRAFTSMAN WOOD SERVICE CO. Dept. PW
� �� ; I 2729 I lli i s 60608 • Send new Craftsman Catalog • I enclose 50c for m a i l i n g a n d h a n d l i ng
1/64"
to
4"
I
• I
So uth Mary st. Chicago,
Name
no
68
I I I I
•
I
--
I 8 Pages of Pre-Cut Hardwood Clock Cases, Clock Kits, Clock Movements! .4: '.0' J (4 f p,: . WOOD SERVICE COMPANY : City . State Zip : Dept . PW 68 . number - saves time! . Be sure to give ZIP •·....-1.1.1I ..-......1Ii1l1lll1lll1llll �•1II .. 2129 South St., Chicago, I I \, 60608 L _______ _ _ _ ____ _ _ __ _• Add res s
Mary
15
STURDY PLASTIC PADS SLIDE OVER JAWS TO PROTECT DELICATE SURFACES. Come off
quickly for HEAVY CLAMPING. Pads $2.25 a pair; CLAMP with 4" throat depth and load rating of 1 1 00 Ibs.
12" 24"
$ 9.65 each $ 1 1 .95 each
openi n g open i n g
UPS ppd . , continental U . S.A. (Alaska, Hawaii and Canada add $ 1 . - ea. ) . Free pads with order of 4 clamps of same size. Orders less than $20., add $ 1 . - for handling. Send $2.- for complete catalog of industrial tools.
<.ico I I Complete Shop Outfitters!
BIMEX. INC. Dept . FW7
487 Armour Circle N E, Atlanta, G a . 30324.
Tel. 404-873-2925 ( N o C . O . D . 's)
CRA
FTW O O D S
5908C Macleod Tr. S . Calgary, Alberta T2H O K 1 Phone 403-255-6401 Ash Alder Basswood Boxwood Bubinga -Bacote Koa Cocobolo Ebony, Gaboon Ebony, Macassar Rosewood, Brazil Rosewood, Indian Osage Orange Rosewood, Honduras
Paldao Walnut, San Claro Wenge Pal Brazil Cherry Shedua Teak Pecan Oak, English B rown Oak, Red or White Walnut, American Walnut, Persian Padauk Honduras Mahogany
Brazilwood Zebrawood Zapote Granadillo Myrtle Redwood Satinwood Figured Maple Oriental Wood Angico Bloodwood Lilac Imbuya Lignum Vitae
Wood is d u ty free to U . S. A . N o o r d e r is t o o small.
Learn
WOODWORKING at the
NEW ENG LAN D CRAFTSMANSHIP CENTER
METHODS OF
WORK
___
Leg Vise
For years I have admired in museums and photographs those sturdy, simple contraptions I call leg vises. They are mounted at one end of a bench, in front of and parallel to its front leg, and are as high as the top of the bench . This type of vise was prevalent in old woodshops both in this country and abroad. A day at a bench equipped with one and you begin to under stand its previous popularity and question its present scarcity . This vise can be adjusted to hold at various angles and gains much of its holding power from simple leverage. It is capable of holding much larger pieces of wood, both in width and thickness, than most commercial bench vises can . Be cause the bottom of the front jaw is on the floor and the rear jaw is the bench itself, it is quite stable (or as stable as your bench) and will withstand great abuse from pounding. With the addition of a few holes and a peg or two in the other front leg, you can support long boards on edge. Hardware can be had from $ 1 5 to $20 from well-stocked tool suppliers such as Woodcraft Supply Corp . , 3 1 3 Montvale Ave . , Woburn, Mass. 0 1 80 1 . But for less than half that price you can have a leg vise with features that standard bench screws don ' t allow. You will need a piece of wood about 3 1JJ. in. by 3 1JJ. in. by the height of your bench, a pipe-clamp or bar-clamp fixture, a piece of pine 1 in. by 4 in . by 1 2 in . , a dowel , a couple of wood screws and a few hand tools. For wood I ' ve used com mon 4 / 4 fir, but anything you have will work. Softwoods can be fitted with hardwood faces at the inside top for better wear. The lower adjustment shown in the diagram works the same as the second screw on a handscrew works. It enables you to keep the vise faces parallel, or at the angles you need . The hole in the upper part of the vise must be elliptical to allow for changes in the relationship of the pipe to the jaw. These changes take place only vertically, so the width of the ellipse should match the outside diameter of the pipe , usually % in. I bore two holes at 7 5 ° off horizontal, intersecting at the center of the wood . This gives a round hole in the center of the piece and ellipses at the outer edges. Cutting two parallel holes also works but is sloppy. With this bar-clamp system, you get quick action by releas-
S mall classes three times a day, six days a week in general woodworking and furniture making.
'I.,,�
Continuous courses year-round, co mpletely flex ible scheduling possible. Wood sculpture in the round, spring and fall. Accessible to all of Greater Boston Area. Call: (61 7) 923-1 130 or write:
Drill and screw to back of bench leg
PO Box 47, Bridge Street. , Watertown, Mass achusetts 02172.
5
:�
TURNCRAFT CLOCKS
oo• •
Enjoy the sat isfaction of making and owning a clock you have created. Complete, simplified plans. Easy to read detailed con struction. Includes material lists. Many show Shaper/Router Cutters used. Choose from Grandfather, Grandmother (Traditional· Early American), School. Bracket. Cottage, Steeple, Vienna Regulator, Wag·on Wall.
•• •
.�
Movements, Dials, Hard ware and all component parts related to clock build ing. Now stoc k i n g the new U rgos Grandfather Triple Chime nine tube movement . (The Cadillac of move· ments).
33
Page Catalog-$2.00 re fundable on $25.00 order.
Special quantity discounts. Dept. F W I , 6 1 1 Winnetka Ave. No.
TURN CRAFT CLOCK
Golden Valley, Minn. 55427
IMPORTS CO.
Phone: 6 1 2-544· 1 7 1 1
Preferred method
16
�
To catch ong boards
Alternate method
• ••
I
METHODS (continued) ing the bar at the stationary fixture behind the bench leg. Simply pushing closes the vise on whatever is in it . A quick short twist of the crank and all is secure. - Craig Schoppe, Arlington, Vt.
Keep contours from becoming detours.
Fixing new saws
As a general rule, new crosscut hand saws are not sharpened properly . The trouble appears to be the result oHorming and sharpening the teeth by machine, after which the teeth are set . As these saws are sold, they feel sharp enough but they don ' t C U t as well as they should and they tend to wander. One can tell about this by looking along the teeth. They should look like A , but they almost always look like B. B A Sharpening a new saw to correct this is easy. It is well worth the trouble. Any set of accepted directions will do, j ust ignore those for leveling the teeth and resetting them . Neither is necessary. The only trick is to make sure the teeth are at equal depth. Even, the saw cuts straight with no problem . Uneven, it wanders and can not be held true. Count the file strokes for each tooth and don ' t try to make each tooth perfect the first time. Give each, say , five firm but not heavy strokes. Then, when all teeth are done, check the saw. If one needs more, they ' ll all need it . Carry on with the same number of strokes per tooth, maybe two or three if you ' re close, until they' re all alike. You don ' t need a saw vise or some other special tool. You do need a thinner file than you think . A couple of pieces of heavy wood or plywood on both sides of the blade, the edges just below the teeth, and the whole put in any vise, will do, and you ' ll never again have to say you can ' t saw a straight line. Amazing how much time you can save using a hand saw, especially if you have a good setup table to use for the pur pose instead of your fancy cabinetmaker's bench, one with an overhanging top so you can clamp a piece along the side of the table if you need to . -Henry Kramer, Somervzlle, N.J.
U se the Rockwell Speed Block Sander. Model Its unique design lets you sand where other sanders can't reac h . On difficult contoured surfaces. And the x 4Ys" offset sanding pad gives �u flush sanding on all four sides. At 1 2 ,000 orbits per m i nute. Hold it in the palm of your hand. See how snug it fits, and how easy it is to flick the power switch with your thumb. It's plenty reliable, too. With a powerful 2-amp motor. All ball-bearing contruction. And di rect motor-to-pad design. Stop by your local Rockwell dealer for a closer look. Or write for Rockwel l 's 1 978 Buyer's Gu ide. Advertising Dept . , Rockwel l I nternationa l , 6263 Poplar Ave., Memphis, Tenn. 38138.
4480.
4)1,"
tJ t1
•�iiiiiiiiiii����ii�
,�,
Rockwell International
r---------------- - - ------ , P E R F E CT
T.
Repairing knots
LION MITER TRIMMER i s a s i m p l e-to- u se h a n d too.! for t h e d o it-you rselfer, c rafts m a n , cabi n et m a ke r a n d c a r p e n t e r . E n d s t h e frustra t i o n of rough and m ism atched j o i n i ng . T h i s v e rsat i l e t o o l m a kes g l ass-sm ooth trim cuts o n any wood - soft o r 0 h a rd - to 4 " w i d e f o r 45 a n g l es to 6" for s q u a ri n g , a n d a n y a n g l e i n between, l eft o r r i g h t. S u p e r s h a r p too l-steel kn ives m a ke t h o u s a n d s of cuts, yet keep t h e i r edge_ M a ke p i ct u re f r a m es, b u i l d c a b i nets, t r i m o u t a room l i ke a P R O !
As a weekend woodworker I find I cannot afford top-quality walnut, nor can I afford to waste any of the waddle walnut I buy. Many times a fine piece of well-figured waddle walnut will have a badly checked knot . I file the check out until I have about lk-in. vertical surface all the way around. Then I plane a scrap of similar grain and color to l,l!-in. thickness and tape it over the opening so that the grain closely matches the solid stock. I turn the entire unit over and spray a latex paint through from the back to give me the exact shape of the check, then I cut, file and sand the " plug" to a perfect fit. After gluing and filling in from the back for support, and sanding, it will be hard to spot this easy repair job. -Dan Quackenbush, Olathe, Kan.
Making chisels
One source of steel for making special tools is the local junk yard. High-carbon steel can be found in auto leaf springs, spring-tooth harrows, bed rails and many other things. You can determine the type of steel, or at least its relative hard ness, by trial and error with a file or a hacksaw: If you can cut it or mark it with relative ease, then it is not what you want . I needed several mortising chisels, and old bed rails lent themselves to this type of tool. Bed rails are usually l,l! in. thick and in. across the right-angle flats. The rails can be cut with a hacksaw, but you will use a lot of blades. They are easy to cut if you first remove the temper by heating with a propane torch 'wherever you wish to cut. First I laid out the design for the tang and sides of the
FO R F R E E I N F O R M AT I O N , W R I T E :
Lion Miter Trimmer
R R - 2 , Box 1 80 . W i n dsor, VT 0 5 0 8 9 . ( 6 0 3 ) 6 7 5- 2 1 0 5
1112
__________________________ ________________________________________
Name
Add ress City
L
State
Zip
� 17
METHODS (continued)
Designer
Craftslnen. rgra egrees Certificate of mastery and unde
&
duate d
.
Studio Programs in: Metal Working; W ood Furniture Design; Ceramics; Weaving; Jewelry; String Musical Instruments; Textile Printing Dyeing.
& Goo;
Our faculty includes: Pat Dunning; Vincent Ferrini; Gwen-Lin ; William Sax; Richard Hirsch; John Kirk; Alphonse Mattia; Jere Osg ood l; Dorian Zachai. Barbara Wallace; Donald Warnock; Fred
Wael
The program requires concentrated studio work, courses in design, art history and business. Admission requires previous experience and portfolio review. For further in(oonation, write: Boston University, Office of Admissions, 121 Bay State Road, Boston, Massachusetts Program in Artisanry. Dept. . 02215. Or call (617) 353-
2300
FW,
ranklin Institute of Boston.
Boston�University Affiliated with F
Wlye QLenturu ®lb �umbtr Source Dlitly New 1JlIeus
For over 1 00 years. we have been cutting the finest Quality hard woods. veneers and turnings for craftsmen like you. Summer Specials until Aug . 31 st 50' 50 ' 50' 50' 50 '
2" 1
Genuine Honduras Mahogany Black Walnut Andiroba . Red Oak . . . . . . . Yellow Poplar .
"" . •
1"
1" 1
.........
.
Reg.
Sale
$ 1 .85 2.25 1.10 1 . 20 1 . 07
$ 1 .55 1 . 98 .89 1 .10 .87
For ordertng and complete prod uct information send 25' to: ---'" cAmericanC\Varlcrafte ""'--Dlvtslon of Hartzell Hardwoods. Inc. .rs Esrablished 1875 P.O. Box 919 Piqua, Ohio 45356
Clamping with bedsprings
TOOLMARK WOOD LATHE DU PLICATOR Features Quality
&
Old bedsprings make excellent-and cheap-clamps for hard-to-clamp jobs, such as clamping veneer on curved sur faces. They can also be used for small solid wood patches. Springs can be cut to different sizes, then bent to put pressure in the exact spot needed. A piece of Saran wrap and a block of wood placed over the veneer will give more even clamping pressure, without marring the work. A caution : Bedspring clamps can suddenly spring off, if wrongly placed. -Robert S. Fn'edensen, Winston-Salem, N. C.
Precision
Write for Free Literature TOOLMARK CO. 6840 Shingle Creek Pkwy Mi n n eapolis MN 55430
& Compare
(61 2) 561 -42 1 0
$285.00
,
FOB Mpls
R EA L WOO DS DIVISION
BROOKSIDE VENEERS,
LTD.
_______ __________________________
Flattening cupped boards
Complete selection exotic h ardwood veneers - from o u r architectural inventory M ail O rder - Retail
Send for our catalogue 5 0�
Your own collection wood veneer samples post paid
$2.00
Personal Attention given to every order
107 T ru mb u ll Street, Bldg. R-B
18
Elizabeth, N .J. 07206
It is difficult to flatten a cupped board with a thickness planer (" Q&A , " Winter ' 7 7 and Spring 78 because the downward pressure of the feed rolls will press out much of the cup, thereby not allowing the planer knives to flatten the board. As it emerges from the planer, it simply springs back to its original cup . To counter the pressure of the feed rolls, I tape wooden strips to the concave side of the board. My method is designed for a planer with a single cutter positioned above the board as it passes through the machine. First run the board through the planer with its concave side up to obtain an even surface along the edges that will make
' )
carving blocks
L
blade , then I roughly cut out the blank with a hacksaw. I fin ished shaping the tool with a bastard and second-cut file, leaving the cutting edge until after the handle was driven on to the tang. The handle can be bought or turned on a lathe, or shaped by hand. To keep the wood from splitting, I used �-in. thin-walled electrical conduit for the ferrules, and a common washer on the shoulders of the tang. I predrilled the hole and drove the handle onto the tang. Then I filed the cut ting edge to shape and tempered it. My method of tempering the cutting edge is adapted from a technique I learned from an old blacksmith. First heat the metal to cherry red, place the tip in cold water for a few sec onds , then file across the beveled cutting edge until a straw color appears. Then immediately and completely immerse the metal in cold water. You will have to use trial and error to get the right hardness. The propane torch is not hot enough to temper a complete cross section of bed rail. When a furnace or an acetylene torch is available, you can make larger tools such as socket chisels and mortising chisels from bed rails and auto leaf springs. I use a tapered pin in a machinist' s vise as a form for the socket. By hammering and reheating it is possible to form the socket around the pin. Then I turn handles of hickory wood to fit the socket. First drive the handle into the socket, then shape the cutting edge on a grinder and with files. Finish by tempering and polishing. -Lester E. Rishel, Belle/ante, Pa.
�
MEmODS (continued) the next step easier. Now set a straightedge across the board, as shown , to determine the correct thickness for the wooden strips. It is usually easier to use several short strips than one long one, especially if the board is very long or irregularly cupped. With reinforced (cloth-backed) tape, fasten the strips to the board in the area of greatest depth of curvature. Wide masking tape will also work. Now run the board through the planer with the convex side up. The wood strips underneath will prevent the downward pressure of the feed rolls from flattening the cup. Thickness-plane until the con-
. -� -.J
2
1 Cupped board
Run concave side through planer
� 4
T u r n , plane convex side
3 Tape on strips
5
6 Plane concave side
Turn, remove strips
to flatten board
vex side is flat, then remove the tape and strips and run the board through again, concave side up, until the concave side is also flat. -Dwight G. Gorrell, Centerville, Kans.
,:r ,;. I�
_
Ilt - '",- ""
�II � I � ... d �� �
-�:-:?-
... .
�r
7� :I;t FREE I LLUSTRATED CATALOG Over 40 different styles in a complete range of sizes - available thru a l l leading tool d istributors.
ADJUSTABLE CLAMP COMPANY THE
Marking tips
C LAM P fOLKS
431 North Ashland Ave., Chicago, I I I . 60622
Old furniture that is to be taken apart, repaired and re assem bled must be marked so that the pieces can be easily identified . Since surface marks will be obliterated by strip ping and refinishing chemicals, it is best to use indentation marks. I mark all pieces before disassembly, and always on the underside. I mark only one end of the male / tenon member close to the female / mortise member. I use one set of chisel marks with the grain , then one set across the grain, then tiny nail-set marks. Next I use marks or any combina tion of the above. -Price G. Schulte, St. Louis, Mo.
X
8%"
Don't just buy a woodworking machine BUY what the machine can realty do INCA-PRECISION SWISS STATIONARY POWER TOOLS
wide jOinter/planer (iUustration)-12,OOO vibration free cuts per min ute. Will handle hardest teaks to balsa woods to glass clean finish. Optional thicknessing attachment permits board thicknessin g from 2"''' ' /.0' max. e o . Five other indusfrial quality
to
min. to absolute perle ti n
machines, deSigned for precision production and priced for the perfec tionist craftsman, hobbyist and cabinetmaker. TWO YEAR WARRANTY.
Removing broken screws
I ' m sure we have all broken off a screw head while twisting the screw into a tight hole. It is hard to remove the screw without damaging the piece . One remedy that I find works well utilizes two simple plug cutters. With one plug cutter, bore out a hole around the broken screw shank. If the screw is large and runs deep and cannot be snapped out with the plug, you can chisel away the plug and grab the shank with pliers. Be careful, however, not to damage the rim of the hole. Once the screw and plug are removed , you can fill the hole with a plug made with a cutter two sizes larger than the one used to cut the original hole. This method is better than using a dowel as a plug because the fit will usually be much tighter, the plug will be less visible since its grain will match that of the original piece, and the screw can be resunk across grain instead of into the end grain of a dowel. -john Rocus, Ann Arbor, Mich.
Ball-bearing collars
My wood shaper has a Yz-in. dia. spindle. In using spacer thrust collars for irregular edge molding, I found that the edge of the wood gets burned from the friction of the collars. I purchased about a dozen Yz-in. I . D . x 1 �-in. O . D . sealed
lOY." combination JOinter/planer with automatic feed thickn.._. 10" bandsaw for w ood , non-ferrous metals, plastiC. 9 blade selections, 6Y." depth of cut. 10" circular saw 3�" depth of cut. Attachments to perform 15 addHional opera tions. r circular saw 2'/32" depth of cut. Same attachment. as 1 0" saw. V E RTI CAL SPINDLE SHAPER, 3 s .
peed
See your local Home Improvement Center. Hardware or machinery dealer or write Anson Industries Inc. for information of an INCA dealer nearest you.
ANSON INDUSTRIES INC. Dept. West Cypress Street, Glendale Calif. 91204
MO 414
Please send me the INCA precision s1ationary power tooi catalog and price sheet. I enclose for first class postage and handling.
$1.00
_______ ____ __________ _
Name City
Address st.
Zip
Dea/er Information Upon Request
19
METHODS (continued)
�SOlld COllar � Ball beanng
Finish it with the finest. . . FREE CATALOG gives wood staining and finishing tips. Send self· addressed, stamped (46¢) envelope (9x12") to Deft, I nc., Dept. FW, 17451 Von Karman Ave., Irvine, CA 92714.
Work held againstIS collar.
INDUSTRIAl STYlI
ball bearings, % in. thick. Next, I machined collars to half a thousandth under the outside diameter of the bearings. The O . D . of the collars were in steps of in . , starting from in. (the collars are thinner than the bearings) . Next, I pressed a bearing into each collar, using the vise to keep the surfaces parallel. It is important to use a solid collar that matches the inner ring of the ball bearing above and below the assembly, so that when the shaper nut is tightened the tension will be only on the inner ring-the outside will float. When the wood is pressed against the outside of the assembled collar, the out side perimeter stops rotating and only the spindle with its bearing rotates. I have used a small, thin washer on each side of the bearing, which permits the same freedom. -George P. Calderwood, Long Beach, Caltf
11/4
For Fast, Economical and u n iform Appli cation of white or yel l ow cabi net g l ues and contact cement. pkg . of D i fferent S ize S preaders. Postage & H a n d l i n g . DAKA, R . D . FLORAL ROAD, F L E M I N GT O N . N . J .
1
(I) Qa: � 0 c:Q •
(I) t!) 0 �
3 $1 .50 + $.50
#8
08822
Sunshine Sawmill
a group of woodworkers with a cooperative Sawmill. Thousands of Feet of Unusual & Usual Appalachian Hardwoods No Order Too Small or Too Large. SUNSHINE SAWMILL RENICK, W. VA. 24966 CUSTOM SAWING Free Catalog .
%6
Planing end grain
(IJ r� tJ:l (IJ •
tJ:lr0 n:;J:: (IJ
I used to cringe at the thought of sending end-grain slabs through a power planer. I do it often now and end up with cutting boards few people can bring themselves to cut on. Scrap pieces from the table saw are jointed smooth and glued together side to side along the length to form a laminate of different kinds of wood-the more species the better. This laminated plank is planed down until smooth and then crosscut into strips on the table saw (2) . The strips are stood up and then glued to each other. One can shift every
(1)
WOODTU R N I NG SCHOOL
BEGINNERS AND EXPERIENCED TURNERS ARE INVITED FOR TWO·DAY WORKSHOPS WHILE GUESTS AT OUR HOME IN SOUTHEASTERN VERMONT Learn and practice techniques for bowl and spindle turning. Emphasis is on the " cutting" method. but " scraping" is not ignored . OlTered throughout the year. With a maximum of two students. we adapt the
ood .
program to your needs. The turning is fun and the food is g
While here you will turn o n the MYFORD
lathe
which
we
im port from England and stock
t(>r sale. Please send
20c
for full details.
RUSS ZIMMERMAN RFD 3, BOX 57A PUTNEY, VERMONT
20
11534&
other strip a bit for a checkerboard effect (3) or line them all up straight. At least three bar clamps are used for each gluing step. Then run the slab through the planer until it is smooth (4). Then round the corners, bevel the edges, sand and finish with mineral oiL When the oil hits that end grain it will have been worth the effort. Checkerboards may also be made in this way, using heavier stock. Only with experience have I been able to estimate the size of the finished board-it varies directly with how thick it is made. It helps to have a sharp planer but no matter how
sharp, some of the trailing edge is going to be chewed up. This is to be expected and must be compensated for, espe cially when making checkerboards. -James B. Small, Jr. , Newvzlle, Pa.
•
Grinding knives
POW E R MAT I C
100
MODEL TH I CKN ESS
Nicked jointer or planer knives can be ground straight and true by making a rest that will hold them off the radial arm saw table. Then mount a stone in the saw and draw it back and forth over the knives. Another way is to mount a stone in the table saw and slide the knives back and forth against the miter gauge. -John Owen, Isaacs Harbor, N.S.
1 2"
PLA N E R
With Optional Sharpening Attachment
Lag-screw tap
For occasional use, an ordinary 2-in. lag screw can be made into an effective wood tap in smaller sizes. Use a triangular
Woodshop Specialties is a stocking d istributor for POWE R M A T I C and other q ual ity stationary woodwork ing machinery offering f u l l service and competitive prices. We also deal in reconditi oned mach i nery.
file to notch the bolt along about 1 in . Tilt the file to get more rake on the cutting edge. See "Wood Threads" (Spring ' 7 7 , pp. 2 2 -2 8) for making dies for wood. -Jim Richey, Houston, Tex.
Mounting flute blanks
Those of us with limited equipment and money sometimes need merely to think a little harder than those with the equipment we lack. In "The Flageolet" (Fall ' 7 7 , pp . 80-8 1 ) , Kent Forrester advises mounting the drilled blank o n the lathe with chuck-mounted abrasive cone centers to turn the flute to shape. Those without a chuck and abrasive cones can use this easy trick: Turn a I -in. blank to the diameter of the bore, leaving about 1 in. at each end square. Cut this pieee in
� �
/ij
"IMOODSHOF SFEC:I:ALT:I:ES P.O. Box 1013 East M iddlebury, VT 05740 802-388-7969 • • LATHES . PLANERS . ARBOR SAWS · SHAPERS · SAN D ERS D R I L L PRESSES . BAN DSAWS . J O I N T E RS · RADIAL ARM SAWS
Quality hardwoods for the serious woodworker
��� Turn to Inside diameter of flute bore
Cut In center ond ,hamle, end, Insert ends in flute blank and remount, using same center marks
�-..:�..v
half, chamfer the round ends and insert them into the bore of the instrument. This assembly can be remounted on the lathe, using the same live/ dead orientation and the same spur indentations. If the live end slips, I suppose masking tape would solve the problem , but I found I didn ' t need it. -Bob Raiselis, New Haven, Conn.
Please send me your catalogue and price list. Enclosed is for postage and handling.
Easier than pumice
Address
Scotchbrite (an abrasive plastic wool) makes a good finishing material . It's easier to use than pumice and oil, and can be used dry so that you can see what you're doing. It' s inexpen sive and durable, but, being soft , is not as good as abrasive paper for taking off high spots. Scotchbrite is available in supermarkets or in various grades from welding supply houses. -Edward S. Taylor, Lincoln, Mass.
50¢
Name
City
______ ____ ____
Mail to:
State
Zip
Ruston Lumber & Supply 311 W. Mississippi R uston, La.71270
21
'�-in-1 * workhorse" molder, planer, edger...
Q
&A
____________
Consulting editors A . W . Marlow and George Frank invite questions from readers about cabinetmaking and fin ishing. We also encourage readers to join the discussion with their own an swers to problems raised in this column, for there' s always more to learn . Write Q&A , Fine Woodworking, Box 3 5 5 , Newtown, Con n . 06470 . (For period furniture patterns, consult our survey of plans in print, Summer ' 76 issue.)
Finishing In the article "Elegant Fakes " (Fall '77, p. 71), George Frank refers to a walnut stain "brewed with some soda ash or a bit of lye. " Could we have complete directions? Smith, Washington, D. C. You can dissolve walnut crystals (also called cassel extract) in warm water. The more concentrated the solution is, the darker your color will be. This dye will have more penetrating power if you add to it some commercial ammo nia (about one pint to a gallon of dye) , or some soda ash, also called washing soda or sal soda (about 3 ounces to a gallon of dye) , or some lye (about Yz teaspoon to a gallon of dye) . Of the three, ammonia is the best for general use. - G.F.
-T.
Convert waste and rou gh-sawn material to dressed l u m ber, free of wave and chatter marks. Plane
14" wide. Plane 1/16".
boards u p to down to
Qu ickly switch f r o m planing or edging to molding. Select from
41 sets of stock mol d i ng k n ives.
Use for picture frames, m i n i a
ture doll furniture, models, dozens of other workshop tasks. *As described by Popu l a r M e c h a n ics, N ov e m b e r , 1 9 7 6 , page 1 28.
...
WI L LIAMS
&
H USSEY MA C H I N E CO RP.
DEPARTMENT 5C, MILFORD, NH 03055 TEL 603-673-3446
O R D E R N O W . Satisfaction guaranteed. I enclose check or money order in amount
$
_____ ____.________ __________ my
Charge MASTER CHARGE
o
(W
0
VISA
Give card info & expire date. & H Molder·Planer will be shipped to you from
New Hampshire via truck; wI. 84 Ibs. Pay shipping charge upon receipt.)
o o o
Handfeed Model W·7
Name
Street Address
22
@ $287.00 @ $385.00 @ $445.00
Power Infeed Model W·7PF
Power In·and·Outfeed Model W·7S
I read about gum benzoin (Fall '77, p. 70) and I have called every chemical company in town. I would like to locate some tfyou could help me. - Orvtlle L. Stucker, Wichita, Kans. Any good pharmacist can supply you with tincture of benzoin, which has some of the perfume I wrote about. He may also be able to order for you some unrefined gum benzoin . - G. F. I would appreciate any information you can furnish me regarding the best method ofobtaining a naturalfinish on Indian rosewood. I intend to apply the finish to a carving of a mallard duck and I want the natural beauty of the rosewood to result from the finishing process. -J. McCoy, Palos Verdes Est. , Calif. The best method of obtaining a nat ural finish on Indian rosewood , or any other wood, is to apply one to it. In other words, take clear or waterwhite gloss lacquer, apply two, three or four coats to the wood, and that is it. Of course, before finishing your wood has to be perfectly sandpapered and dust free. Each coat of lacquer-whether ap plied by spray or by brush-must be thoroughly dry and sandpapered again with finer and finer grit before you ap ply the next coat. Some people use as many as 1 0 to 1 5 coats. The final rub-
bing should be done either with the finest steel wool you can find, or with water and pumice stone. You may fol low this up with a light waxing, pol ished up with wool. - G. F.
I have recently purchased an old house in which the den walls are covered with cypress. It appears as if the walls were originally sealed with a thin coat of clear varnish. Where pictures have hung, the wood is lighter in color than the remaining walls, which have darkened through exp osure. How might I blend these lighter spots into the remaining wall? -Furman B. Riddle, Jr. , Greer, S. C. There is no simple answer, although someone specializing in photographic chemistry might be able to help you. My approach would be the French one: .. Aux grands maux les grands remedes" (For big problems, strong remedies) . I would take the boards off the walls and run them through the planer, taking off in. Then sandpaper them and put them back. In the long run this may be easier than working with chemicals toward a very uncertain solu tion. Good luck. -G. F.
�
I glued Y40-in. rosewood veneer to a base, sanded smooth, then filled with an appropriate colored filler, let dry, sanded smooth, then sprayed on Vara thane satin finish. The problem is, it wouldn 't dry-it always remained tacky over most of the area, especially the darkest area. Next I tned a sample as follows: sanded, cleaned with alco hol, sanded again, filled as before, sprayed with Varathane. Some areas were still tacky. What's the problem? -Paul Doty, Rolling Htlls Est. , Calif. Your problem-I guess-is the se quence of finishing products that you used . The culprit is probably the filler. The remedy with the greatest chance of success is this: Wipe off the present fin ish with a rag soaked in gasoline. Let dry, repeat once. If the tackiness is gone, you are on the right track. Spray on the wood a thin coat of fresh orange shellac, using lots of air and little shel lac, so it dries practically as you spray. Let it dry overnight and repeat, this time a bit heavier. The two coats of shellac should seal the finish already on the wood. After proper drying and light sanding, discontinue Varathane and use instead a good grade of spar varnish (such as McCloskey's Spar Var nish-a phenolic alkyd-resin varnish) as recommended by the manufacturer. If wiping with gasoline does not remedy the tackiness, I am afraid you will have to wash the present finish off
Q
& A (continued)
and start again. If such is the case, since you have a spray outfit, alcohol-proof lacquer is your best bet, used as per manufacturer's direction. GF Using veneer that thin, chemicals in the glue could seep through to the sur face. Try other glues. Also, you say " appropriate filler" in an offhand way. This could be the key to your problem . Try other fillers, or none at all. Try some other finish. -A. W. M.
-.
I have a coffee table made from a large slab of oak, bark and all. I sanded it smooth and applied Duroseal. It looks fine now except for near the center and one or two knots near the perimeter, which are dull and gray. Another coat of Duroseal makes the gray disappear, only to reappear when the finish has dn·ed awhtle. How do I seal in whatever that stuff is, without going to an on the-surface finish, which would impair the natural good looks of the table? -James}. Lewis, Birmingham, Ala. I can only compare your problem to knotty pine, which will discolor over knots unless a build-up of white shellac is used on problem areas under the de -A. W.M. sired finishing materials. I am almost certain that your prob lem is not of finishing, and no finish ing product will solve it. If I interpret your description correctly, you are try ing to finish a piece of wood that is not properly dry as yet. The remedy is time . Let your wood breathe, let it get rid of all moisture, and your problems will be G over.
-.
p.
I have come into possession of an old dentist's tool cabinet made from oak. The original finish was stain and var nish, but it has since been given a coat of green, then white, paint. Previous attempts at stnpping oak have resulted in the wood turning grey. Can you recommend a stnpping matenal, either manufactured or homemade, that wtll not discolor the wood? -Jack B. Larson, Negaunee, Mich. Generally speaking, there are two kinds of paint removers: the flammable type and the nonflammable type. I ad vise you to use the flammable type, since it will not affect the color of the wood. Do a thorough job and, if you care to, do a final wash with lacquer thinner and / or alcohol . -G.P' I made a m odtfied Parsons-style dining-room table of supposedly dry oak. I sealed the underside with wood sealer and used liquid grain filler, then finished with many coats of Watco The problem is that after a satin year the oak is developing longitudinal
011.
Heres 33 hardwood reasons to send fur our sam�e �ck. Wonny
Chestnut, Cherry, Cocobola, Black Ebony, Ash, Benge, Birch, Bubinga, Macassar Ebony, Ekki, Greenheart, Holly, Honduras Mahogany, Hard Soft Maple, Narra, English Brown Oak, Red Oak, White Oak, Paldao, Padouk, Poplar, Purple Heart, Brazilian, East Indian Honduras Rosewood, Sugarpine, Teak Brazilian TuliP, American French Walnut, Wenge, Zebra.
&
& &
Our sample pack can introduce you to hardwoods from around by 6 inch lumber samples are large the world. These !4 by enough to help you identify hardwoods and large enough to finish too. We've even included some tips to help you compare hardwood finishes. Hardwoods can make your woodworking world more exciting. You'll see how Thai Teak, .or Cocobola, or Black Ebony can bring its own uniqueness to your woodworking projects. If you want to know more about hardwoods send for our lumber sample pack. If you already know about hardwoods send for our catalog.
2
Heres 1 reason to buy these hardwoods now. The �rice. 5/4
4/4
ASH TEAK . BLACK EBONY MACASSAR (stripped) EBONY EAST INDIAN ROSEWOOD WHITE OAK RED OAK AMERICAN WALNUT SUGAR PINE CHERRY
8/4
1214
$1.35bdft $1.62bdft $2.95bdll 4.00 5.30 9.70 10.70 9.50 10.50 6.00 5.25 2.50 1.90 1.45 2.45 1.40 1.85 2.95 2.70 3.75 4.50
$1.30 bdft 3.90 8.70 8.50 5.00 1.35 1.30 2.50
16/4
$3.75bd ft 4.60 4.55 4.75 5.00
$10.00 each. TERMS. Minimum per species, 50 bd ft by the board measure. Maximum per species, 100 bd ft by the board measure ( except lignum vitae boards). All FAS kiln dried. All available for shipment. Net payment required with order. We ship freight collect. Sale ends September 1, 1978. LIGNUM VITAE BOARDS
Ya 6 x 24 (approx L 5 board lnin. 10 board max.
CUSTOM DRYING SERVICE AVAILABLE.
Call or write for details.
r - - - - - - - - - - - - - - -- - - - - - - - - - - l
John Harra Wood & Sup�ly NY 10011 39 West 19 Sf.. New 212/741 -0290 Co• o Please send me your sample pack. Enclosed is York ,
$18.00.
o Please send me your catalog. Enclosed is $1 .00.
_____________________________________________________________________________________________ __________________________ Name
Address
L
City
State
Zip
!;
" <Xl
2
�
23
Q
& A (continued)
cracks. What type of treatment and finish can I use to keep the woodfrom developing cracks? -Robert Schneider, De Ridder, La. There is no finish that can seal mois ture permanently in the wood. You are paying the penalty for not using prop erly dried wood . I am sorry, but I can not help you . G P.
-.
For QU
Cabinetmaking
ALI TY
woodworking tools and parts . Many hard-to-find. A unique collection of Old Fashioned cut nails guaranteed to charm a l l i nterested i n the memorabilia o f E a r l y American building. Included in the package is a description of the history of Cut Nail making in America.
Also distributors forGreenlee Tool Co. Wetzler Clamp Co. Wisner Tools
20 Nail Kit $3.00 ppd. Mass. residents add 5% sales tax SEND FOR OUR FREE CATALOG TODAY
$1
Send for current catalog. Visitors welcome by appointment. Call Bart Slutsky at
(2l2) 242-5815 76 9th Avenue Suite M-2 New York, N. Y. 10011
TREMONT N A I L CO.
P.O.
Dept. FW68 Wareham, Mass. 02571
Box I I I
I have a problem with a dresser I've been but/ding. During construction, the dresser was movedfrom a concrete butlding to a cellar. The cellar is com pletely furnished and equipped with electric heat. Within a week, the sides ofthe dresser warped, bowing into the dresser considerably. -Hal B. Helms, Orleans, Mass. You have moved the dresser from a damp , unheated building to an exces sively dry place and have failed to pro vide equalizing dry air circulation on the inside surfaces. To get the sides back to normal , remove the drawers and back, soak a pad of newspapers in water and devise a method for holding it against the outside surfaces. Repeat as necessary, until the panels return to a flat condition. -A. W. M. I would appreciate it t/ you could give me complete information for using a router to cut inlays and routing the re cess. Ifyou happen to know t/there is a book on the subject, please give me the title and author. - Wm. del Solar, Westmont, I am not sure what you mean by us ing a router for cutting inlays. The closest publication I can think of would be one on marquetry by W . A . Lincoln, The Art and Practice ofMarquetry. For information on routing out inlay re cesses, try my Classic Furniture Proj ects. Both should be available from Constantine, 2065 Eastchester Rd . , Bronx, N . Y . 1 046 1 . A . W. M.
V.
Binks brings your project to a flawless finish.
15
Sinks Model spray gun combines the spray precision of an airbrush with big gun versatility. Sprays stains, l acquers, enamels, shellacs . . . pigmented or clear coatings of almost any composition. Remarkably easy to handle and control . Fully adjustable spray pattern. Quality construction and performance. Come to Sinks for anything in spray finishing. We have a way with wood.
B l n KS
9201
24
W. Belmont Ave., Franklin Park,
IL 60131
71 87
III.
I have had some problems with a butcher-block cheese board. . . . I lami nated three types of wood: maple, cherry and walnut. After sanding smooth, I then ot/ed the board using 600-gn't sandpaper and it was perfectly flat. Several days later I noticed that the board was wavy. It seems that the otl penetrated each wood differently . . . . I checked a piece of waste cut off the same board and it was flush across all three species. Is it the at/ and is there a solution? What's the best type ofglue for a butcher-block cutting board? -Po Pestalozzi, Port Washington, If the waste stayed flat, troublesome conditions point to the added work
N. Y.
Q
& A (continued)
done on the board. I question the use of 600-grit paper. If all the sanding was done by hand, try a wooden sanding block (4 in. by 3 in .) covered first with 60-grit garnet paper stroked across the grain , followed by with-the-grain strok ing. Repeat with 90-grit. Finish with nothing finer than 1 20-grit finishing paper, stroking only with the grain and always using the block. Oil would not cause swelling. If you choose to make repeated oil applications, sand between coats with 7 / 0 finishing paper wrapped around the block. Be sure to have smooth , straight jointed surfaces. Any brand of resin glue is sufficiently water resistant. Clamp tightly and leave over -A. W. M. night in clamps.
Have you ever heard ofanyone putting moisture back into air-dried walnut be fore using it for cabinetry? -james H. Dew, jr. Vandalia, Ohio Never heard of that need, the reverse is usually true. To make the desired correction, place lumber in an under ground unheated room with little or no air circulation for a reasonable time one or two months. It will take that long to get a uniform moisture content throughout . - A . W. M. I recently tried turning a walnut bowl in which I inserted birch dowels and had problems. I got chipping of the end grain next to the dowel-the wood broke out in little pieces, leaving holes. It didn 't matter whether I used a small or large gouge, or small or large round nosed tool. Speed seemed to make no dt/ference either. Each time the wood chipped I cut in beyond the dowels, making a smaller bowl, and tried doweling again. The third try left me with chips and a bowl about 3 in. in diameter, at which point I threw the wood away. What is going wrong? -Henry Fisher, Columbus, Ohio It is hardly possible to eliminate tear ing completely because the dowels do not fit closely enough to the hole wall. If they did, it would be impossible to glue and drive them through the block. To do the best possible job, hone your tools to razor-sharp edges and have the lathe turning at high speed. -A. W. M. When attaching the solid wood frame to the plywood carcase during butlt-in cabinet construction, it is unsightly to have filled natf holes showing on the fro nt surface. Gluing the frame to the carcase isfeasible only t/the frame is at tached pn'or to installation, otherwise one can 't clamp. Reference was made to a blind natfing technique in james French 's question (Spn'ng '78, pp. 28-
Harpsichord & Fortepiano Kits
Model G·22
Delm horst Wood Moisture Detector SOL I D STATE COM PACT L I G HT WEIGHT D I R ECT R E A D I NG 6% TO 30% WOOD M O I ST U R E RANGE
This is an exce l lent a l l-purpose i nstru ment for use in plants, m i l ls, or by the i nd ividual craftsman. I t is norma l Iy sold with t h e Type 4E Electrode, 4-pin, 5/ 16" penetration. How ever, any other e l ectrode can be used with it, either i n place of, or in addition to the 4E, thus making i t a very versatile, efficient tool in the hands of anyone con cerned with the best u t i l i zation of wood. O t h e r D e l m h o rs t w o o d moisture testers include the pocket-size Model-J series and the standard wide-range RC-IC and RC-2.
For 20 page brochure :
All i n q u i ries are welcome. Free l i terature.
FRANK HUBBARD
elmhorst Instrument Co.
HARPSICHORDS, INC. 185A-W Lyman Street Wrutham, �ass. 02154
908 Cedar
201/334-2557
Street, Boonton, New Jersey
07005
�.
If you thoug ht IISwiss-Precisionll cou ld only be found i n watchmaking, then you don/t know about our power tools. Only you know how good your tools have to be. When it comes to woodworking machinery, they should be better than you are even if you're al ready an accomplished craftsman. Therefore, you owe it to yourself to
learn more about our Swiss-made line of I NCA stationary power tools which we sell throughout these 50 states. Ta ke the 10" Cabinetmaker's Saw, for example. It has a 20mm (25/32") arbor at the blade for strength and rig id ity where it counts. The ta ble castings are tough, precision m i l led a l loys and the g u ide ra ils are a i rcraft qual ity extrusions. All the major rotating pa rts are dynamical ly bolanced. The bottom l ine is a machine that takes h igher loadings and gives you less vibration with a truer running saw blade. I f fact, every one of our INCA saws, jointers, planers and shapers are built to quality standards which are becoming inGreasingly hard to find in this country. That's because they're made with the same pride of workmanship as the Swiss put into their watc. .h.es ' Ou r catalog is a good place to beg in your comparisons. We want you to be as good as you can get.
d.�.b
��
Garrett Wade Company, Oept.FW-6-8 302 Fifth Avenue, New York, N.Y.
1000 1
(National Distributionl D D
Gentlemen: Send me your INCA cotolog. Enclosed is $ 1 .
\
>� '-'>
••••••••••••••• ___________________ ________________________ Here's another $ 1 for your 108-poge catalog of qual ity hand tools.
, ..... .. .. v' '--\ � ""'
V-"/
Nome'
Addres,,, sCity
State
Zip
25
Q
& A (continued)
29) . I'd appreciate a description of this
technique and other suggestions to fa ctlitate attachment after the carcase has been installed. -RichardIreland, Chevy Chase, Md. F r e nc h ' s d e s c ri p t i o n is q u i t e understandable and cannot b e im proved upon. Two suggestions: If the solid wood fram e is thick enough, use blind dowels. A more solid construc tion would be to bore for wood screws, then counterbore for flush wood plugs. This is a decorative feature I often use -A. W. M. in good furniture.
Tools and Supplies I have a 4-in. drum that has an expand ing attachment for mounting 4-in. sanding drums that are 2 in. wide. These belts cannot be located and I'm hoping you can tell me the name of a company that would make me a few or where the matenals can be purchased. W. Peterson, Osage Beach, Mo. You have undoubtedly exhausted all sources of supply for this size sleeve , so contact your supplier for 2-in. cloth backed belting with a suitable grit number. Turn a 4-in. round spool of wood-and cut belting on a 30· angle to the exact circumference plus % in. for lap . Soak and scrape the abrasive from one end lap. When dry, glue and clamp between wood strips. -A. W. M.
-H.
�-5AMPLE5 with woodworkers Catalog
I I I I I I I I I I I
ENJOY woodworking more! Let this new Constantine Catalog-Manual help you build new furniture-refin i s h , restore beat-up cabinets, chairs, chests, tables faster, easier than ever before! Picture·Packed GIANT PAGES Find instantly whatever you need. Buy at money-saving prices - cabinet lumber, carving blocks, pipe briar, picture molding, cane, fum. hardware, clock kits, lamp parts, woodwork plans books, etc. Needed prod ucts found nowhere else!
100
&
Catalog
& Wood Samples Only $1
Dollar Fully Refunded on First Order Accept this offer to own fascinating set of 20 2x4 specimens of world's most glamorous veneers-Rosewood, Satinwood, Lacewood, Walnut, Mahogany, Purpleheart, Zebra, ·etc! Compare! Then identify instantly finest woods wherever yoU go!
Now
Mail ad for productpacked new money-saver Catalog
I I I I I I I I I I I
.... .. . ...._....,.�� \l�� _........_
I � Io I & 50¢ I I I I I ::::.:-============================: I a--.--;;.-;;.-;.. _ ;;;-;;.-�. ;;.-;;1 2065 Eastchester Road, Bronx, N. Y. 10461
Enclosed $1 for Wood Samples Woodworkers Catalog. 0 Catalog Only ($1 Refunded)
26
I am looking for a book or any informa tion on polishing brass and copper. I have trouble having black come off on the piece when I buffit on a dntlpress. I also need a typewn'ter platform that folds under the desk and spn'ngs up when needed. The type I am looking forfits into the bottom nght side where drawers would normally be. -Hap Aames, Lt"ncoln City, Ore. For buffing, try different grades of rag wheels and a coarse to fine rouge . For the typewriter platform , contact an office furniture supply house. They can o r d e r w h a t y o u w a n t fro m t h e manufacturer. -A. W. M
to a dullish red heat, then touched with the magnet. If the magnet sticks, it' s too cool. When the magnet ceases to stick to the steel , the steel is ready for quenching. " Suppliers to the metalworking in dustries have developed a broad range of excellent rust preventatives and re movers in recent years. Local industrial hardware dealers can give both general and special recommendations to indivi dual customers regarding these prod ucts. Look in the Yellow Pages under " Industrial Equipment and Supplies:' "The home craftsmen can blacken most steels with linseed' oil. The steel is first heated to several hundred degrees (too hot to touch but well below forg ing or oxidation color) . Then the lin seed oil is vigorously rubbed into the workpiece with an old rag. Care must be taken where tools are involved, lest their temper be ruined. A good idea is to wrap all cutting edges in wet rags be fore starting. "
Follow-up I am wn"ting in answer to the letter from Paul Lee (Spn'ng '78, p. 31). As an industnal arts teacher with certifica tion in spectal education, I've been teaching woodworking at the New
10112"
/:) �W THICKNESS
ER
SINCE 1937 K·Ll N E YAGER BALL BEARING CUTTERHEAD The perfect thlckpe,s planer lor cabinet makers, home workshops, pattern shops, boat builders, industrial training departments.
•
Solid cast iron construction 3 blade cutt"r· head steel knurled Inleed roll can be hand
•
cranked or power led
•
uses a ,/, H.P. motor
A low priced proven money saver
�1o
in any woodworking shop.
WOOD P LA N E R CO., I NC. Depl. 1 0 1 . 58 Jerome Ave. Bristol. Conn. 060 1 0
After I've tempered a tool made from scrap steel, is there any way to get an approximate measure of its hardness? What is the best matenal for prevent ing rust on tools-and for removing rust from tools? What is the chemical usedfor blackening steel? Capen, Granada Httls, Caltf Toolmaker Ray Larsen replies: " The best way to ensure proper hardness in heat-treating tools is to carry out the hardening operation properly. Many smiths keep a small magnet by the forge for this purpose. The steel to be hardened is placed in the fire, brought
-H.N.
S E N D F O R FREE BROCHURE
OLSON Precision Made
Wood Band Saw Blades Coping Saw Blades Scroll & Jig Saw Blades CustOIn Specialty Saw Blades Finest Quality. Highest Accuracy. Longest Cutting Life. Write Willard A. Nelson, SIs. Mgr. [I] THE OLSON SAW COMPANY
�.
"
A DIVISION OF BLACKSTONE INOUsrRIES. INC Bethel, CT 06801 • (203) 792·8622
Q & A (continued) Jersey Commission for the Blind and Visually Impaired for twelve years. With the use of specially adapted m easu ring tools , and s o m e re organization of one 's thinking, what a visually impaired person can ac complish is almost unlimited. I would strongly recommend that Lee investigate what services might be offered in the State of Caltfornia. Along with services and training, he may find that written material is avatlable in either tape or bratlle form. Lee could also contact the American Foundation for the Blind at 15 W. 16th St. , New York, 1001 1 and re quest a copy of their Aids and Appli ances catalog. In it he will find the nec essary measuring tools. I strongly recommend the telescopic ciick rule TS283 pictured on page 28 ofthat cata log. This is the only specialized tool that we have in our shop and I feel we have been quite successful. -Henry H. Bosch, Newark, N.J.
Offered by
Iron Horse Antiques North America's largest antique lOol dealer for the collector and craftsperson:
T- H H
Super Epoxy Adhesive -88
350
F.
Boxwood Plow Plane circa
American Classic
You'll find it listed in our most recelll periodical offer � n g over antic "e lOols and implements for use and IIlves(ment. Sene for a one year subscription, or for a sample copy.
/ $6
300
52.50
1 :1
adhere to moist surfaces and i s very easy to use even if y o u ' re inex perienced. Clear amber for mula forms virtually invisible joints.
1865
N. Y.
For Wesley (t1ye (Spring '78, p. 27) : Never use turpentine as a thinner for polyurethane. It produces a white streaking like the salt encrustation on a car in winter. The proper solvent is var sol, which will dilute urethane varnish without any complications. -K. Nancekivell, Thunder Bay, Onto
The finest wood binding epoxy adhesive on the market. T will cure at temperatures as low as without shrinking. T h i s strong, durable mix w i l l
I n t rodu ctory offer only.
P.PD. U.S. $6 .65 at. $1 0 . 50 gal. $31 .50 For more information on T-88 and other fine Chem-Tech products, write to:
pt.
Write for our latest BOOK CATALOG
Sixt y -four pages of hard-to-find boo ks about wood �' orking. ship building, metal workin g. fa rming. tex tiles. household utensils. Hundreds of titles on tradi tional crafts. their history. methods and tools. Send cellls to:
25
Iron Horse Antiques, Inc. 30,
Dept. F782, RD2, Poultney, Vermont 05764 Visit our sho p on Rte. H ubbardton, Vt.
Re Tom Jordan 's question (Spring '78, p . 29) : With all due respect to Marlow 's reply, wood with different moisture contents is one cause, but not the only cause, of a raised glue line. Another common cause is the cold flowing of the commonly-used white and yellow glues. The pressure caused by expanding and contracting wood, when applied to the glue in ajoint, can cause the glue to be squeezed out, thus causing a slight n·dge. The poorer the joint, the thicker the glue line, and the more the glue protrudes in time. -R. H. Norton, Shalimar, Fla.
A Ful l Feature Workbench at an Affordable Price! Made of solid rock maple, the Garden Way Home Workbench not only offers a spacious work area . .sturd i n ess and ex traord inary c l a m ping versatility. but is a fine precision tool itself that can be as helpful to you as having an extra pair of hands helping you i n your shop. Until now. quality work benches have usually been too expensive and too small. This huge lb. workbench with sq. f1. of work area is available d i rect from the factory at an incredibly price! U .S.A.
215
12Y, Made In
Re Q&A (Spn'ng '78, pp. 27-28): An tonius Stradivan'us didn 't make harpsi chords, and he never, never used shel lac on a violin. Even today, except in touch-up work, it is rare to find shellac in any high-quality violin varnish. -Jim Cave, San Francisco, Calt!
• Huge sq. f1. of work area (30" x 60"). • Solid rock maple construction Ibs!). • Rugged thick laminated top. • Our own "flip-over" design vises/turned one
Re gluing rosewood with plastic-resin glue (Spring '78, p. 29): It has been my understanding that casein glue is the best glue for ody woods such as teak and lemon. - Gene Anest, Southern Pines, N. C. Casein glue is a first cousin to the resins in performance. -A. W. M.
• •
12Y, 2"
low
(215
way. vise extends above the work surface to become a solid workstop. or. when used with bench dogs. the entire bench surface be comes the clamping area. When vise face is turned opposite way. the vise top is flush with the bench surface. Two large capacity vises with
18" long faces.
Bench dogs are round-they rotate to securely hold hard-to-grasp objects (round. oval or angular).
• Easily disassembles for moving. • Optional tool well and tool drawer available.
AVAILABLE III BUiLD-IT-YOURSELF KIT FORM TOO! Home Workbench c/o Garden Way Research Charlotte, 05445 VT
rT;-H:;;;;;;�C;- - - - - .,
____ ____
I I I YES, I I I I I I I s e L�
c/o Garden Way Research Dept. 81 1 1 8W CharloHe, Vermont 05445
please send me com plete details. specifications and prices including information on your Build-It-Yourself kits'
Name
Address City
.
��
I I I I I I I I I I ..J 27
FULL-SIZE PLANS
B U I LD B E DROO M AND FAM I LY ROOM F U R N IT U R E
BOOKS
______________________ � .
#448
ROO OR FAN BACK ROCKER
$9.00
" :'"" ::"
- = ..>, ,
"
A complete line of "OO·IT·YOURSELF" FURNI· TURE OESIGNS. Simple shop equipment and a basic woodworking knowledge allows you TO BUILD ANY OF AVAILABLE PLANS. PLANS ARE FULL·SIZE with bill of materials, perspective and exploded view drawing. EARLY AMERICAN, SPANISH and MODERN Sofas, Loveseats, Rockers, Beds, Dressers and Accessory items. Matching items in each group.
3-1-
-
O. BOX
DETA I LS
__
____ ..
A necessary tool for deburring and final honing of gun parts, medical instruments, woodwork ing tools, or anytime a precise amount of metal is to be removed. Each set contains one rou n d , square, triangle, and knife blade shaped file, all in a foam pack ed plastic container. FULL COLOR. MAIL-ORDER KNIFE AND STONE CATALOG AYAILABLE ON REOUEST.
1Slhuti4® 262
K N I F E & STO N E
Central Avenue
Hot Springs, AR 71 901
Please send me $1 3.95 each postpaid. CHARGE MY .
.
.D
File Set(s) at D Master Charge
VISA
_ __ __________ _____________ ___ ___
Interbank No.
Exp. Date
Accl. No. NAME
ADDRESS CITY
STATE
v D CATAlOG. ONlY
28
ZIP
8
t - 34
," ; -.:'>
TYPICAL JOINERY
DIREX On.IN
Y. YANG Typical joinery detads, reprintedfrom Ecke 's Chinese Domestic Furniture.
by George N . Kates. Dover Publications, Inc. , 180 Van'ck St. , New York, 1 0014, 1962. $3. 00 paper, 205 pp. C h ines e H o u se h o l d F u r n i t u re
Chinese Domestic Furniture by Gustav Ecke. Charles E. Tuttle Co. , Drawer F, Rutland, Vt. 05 701 , 1 963 . $35 . 00 cloth, 210 pp.
A � NSAS � FILE SET
Of
G [eKE
N. Y.
(§�® HARD
:
34
135
45 Fully Illustrated Catalog $1 .00 $1.00 Refunded with First Order DALCRAFT FURNITURE DESIGNS P. 746 DEPT. FW STARKVILLE, MS. 39759
" rr"','
Chinese Furniture by Robert Hatfield Ellsworth. Random House, Inc. , 201 E. 50th St. , New York, Y. 1 0022, 1971. $75 . 00 cloth, 304 pp.
N.
A t first glance these three books , photographic and documentary surveys of Chinese furniture, would seem to be of most interest to collectors and deco rators. All, however, contain pertinent information for the designer/ craftsman in wood. The books cover hardwood furniture fou nd i n better Chinese homes , not lacquered furniture or pieces influenced by the West or ex ported. Most of the pieces are from the M ing dynasty ( 1 3 68- 1 644) and the Ch ' ing dynasty ( 1 644- 1 9 1 2) . Earlier ex amples are rare because of decay and the unusual Chinese practice of altering and converting furniture. The Kates book contains pieces that w e r e r e c o r d e d a n d m e as u r e d i n 1 9 3 7 - 1 9 3 8 in Peking by his sister, Beatrice M . Kates, and by Caroline Frances Bieber. Gustav Ecke produced
his book while on the staff of the Catholic University of Peking. Much of the furniture Robert Ellsworth displays is from his own collection. Just from their photographs these books inspire new designs. They document the range of Chinese style, from spare and subtle grace to the heavier Chinese " Chippen dale , " from ornate flanges to unusual laticework, including some carvings and the rare case of carved ideograms in the splat of a chair to record its history. More than a design source, these books illuminate the design process. The Chinese culture has persisted for several thousand years and the design of Chinese furniture has been slowly re fined down through the ages . Ecke pro vides insight into the design process in his well-illustrated discussion of the de velopment of the horse- hoof foo t . Tables were not originally a part o f the Chinese household . There was only a box-like seat or dais, using frame-and panel construction. Slow modification led to the piercing of the panel and then to the elimination of its lower por tion. The remaining panel parts were embellished with scrollwork. Later, fu sion of the upper rail and stiles with the scrolled panel created a more clearly defined leg. Finally the lower rail was eliminated and the scrollwork then be came the horse-hoof foot. This foot later influenced Western design and yielded the cabriole leg . E llsworth
BOOKS (continued) treats the chair in a similar manner and the photographs, some in color, are superb. Kates has a multitude of photos of lesser quality (the book is softbound) . He is more concerned with recording the pieces-including general descrip tions and outside dimensions. His dis cussion of the function of pieces in the household helps us understand some of the design features. For example, the central stile of a wardrobe, necessary to help lock it , was removable to facilitate laying garments out on the shelves. Sideboards had a row of drawers and a long-term storage space beneath that could be reached only by removing the drawers . Such features have applica tions today. The major interest for woodworkers in these books is Chinese joinery. Al though Chinese cabinetmakers were not held in high esteem-they were considered only artisans, not artists, a n d t h e r e are a l m o s t no s i g n e d pieces-they carried joinery t o a high art. Miter joints for framed panels and legs were locked together with a mor tise and tenon (sometimes a double tenon) . Glue was never used, except for veneering lesser pieces of furniture. Chinese joinery served many pur poses. The floating panel was used to compensate for changes in wood with age, climate and weather. But the Chi nese added refinements, including slid ing dovetailed battens across and un derneath the panels to stiffen but not restrict them. Other innovations in cluded locking scarf joints, and wedge shaped slide-lock tenons. Joinery was fel t to enhance the beauty of the furniture and was usually not hidden. The furniture could also be easily d isassem b led for transport . " Easily" of course assumes one knows where to start on these original Chinese puzzles. Ellsworth has a fine chapter on Chinese joinery. He owns many of the pieces described and disassembles them for the reader. An appendix for con servators and restorers details the prop er procedure for disassembly. And he describes the joinery in each piece. Ecke does not discuss j oinery i n detail but he has more complete il lustrations of the joints. More impor tantly, many pieces have scale drawings as well as photos. He also compares t h r e e d i ffe r e n t c o n s t r u c t i o n a p proaches: frame and panel, POSt and rail , and the more unusual hardwood interpretation of earlier bamboo con struction . He concentrates on tables and chairs. Of passing interest in these books are discussions of the woods used in Chi-
Natural Wood Finishing
famous
�,
�
S EALACELL 7.7,
'0) 1 - 2 - 3 Process 'b •
Penetrates wood, d u rable, long-lasting
• • • •
One of Europe's leading manufacturers of Woodworking Tools oilers:
• • • • •
Professional Carving Tools, i. e.
49
styles,
670
E l i m i nates d ust problems Works for fi rst f i n ish or refi n i s h i ng E n hances beauty of any wood Used by professionals and i nstructors
WOODCARVING TOOLS •
Protects and Preserves
Wi pes-on , No brush marks
varieties. These taols
are hand-forged from high carboned steel. light Pattern Carving Tools,
i. 12 e.
styles,
72
varieties. These lools
are hand-forged from high carboned steel. Chip Carving Knives
Firmer Chisels, Gouges and Mortice Chisels Turning Tools other hard-ta-find Woodworking Tools
MOST TOOLS ARE DELIVERABLE EX STOCK! For wholesaler and retailer only. No private sale. Please ask for our catalog.
GEBR. BUSCH P. O. BOX 1302 54
D 5630 REMSCHEID 1 (W.-GERMANY)
Join thousands of Americans-and from U.S. General's catalog. Enjoy ' Confidential" prices on hand tools, power tools, automotive tools, motors, handyman suppl ies -6,000 nationa lIy advertised name brand items at rock bottom prices. Save on the famous names you know and lIU',l-'''. '' Wiss, Di sston, Skil, Kennedy, Lufkin, Roc Black & Decker, plus many, many more. Thousands of serious m i nded craftsmen, m chanics, homeowners and hobbyists each send us $1.00 just to get this big 196·page catalog of fantastic buys on brand name tools, hardware, and accessories. Our bargains are so great, we ask $1 simply to d i scourage curiosity seekers. But really, the catalog is free. Because you get a $1 Cash Certificate to spend just like money! (Or, i f you're not 100% satisfied with the catalog, send the Certificate back to us and we' l l refund your dollar.) As a n "extra", you ' l l also receive with your f i rst order a lO·piece High Test Steel Dri l l Bit Set (worth about $3.00) absolutely FREE.
Who
buys
from U.S. General?
•.
Thousand. of Individual. and companle Here'. a partial lI.t of firm. from our cu.tomer lI.t: General Motor. Corp Ford Chry.ler IBM General Electric . RCA co Te..
1977·1978
• • .• •
•
low prices younoSame minimum orderforrequired!
.i .... FaI18
6,000 NAME BRAND ITEMS �---------------� V A.1441 I u.s. .V I I & I I purchase. I I I I I I �:� i I I I I I�----------------.I G E N ERAL SUPPL CORP., Dept. 1 00 General Place, Jericho, N 1 1 753 I e n c l ose $ 1 . Please send y o u r new 1 96·page l u l l y
.
illustraled Conlidenlial Tool Hardware Catalog. Also include a Certilicate worth $ 1 .00 on my first II I am not 100% satislied with the Catalog. my $1 will be immediately refunded.
n )
Address
City
___ ___
State
Zip
29
BOOKS (continued)
Finish Wood Like An Expert!
WATCO® DAN I SH O I L IIFive-ln-One" WOO D F I N IS H
O n e easy a p p l i c a t i o n p r i m e s , seal s , hardens, protects , beau t i f ies ! W i t h Watco you j ust WET-WAIT W I P E , and you have an elegant , extremely d u rable f i n ish that w o u l d please the m o s t critical profess ional . Watco p e n e t ra t e s d e e p l y creates a tough f i n ish I N S I D E the wood - makes wood up to 25 percent harder. Can't ch i p , peel or wear away l i ke a su rface coat i n g . Stai n s , scratches or m i nor burns usually are spot repairab l e . F o r comp lete i n format ion f i l l i n a n d m a i l t h e cou pon .
�--- --l rI -�;�����I�;������d ����; FW·SU8�;����:��:�� o a 9
·
ePt
I I I I I I I I
I Send name of nearest Watco Dealer I I Send free booklet "How to Finish I Beautiful Wood" . I I Name. I ee t
D 0
r SH
I C,ty Stat It_______ _ __ e
Zip
I
I I
_
1
__ __ __ A guide to the selection and use 0/ the world s
nese furniture. Their color and charac ter are the result of age , and they are hard to identify . Depletion of Chinese forests necessitated the expensive im portation of fine h ardwoods from Southeast Asia and India. Traditional names were used to describe the im ported replacement species. Reclaiming wood from earlier pieces was also a common practice. On this subject Ells worth is superior, with color plates of many of the woods. Of these three books, I recommend Ecke to readers interested in plans, joinery, history of design , and a good collection of photos. Kates has many examples and discusses the household use of the furniture. Ellsworth' s book has superb photography and the joinery and construction details of each pIece, but it is quite expensive. -Irving Fischman by Eldon Behr. Michigan Extension Bulletin #5 1 4, Michigan State University Bulletin Of /ice, Box 23 1 , E. Lansing, Mich. 48824. $0. 75 paper, 29 pp. Refinishing Furniture
This booklet costs only $0 . 7 5 . I know of very few such modest investments that would pay off better for the interme diate woodworker or for the beginner than purchasing this booklet and read ing it. Dr. Behr' s writing is clear and concise. His main subjects are cleaning off the old finish from the wood and applying the new one. This pamphlet will not revolutionize the world of woodfinishing, but it contains much sound and practical advice, some of which may be useful even to the more experienced woodworker. - George Frank by Drew Langsner. Rodale Press, Emmaus, Pa. , 18049, 1 9 78. $12. 95 cloth, $9. 95 paper; 288 pp. Country Woodcraft
Contains detailed listing of over 300 species and 1 5 5 full color illustrations of actual wood samples and their uses. r - - - - - - - - - - - - - - .. I I t 730, 606t t I I 666 I Please ship __ copies of the " Fi n e I I Hardwoods Selectorama" @ $4.00 per copy. I I Check enclosed for $ I I Name I I I I I Address I c. I I I � I State I Zip L _ _ _ _ _ _ _ _ _ _ _ _ _ .. FINE HARDWOODS/AMERICAN WALNUT ASSOC. North Lake Shore Drive, Suite
Chicago, I L
I
.
30
When a person decides to seek the sim ple life of the self-sufficient home steader, he must be prepared to devote a good many hours to making one wooden hay rake. Indeed, he will have to find considerable joy in it, for he must first discover how to choose and fell a suitable tree, how to buck it into logs and split the logs into bolts, and how to cleave the bolts into boards and poles. Then he can figure out how to join the handle to the rake head, form the tines and fix them in place. Drew Langsner is such a person , and Country Woodcraft contains much practical advice about how to do all of the above . Langsner and his wife ,
1 2"
PA RKS
T H I C K N E S S PLAN ER
• MORE THAN
40,000
IN USE ALL OVER THE WORLD The PARKS No. 95 i s a c o m p a c t , t h i c k n e s s planer that offers m i l l planer precision and ruggedness at a sensationally low price! Write for complete descriptive literature on the No. 95 P l a n er , as well as on PARKS wood·and metal'cutting Band Saws: Planer·Jointe r C ombination Machines: horizontal and vertical. manual and auto· matie Panel Saws.
sturdy
THE P A R K S WOOOWORKING MACHINE CO.
Dept. FW,1S01 Knowlton SI. Cincinnati, Ohio 45223 Manufacturers of Qualify Woodworking Machines Since 1887
t--
Rochester Institute of Technology Summer s ons
Ses. i ....
�
School for American Craftsmen
School of and Design
Art
Write for catalog:
College of Fine and Applied Arts June 26·July 28 and July 31 ·September 1 Ceramics Metals Wood Textiles Painting Prlntmakmg Communication DeSign HIgh School Art College of Cont inuing Education One Lomb MemOrial Dnve Rochester, New York 1 4623
FIX LOOSE CHAIRS
Chair-Loc "Swells" Wood S u re-acting liquid synthetic penetrates wood fibres, makes them S·W·E·L-L. Locks wood jOints tightly in place. Fixes loose chairs, rungs. legs: also dowels, tool and broom handles. Plastic squeeze bottle with applicator nozzle makes it q u ick, clean, easy. Over million sold in years.
2
20
CHAIR-LOC IS NOT A GLUE
Not necessary to take pieces apart to get everlastingly tight wood jOints. Used and recommended by antique dealers and cabinet makers. For oz. Bottle nd to:
3
52.00
$e
CHAI R-LOC, Dept. W278, P.O. Box 4 5 Lakehurst, 08733 N.J. residents add tax.
10e
N.J.
WOODWORKING
200 PLANS
A treasury of plans lor every home work· shop. school, library. t9 series of individually printed, easy·read drawings for beginner to advanced craftsman. Each series with or more complete plans.
t. 2. 3.4. 6.7.5. 8. 9.
Colonial Series Early American Gun Cabinets Spice Cabinets Wall Shelves Grab Bag (15 plans) Cape Cod Series Modern Series Outdoor Projects
tt10.2.t. t3.t4. tt7.t5.6. 18. 19.
Wall Accessories Wall Furniture Miniature Chests Wall Shelf Clocks Contemporary Series Old Salem Series Garden Projects Shaker Furniture Country Kitchen This 'n That (15 plans)
&
(t 0 seri$16.50 es $5 (40order desired series. $1.50 per 25¢.seriOe.sBox
FULL SET plans),
4
to
or
plans). Postpaid. Catalog Satisfac tion guaranteed. Write COLONIAL WORKSHOP, P Sacramento, CA 9 1.
4t032,
584
.
BOOKS (continued) Cherry - Oak - Wal nut Mahogany - Teak - Sugar Pine
and
many
more .
Our
prices and quality will please you .
No Mail Orders. Come to
our warehouse - pick and see what you wan t . Our stocks are large and varied .
Ask for Tom McCarthy INTERST ATE HARDWOOD LUMBER CO., INC. 850 FWRA STREET ELIZABETH, N.J. 07201 Tel. (201) 353-5661
Build the Clock You Most Admire
Solid Walnut Bracket Clock Kit
Features Westminster Chime Movement
$105.3.5000
No. A92E-WA Shipping Charge
1 00 Page Catalog
America's largest selection of precision planned hardwood kits.
Send 75¢ 10:
PRODUCTS Dept. 14, St. Charles, IL 60174
Louise, live in a cabin "on a patch of cleared farmland surrounded by for est , " where they make their way as farmers , woodworkers and writers . Country Woodcraft is no nostalgic ex cursion into the rural past, but a sober account of the attitudes and skills Langsner has had to learn to provide for his everyday needs. His one concession to machinery is a chain saw; on the other hand , he built and enjoys using a foot-powered spring-pole lathe. The first part of the book is general and specific advice about wood and how to wrest it from the forest. Then Langsner tells how to make a shaving horse and a workbench , clubs and mallets, a bowsaw, and handles for all sons of tools. He turns to farming im plements-hay rakes and pitchforks, wheelbarrows , yokes, sleds, plows and harrows-and finally to household crafts and furnishings-brooms, boxes and baskets, spoons, dough troughs and tables. Nowhere does he reson to the usual measured drawing with cut ting list. Instead, each project consists of an intelligent discussion of the prob lem and several solutions, with dimen sional ranges, simple sketches and clear photographs. This is an unusual, practical and in formative book, even though it only begins to reveal what woodworkers used to know. -John Kelsey Planecraft by C.W. Hampton and E . Clifford. First published in 1934; re printed by Woodcraft Supply Corp . , 313 Montvale Ave. , Woburn, Mass. 01801, 1974. $4.50 paper, 255 pp.
V
DREMEL
ARIAB LE SPEED
MOYO -TOOL.
• Drills, carves, saws, shapes, routs, sands. • Cuts in any d irection in any kind of wood . • Goes through knots and imperfec tions as easily as clear wood . • Dial fast speeds forworking in hard w ood s, slow speed s for softwoods.
by Richard A . Mar tin. Early American Industries Associa tion, 1 1 Scots dale Rd. , S. Burlington, Vt. 05401, 1977. $7.50 cloth, 156 pp. Also avatlable from Iron Horse An tiques, RD 2, Poultney, Vt. 05764. The Wooden Plane
FUR N I T UR E H A R DW A R E LA M P P A RTS - CH A IR CANE
Jlaxton
UPPER
FALLS.
8-4 M D . 21 1 56
Catalog.
$1.00
Duo Pneumatic Drum Sander Sands convex and concave parts.
Pump in enou gh air to conform to shape and sand on a "puff of air."
Write for free brochure. 116 60614 SAN D-RITE MFG. CO. N. Sheffield Avenue Chicago. III.
The hand plane has to be considered the hean of the cabinetmaker's arsenal of tools, and therefore , each of its working aspects, irregularities, and va rieties must be completely understood if one is to achieve the finest results . Although written over fony years apan, Planecraft and The Wooden Plane are both very traditional discussions of the history, design and use of this indis pensable tool. While at times Plane craft reads like a Record -Ridgway p r o d u c t e n d o rs e m e n t a n d Th e Wooden Plane like a master's thesis, the well-documented, highly practical information in these rwo books renders them enlightening texts for the inter-
381 34 5
-
Consists of Moto- Too l with bu ilt in finQertip s control, acces sones and storage case. other kits ava ilable. your favorite w ood carving supply store, hobby, craft or ha rd ware dea ler. Dr l Mfg. Division of Emerson Electric Dept. Racine, Wisconsin
peed
See
eme Co., FW-12 53406.
DREM EL: If you're really serious about wood carving.
31
BOOKS (continued)
WOOD MOISTURE GAUGES
4 Models Self-contained Rugged Easy to Use Precision and durability at the lowest prices in the industry.
Prices start at $85.00
Telephone: 71 7-296-8009
V
-
a l ley Pro d u c ts P . O . Box
396,
&
Design I nc .
M i lford, Pa.
18337
------------
-
Time to test your skill.
-
-,
Now you can build your own Mason & Sullivan heirloom qual ity, antique reproduction clock.
20
Over dillerent models available i n do-it-yourself, pre-cut or seml·assembled form for all levels of s k i l l . Grandfather, Grandmother, wal l , desk, mantle and more. All solid hand·matched kiln-dried hardwood In wal· nut, oak, cherry or Honduras mahogany. I m ported preci· slon movements and chimes. Solid brass dials. Clocks you'll find challenging to make and at a savings you can appreciate. So, you're looking for the finest clocks around don't waste another minute. Build a Mason Sullivan. It's well worth the ellort.
34"
if
&
Send 1orour new 36 page catalog today. o
Please send me your new color calalog ol lop quailly anllque repro· ducllon clocks can bUild enclose lor calalog
I
N am
50�
e
I
________ _________________________
Address
Clty/State
Zlp
Mason & Sullivan Co. Dept FWX8 Osterville. MA
02655
1- - - - - - - - - - - - - - - -'
32
ested reader as well as invaluable re sources for the serious craftsman or col lector. In order to familiarize the reader with the basic components of the hand plane, each book begins with a careful introduction to the nomenclature of parts, with detailed section drawings, photographs and reprints. The vocabu lary defined here permits easy under standing of the more complex tools and procedures in later chapters. From this point, both books move into a historical account. The Wooden Plane immediately strikes the reader with its abundant historical references, stret ching all the way back to Roman times. Furthermore, it provides a cultural backdrop for the major developments in the hand plane . For instance, the se cond chapter deals specifically with the evolution of the hand plane as it paral leled American domestic expansion . Planecra/t, on the other hand, merely utilizes its historical synopsis as a start ing point from which to explore the metal plane. The authors delineate a direct relationship between new steel technologies and advanced plane irons, which in turn influenced the design of the remaining plane parts. However, both books are filled with informative facts and explanations of how our woodworking ancestors satisfied the numerous demands of their trade. As a result of its emphasis on the more modern metal version, Planecraft excels as a practical guide. Many of to day's fine mass-produced " ready-to use" planes, as well as used planes, re quire a great deal of preparation to ad just for irregularities and varying func tions. The finer points of plane adjust ment, traditionally passed down in the teaching workshop or from father to son , are catalogued here. Cap iron set tings and sizes and distances of open ings are examples of this type of in formation. However, one must remem ber that such figures, without the bene fit of practical experience, should be only a starting point for personal discovery . Messrs. Hampton and Clifford pro ceed from basic descriptions of grind ing and honing techniques to a man ual-like analysis of the more complex multiplane, No. 405 . The photographs and exacting illustrations will encour age successful use of this remarkable hand tool. The fundamentals of plan ing, including specific difficulties (such as end grain and miters) are care fully reviewed in the English fashion familiar to readers of]oyce' s The Ency clopedia o/Furniture Making and Hay ward' s Woodwork Joints. And while
B UTTE R N UT, WALNUT, ROSEWOOD, P I N E , C H E R RY , B U C K E Y E and about a dozen other woods, in boards, slabs and freeform cut ovals. Pieces up to 6 " thick, wide and 16' long in some species. We specialize in coffee tables, benches, bars, carving stock, clock ovals and movements, accurately cut for you to finish. We sell by m a i l a n d from o u r fantastic wood "museu m , " 9-5 except Sunday. Send $ .25 for brochure.
3'
W E I R D WOOD, Box 190FW
Chester, Vt. 05143, 802-875-3535 MUS ICAL I N S T R UM ENT w o o d s , s u p p l i e s, a n d ac c e s s o r i e s o f t he f i ne s t q u a l i t y. F R E E C ATA L O G
<GURIAN GUITARS B
D E P T. H IN SDA L E, NH
03451
�e biMgt ill l2iQII-dhied hahdwoodg
vUohe thall a d03ell gpeCleg avaiQabQe u\Jo vUilIi�U� (0hdeh CWhite today bOh a bhee bhochuhe
f
(6 5) 926-8700
LARGE DOVETAIL TEMPLATES Producing a
through·do vetail join t
rapidly and accurately in stock up to
1 \4 "
tails on ture.
thickness.
3"
One·inch dove·
cen ters for fine furni·
With carbide rou ter bits.
DA VID A. K E L L E R STA R ROUTE. B O L I N A S , CA
94924
BOOKS (continued)
PRECISION
Imagination May Limit Your Routing OUR EQUIPMENT WON'T I
6'.8' ,hod 8'x12' similar
SOLVE STORAGE PROBLEMS
Build a handsome rugged outbuilding. Using our plans you
semble with
prefabricate several panels (below) and then as
bolts. May be disassembled for transport. Features: pier foundation, salt box roof.
boa rd-batten siding. large door
(below), l i l t out wi ndow optional extra step-ramp and wood sheds. Plans include panel construction. assembly di rections. and stock list. Order:
6' x 8' shed plan (7 panels. 3' door) 8' x 12' shed plan (12 panels, 4' door) 5' x 6' (approx . ) wood shed plan (3 panels) Step-ramp plan
ARCADIA SHEDS Dept. W 82 ArClldl1 Road Westwood. Mass. 02090
$3.75 $.4.75 $1 .75 SOc
Kiln-Dried HARDWOODS!
Ash- B utternut-Cherry Maple-Red Oak-White Oak Yellow Birch-Wal n u t B y The Board O r T h e Truckload. Cabinet Quality. Write For Prices Or Stop By To Visit Our Fine Woodworking Gallery Opening March
'78. Sterling Pond HARDWOODS Route 100 Stowe, Vermont 05672 802-244-7274
BRAZILIAN ROSEWOOD Veneer SPECIAL 20 sq. ft. for $10.00 pp. All pieces 3 ft. or longer. Included with order our 50 page
catalog of hardware and supplies for antique restoration and repro duction,
including locks, drawer
pulls, hinges, casters, and chair cane. Catalog separately
$1.00.
NOEL WISE ANTIQUES Antique Restoration Supplies PO Box 1 1 8F . 6503 SI. Claude Ave. Arabi, 70032
LA
sometimes the words appear a bit strange (" cramps and croid glue " ) , the intent remains clear. Although the technical genius of the metal plane has overcome many of the limitations of its wooden predecessors, it will never replace the beauty or reli ability of a set of simple wooden mold ing planes. These planes, with numer ous cross-section diagrams of their cutS and constructional diagrams of more complex moldings, are emphasized in The Wo oden Plan e . Planecraft , though, will be more helpful in deter mining the exact progressions necessary to complete many more molding styles, including bolection, architrave and tra ditional hand-rail patterns. Planecraft stands out as a valuable shop handbook not only for planes, but also for numerous related edge tools, including common spokeshaves, cabi net and box scrapers, and the lesser known fiberboard planes. There is an imponant chapter on benches and fit ting of vise hardware, and a brief list of workshop hints that provide simple so lutions to aggravating problems often encountered in using hand planes for the first time and in basic cabinetry. Martin's book concludes with three short but interesting chapters on the manufacture of wooden planes, on their decline, and on collecting. In cluded are sketches of the steps in the construction of a very simple plane and a description of the more developed machine processes used in contem porary wood plane manufacturing. For the collector, there is a broad look at identification and dating techniques, as well as information on cleaning, res toration and care of a collection. This reader finds Planecraft to be of tremendous value despite its age. It contains i nformation relevant to today' s work and to readily available tools. Each book must, however, be recognized and accepted on its own terms. The Wooden Plane is meant to be a history, and as such is an excellent portrayal . As its title implies, Plane craft confronts the practical workings of the plane in the manner of a basic workshop course, a course taught for forty years, that by its nature covers all. -RichardE. Preiss
Your home workshop can pay off BIG
with • • this
Planer Molder Saw Three power tools in one a real money-maker for you!
The BELSAW Planer/Molder/Saw is a versatile piece of machinery. It turns out profitable precision molding, trim, flooring, furniture . . . in all popular patterns. Rips, planes, molds separately . . . or all at once. Used by individual home craftsman, cabinet and picture framing shops, lumber yards, contractors and carpenters. Never before has there been a three-way, heavy-duty woodworker that does so many obs for so little cost. Saws width, planes to desired thickness, and molds to any choice of patterns. Cuts any molding pattern you desire. Provides trouble-free performance. And is so simple to operate even beginners can use it !
to
j
30-Day F R E E Trial! EXC����GF��CTS NO OBLIGATION-NO SALESMAN WILL CALL CO. RUSH COUPON BElSAW4282POWER TOOLS Bldg. Kansas City, Mo. 64111 TODAY! Field
:E D 8 E> EJ � E7
rl BElSAW POWER TOOLS Kansas W 4282 Field Bldg.,
D o ' :
Irving Fischman of Cambridge, Mass. , is writing a book on woodworking. George Frank, a contributing editor of F i n e W o o d w o r k i n g , has been a woodfinisher in Europe and Amen'ca for more than 50 years. John Kelsey is editor of this magazine. Richard Preiss is resident instructor at Leeds Design Workshop in Easthampton, Mass.
rc�
Power
City. Mo. 64111
Please send me complete facts about PLANER - MOLDE R - SAW and deta i l s about 3D-day trial offer. No obligation, no salesman will call .
J ____-----
�
D
NAME
ADDRESS CITY
�
O·'. � ,
M lJ �
dJ � � cC3 c=J c:::=J 0 STATE
IP
33
r------------------------------,
MAKE WOOtJEN tOYS
TA ERRA
ADDENDA,
Now bimonthly: In case you missed the notice on page 4, Fine Woodworking will change from a quarterly to a bi monthly magazine this autumn. You' ll receive six issues a year instead of the present four, and we'll have half again as much editorial space . We plan to broaden our coverage of woodworking orofurui in several directions: more articles for ! scrni- tructz I Ltm0I the beginning craftsman , more for the tal cabs COtW (,l1itor I ····· · ··· �C3 ···· · advanced amateur and professional CL D OO worker, more about design, and more WP7D$"5.50 reports about the incredible variety of things people make out of wood. Z 0 • � We ' re also taking the opportunity to rearrange the magazine a little. We've added a new section of regular columns and departments in the last pages of ·· .. · · · magazine . It will include new col N'iq :.:N.w [j$4:00� the umns by contributing editors Tage Frid and R. Bruce Hoadley and editor John otava: 2OO d.e5� cata!-R9 surPlilS CfttC, wuiurw) Df·50 � Kelsey and our usual Sources of Supply 1I · . ·.······· ··················· ··················" 1I feature. Frid and Hoadley will take I I turns, with one or the other writing a column each issue. In addition , each I I I has agreed to write at least one major I I FW·68 I Toys & emfts article a year. 2907 uk. Fo,••t Ro.d, P.O. Box 5459, T.h City, CA 95730
€a5y' to tnake from fulL sift pa1:tUtlS. c1WllLed.
, ,� ciesiBtIS,
WH£asIDR il6� L &
i :frEitNS
-over
mucKS o
0
o
�f.
�� :i�ER�
� �
ood
ood
Available in
lL ��
Build Your Own Family Heirloom ROCKING CHAIR
RESS iAVV I :� CIT'l
STATE
____ _ _ _ _ _ _ _.
ZIP
:I
: J
A
A GREAT lEW CATALOG FOR SERIOUS WOODWORKERS.
Educational Lu m ber Company has specialized in Appalac h i a n hardwoods since 1 9 5 1 . We se l l k i l n dried, cabinet grade wood and g uarantee every board foot we s h i p . W e have a good supply of hard-to find veneers and turnings. We offer exceptional val ues in i n structional books on woodworking. We sell at d e l i vered prices.
._- '-�____ ____ P.O . Box 5373 FW, Meadow Road Asheville, N .C.
catalog. Please send me y o u r for postage and h a n d l i n g , enclose refundable with first order.
Name
I L�
Address
34
j
EDUCATlDNAl I LUMBER COMPANY, INC. I 21 28803 I 1 977 50¢ I I I J � =-�
I
Lever-acting h o l d - downs : In J i m S i e b u rg ' s t i p on j oi n t i n g v e neers (Spring ' 78 , pp . 16- 1 8) we showed a drawing of a lever-acting hold-down but neglected to say where to buy one. These useful clamps come in a variety
do·it·yourself
• Quality
, Hardw Maple,
Waln u t , Cherry.
• Pre·sanded,
oods
ready·to·
finish.
• All
parts, hardware and easy step·by-step furnished directions (except upholstery) .
•
..
Wooden clocks: Following John Lord ' s comprehensive account o f designing a n d m a k i n g w o o d e n c l o c kworks (Spring ' 78 , pp. 44- 5 1 ) , readers have told us that Lord Grimthorpe's classic Rudimentary Treatise on boo k , Clocks, Watches and Bells for Public Purposes, is back in print. It is available for $ 1 2 . 50 from Caldwell Industries, Box 1 70 , Luling, Tex. 78648. Caldwell has several other books on c1ockmak ing, and some on machining metal for the amateur craftsman. For those interested in early Ameri can wooden clocks, a lemarkable histor ical study with construction informa tion is Eli TeTry and the Connecticut Shelf Clock by Kenneth D . Roberts. It costs $22 and is available from Roberts, Box 1 5 1 , Fitzwilliam , N . H . 0344 7 . Roberts, a n horologist and collector of antique tools, also publishes facsimile editions of 1 9th-century tool catalogs. Students of antique American clocks should also k now about The Cog Counter's Journal, published by Ward Francillon , 24482 Spartan , M ission Viejo, Calif. 9267 5 . Francillon writes, " To appreciate the American wood clocks and their makers is to realize that today, in collectors' homes, thousands keep time tolerably well.
• Pre-<:ut kit.
•I •
i CALIFORNIA RESIDENTS ADD 1070 SALES TAX : I t mcLoscd.. total runoun L�- Built : iII I I :I � :I
3 sizes:
35mm .. .. .. .. .. .. .. .. .. .. .... ....$10.95 250mm XX 25mm No. 21 -- 200mm 9.95 No. NO. 3 - 140mm X 20mm . . . ... . . . .. . . . . .. 8.95
RWHffiS WP8 0 $"3.50� Cl.llNl<£ (irui �
: 30
i i
• 0
i
ood
carvers, sculptors. model One of the essential tools for w and pattern makers. Saves time in shaping, finishing· and . Razor·sharp blade of tempered removing excessive w handles for German steel holds keen edge longer. Hardw non-slip grip_
oj an Reproduction 1876 riginal
M o n e y guarantee.
b a c k
o
Write for our
FREE brochure.
H E RiTAG E
DESICN MONTICELLO, IOWA 52310
P.O. BOX 103
C H I S E L S H A R P E N I N G M A D E EASY Anyone can d o it with this jig M o n ey back g u a ra ntee
Handy Grinding Jig
Perfect Hollow ground bevels on blades to 2V2" wide, aluminum cons't, nylon screws, brass washers and rubber no slip damp surface. Only 4 V. ozs. $6.95 ppd . , Conn. res. add 49¢ s . tax, ck. or m . o . only.
RIMA MFG. CO., P.O. Box Hill, Conn.
Quaker
99
06375
With very little practice this jig will do as good a job as sophisticated models four times the price of this one.
KEN WI S N E R
l.
SIGNATURE TOOLS
Cabinetmaker's precision corner mortise chisel-% " square. $ 1 9 . 50 plus $ 1 shipping. 2. Beading tool (scratch stock)-steel with two adj ustable guides based on Stanley #66. $44 . 50 plus $ 1 . 7 5 shipping. 3 . Edge-trimming block plane bronze with fence-similar to Stanley #95 . $49 . 50 plus $ l . 7 5 shipping.
Sendfor brochure. WISNER FINE TOOLS 259 Whaley Street Freeport, NY 1 1 5 20
. ..-..���, ' (�����)--..�.--.�
F l ex i b l e shaft machines and ac cessories for g ri n d i n g , pol is h i n g , d e b u r ri n g , routi n g , buffi n g , e n graving, san d i n g , d r i l l i n g , sawi n g , a n d more.
� ���v��O����A��S������D�?T�I���N� Bethel, Connecticut 06801
_
PLANS TO B U I LD YOU R OWN FIN E FLOOR CLOCK
Show your skill a n d craftsmanship by building a superb quality traditional floor cloc k . Our detailed plans or semi· assembled kits complement your ex· pertise. Prem i u m q u a l ity German movements, dials, accessories avail· for complete illus able. Send trated catalog.
$1.00 & Son H. DeCovnick ... Clockmako Erllblllhld 1947 Bo. 68, 27, 200 MilkO! Ptaza, Alamo, CA 94507
Dept. FW
P.O.
OLD FASHION BRANDING IRON $5.00 YOU R CHOICE U P TO Plus 75. COPPER FIVE 3/8"
LETTER S OR N UMBER S handling
ADDITIONAL $1.50 EACH I.
GREAT GIFT
LETTERS
PUNCTUATIONS
OR
ENTERPRISES MILLER BOX 772-FW MO, MANCHESTER MAGNETIC CLAMP PA DS 6301 1
Ha rdwood pods c l i n g to c l a m p s, s i m p l i f y
a l i g n m e n ' a n d t i g h t e n ing; eliminate marks. '
C
' ( clamp sIIe O . 5 sq inchs)
set of .4 : $ l . l 0
8 o r & Pipe ciomp size ( 3 in.1)
set a f 4 : $2.20
Vise pods ( .. i n c h s )
s e t of 2 : $2.35
eon
odd ogeo handling
" lax
odd S.50 potl & Collf. rl"lidenh 6'tb
l AMPA D S ; Dept. W3 ; BO.l(2372; S. Mario , Calif. 93454
3 WOODEN LANTERNS
Golhle. Early Amencan and Colomal design l.Jlusuai functIOnal amversatlOn pletes Send $300 lor Ihe 3 plans and get our
�
RustIc Sconce plan flee
BINGAMAN PLANS Oepl. 500
P . O . Box 74, langhorne, Pa. 1 9047
Swinging CRADLE \
Easy to make with FULL
���I.� ���!! � � � ��� �
n I j t ut nI America. Plans show alternate construction t s ���f;��f�; ������: :u��lO! ���tz1�:! 39" 30". Order plan JI66. . . . . . . . . $6. 00
x
CATALOG
150 dill., lulI-slz. plans-SI.OO refunded with 1st
DESICNS,OeptKS-68 prol. FURNITURE Sherman Ave., hanston, 1425
III. 60201
. .
$1
order.
I
Emco-Ummat I i I-,
=_
,I ,
i I I
FOREDOM MINIATURE POWER TOOLS
" Unimat-5.in-1 Machine Shop - World Famous lathe that converts to , " unimat the precision ' vertical mill, drill press, surface grinder and polisher-over 100,000 in use by R & D labs, ' inventors, hobbyists and precision machinists. A complete miniature machine shop in a craft· en storage chest, Reg, $279.00. Add wood ed $5 00 for shipping. _ 1 000.A3 Unlmat 5-in-1 Shop . . . . . . . . . . . $1 99.98
' Dnll bushings and end mzi/s. of sizes and styles and are common in the tool, pattern and general wood working industries, They are usually sold by dealers in industrial hardware , who are listed in the Yellow Pages under " Industrial Equipment and Sup plies . " This is also where to look for end-mill cutters, which are better than router bits for mortising and removing large amounts of waste. Other useful industrial items are drill-guide bush ings. They are cylinders of hardened steel, bored through in common drill sizes, just the thing when you are drill ing sequences of precisely spaced holes with the aid of a j ig or template. When the j ig is wood, each drilling enlarges the hole and reduces accuracy. When you press a bushing into the holes in the template, the drill bit stays exactly on target. Design Book: Entries have begun to ar rive for Fine Woodworking 's Design Book 2 , to be published next spring. An entry blank appeared in our last issue (Spring ' 7 7 , page 28), along with the rules. Please remember that we must have good black and white photo graphs to make a good book (we' ll re turn them unjudged if the quality is not good enough) , and that each entry must be accompanied by its own entry blank. The deadline is Dec. 3 1 , 1978, and we' ll reprint the rules and the en try blank in our November ' 78 issue. The bas-relief m irror frame (Spring ' 78 , p . 66) was made by Vic toria Hancock (not Virginia) of Laguna Beach, Calif. We apologize.
Errata :
Art credits: 8 , 10, 1 3 , 1 6- 2 1 , 56, 70-73 , Joe Esposito; 2 8 , Charles E. Tuttle Co. , Inc . ; 4 1 -46, 80, Stan Tkaczuk; 5 1 - 5 3 , 60, 6 2 , 74- 7 5 , C. Clapp; 6 5 , Ian Kirby; 67, Lor raine Schechter; 76, Percy W . Blandford; 78, The Escher Foundation, Haags Gemeente museum, The Hague; 79, Stan Hess. Photo Credits: Cover, 3, 47-49, John I . Russell; 3 8 , Barbara Charles, 38-39, S . Wellborn; 4 2 , B . Kronenberg; 5 0 , Adrian van Draanen; 5 4 , Mark Lindquist; 54- 59, Tim Savard; 6 1 -64 , Dan Dogen; 68-69, David Adamusko; 70-73, David B . Eckard; 7 5 , Jim Brown, Houston Home and Garden Magazine ; 77-78, Millie Hess; 80-8 1 , Roger A. Bien; 84, Richard Starr. All others, staff.
,-
,
I I ·" I I
i
.
. .
Send .50 for Complete Unimat
& Accessory
Catalog,
,"
,
I I-,
I I I
I
I I I
tCA3C p-
-,j
_
" Hargrave Miler Frame lam Clamps a l l four corners at one time. Quickly adiusted. Absolute " IY accurate. Aluminum alloy corner blocks. Screws and adiusting nuts are steel. Capacity 2 to 14", Add $1.00 for shipping. Miter Frame Clamp . . . . . . . . . . $11.25
,
i,Jao-CIS
. . . .
•
Hargrave Extension Screws-Each set increases " capacity of No, 780 clamp 12". Any number of ' extensions may be used. No, 780-E available - only in sets of Add .75 for shipping, Set of Extension Screws . . . . . $5.29 " Rockwett Speed-Bloc Sander-Palm grip design for one hand use. Thumb control switch, offset pad for 4 way flush sanding, 1 2,000 OPM. 1 00% Ball Direct Motor to pad · Bearing, 5/64" Orbit. design. Pad size 41/2" x 4Va". Add 52.00 for ShiP" ping. Reg. 564.99. " " 44BO(330)·R7 . . . . . . . . . . . . . . . . . . . . . . . . . . . . . . . . $47.98
4, 4
•, 7aOE-CIS
_ __
I
_
I
, , -,
,
" 5and·O·Flex Contour Sander Kit-For curved or brislles force Firm cushioning fiat surfaces. abrasive strips into, around and over corners, small openings, convex and concave surfaces. " , Aluminum wheel contains 80" to 150" of abrasive cloth strips, which is fed out as used. Use on metal, wood, fiberglass or ceramics. No iob too tough. Kit contains #350-R wheel, 6" dia. x bore, 3 abrasive refills in assorted wide by ' shank adap' grits for wood or metal sanding, ter to fit chucks, and an arbor reducer bushing included. Add S1 .5(}-Reg. $24.95. to _ . . . . S1 7,98 1 35.M2 Sand·O·Flex Sander
,TI
,i ,- ¥a" -
¥a"
1,4"
'12"
1
I I I Ii
-, , 1" i , 1
..
,
I I I I I I,
Skilsaw Worm-Drive Saw-Super-d for output torque high Unequatted bearing. ' fastest cutting. low for throughout Designed maintenance, long life. Has Skil "Super Burnout Protected" Motor No. 7T Sk il saw has Blade, Powerful 13 amp motor, cuts from 2" , dressed lumber at 45° to 2'l11" at 90·, Net weight 1 16 Ibs. add 53.50 for shipping. Reg. $175.00 . . . . . . . . . . . . . . . $136.98 _ . . 77·S37 Skilsaw
iI
7'1. "
iI i
I
•
7v."
I
No, 59 Stanley Doweling Jig-Make boring dowel holes in edge, end or surface of boards eaSY- I , complete with 6 guides to Y,"-with depth for shipping. Reg. 523.45. gage. Add . $15.39 . . . . . . . . . . . ig J Doweling 59-S19 ,
,75
�6'
.. . . . .
..
I
I SILVO (BRAND NAME) TOOL CATALOG I
' iI
I I I
THOUSANDS OF EXC I T I N G TOOL VALUES: Stanley, Wen, Speedy-Sprayers, Mi lwaukee, Rock· well, Dremel, Skil, N iCholson, Disston, Mil lers Fatts, Hel ios, Wellsaw, Plumb, Kennedy, Huot, , Ridgid, Crescent, Vise·Grip, Audel Books, Unimat, Wiss, Channel-lock, General, Pony Clamps and _ , many Nationa lly Advertised brands of tools and ' supplies. We ship Coast to Coast at prices hard to beat. Send $1 .00 for our big S I LVO TOOL CATALOG today.
i •-i
I
•
Minimum Bank Americard, - Visa or Master Charge or· der is $25. Show a l l Nos., E xp Date and Signature. ( N o Phone Orders Please.)
II
,
I I
. , :'::::: ;1i. :1 •" " . . I • .
Note: Reg=Mfr's suggested list price,
Just say "Charge it" .
.
7,,';;-..
-- I CO. SILVO HARDWARE II FW8-8 , t"-C � Phila'r �""",,,),, ,�'-""-( 107 Walnut St., Dept.
� �
Pa, 19106
35
CLASSIFIED STANLEY 5 5 s. Complete with blades. $ 1 7 5 to $2 2 5 . The Tool Box, 5005 Jasmine Drive, Rock ville, MD 20853. STUDIO ASSISTANTSHIPS AND SUMMER WORKSHOPS with Anderson, Sperber, Kirby, Bryant, Crump, Henry, Sigler, March. Write to Peters Valley Craftsmen, Layton, NJ 078 5 1 . THE BAULINES CRAFTSMAN ' S GUILD-Mas ter craftsmen teaching in their own workshops. Apprenticeships in: Ceramics-Harvey Young; Stained Glass-Shirley Sanford; Textile Pajnt ing-Karen Gray; Weavin g -Ida Grae; Wood workers seminar tours available. Write for bro chure . BCG, Box 305 , Bolinas, CA 94204. Dedi cated to the growth of independent craftsmen. HARDWOOD LUMBER. Wholesale prices, kiln dry, best grades, surfa(ed or rough . Walnut, cherry, oak, maple, ash, poplar, cocobolo, padauk, zebrawood, mahogany, teak, etc. One dollar for price list. WOODENWARE, Box 1 0 , Brownsville, M D 2 1 7 1 5 . FINEST QUALITY, lowest priced, exotic wood veneers available. Write for free price list. A CUT ABOVE Veneers, P.O. Box 1 39, Greensburg, OH 442 3 2 . Are you interested i n WOODTURNING a s a hobby) Take a two-day intensive course for beg inners from a qualified instructor. For further in formation write: PRACTICAL WOODTURN l N G , P . O . Box 1 7 1 , Brampton, Ontario , Canada, L6V 2L 1 . WOOD BENDING. Wanted: source for quan tity production turned and bent hardwood chair poSts. Prefer West Coast shop. Write/ call Ken Hopkins, State Capitol Museum, Olympia, WA 9850 1 . (206) 7 5 3 - 2 580.
NOW YOU CAN "PERSONALIZE" WOODWORKING PROJECTS Twelve custom labels with each catalog of "WOODWORKING SUPPLIES" nlays hardware, clock movemen ts . catalog to: . Suite 13 ornia
. . . i
,
Send $1 .00 for
CALIFORNIA WOODWORKERS SUPPLY CO. 1 0 1 0 Morse Ave
.
Sunnyvale. Calif
94086
PROFESSIONAL • FI N ISHES • Use what the pro's use FREE BROCHURE Box 7204 A M I TY Madison, W s 53714 i
.
PROFESSIONAL TURNING TOOLS Fillings and accessories Catalog on request The Old Hyde, Lillie Yeldham, Halstead, Essex, England.
I 96 ::: I I II BOB MO RGAN WOOD, Dept.
--
For Sale Violin wood. Beautifully flamed, seasoned maple back (2 Pc.) large enough for viola, $35. C. Mills, 3 509 W. 72nd Place, Chicago, IL 60629.
FREE DETAILS. German quartz clock move ments. Desk set components. Free woodworking lessons. Clocks and Woodcrafts, Dept. FW, Route 3, Box 94, Madison, NC 2702 5 . CARBIDE-TIPPED CIRCULAR SAW BLADES AND DADOES! 6'h in. through 1 6 'h in. Specials good through July 3 1 , 1978. 10 x 60T x ',l, ATB $ 3 9 . 9 5 . 1 0 x 4 0 T x ',l, Comb i n a t i o n / P l a n e r $4 1 . 5 0 , postpaid (UPS), check or money order. Free price list. German Blade ImportS, P . O. Box 684, Conyers, GA 30207. THICKNESS PLANER. 1 1 in. wide. Build your own. About $ 1 7 5 . Btochure $ 1.00, deductible from Plans $ 1 0.00. Planer, Box 336AF, Oley, PA 19547. EXOTIC HARDWOODS. K ingwood, tulip wood, pernambuco and others. Planks, turning squares and carving blocks. For free price list send SASE to: KINGWOOD ENTERPRISES, Box 320 FW, EI Portal, CA 9 5 3 1 8. (209) 379-24 1 3 . For samples send $ 2 . ANTIQUE WOODWORKING TOOLS: Collec tors and Craftsmen-4 issues per year, $ 2 . The Tool Box, 5 0 0 5 Jasmine Drive, Rockville, MD 208 5 3 . NEW AND USED BOOKS o n woodworking, woodcarving, turnery, and all woodcrafts. Cata log $. 50. R. Sorsky, Bookseller, 520 E. Garland, Fresno, CA 93 704. TUNG OIL. The hardest drying natural finish. Available in gallons, quarts and pints. Write for brochure on this amazing ancient China Wood Oil finish. Sutherland Welles Ltd., Box 639-FW, Woodbury, CT 06798.
I
HAN GE
Stanley plane (#4 5 ) . 22 cutters, original box. Best offer. Charles P. Waitz, 109 McCormick Avenue, Baltimore, MD 2 1 206. Moving and selling my tools, both new and used. New include Rockwell: speed block sander, $40; 2 5 -pc. molding head cutter set, $60; Stanley: 9-pc. no. 60 chisel set, $30, doweling jig, $ 1 0; Irwin 1 7 -pc. bit set Y. in . - l 'k in. , $25 ; Hanson 36-pc. H . S . steel drill set in. - l in., $60. If interested or for a list of other new and used write: B. Campbell, County Road 3 7 , Livonia, NY 14487.
%6
Stanley #50 plane, complete with box of 1 5 cut ters, $ 7 5 . Herb Tinson, 2 3 1 9 N. Taylor Street, Little Rock, AR 72207. (50 1 ) 666-08 1 6. Old woodworker' s workbench , large, has tWO vises with wooden turn screws, vg condition, $345. W. Fleming, 33 Country Club Drive, Rex ford, NY 1 2 148. Model 648 Timesavers Mini Belt Sander. 3-h p single-phase motor with automatic feed be d . 0-8 in. opening, 60 and 90 durometer contact drums. New condition $ 3 , 200. Fireside Looms, Box 1 1 , Deadwood, OR 97430. (503) 964-377 1 .
Wanted t o Buy Thickness planer, 12 to 1 8 in. Send description, condition and price. Mike Tyree, Route 1 , Box 247, Frenchburg, KY 40322. Stanley woodworking hand tools of all kinds plus Stanley hand tools catalogs prior to 1 960. Please write or call Jacques Dahan, 30 Ocean Parkway, Brooklyn, NY 1 1 2 1 8 . (2 1 2) 436-9090.
SHAKER AND EARLY AMERICAN REPRO DUCTIONS. Over 40 finely custom-crafted re productions by dedicated cabinetmakers. Made ro order only. Send $2 plus $ . 7 5 handling charges for catalog. Eaton Industries, Inc . , Box 9 3A, Eaton, NY 1 3 334.
Saw guide to fit an early Miller Falls Langdon Acme miter box. This guide is the old design, be ing . 70 in. in diameter and having ball rollers to support the 5 - in. saw. If you can p ossibly help, please contact Vernon McCormick , 245 22nd Street Cedar Rapids, IA 5240 5 .
R E S I D E N T W· OODWORKER P O S I T I O N AVAILABLE, one t o three years. Write t o Peters Valley Craftsmen, Layron, NJ 0785 1 .
Cutters for Stanle y #45 plane, one o r a whole set. Also always looking for old tools of any kind. Write Jack Dunigan, P.O. Box 95, Sun Valley, AZ 86029 .
NW,
C A B I N E T M A K E R ' S S U P E R - P R EC I S I ON PLANE. 9 Y.-in. machined iron body. Weighs over 6#. Adjustable throat, micrometrically posi tioned 2-in. blade at 1 5 · . Brass mounted rose wood handles. Peerless craftsmanship. Contem porary design. ' Shoots' edges, yet smooths wildest-grained surfaces like glass. Price $3 50. Send $ 1 for color p hotograph, description, pur chasing informatIOn to: W isner Tools, 2 5 9 Whaley Street, Freeport, N Y 1 1 520.
Delta Unisaw. Old model, 1 0-in. table saw. Cash or trade for wood. Barry, Sunshine Sawmill, Renick, WV 24966.
I N SAN FRANCISCO, tools and supplies for the wood craftsman. SEABRIGHT HARDWARE, 1 749 Noriega Street. (4 1 5 ) 7 3 1 - 1 2 74. Inca dealer.
Overarm or template router. Wm. Prince, Route 1 , B o x 4 3 A, D u n c a n , SC 2 9 3 3 4 . (803) 439-779 1 .
CANADIANS . . . INCA SWISS- PRECI SION WOODWORKING MACHINES. Personal dem onstrations arranged. Also, imported hand tools: U l m i a , Tyzack, E . C. Emmer i c h , Record, Marples, etc. Best prices. List requirements and/ or catalog references. J. Phili p Humfrey, #1 1 1 , 747 Don Mills Road, Don Mills, Ontario. M3C lT2. 1 (4 16) 4 2 1 - 5 565. 1 (4 16) 887-5 302 evenings and weekends.
Cast-iron base and/or table for 1 6-in. Walker Turner band saw. Harry J. Goos, 20 1 1 Cypress Avenue, Allentown, PA 1 8 103.
TX
t_":l-=-���.����O��I����2�J
36
LEARN WOODCARVING. Send stamped enve lope to National Carvers Museum, Woodcarver Road, Monument, CO 801 32.
FURNITURE STRIPPING, REPAIR AND RE FINISHING SHOP for sale in beautiful Austin, Texas. Owner wants ro retire and will be willing to teach energetic person the business. Call Frank Hunt ( 5 1 2 ) 4 5 2 - 2 3 1 1 . or, write 2 4 1 7 Buell, Austin, 78758.
v eties world's rarest veneers and lumber at reasonable prices. Simpl ified veneering instructions plus fu l l color wood selector included. Send for free catalog now and get special bonus starter offers. S A V E 2 5 0/0 Hurry!
F04K12
WOOD &TOOL EXC
CARVING TOOLS of finest German steel. 7'h in. overall. 8-piece Set, $34. Robert Halliday, 82 Glenwood Road, Glen Head, N Y 1 1 54 5 .
PETER C H I LD
l-�3�tJ HARDWiiii DYEiiEEi�- & LUMBER CATAlOG
LOCAL LUMBER CO. Fancy hardwoods, custom milling and kiln drying. 1 6 1 Bowers Hill Road, Oxford, CT 06483. (203) 888-6509.
IRONS AND CUTTERS. Offering the country's largest selection of plane irons and cutters at un beatable prices. Send $ . 2 5 for lists to Bart Slutsky' s Tool Works, 76 Ninth Avenue, New York, 1 00 1 1 .
NY
1 2 - in. thickness planer with 3 to 5 hp and an air compressor with 2 or 3 hp. Motors must be single phase. Also need a Lion (or equal) miter trim mer. Please write describing make, model, hp, accessories, condition and price to Wimbrow, 47 Rutland Street, Mt. Kisco, NY 1 0549.
SITUATIONS WANTED Seeking ap prenticeship in furniture making with experience d craftsman. Have basic skills and de sire to learn. Prefer New England location. Please write to Joseph Sullivan, 5 09 Blake Street, Sparta, WI 54656. The CLASSIFIED RATE IS $ 1 . 5 0 per word, mini mum ad 1 5 words. Payment must accompany or der. The WOOD AND TOOL EXCHANGE and SITUATIONS WANTED rate is $ 1 .00 per line, minimum three lines. The exchange is for private use by individuals only. Commercial accounts must use Classified. Allow 40 letters or sp aces per line, including name and address. Sen d to: The Taunton Press, Advertising Dept., Box 3 5 5 , Newtown, CT 06470.
EVENTS
____
NATIVE AMEPJCAN HARDWOODS
This column is for gallery shows, maior craft fairs, lectures and exhibitions ofgeneral in terest to woodworkers. To list your event, let us know at least three months in advance,
WALNUT, BUTTERNUT, AMERICAN CHESTNUT, CHERRY, MANY OTHER SPECIES - TURNING BLOCKS EXTRA WIOE STOCK NO MINIMUM - MAIL
& FREIGHT SHIPMENT
DETAILED LISTING 25¢ D,A, BUCKLEY, RI. VALLEY. N,Y,
14171
W,
( 7 1 61 942-6631
In Process : A Study of Designer-Crafted Furn i ture - Currenr work by Jim Nash,
Books on Antique Tools
19th Century Reprint Stanley Cat&l0liirue.
Send for f}3rochure of Publications Ken Roberts Publishing Co. Box 151, Fitzwillia.m, N.H. 03447
Renwick Multipl es-to June 1 1 , Northeast
Regional Library, Corinth, Mo. ; July 8 to Aug, 6, Huber Art Cenrer, Shippensburg,
Pa. ; Sept, 2 to State College,
POLYET H Y L E N E G LYCOL
The new wood stabilizer and chemical seasoning agent.
Make crack-free tops from log cross sections and flawless bowls and carvings from green scrap wood, 50' for catalog,
The Crane Creek C o m pany Box F M a d i s o n . Wisconsin
5553
53705
AuthentIC 18th century design. All joints h and-pegged like the original long, 29'A- high. Perfect for fire place ma1\3zines. B a by. o o ker s delight. Plan # 1 2 0
. '
r · ·wonl)"d$5,00, 150 diffa�full-siz. S 1 ·FURNITURE DESIGNS,
CATALOG
S-S1.o0 orof, 0I refunded with ht order.
1425
Oepl. Sherman Avenue, Evanston, III.
tool
KP-1i8 60201
RADIAL ARM SAW OPERATORS
At last! A long needed, newly deSigned fence that enables operator to make those extra thin, narrow and very shon rip ping cuts heretofore not possible on the radial arm saw. From a inch wide strip of veneer, to over one inch stock, our new "EASY RIP" fence will do the job with amazing ease. If you own a radial arm saw you need this innovative device in your shop. Solid pine, oil finish, complete with brackets. Write for more information, or send $8.95, plus $ 1 .25 shipping. IOWA ROYAL P R O D U CTS-2221 Otley Ave" Perry.
%�
Iowa 50220,
postpaid in
U,S.A.
Over 1 40 varieties of Veneers. Complete Une of Tools for Veneering, Laminating and Marquetry. - Cements and Glues. Simplified Veneering Instructions pri list for
HOMECRAFT VENEER,
ce
and SOc. Dept. F. 901 West Way, Lalrobe, Pa, 1 5650
For WOODCARVERS O n ly The
-
"WOOD IS G O O D" C ompany
offers cut blanks with real instruc tions. Tools
Sharpening Materials.
Oct. I,
Plymouth (N. H. )
&Wifua;-
Northeast Craft Fair-June 20-2 5 , Dutchess
Counry Fairgrounds, Rhinebeck, N , Y , All crafts, ACC-sponsored, juried, wholesale retail fair, among the largest, Pacific States Fair-Aug. 9 - 1 3 , Fort Mason,
Full-Size FURNITURE PLAN 18th Century PINE CRADLE 36· wood. A o w
through July 3 1 , Muckenrhaler Cultural Cenrer, 1 2 0 1 W, Malvern , Fullerton, Calif.
Pier 2, San Francisco, Calif, All crafts, ACC sponsored, juried, wholesale-retai l .
ASK FOR FREE CATALOG SOLD THROUGH LEADING DISTRIBUTORS WETZLER CLAMP CO., Inc. 43-13
T E L . 2 1 2 -784-2874
9 t h Annual Peters Valley Craft Fair July 29-30, Layton Valley, N.). Craft sales
and demonstrations. Also, 1 - 3 wk. summer courses in lumbering, desig n , carving, coopering and joinery. Early American Woodworking Tools
through Sept . 10 at Wilson Hall, Dart mouth College, Hanover, N , H . Young Americans: Fiber, Wood, Plastic, Leather-July 2 to Aug, 1 3 , Huntington (W .Va.) Galleries; Sept. 10 to Oct. 2 2 , Jacksonville (Fla . ) Art M useum. Marietta College Crafts National ' 78Entries due Sep t . 9, exhibition Oct. 2 8 through Nov. 26, Write A , H. Winer, Mari etta College. Marietta. Ohio 4 5 7 5 0 , O u t o f the Woods-Major (and first ever)
exhibition of high-quality woodworking by Onrario craftsmen. Enrries due Nov, 1 ; show opens March 5 , 1 979, at Cambridge Public Library. 20 Grand Ave, N" Cam bridge. Onto N 1 S 2K6 Canada,
SHAKER PEGS
The Shakers used these finely turned, durable pegs to han g chairs, clothing and kitchen utensils. Each
WRITE F O R F R E E B R O C H U R E :
W,I.G, COMPANY, OEPT, R BOX 477, LAKEWOOD, CA 9071 4
D e c o r a t i v e D e s i g n s of F r a n k L l o y d
3 % 6" %"
hardwood peg is l on g overall with a long tenon, Diameter of the en on i s tapered for a snug fit. Unfinished.
Wright-to J u l y 3 0 . Renwick Gallery .
Smithsonian Institution. Washington. D . C .
MOVING?
Your postmaster will forward your magazine only if you request it. We don't want you to miss an issue, so please send us your new and old addresses at least six weeks before we publish. The Taunton Press Address Change PO Box 3 5 5 Newtown , CT 06470
1 1 TH STREET
L O N G I S L A N D C I T Y , N .Y . 1 1 1 0 1
t
2nd C:tnadian Agricultural International Wood Carving Exhibition- A u g . 1 6 to
Sept. 4 . Canadian National Exhibition . Many carvings. cash prizes, Entry deadline is June 1 6 . Write Ross T. Farr. Exhibition Place, Toronto. Onto M6K 3C3 Canada. 1 1 th International Wood Carver's Con
Y2",
MaJJ. ReJ. add SaleJ Tax 04E51-GR 04E54-GR
04E52-GR
Bag of 10 pegs Bag of 50 pegs Bag of 100 pegs All PriceJ pOJtpaid
5% $ 2. 15 9.50 $18.75
$
gress-Aug. 4- 1 3 , Great Mississippi Valley
Catalog 50¢. Free with OI'der.
Fair. Davenport. Iowa, Entry deadline is July 1 . Write Chester Salter, 2 8 1 5 West Lo cust St . . Davenport. Iowa 5 2 804.
Order mail or call Toll Free 1 -800-225-1153 (Ma,Res.1-800-842- 1 234 ) Master-Charge, Visa. Am, Express welcome.
Most state and regional carving clubs ex hibit annually. For a list ofshows and dates, contact National Wood Carvers Association, 7424 Miami Ave. , Cincinnati, Ohio 45243.
by
WOODCRAFT SUPPLY CORP.
68
Ave. MASS. 01801
Dept. FW 3 1 3 Montvale WOBURN,
37
THE WOODCRAFT SCENE
________________________
Harpsichords Musicians make concert instruments by Stanley
N.
Wellborn
T
om and B arbara Wolf consider themselves musicians first and harpsichord makers second. It is their work with wood, however, that is pro ducing some of the finest keyboard in struments being built in America to day . " Our great advantage is that we have the practical experience and historical insights that only musicians who have been out on the concert circuit can understand , " says Tom Wolf, 30, who spends several months each year on tour with the Smithsonian Chamber Players. He plays string bass with the group , does about 40 concerts a year and still puts in about 2 ,000 hours in his Washington , D . C . , shop, which is housed in a former fire station. His wife , Barbara, is a pianist and also an accomplished instrument maker. "We can tell a performer who buys one of our harpsichords that it will hold up in different climates, will remain structurally sound while being shipped from city to city , and will re-create the musical quality of a fine European an tique instrument , " he says. That is evidently of prime importance, because most of the Wolfs' customers are pro fessional musicians. Their current pro ject is a harpsichord to be used exclu sively in the Kennedy Center for the Performing Arts in Washington. The Wolfs make about six in ments a year and have a three-year waiting list. Their prices range from $4 , 000 for a Flemish virginal to $9, 500 for a German fortepiano. No com mer-
A precisely crafted soundboard is critical to the tone of the instrument. Here, the soundboard is carefully measured with a 'poor man 's caliper, ' a dial indicator at tached to a Jigsaw. Then the soundboard be planed to the proper thickness.
WIll 38
cially manufactured parts are used in any of the instruments. " M y father was a carpenter, and so I grew up with a knowledge of basic woodworking , " says Tom . " The first harpsichord I made was from a kit . It was a horrendous instrument, but I was fascinated with it . " After finishing their studies at the New England Conservatory of Music, Tom and Barbara decided to apprentice in instrument making. In Boston they studied with two of the foremost harp sichord makers in the world-two years with Eric Herz, then another three with the late Frank Hubbard , who wrote the key text in the field , Three Centuries of Harpsichord Making (Harvard Univer sity Press, 79 Garden St. , Cambridge, Mass. 02 1 3 8 , $ 1 5) . Then Tom worked for two years as a restorer at the Smithsonian Institution Musical Con servation Laboratory . " You can ' t really understand how to build great harpsichords unless you ex amine piece by piece the way the old masters did .their work , " he says. " The Smithsonian has the best collection in the U . S . of antique keyboard in stru ments, and I rebuilt several of them that were in very deteriorated con d i t ion . It was an i n v a l u a b l e ex perience . " In 1 97 5 , the Wolfs decided to strike out on their own. " Barbara and I found that we were obsessed with the idea of starting our own business, and we felt that there was an expanding market since more and more people were taking up the harpsichord all the time , " Tom explains. The building of a harpsichord re quires a variety of woodworking techni ques and involves the use of many dif ferent woods , most imported from Europe. An Italian model , for ex ample, has a case and moldings of Italian . cypress, a fir bottom , poplar framing, oak pin blocks and walnut bridges and j acks . The keyb�rd is basswood, with boxwood and ebony overlays . The soundboard, over which the strings are stretched, is European spruce . The instrument, without its base and legs, weighs only 35 pounds. One familiar feature of an instru ment maker's shop is a " go-bar deck" used in gluing and veneering opera-
French double-manual harpsichord by Tom and Barbara Wolf, with paintings by Sheridan Germann.
tions. This useful device allows com plex shapes to be clamped or held down with long, springy oak strips. The piece to be glued is placed on a deck that can be raised and lowered to ac commodate the size of the work . Wooden strips , or " go- bars , " are bowed and braced between the mov able deck and the stationary upper deck, or the shop ceiling. Using many go-bars along the length and width of t h e work p r o v i d e s c o n s t a n t a n d uniform pressure and allows numerous pieces to be held in place while the work is being arranged. " The go-bar deck is such a simple j ig that 1 ' m sur prised it hasn ' t caught on with more woodworkers, " says Tom . " It would be particularly useful for marquetry and model making. " The Wolfs believe that some of their most distinctive work comes 10 the fi nishing stages . Their inlay , ve neering and paint ing-touched off by an elaborately carved and gilded rose a n d s i g n a the t u re - a r e trademarks of their instruments. Barbara does much of the final painting and gilding. One of the most painstaking operations is the preparation of the soundboard , a piece of edge-glued quartersawn spruce that v a r i e s i n t h i c k n e ss fro m a b o u t 0 . 105 inch to 0 . 1 3 5 inch . The thick ness increases near the center of the board, and a precisely tapered shape is critical to the production of high quality tone in the instrument. Using what he calls a " poor man ' s deep throated caliper" -a dial indicator at tached to a j igsaw-Tom can calculate the thicknesses minutely. Then, by set ting his wooden plane to remove 0.005 in. of wood with each pass, he
can easily take off the proper amount of stock. Rubbing the wood with the shav ings brings out a natural sheen that needs no further finishing. Another technique, used in cutting the keyboard, is to file off the points of a 20-in. band-saw blade, so that the resulting kerf has virtually no rough edges. Tom does this by sandwiching the blade between a carborundum stone and a hardwood block while the saw is running. Although the tech nique appears dangerous, Tom has not yet broken a blade. "The space be rween the keys should be as narrow as possi b l e , and getting a pe rfectly smooth band-saw cut simply eliminates a lot of labor, " he says. Another procedure that ensures con tinued improvement is a complete writ ten record of each instrument , covering such areas as soundboard, stringing, woods and paints. "After each instru ment is completed, I listen to it and note any Improvements over previous harpsichords. I try to figure out what I did differently and incorporate it in fu t u r e w o rk . " T h e W o l fs p r i d e themselves o n using materials effi ciently. " With the price of wood today, you can ' t afford to waste anything, " says Barbara, the bookkeeper of the business. "We try hard to catch a flaw or mistake before it happens. It's possi ble to salvage almost any error and turn it into a virtue. That' s the real mark of a professional in any field. "
0
Stan Wellborn, a Washington-based journalist, is a frequent contributor to Fine Woodworking magazine.
WAlCO FINISHES The original deep
penetrating Oil
& Resin
Sealer-finish
3.58 4. 79 Pt.
ot.
14
.
47
Gal.
• Danish Oil F i n ish ( Natural) • Teak Oil Fi nish • Marine Teakwood F i n ish • Wood Floor Fi nish • Exterior Wood Fi nish • Satin Wax ( N atura l ) • Satin W a x ( Dark) • Satin Oil
THE -DOVETAILERw JIG FOR PROFESSIONAL LOOKING JOINTS For quick and easy dovetail joints and box joints (with accessory bit). We ran the cutting bit on a
200
'A,", 3
DANISH OIL FINISH
•
Medium .
3.90
Pt .
eral boards with a 'A,", 1
Qt .
15.80
Sales Tax
RPM drill and exper
we significantly reduced "tear out." Bits will
(1) %'1 ;
NOT fit a 'j." chuck. Jig set includes: one
Gal .
grid; one
All Prices I nclude Freight. No C.O.D.'s N e w York State Residents Add
200
ienced slight "tear out" on exiting. With practice
Dark . Black Walnut
5.22
R P M drill and made incredibly fast and
clean cuts in Maple, Oak, etc. We then cut sev
(1)
bit assembly; one
with depth stop; one
7%
(1) $21.00, one
(1)
(1)
guide handle
dovetail bit (width:
set o f detailed illustrated instructions.
postage included. Replaceable Dovetail
Bit, $4.50. Boxjoint Bit, $4.50. In addition to this
TOBI N 'S
jig we sell many other high quality hand tools. Write for our current catalog, $ 1 .00.
4269 JAM ES ST. E. SYRACUSE , N.Y. 1 3057
T H E P R I N CETO N COM PANY P,O. Box 276CC Pri n ceton , Mass.
( D E A L E R I NQUI R I ES W E LCOME)
01541
Wide Lumber · Flitches Rosewood • Cocobolo Ebo ny • Walnut If you are a wholesale buyer of f i ne domestic and i m ported hardwood s : We are i m porters operat i ng the fi nest saw m i l l i n the U n ited States for saw i n g expensive h a rdwoods: u p to wide,
2' - 16' l o n g , Ve" up t h ick.
45"
Our products: Logs, l u m ber, squares, sawn veneer, book m atched f l itches, table tops
Suitable for: Scu l pt u re, carv i n g , cab i n et m aki n g , crafts, m us i cal i nstru m e nts
Available from stock: I nd i a n rosew ood, H o n d u ras rosew ood , Cocob o l o, I n d i an ebony, Macassar ebony, A merican black wa l n u t Man ufacturer a n d retai l l u m ber company i n q u i r(es invited .
329 N azaret h , PA 18064 . � � 215-759-2837
Box
Springy oak 'go-bars ' braced against sta tionary upper deck hold down work placed on movable lower deck. Jig provzdes uni form pressure for gluing complex shapes.
.- .- ....
39
Fine WqqqWorking
Summer 1978
__
1
Sp
innin g Wheels
The tricky pans are the flyer/ bobbin and the wheel itself by Bud Kronenberg
ne of the most compelling motivations for working with
O wood is the natural urge to create. When we successfully
produce an item that is well-built, useful and good- looking, our feelings of pride and achievement are temporarily satis fied . However, I don ' t think a woodworker has realized the fullest sense of achievement until he or she makes a thing that is not only functional and beautiful, but also works mechani cally and productively, such as a spinning wheel. There are two broad categories of spinning wheels. The large " walking" wheel (so named because the spinner has to walk to operate it) is used for spinning wool. The wheel is from 3 ft. to 6 ft . in diameter, and its rim is in. to 4 in. wide. The spindle is turned by a drive band on wheels of dif ferent sizes. A walking wheel, how'ever , requires one opera tion to spin the fiber and another to store the yarn. The sec ond category includes treadle wheels, originally used to spin flax into linen and modified in the late 1 800s to spin both flax and wool. The key to this " modern " wheel is the flyer/ bobbin, invented by Leonardo da Vinci about the time Columbus discovered America, which spins and stores the
1112
40
yarn in one continuous motion. In 1 5 30 Johann Jurgen, a German from Saxony , developed a treadle arrangement to ac tivate da Vinci's device. Thus treadle wheels are also known as Saxony wheels. The purpose of a spinning wheel-or any other spinning device-is to twist short individual fibers into an overlapping long thread, which can then be woven into cloth. Most animal fibers, and many plant fibers, have microscopic teeth that engage each other when the fibers are twisted together. This interlocking is what makes a spun fiber strong and suit able for weaving. On the Saxony wheel, the fibers are twisted as they pass through the orifice, the hole in the end of the shaft. The resulting yarn or thread passes over the hooks on the flyer and onto the bobbin for storage . Since the bobbin must revolve faster than the flyer in order to pull the yarn through the orifice, the bobbin pulley diameter is usually in. to Yz in. smaller than that of the whorl pulley that moves the flyer. Pulley diameters can be changed to suit yarn thickness. Increasing the sizes of both pulleys makes for slower spinning, an advantage for beginners who haven ' t yet
Y4
Anatomy of a Saxony Wheel
� e;t
. Dimensions and d tails are taken tyle wheel, from author's Sha shown in photo a t I ;
L.H.
.
th read
'}
2"
dia. groove
�
�
'i O O "
M other-ot- a l l dia .
1%"
by 10"
Table
C
Tapered dowel Wheel support
0"�5"
Treadle detail 24"
--..-1
41
Left, 'walking ' wheel has no treadle and is spun by hand. It is used for heavy fibers and thick yarns. Center, two-handed 'gossip, ' or 'courting, ' wheel (c. 1875), designed to increase production. Right,
early 1 9th-century chair wheel has two wheels connected by a dnve band, for high speed. Double treadle and pitman permit precise starts and stops without hand propelling.
got the knack of feeding in the fibers smoothly and rapidly. To use a Saxony wheel, one first ties a leader of yarn to 'the bobbin and threads it back over all the flyer hooks and through the orifice . Then the spinner feeds in the prepared and roughly aligned fibers and works the foot treadle. The impetus of the treadle is transmitted to the flyer and bobbin via a double drive band around the great wheel. The spinner moves the yarn back and forth from hook to hook on the flyer so that the yarn winds evenly onto the bobbin. When the bobbin is full it is removed , and another is inserted. When I began making spinning wheels, the only electric equipment I had was a lathe, a drill and a sabre saw. Despite laboring 60 hours on each wheel , they were not the epitome of workmanship or workability. You don ' t need elaborate equipment, but you do have to think and plan ahead. I ' ve added a band saw, wood threading kit, circular saw, radial drill press, and router and table. Now I spend about 1 5 hours on a medium-sized wheel-complete. The equipment has helped to reduce the time, but more important are exper ience and the j igs I ' ve had to concoct. Our primary attention will be focused on the treadle wheel, because it's the most popular with today ' s spinners. If you can make a treadle wheel, you ' ll have little difficulty making the simpler wool wheel. Even the rim of the large wool wheel is easy, because you don ' t have to steam the '/.I-in. oak to bend it into a circle 5 or 6 feet in diameter. I ' ve done this with 1/4-in. oak 200 years old without soaking or steam ing, and without any sign of impending casualty. You can take working measurements from an antique wheel, but the exercise of measuring a few of them will prove to you that nothing is standard about them . All the dimen sions and the design of each turning are different from wheel to wheel, although each builder had preferences that appear in much of his work-this we know because many of the makers signed their wheels. There are some critical relation ships which must be maintained if the wheel is to spin prop erly, and I ' ve tried to discuss them as they arise in the text and diagrams. The dimensions given here are taken from my reproduction of a Shaker-style wheel. There isn ' t anything magic about them , except that they work. If you do intend to reproduce an old wheel, the turnings should all be of the same design , but you don ' t have to match the ones on your model. There are hundreds of styles of an-
tique wheels. Take your pick from the highly ornamental ones found in the Philadelphia area, down to the very plain Shaker style. The Irish preferred the upright type, East Euro peans favored very small wheels-sometimes only 20 in. from floor to' top-the French liked decorative turnings, and so on.
42
Materials I ' ve made wheels from pine, walnut, maple, oak :>.nd cherry. In my opinion, pine is too light; maple is nice to work but hard to color properly; oak is good for rims and tables; walnut is expensive and I don ' t like its dirt-like dust. Contrary to the experience of others, I have had good luck threading walnut. But my favorite is black cherry. The natural coloring is beautiful, and it's fine for all parts of the wheel. All the material for a Saxoriy wheel should cost less than $20. To be historically authentic, use thoroughly dry white or red oak for the rim and the table . If you demand complete authenticity, you ' ll use only quartersawn oak, as the Col onists did . You ' ll probably use less wood than you thought you ' d need . That ' s because there are so many small parts to use up the small leftovers. I cut the rim from full I -in. stock and square up the quartermoon leftovers for spokes. Wheel
The most difficult part to construct is the wheel itself. It re quires the most accuracy, because it must be flat, true and perfectly round . When you have a good wheel, the rest of the job will be fairly simple. I sell wheels only for $6 5 , and a com plete spinning wheel for as little as $ 1 2 5 . This shows the im portance I put on the wheel. It's not the materials, it's the time it takes to fit and assemble. It takes me only about minutes t o turn a spoke. M y wheels have from 4 t o 20 spokes, depending on the style. It is almost always an even number, which gives the best balance and design . The first step is to make a template of the rim to the speci fied width (from 1� in. to 4 in . ) . This is nothing more than two perfect circles drawn on the template material of your choice-Masonite or cardboard is fine. Quarter the circle as shown in the drawing (opposite page) , and transfer the four sections to the wood, running the grain lengthwise. Cut the sections as squarely as possible and use every bit of skill you can muster for the inside cutting of the circle. Don ' t be overly concerned with the outside, because it will be recut later. In
lO
fact , some makers leave the outside square for now, as the straight edges can help in getting the joints to fit truly. The four j oints can be blind mortise and tenon, splined, or doweled . I ' ve found it necessary to work on a perfectly flat surface. When I started out, there wasn ' t such a thing in my workshop-so I tried a piece of plate glass large enough to ac commodate the entire wheel . Not only is the glass flat, but you can hold it up to inspect the progress of the joints from below. When that' s done you can get ready to put the joints together, using the best glue you know of. I use one pipe clamp with a thickness of waxed paper over the plate glass ro prevent sticking (and spoiling my only flat surface) . When putting pressure on with the clamp, which is on each of the two longest rim sections, be careful the j oints don ' t buckle up-not a fraction . It's better to back off on the clamp if the work leaves the glass. If you ' re using a doweled joint, let the glue set, then drill and dowel with one or two dowels through the outside of the rim , but not all the way through. Vee groove the dowels for better glue contact. While the rim is setting, I turn the hub of the wheel. Be fore you take it off the lathe, put a circumferential cut mark in the exact center of the rim of the hub as you face it, spin ning on the lathe. This is important and will save frustration later on. After the hub is sanded and polished you' re ready to drill the spoke holes. Mine are usually % in . , but follow your own measurements. Instead of trusting to my error-prone math to space the spoke holes, I make a pencil mark on the cut- line to use as a starting point, and work with dividers through trial and error until I get the spacing correct. After the spoke holes are drilled , put a witness mark across the center line, and cut the hub in half along the circumferential center cut. I ' ve found this " split-hub" method makes the strongest wheel, but there is another method I ' l l explain later. Don ' t drill the axle hole yet. Before you start making the spokes, measure the diameter of the holes in the hub, because you ' ve reduced them by the thickness of the kerf when you cut it in half. I make my spokes freehand, with the aid of calipers. I don ' t have a du plicating attachment for my lathe, but I soothe my feelings by telling myself, neither did the American settlers. When I am bored by the repetition of many spokes, I do a couple of them on my 1 00-year-old foot-treadle lathe. Promptly , my respect for the early craftsman zooms. The inside of the wheel rim must be j ust as round as you can get it, and now is the time to sand and shape it if you ' re going to , because soon the spokes will be in place, I use a large-diameter sanding drum on the drill press. Locate the spokes freehand, with the aid of calipers. I don ' t have a du plicating attachment for my lathe, but I soothe my feelings by telling myself, neither did the American settlers. When I am bored by the repetition of many spokes, I do a couple of them on my 1 00-year old foot-treadle lathe. Promptly, my re spect for the early craftsman zooms. The inside of the wheel rim must be j ust as round as you evening when you won ' t be interrupted-there's no stopping once you start. The hub must be centered as perfectly as pos sible, laterally and longitudinally, with the inside of the rim. The cut surface of the hub must be in the center of the thick ness of the rim . Not an easy task, but you can do it by using shims and being careful. Take time to experiment. Put the spokes in the rim , lay them on one half of the hub and put the other half on top . By holding them together you should
Quarter the wheel template, then lay out the four segments on a 1-in. plank. The waste crescents may be squared up and turned for spokes.
Use a single bar clamp to butt-glue the four segments together; working on plate glass ensures flatness.
\
/
When the glue has set, carefully drill through each joint for two rein forcing dowels. Or, be fore assembly slot each piece a n d glue in a spline.
Turn the hub between cen ters and cut a small cen tered notch around the cir cumference.
Lay out and drill "la-in. spoke holes along the center line, then cut the hub in half.
43
Center the half-hub in the rim, place the spokes, and put the other half-hub on top. Don't glue until everything is just right.
f'w"''''�''' m,., '"
A shallow box with a center hole (shown in section) allows the hub and rim to sit flat for drilling the axle hole. For alternate assembly method, shown below, drill spoke holes in solid hub and rabbet in side of rim, then notch spoke ends to fit rabbet shoulder. Pin with small dowels.
problems at first, because there ' s a surpnslOg torque and strain on the axle and hub. The axle can ' t be allowed to turn or slip in the hu b . The old-timers solved the problem by making a square hole in the hub , and squaring the axle part that passed through it. I find it difficult to make square holes and I don ' t if I don ' t have to, so I use regular hardware-store Y4-in. steel rod and weld a washer to it . Then I drill four holes in the washer and brad the washer to the hub. This makes it possible to take the wheel apart if need be. You ' re not ready, at this point, to fasten the axle permanently to the wheel don ' t . First you have to make the outside of the rim perfectly round . The jig shown on the next page is the best way I know to do this. Use a rod as a pivot to turn the wheel into your band saw. Bear in mind that the pivot should be even with the blade. If you don ' t have a band saw, you can put a 90° bend in a rod that will fit your sabre saw or router. With the rod in the axle hole and the sabre saw on the other end, you can cut the circle and make out pretty well. The perfected outside rim must now be grooved to take the drive band . You can make two V -shaped grooves, or one wide groove with straight shoulders. Make them deep enough-at least in. , and preferably in. Old wheels were grooved both ways, and either way spins equally well. Without a router or shaper, you ' re in for a lot of work with a rabbet plane , file and rasp, unless you can concoct a way of mount ing the wheel outboard on the lathe. After grooving, you may want to do some decorative routing on the flat side of the rim. I do this using the same method I suggested for sabre sawing the outside rim : With a rod in the axle hole, I swing the router around the wheel . This works very well and quickly. Don ' t make the decorative grooves too deep ; in. is usually sufficient.
%
%6
'/16
be able to pick up the wheel in one hand. When you have the situation under control, glue the spokes in the rim and turn them so the best grain shows. Apply glue to the bottom half of the hub, then to the spoke ends and the top half of the hub and clamp. I stress accuracy in locating the hub, but you ' ll still have a chance to make a slight correction when drilling the axle hole. Remember, the perimeter of the wheel still hasn't been rounded out yet. The next step is locating the axle hole, by repeated meas urement from the inside of the rim . Drill the axle hole and be sure that it is exactly perpendicular to the rim. The j ig shown above, which I call a "wheel-box , " will help situate the wheel perpendicular to the drill-press bit. The diameter of the axle hole depends on the size of the axle and the method you use to secure the axle to the hub. The alternative method to drilling spoke holes in the rim is to rout a '/4-in. rabbet on the inside of the rim , down to about three-quarters of its thickness. The spokes fit holes drilled in the hub and are notched to fit over the remaining shoulder at the rim, then pinned with 'AI-in. hardwood dowel angled through the rim from the lip side . This ancient method uses no glue . Its advantage is that you can adjust the trueness of the wheel by moving the spokes across the thickness of the rim . I ' ve done it this way , but prefer the split hub because I believe modern glues make it stronger. However, wheels con structed by rim-rabbeting have lasted for hundreds of years. If you ' re after authenticity, this is the way to do it. Now we need an axle and pitman crank. This caused me
44
The table Next I start on the table using 2-in. planed , or full S / 4 stock, 6 in. to S in. wide. Some tables are slightly tapered toward the end with the tension device. A half-inch off each side is plenty of taper. The top of the table will be very visible, so choose wood with attractive figure. The reverse is true of the underside-it will seldom be seen. Just be sure it doesn ' t have knots that would interfere with the holes you ' ll b e drill ing later. At this stage do some preliminary sanding and any design shaping you wish . The three legs are next. Turn them from the 2-in. stock, making the two front legs the same length and the back leg an inch or two longer if your table is sloping. Drilling the leg holes in the table can be tricky because the angles must be ex act. My solution is a radial drill press. A riskier method is a hand-held bit and brace guided by sighting a sliding bevel. The legs have to be a tight drive fit into the table. You can get a good fit by careful tapering on the lathe, and by ream ing the leg hole . Don ' t drive the legs in yet , because you ' re going to have to take them out again before you ' re through . The next step is the two wheel-support uprights. They too will be a tight drive fit . Take pains to drill the support holes particularly accurately-they must be parallel . If they ' re not, the wheel will go off at an angle and you ' ll always have an un satisfactory spinner. The axle slots in the supports are also critical. Both should be the same depth when the supports are seated, so a rod set in the slots is parallel to the table . Now you can see how your wheel is going to look. Using a rod or dowel, put the wheel in place . Spin it slowly. Is it running
true? Don ' t worry if it rubs on one side, because later it will be riding on leather bearings that can be built up on one side more than the other to compensate for the tilt. Don ' t ever glue the upright supports into the table . If you don ' t have a tight fit, save yourself later grief and make new supports now. After the wheel supports are in, we can finish making the axle and pitman , because we now know the distance between the outside of the wheel supports. To make the pitman crank, I fit a piece of pipe over the rod, for leverage. You may wish to heat it and pound out a better arc. As you look at the wheel from the pitman side, the curve goes counterclockwise, which means that from the spinner's side it goes clockwise. The end of the pitman fits a slot in the drive rod, or footman, so the turned-over tip should be long enough (about 112 in. to % in .) to accept the footman and a snap-nut that holds it in place. Be sure the turned-over tip is parallel to the main axle. Tension device It's best to slot the table for the tension device before making the threaded parts. I ' ve found it best to locate the slot about Yz in. off center toward the spinner's side. Drill a hole to ac cept your sabre saw or coping saw, then cut out the slot. In the end grain of the table, drill a hole to fit the tension screw, centered on the short dimension of the slot rectangle. This hole should be slightly below the center of the 2-in. thickness of the table . Just leave enough wood beneath it- Yz in. or so. I prefer to make the diameter of the tension screws at least % in. and 1 in. is better, with a Yz-in. guide peg on the end . Drill a hole to receive the guide peg into the opposite end of the tension slot. Now turn the tension screw and thread it ( "Wood Threads, " Spring ' 7 7 , pp. 22-28). Before I had threading tools, I used Ih-in. threaded steel rod pinned into a turned handle. For the upright part that moves the mother-of-all, I welded a rod on the flat edge of a square nut. This works perfectly well and doesn ' t affect the appearance of the wheel because it's concealed. The side walls of the tension slot have to be parallel and squared off, because the mother-of-all holder is going to travel its full length. If it is not accurately made, the holder with the female thread will bind on the sides. Turn the holder but leave a square section to drill and thread. The dowel part can be left longer than necessary and cut to length later. Turn the half-ball part that is directly beneath the mother-of-all. This is not attached, ever, to the upright from the tension screw . The mother-of-all and maidens are easily turned, but take care when drilling the holes for the maidens-they must be a tight force-fit . Notice that they angle back away from the wheel and are not perpendicular to the table. Cut both leather bearing slots in the maidens the same distance up from the mother-of-all. Don ' t put any of these parts together permanently, yet. Treadle The next step, if you ' re following my order of working, is to make the treadle bar, treadle platform and arm . If you want to be fancy, you can dovetail the plarform into the treadle bar. This lends a pleasing touch. The simplest way to attach the platform is to have it ride on top of the bar and dowel it on , or you can mortise it. Now, we come to another operation that could lead to a pitfall, if care isn ' t taken. The hole in the end of the treadle arm must come directly beneath the pit man crank when it' s in the down position. Put the wheel in
Auxilary table, with sliding bar that carries dummy axle, permits band saw to cut outside of wheel per fect/y round.
Or, a bent rod pivoting in the axle hole will guide a saber saw or router around the rim. Same jig with router can be used to cut groove for drive band, and decorative coves.
The pitman-crank axle is made from 'i.-in. rod with a washer welded to it. Make the bends in the se quence shown, taking distances from your wheel and uprights.
8 ,, ' / OJ ,
place and angle the treadle arm to accomplish this. You can now drill the angled hole in the bar to accept the treadle arm. Use cut-off spikes, or rod, for the metal pins on each end of the treadle bar. The pins should come straight out of the ends of the bar. These pins will go into holes in the one front leg nearest the spinner, and in the back leg. You have to remove the legs to install the treadle. If you want to try out the treadle acrion , make the footman and put the wheel in place with strips of leather in the bot tom of the slots for bearings. Chances are you ' ll find the wheel jumps up and down as you treadle. Center the wheel
45
between the uprights by adding or subtracting thicknesses of bearing leather, then drill a 1/4-in. hole j ust above the axle, all the way through the upright nearest the spinner, and turn a peg to fit . This will hold the axle in place and stop the jump ing. In actual use , the bearing leathers will be oiled continu ously, but if you oil them now you may affect the finish . The flyer and bobbin You can purchase an excellent flyer/ bobbin assembly for about $30. A good source is Eric Gudat, 460 Union St. , Washingtonville, Ohio 44490. His assembly fits an 8-in. span between the maiden leathers. If you want to make your own , here are my suggestions: Start with the metal shaft, which is the most difficult. If you have a metal-turning lathe, you ' re all set. If you don ' t , you can use a steel rod with copper or steel tubing to form the ori fice , and a washer can be soldered or welded in place. The function of the washer is to ride on the inside of the maiden bearing to keep the whole assembly in place. Or, turn the shaft out of wood . The key to making the horseshoe-shaped flyer is accuracy. I cut the outside, then put it on the lathe to make the round section near the orifice and to even up the outside. Before cutting the inside of the horseshoe, I drill the shaft hole while I still have a flat surface on the ends . The flyer, which is permanently attached to the shaft , must be centered and in balance or it will vibrate as it spins. It's going to spin rapidly , because for every pump of the treadle it will rotate from 10 to 20 times, depending on the size of your wheel. Securely pin the flyer to the axle. The next part is the bobbin. It took me years to realize the bobbin is made in three parts: the shaft , and the two ends . Make the wooden shaft with the wood running lengthwise with the bed of the lathe, and turn the ends of the bobbin with the grain perpendicular to the bed . Drill holes in the ends to receive a glued and force-fit core. The hole in the core must be dead center and true, or again you ' ll have a wobble. The bobbin has to run free and easy on the shaft-it' s never attached . Next make the whorl the same way as the bobbin ends. The whorl is firmly attached to the shaft. The groove in the bobbin for the drive band must be smaller in diameter than the groove in the whorl , so the bobbin will rotate faster than the flyer. This is essential if the wheel is to spin properly. The best way to attach the whorl to the axle is with a lefthand thread on the axle to receive a nut embedded in the whorl. If you don ' t have the necessary tools, force-fit and pin it. But it is better if the bobbin is removable, so the spinner can remove a full bobbin and replace it with an empty one. After you know the size of the shaft , cut the maiden bear ing leathers and put the holes in them to receive the shaft . A little trick is to use a spade bit in your electric drill . I ' ve always had trouble with leather punches and find drilling more prac tical . Sole leather for women ' s shoes makes an excellent bear ing material . It should be about Y4 in. thick. Loose ends and fini sh es
The drive band is a circle of cord that is folded once upon itself to make a figure eight. The two ends should be spliced or sewn, not tied . The drive band goes around the wheel and around the whorl , and the other loop comes from around the wheel and goes around the bobbin . Before you fit the drive band, screw the tension device so the flyer/ bobbin is as near the wheel as possible-even the best drive bands stretch. A
46
suitable drive-band cord is a small-diameter chalk-line avail able at most hardware stores. The best is a heavy linen line, braided or plied . A heavy linen fishing line used for trolling is excellent, but hard to find. Spinners usually make their own by plying together about six yarns of thinly spun linen . A linen drive band will last for years, and there's very little stretch. Apply beeswax to the band and put it on. Decoration is optional: Rope burnings can be done while the leg or upright is still on the lathe, and after sanding, by holding cord (I use chalk-line) against the revolving wood un til it JUSt starts to smoke. Or you might carve on the sides of the wheel table, or paint on fancy designs. Everything should be set to go , except two things. The maiden leathers have to be secured with small wood pins , and the mother-of-all has to be pegged to the upright tension part. Before drilling and doweling, aim the flyer/ bobbin pul leys at the wheel . Now, with everything in place , treadle the wheel . A common problem is having the drive-band come off the wheel . There are three remedies: Grasp the wheel sup ports with both hands and twist to aim the wheel at the bob bin and whorl pulleys; raise or lower the leather bearings in the uprights; or deepen the groove in the wheel. When things are going smoothly, insert pins into the maidens under the mother-of- all, and into the wheel supports under the table. The pins are to keep these members from rotating. Another common problem is having the footman slip down around the pitman arm. The solution is to bend the tip so that it' s parallel to the axle shaft . I usually finish cherry wheels with a good oil- base prepara tion that will not slow down the wood ' s natural coloring pro cess. The only problem with boiled linseed oil is that the sur face will mildew in hot and humid weather. The old formula of equal parts boiled oil, turpentine , and dark vinegar doesn ' t seem to mildew as easily. Exposure to sun and air ac celerates the darkening of cherry, so I put my completed wheels outside to tan . Tung oil will stop the darkening at any stage you wish. After the finishing is complete, apply a lightweight sewing-machine oil liberally to all places of fric tion: maiden leathers, wheel-axle leathers, between flyer and bobbin , pitman crank end and treadle-pin holes. Oil regu larly, before every spinning.
0
TE
AUTHOR'S N O : The following firms and individuals sell spinning wheel plans-Constantine' s , 2050 Eastchester Rd . , Bronx, N . Y . 1 04 6 1 (Colonial flax wheel, $2) ; Early American Life Magazine, 206 Hanover St. , Gettysburg, Pa. 1 73 2 5 (Saxony wheel, $5) ; Minnesota Woodworkers Supply Co. , Industrial Blvd . , Rogers, Minn. 5 5 374 (Pennsylvania Dutch wool wheel, $2 . 20 ; Colonial wheel, $ 2 . 20; ver tical wheel, $2 . 20) ; Woodcraft Supply Corp . , 3 1 3 Montvale Ave . , Woburn , Mass. 0 1 80 1 (Welsh sloping wheel, $ 10; English upright wheel, $ 1 0 ; Norwegian spinning wheel, $ 10) ; and Stephan Vannais, 1 8 0 1 N. Hampton St . , Holyoke, Mass. 0 1 040 (Shaker treadle wheel, $ 1 5 ) . I ' ve stopped using plans because I ' ve made so many wheels. I work from photographs and from antique wheels in my collection. The only book I know of about spinning wheels themselves is American Spinning Wheels by David Pennington and Michael Taylor, Shaker Press, Sabbathday Lane, Poland Springs, Maine 04274 ($4 . 50) . For information on learning to spin and on spinning accessories, consult Your Hand Spinning by Elsie Davenport, Select Books, 5969 Wilbur Ave . , Tarzana, Calif. 9 1 536 ($5) , or Spinning and Weaving with Wool by Paula Simmons, Pacific Search Press, 7 1 5 Harrison St. , Seattle, Wash. 98 1 09 ($9 . 9 5 ) .
Bud Kronenberg, 58, a former advertising copywn'ter, now makes and sells spinning wheels in Southbury, Conn.
Atnerican Woodcarvers
Exhibit blurs traditional defmitions by Roger Barnes
OTE: The Craft Center in Worcester, Mass. , organized a major exhibition this spring called " American Woodcarvers. " After a month in the center's own gallery-where it drew unusually large numbers of people-the show shifted to the Warner Communica tions Building in Rockefeller Center, New York City. It closed April 29. The organizers-center director Angelo Randazzo, his assistant, John Russell , and the school' s woodworking teacher, Mark Lind quist-set out to explore the frontier of contemporary carving. They wanted to show how woodworkers had supplemented the traditional gouge and mallet with sophisticated 20th-century machinery. They also wanted to blur the usual distinction between carving and sculp ture. Fine Woodworking therefore asked its art director Roger Barnes, who is a sculptor and painter, to take a look. He selected the pieces shown here from the 3 1 on display, and his report foHows. EDITOR ' S
he handsome and impressive " American Woodcarvers" show has been carefully chosen-all the pieces are a pleasure to see and touch, and all attest to the skill, persis tence and dedication of their makers. The organizers suc ceeded in broadening the usual definition of woodcarving, for the show is primarily of wood sculpture, most of whose antecedents are to be found in the modern masters and move ments of the 20th century: Picasso, Brancusi and Calder; art deco, surrealism and dada, and their contemporary variants. The pieces by Harry Wunsch and Jeffrey Briggs are notable exceptions, in that they come from an older tradition of carv-
T
ing and form . A number of the pieces-by Steve Madsen, Robert Strini and Michael Graham-derive from the ordinary box or container, and although much transformed they re main extensions of this functional use of wood . In terms of sculpture, though, the most successful pieces are those by John Bozarth, Wendell Castle, Jon Brooks and Wunsch . Because of its unusual conception , this show raises as many questions as it answers. In particular, one wonders about the intent of the various woodcarvers represented-are they set ting out to make sculpture, and only incidentally working in wood, or are they woodworkers who have stumbled upon sculpture? In some of the pieces, the wood seems to be merely a convenient material for a vision of form , while in others the form appears to be the result of wishing to use certain woods and techniques. The first is the approach of the sculptor, the second of the woodworker who is moving away from using wood for functional ends and toward esthetic goals. It seems to me that the person trained as a sculptor, using wood as the medium to realize his aims, could often benefit from greater knowledge of the material and traditional tech niques for working with it. And conversely, the woodworker could frequently benefit from a more thorough knowledge of visual design elements and the history of art and design. Ulti mately it is the amalgam of technique and esthetic judgment that produces outstanding work.
Foreground: 'Sun Bather ' (48 in. by 22 in. by 24 in. ; elm) and 'Fish Hawk ' (32 in. by 18 in. by 18 in. ; elm) by John Bozarth of Providence, R.I. Bozarth is a sculptor who has worked in clay, stone and metal, but his favon"te matenal is elm wood-it 's free and it carves well. He roughs out with a chain saw, then carves with mallet and gouges. Many of his pieces are softly colored w ith n a t u ral dy es. ' S u n Bather' is pink; 'Fish Hawk ' is aqua and pale blue. Center: 'Oh Elm ' (6 ft. by 5 ft. by 5 ft. ; elm) by Jon Brooks of New Boston, N. Brooks also works green wood with a chain saw, but does much of his fin ish carving with a body gn·nder and electn·c sanders. Right: ' The Rule ' (12 in. by 72 in. by 4 in . ; m ap le) by L e roy Schuette of Durham, N.H. It is made of three longitudinal pieces joined by splines. The center piece was turnedfor the bottom curve, then cove-cut for the top curve. The numerals were carved by hand.
H.
47
\
'Flamingos Waiting for the Moment of the Moon ' by Steve Madsen, Albuquerque, N.M. (15 in. by 7 in. by 21 in. ; vermilion, zebrawood, ebony, map le, tulip wood, Plexiglas, water-buffalo h ide, ivory, rose wood and silver) . Madsen has three compli cated and finely made boxes in the show, from a sen·es he 's evolved over the past sev eral years. He prefers simple rabbet joints reinforced with dowels here, silver dowels) to intncate joinery, an concentrates his ef forts on the carving and inlay, which is all done by hand, piece by piece. The texture of the buffolo hide glued to the drawer fronts is novel, but the effect when the drawers are opened is even more startling. Their bottoms are milky white Plexiglas, which seems to glow against the dark wood sides. The flamingos are looking at an ivory marble retained in stiver, which serves as a handle for the deep box atop the case. And there is another small drawer on the back of the box.
j
' Umbrella Stand' (36 in. by 15 in. by 1 7 in. ; maple) by Wendell Castle of Scotts vtlle, Castle blocks out eacb of the three curved sides in 5 14 maple and shap es them with a router mounted on a traveling carnage, guided by a template. The bottom is a panel let into a groove; the corners are glued miters. The carved umbrella doesn 't come out. An elegant and understatedpiece.
N. Y.
'Helen ' (15 in. by 15 in. by 48 in. ; painted wood) by Harry Wunsch of Westp ort, Conn. An honest traditionalpiece with con siderable presence and personality.
'Anniversary Piece ' (16 in. by 12 in. by 6 in. ; ebony and teak, with a Sarna bell m o u n te d inside) by Ly le Laske of Moorhead, Minn.
20
Wall hanging by Chuck Masters of San Diego (24 in. by in. by 4 in. ; walnut) . Masters edge-glues slabs of 1 614 walnut, then band saws away as much waste as possible before going to work with body gn·nders, sanders, a die gn·nder and g ouges. His idea is to make wood seem as malleable as clay, a single thickness everywhere. This piece is from a senes of serving trays that hang on the wall when not in use.
48
'The Elms-Silent Witnesses of Our Past '
' TubaJewelbox ' (36 in. by 15 in. by 15 in. ; oak, walnut, bird's-eye maple, rock maple, Baltic birch plywood, palomino, padauk, leather and j5lass) by Robert Strini of Santa Cruz, Caltj. A most intriguing box (the drawers are on the other side ofthe checker足 board block in the middle) that pushes the sculptural possibilities of wood to the limit-and beyond. The drawers are swollen shut, several of the curved parts no longer meet as squarely as they when made, and the glue lines between different woods are raised-all consequences ofwood's inev足 itable movements as the humidity changes.
(24 in. by 8 in. by 36 in. ; mahogany, wal足
nut, elm) by Igor Givotovsky ofAmesbury, , Mass. Givotovsky 's 'polyglyphs come apart, like puzzles. Here, the base is made of several interlocking pieces of elm wood. The walnut tree trunks unplug or slide out of the earth, and the bulbous mahogany crowns can be wiggled off their branches. Meticulous planning, precise bandsawing and carving, and very pretty too.
dtd
2'
Show organizers had a lot of space to work with, and used it well-no clutter, no ropes around the work, good lighting.
'Free (56 in. by 9 in. by 6 in. ; stacked walnut with aluminum base) by CarlJohn足 son of EI Cajon, Caltf Johnson, an art teacher, laminates the rough form from 0 boards, then carves with gouges.
49
Drawers Logical assembly ensures proper fit by A drian C. van Draanen
ith the exception of those who make only chairs, the
W makers of furniture are regularly called upon to pro
duce pieces with one or more drawers. Often the design of the drawers must meet specific requirements. For example, a china' cabinet usually has at least one felt-lined drawer, with dividers; one drawer in a desk should have provision for pens, pencils and other small supplies. Drawer exteriors may also demand special attention. A chest of drawers is a good ex ample of a piece of furniture whose appearance depends on the proportions, shape and material of the drawer fronts . In this article I will look at what goes into making and fit ting a drawer. The methods and recommendations given here apply to traditional, first-class work, and they involve hand work. For the large production jobs a shaper or router with dovetail attachments significantly reduces the time. A drawer has a front, two sides, a back and a bottom. The front must match or complement the piece of furniture of which it will become a part, and therefore the wood is chosen mainly for appearance. The thickness of a solid front should not be less than 2 cm (% in.) in order to have enough mate rial for dovetails, and for a mortised lock if the customer wants one. As a rule the grain of the front runs horizontally. To do otherwise would result in a drawer which would have no strength without unusual measures to reinforce the joints. Moreover, the drawer front would undergo considerable di mensional changes caused by fluctuations in humidity. These problems do not exist with plywood fronts, because the direction of the grain in the face veneers is of little conse quence. Plywood fronts are often used in simple , modern fu r niture and in kitchen cabinets. To preserve the pattern of the face veneers, particularly when the grain is vertical, no rails show between the drawers. Because of this, and because ply wood drawer fronts need a veneered top edge� their construc tion and fitting are quite different from solid-front drawers and fall outside the scope of this article. The wood for the sides and back does not need to match the front. Ability to resist warping, to be hard-wearing and to finish nicely are the most important considerations. Depend ing on availablity, ash, beech , birch , maple, oak or sycamore can be used. Cedar, fir, pine, poplar and spruce are less satis factory because they do not stand up to hard wear. Sides are 8 mm to 1 2 mm (l/1 6 in. to 112 in.) thick, and the back has either the same thickness as the sides or a little bit more. The direction of the grain in a drawer side must permit you to plane it from front to back along the top edge and on the out side. If the grain runs the wrong way and the drawer sides cannot be planed from front to back, you risk damaging the drawer front when fitting the top edge or when the outsides
Adrian C. van Draanen, 50, has worked as a cabinetmaker in his native Holland and in Ottawa, Canada, where he is now a government computer expert.
50
of the drawer are being cleaned up after assembly. The sec ond thing is that when a drawer side has any tendency to bow, it must be placed with the hollow side out. When the bottom is put into the drawer, the side will straighten auto matically. If the drawer side curves out, binding will be a con stant problem . Naturally, if the side has anything more than just a slight bow, it should be rejected . The bottom is usually made of plywood, 3 mm to 6 mm in. to 1/4 in;) thick. Heavier plywood may be used for extra-large drawers or when the weight of the contents is going to be excessive , although thinner plywood with a rein forcing center strip glued underneath it is preferred for better work. Birch and beech are good choices for plywood bottoms and they are readily available in several thicknesses. For first class work, Douglas fir or poplar plywood should not be con sidered unless the bottom is lined . Convention dictates that the grain on the bottom run in the same direction as that of the drawer front. This means you have no choice but plywood when the drawer has a vertical front, since there is only one way a solid bottom can go in: with the grain running from side to side. The grooves for the bottom must be neither too tight nor too loose-in the first case, the bottom may force the sides apart or cause them to split; in the second , the drawer may rattle. It is also important that the width of the bottom be accurate, to ensure that the drawer remain square and that the sides stay straight. The bottom should be long enough to extend 2 mm to 3 mm in.) beyond the back of the drawer, but not so long as to be even with the ends of the sides. If you should have to shorten the sides during the final fitting, you do not want to have to trim the bottom too. Before plywood became available, and even after that but before it was accepted for high-grade furniture, drawer bot toms were always made solid. I see no advantages in using solid bottoms for contemporary work. But they are a must for certain reproductions if they are to appear authentic, and in the repair and restoration of old furniture when the original condition must be preserved or restored. A solid bottom re quires a fair amount of work and it is not something that is highly visible or immediately apparent to an uninformed observer, and for that reason not appreciated . Suitable timbers for solid bottoms are clear pine, spruce, fir and basswood . If woolens are to be stored in the drawer, aromatic cedar might be considered. Preference should be given to quartersawn boards, and the wood must be thor oughly dry. You should aim for a bottom with maximum sta bility and maximum freedom from warping and cupping. The boards are edge-glued to obtain a width equal to the depth of the cabinet. The grain of a solid bottom must run from side to side , so that the shrinkage and expansion of the bottom can then be allowed for at the back of the drawer, the bottom can be glued to the front, and the sides will be kept square with the front because there is no movement of the
(\\l
(\\l
::-c--�_ --=:- - ----: � ��
Attach bottom to drawer front with a glue block, but don't glue into the groove, so it can be taken apart for repairs.
it
�
-
.
Drawer sides extend 'I. in. beyond back. Drawer bot tom also extends beyond back, but not as far as sides. Thus the side will act on the stop at the back of the cabinet.
Old-style solid drawer bottom is beveled like a panel and held at back by screw in slot.
bottom in that direction. A thickness of 5 mm to 6 mm (Y4 in.) is good for most drawers if they are not too wide, but in repair work or in reproductions the thickness may have to be much more. When the original was made, thicknessing was done by hand, and the sawmill did not provide boards much thinner than 1 in. The bottom was made like a panel, with the center part left the full thickness and a border about in. wide all around it planed down to 1/4 in. or % in. The flat side of the panel was placed on the inside of the drawer. The width of a solid bottom must be a perfect fit in the drawer. The grain runs in this direction , and this dimension therefore doesn ' t change. The front to back length of the bot tom (across the grain) must be such that at its driest the bot tom is at least even with the backside of the drawer back, and that at the other extreme the bottom does not extend beyond the drawer sides. The bottom is screwed to the back with flat head screws . The screw holes in the bottom are elongated across the grain of the bottom, so that the bottom can move and still be held. This eliminates the danger of splitting (winter) and buckling (summer) . The bottom must be glued to the drawer front with good-sized glue blocks. Do not glue the bottom into the groove at the front, because this would make future repairs very difficult. It is imperative that the bottom and the front be securely kept together, else the bot tom will pull out of the groove when the wood dries.
Ph
Assembly Assuming that all material has been chosen and cut slightly oversize , and all the components have been paired and marked ("Triangle Marking, " Fall ' 7 7 , pp . 46-47) , fitting and assembly can begin. Note the order, fitting comes before assembly. Take the drawer front and plane the bottom edge. It must be made true and parallel to the top edge, and the height of the drawer front must be a perfect fit in the drawer opening. Square one end of the drawer front and place it in the open ing to scribe the other end. It does not matter whether this mark is made on the face or on the inside of the drawer front,
Use triangle marks to keep the parts in order. The tri angles always point up and away from you.
but cutting must be done on the face because cutting from the inside may leave the face rough . When the second end has been cut you have a front that fits the opening exactly . No force should b e necessary to place the front in the open ing, but there should be no clearance either at this stage. The back is next. Its top and bottom edges must be parallel to each other. The distance between them , that is, the height of the back, is less than the height of the front. It is not pos sible to give exact measurements, but it is from 2 cm to 2 . 5 cm (% in. to 1 in.) less. The bottom of the back must clear the drawer bottom when the bottom is slid into place, and the top edge is lower than the sides by about . 5 cm (Y4 in . ) . This clearance at the top of the back allows air to escape when the drawer is being closed. Without it a well fitting drawer acts like a piston. The length of the drawer back must be the same as that of the front. The drawer sides must have a true bottom edge, and the ends of the sides must be square to this bottom edge. The height of the sides is of no consequence yet , provided that it is more than is ultimately required: The sides should be just a little too high to fit into the drawer opening. The length of the sides is equal to the full inside depth of the cabinet (from the face of the front rail to the inside of the back) minus the . 5 cm (Y4 in.) or so you leave in the drawer front for half blind dovetails. In a cabinet without a back, or whose back is not sturdy enough to act as a drawer Stop, measure to a rail or stop, securely fastened as close as possible to the back of the cabinet. Thus the drawer stops are always present, and fixed , and the drawer sides are fitted to these stops. It is a good prac tice to make the drawer sides as long as possible, even when the drawer itself is short. This is some insurance against a drawer being pulled out too far and falling on the floor, and the wear from the sides on the front rail is more even. So now we have a perfectly fitting drawer front, a back ex actly as long as the front but lower than the front, and two sides with straight bottom edges and square ends. Before put ting these pieces aside, restore the pairing marks on the top edges where necessary. If the piece of furniture has more than
51
With the sides cut to length and the bottom edges planed square, lay out and cut the dovetails. Be sure to account for the half-lap at the front, and for the recessed back. Cut-outs for half-pins are full width or better- they are called half-pins because they slope only on one side.
A short drawer needs a long side, to keep it from coming out. Join the back with a slid ing dovetail.
Cut the drawer front to fit the opening exactly, make a groove for the bottom, and hold it upright in the vise to scribe the pin outlines from the sides. A slip of plywood in the bot tom groove will index the pieces.
To index the side and back for scribing, fit a piece of plywood into the groove in the side and butt it against the bottom edge of the back. To plane the sides clean when drawer is glued up, hang it over a wide board clamped to the bench top.
52
one drawer, repeat the whole procedure for each drawer. One more thing remains ro be done before the drawers can be assembled . A groove must be made in the drawer fronts and sides ro receive the bottom . The reference line for this groove is the bottom edge of the drawer fronts and sides, that is, take measurements from this edge. The depth of the groove must not exceed half the thickness of the sides, and enough wood must be left between the groove and the bot tom edge of the drawer to allow clearance and to support the bottom without danger of splitting the sides. The next step is making dovetails at both ends of each side . The half- blind dovetails joining the drawer sides to the front should not present any difficulties ( " Hand Dovetails , " Spring ' 76 , pp. 28-32) . On the other hand , the joint I use at the back might appear unconventional to some. The sides ex tend approximately . 5 em. (Y4 in.) beyond the back for a drawer as deep as the cabinet. Because the dovetails extend beyond the back of the drawer, they look best when the tails are wide-almost touch ing each other-and the pins on the drawer back are small. The illustrations should make this clear. Dovetails are not practical at the back of shallow drawers with long sides. It is better to join the sides and the back with a sliding dovetail , in which the back is slipped into place from below, or let the back into a dado in the sides. When all the dovetails have been cut, the location of the pins is marked on the drawer fronts and on the back. The bot tom edges must be used again for reference, but because the grooves for the drawer bottom have already been made with the bottom edge as reference, the grooves can now be used to align the drawer sides, fronts and backs. Take a small piece of the plywood you intend to use for the bottom , insert it in the grooves of both the drawer front and its mating side , and the two pieces will be correctly aligned and will stay that way while you scribe the pin locations. The drawer back has no groove but it can be held against the piece of plywood to align it with the sides. I do not dry-fit dovetail joints . They are too easily damaged in fitting, with a subsequent loss in accuracy in the final joint. By holding one piece on top of the other it is not difficult to judge the fit, and it is entirely possible to obtain perfect re sults without actually assembling the joint first. One more observation before we return to making drawers. Many workers divide a space in equal pans when laying out dovetails. This results in half-pins that are often too small. Dovetails depend for their strength on a wedging action. If the two outside dovetails are too close to the edge, not enough wood is left to keep the joint tight and closed under all conditions. Severe strains on the joint may even cause a split to start at the half-pins . The answer is wider half-pins . They can be achieved either by making the two outside dove tails a little narrower than those in the center, or by setting out the half-pins first and then dividing the remaining space evenly. With all the dovetails made and ready to be glued up, now is the time to clean up the insides of all the pieces, and var nish or paint them if you are so inclined . Finally the drawers can be put together. Care must be taken to keep them square while the glue is drying. If you take a board or a piece of plywood, 2 em (% in.) or more thick and a little bit longer than the width of your bench , and put this across your bench , you have a good sup-
port for the drawer when you are planing the outsides clean . The board must be secured to the bench, and if the inside of the drawer is already finished , the overhanging end of the board must be covered with cardboard or cloth. Clean up the outside of the drawer, and you are ready for the bottom. Some workers like to have the bottom in the drawer when they work on the sides, but leaving the bottom out is more satisfactory because it allows much better support. The drawer looks best when the bottom is just long enough to ex tend to the outside of the drawer back, or maybe 2 mm or 3 mm (about in.) beyond that. It should not be quite as long as the drawer sides. When the bottom has been sanded and finished , it should be inserted and screwed to the back of the drawer. This is a first-class drawer and nails simply won ' t d o . If the bottom i s plywood, use two o r three flathead screws , countersu nk. If it is solid, use screws in slots to allow for movement. Some workers like to put glue blocks on the underside of the bottom along the drawer front and sides. Glue blocks are made out of square material about 8 mm (% in.) on a side and are approximately 5 cm (2 in.) long. Two of the long sur faces are coated with glue, and the block is rubbed back and forth a few times in the desired location . The rubbing will distribute the glue evenly, and if you do it right, there will be so much suction that it quickly becomes impossible to move the block. Clamping is not necessary. I believe that glue blocks are not necessary when the stock is dry and free from defects. But if there is any doubt that the drawer front or sides will stay flat and straight , glue blocks provide peace of mind . The sides of the drawer are still too high . The height of the drawer front should be scribed onto the sides, and the top edges should be planed down to make them even with the drawer front. If you did everything right, you now hav� a drawer that fits tightly in the opening, more so in height than in width . This is because the height has not been changed since fitting the drawer front, but the width has been slightly reduced by cleaning off the outside dovetail joints. The reduction is hardly noticeable , but it provides just the clearance the drawer needs across its width . Clearance in height is obtained by taking one shaving off the top edges of the front and the sides. This is probably all you need to pro duce a drawer that fits well and moves freely . If you think the drawer is still too snug, take off one more, very light, shaving, but only after you have rubbed a candle along all the edges and tried the drawer once more. Paraffin is also good to make the drawer slide better, but beeswax or other sticky substances should not be used because they attract dust . The length of the sides can now be checked . Where the drawer front is going to be in relation to the front of the cabi net is determined by the length of the drawer sides, because the drawer stops are already in place. The front of the drawer can be flush with the cabinet, in which case you should not have to do anything to the drawer sides. A front recessed not more than 1 mm (a fat in.) often looks better than a per fectly flush front. If a recessed front is desired , the sides must be shortened by 1 mm, or less. For those who have not yet been exposed to the impending metric system , your thumbnail is about 1 mm thick. As a finishing touch, slightly break the sharp edges of the drawer, give the last 2 cm or 2 . 5 cm ( 1 in.) of the top edge of the drawer sides a slope to correspond to the slope of
To finish up, put a little slope at the back of the sides so the drawer easily enters the case, and slightly chamfer all edges.
%!
%2
For a molded front, make through dovetails and cover exposed end grain with mitered decorative mold ing. For an overlapping front, use thick stock and rebate all around be fore cutting dovetails. Remember that such a drawer must fit perfectly before assembly, for it cannot be planed afterward.
the dovetails, and chamfer the protruding dovetails at the end of the drawer sides. A drawer with a molded front is made as described above, with one difference: The dovetails joining the sides to the front are through dovetails, and the length of the sides is equal to the depth of the cabinet minus the thickness of the molding. The molding is not applied until the drawer has been fitted and all adjustments have been made. The mold ing covers the exposed dovetails in the drawer front. This type of drawer is reserved for more traditional work. A drawer with an overlapping front must fit perfectly when assembled , because the oversized front makes subsequent planing impossible. The rabbeted part of the drawer front must fit in the cabinet with just the right degree of clearance, and the drawer sides must also be the right height before the drawer may be assembled . They can be planed and checked in the opening before assembly . It is somewhat more difficult to give this drawer a perfect fit because of its construction. On the other hand, the very feature that makes fitting difficult, that is, the overlap, also conceals a less- than-perfect fit. The stock for this drawer front should be thick enough to permit dovetails 1 2 mm to 1 5 mm (1J2 in. or more) long, with enough left for an overhang that is not going to break the first time the drawer is closed. Although this type of drawer does not seem to need stops, it is highly recommended that the ends of the sides, not the overlapping edges of the front, take the impact on closing. A completely different way of making an overlapping drawer is to make a flush-front drawer first. The overlapping front is a separate piece attached after the drawer has been fit ted . When this method is used it is imperative to have StopS behind the ends of the drawer sides. If this is not done , chances are that the separate front will sooner or later become a separate front in a very literal way.
0
53
Turning Spalted Wood Sanders and grinders tame ghastly pecking by Mark Lindquist Spalted maple bowl (5 in. high, 1 1 in. dia.).
ust as spalted wood is not like ordinary wood , so turning spalted wood is not like turning ordinary wood. New methods must be found . Spalting refers to the often spectac ular patterns of line and color that occur when water and fungus invade downed wood and begin to rot it ( "Spatted Wood, " Summer ' 7 7 , pp. 50- 5 3 ) . These processes of decay change the wood's chemical and cellular structure, and its physical properties. In particular, the density of spalted wood varies enormously and unpredictably. Highly spalted zones are much softer than surrounding, more ordinary wood . The differences in density cause hideous pecking in turning, and spalted wood requires extremely tedious sanding before a smooth surface can be achieved . My father and I , over the past decade, have developed an abrasive method of turning spalted wood. We rough out the blank with conventional turning tools, then , with the wood still whirling on the lathe, we shape and finish it with an as sortment of abrasive body grinders and disc sanders. Our method also works on conventional woods and can be con sidered an alternative to traditional turning. But it transforms the working of spalted wood from an impossibility to a fasci nating challenge. I like to use pieces that have dried for at least three years
J
after harvesting. Occasionally , if the wood was already dry when harvested and feels okay after a year, I attempt to work with it. But in turning the wood this soon , there is always a risk that it will crack or warp. First, I use a Rockwell #6 5 3 power plane to expose the pat terns and figures in the aged block of wood. It planes a swath 4 in. wide, has an optional carbide-tipped helical cutter (which I strongly recommend) , and can handle just about any hard surface. I cut the ends off the block cross-grain to expose the end grain , which often is the key to the picture or figure of the spalting within. If the piece has been properly pre pared and aged, cutting an inch or so off each end will usually take out end-grain surface checks and cracks. It is best to saw the blank so that the bowl lip faces the outside of the tree, and the pith side is toward the bottom of the bowl. This may seem extravagant, but it makes sense to have a bowl whose lip is less liable to crack later. I have also made reasonably suc cessful bowls by turning end grain up towards the lip. The best way is to turn side grain , so that the bottom of the bowl has side grain and the sides or walls have end grain . Usually, the best figure or picture is in the end grain , so this is also an esthetic advantage . Once you have visualized the bowl within the chunk of
Before turning, Lindquist exposes the pattern with a power plane, cuts out surface checks and cracks, and decides on the orientation of the bowl. Then the blank bandsawn cylindrical and mounted di-
rectly on the faceplate with self-tapping screws. The bowl is turned between centers as much a possible and at low speed to avoidprob lems caused by the varying density of spalted wood.
IS
54
wood, examine the piece all over for checks and cracks. Deter mine which side is the bottom and which is the top by decid ing whether the cracks may be turned out or eliminated . With a compass, scribe a circle larger than the top of the bowl will be, and another that is the minimum size of the bowl. Somewhere in between, scribe the line on which you will cut the blank. Cut out the blank on a band saw-a Y4-in. skip tooth blade works well-and center and mount the faceplate on the bottom side of the blank . Normally, I use Y4-in. self-tapping sheet metal screws , 0/4 in. long , to mount the faceplate directly onto the wood. This method has both advantages and disadvantages. There are usually harder and softer zones within a piece of spalted wood . While the wood is spinning rapidly on the lathe, it is easy for the tool to grab and catch in a soft spot that meets a hard spot. This wrench may be violent enough to rip the bowl loose from the faceplate. I ' ve found that the more usual method , gluing the wood to a waste block with paper in be tween and screwing the waste to the faceplate, simply is not strong enough to withstand the wrench . In addition, the blank may be unbalanced because of its varying density, and screwing the faceplate directly to the wood is safer. After ward , I plug the screw holes with turned pegs that over the years work themselves slightly out, but as they do so they also lift the bottom of the bowl just off the table, protecting the underside finish . Although gluing to paper isn ' t strong enough, a bowl can be glued directly to a waste block, which can be cut off after turning. And often the stock is large enough to turn a bowl with an extra-thick base, containing the screw holes, for cutting off later. Once the faceplate is mounted on the bowl, and the bowl on the lathe, I chuck the headstock with the bowl up to the tailstock. Free faceplate turning is dangerous with spalted wood, again because of its varying density. Whenever pos sible, it is best to keep the bowl between two centers. Now with the lathe running at low speed, I rough the outside of the blank. I use carbide-tipped scraping tools, which I make myself; you can use conventional or carbide scraping tools or cutting tools. I prefer carbide because the black zone lines in spalted wood are very abrasive and quickly dull steels. What ever tools you use, the first time you try spalted wood you will be shocked, disappointed and amazed, all at once. Spalted wood cuts like butter. It seems to be mush. But it pecks. Great chunks j uSt tear out of the surface, leaving ugly pits and pockets behind . It will seem impossible to repair and you will want to throw the blank away. But don ' t , not yet. Cone separation
First, rough out a fat version of the bowl you want to make. The inside may be removed by any traditional turning method, but with a large chunk of spalted wood the cone separation technique is a sensible choice. This trick removes an intact cone from the block of wood , which may be re mounted and turned into another, smaller bowl . This is a good technique but requires confidence and care: If the tool catches deep inside a large blank, the lathe shaft will bend. To separate the cone, I use a long, thick and strong file with its teeth ground smooth. I make the cutting edge on what was once the edge of the file, not the face, so the tool is rather thicker than it is wide. Grind the end to a short, sharp bevel, on the order of 60° or 70° and keep the corners sharp. Then add a long, sturdy handle for leverage.
Spalted wood is a turner's nightmare. Roug h turning yields pitted surface, with pockets nearly in. deep. Dark patches are hard wood; soft areas appear light. Black zone lines define patterns.
Y4
The lip and the face of the bowl are trued up with a long, straight borer, to prepare the blank for cone separation.
Start the cut at the inside rim of the bowl, and aim for the bottom center of the bowl. Make the cut at least twice as wide as the tool, for clearance. Once you have penetrated deeply enough to make a cone of the piece that normally would have been chips, use the same tool to begin cleaning out the sides of the bowl. The idea is to save the center section for another bowl or possibly two, and to keep the bowl between centers until it is almost completely roughed out . When the blank at last begins to look like a bowl inside (you can peer behind the cone, which is still attached at the center) , take the whole thing off the lathe and place it on the floor, preferably on concrete. Using a spoon gouge and mallet , strike the center of the cone-with the cutting edge of the chisel facing end grain, not side grain-a good sharp whack. If you have done it right, a few subsequent blows will pop the cone right out. If you try to go at the side grain, there ' s a good chance you will split the bowl in half. Play with the method and find the best way for you-the point is to get the cone out without damaging the bottom of the bowl. Once the bowl is remounted on the lathe, the inside must be cleaned up and the piece finish-scraped (not that it will do much good, for the more scraping that is done , the worse the
55
chips keep coming out all over in what appears to be a turner's nightmare) . At any rate, disregard the appearance of disaster, and let the bowl stand as it is, with all its blemishes .
1. Cut runs from bowl lip toward cen ter, and is twice as wide as tool, for clearance.
2.
Same tool hol lows o u t b o wl. Technique is tricky: tool catches, lathe shaft will bend.
If
Cone separation: Above, a cut twice the thickness of the file divides the center cone from the bowl. After subsequent cuts have roughed out the inten'or of the bowl, the cone can be freed with a spoon gouge and mallet, below. A few sharp whacks ofthe mallet, with the cutting edge of the chisel facing end grain, wzll do the tn·ck. The cone can later be made into another, smaller bowl.
Microwave drying If occasionally I find that the bowl I ' ve turned is still too wet to sand and finish , I leave it about an inch thicker than I want it to be all around . With white glue I paint the places that look as if they might crack-especially the end grain . If the wood is wet , the glue usually takes a while to dry and some times only becomes pasty . Then I pop the rough-turned bowl into a microwave oven. As I understand it, the microwave oven speeds up the molecules in the mass of the object, caus ing friction that results in heat. Not just heat, but a very even heat throughout the mass. Whole green pieces crack, but drier, merely wet pieces, especially in the rough shape of a bowl , dry out quite well without any cracking. This approach is experimental, but here ' s the drying se quence I ' ve found best: After I ' ve turned the bowl over-thick and have it painted and placed in the oven , I try " shooting" it for 20 minutes on defrost . Defrost must be used , otherwise the bowl heats up too fast and is sure to crack. When the microwave is set on defrost , it cycles for a minute, then stops for a minute , then resumes, and continues this cycle until the timer stops. I ' ve found that for bowls about 5 in. deep or 1 2 in. in diameter, 20 minutes is a good first cycle. After the first cycle, the bowl will heat quite rapidly and must be cooled. I usually leave it right in the oven for another 10 or 20 minutes, then check it for cracks, repaint it if necessary , then zap it again. Depending upon how wet or green the bowl is , it may be dry enough to finish after three or four cycles. Each bowl reacts differently, so times vary. If the piece is very special, I start out slowly ( 1 0 minutes on defrost) , cool for another 1 0 , then recycle all day . Usually the bowl will move considerably, which is to be expected, but cracks won ' t start. I am still experimenting with microwave drying, and would like to hear from others who' ve tried it. Although the trick works in a pinch , I don ' t think there is any substitute for air and time. Thorough air-drying is the only way to allow all the richness and mellow color to come out. Equilibrial abrasion Torn end grain is always a problem in woodturning. In tradi tional turning, using as sharp a chisel as possible, gouging and shearing produce relatively smooth, "planed" surfaces. This requires much skill and a delicate balance berween a sharp edge and perfect technique. My alternative uses indus trial abrasive tools and products. Turning hard, brittle spalted wood creates and leaves deep cavities and pecks in the surface . No amount of scraping with the sharpest of tools will improve the situation . When we first worked with spalted wood, my father and I would spend hour after knuckle-bending hour sanding through the pecks and chips to achieve a uniform surface . One spalted bowl would consume several sheets of coarse-grit paper and a lot of gruel ing work. Eventually, all the pecks and chips would disappear and the bowl could be finished . By the time we arrived at that point, all of the creative energy of making a beautiful bowl was gone, and it had become just a chore to endure. After several years of searching and talking to other turners who were experimenting in the area, we arrived at a theory that we now call equilibrial abrasion. The shaft of a lathe
About bowls I turn my bowls for appearance and artistic expression more than for utilitarian function. This may be a controversial approach among woodworkers, although it is in accord with artists and sculptors who accept a work for itself and not for its utility. As I see it, the bowl's function is to command the space of a room, to light its environ ment. Its function is to display the beauty of nature and to reflect the harmony of man. It is wrong to ask the spalted bowl to function as a workhorse as well, to hold potato chips or salad or to store trivi alities. The bowl is already full. It contains itself and the space be tween its walls. The bowl is simply a vehicle in which the grain and patterns of the wood may be displayed. The patterns and colors are natural paintings, the bowl a three-dimensional canvas. Complete and utter simplicity is required in the making of the spalted bowl. The simpler the form, the more uncluttered the sur face for the wood to display itself. If we make bowls with lots of curves and decorative lines, the forms within the form fight with each other and with the wood. Wood that is spalted has become graphically oriented. To understand the art of making a spalted bowl, first understand the art of the ancient vessel . Study ancient Chinese and Japanese pottery vases, bowls, and tea-ceremony cups. Look at the work of Rosanjen. Investigate Tamba pottery. Study the masters and see simplicity at its very best.
-M.L.
turns clockwise. Most common rotating shop tools also turn clockwise. But if the shafts of two clockwise rotating tools are put together face to face, they oppose and rotate in opposite directions. We've found that two counter-rotating forces, with proper control and balance, can reach a state of equilib rium. We use abrasive discs on auto body grinders, tubber disc sanders and foam-pad disc sanders while the lathe is turning. Rather than holding the sandpaper still while the bowl turns, the spinning sandpaper works in the opposite di rection against the spinning wood. The physics of the inter action aren ' t clear, but in practice there is a point-and it' s not difficult to find-where the two rotational forces balance each other. The tool seems to hover over the work, and the sanding dust pours away in a steady stream. The counter rotational system easily overcomes the problem of end-grain tearing. It does not eliminate the problem , it merely deals ef ficiently with it. And while this method won ' t replace the turning gouge and scraper, it incorporates the past and offers a new alternative for difficult woods. Our method began in experiments with " flap-wheel" abra sives, at a time when it was difficult even to get flap wheels because the manufacturer, Merit Abrasive Products, Inc. , was offering them only as an industrial product. Today they are also marketed for the hobbyist. We began by grinding the in terior surface of a bowl-the biggest and most time-consum ing problem-with a coarse-grit, 6-in. flap wheel driven by an electric drill . The outside surface wasn' t so bad because it was accessible and conformed naturally to sanding. So, with counter-rotational abrasion using the flap-wheel accessory, the inner surface of the bowl was sanded much more easily than by hand. Soon I tried my auto body grinder with a coarse disc on the outer surface of the spinning bowl . At first, this was scary and dangerous, but after practice and with faith in myself and my tools, I found out how to achieve a perfect
Elm burl bowl (6 in. high, 6 in. dia.) by author.
abraded surface. The tool and the application of it to wood were not new-but using the body grinder with the bowl spinning in the opposite direction and actually shaping the bowl with the grinder were new to us. With practice, the body grinder, a heavy and unwieldy machine, can become a sensitive insttument that improves with constant playing. With such rapid sanding, the whole room immediately be comes full of dust , thick enough to cut with a knife. So an es sential accessory is an efficient blower system located above and to the left of the bowl, facing it from the front of the lathe bed . Positioning is a matter of preference, but the best position is the one that sucks the most dust and is out of the way. The dust must be sucked up before it can enter the room , or it is impossible to work, breathe or see . A simple squirrel-cage blower obtained from a local scrap yard will work fine for moving the dust . The best kind is a blower with a cast-iron housing, ball bearings, and at least a 6-in. diameter intake opening. Six-inch galvanized stove pipe works well and is cheap. The motor for the blower should be at least � hp and turning at 3 , 500 rpm . The on-off switch should be located near the lathe, since the blower is fre quently turned off and on . An alternative to the blower is a large fan in the wall in front of the lathe to suck the dust out of the room. But I prefer the blower because I can direct the intake pipe to the area releasing the most dust . After success with the body grinder, I got a smaller hand held grinder that is easier to control , to use with finer grits. I use it with 1 20-grit floor-sanding discs to prepare the outside of bowls . I also use a small, flexible, rubber-backed disc on the interior of the bowl . Both Merit and Standard Abrasives make a system called quick-lock or soc-at that connects the sanding disc to the pad with a screw or snap fastener, making grit changes quick and easy. My usual grit sequence begins with 24, then 36 or 50, then 80, then 1 20 followed by finish-
57
ing papers. If the wood is especially soft, I leave out the 24 grit. Thus equilibrial abrasion can prepare the whole bowl for final finishing with hand-held sandpaper. Speed is the key to these techniques. If the bowl turns faster than the disc, the bowl will overpower the disc. The disc must spin almost twice as fast as the bowl (unless it is burning the wood) in order to achieve equilibrium. There must be a balance of power and an overbalance of cutting ac tion. In interior abrading, the disc should reach a flow, a floating movement, gliding back and forth from the bottom of the bowl to the lip, and each pass grinding off excess wood . Preparation sanding calls for careful control, discipline and knowledge . Use high-speed drills ( 1 ,000- 1 , 800 rpm) , espec ially two-speed drills, but not variable-speed drills, since they can ' t take too much force. A low-cost drill can ' t be used-it will merely burn out. When you hit equilibrium, the tool will appear to be suspended or within a magnetic force-field, free to vacillate in any direction. This can occur only when the tool is properly cutting the wood. A good strong drill will really cut, and the bowl will quickly take shape. " usually start by abrading the interior of the bow'!, using the electric drill with a 3-in. locking disc and a 24 or 36-grit abrasive. Some pieces of wood will finish up more quickly if the initial sanding of the end-grain portions is done with the lathe turned off. With others, I start immediately on the whirling wood. As you face the front of the bowl, place the disc on the right side. This may seem wrong, but the wood comes off much more quickly than it does on the left side.
I
The bowl interior is ground smooth with a dzsc attached to an electric dnll. A suction system located above the bowl removes the clouds of dust that lathe-sanding creates.
Author rests body gn'nder on hip and pushes it from headstock to lip to sand bowl extenor.
58
The point is to try different sides, different angles, different approaches until the right way is found. In abrading the ex terior, I rest the grinder on my hip and use my weight to push it toward the bowl , moving from headstock to lip . Near the end of the pass, I pull up the handle, turn my hand over on the handle, and reverse the direction to complete the lip , all in one movement. The idea is to get motion and control going together, to think of the grinder or the tool as an exten sion of the hand, but, most importantly, as a sensitive instru ment. Paying attention to the sounds will pay off. The right pitch will tell you that the speeds are right. Ticking means the disc has a tear in it and will soon explode; click, click, click means there is a crack in the bowl; bump, bump, bump means there is a soft spot that the grinder is wearing away faster than the rest of the bowl. An important caution: Do not attempt to use the body grinder on the bowl without proper safety measures. Wear goggles and make sure there is no loose clothing about. Be careful about ripped discs-plan on ripping about a dozen or so to start-and above all, know how to operate the grinder on a stationary surface before attempting to use it on a con cave spinning surface. Lack of caution can easily prove disas trous for both the operator and the equipment. Finishing After the surface of the bowl is prepared with the disc sanders, the diagonal scratches caused by the grinding must be removed. If you use a heavy-duty foam-rubber pad �-in . thick behind the sandpaper, the marks come out quickly since the foam pad keeps the paper from heating up and maintains a uniform surface. Aluminum-oxide or silicon carbide sanding sheets work best with spalted wood . To take the scratches out, I use 1 00 grit, then 1 50 , 220 and finally 320 grit. Occasionally, I ' ll go to 400 and maybe to 600 grit, but for the most part, 320 does the job. With spalted wood, usu ally anything finer than 320 discolors the surface and clogs the pores, leaving a grey mousiness. I do a little hand-sanding if the marks haven ' t come out, but if the pad sanding has been done right, and not rushed, usually 320 polishes and no marks are left. For the inside bottom of the bowl, I use a foam pad glued to a disc attached to a drill, and I finish the scratches or circular concentric lines with 220 and 320 grit. I glue turned pegs in the screw holes and sand the bottom flat using a disc attached to a drill press. The bottom of the bowl is also finished to 320 and signed. I make up foam pads, starting with the 3-in. rubber sand ing disc mounted on an arbor that is commonly sold for home auto body work. First I glue on a �-in. layer of industrial foam , then I use the auto body grinder to shape the disc and foam to what I need. The handiest shape seems to be a cone, its wide part ourward. Then I spray the foam with disc ad hesive and stick cloth- backed aluminum-oxide paper to it. Many of my sanding tools are cut-and-try, made from scrap. A useful heavy foam for all sorts of sanding tools is sold in sheets and tubes by refrigeration suppliers, as insulation. The best finish that I ' ve found so far is an oil, urethane , and buff finish. M i x equal parts o f raw linseed oil and high gloss polyurethane varnish. Wipe on one coat and immedi ately wipe off. Repeat the next day. Allow to dry at least one week and then buff with tripoli, a buffing compound . Once the bowl has been buffed with tripoli (available at hardware stores) , the finish may be hand-rubbed and polished with a
The bowl is finish-sanded in increasingly finer gn·ts, with a 'h·in. foam-rubber pad held behind the sand paper.
Afterfinish sanding, the faceplate-screw holes are filled with turned wooden pegs, which are glued and pounded in. Then they are tn·mmed, and the bottom of the bowl is sanded flat with a disc attached to a drill press.
wft cloth. This seals the oil finish, yet is very thin, allowing all of the wood to come through. Most finishes may be used on spalted wood, and experimenting will uncover the best one for your tastes. If the wood is extremely soft, plain polyurethane will work wel l . If the wood is soft and has become discolored, buff it first with a cotton bonnet. The bonnet will pull out the dirt and the finish will take better. Or blow off the dirt, if you have compressed air. If the bowl is extremely soft and a high gloss finish is desired, apply multiple coats of clear Deft, but after approximately rwenty coats, it' s best to sand off about balf the build-up to an even coat. Best results are without sanding berween coats. Most· often, the oil/ urethane finish works the best, for color and character. Obviously it is not a non-spotting, non-marking finish, but it is not intended to be. A much more utilitarian finish may be applied by build iilg up several layers of urethane, but I ' m not much inter m� � ir.
D
Mark Lindquist, 29, of Henniker, N. H. , is a sculptor who earns his I£ving by turning and carving spalted wood and burls. He is writing a book about his techniques.
59
Scratch Beader Simple tool makes intricate moldings by Henry
T.
Kramer
he scratch beader is a tool of many virtues. It is quickly
T and easily made . With practice, it is a substitute for a
router (table or hand) and for molding planes . It can do things those tools cannot, depending on the particular job. It can cut any molding (or groove or rabbet) you are willing to make a cutter for, including intricate shapes. The beader consists of hardwood stock with a projecting arm, which has a vertical saw kerf along its length. The tools are held in the saw kerf by bolts. The shoulder between the stock and the arm guides the tool as it is drawn along the edge of the work. Making a cutter for the beader is easy. File or grind a piece of any scrap steel-old saw blades or cabinet scrapers are ideal , but in a pinch one can use almost anything. The steel should be wide enough to accommodate the desired shape plus another Ij4 in. or % in. to recess behind the shoulder. Re cessing the tool stiffens it during each stroke. It should be long enough to accommodate the design and stick out the top , and no thicker than the kerf in which it will be placed . The cutter is formed by cutting and filing the desired shape, as a negative cross section, in one end of the blank. The cutting edge is filed straight across the edge of the tool. With steel no thicker than an old saw blade, a mere awareness that the trailing edge should not extend below the cutting face will allow sufficient clearance. With heavier steel, a more deliberate relief will be required , as on the sides of a tool that is to follow a curve. But do not leave any more relief than nec essary. The tool cuts like a scraper, not a chisel, and it should not want to cut the wood under vertical or horizontal pressure. If you wish to harden and temper the tool, fine. It is not or dinarily worth the effort for one-of-a-kind applications. If the shape is complex and not easily sharpened without destroying the design, hardening may be desirable. Usually one is not obliged to harden unless the molding to be cut involves a lot of wood. This is not a production tool . It is for small or non repetitive jobs, and it permits a flexibility of shapes that pro duction tools cannot match . It is used by placing the beader at right angles, vertically and horizontally , to the shape or groove to be cut. With cuts of any depth, say in. or in . or more, the tool is first placed part way below the arm and secured tightly on both sides by rwo or more small machine bolts of any convenient size . The beader is then drawn along the surface to be cut, holding its shoulder against the nearest edge or surface , and at a right angle to the surface to be cut. The beader should be held upright at all times, but at the very start some slight tilt in the direction of the stroke may be useful. One or two trials will show that the leading edge of the cutter will then have the effect of providing a quite shallow cut. But as soon as the cutter has got into the wood, the beader should be used up right . As the work progresses, the cutter may have to be reset
%
60
%6
Scratch beader is easily made from hardwood and steel scraps; cutter can be bolted in saw kerf at various positions along projecting arm. L eft, cutter profiles are negative cross sec tions of desired shapes. Drawing be low shows tool's rounded shoulder, which allows the beader to follow curved edges.
deeper until the final design has been cut. A beader will be used most often to shape an edge, but may also be used to cut a groove (for inlay, for example) or molding in the surface of a plank following a straight or curved edge. In this case the shoulder of the tool , which lo cates and maintains the distance between the groove (or inner edge of the molding) and the outer edge, may be rounded to about the smallest arc of the curved edge being followed. This makes it easier to hold the tool steady as you follow a curve, it keeps the distance of the cut more constant, and it permits you to keep the long axis of the tool normal, or per pendicular, to the curved edge as you follow it. The beader is best used on hardwood and with care it will CUt across the grain-even in situations where a plane or router would tear. It will not cut cleanly to the very end of a blind groove, nor, in the case of sharp angles, can it be worked right to the intersection. Work up to about a half inch away and finish with a knife or chisel . Take care always to keep the shoulder bearing on the work as you scrape. And put a bolt through the hole nearest the end of the arm, so the saw kerf won ' t pinch your hand as you work. Beaders may be made in a variety of sizes, although they are difficult to use for large moldings. Some beaders, for deli cate work, are quite small. Start with simple designs; later, all sorts of applications will invite your interest. Whatever size you try, keep to the general proportions shown in the draw ing. Too long a beader encourages twisting as you scrape, which is not good. Beaders don' t last forever, because the cut ter tends to enlarge the kerf in which it is held during use. When this happens, you ' ll have to make a new beader. Make one and practice on some scrap and you ' l l soon appreciate the versatility of this inexpensive device.
0
Henry Kramer, 60, of Somervzlle, N.J. is in the reinsurance business. He 'd rather make and fix tools and furniture.
Leather on Wood How to inlay it and tool it with gold by Sandy Cohen Inlaid and gold-tooled box top.
love the feel and texture of fine leather. It is pliable, strong, and , with the proper care, enduring. In fact, I have written this article on an inlaid desk surface of fine grained olive-green morocco, richly tooled in gold and black, matched to fine English oak, a joy and a delight. Creating such a surface is not that difficult, but it takes practice to get the feel. First the leather is cut and pasted into a recess as deep as the leather is thick. After the leather is in laid , a design is stamped or rolled in with a heated brass tool . Gold tooling involves the further steps of sizing the impres sion with glair (an egg white / vinegar mordant to which gold adheres) and restamping the design over gold leaf. Some of the tools needed are quite specialized and a few are expen sive, but they can be improvised with good results. Combining wood , leather and gold is an ancient and hon orable practice . This technique was introduced into Europe in the late 1 5 th century by the Moors. Craftsmen who practiced this art were among the very first to come to America, and many of our founding fathers were directly involved in it. Benjamin Franklin, for example, sold leather to craftsmen . All over the world , palaces and cottages alike are richer be cause of the marriage of wood and leather on books, chairs, desk tops, tabletops and boxes. The 1 7th-century Dutch, among others, used gold-tooled leather wallpaper. The first thing to do is to obtain the leather, because it must fit into a recess routed or paneled to a depth equal to its thickness. And because goats and cows, like woodworkers, come with hides of varying thickness, it ' s best to have the leather in your hand before doing any routing or grooving . Don ' t go by the supplier's sample cards because your hide will most likely be thicker or thinner. Goats and cows are the two best and most popular hides, but you can use anything from moose to shark. I would not recommend sealskin be cause it is too oily, or sheepskin (often called " roan ") because it does not wear well. Avoid "skiver, " which is sheep hide split very thin. While ideal for labels on books and covers for cameras, it is far too thin for the top of a desk or a card table. Cowhide is a good choice. When it comes off the cow it is fairly smooth, a perfect surface for writing. Some manufac turers, however, roll it under big steel drums that emboss the leather with a grain that simulates the more expensive goat skins called " morocco. " With cowhide, though, take care that no ferrous metal touches the leather when it is damp, or a dark and very permanent stain will result. Goat is tougher than cow and easier to handle when wet , but considerably more expensive . The best goat is morocco ; the best morocco, Niger. Since goats are small animals, you
I
Sandy Cohen, 30, is assistant professor of English at Albany (Georgia) State College. An avid amateur woodworker and leatherworker, he has demonstrated leather bookbinding for an educational television series.
will probably have to use cowhide if the area to be covered is more than two or three feet square. Hides are usually sold by the whole skin or, in the case of large cows, by the side . Buy a side to avoid the spine, which is darker in color, rougher in texture and somewhat unsightly. Spines are good for book spines, but not secretary tops. When ordering your leather, send the dimensions of the area to be inlaid , and perhaps a rough diagram , to ensure that you get a large enough hide . You will need some extra for cutting and paring and will probably want the scraps to practice tooling before going on to the real thing. If you want your handiwork to last, buy leather that is stamped " guaranteed to withstand the PIRA (Printers Indus try Research Association) test . " Technicians at the British Museum found that leather subjected to the modern tanning process decays because it creates su lfuric acid out of the sulfur spewed into the air by automobile exhaust, smoke, and so on, or absorbs free sulfuric acid already in the air from the same sources. They also found that treating leather with a potas sium lactate solution interferes with acid absorption and hence prevents decay. Such PIRA-treated leather is consider ably more expensive, not only because it has been treated but also because only the better grades are deemed worthy. You can treat your own leather simply and inexpensively, both before and after tooling. Wipe the leather with a clean , dry flannel rag , then apply a generous amount of potassium lactate solution , available from leather suppliers, with a cot ton ball. The next day , apply .an even more generous amount of leather dressing and let it dry for three days, then wipe off the excess and polish gently with a flannel rag. The best leather dressing I know is Formula No. 6 , a 2 : 3 mixture of an hydrous lanolin and neat's-foot oil. Buy it r�ady-made or mix your own . Potassium lactate prevents decay; dressing keeps the leather moist and supple. You should apply the potas sium lactate solution and dressing to any valuable pieces of leather you have. PIRA-treated leather needs treatment only after tooling. You will also need some paste to attach the leather to the wood. I recommend paste rather than glue because paste pen etrates the pores better and makes for a longer-lasting bond . I know of leather pieces many hundreds of years old that are still sticking tightly, though they were pasted " only" with starch. My favorite formula is as follows: In a clean wide mouthed jar, place 3 tablespoons of a gloss laundry starch such as Argo, teaspoon of powdered alum, % tablespoon of powdered white chalk such as that used for chalk lines, 2 drops of oil of wintergreen, and enough cold water to stir into a mixture the thickness of cream. Slowly add boiling water, stirring constantly until it suddenly thickens. Then stop add ing water, but stir until the mixture is smooth . You will also need some newspaper for pasting up the leather. Get unprinted news (from art-supply stores) if the
%
61
\
C�" w;'h fingernail.
leather is very light-colored, or " fair, " that is, undyed. Once the leather has arrived and you have routed or pan eled the recess to receive it, cut a pattern out of light card board or heavy wrapping paper. This pattern should fit the recess exactly. Then place the pattern on the leather, flesh side up (the "fuzzy , " undyed or " bad" side that will be pasted) and mark the leather. Before cutting, turn the leather over to be sure you are satisfied with the grain and texture on the good side . If not , reposition your pattern on the back. When the leather is marked, cut it slightly larger than pattern size with a sharp, small- bladed knife and straightedge. Now place your leather, good side up, on a piece of news print and lightly sponge with water-only enough to dampen the leather. Use a cotton ball for all sponging, wiping and gold lifting. This dampening caUses the leather to stretch out slightly and dry tight and flat. Now turn the leather over and
Gold can be tooled with either roll (top) or stamp.
62
apply the paste, spreading it with a round brush or with the fingers in the pattern shown. Spreading it this way ensures that, the leather stretches evenly. Then fold the pasted side of the leather over on itself to " set" for a minute or so and spread paste on the wooden surface. Don ' t use too much paste;-you don ' t want it to squeeze through the pores of the leather. Next, unfold the leather and spread it smooth in the recess, stretching it out with your fingertips in the same way you spread the paste . When it begins to stick, run your fingernail along the borders to crease the leather enough to see where to trim, then cut along the crease line with a knife and straightedge. Hold the knife with the handle angled . away ; from the leather to ensure that no "white , " or flesh, shows on the surface. If your leather is cowhide and your straightedge ferrous metal, put a piece of waxed paper be tween them to prevent unsightly staining. With your fingertips, push the trimmed leather toward the borders for a good tight fit . The leather should be sticking by now. ,To be sure that it won ' t buckle or pull away from the borders , you might want to turn over the whole pasted-up piec�' and rest the leather on a few sheets of newspaper or un printed news. The surface beneath the paper must be smooth; any imperfections will be transferred to the leather. Apply some light pressure with books and allow it to dry over night. Do not apply too much pressure or the paste will seep through and give the leather a grey cast impossible to remove. The i nlay should be perfect in the morning. But if any edge or corner has not stuck, dampen it with a small brush, lift slightly, repaste and work it into place. THere are two basic kinds of tools for tooling leather: rolls and s�amps. Rolls are brass wheels with a continuous design engraved on their edges. One simply heats the tool on a stove and runs it along the leather. Rolls are quite expensive, and used ones are very hard to find . Even more expensive are the rolls with their own heating elements. The main advantage of rolls is that they save time, especially on long borders. But stamps, which have one design engraved into brass and are fitted with a wooden handle, can do an equally good job. They are much less expensive and can even be cut from brass scrap or bronze brazing rods. M ake sure the gold you buy is genuine. There are a lot of imitations on the market, many of them cleverly packaged . Genuine gold must by law say " genuine gold leaf' and give the gold content in carats. Real gold comes in books of leaves, each 3 Y4 in. sq . B e wary of labels that read " gold metal leaf foil , " or some such. Most phony gold leaf that I have tested tarnished completely within six months after applica tion, some within two. To cut your gold leaf you need a gold cushion and knife . The cushion is a piece of wood at least 6 in. sq . , padded lightly with cotton, then covered with a soft leather, flesh side out. A new piece of chamois from your local auto supplier is perfect. This leather is sprinkled with rottenstone or very fine pumice to keep the gold leaf from sticking to it. You can use any thin-bladed, sharp, flexible knife, or buy one made spe cially for cutting gold . Gold also comes in tooling rolls of Mylar atomized on one side with gold and presized. This is the easiest form of gold to use and gives excellent results. With Mylar rolls you don ' t need a gold cushion o r glair. And they come in other metals ' and color pigments besides genuine gold . If. you are going to use gold leaf, you will need glair, the
25
Special lJold knife, lightly dusted with fine pumice, lifts sheet of genuine gold leaf Beware of imitation gold, which tarnishes within months.
t
' Lzghtll greased cotton ball transfers bit of$old Heated stamp resses gold leaf from gold cushion (in background) to from Mylar ro into glair.glair-treated section of leather. coated impression.
'I
\ mordant that makes the gold stick to the leather. Traditional glair is a preparation of egg white and vinegar. If you don' t think eggs will make the gold stick as well as something more modern might, let me tell you that it has been used for' 'Yell over 400 years. I have seen a number of books that were tooled with egg glair in the 1 6th century; the gold is still in tact and bright. To make giair, beat up one egg white with teaspoon of vinegar until it froths. Let it sit overnight in a covered dish , then strain it into a jar with a funnel and a filter of clean cotton linen-a piece of an old bedsheet is fine. Keep the jar tightly covered . After a while the glair will smell horrible , but will still be usable. If you don ' t want to make your own glair, you might \yant to try B. S. glair, a varnish formula based on French glair� first developed in the 1 8th century. It is much less troublesome to use, requires less heat, allows more time before it is ineffec tive and gives cleaner results. If you are going to use gold leaf and traditional glair , you must prepare the leather. Wash it over with a cotton. . ball slightly dampened with water, or water and vinegar. Some people like to put a little paste into the wash water, bud find that it dulls the leather. Old-time finishers often add some clear urine. I have never tried it. Now, with a good artist' s ' brush , brush the glair only over the area t o b e tooled . Egg glair discolors the leather slightly, so neatness counts. When the glair is dry (when it looks dry and isn ' t sticky) , apply a second coat, not as generously as the first. While it dries, pre pare your gold leaf on the cushion. Open the book of gold to expose the first leaf. Slip your knife, which is free of grease and lightly dusted with rottenstone or fine pumice, under the gold , lift it, and transfer it to the cushion. If it does not lie flat, blow on it gently from directly above. Then cut the gold into appropriate strips with a very light back-and-forth motion. Cut only the gold, not the cushion. As soon as the glair is dry, smear some light grease, such as petroleum j elly, onto the back of your hand, then rub a cot ton ball in the grease to transfer a minute amount to the cot ton . Rub the cotton gently on the leather wherever you in tend to lay gold. This tiny amount of grease will hold the gold in place until it is tooled. Now lift a strip of gold with the lightly greased cotton ball and place the gold on the greased leather. With the gold strip in place, heat the brass roll until it just sizzles when touched to a damp cotton ball or sponge. The etched surface of the tool should be shiny ; if it isn ' t , buff it
!f4
on a piece of leather rubbed with red, or j eweler' s, rouge. An etched surface that does not shine will mean a gold surface that does not shine. The correct pressure and heat to apply are a matter of prac tice, since every piece of leather is different. But that is what your scrap leather is for. Cowhide needs less heat than goat, and for goat the tool should just sizzle. Once the leather has been sized with egg glair, it must be tooled as soon as possible, certainly within hours. With B. S. glair, once the second coat is dry (which takes an hour) the surface can be tooled anytime within months, or longer. The tools can be cooler, with less chance of leather being burned , and there is no need to add moisture by sponging the leather with water, paste, urine or anything else. If you don ' t have a roll, you can obtain excellent results with a stamp. Amateurs may get better results because one works with a paper pattern the exact size of the leather inlay . Any paper will do. After making the pattern, draw light pen cil lines with a straightedge where you intend to make your border. Now, using your brass tool and an ink stamp pad , stamp in the border. When the pattern is to your liking, place tracing paper over the pattern and restamp the tracing paper in the same way you stamped the pattern . Tape the tracing paper to the wooden borders of the leather, clean the ink from your tool, heat it slightly (to the point where it is un comfortable to touch) and impress through the tracing paper onto the leather. If needed, go over the impressions with the tool directly on the leather. Rock the tool in slightly in all di rections to make sure the whole tool touches the leather, but be careful not to make a double or smeared impression. The impressions on the leather should be clear but not too deep. Then they are painted in with glair, greased and inlaid with gold leaf. The gold will stick only on the glair, where the heated tool touches it. The impressions should show through the gold; if they don ' t , pat the gold down with the cotton ball until they do. If the gold cracks or tears , put another piece of leaf right over the first. In fact, it is probably a good idea to lay down double thicknesses of gold all over. When the gold is in place, re-impress the heated tool into the impression . The tool should barely sizzle when laid on the wet sponge. Hold it on the sponge until it just stops sizzling, then impress it on the leather. With B. S. glair, the tool can be a bit cooler. With presized gold on Mylar rolls, simply tape the roll in place, shiny side up, then impress the heated tool. There
fWO
fWO
63
Notes on Finishing Avoid the unseemly rush to glue up by Ian Kirby
ompared to the paucity of attention given to the prepara
C tion stages of woodworking, a plethora of technical data
Full-sized paper pattern, right, has been traced, then imprinted in leather, before tooling border with presized Mylar roll.
is no glair, wash-up or fuss. You cannot do intricate patterns with a Mylar roll, but for borders it is perfect-the roll itself is a guide to straightness. Once the gold is impressed, clean off the excess by wiping with a piece of flannel, then applying naphtha or benzine (not benzene, which is dangerous and will remove all the gold if you have used a Mylar roll) . If the gold has not stuck properly, either the glair was too weak or dry, or the tools were too cool, or the tool failed to touch all corners. If the gold is dull, or " b leeds" over the impression , the tool was too hot or the glair too wet. Places that do not stick can some times be reworked if you are very careful. Tooling in " blind , " that is, without gold , is tricky, but cor rectly done , it leaves a rich , dark impression. Use a warm tool and slightly damp leather. If the tool is too hot , it will burn the leather, something much easier to do when the leather is moist. The tools should be j ust hot enough to be uncomfort able to hold for more than a second. Sponge over the section of the leather to be tooled j ust before the tool touches it. On light-colored leathers, sponge the entire piece, so as not to leave water marks. Touch the tool repeatedly to the same place until the desired darkness is achieved . Each time the tool touches the damp leather the leather is made drier, and the tool cooler, and each time, you must hold the tool in place longer. Some workers advocate holding the tool in a candle until it is sooty with lampblack, then impressing this soot to the leather. I don ' t recommend this method because the soot can smear. It is far less permanent and looks not as rich-like staining pine to make it look like oak. A final treatment of potassium lactate solution and leather dl"essing completes the job.
0
AUTHOR'S NOTE: Specialty shops carry leather and tooling supplies. Basic Crafts, 1 2 0 1 Broadway, New York, N . Y . 1 0001 sells leather, stamps, adhesives and gold (free catalog) . TALAS, 1 04 5th Ave . , New York, N . Y . 1 00 1 1 has leather, stamps, gold, adhesives, potassium lactate, Formula No. 6 and B . S . glair (catalog, $ 1 ) . Amend Drugs, 1 1 7 E . 24th St . , New York, N . Y . 1 00 1 0 and Newberry Library, 60 W. Walton St . , Chicago, Ill. 606 1 0 both sell potassium lactate and Formula No. 6 . A good general supplier is Tandy, 1 1 5 W. 4 5 th St. , New York, N . Y . 1 0036 (catalog, $ 1 ) , though the leather I ' ve tried was quite below par. For leather, try Ernest Schaefer, 7 3 1 Lehigh Ave . , Union, N.). 0708 3 .
64
is available about various wood finishes. Despite this, many otherwise fine pieces of work are spoiled at this final stage. Finishing problems seem to create as many problems at the end of a job as bad preparation of wood creates at the start. Everybody seems to understand the need for extreme care and discipline when cutting joints and fitting pieces together. Yet when it comes to the finishing work, the time needed is usually underestimated. Then the urge to get the piece put together for the last time often overrides the need to assemble and finish in a considered sequence and under careful condi tions. Ironically, an undignified rush to glue up before every thing is absolutely ready inevitably requires substantially more time for finishing than would otherwise have been the case, and the result can only be less than acceptable. This is not another article about wood finishes as such. It is an attempt to make a few points, which in my experience seem often to be forgotten at the finishing stage. Cleaning up, applying a finish and assembly are all related parts of the finishing stage. The most common error is not to see them as such, especially where assembly is concerned. People glue together full or part assemblies and forget that it is far easier to clean up a piece of wood when it is separate from any other than to clean it up when it is glued into an as sembly. Where two or more pieces come together at right angles to each other as in, say, a frame, it is virtually impos sible to plane the inside surfaces or even to sand them prop erly without considerable frustration and sometimes taking the skin off the knuckles. Even when one is prepared to make this sacrifice, it remains impossible to reach right into the cor ners and a good crisp result simply cannot be achieved. It is also difficult to apply finish, at least by hand methods, to in side surfaces. In general, it is best to prepare the surface for finishing with a minimum amount of sanding. The best finish comes from wood that is carefully smooth-planed, then sanded lightly (if at all) with 2 20-grit paper. This is particularly true when working ring-porous hardwoods, which may have con siderable variation in density between earlywood and late wood . Excessive sanding CUtS down the harder tissues in each growth ring, and depresses the soft tissues. As soon as the finish hits the wood , the compressed soft tissue springs back and the surface may become quite rough. Once the piece is ready to go together, a sequence has to be worked out for each particular job, along the following lines: All inside and subsequently inaccessible surfaces should be planed with a very sharp smoothing plane and sanded lightly with fine garnet paper. Then they need to be dusted and given their full, final finish. Great care must be taken not to contaminate the surfaces to be glued during assembly, since the finish would prevent adhesion. Nevertheless it is neces-
sary to apply the finish right up to the pan to be glued . Doing it this way saves time and energy and ensures high quality. Other benefits also accrue. During assembly glue in evitably will squeeze out from the joints, leaving beads and dribbles on the work. If the surface of the wood is polished these can be, indeed should be, left strictly alone to cure. Re sist the strong temptation to wash or scrape them off immedi ately. Once they have cured they will simply fly off when the edge of a chisel is eased gently under them, leaving no trace or mark. Had the work not been polished, the glue would have penetrated the wood. Even an attempt had been made to wash it off immediately, some would have still entered the surface tissue of the wood, since washing only dilutes the glue and increases its rate of absorption . If the wood is cleaned up before assembly but not polished, the squeezed-out glue will have to be chiseled off. This can only result in damage to the surfaces, in precisely those places inaccessible to cleaning-up tools. Further, the residual glue on the surface of the wood forms a barrier to polish applied over it, and shows up as an unsightly mark about which little can be done. These considerations don ' t matter with surfaces on the out side or accessible to planing after assembly, because they won' t yet have been cleaned up. Indeed , it would be unwise to smooth-plane such surfaces before assembly, as they are often scuffed and dirtied while the piece is being put together.
if
Why finish ? Wood finishes have t o cater to a t least five requirements: 1 ) to keep dirt out of the wood; 2) to prevent degrade of the wood surface as a result of abrasion and heat; 3) to produce visual and tactile qualities; 4) to bring out the colors in the wood, and 5) to slow down moisture exchange with the air. I don ' t intend to go into great detail about all the different finishes available nor to describe the merits or debilities of each, relative to these five requirements. Indeed , a full ac counting would require a lengthy excursion into exotic chem ical technology. The point I do want to emphasize is that no one finish can be regarded as best, separate from the specific requirements of the job at hand. In all but the most stringently clean conditions, wood will be degraded through discoloration from dirt, unless the finish provides a barrier. If it were not for the fact that wood absorbs debris from the atmosphere and through direct con tact, it would need no finish at all . The second requirement, to prevent degrade of the surface , i s related t o the first. But here I have in mind potentially more harmful agents such as physical and chemical abrasion and wet and dry heat. The degree to which such degrade can be repaired is a factor to weigh against the longevity of any finish that is not easy to repair. The available choices of visual and tactile qualities are de termined primarily by whether the finish resides in the wood, such as waxes and oils, or on top of its surface, such as lac quers and varnishes. This is a decision about texture. Once this decision has been made , the maker must choose the de gree of gloss the surface is to have. The range from gloss to matte is narrow with waxes and oils, but very broad with var nishes and lacquers, from totally matte to mirror glossy. How ever, the choice is determined by the manufacturer-there is little a maker can do to transform a glossy varnish into a matte finish, and vice versa. It has to be stressed that in touching a piece that has been
When making leg-and-rail assemblies, above, or frames, left, smooth-plane, sand and apply finish to all the inSide edges while they are s till easily accessible, before glu ing the joints together.
lacquered or varnished, one is not in contact with the wood at all, but with the film lying over it. The number of coats of varnish or lacquer also affects visual and tactile qualities. Two light coats of varnish put directly onto the natural wood leave an open finish, in contrast to the full finish achieved by first filling the grain and then creating a build with a number of coats, each one being cut back before the next is applied, and the final one polished. The founh requirement, that of bringing out the colors in the wood, is often regarded more from an emotional point of view than from a practical one. For while some finishes do ac centuate the visual characteristics, usually by differentiating light and dark features, others can discolor the wood far more than one might wish. Staining is a complete topic in itself, but it ought to be said that in the main it kills the visual qual ities of wood, making it bland and lifeless. So much of the furniture one sees is adulterated in this way, and it's sad that so much beauty is stained away for spurious reasons. The principal spurious reason for this state of affairs is usu ally given as economy. Manufacturers take wood randomly from the pile and cut whole sets of furniture " en suite , " in whatever manner wastes the least, and then employ men to stain it all to uniformity. The public has come to expect wal nut or maple always to have the same color it does in the fur niture store. I t probably would cost the industry less to ' employ a man to select the lumber at the stan, as does a maker working alone, according to subtle variations in color
65
and figure. The saving in finishing materials would offset any additional waste in cutting. And despite industry ' s percep tion of the public' s expectations, most people-once they are given the chance-quickly come to relish the juxtaposition of heartwood and sapwood on a surface, and the beauty of the wood in all its color and variety. Indeed, this is a part of what gives custom furniture its quality. I never use stains, except when matching new parts to old in repair work. Generally speaking, the visual qualities and certainly the tactile qualities of the wood are best brought out by the fin ishes that reside in the surface . However some light woods such as maple and sycamore tend to turn yellow, and lacquer or varnish inhibit this better than wax does. It is always a question of weighing one factor against the other. Finally, no finish will prevent wood from taking up or los ing moisture as the humidity of the atmosphere varies with the seasons, nor as a consequence from shrinking and expand ing. Finishes do, however, provide an effective barrier against sudden changes in relative humidity and in this respect var nish or lacquer offers the most protection . This is also why all wood surfaces, both visible and invisible, should be finished in top-quality work. Varnish and lacquer Most people are aware of the advantages of varnish or lacquer over oils and waxes when it comes to protecting horizontal surfaces against wet and dry heat, and chemical abrasion. The tendency is, however, to think of on-the-surface finishes as entirely appropriate in all other situations, irrespective of whether the work is likely ever to meet harsh conditions, and in spite of the fact that varnish and lacquer have disadvan tages in other directions, when compared to wax and oil. Also, there is no reason that one must apply the same type of finish to every part of a piece. For instance, a vertical surface rarely needs to be highly resistant to the wet and dry heat or chemical abrasion that a horizontal surface is liable to en counter. The tabletop clearly needs protection, while the apron and legs usually do not. Also, because of the way light and shadow work, we rarely see the same effect from a hori zontal surface as from a vertical surface . There is no reason why they shouldn' t be finished differently, to capitalize on the combined advantages of a variety of finishes. I have used the terms varnish and lacquer together to refer to on-the-surface films. This is because there is tremendous confusion about j ust what each word means, aggravated by advances in chemical technology over the last 50 years. A cen tury ago, each town or locality had its own paint maker who mixed varnish according to his own secret recipe. Usually the base was boiled linseed oil, with the addition of various gums, resins and dryers. The same preparation became paint with the addition of whitening and pigment. Such prepara tions were soluble in oil, turpentine and mineral spirits. The original lacquer, on the other hand, was shellac, prepared from the resinous deposits of the lac insect and soluble in al cohol. But things changed soon after the turn of the century with the development of nitro-cellulose lacquer, and since then with the creation of a veritable flood of synthetic resins. Manufacturers first introduced these synthetic resins into existing varnish and lacquer mixtures. But chemists quickly developed more sophisticated, and more highly reactive , preparations that required new formulations. Most began as two-can products which the user had to mix, but people are
66
notorious about experimenting with directions and the result ing disastrous finishes forced the chemists to devise single-can preparations that polymerized upon contact with oxygen or moisture in the atmosphere or by internal catalysis. The result today is a profusion of clear wood finishes, marketed under the familiar old names of varnish and lacquer, but containing few of the original ingredients of these materials. This is a case where big is better, since the research that goes into a modern finish is extraordinarily expensive, and so is the factory required to produce it. Indeed, most synthetic resins are made by a few large firms and sold in bulk to smaller producers of paint and varnish. These resins are vastly better than the products they have replaced, but they ought to be applied according to the directions on the can. Many furniture makers begin with commercial varnishes and mix their own oil-varnish preparations, according to experiment and intuition. It's possible to achieve good results this way (" Oil/ Varnish M ix , " Spring ' 7 6 , pp. 46-47), but I never do it. I don ' t think I can match the research facilities of DuPont or Farben , especially when the label usually doesn ' t even tell precisely what is inside the can . Most lacquers and varnishes may be sprayed on, but they can be applied with a brush or rag. If they are being applied to a veneered surface where the veneer has been bonded with white or yellow glue, it is always best to apply the first coat sparingly with a rag to form a seal, because an excess of lac quer may seep through the veneer and attack the glue line, resulting in blisters. I don ' t mean to dilute the preparation, but to rub a little of it over a large area. Once the grain has been sealed by the first coat, which must be abraded to de nib the surface , subsequent coats should be applied sparingly and quickly without too much brushing in. Each coat should be allowed to flow out and left to cure. One hazard to a glossy lacquer or varnish finish is floating dust from the air. The best way to avoid the problem is to work in a dust-free finishing room . Without such a room, one can guard against dust fall-out only by scrupulous cleanliness. Clear all the tools and debris from your bench , sweep well, and cover the bench top with a piece of clean plywood. Have nothing on the bench but the tools and materials you need for finishing. Apply finish to the furniture partS and lay them out flat on the plywood, then block up another piece of ply wood over the work, as an umbrella against falling dust. If despite these precautions you do get dust in the finish , then you will have to sand out the offending spots with fine, worn paper and refinish. Many makers attempt to turn a gloss finish into a matte finish by sanding or rubbing with steel wool. This scatters the incident light by abrading the top surface of the finish . The scratches are large at first, but the more rubbing the finer the scratches and· the glossier the surface becomes . A glossy finish dulled with steel wool or pumice and oil will soon become shiny again under the normal abrasion of routine household cleaning. If you want a matte finish , buy a matte varnish or lacquer. These products contain stearates in suspension, which scatter the incident light by their presence throughout the film . Wax and shellac A wax finish gives, in the main, excellent visual and tactile results. It protects well against knocks and physical abrasion and is very easy and fast to apply and repair. It is entirely suit-
able for vertical surfaces in most situations. The quickest and easiest way to achieve a good finish is with a coat of shellac to seal the wood, followed by wax, for polish . An equally good method is to finish with oil, or with oil followed by wax, al though the speed of drying and ultimate curing is consider ably longer than with wax and shellac. While lacquers and varnishes are bought as prepared pro ducts with full data sheets and instructions, the best furniture wax is made up in the workshop from beeswax . Beeswax is the basis of most commercial furniture waxes, although it is often adulterated with paraffin wax and other substances. I use the word " adulterated" advisedly, for often the proportion of beeswax to other substances is very small in name brands. A good mix can be made quite easily from a block of pure bees wax grated with an ordinary household grater or pared with a wide chisel. Put the chips into a wide-necked container, that is, wide enough to get your hands in, such as a large mayon naise or peanut-butter jar. Pack them loosely and add pure turpentine to half the depth taken up by the chips and set aside to dissolve. This will take about 24 hours. The final con sistency should be that of soft butter just before it melts into oil. If it is too thin add more wax, or if too thick, more tur pentine . When stirring, take care not to splash because, while it won ' t damage the skin, it can be very painful in the eyes. Store the mix in the same wide-necked vessel with a lid, to prevent evaporation of the turpentine and hardening of the wax (although if it does harden, it can always be softened
Left, a squirrel-hair 'mop ' kept in a shellac bottle. Below, how to make a 'mouse. '
A square of cotton cloth is wrapped around a ·wad of cotton batting a little smaller than a tennis ball. Finishing material is poured in and the cloth is folded and twisted around. Hand pressure controls the flow onto the wood.
again by the addition of a little more turpentine) . Additives can be used with this sort of preparation , but it is questionable whether it is worth it in the long run . Carnauba wax, which is added while heating the mix, results in a wax that finishes out harder than beeswax but becomes more dif ficult to use . Drying can be speeded by the addition of up to 2 5 % gasoline, but the easiest and safest way is to use pure beeswax and pure turpentine. Incidentally, if you heat this wax up, you should use a hot water bath or double boiler. Before waxing, apply an initial sealing coat of dilute shellac with a large, soft brush called a " mop" or with a " mouse" rubber. A mop is a round, squirrel-hair brush about 1 IJz in. in diameter, and it is best to keep it right in the shellac, sus pended through a hole in the lid. The diagram shows how to make a mouse. Its advantage is that while it has a substantial reservoir of liquid, it allows fine flow control according to the amount of pressure exerted by the fingers. You can obtain a more even coat than with the brush . Only one application of shellac is necessary, to act as a barrier to inhibit the wax from penetrating the wood so deeply that it eventually disappears. If the ground of shellac were not there, it would take very much longer, and more wax, to finish the surface. The best is pure shellac dissolved in wood alcohol , rather than a commer cial preparation that also contains polymerizing agents, rapid drying agents or gums. Shellac dries rapidly anyway, and you don ' t want to achieve a build . Apply the wax with either a rag or brushes. The brushing method, all too infrequently used, is very similar to shining shoes or horse tack, in that two brushes are used, both of which need fairly soft bristles . Whether the brush or rag is used, apply the wax across the grain in circles to get an even, light spread, then make the final strokes with the grain . A common mistake i s t o apply too much wax, leaving a de posit on the surface , on the false assumption that it will harden and disappear into the wood . The result is a sticky, uneven surface that is very difficult to level. Two or three light coats of wax are much better than one heavy one. Oil finishes Oil is also a sound finish in itself or as a base for subsequent waxing. Oils for furniture are usually based either on linseed oil to which polymerizing agents have been added, or on syn thetic resins with hardeners added . These latter oils are often referred to as " teak" oils or "Danish" oils but this should not be taken to mean that they are used only on teak or by Danes. They can be used on any wood where the main concern is to protect and enhance the visual and tactile qualities. Oils do, however, present more problems at the pre-gluing stages because they are highly fugitive-it is easy to contam inate gluing surfaces with oily fingers or with a touch or drip from the rag. Great care must be taken to avoid the risk of poor adhesion due to oil contamination . Also, because of its volatile nature, oil tends to creep along the grain, which makes working up to joint lines more of a risk. It is the maker's responsibility to advise customers about the finish, its expected performance and daily care. For your own protection and reputation, this should not be merely verbal. A printed sheet giving all the information necessary should accompany the delivered furniture.
0
Ian Kirby, 45, who was trained in England, directs the Hoo suck Design and Woodworking school in North Adams, Mass.
67
Building Green Native oak and pine are easy to work, shrink in place by David Adamusko Scale model, 1 in.
I
spent last summer building my own leisure home in rural Hampshire County, West Virginia. This is the second house I ' ve built for myself in the past five years and I ' m proud t o b e able to say that I own them both , having dealt in cash all the way . I ' m not rich, I make a living teaching wood working and antique furniture restoration in the Washing ton , D . C . , area. The secret is in the building techniques. I use fresh-cut green lumber-cheap and abundant in the Ap palachian mountains, and in many other pans of the country. This latest building is a refinement of my first attempt . From the start, I decided to build alone , following my own designs. The building is smal l , but is designed to allow addi tions. The basic floor plan is a 1 6-ft . by 24-ft . first floor with a 1 6-ft. by 1 4-ft. upstairs-totaling 608 sq . ft . of usable space. Also, I made a covered porch 8 ft . by 24 ft . for 1 92 sq. ft . , plus 1 60 sq. ft . of open sundeck. The whole building, ex cluding wiring, insulation and fixtures, cost less than $ 2 , 500, including roof and foundation. M y building lot is three miles from a prosperous lumber mill , in the midst of a second-growth oak and pine forest . I bought the lot three years ago and spent the first summer clearing and preparing the site. During the next winter, I de veloped my design and built a scale model. I also began to or ganize my tools and to collect the various parts I would ·need for my building . Since I was two miles from the end of the nearest electric power lines, I bought a McCulloch 1 , 500-watt gasoline-powered generator to run my saw and drill . When the warm weather finally arrived , I laid out the foundation, dug pits for concrete footers, then built and leveled concrete-block piers. I covered the ground with plastic sheets as a moisture barrier, then covered the plastic with pea gravel to keep it in place. This would keep the floor girders, joists and 1 -in. oak planks from absorbing ground moisture, thus allowing the floor system to dry uniformly and stay dry. built the subfloor platform in mid-May and left it to dry and stabilize in the sun until I was ready to begin full-scale con struction in mid-June. I knew from experience that it would be important to es tablish a good rapport with the lumber-mill operator. I showed him the scale model of the framing I wished to do, to enlist his aid in providing the lumber I needed-when I needed it. He took a personal interest in my project, and he persuaded me that oak was the logical choice for the flooring system . I had doubts, because green oak is very heavy to carry around, but at $0 . 1 6 a board foot I couldn't resist. In the end , I built the entire frame of oak lumber using full-size rough-cut 2x4 studs on two-foot centers and 2 x6 rafters . The full-size studs made it easy to calculate framing dimensions. In a couple of weeks my muscles had hardened up enough so that I hardly noticed the weight of the heavy wet oak . Therein lies the key to green-lumber carpentry. It has to all be wet and fresh in order to get consistent results. It is easy to
I
68
=
1 ft.
cut and nail the green lumber and even to bend it when nec essary . In my ideal arrangement with the mill operator, he cut the trees in the forest one day, cut the logs into boards the next, and I tried to nail them into place as soon as I could thereafter. This permitted a uniform rate of drying-especi ally important when the boards were wide. Everyone knows that green lumber shrinks a lot when it . dries, but the shrinkage is critical only across the grain . I used plainsawn lumber for my floors and roof-fully expecting it to shrink and check, but not to warp. One-inch roughsawn oak boards, when nailed in tight with 1 0d nails, will not pull nails out, will not warp (unless the boards have severe grain defects) and usually show only small checks. Besides, those 1 - in. boards are all covered up as the building proceeds. My main emphasis in framing my building was to get the roof sheathing boards nailed in so they could start drying. I tried to use full-length planks when I could get them , but I staggered shorter boards over the rafters when necessary. As soon as the overhangs were trimmed, I covered the roof sheathing with tar paper to protect it from the direct heat of the summer sun . Months later, I removed the tar paper and reset the lOd nails where the heads had been exposed by the slight shrinkage in board thickness. Also at this time, after the boards had dried, I caulked between them to keep out drafts and insects, then re-covered the roof with new tar paper. nailed on shingles when I was sure most of the shrinkage had already occurred. This takes three to four months in the summer heat . Be aware that the average gap between two 8-in. oak boards after drying is about % in. Caulking is necessary after the roof sheathing dries, but the roof will withstand any loads placed on it. I believe green lumber framing can easily support heavy solar collectors, too. I chose to use solid oak roof sheathing as opposed to ply wood for two reasons. First, green boards are economical : One-inch oak cost $0. 1 6 a square foot in 1 9 7 7 , and %-in . exterior-grade plywood cost about $ 1 6 . 00 a sheet, or $0 . 50 a square foot. Second, the exposed underside of the eaves weathers along with other exterior sheathing boards, and this gives harmonious esthetics to the structure. Short overhangs (of up to 8 in. long) don ' t warp much . Longer overhangs need fascia boards nailed on to prevent warping and this necessitates a soffit. Short overhangs without fascia dis courage insect nests and bats. Throughout my work, I used fresh wet lumber. When I had to store lumber on the building site for days or weeks, I would dead-pile it and soak it with buckets of water. Then I would cover it with a tarp or tar paper to keep the direct sun off and the moisture in. It is relatively easy to nail through and into wet , green oak. But once oak dries it becomes almost impossible to pull the nails. When had to pull nails from dried boards , I usually ended up breaking them off. The only saws I used were a standard l O-pt. crosscut saw, occasionally a
I
I
6x6
2x6
girder and Left, concrete block f oundation, built on concrete footings, supports solzd oak joists. Frame, a60ve, requirCi diagonal bracing untt!particle-boardsheathing is nat!ed on.
Finished leisure house has covered porch, wide sun deck. End wall at right is designed to accommodate future additions.
sabre saw for curves, and my 7 Y4-in. Black & Decker circular saw with a carbide-tipped blade . Carbide-tipped blades offer the only efficient means of working green lumber. A blade with eight teeth is perfect for both crosscutting and ripping. I followed standard carpentry techniques when framing, and used oversized nails for a little extra bite in the wood . The only extra I gave to the wall frames was a horizontal 6-in. wide oak board set into the studs that would serve as a nail base for vertical exterior siding. Once the frame was complete, I sheathed the walls with 4xS sheets of %-in . particle board . I nailed with sd nails spaced every 6 in. into all the studs and framing members. Particle board gives a very rigid shell to the frame , and it will hold siding nails. I also nailed particle board over my sub floors, using 1 'h-in. screwshank nails. By waiting until parti cle board went on sale, I was able to get all I wanted at $ 3 . 00 a sheet. The one disadvantage to particle board is that it needs to be kept dry or it will absorb moisture and swell. I covered the particle board with black building paper, then set my windows into the wall frame . The black paper serves as a moisture barrier as well as an air seal. My buildings do not leak heat in the wintertime. Also , insects and vermin don ' t like t o eat asphalt-impregnated building paper. When the building was covered with overlapping tar-paper sheets, it could withstand the winter winds and moisture. I sheathed the exterior with roughsawn vertical boards, as a fin ishing touch . I drove sd nails into the wall-frame bottom and top plates and the 6-in . wide oak nailing base I had put into
Details at left show rafterjoinery, green-oak decking. Windows are installed after fram ing is sheathed in particle board and covered in tar pap er, above, then exten·or is fintshed with wh ite pine boards.
the studs. I used vertical siding instead of horizontal because it was easier to nail up when working alone . One-inch white pine boards from the local mill cost $0.20 a board foot. White pine is lightweight, has beautiful large knots, rarely checks or splinters and shrinks very little . As white pine ages, its color mellows and darkens into grey and brown tones. While putting up the siding, I tried to produce special effects in color and texture with the positioning of unusual boards. This beautiful rough lumber shows its texture boldly, and it never really needs painting. Many of my siding boards were 1 3 in . wide and some were 1 6 in . wide. With several months of proper air drying, the white pine can easily be worked to make shelves, tables and benches suitable for inside fur nishings . I t resists b e n d i n g , warping and shrinking reasonably well. I built the porches of white oak because of its weather resis tance, again using 1 0d nails to secure the I -in. planks to the deck joists. I alternated wide and narrow boards to help con trol the gaps of shrinkage. The 'h-in. spaces between the boards don ' t matter-they promote water drainage. Next, I plan to build a two-story workshop of green lumber in the mountains. I plan to use 2x6 wall studs and 2xS roof rafters, which will permit thicker insulation and will improve the load-bearing capacity of the walls . I need a large internal space with 1 2-ft. ceilings and garage doors. The local mill �as a 24-ft . length capacity so that seems to be the only limitation on the design , other than the weight of the individual beams and the problems of getting them in position .
D
69
Parsons Tables Building and veneering them by C. Edward Moore Solid walnut table with recessed glass top. Exposed ratf tenons are mitered.
he Parsons table came into existence during the 1 930s as
T a result of a simple drafting technique. Students ofJohn
Michele Franc of the Paris division of the Parsons School of Design were taught to block out a cube or rectangular prism and then to design an object within it. At some point the stu dents and Franc decided that such a block form itself could be a design solution . Consequently , the first Parsons table was produced and one of Franc' s own designs is in the collection of the Cooper-Hewitt Museum in New York City. A Parsons table is a rectangular table that appears to be made of stock of one thickness. Simplicity has made these tables a stock item with interior decorators (especially those besieged by clients with visions of " modern eclectic" ) . They are frequently placed behind a sofa to support a lamp. Large cities, where contemporary design is most likely to flourish, sometimes have small shops specializing in wooden Parsons tables. One also finds wicker, plastic, metal, glass-topped , painted and plastic-laminated Parsons tables. It is possible to adapt this style to obtain a wide variety of results . It would appear that the easiest way to make such a simple item as a Parsons table would be with solid wood , with the skirt outside and around a beautiful solid wood top. I made such a table once, with a beautiful butcher-block walnut cen ter, finished it with much elbow grease, and gave it as a wed ding gift. Six months later there was a split (in the table, not the marriage) . The violation of grain direction doomed it from the start, despite the valiant efforts of resorcinol glue . Consequently, I am convinced that it is virtually impossible
to make a true Parsons table with a solid top and solid rails that will withstand the test of time . A parquet top might be the exception. Industry has produced a vast assortment of false or floating tops in this style of table to circumvent the problem . Many such tables are laminated or lacquered particle board , de signed more for quick sale than for strength or durability. In general , Parsons tables are among the worst-made items avail able from any source. One eventually concludes that a Par sons table with wood as its visible surface should be veneered over a sturdy base. Some early thought should be given to the veneer. If you are new to veneering, stick with mahogany , walnut, oriental wood and other " strong" veneers , and avoid thinner veneers such as rosewood and the burls. If you aren ' t using any matching, some attention should be given to " loose" versus " tight" sides of the veneer. Flick your finger across the end of a piece of veneer and note from which side little pieces chip . This is the loose side and when possible it should be the glue side rather than the exposed side. Obviously this is of more concern with some veneers than others. I frequently maxi mize the randomness in the butcher-block patterns I use and violate the principle just stated. Some books ignore this sub ject and others seem to say little more. Let ' s discuss an end table 2 1 in. wide, 3 1 in. long and 22 in. high , with stock thickness a 2% in. These are arbitrary dimensions, provided only for ease of discussion. It is best to use a leveler or glide on the bottom of the legs, and to ac count for it in designing the height of the table. I start with 4 / 4 poplar, which I plane and laminate in three layers with Titebond glue . (I use Titebond glue for the entire project when making a table this size .) Then rip , joint and plane the poplar to stock that is 2% in. square. Suitable solid stock could be used for smaller tables. For the legs, cut four pieces %6 in. shorter than the final height of the table, or 2 1 1 %6 in. long. I try to add a touch of elegance by beveling the inside of the legs, but this is a mat ter of personal taste. The next step is to veneer the inside of the legs, before cutting the joints. It is important that the beveled side of the leg be veneered fust, then the two adjoining sides, because this sequence will yield the fewest visible seams. I apply the glue to the leg with a rubber roller or brayer, to get a uniform application . Then I place the veneer on the glue-covered wood and clamp the as sembly against a suitable flat surface. Sometimes roll the ve neer with a dry rubber roller before clamping. Glue spread with a roller seems to dry very quickly, so some haste is required. But use no more glue than is necessary . If
I
I
Parsons table appears to be made from stock 0/constant thickness, a, although it looks best when instde a/leg is beveledas shown. Veneer the bevelfirst, clamping with V-block, then veneer adjoining stdes.
70
Ed Moore is an associate professor 0/ mathematics at the U. S. Naval Academy in Annapolis, Md. His work is usually on dis play at Elizabeth Interiors in Annapolis.
you apply too much glue it will either seep through the po rous veneer or form dry pockets, leaving you with either a sandwich of leg and clamping bench, or a lumpy surface . To avoid making a sandwich, cover the bench with a plastic film such as " Glad Wrap" (but not waxed paper, because it can mess up finishes) . The plastic forms a moisture barrier, so the clamping time must be increased and after removing the clamps the wood should be allowed to sit undisturbed over night, until the moisture dissipates. It takes a little care to trim the veneer at the bevel . Place the veneered side down on a piece of scrap wood and insert a piece of waste veneer berween the stock and cutting tool. I find a serrated veneer knife most convenient. Cut carefully and then plane or sand off the little lip of veneer that re mains. A slip or split here can lead to a very ugly repair. Next veneer the adjacent inside faces in the same way. With three of the five sides veneered, one may start cutting and fitting the joints at the top of the leg. Cut a lh-in. shoulder in. from the top of the leg on the inside faces, leaving a Pk-in. square cross section . Then cut open mortises 1JJ. in. wide and 0/4 in. long, and 1JJ. in. from the outside. I use a router mounted under a table. This is a lot of wood to remove in a single pass, and it is best to drill out some of the waste first. Extreme care must be taken to have the fences fit snugly and to control the feed carefully. The end and side rails are each in. shorter than the re spective outside dimensions of the table, so you need two pieces 1 8 0/4 in. long and two pieces 280/4 in. long. For the top I use %-in . imported l l -ply birch plywood. To accommodate it, it is necessary to cut a rabbet 1JJ. in. wide and % in . deep into the inner edge of the side and end rails. For balanced construction, you must completely veneer the rails. Cover the. l %-in. inside face first , then the bottom of these four pieces. Each end of each rail gets a tenon % in. long, 1JJ. in. thick and 1JJ. in . from the outside edge. I crosscut the shoulders on· the radial arm saw (using a stop-block for uniformity) and rip the other cuts on a band saw, (using a rip fence) . A dry fit of a rail and a leg shows two things: One, you need a 1JJ. - in . miter on the inside shoulder, so cut it; and two, the rail is in. plus the veneer thickness higher than the top of the leg. Cut a dado in. deep across the top of each end of each rail , 2 in. or in . from the end . Adjust this cut to make the resulting surface flush with the top of the leg when the joint is in place . This will accommodate a cap , to prevent end grain from tele graphing through the veneer. When everything fits , glue up the two end assemblies. Then dry-clamp the rwo side rails in place to get a precise measurement for the plywood top. Be sure the plywood has no hollow Spots, and veneer its bottom side to balance the construction. With l l -ply stock, as opposed to 5 -ply or 7-ply, this balance may be more cosmetic than actual. Now glue up the rwo end assemblies, side rails and top. By breaking the gluing into these segments you are more likely to get square corners and parallel legs. Sometimes I glue a cross-rail to the underside of the top, berween the long sides of the table. If the table is so large that the 5 / 8- ply seems too thin I glue another layer of plywood, of a size to fit tightly berween the rails , to the underside. I always use glue blocks berween the top and rails, as insurance, and a 3-in. mitered brace at each corner. The brace solidifies the leg construction when it is glued to the top and screwed into the adjoining rails. I cap the corners with %-in . poplar that is in . wide and
When the glue has set, use a serrated veneer knife, or a veneer saw, to tnm the excess veneer and plane flush.
2%6
2 Y4
With some of the waste dnlled out, a two-flute straight bit in the router table is used to mortise the legs.
5j1 6
2 1h
%6
Typical leg-rail joint is dimensioned above, and fits together as shown below. End caps strengthen joint and keep grain from tele graphing through veneer.
2
71
mitered to cross the corner. After these eight pieces are glued in place it is best to let the table sit idle for a day or so while the glue cures. Then hand-plane to true up the surfaces at the corners. Now the only exposed end grain is on the bottom of the legs. Capping avoids the telegraphing of end grain , which one can see on old pieces where uncapped dovetailed corners are veneered. This is the " ring around the collar" of veneer work and should be avoided . Also, running the caps back on to the rails strengthens the joints. The outer surfaces of the table will be veneered in the order of end, side and top. Now the advantage gained by veneering the inside of the legs and the underside of the rails while they were accessible becomes apparent. Matching veneer patterns is the dominant consideration in determining the overall ap pearance of the table, but the details are best left up to each maker and the wood he is using. I like the crispness of
Select rail veneer and scribe and cut miters at both ends.
flat surface and prevent the j o i n t fro m b u c k l i n g b y applying a little weight (such as a plane) while the glue sets. The result shoulcL be a U-shaped piece that, when carefully placed, has joints crossing the interior and ex terior corners exactly and appropriately . Tape and glue joints to Leave the tape on what get a V-shaped piece will be the outside surface, for end of table; repeat for the other end and both sides. but remove it from the inside and put the veneer face down on the bench, with the cor responding end of the table on top of it. Manipulate the ar rangement until the corners do line up just right, and mark the position . Then turn the table over, remove all but one piece of tape from the veneer (take care not to break the joint) , and apply glue to the table end . When you glue, ke�p in mind that too much glue makes it difficult to clamp the veneer in place without drifting, and that clamping force applied even slightly askew can pull the joints apart. After spreading glue on the wood, place the ve neer exactly in place and lay smooth 4 / 4 maple cauls across the rail and along the legs. First put bar clamps along the top side of the rail (anchoring them to the bench or to the other end of the table) , and C-clamps along the bottom side of the rail . Then C-clamps with protective blocks go down both legs. Before tightening them down hard, I check and recheck the positioning to make sure nothing has drifted . After removing the clamps and boards, carefully peel off the tape to avoid tearing up patches of veneer. Lacquer thin ner will soften the tape and remove its traces . Trim , and re peat this process at the other end and on the sides. clean up the edges of the veneer with a router and a three-flute carbide bit with ball- bearing guide. Be wary of grain directions. I pass the router in the opposite direction of normal feed so that it nibbles off the excess veneer. This prevents wholesale split ting, which can be disastrous if there is an area of nonadhe sion at the edge. Trim the inside corners with a knife. Before moving on, feather (gently flick as if to lift) the trimmed edge with your finger to detect spots that did not adhere-the remedy is a little glue. Be very careful when you remove the clamp boards since there always seems to be a spot or two where glue comes through. Use a cabinet scraper to remove such debris from the clamping boards before using them again . And repeat the whole process on the other three sides
I
Sandwich the veneer between two boards to plane the miter clean and true.
mitered corners that meet exactly, and the drawings above show how I do it. First, I veneer the ends of the table. Cut overlong strips for the rails and legs, at least a half-inch wider than dimension a. Choose a strip to cover an end rail and overlap Y4 in. of veneer with the long metal ruler. Find the finished length (2 1 in . , at the l O-in. and 3 l -in. marks) , and use a plastic drafting tri angle to scribe the miters. Then cut them along a metal straightedge-I use a Stanley utility knife with a new blade, or a deluxe musical instrument maker's knife . Sandwich each veneer between two boards with the mitered edge protruding in. , and use a shoulder or block plane to clean off the irregularities left by the knife. If you don ' t square up the cuts, the joints will open when you sand or scrape the finished surface. Now cut a miter at one end of each leg piece, and join the three pieces of veneer together to form an overlarge U. Check each joint and get it perfect before taping tightly across the joints with several strips of masking tape. Then turn the ve neer face down and apply a little glue with the joints cocked slightly open . Rub the glue into the joint with your finger, flatten out the veneer, and roll. Place a piece of tape across the glue line to equalize the tension of the tape on the other side. Avoid getting glue on the front . Place this veneer on a
%6
72
With the veneer ex actly in place, use hard maple cauls, b a r clamps a n d C-clamps to glue it down tightly. Check a n d re c h e c k the positioning to make sure n o thing has drifted.
Left, finished table in walnut veneer has butcher-block center field and cnsply mitered comers. Veneered construction can be enhanced
by geometn'c marquetry, center. Solid oak table, nght, has ceramic ttle top and wzll be used for plants.
of the table. Now you are ready to veneer the top. Although innumerable veneer patterns might be used , my most popular tabletop is walnut veneer in a butcher-block pattern , set inside a veneer border of width a (here 2% in.) which adds to the illusion of constant dimension. Random ness and variety count more than pattern matching in achiev ing an attractive top. Begin by laying out the border directly on the plywood tabletop and draw in the miters from the outside corner to the center field. Measure the center field-on this 2 1 -in . by 3 1 -in. table, it is 1 6 1f4 -in . wide and 261f4 -in . long. Use eight strips 2 1fn in. wide or ten strips 1 % in. wide. To obtain strips of uniform width and with good edges, pass the edge of a 30-in. piece of veneer across the jointer (or past a sharp router bit) . Then cut a strip about in. larger than needed . Cut a good second edge on the router table with a rip fence and a three-flute carbide bit. Tape and glue the joints one at a time, as before, cut the field to length and carefully plane across the edge to square it. The center field is done. The four mitered joints of the border can be most difficult. Veneer matching, joint tightness and corner alignment are crucial. Start by jointing one edge of a 3-in . strip of veneer, and miter one end so the jointed edge is inside. Fit this jointed edge and the mitered corner along one edge of the center field , tack it in place with tape, then scribe and cut the miter at the other end . Cut it the merest hair fat , so the knife-work can be p l a n e d c l e a n , t h e n tape J ointed edge M iter tightly in place, turn over and rub glue into the joint. Prepare the next strip the Tape same way, with a jointed in side edge and a miter at one end, and fit it along an adja cent edge of the tabletop. Tuck the uncut end under the extended miter of the side a l ready taped . Tack down with tape, then use the first miter as a guide to scribe and cut the new piece again, allow a tiny bit extra and plane it clean . Tape and glue, and continue around To fit the top border, scribe each the tabletop. If the miters miter from the real table, not from drawn on the plywood table- the drafting triangle.
top are not precisely 4 5 ° , prejudice your miter cuts in the veneer accordingly. When the top is completely taped and glued together, re move the tape from the side that will be attached to the table. Remove all but a few strategic pieces from the exposed side , and place the veneers face down on the bench . Align the table on the veneer and mark the corner positions-a red pencil is easiest to see . Turn the table over again, roll a thin but uniform layer of Titebond glue onto it with a rubber roller (brayer) , and move quickly because one side of the sur face may dry before you finish spreading the glue. Carefully align the top on the table and clamp with care. I sometimes press the veneer down with a clean rubber roller before plac ing the clamping boards, and check the alignment again . Then cover with as many clamps as will fit . If the table is simply too big to be clamped, you will have to use contact cement-another problem altogether, and a course I do not recommend , whenever it can be avoided. After trimming the edge, feather it with your finger to lo cate spots that didn ' t adhere and reglue them. Then pass your fingers lightly over the surface and listen carefully. At a bad spot it will sound almost as if you are passing over loose newspaper instead of solid material. When you suspect an area, tap it with your finger and again the sound will tell you if the veneer is not stuck down. Make a small slit with a razor blade, with the grain, inject a little glue with a syringe, and roll. Immediately wipe with a moist cloth to remove all ex terior glue traces. The moisture in the glue and from the cloth will swell the slit back tight. Rub dry with a different cloth and roll again with a clean roller; clamp if necessary . Don ' t use steel wool on bare veneer; it invariably snags and requires difficult repair. Never throw away any veneer scraps; you never know when a sliver will be needed for a repair. An oil finish , if necessary on , for example, rosewood , should not be allowed to saturate an area. If oils penetrate deeply, they may break down glues, especially contact cements. First test your finish on a sample. Satin urethane varnish over a light application and immediate rub-off of Watco oil have worked well on my walnut tables with butcher-block centers. Don ' t forget to stain the underside o f the top i f you used a dark veneer. Always apply finish to the underside to seal the wood and prevent warpage. The faint smile of surprise on the face of someone who runs a hand underneath a side or end rail and discovers a solid, finished surface is usually amplified when curiosity leads him to peek and discover that it is ac tually veneered. Somehow this justifies the extra effort and thorough approach we have taken .
1Js
9= � 3" 1----
0
73
Hanging a Door Another way to get it right by Wtllis
N.
Ryan III
EDITOR'S NOTE: When we published Ben Davies ' article "Entry Doors " (Winter '77, pp. 44-47), we asked Tage to jill a page telling how he hangs a door. Frid obliged with detads ofthe intn'cate dovetail jamb joint he learned as a carpenter's apprentice, and we added a headline that read, "The Right Way to Hang a Door. .. Several readers objected, and rightly so, for there is no single "right way " in woodworking. There are many ways, and the "nghtness " of each can be judged only by the results. Here, Wtllis N. Ryan ofFay ettevtlle, descn'bes the method "taught to me by a cantanker ous and exacting budder before he retired. " Ryan adds that he has been hanging doors for 15 years, "and sen'ously for the past jive. ..
Frid
N. Y.,
hen a door j amb has been cased out it should have and
W retain a clean , unbroken, molded-in-place appearance .
With a painted door especially this requires the jamb to be set securely , its head fixed , and the casing miters glued . The paint fractures we usually see shouldn't be there . In new construction, figure back from the door size to de termine the rough opening. In remodeling, the rough open ing and jamb stock can usually be made to accommodate a standard door. Extensive trimming of the door is always a last resort. If the rough opening is greatly out of plumb you will need extra clearance for the j amb. Normally Yz-in. clearance in width is plenty . When I make a jamb the sides are rabbeted to accept the header, the header is glued and toe-nailed to the sides, and then the sides are nailed to the header. Then I nail temporary spreaders to the j amb about 8 in. from top and bottom , ex tending past each side by about 6 in. The spreaders hold the jamb in plane with the wall and keep the sides of the jamb parallel during installation . This jamb assembly's inside dimensions are larger than the finished door by in. in height and in. in width . It is tacked in place through the spreaders , with the sides plumb and the header level. Both sides are then scribed to the floor. The clearance allowed for the door depends on the hand of door and the run of the floor; if the floor is level in. is fine. The jamb is pulled out of the opening and cut to the scribed lines. When put back in the opening the jamb will meet the floor correctly, and its header will be level. When setting the jamb, keep the sides plumb and true. If the hinge side of the rough opening is plumb, nail the j amb directly to it. If not, do the minimum necessary shimming on the hinge side and keep the shims near where the hinges will be placed . Shim and nail the latch side at top, bottom and middle. When the j amb is secure and true, remove the spreaders. This method is very trustworthy and , once you ' re used to it, very fast . Always use three hinges, unless you ' re hanging a door under 5 ft. or a hollow-core. Each butt hinge is designed for a specific door thickness, size, weight and for the usage it will receive. Solve your hardware problems by taking your busi ness to a firm that specializes in hardware, not a hardware
%.
%6
0/16
74
Glue and nail the header to the jamb, then nail spreaders, which keep the sides of the jamb parallel and in plane with the wall�
store . For doors that are heavy, much used or equipped with a mechanical closer, ball- bearing hinges are available in most sizes. To hang the door, drive twO nails into each side of the jamb to act as temporary stops. Set them back from the edge of the j amb slightly more than the thickness of the door. Set the door in the opening and wedge it against the hinge side of the jamb. Check the top of the door for even clearance. If it runs one way or the other, plane the top of the door. I use a router template to inset the hinges. If you ' re going to lay out the mortises by hand and chisel them, careful figur ing here will save much trouble later. If your hinges are insuf ficient or the door is extraordinarily heavy, you can increase the depth of the inset with each higher hinge to produce an even clearance between the door and hinge side of the jamb.
Hang the door and swing it in. Scribe the lock edge %2 in. from where it meets the jamb, and plane a bevel. Sectional view shows why: Center of swing is hinge pin.
the door will hit the edge of the j amb. Set your scriber for minimum and scribe the inside of the door where it meets the j amb. Pull the door off, plane a bevel on the edge to the scribe line, and rehang the door. Any further planing can usually be done without removing the door. When the lockset is installed correctly, a little outward pressure against the door will bring it into plane with the jamb. To install the casing trim, first cut all the miters, leaving the sides overlong. Then nail up the header casings. To find the proper length of a side piece, simply set it upside down against the wall and mark where it meets the header piece. Glue the mitered joints. The door's performance is fine-tuned by the installation of the stops. When closed, the door should be held under slight tension between the lockset bolt and the upper and lower most points of the stop on the lockset side of the jamb. The stop should be slightly bowed away from the door between those two points. The stop on the hinge side is held away from the door its entire length, and the stop on the header curves from there to meet the door on the latch side. If this tension is too great the lockset will feel sticky. If it is too little the door will feel loose. Properly stopped , the door will have a very light spring when opened, and give a solid , satisfying thunk when closed.
0/32 in.
Door (hatching) closes with satisfying thunk when stops are correctly placed. Hinge side stop is held away from door for its entire length and head stop (section above) curves from there to meet the door at the latch side. Latch stop touches the door at top and bottom but bows away in between (right, exaggerated for clarity. )
If you ' re using the right hinges, a common door, and your jamb is set solidly , this won ' t be necessary . Split the hinges and screw half to the door and half to the jamb. Knife-thread screws are a worthwhile investment. Hang the door, and swing it in. Unless the door is very wide it won ' t close completely, because the inside swinging edge of
0
More Doors
Mock-up shows deep mortise and tenon, with H-section molding that straddles frame and holds panel.
Michel Panayi of Houston, Tex. , runs a two-man shop that specializes in solid wood frame-and-panel doors. This door, of cypress, was designed around the cus tomer's glass. Panayi favors cypress for exten·or doors because it is both weather-resistant and strong.
Mahogany door to Panayi's shop has arched panel and shell carving. Two square tapered pegs driven through each mortise· cheek lock the tenon in place.
Oak entry way has elegant Louis flavor, evidence of Panayi's French training. He uses traditional construction techniques, and his work is influenced by early French designs. Panayi has tn·ed in-line doweled tenons (Winter '77, p. 44-47), but prefers the pegged joint. He buys lumber locally and mills it himself. His work backlog is six months.
XVI
75
Pencil Gauges A bag of tricks for marking wood by Percy
W.
Blandford
he marking gauge goes back a long
T way in history . When the old-time
cabinetmaker did not want a scratch because it might show in the finished work, he then reverted to pencil and had several ways of using it . These methods have applications today, and their simplicity makes them attractive. The simplest way of using a pencil to gauge a line up to an inch or so from an edge is by holding the pencil berween the first finger and thumb, then letting the tips of one or more other fingers rub along the edge of the wood. With confidence and a steady hand one can pull along the edge to draw a line with surpnslllg accuracy. For more accuracy a notched thumb gauge can be made. The wood should be long enough not to wobble as it is
pulled along . If several l i n es are needed , the gauge can be made and used for the farthest one in. Then the end can be cut off. This sort of gauge is intended to be discarded after use . However, most of us find ourselves repeatedly gauging the same width . A graduated pencil gauge allows several fixed distances to be drawn with the same gauge. The hollow provides a finger grip, and the small chamfer makes the tool slide more smoothly. Another way of getting
Solid rubbing strip
76
,'�
C hamfer
more increments in the same tools is to use the opposite side of the block or even a square block with distances in four directions (shown below) , but in dividual gauges are less clumsy.
while there might be variations in an adjustable setting. Even with a stock of fixed gauges there may be occasions when a special measurement is needed, particularly in the deck-fixing type of work. A combi nation gauge will not mark a line of nail positions over a rough edge. An adjustable gauge for this sort of work can be made by cutting a central block
A thumb gauge used by boatbuilders could have applications in other work. A plywood deck is laid to overlap slightly, but the row of fixing nails or screws needs to be parallel with the final edge if it is to look neat. A thumb gauge 1S cut to fit over the plywood
edge to guide the nails into position. For even spacing there could be an extension at the side to check the distance from the previous nail. When the glued plywood has been nailed it is helpful to have a pencil line on top to mark where the edge is to be cut. A gauge with both legs the same length (below, l eft) will do this. However, there is a complication in boats-the angle of the side is not con-
stant and may flare considerably to wards the bow. A gauge with a curved cutout (above, right) conforms to vary ing slopes and gets the line right . A combination square can replace thumb gauges, but it has to be set each time. Also, stock sizes carefully cut in a wooden gauge will always be the same,
to slide in two grooved pieces. The whole thing is locked with a bolt, washers and a butterfly nut. Notched pencil gauges have much in common with m iter and dovetail gauges, so it is possible to make combi nation tools . A two- sided notched gauge can have one end of both sides cu t at 4 5 0 for marking miters. The tool body could be notched to mark dovetails at an angle of about 1 in 7. One side could be a slightly steeper angle for hardwoods and the other side slightly wider angled for softwoods.
The cutouts should be wide enough to allow easy use of a pencil . They are not intended to indicate actual dovetail widths, but will be moved to suit the spacing marked on the wood .
0
Percy Blandford writes on woodwork ing and traditional crafts in England.
Dulcitner Peg Box Designer proposes one-sided solution by Stanley Hess Dulcimer deszgned and budt by Hess has elongated, guitansh shape and Moebius-stnp peg box.
he peg box of the mountain dulcimer has been much less
T subject to experimentation than have other pans of the
instrument. Except for a severely elongated sound box and fretboard, the dulcimer has resisted accepting ftxed character istics for over a hundred years. Indeed , there is not standardi zation of critical factors: the number of strings, their vibrat ing length , the shape and number of bouts, and more. On the other hand, though the dulcimer has lately been lavished with attention , the peg box, whose shape has nothing to do with the instrument's tone, has been much neglected. For the most ' part it has remained a rather rudimentary scroll . When I began making peg boxes for the dulcimer, I be lieved that because the instrument is at least a quasi-indige nous creation , a bit of Americana should be reflected in its pans and that the accumulated traditions about it ought to be preserved . Or if a rich lore no longer matters, then the peg box must take on a distinctive form , rather than remain a crude scroll derived from long-dismissed ancestors. Accordingly, I made a trio of dulcimers (shown in the photos below) whose peg boxes were ftgurative at the expense of the scroll . I attempted to offset this deviation by using im ages compatible with our heritage. The first peg box was topped with a gobbler, complete with snood and wattle. The choice seemed appropriate because the turkey, like the dul cimer, is native American. My musical friends insisted there was even a pun involved, since both the instrument and the bird are " plucked . " My choice for the second peg box, the eagle, is almost as American as the traits we are pleased to confer upon apple pie. The third solution was conceived of as American Gothic , reminiscent of the Grant Wood painting . The tracery of the bodice was a special challenge because the carving was managed blindly , in the absence of an opening on the r.everse side. Moreover, determining angles for the strings that pass through the tracery without disturbing it
Figurative peg boxes, each 5 in. long, reflect traditional themes. Native Amencan turkey, left, zs /ruitwood with ivory andpadauk in lay; eagle, nght, is carved in walnut.
seemed somewhat of an achievement to me. But soon after the initial euphoria, the images I had carved seemed too homespun , if not altogether patronizing. They also seemed a good deal less innovative . My feeling of well being dissolved entirely as the word " turkey , " almost over night, became the word most widely used in America to mean abject failure. Thus I returned to the scroll and carved what handbooks on ornament called a terminus, in this case the half-figure of a caryatid melding with a console (below, far right) . I intended to depict a siren, the musical temptress, emerging from a conch. (It is said that the scroll is but the abstraction of a sea shell . ) Here the classic credentials were impeccable but, as it turned out, unsuitably arranged . No one responded favorably to a ftgure that would be both upside down and backward on a finished instrument. The fact that we find working with wood a stimulating process is no promise of success. Still, we must make what we design to test our assumptions. The process of inventing is always difficult to force. The most dogged determination is often attended by an abiding futility. It is perhaps easier to maintain a " prepared mind" and eventually to surprise solutions as they insinuate them selves-to see relationships where none exist. Anyway, I turned to other projects and made no more peg boxes for some time. Long after, while thumbing through a copy of M . C . Escher, I was moved to take up making peg boxes once again. Many readers will know the graphic work of the Dutch artist Escher ( 1 898- 1972) . Mathematicians are usually exultant ; the rest of us, confounded . Each page is another step into a strange, illu sionary world where spaces become shapes, where foundering things fly, where inert matter becomes organic . When I reached his famous color woodcut of industrious ants forever seeking the end to a path that has no end, I saw a
Waln ut woman with carved bodice tracery -an 'American Gothzc ' peg box.
Caryatid emerges from 'shell, ' as Hess retreats to classical myth and conventional scroll.
77
relationship , which really didn ' t exist, to my earlier design problem . Why could not those strange, difficult-to-perceive strips of August Moebius be turned into peg boxes? They worked well for Escher. We know that music is magic: The ancients supposed that sirens cast a spell with it. Why could not those curious one sided bands be attached to the dulcimer-and cast their spell ? To be sure, the concerns of the topologist are hardly those of the folk music maker. Still , it is a mistake to take for granted that the dulcimer is the vested province of quaint performers or that the instrument ' s makers are invariably the local craftsmen . So assuming, I decided to make a peg box that was nomi nally a Moebius strip, a one-sided surface formed from a rec tangular strip by rotating one end 1 80 · and attaching it to the other end. Try it with a strip of paper. Such a peg box would consist of a band that parted from the fretboard, pivoted the required 1 80 0 and returned to the starting point, making an
Moebius tre/od adorns unfin ished headstock 0/ maple.
by M. C. 'Band van Moebius Escher inspiredpeg boxes with a new twist (right and below).
11'
Fruitwood peg box combines scroll with Moebius stnjJ.
Fruitwood peg box, /ront and back views. Vertical sides form nght angle, which adds strength and simplifies stn·nging.
78
endless cycle. It would recall the pulsations of sound . Now the Moebius strip is easy to construct. But applying the procedure to peg boxes is another matter. In fact, the dra matic differences between the ways of figurative carving and those of Moebius strips are so pronounced that they may be said to be more of kind than degree. Carving a bird or human head requires only the barest two dimensional sketch-or perhaps none at all. My approach is probably not exceptional. I cover the block of wood with chalk marks for roughing out masses, pinpointing references and the like. As the carving proceeds, the tools of course be come much smaller and more selective. With almost every chip , the chalk marks that have become obliterated must be renewed . As I approach the final form , I confirm dimensions with dividers, calipers or a depth gauge, because at this stage chalk marks and eyeballing are too crude to rely on . All of this is workmanship of risk in a pure, invigorating state. A single slip might irreparably spoil the work. An inner excitement grows as the image evolves and finally emerges. From here on the workman must exercise rigorous discipline to avoid the compulsion to hurry the process by compromis ing details, shortchanging the sandpapering and so on . In carving a Moebius strip , the problems of figurative carv ing no longer pertain . To interpret a strip that is supposed to rotate at a constant degree throughout a precisely determined distance requires nice calculation ahead of time. The strip must be plotted with drawings taken from several views. What takes place in the design is often difficult to envisage because the plan view of the strip will never be bisymmetric, as we have come to expect from scrolls-one side cannot be a mirror image of the other. Accordingly, drawings on section are usually indicated-and even then the mind is reluctant to accept the irrefutable conclusions. Once the intended result is correctly interpreted on paper and then transferred to the block, however, the carving is al most mechanical and requires little ongoing verification . It is very nearly workmanship of certainty (which, unhappily, has the side effect of making such designs susceptible to pirat ing) . The intended result appears rapidly. And there are no surprises except for the play of light on forms, which is not re corded in the drawings. It may be well here to digress and touch upon desirable tools for carving. A spirited controversy has been taking place in the pages of this magazine for some time now about their nature and especially their number. Both the more-is-more and the Iess-is-more adherents have stoutly defended their positions. I have no strong desire to take sides, but feel that I am obliged to report my own working habits. To make peg boxes I use almost exclusively a band saw for contouring, an X-acto knife with pointed blade (# 1 1) for carving, a putty knife for scraping, and several grades of garnet paper for fin ishing. Occasionally these tools are supplemented with small gouges, burins, rasps and homemade expedients. An emery board cut to a point is handy for sanding hard-to-reach places. I use very few tools compared to other workmen I know. Nonetheless, I would not hesitate to make or acquire any number of tools suitable for the small shop, if they clearly better equipped me for the project at hand. To return to peg boxes derived from Moebius strips, my first attempt proved to be not only a critical success but also exceptionally efficient. Since the box sides are siruated at right angles and thereby open, fitting the pegs with strings is
Carving a Moebius Strip An accurate drawing is the key to mak ing a Moebius-strip pee box. For the one shown at right, a front view, plan sections through A-A and left and right elevations were drawn. Once the drawing has been made, however, the layout of the peg box and the carving are largely procedural. First select a suitable hardwood and cut it to the maximum vertical and lateral dimensions. The peg box zllus trated here is made of a fruitwood, which is joft enough to carve easily yet hard enough to hold an edge.
1
1"
1
A
A
1" I
� 2[ �1%"-1
\ \ I R
1 . The side view of the w o rk ing drawing is transferred to the side of the block, using a lead penczl or a technica en. Then the pivot 0 the Moebius strip and t e peg holes are dnlled with a in. bit. Dnlling the peg holes first provides con vement reference pomts for the Moebius design.
+
�
� I L 1--+-5"---J The top view of the working drawing trans ferred to the top of the block, and the waste bandsawn away. The 7k in. deep section at the bottom wril later serve as the end block of the side assembly.
3.
t:
2. The profile of the peg box contoured with a band saw. The 7Js-in. deep notch at the bottom nght wzil later house the end of the /retboard.
IS
'/4-
IS
IS
1'--1 \�' r
4 . The peg box zs routed
out, straight through /rom /ront to back, using large bits. Or it can be cut out with a coping saw after a p ilot hole is dnlled. Either way, the interior surface then smoothed with a rasp, chzsel or knife blade.
IS
The Moebius stnp zs shaped with an X-acto knife. One could also use carving gouges or a small grin de r with carving burrs. The peg holes are enlarged with a no. 5 --"" taper-pin reamer, and the end block tn'm med to accommodate the shape of the dulcimer.
easier than with the usual deep-V or parallel-sided box. And the larger wooden surface touching the pegs provides a re liable grip . Moreover, the box may be designed to accommo date three, four, five or any reasonable number of pegs and strings. Finally it is worth noting that the Moebius strip is eminently suited for hanging the dulcimer on the wall. The dulcimer' s peg box is not invariably an extension of the fretboard . Proceeding along other lines suggested strips that more nearly coincide with the typical dulcimer scroll . Canted extensions of the fretboard (or neck) , usually called headstocks, are becoming commonplace for the dul cimer-much as they always have been with the guitar and mandolin. These extensions call for geared tuning machines, which provide more strength and finer tuning. The unfin ished headstock shown on the previous page will accommo date the several ways of attaching machines and also any reasonable number of strings. With guitars, the way the headstock is finished off is in fact the signature of the maker. My signature here is three Moebius strips arranged to form a
5.
IS
Tracing the edge of the completed peg box wril produce one con tinuous line, however meande ring or lo ng . Since the peg box also a c o n tin u o us band, it follows that this is a Moebius stnp, a figure with only one side.
6.
IS
trefoil. In this conception the strips exist in isolation, whereas previous ones undulate to and from the sound box. My adaptations of the Moebius strip to the dulcimer by no means exhaust the possibilities. The forms the strips may take are probably not unlimited, but new ideas somehow occur before the last ones find their way to an instrument. I have several on the drawing board now. And fortunately each new solution is easier to calculate than the last. We need not be in any hurry to insist upon an ultimate form . Novel shapes can exist with the established scroll, and excellence may gain the following it deserves without neces sarily supplanting the old. Meanwhile, fine woodworkers ought to find the dulcimer as engrossing from its imaginary neck up as they have in the past from its imaginary neck down . The peg box is as interesting as the sound box. It's high time the twain should meet and evolve as one.
0
Stanley Hess, 54, is professor of art at Drake University, Des Moines, Iowa. He designs and makes dulcimers and recorders.
79
TAGE FRID
Removable trays are hean of tool cabinet
hy bother making a tool cabinet when a crate with
W shelves nailed in would hold the tools? I believe if a
person wants to make a living as a woodworker and furniture designer, a well-designed and executed tool cabinet is very important. It's a pleasure to have a beautiful tool cabinet, where the tools are properly arranged and easy to find . And when a potential customer comes into the shop and sees a nice cabinet, half of the selling job is done right there. For a cabinetmaker, a cabinet for tools is more practical than a tool chest like carpenters use. Usually a cabinetmaker does most of his work in the shop, while a carpenter has to move his tools from job to job and many times must use the tool chest as a workbench. Also, there is less wasted space in a cabinet, and because you can make it open from the front it is easy to arrange and get at the tools you need . Most of my graduate students design and make a tool cabi net as their first project . They find it a difficult piece to de sign because every inch has to be used, but at the same time it has to be flexible, handy and easy to rearrange as you add new tools or replace old ones. The photos shown here are all of cabinets made by my students. The drawing below is not a working drawing and the joints are left up to you-it is just an idea of how I would make a tool cabinet if ! needed a new one. I prefer trays that slide out instead of drawers or shelves because I can take the one that holds chisels out of the cabinet, work with them at the bench, then put them back in the tray and return it to the cabinet. The same goes for screwdrivers and all my other small tools-each kind of tool has its own removable tray. I would n ' t make the height of the cabinet any less than 40 in. if I wanted to have a bowsaw hanging inside the door, and in that case I wouldn ' t make any grooves in the door.
Personally, I would have the bowsaw hanging on the outside and use small shelves in the door grooves for storage of small tools. If you aren ' t going to hang saws inside the door, the height isn' t that critical. Through the years, I ' ve found that 1 5 in. is the best depth for the cabinet, not counting the door, which should be another 4 in. This is deep enough for nearly everything, in cluding heavy tools. The width , 30 in. , is necessary so the jointer plane , slicks and other large tools can fit in the upper ' part, which can be an open shelf or a drawer. I make the sides of the trays out of hardwood-use what ever joint you like at the corners-with a bottom of Y4-in. ply wood . The grooves in the sides of the cabinet of course are 1/4 in. by Y4 in . , so the plywood can easily slide in and out. The space berween the grooves is 1 Yz in . , which makes the cabinet very flexible-the trays can be 1 in. apart, or 3 in. , or 4Yz in. and so on, depending on whether they are used for chisels, planes or whatever. The center divider should be in the exact center of the cabinet, so both sides are the same wid th, in this case 1 3 1/2 in . , and all the trays and shelves are interchangeable . Remember that the plywood bottom of the tray slides into the groove and add Yz in . , making the bottoms 14 in. wide. Inside the sides of the trays it is a good idea to make some vertical YI-in. grooves for removable partitions. Part of the front of each tray is cut down for a handle, and to make it easy to see what' s inside . If the cabinet is made out of solid wood, make the trays % in. shorter than the cabinet is deep , in case the wood shrinks.
Yz.
0
Frid,
Tage professor of woodworking andfurniture design at Rhode Island School of Design, is a contributing editor and regular columnist for this magazine.
All grooves by '/ ;'
'/. "
Tray bottom '/ ;' plywood
80
John Dunnigan 's tool cabinet (41 in. by 34 in. by 1 9 in. ; base is 24 in. high) is solzd mahogany, with ply in. deep. One door wood door panels veneered in fiddleback mahogany. The inside of the door is holds saws; the other has adjustable shelves with holes and slots for screwdrivers and carving tools. The shelves are 14 in. deep and adjustable in height.
3%
A bove and cent�r, these two cabinets in. by 1 9 in.) by (each 32 in. by Douglas Hale can either stack on top of each other, or sit or hang indivtdually. The doors are a flat Jrame-and-panel, and hold a few flat tools such as squares or small saws. The detad photo, opposite page, shows how the trays work.
32
Above and left, solid-oak cabinet by in. by Richard Gallo is 48 in. by 1 9 in. , with 18-in. high base. Stretcher at back makes space underneath usable for storage. Doors, in. deep, have adjustable shelves; three large central drawers hold planes and saws. Lower cabinet was designedfor electrical tools.
32
3
81
EDITOR' S NOTEBOOK
Of Sitka spruce, French antiques and carving gouges
by John Kelsey Bombe chest with ormolu.
oatbuilders favor Sitka spruce for masts and booms, be
B cause it is especially stiff, yet very light. On a recent visit
to the Boston University wood shop, a student showed me just how stiff it is . He was making a double bed of spruce, with the headboard and rails tenoned into turned posts. The foot rail is about 5 ft . long, 7 in . wide and less than an inch thick, and lighter than a pine board of the same size . He set one end against the floor, grabbed the other with both hands, and put his knee into the middle . It flexed hardly at all. I would have thought it hard maple or white ash, it was so stiff. Sitka spruce is also notable for its straight, even grain and lack of defects. Besides yacht masts, spruce is widely used by harpsichord makers for soundboards, and by luthiers for gui tar and lute tops. They say it resonates particularly well. French antiques I don ' t know much about European antique furniture, which is why I hugely enjoy the opportunities my job affords to poke about the posh galleries of Manhattan . I like to take the drawers out of priceless 1 8 th-century chests, to peer under neath and behind ornate desks, to sit on the chairs and touch the wood wrought by legendary craftsmen . I am always amazed by what they got away with 300 years ago, by the con trast between everyday practice in the 1 7th and 1 8th centuries and modern textbook injunctions. Take the elaborate marquetry and veneer work that reached its height in 1 8 th-century France and Italy. All the modern experts say you have to treat the back of a veneered panel the same way you treat its front: If the front is veneered with the finest walnut burl , the back must at least have pop lar. Othetwise the panel will warp and split. French antiques aren ' t that way. Intricate floral marquetry on a Louis XIV desk is usually glued directly to an oak or pine panel . Nothing is done to the back of the panel , unless it shows. The backs, bottoms and insides of the furniture-all the surfaces that don ' t show in normal use-are pine and oak , straight from the saw and scrub plane, black with age. I n many cases, the groundwork has split under the veneer, and in some of these the split has proceeded on through the sur face , to be meticulously repaired. In many others, however, the groundwork does not appear to have split and the marquetry has remained beautifully in tact for two centuries and more. One has to wonder how. Can it be that the pristine pieces were made of perfectly dried stock and have been maintained at exactly the same dryness ever since? We read that the cabinetmakers of Versailles dried their wood for ten years or more. But the furniture I saw is in the Dalva Bros. galleries in the heart of Manhattan, five floors of showroom and salon, with no air conditioning. Leon Dalva explained that the furniture has been used and will be again, it would be pointless to baby it artificially because the pur-
82
chaser won ' t , and it has survived intact simply because it is first-rate work. I replied that New York doesn ' t enjoy uniform humidity and neither does Paris, and Dalva j ust shrugged . I still wonder how they got away with it. Dalva also-explained the ormolu garlands that adorn many French-style antiques. Ormolu is a ductile alloy of copper, zinc and tin. The ornate metalwork actually is quite func tional, although books on antiques usually discuss it in terms of decorative style alone. But it generally encrusts the fragile parts that are most liable to be kicked and bumped-it is ar mor, another reason this furniture has survived. The gilt feet on a heavy desk permit mopping the floor without having to move it. The metal leaves wandering down a slender leg, or along the corner of a bombe chest, protect the fragile veneers from hard knocks. And the horizontal surfaces of even the most flagrantly veneered pieces are often marble slabs, imper vious to heavy clocks and mixed drinks alike. Carving gouges Robert C. Whitley of Bucks County, Pa. , is one of the few craftsmen equally at home with traditional and contemporary furniture. He is master conservator of furniture at Indepen dence Hall in Philadelphia and has repaired or reproduced many prized American antiques (and keeps patterns in his voluminous files) . He has also made many flowing contem porary pieces of furniture and is currently working on some lovely carved chairs, which he hopes will combine the best of traditional taste and modern idiom. Looking around his shop, I noticed that many of his carv ing gouges are shaped so the center of the edge is well back of the corners. Most carvers sharpen gouge edges straight across. Whitley explained that he keeps some straight across for finishing work, and some ground back at the middle for rough ing out. This way the wood fibers on the surface are severed in advance of the ones below the surface, and there is much less tearing out. I had never seen this before, so I kept an eye on tool edges at the Great Lakes Wood Carving Exhibit in late April in Cleveland . I spotted some with the corners ground back, but none sharpened the way Whitley does it. Later I met John Sainsbury, an expert carver who is educational adviser for Britain's Record-Ridgway tools. He told of buying a roll of tools at auction. It was a much used but still perfect set-each gouge in its own pocket, with a bit of oiled wadding at the bottom to protect the edge, ob viously once the property of a master craftsman. And many of those gouges were indeed ground the way Whitley grinds them . So I tried it and I am now persuaded.
j
0
SOURCES OF SUPPLY
Schools and tools-an update
is a general Thisalphabetically)
reVISIOn (listed of our regular surveys of woodworking schools, tool and supply dealers. It is purely an editorial service in no way connected with advertising-our aim is to put woodworkers in touch with the supplies and information they need to pursue the craft . We hope readers will con tinue to let us know when they come across a new supplier. Woodworking schools were surveyed in our Spring ' 7 7 (No. 6) issue. Be cause course offerings and fees change frequently, readers should contact the schools directly-most publish bro chures describing their programs in de tail . Previous listings of tool and supply dealers appeared in Spring ' 76 (No. 2) , Winter ' 76 (No . 5) and Fall ' 7 7 (No. 8) .
Craft Srudents League, YWCA, 6 1 0 Lexington Ave . , New York, N.Y. 10022. ·8-wk. summer courses, evenings, $75. Turning, woodworking. East Central State College, Woodworking Dept. , Ada, Okla. 74820. 4-yr. bachelor' s and master's degrees in Industrial Arts, days, evenings, sum mers, approx. $ 1 200. "Course covers work in wood, metal, drafting, crafts and electronics. You can't get a degree in wood alone. " Fairmont State College, Industrial Education Dept . , Fairmont, W.Va. 265 54. 4 -yr. college, bachelor's degrees in education, full-time days, evenings, summers. Furniture and cabinetmak ing, turning, bending, antiques and reproduc tions, wood science and technology, finishing. Frog Institute, 5 4 1 North Franklin, Chicago, Ill. 606 1 0 . 5-wk. evening course, certificate, $ 5 5 or $ 7 5 . Cabinetmaking, carving, turning.
Woodworking Schools
Guitar Research and Design Center, South Straf ford, Vt. 05070. 6-wk course, full-time days, summers, $ 1 000 (includes living accommoda tions). Course covers every aspect of guitar mak ing, " from designing and pattern making to final finish and tempered intonation . . . . A course for future professionals. "
American Carving School, Box 1 1 2 3 , Wayne, N.) . 07470. I -wk. to continuous study, evenings; summer course, days; $ 1 50 to $2 50. Carving, sculpture , fi nishing, tool sharpen i n g and maintenance.
Hartwick College, Oneonta, N.Y. 1 3820. 4-yr., degree in art. Furniture and cabinetmaking, musical instruments, carving, turning, bending, design, sculpture. " . . . not professional in orien tation. "
Arrowmont School of Crafts, Box 567, Gatlin burg , Tenn. 37738. 2-wk. summer course, $ 1 50, credit. Furniture making, musical instruments, carving, bending, sculpture.
Humber College of Applied ArtS and Technol ogy, Lakeshore Campus, 56 Queen Elizabeth Blvd. , Toronto, Onto Canada M8Z 1 M I . Voca tional and adult retraining, certificate, full-time days, evenings, summers. $ IO / wk. Furniture and cabinetmaking, carpentry, musical instruments, antiques and reproductions, machinery, finish ing, industrial arts (teaching).
Ball State University, I ndustrial Education and Technology, 2000 University Ave. , Muncie, Ind. 47306. College, 4-yr. degree, $25 5 / qtr. ; full time days, evenings, summers. Furniture and cabinetmaking, carpentry, turning, furniture de sign, industrial processes. Baulines Craftsman's Guild, Box 305, Bolinas, Calif. 94924. Apprenticeships, group classes and individual instruction; full-time days, summers. 3-mo. short course, $ 1 50 plus $450 / mo. Furni ture and cabinetmaking, carving, design, sculp ture, furniture history and design. " . . . a very selective p rogram, for those who wish to become indepen dent craftsmen. " California Poly technic State University, San Luis Obispo, Cali f. 93407. 4-yr. , degree, full-time days, evenings, summers, $48/ qtr. , $ 5 2 5 / qtr. out-of-state. Furniture and cabinetmaking, turn ing, bending, design , industrial processes, busi ness and marketing, industrial artS (teaching).
&
California State University, Chico, Industry Technology Dept., W. First Normal Sts. , Chico, Calif. 95926. 4-yr., full-time days, even ings, short courses, $ 1 00 / sem. Furniture and cabinetmaking, carpentry, teacher training , an tiques and reproductions, wood science an d tech nology, industrial processes.
&
John C. Campbell Folk School, Brasstown , N.C. 28902. 2-wk. summer course, credit, full-time days, $60/ wk. Furniture and cabinetmaking, carving, turning, finishing, machinery. Michael Coffey, RD 2, Poultney, Vt. 0 5 764. 2-yr. full-time work- study program, certificate, $3000/ yr. Furniture and cabinetmaking, carving, turning, bending, design, machinery, finishing, wood science and technology, business, mar keting, furniture hardware. " . . . features a spec ified curriculum. . . . not an apprentice program. "
The Knowhow Workshop, 1 7 E. 16th St., New York, N. Y . 10003. 1 O- 1 2 -wk. courses, evenings, weekends, $ 100 to $ 1 90. Affiliated with the New School. Carpentry, cabinetmaking, design, fram ing, joinery, turning, furniture making, carving, guitar making, picture framing, refinishing. Maine School of Cabinetry, Box 1 2 , Cobb's Bridge Rd. , New Gloucester, Maine 04260. 2-wk. intensive course, IO-wk. evening course, spring , summer and fall, $395. Traditional cabinetmak ing and joinery, turning, bending, design, furni ture history, hardware. John Makepeace School for Craftsmen in Wood, Parnham House, Beaminster, Dorset, England. 2-yr. intensive program, certificate, full-time days, £ 3000/ yr. (includes accommodations) . All aspects of woociworking; design, business prac tice. Mr. Sawdust, Box 4, Schooley's Mountain, N.). 07870. 6-wk. short course, evenings, $90 to $ 1 00. Windsor chairmaking, hand-tool joinery, copy ing museum furniture, musical instruments, sc ul p ture, toolmaki n g , carv i n g , turn i n g , bending. North Bennet Street Industrial School, 39 N. Bennet St., Boston, Mass. 02 1 1 3 . 68-wk. course, full-time days, $230/ mo. Furniture and cabinet making, carpentry, design, framing. " . . . Amer ica's first trade school. " Ohio Colle$e of Applied Science, 1 00 E . Central Parkway, Cincinnati, Ohio 4 5 2 2 1 . Junior college, vocational training, certificate, evenings, $ 2 2 / cr. hr. Cabinetmaking, carpentry, furniture restora rion, pattern making.
&
Philadelphia College of Art, Broad Pine Sts. , Philadelp hia , Pa. 1 9 102. 4-yr., fine artS degree in crafts, full-time days, $ 1 1 2 / cr. Furniture and cabinetmaking, carving, turning, bending, de sign, marquetry, industrial processes. ' San Francisco State University, Dept. of Design and Industry, 1600 Holloway Ave. , San Fran cisco, Calif. 94 1 3 2 . 4-yr. , in dustrial-artS degree, full-time days, evenings, summers. $ 1 00 / sem., $800 our-of-state. Furniture and cabinetmaking, musical instruments, antiques and reproduc tions: business and marketing, furniture history. Sierra College 5000 Rocklin Rd., Rocklin, Calif. 95677. Junior college, vocational training, ap prenticeship; full-time days, evenings. $46/ unit our-of-state. Finishing, cabinetmak ing, furni ture, residential construction, industrial arts. State U niversity of New York, College at Oswego, Oswego, N . Y . 1 3 1 2 6 . 4-yr. , degree, full- time days, evenings, summers, about $800/ sem. in-state, $ 1 200 / sem. out-of-state. Cabinetmaking, carpentry, sculpture, wood science and technology, business. " Our main goal is to prepare industrial arts teachers. " The Woodsmith's Sturlio, 142 E. 32nd St., New York, N. Y . 1 00 1 6 . Vocational training, IO-wk. course, full-time days, evenings, summers, $95 to $ 1 90. Furniture and cabinetmaking, sculpture, carving, joinery, picture framemaking, children's classes (age 7 to 1 1 ) . Tools and Supplies
The Cutting Edge, 295 S. RobertSon Blvd. , Beverly Hills, Calif. 902 1 1 . (2 1 3) 652-6 1 3 3. Re tail sales only. Hardwood lumber, carving and turning blocks; hand tools; stationary power tools. Classes in carving, finishing, turning.
&
Olsen Tool Supply Co. , Inc., 1 9 3 1 S. Bere tania, Honolulu, Hawaii 96826. (808) 946- 1 58 5 . Mail order, retail store sales. Cabinetmaking, carving and turning hand tools; portable and sta tionary power tools; books. Ross Tool Co., 2 5 7 Queen St. West, Toronto, Ont . , Canada M5V lZ4. (4 1 6) 598-2498. Cata log, mail order, retail store sales. Cabinetmaking, carving and turning hand tools. Taylor-Made Crafts, 4 1 4 Winona St. , Hot Springs, Ark. 7 1 90 1 . (501) 624-68 7 1 . $1 catalog, mail order, retail store sales. Cabinetmaking, car ving and turning hand tools; Arkansas oilstones. The Tool Works, 76 9th Ave., Suite M-2, New York, N.Y. 1 00 1 1 . (2 1 2) 242 - 5 8 1 5 . $ 1 catalog, mail order, retail store sales. Portable power tools, cabinetmaking hand tools. Wisner Fine Tools, 259 Whaley St. , Freeport, N . Y . 1 1 5 20. (5 1 6) 379- 3 5 3 2 . Mail order, retail store sales. Cabinetmaking hand tools; planes and other edge tools. Woodesign, 34 Laurel St., Waterloo, Ont. , Canada N2J 2H2. (5 19) 886-0450. No catalog ; mail order, retail store sales. Hand tools, portable power tools. Woodline /Ja p an Woodworker, 1 004 Central Ave . , Alame d a, Calif. 945 0 1 . (4 1 5) 5 2 1 - 1 8 10. $1 catalog, mail order, retail store sales. Hard woods, carving and turning blocks; hand tools; portable and stationary power tools, books. Japanese hand tools. Woodshop Specialties, Box 1 0 1 3, E. Middlebury, Vt. 05 740. (802) 388-7969. Catalog, mail order, retail sales. Stationary power tools; specialists in Powermatic and DeWalt.
83
Tiny Tools
paul B. Kebabian is an active mem-
ber of the Early American Indus tries Association and owns a major col lection of 1 8th, 1 9th and early 20th century woodworking tools . His book, American Woodworking Tools, will be published this fall by the New York Graphic Society. Professionally , he is director of libraries at the University of Vermont. Obviously, Kebabian has lit tle time to spare, but when he has some time he makes little tools. He got started several years ago after a visit to Vermont's Shelburne Mus eum,where he noticed a tiny plane that was missing its cutter. Kebabian set out to make only replacement pans for the museu m ' s tool, but he soon found himself reproducing the whole plane . He has been making lilliputian tools ever SInce . Kebabian is deeply interested in the history of tools and in the men who made them , and he uses the design skills and techniques of two centuries ago to make his miniatures. None are slavish copies of existing tools-they are redesigned to suit the needs and tastes of the maker. And all of them actually work. Kebabian finds it difficult to explain his fascination for making these gem like objects. " It's a challenge, a little like climbing mountains , " he says. -Richard Starr From the top: Shipbutfder's jointer with razee stock and smooth plane with closed tote, both made of ivory at scale and reproduced actual size.
1/10
Plough plane with sliding arms, made of ebony with ivory wedge, depth stop and keys, about 1 /4 scale. Turning bowsaw made from boxwood and ebony, about scale.
117
Coachmaker 's rabbet planes of ebony, box wood and ivory, about scale.
1/6
84