
6 minute read
BRISTER’S BRIEF


BRISTER’S BRIEF
The Bad Floater is Everybody’s Nightmare
Gentle persuasion is the key to coaxing a newbie on to a float, writes CHARLIE BRISTER, who has a few ideas to help along the way.
Getting your horse on the float. How many times have you heard of a horse refusing to load on the morning of a competition? Or seen a bunch of people flapping around a horse which is refusing to load up so that everyone can go home after an event?
Floating should be part of training well before competition day. Floating should be firmly established so that it doesn’t add stress to the horse or rider and cause a public riot.
If you don’t own a float, work out how to borrow one for training. A horse that loads well is much more likely to be invited to hitch-hike!
Also, make sure you have an experienced horse person, or, even if you are experienced, another experienced person, to help during training. Especially with a straight load because someone needs to close the bar after you’ve got the horse on to the float - before they learn to stand perfectly still for you.
No 1 Goal: Safety for you and the horse
you’re wearing proper boots, gloves and helmet. An upset horse can knock your head in a small space so take care.
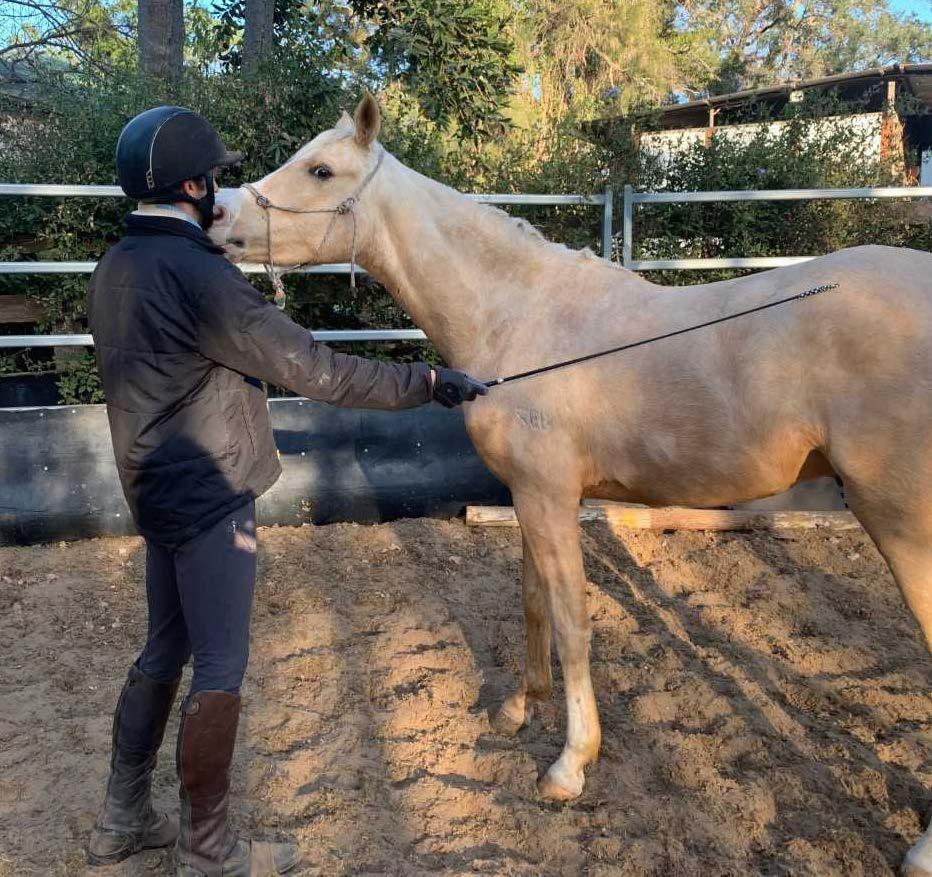
Always use a dressage whip so you can stay near the head of the horse and still tap their side.
A good rope halter works best because it is more definite with the pressure and immediately goes soft when you release it because they have moved forward. (Thereby using pressure/release as your key to letting the horse know it’s doing the right thing.)
I would not suggest having floating boots on when they are first being trained to float. If you are concerned about their legs during training use some tendon and bell boots.
(I know that there are arguments for and against floating boots for travelling – but that is not for this article.).
Remember to chill out. The most important thing is to build confidence and relaxation – for both the horse and rider!
Check the float is ready
A small hay bag should be firmly attached to the front area of the float to serve as a reward for successful loading. As this is training just load a single horse. In a straight float it is generally better to load a single horse on the driver side of the float.
Make sure the tailgate has both sides on the ground so it doesn’t rock when the horse takes its first steps off the ground.
Don’t forget to make sure the float is attached to the car - with the brake on! (It happens.)
First things first
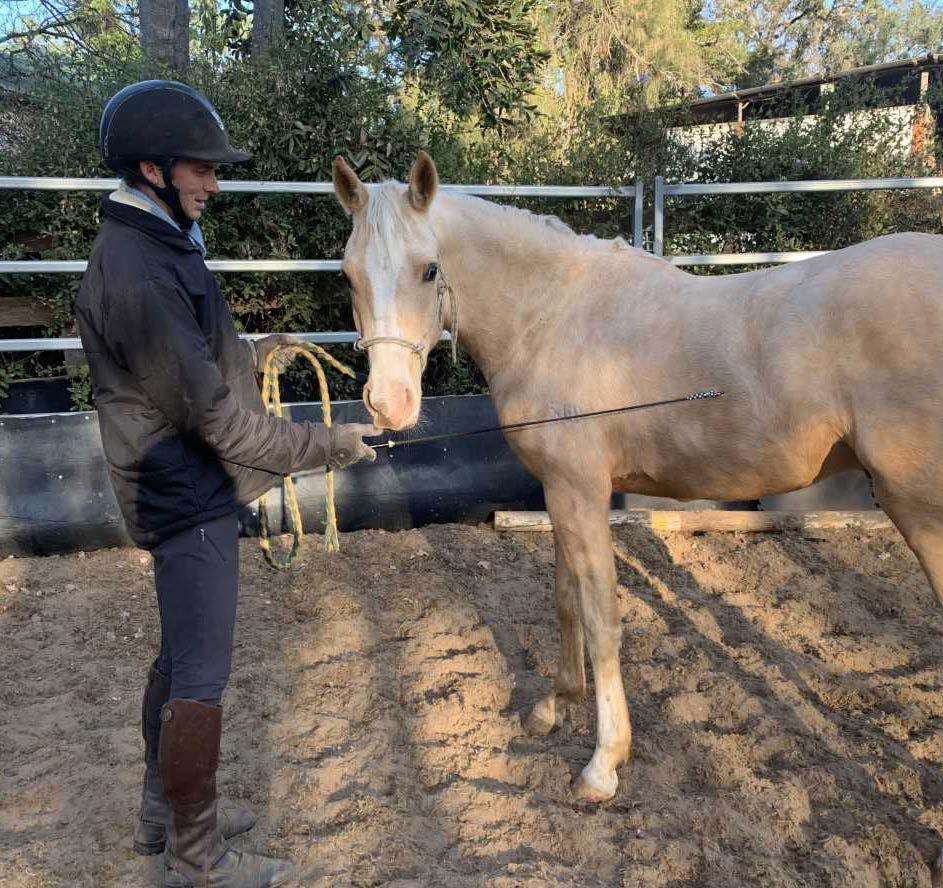
Follow basic lead rope handling principals. Never wrap the lead around your hand. Make sure you have folded loops across your palm and are not trailing rope or tripping over it.
I generally like a lead rope around two metres long but up to three metres in fine. Before you take the horse anywhere near the float, practice using halter pressure to make the horse come forward and also to back up.
If you have an angle float the horse will also need to be able to calmly yield its hind quarters from a gentle tap on the hip.
If the horse cannot perform these basic actions on the ground, don’t attempt to teach them on the float.
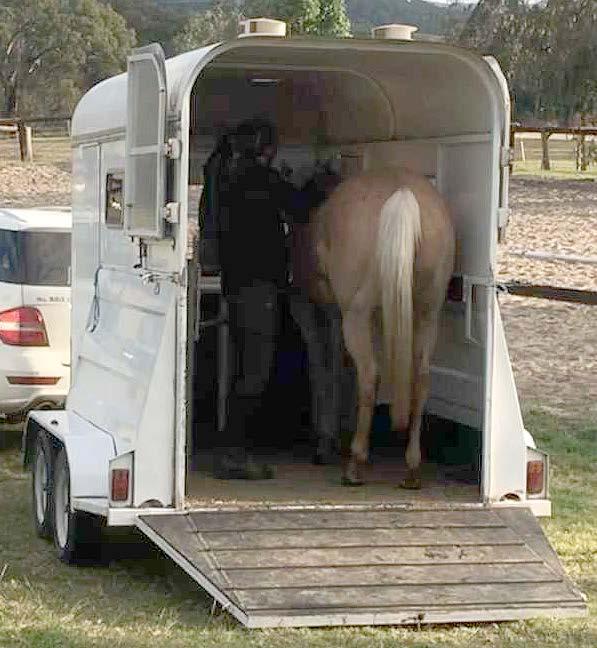
Introducing the float
Bring the horse confidently toward the rear of the float without a real goal to put it on. Be happy if it just stands calmly by the tailgate and looks inside. Allow the horse to sniff the tailgate
A B
C D
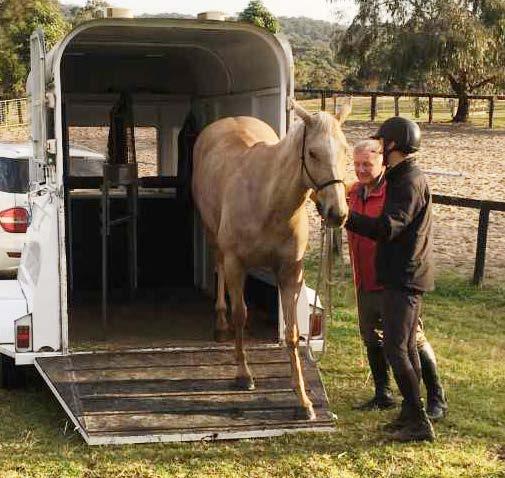
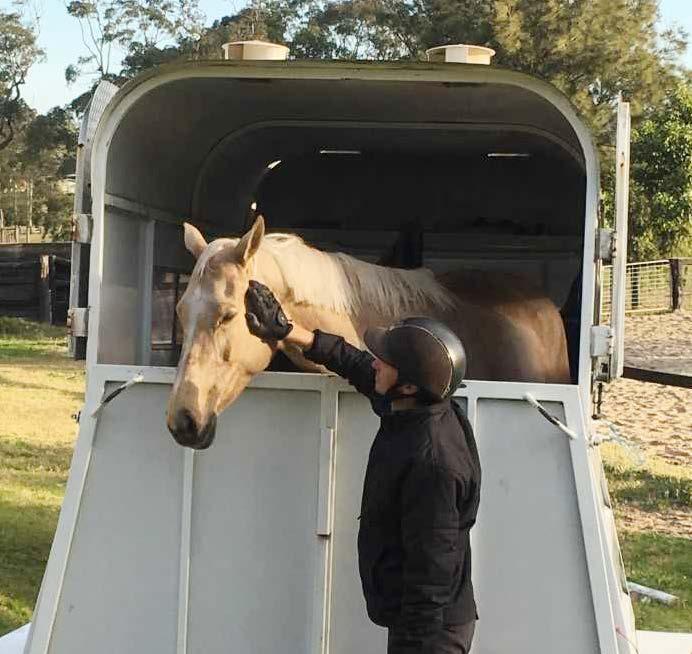
A: Getting a young horse calm with the whip and understanding the halter pressure. B: Horse whispering, or human whispering? C: What’s wrong with this picture? Charlie’s advice: “Always try to face the right way!” D: Success! Well, sort of. If the horse is comfy on its first attempt back to front, go with what you’re given - you can finesse it next time.
and let it stand for a short while before proceeding. When the horse can stand relaxed at the base of the tailgate you can start the next stage. If they are still fidgeting or tense wait until they are calm.
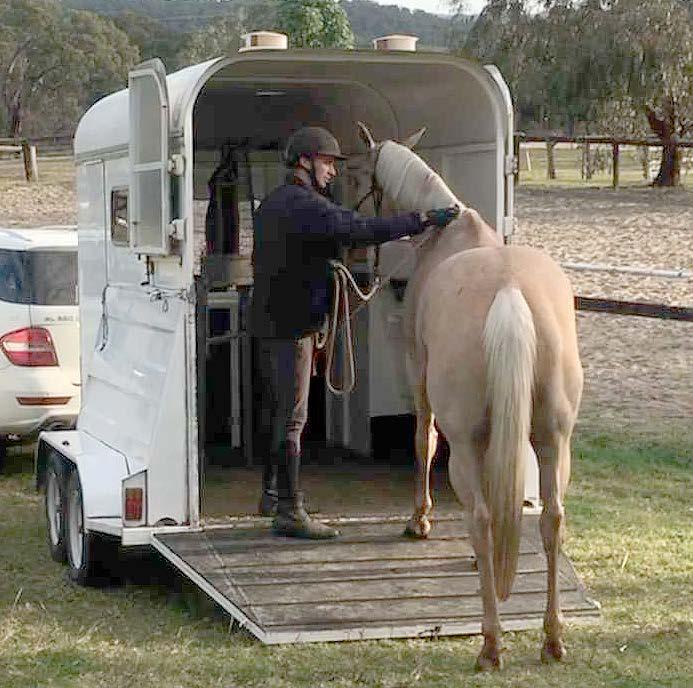
First Step Up
By now the horse is standing at the base of the tailgate. You should be standing on the near side of the horse – next to his neck and slightly in front of the shoulder. The lead rope is in your left hand and the dressage whip should be in the right hand.
By this stage your own feet are probably just on the tailgate.
Face the horse and apply gentle pressure on the lead rope asking it to move forward.
When you get that first hoof onto the tailgate ease off the pressure on the lead rope. Reward your horse by a gentle scratch on the wither area. Smile. The first step is great!
If the horse fails to take a step, maintain the same pressure on the lead rope and gently tap the horse on the rib cage where your riding leg (forward aid) would normally be positioned. Maintain pressure on the lead rope and continue tapping behind the girth area until the horse takes its first AUGUST 2019 - HORSEVIBES MAGAZINE 7
E F
E: At last. The normal way. F: A good day’s training, with a calm horse and no issues.
step onto the tail-gate. Release the rope pressure, stop tapping and give that wither a good scratch.
The horse fails to move or backs up
Don’t be too concerned if the horse goes backwards at this point, it happens a lot. Follow the horse while maintaining lead rope pressure and increase the frequency of your tapping until the horse starts to move forward.
Breathe. Don’t panic. Don’t lash out with the whip. Just be calmly persistent.
Repeat the process until the horse has taken a couple of steps forward onto the tail-gate and has its head inside the float area.
Don’t ask for too much! This is training. For a new horse I like to take them off at this point and give them a reassuring scratch and then repeat the process a few times until they are relaxed going up and down the tailgate.
Once the horse is relaxed and will place its head inside the float area we can move to fully loading them.
The full Monty
don’t be afraid to back it up and move it forward a few times. Remember that you are training the horse, not just getting the horse locked in a quickly as possible.
Gradually ask the horse to move further into the float and allow the horse to take its time. Stopping for a 10 second breather is fine.
We want the horse to be relaxed and the time taken will vary from horse to horse.
The horse should now be fully on the float and hopefully munching on the hay bag.
Without surprising your horse, the assistant now can close the rear bar making sure they do not place themselves directly behind the horse in case it kicks or runs backwards.
If your horse runs backwards off the float, relax the horse outside the float and then repeat each process again without rushing to put the horse on fully.
If this is the first time on the float for the horse this would be plenty to achieve in the first session.
Keep calm and carry on
session if the horse doesn’t load on all the way.
Even if only its head is in the float and it has taken a while, finish on this good note and continue in the next session on another day.
Once your horse will load on and off, you have closed the bar several times and everyone is relaxed, then it is time to quietly close the tailgate and take it for a drive.
Make sure you don’t rush around corners and or jam on the brakes. Horses aren’t Porsches! Once the horse is calm and consistent travelling in your float, try some floats with different loading approaches or even a truck if you can find one to practice.
Training a horse to float is exactly the same as any other training. They need to learn the basics and practice.
If you don’t have the time to get this sorted as a training exercise, say goodbye to happy travelling. Like every part of horse competition, everything on the day is a result of extensive preparation. Leave as little as possible to chance.


