Arduino & Co – Measure, Control, and Hack
A degree of battery protection can be achieved by using the ATmega’s standby mode when the battery is almost empty. Then, only a few μA are used (i.e. practically nothing). A more in-depth explanation is given in Chapter 13.3, on Page 271. Even the inexperienced solderer will get familiar with the LilyPad quickly. The clearly-laid-out, large connections invite one to practice. LilyPads can be obtained directly from China for around 3 euro.
16 MHz LilyPads Officially, LilyPads operate at 8 MHz, but that doesn’t bother some Chinese manufacturers, who now prefer to offer 16 MHz LilyPads. For applications that need high speeds, this may be optimal, but usually the higher clock frequency is a drawback. The current consumption is higher, and thus, according to the datasheet, the microcontroller needs at least 4 volts to work at 16 MHz. We might be able to get by with about half a volt less, so these versions can also be run on batteries, but with restrictions. When we upload our programs, we have to ensure that the Arduino IDE is aware of LilyPads. For this, we must select a Pro Mini board and then specify a clock frequency of 8 MHz. This is important, otherwise serial ports and delay functions, for example, will run at double speed.
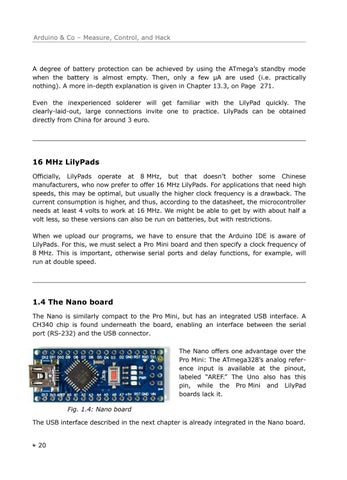
1.4 The Nano board The Nano is similarly compact to the Pro Mini, but has an integrated USB interface. A CH340 chip is found underneath the board, enabling an interface between the serial port (RS-232) and the USB connector. The Nano offers one advantage over the Pro Mini: The ATmega328’s analog reference input is available at the pinout, labeled “AREF.” The Uno also has this pin, while the Pro Mini and LilyPad boards lack it. Fig. 1.4: Nano board The USB interface described in the next chapter is already integrated in the Nano board.
20
arduino_and_co_DM 2022-07-27 CROPMARKS.pdf 17
2022-07-27 20:20