7 minute read
Silage Management


By: Jeremy Martin, PhD, Great Plains Livestock Consulting Inc.
Recently there has been renewed interest in the use of silage from corn and a variety of other crops. There are a number of reasons silage crops have become more popular including more interest in cover crops, reduced price advantages of wet byproducts, and the potential to generate more income per acre with silage crops.
From a nutrition standpoint, silage is versatile enough to work well in feedlot, backgrounding, or cow rations. However, the true cost and benefits of silage depend greatly on how well the process is managed. The dairy industry is far ahead of us cowboys when it comes to putting up quality silage, and I would encourage you to study their recommendations as you plan your silage season.
Ensilaging is a simple idea: chop a wet crop, eliminate the oxygen, and allow microbial activity to both preserve and enhance the value of said crop. Achieving the desired results from a silage operation is not nearly so simple; like most of what we in agriculture do, it requires strict management.
This article will focus on general management of the silage chopping and feeding processes, and I hope it reminds you that the process truly determines the success of making and feeding good silage.
First and foremost, the silage crop needs to be at the optimum moisture content when chopped. While the ideal moisture varies with each crop, it is generally 60-65% (35-40% dry matter).
Recent research (2016 UNL Beef Reports) indicates chopping corn silage at dry matter content up to 43% (beginning of black layer formation) can be an advantage for finishing cattle, but if you are chopping a large quantity of silage, please consider weather risk and equipment issues that could cause your silage to become too dry. So, perhaps finishing at up to 43% dry matter is an option, but unless you can chop all your silage in a day, do not wait that late to start.
Often producers desire to direct-cut cover crops, haylages, or small grain silage in the interest of time and land use, which results in silage at 20-25% dry matter or less. The risk with overly wet silage is that fermentation is delayed and compromised, resulting in high butyric acid concentrations (making it unpalatable) and greater shrink.
With cover crops and forage crops, the best silage usually results from swathing and allowing the crop to wilt prior to chopping so the ideal moisture can be achieved. The difference in timing is only a day or two; the difference in silage quality can be huge. Conversely, silage chopped too dry is hard to pack, often resulting in sub-par fermentation as a result of the oxygen present.
Once the chopping process starts, it is important to complete the pile as quickly as you can do it correctly, with a target density of 15 lb. dry matter (45 lb. as fed) per cubic foot. A good rule of thumb is 800 pounds of packing weight per ton of wet silage delivered per hour, packed for approximately one minute per ton.
Most newer choppers have kernel processors, and we recommend using them on corn silage, mostly because of the increased dry matter digestibility of silage run through a kernel processor. Ideal setting for the kernel processor is 1 mm to adequately process kernels. The secondary advantages of kernel processing are that it virtually eliminates the coarse pieces of cob that cattle often sort out of the bunk and it allows for silage to be packed to a greater density. The drier the silage, the more important it is that a kernel processor be used.
As far as length of cut, the correct choice for grain crops depends on whether or not you use a kernel processor. The ideal length of cut with grain silage run through a processor is 1/2” to 3/4”, with the longer cut preferred in finishing rations where silage is the sole roughage source and the finer chop preferred in cow or growing rations where silage serves as a major energy source.
If silage is not processed, I prefer 1/2” or slightly less length of cut to minimize sorting in the bunk and allow for improved starch availability. Likewise, for small grain and hay silages, the correct length of cut depends on the end use of the silage, with the caveat being that it has to be chopped fine enough to pack well. If the primary use of the silage is for roughage in a finisher ration, it makes sense to chop the silage at 3/4”, but a finer chop is preferred in rations where silage will be a major energy source. A simple particle size separator test on site will allow you to evaluate and adjust the length of cut.
Inoculation is proven to reduce dry matter loss during storage and, in some cases, improve bunk life or reduce loss during feed-out. The proper inoculation is dependent on the crop, but is important for all silage crops.
Inoculation must be applied accurately to work well, as the idea is to supplement bacteria native to the crop with bacteria that will expedite and improve the fermentation process and result in a more rapid pH drop. Because inoculants contain live bacteria, which must remain alive to be effective, they need to be stored, mixed, and applied correctly for best results.
If you have the option of applying inoculant via the chopper, that is likely the best route. This results in even distribution and immediate application to the crop. Silage can also be inoculated after delivery to the storage site, with care to adequately distribute the inoculant. Choosing the right inoculant is dependent on the crop, application method, storage method, and feeding management. This is a choice you should make with the help of a nutritionist, based on your individual needs. Remember, you inoculate feeds you want to ferment (silages) and you use a preservative on feeds you do not want to mold (dry hays).
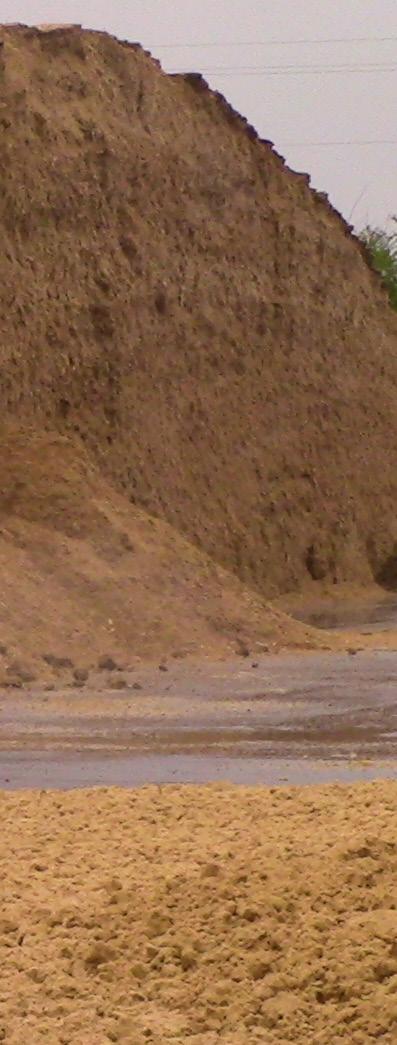
Packing is the key once silage is chopped, and it is hard to overstate the value of correctly packing any silage crop. Bagged silage density is controlled by the bagger, but in the beef business, most of us are using bunker or drive-over piles and it is critical that we have enough packing weight per square foot.
How you build a pile will depend on your own operations, but regardless of the pile design, focus on adding thin layers of 6” of material or less to the pile so it can be packed tightly. Remember, excluding oxygen throughout the pile is the key. Some people have the misconception that they can push silage loosely during the day and then pack after the chopper stops.
The problem with this is that even the heaviest tractors do not effectively remove oxygen for much over 6” below them. So, spread silage in thin layers and pack extensively throughout the day for the best results. If you cannot spread thin layers and get them completely packed before you are overwhelmed by trucks bringing more silage, get more packing tractors on the pile.
With today’s high capacity choppers, it is rare that I see a silage pile that can be adequately packed by a single tractor. Calculations for the proper amount of packing vary, but it is likely that you need to pack for approximately 1 minute per wet ton of silage delivered to the pile, so packing tractors should not stop moving during silage harvest. The edges of piles are problem areas to pack due to safety concerns.
As you build the pile, focus on safely minimizing the amount of silage on the edges that remains loose, as it will contribute to higher shrink. Drive-over piles are ideal because the edges can be completely packed. In bunkers or wedge shaped piles, focus on building the piles in a trough shape, so the tractor leans into the pile rather than off the edge. At the end of the process, round off the pile. This will allow for the best pack on the edges as well as in the middle.
As soon as harvest is complete, cover the silage. There is no doubt that covering silage in some fashion will reduce spoilage and shrink. Feeding spoiled silage reduces intake and performance of cattle, so the spoiled layer on top costs you twice. Traditionally, white/black plastic has been used, although many operations have experimented with distillers solubles or other liquid feeds for covering silage. Any of these are better than not covering a pile, but none have proven to be as effective as the newer oxygen barrier films on the market. These oxygen barriers resemble cling wrap and are put down on the pile, then topped with plastic. They add some cost, but in our experiments have reduced shrink by 50% or slightly more. Thus, the cost is more than justified, and easily recovered.
The feedout phase is very tightly managed in dairy operations, and haphazardly managed in a lot of beef operations. Maintaining a smooth vertical face on the pile with very limited amounts of loose silage present at the foot of the pile helps eliminate shrink and loss of feed value incurred when silage is exposed to oxygen.
At the end of feeding each day, the face of the pile should be even from one side to the other, straight up and down, and very little loose material should be present. It is shrinks 15%, which may not be far from the average, but a lot of operations experience greater shrink and just don’t measure it well enough to know for sure.
Our data indicates 15% is probably normal for piles packed reasonably well, covered with white/black plastic, and managed fairly well during feedout. You may believe you can limit shrink to 15% without taking the time to manage a pile, but frankly the shrink is probably greater. When you consider the sheer dollar value of silage in most piles, saving even a few percentage points of shrink is worthwhile. We encourage you to manage the process from start to finish in order to get the most benefit from your silage.
These silage management tips are general, and apply to most silage crops you may choose to harvest. Another general idea you need to focus on is safety, through every step of the process. Take the time to review safety tips with chopper, truck, and pack tractor operators.
Furthermore, remind feeders that silage piles are dangerous due to the potential for silage to cave off the pile and engulf a person. Do not park or stand near the face. There is a lot more to the process than covered here and although the process may vary it starts with a plan tailored for your specific operations.
We look forward to seeing the results and pray that you all have a safe and abundant harvest.
Easy on cattle1 and your bottom line.
Titanium® vaccines have no impact on feed intake and result in little to no post-treatment side effects, so you can keep your cattle on track with health management solutions that don’t interrupt your day-to-day operations or affect your bottom line.1,2 It’s BRD protection that doesn’t impact performance, so you can be confident in every dose.
ELANCO.US/TITANIUM
The


