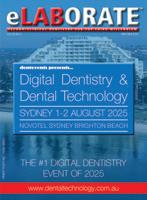
TWO DAYS OF LECTURES AND WORKSHOPS ON DIGITAL DENTISTRY FOR DENTISTS, SPECIALISTS,
DENTAL TECHNICIANS AND DENTAL PROSTHETISTS
ONLY $880 FOR 2 DAYS OF EDUCATION
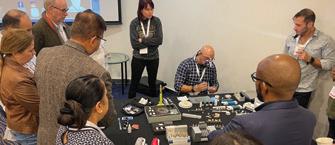
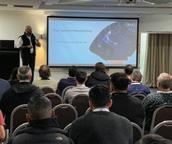
Join us again or for the first time at Digital Dentistry & Dental Technology No 6 for a fun, exciting and fully immersive learning experience with the best of the best in the new age of dentistry. This year’s program will again cover Digital Smile Design • Digital orthodontics • Intraoral scanning • 3D Facial Scanning • Digital implantology • Digital full arch restorations and full mouth rehabilitations • Digital Dentures • 3D Printing • Milling • CBCT • Materials and applications • Software and more with MORE Hands-on Sessions • MORE Advanced Sessions
REGISTRATION FEES
$880 inc gst
EARLY BIRD PRICING
$440 before 5 apr 2025 price increases $110 on the 2nd of every month
$440 before 24 Jan 2024 price increases $110 on the 2nd of every month INCLUSIONS Registration fee includes participation in TWO full days of education (12 CPD hours), all catering and Friday drinks. Multiple lectures and workshops are being run concurrently to allow you to build your own program to suit your specific interests. Price is all inclusive.
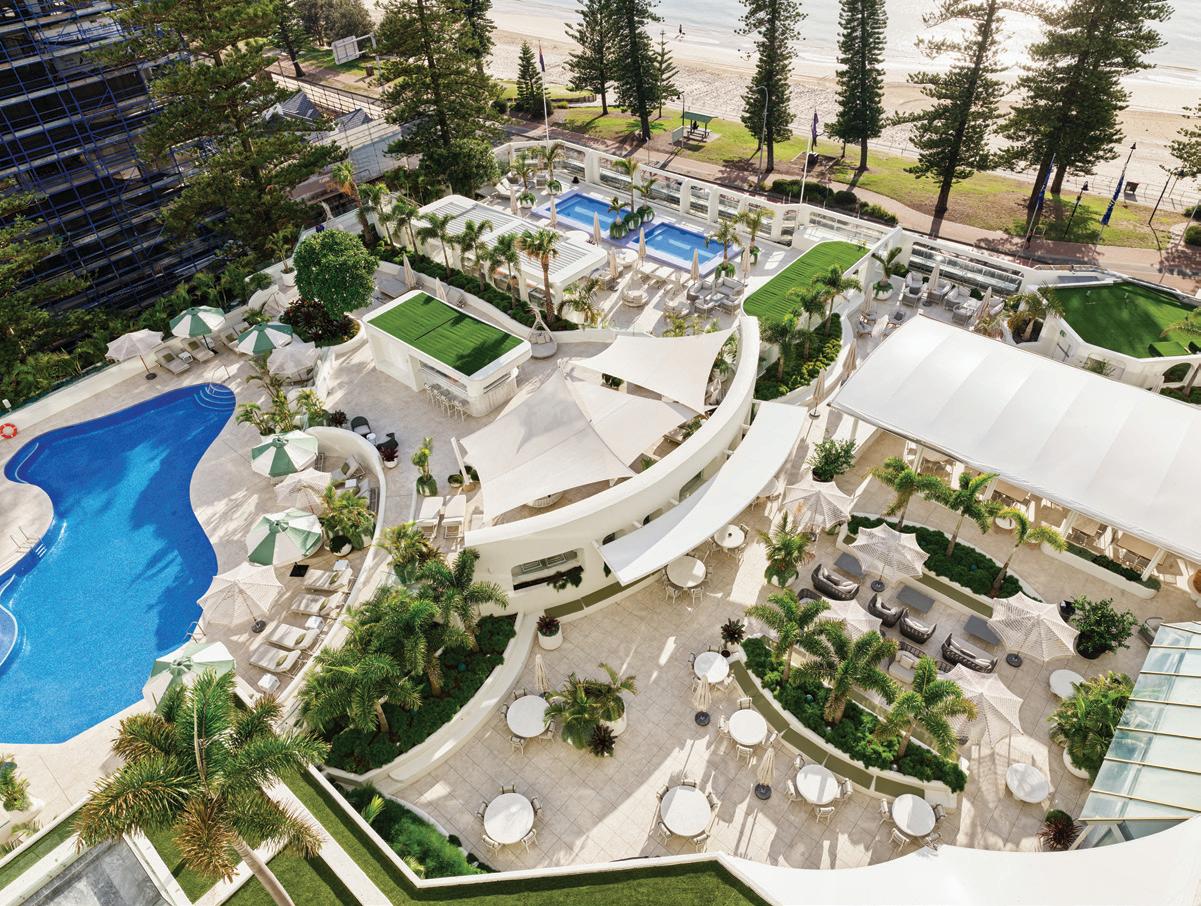
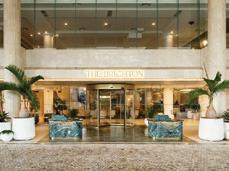
VENUE DETAILS
VENUE DETAILS
and more!
Join us again or for the first time at Digital Dentistry & Dental Technology No 5 for a fun, exciting and fully immersive learning experience with the best of the best in the new age of dentistry. This year’s program will again cover Digital Smile Design • Digital orthodontics • Intraoral scanning • 3D Facial Scanning • Digital implantology • Digital full arch restorations and full mouth rehabilitations • Digital Dentures • 3D Printing • Milling • CBCT • Materials and applications • Software and more with MORE Hands-on Sessions • MORE Advanced Sessions • MORE New Products • NEW Masterclasses... and more! ONLY $440 FOR 2 DAYS OF EDUCATION (12 HOURS OF CPD) IF YOU REGISTER BEFORE 24 JANUARY 2024 (SAVE 50%) TWO DAYS • 6 CONCURRENT EDUCATION STREAMS 39 TOP SPEAKERS • 80 EDUCATION SESSIONS THE
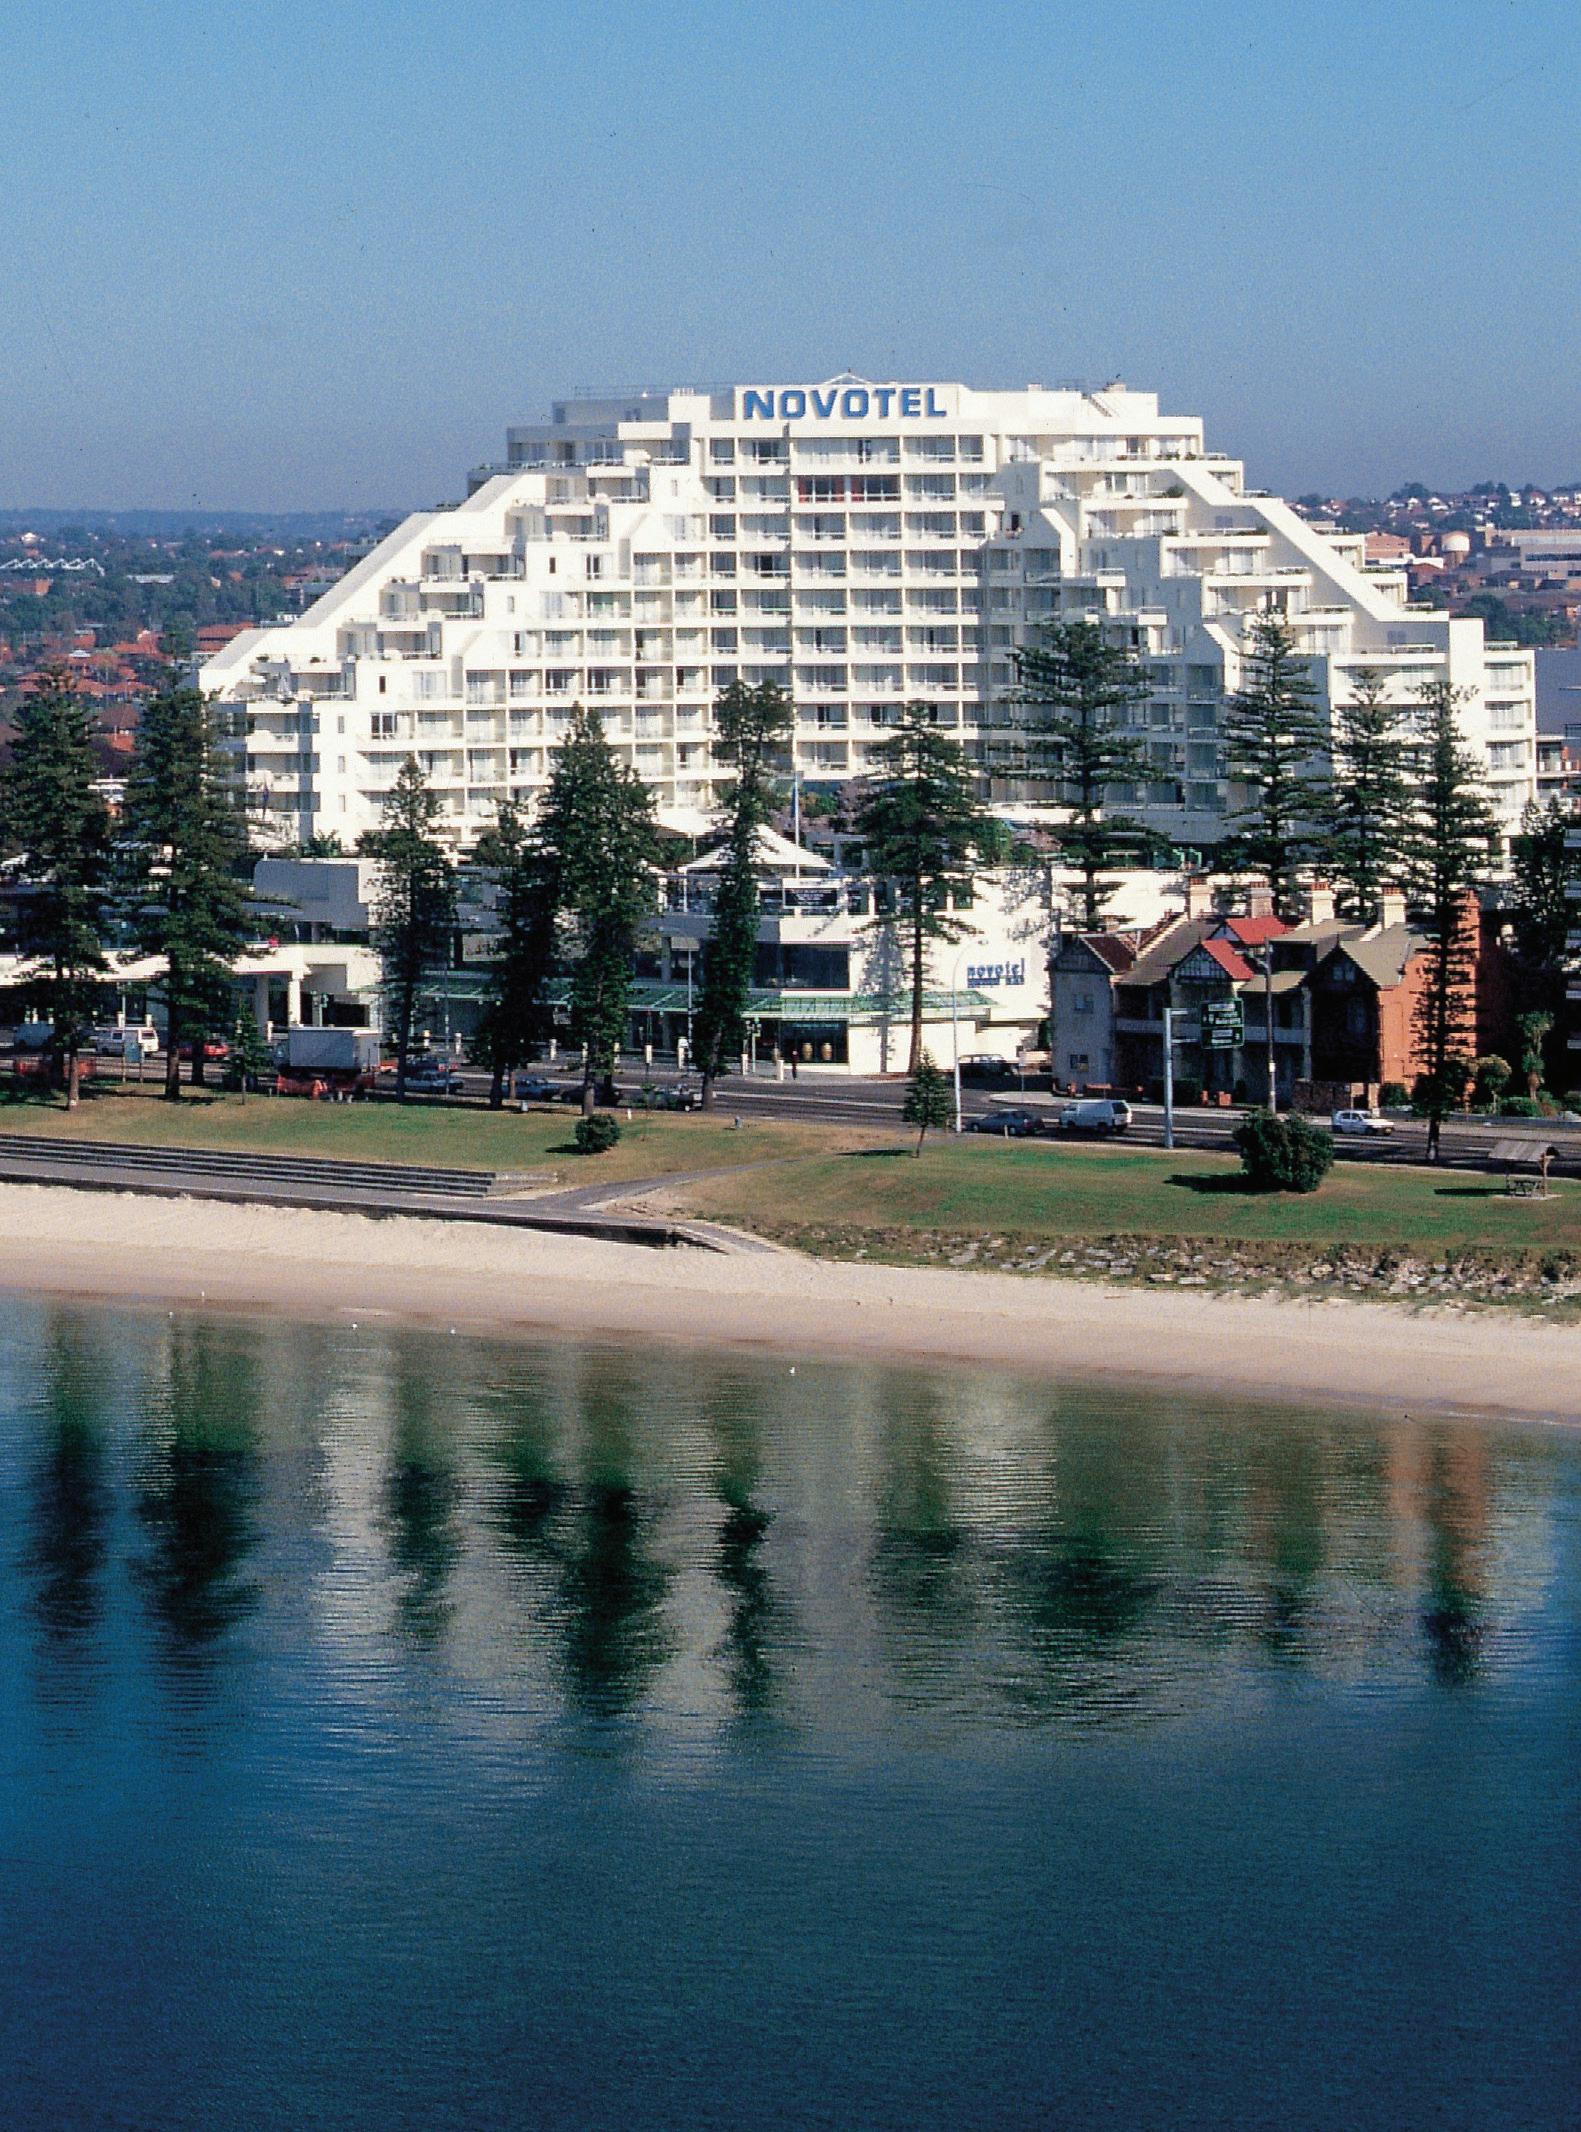
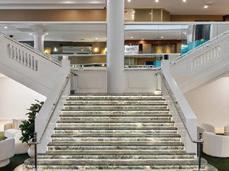
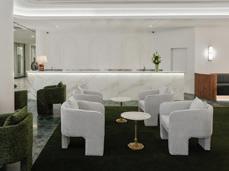
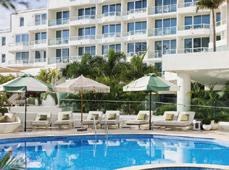
Novotel Sydney Brighton Beach - The Grand Parade, Brighton-Le-Sands NSW 2216 - Close to Sydney Domestic and International Airports Check the website for details of discounted accommodation rates for the conference • Ample parking available at the hotel
Dr Andrew Ip Dentist Terry Whitty Dental Technician
Jeroen Klijnsma Dental Technician
Akruti Tataria Dental Prosthetist
Elias Ibrahim Dental Technician
Greg Baker Dental Technician
Yahya Karim Dental Technician
Mario Aparicio Dental Technician
Dr Adam Schulhoff Orthodontist, Founder GRIN
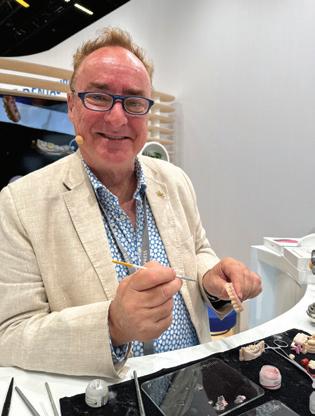
By Joseph Allbeury
IDS delivers again...
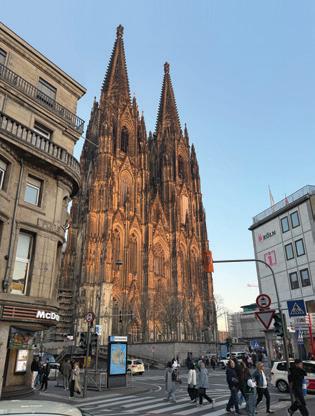
For the thirteenth time, almost in a row except for the COVID mess, I joined hundreds of other Australians and thousands - 135,000
to be exact - of dental colleagues from across the globe in descending on Cologne, Germany for the greatest show on Earth. And once again, it delivered and then some.
The 41st IDS concluded with 135,000 visitors from 156 countries having come together to see the latest and greatest from 2,010 exhibitors from 61 countries.
The exhibition - there is no accompanying education program - covered 180,000 square metres with stands big and small on show from every dental manufacturer you know and love and thousands you have never heard anything about at all and never will.
From a dentists’ perspective, the IDS is often a bucket list trip to see how big “dentistry” actually is [it’s massive]. Much of what is on show will never be available in Australia, however, it’s certainly the place to stay on trend with the latest in diagnostic technology, radiography, intraoral scanning and the like.
Dental technicians and prosthetists, conversely, flock to the IDS to keep up with the trends in manufacturing solutions. Big ticket items like milling machines are plentiful at the IDS as are 3D printing solutions and the exhibition is a great place to find out exactly what’s coming next. Manufacturing dentures digitally remains a key area of interest.
Most of all, however, IDS is where the dental industry comes together to deal. The dental trade from Australia meets with the agencies they represent to renew relationships and see what’s coming next. Equally, manufacturers are often on the look out for new distributors and distributors for new agencies. With everything all in one place, the event attracts dental dealers from across the globe.
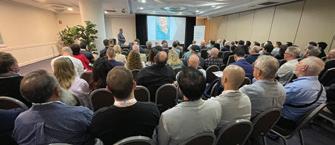
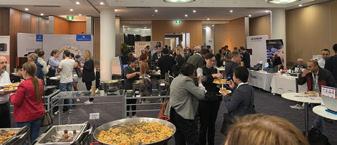
Digital Dentistry & Dental Technology 2025 is coming up on August 1-2 and many of the new products from IDS 2025 will already be on show.
We’ve been working hard to firm up the education program and if you visit www.dentaltechnology.com.au, 80% of the sessions are now locked in with 30+ speakers confirmed presenting across six streams. Expect lots on full arch restorations, digital dentures, 3D printing, milling, CAD and CAM software, artificial intelligence, automation, intraoral scanning, 3D facial scanning, milling, orthodontics, photogrammetry, materials, smile design, implantology, CBCT, cosmetic dentistry, aligners and more.
The venue is looking pristine following the conclusion of renovations and the new ballroom will bring the exhibition together in a single location. The format is once again the same but there will be some changes we hope will enhance the delegate experience.
So register now and don’t miss out!
Enjoy the edition...
Joseph
Allbeury, Editor and Publisher
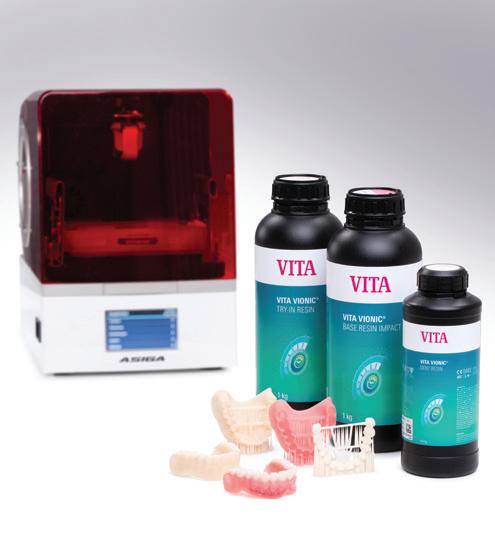
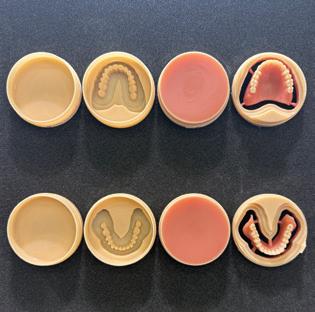
New VITA VIONIC 3D printer resins
VITA Zahnfabrik is expanding its range of products for digital prosthetics with the innovative 3D printing materials from the VITA VIONIC SOLUTIONS portfolio. The new VITA VIONIC RESINS offer users high-quality materials and reliable shades, making 3D printing in the laboratory costefficient and dependable.
With VITA VIONIC RESINS, a completely printed workflow becomes reality: from VITA VIONIC TRY-IN RESIN for try-ins to the definitive denture base with VITA VIONIC BASE RESIN IMPACT, to the tooth elements made from VITA VIONIC DENT RESIN and the final customisation. This workflow is at the heart of the new VITA VIONIC ECONOMY level, making it possible to print dentures quickly, efficiently and with impressive quality, saving both time and money.
VITA VIONIC BASE RESIN IMPACT offers a new level of quality for fabricating final denture bases. Thanks to its durability, the material has a high load capacity and a low risk of fractures. The balanced property profile promises longlasting results.
VITA VIONIC DENT RESIN is used to create highly abrasionresistant, shade-stable dental arches and elements: as of April 2025, resins in eight VITA classical A1–D4 shades and the bleach shade 0M3 will be available. Thanks to its high strength, the new resin is suitable for final dentures, as well as temporary crowns and bridges. The very low wear values of the printed denture teeth made with VITA VIONIC DENT RESIN, make them comparable to milled work in terms of durability
The new VITA VIONIC TRY-IN RESIN completes the portfolio. It is an ideal material for functional try-ins in partial and full dentures. It offers fast and material-efficient production and easy processing. It also sets new standards for durability, thanks to its long shelf life of three years.
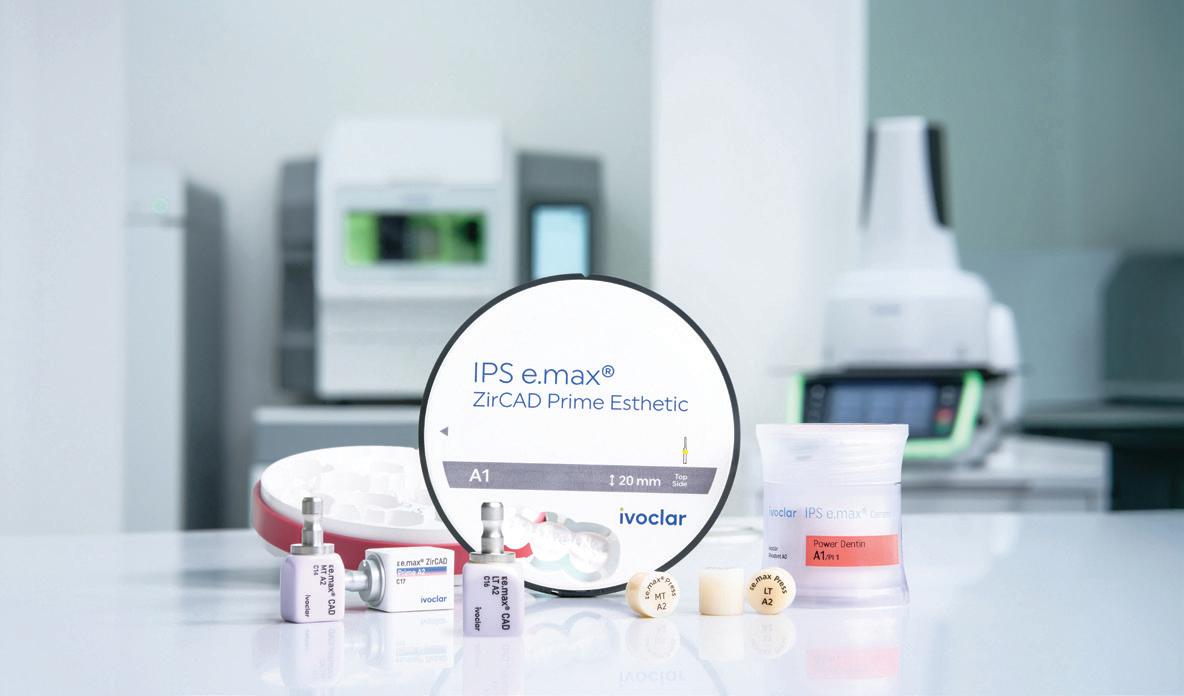
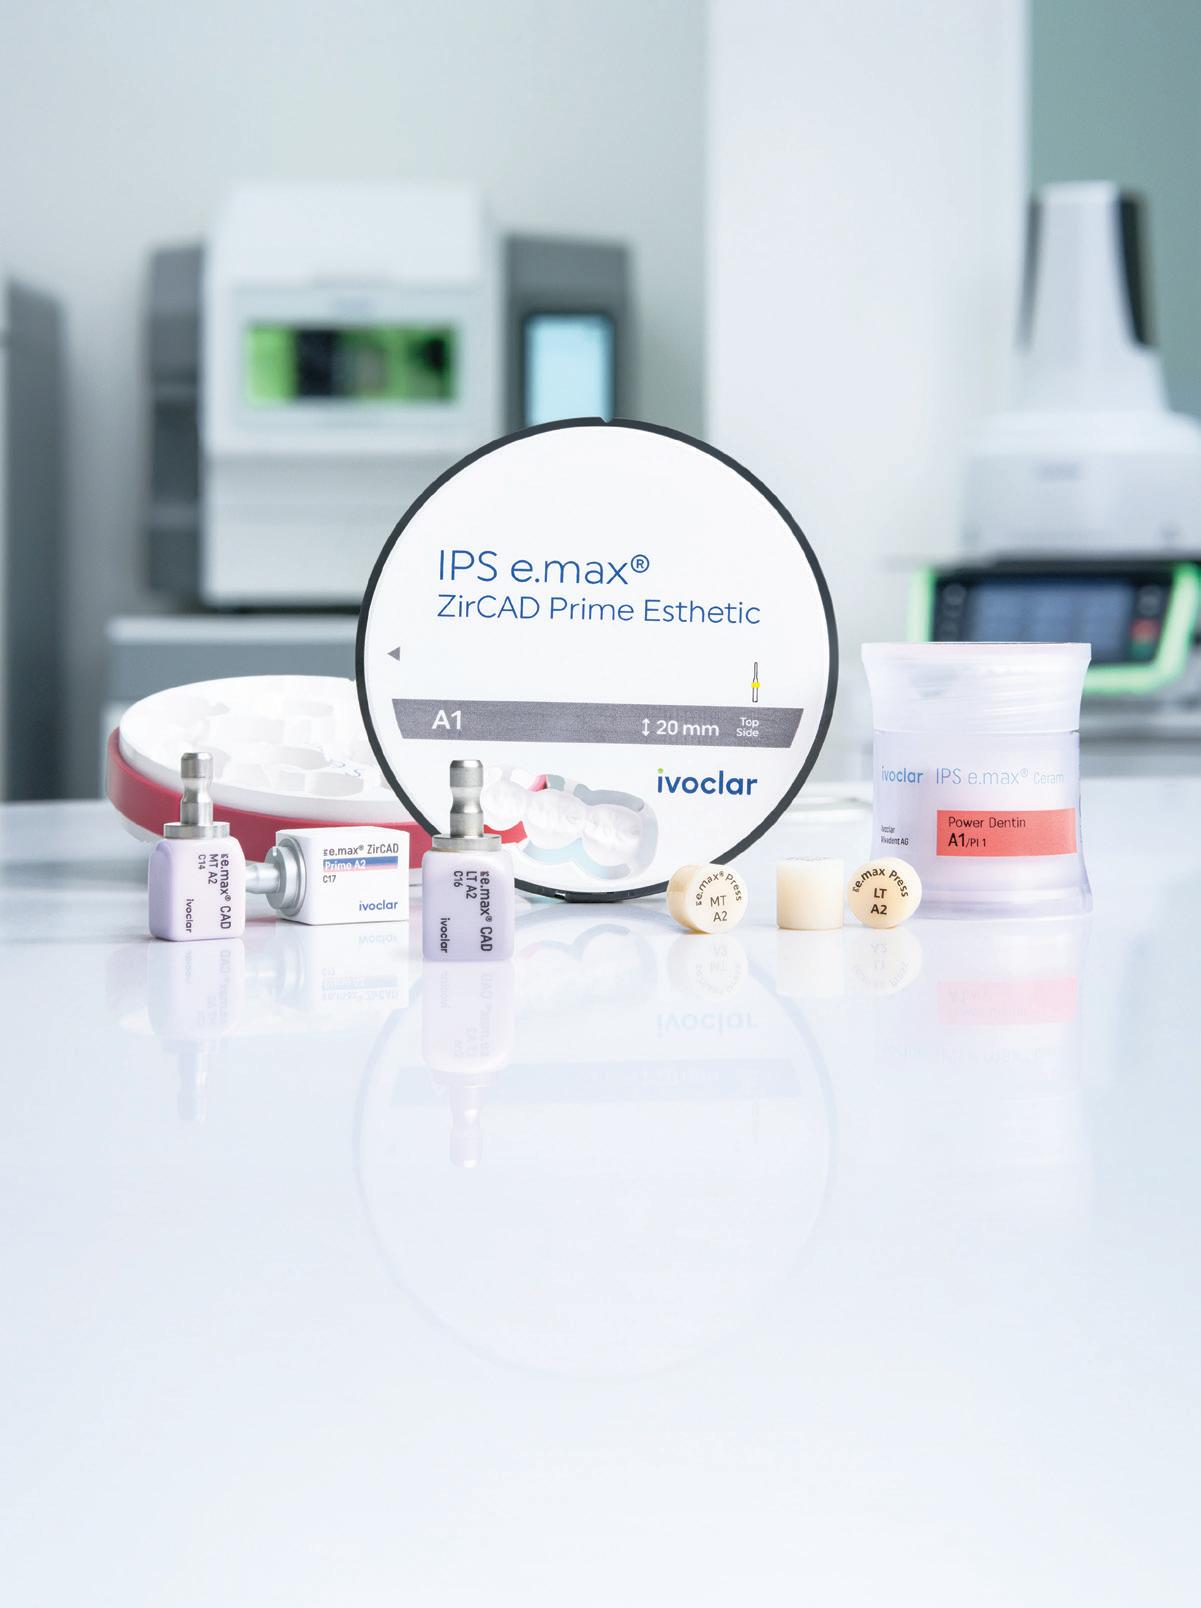
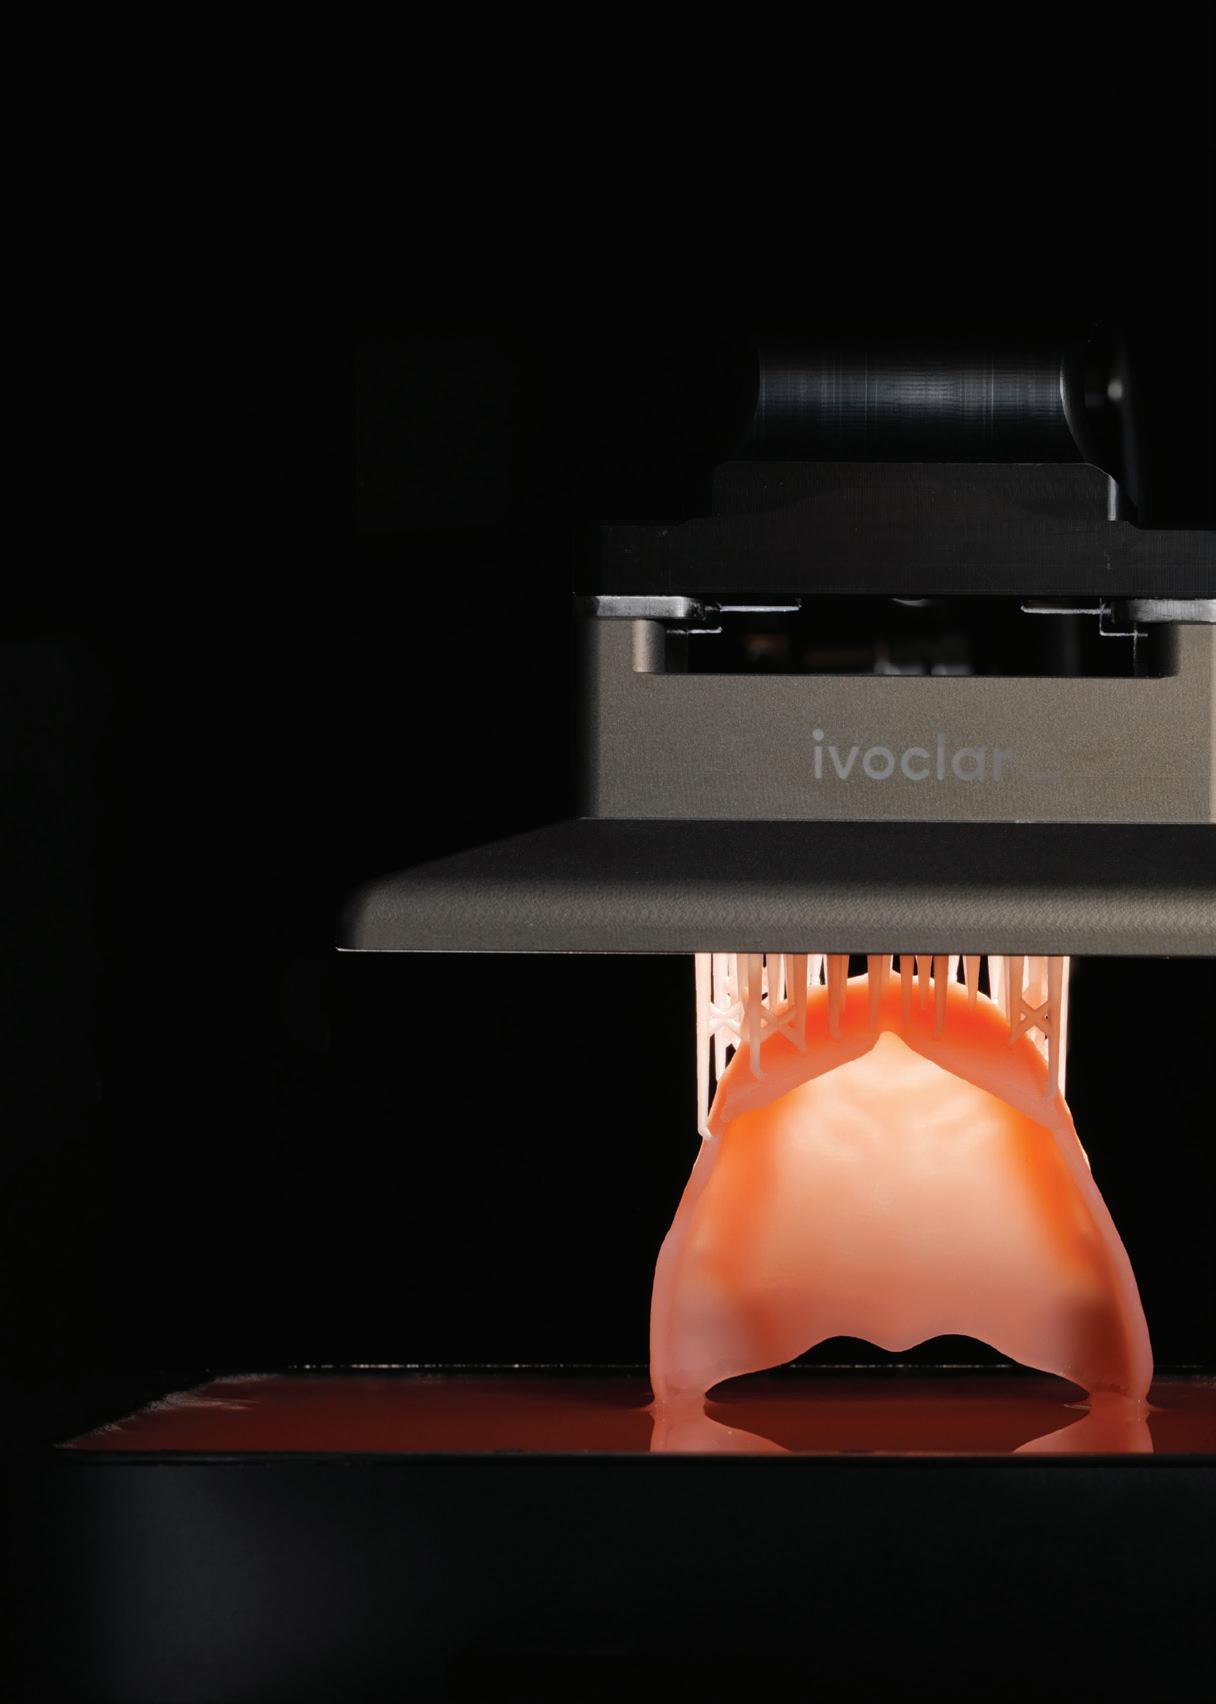
IPS e.max® celebrates 20th anniversary
The Ivoclar Group is celebrating the 20th anniversary of its IPS e.max family. Since its market launch in 2005, IPS e.max has revolutionised dentistry, setting new standards in quality, efficiency and aesthetics.
With more than 230 million restorations* worldwide, IPS e.max has proven its clinical success and lasting impact on modern dentistry.
The IPS e.max family was introduced in 2005 with a range of different products, including the two high-strength lithium disilicate glass-ceramics IPS e.max Press and IPS e.max CAD; the zirconium oxide ceramic IPS e.max ZirCAD; and the fluorapatite veneering ceramic IPS e.max Ceram. This comprehensive solution has given dental technicians and dentists a high level of flexibility and aesthetics from day one. The all-ceramic materials have driven advancements in monolithic techniques for durable dental restorations, enabling minimally-invasive treatment approaches.
Lasting change in patient care
The innovative power of IPS e.max is especially evident in the advancement of minimally invasive dental treatments. While in the past extensive preparations were necessary, the highstrength materials of the IPS e.max range have enabled a more conservative approach.
Generally, more and more patients are looking for metal-free, highly aesthetic restorations that offer both functional reliability and natural appearance. With the IPS e.max product family, dental technicians and dentists have access to a wide range of solutions designed to meet these evolving demands.
OMilestones in the evolution of IPS e.max
ver the past two decades, four flagship IPS e.max products have established themselves as key pillars of modern dentistry:
• IPS e.max Press: The proven lithium disilicate press ceramic for highly accurate, esthetically impressive restorations.
• IPS e.max CAD: The high-strength lithium disilicate glassceramic for the CAD/CAM production of restorations with highly aesthetic characteristics.
• IPS e.max ZirCAD: Innovative zirconia that, thanks to GT technology, combine high strength with exceptional aesthetics.
• IPS e.max Ceram: A veneering ceramic suitable for both lithium disilicate and zirconium oxide, offering natural light dynamics and excellent shade effects.
Future developments of IPS e.max
Future developments of IPS e.max will focus on enhancing efficiency and aesthetics even further. New material generations and digital workflows will help dentists and dental technicians to achieve outstanding results with even less effort. Following the mission “All ceramic. All you need”, Ivoclar will continue to drive innovation in all-ceramics and build on the success of the IPS e.max family.
For further information on the IPS e.max family, please visit: https://www.ivoclar.com/de_li/landing-pages/20-jahre-ips-e.max or call AU: 1300-486-252 or email orders.au@ivoclar.com or in NZ: 0508 486 252 orders.nz@ivoclar.com
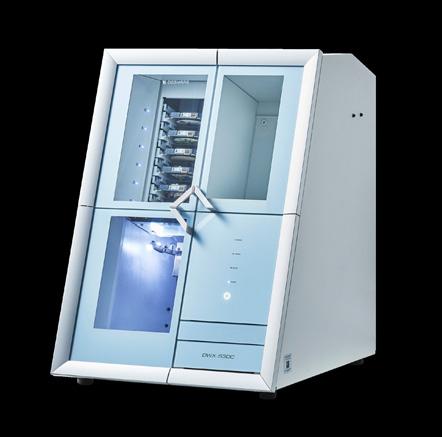
– Advanced zirconium oxide and lithium disilicate glass-ceramics
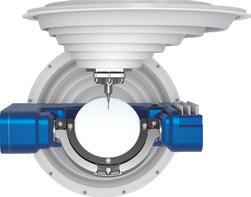
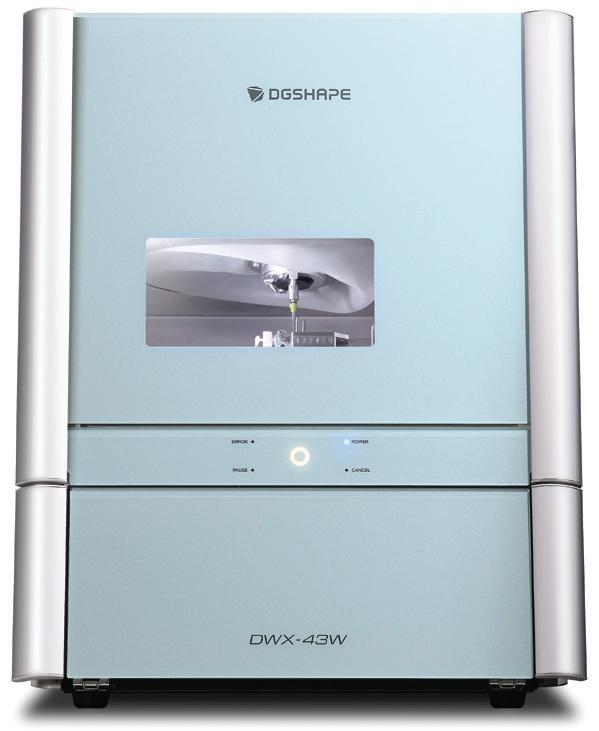
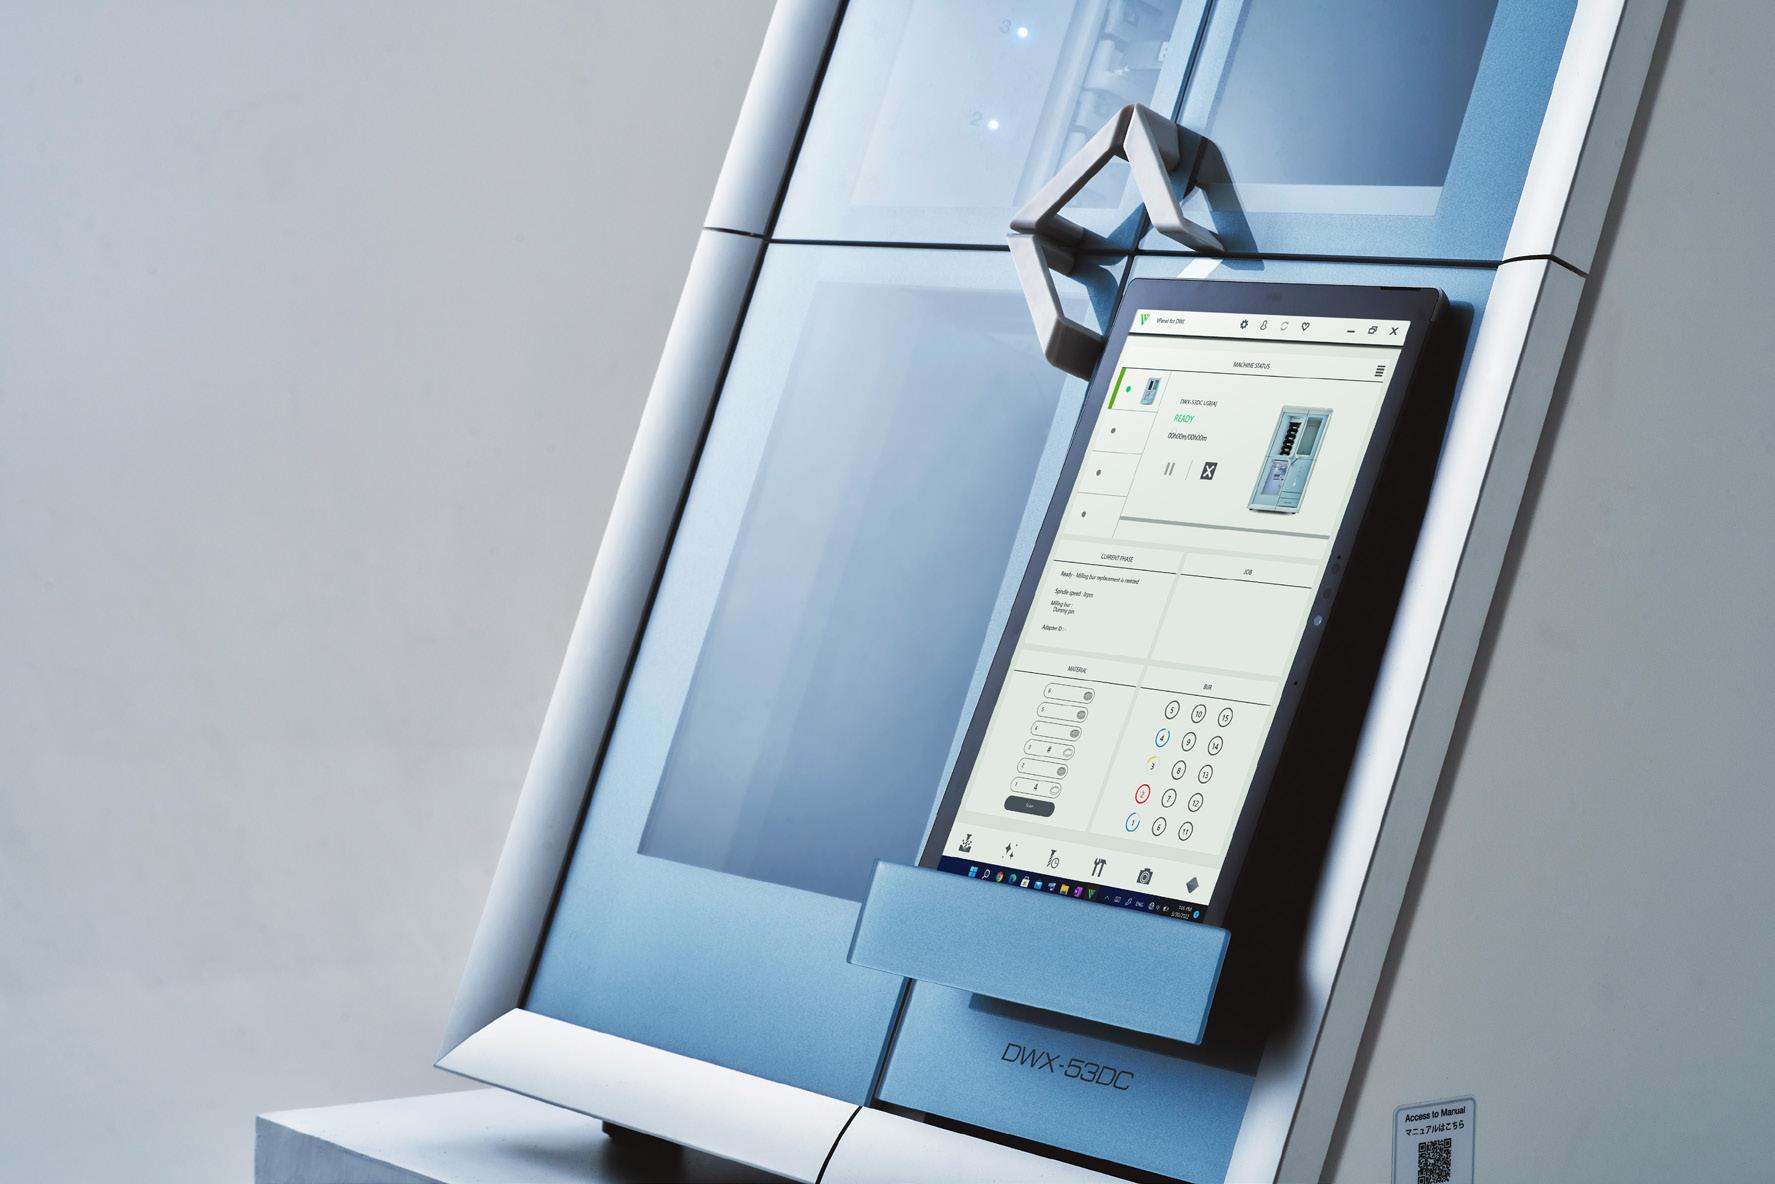
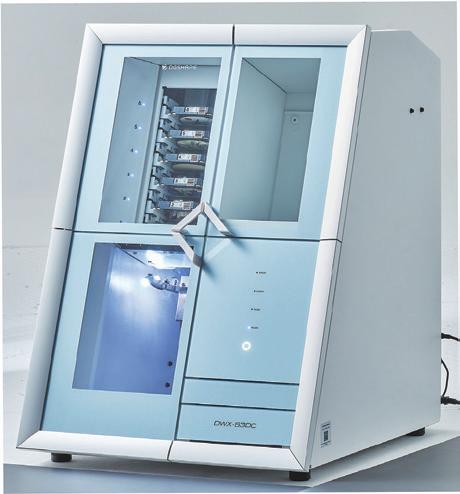
DGSHAPE Corporation, a wholly owned subsidiary of Roland DG, has launched its latest DWX-43W wet dental milling machine. This advanced milling device provides a suite of automated and improved features and more adaptable milling workflows, all with the precision, quality and reliability users have come to expect from DGSHAPE milling devices.
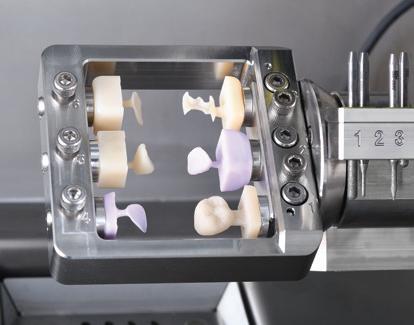
The DWX-43W offers users advanced features that save time, enhance connectivity and simplify workflows, all while providing easy, consistent, and accurate wet milled production. The included
multi-pin accessory allows batch milling of up to six units without compromising quality, while additional available accessories enable easy in-house custom milling of titanium abutments. Automated features like automatic draining, automatic correction and periodised spindle run-ins combine with an improved waterflow system to minimise maintenance needs and simplified strategies in the included CAM software make milling more consistent, efficient and accurate than ever before. DWX-43W users can also access performance visualisation software through DGSHAPE CLOUD and monitoring software through VPanel to monitor the mill’s productivity, maintenance, tool usage and more.
“With features and accessories that improve production speed, simplify workflows and automate maintenance functions, the DWX-43W provides more efficient digital dental milling on a wide variety of materials,” said Junichi Toyama, DGSHAPE Corporation’s President of Operations. “DGSHAPE remains dedicated to providing dental professionals with advanced open-architecture dental milling solutions that improve the ease, speed and accuracy of their milled production, allowing their businesses to thrive.”
For more information on the DGSHAPE DWX-43W wet dental milling machine visit www.rolanddg.com.au/products/ dental/dgshape-dwx-43w
New
Sealed
Built
DGSHAPE
Optional
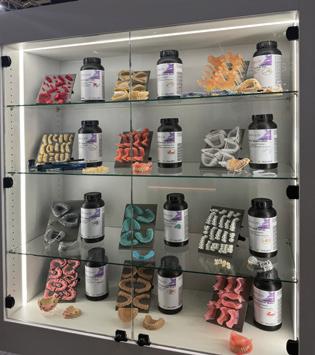
Asiga sets new standards at IDS 2025
Australian 3D-printing powerhouse Asiga has again delivered a tour de force at the IDS 2025 in Germany, serving up a range of new products that has continued to extend its leadership in the additive manufacturing space. These included...
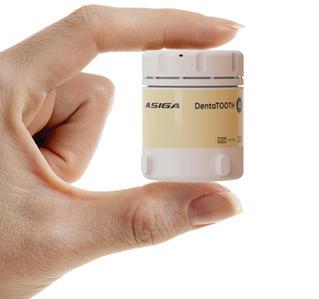
ASIGA PrintPods
Universally hailed as the most innovative new product shown at IDS 2025, Asiga PrintPods™ are self-contained material capsules that turn your existing Asiga 3D printer into a chairside powerhouse. Print crowns, inlays, onlays and veneers in minutes in a variety of restorative materials from trusted dental brands. Each PrintPod contains enough material for up to 5 prints and will be priced accordingly, meaning clinicians looking to print chairside no longer need to invest in large quantities of expensive resins.
Launching at Digital Dentistry & Dental Technology 2025 in Sydney, PrintPods will initially be available for any Asiga MAX or MAX 2 printer via an inexpensive conversion kit.
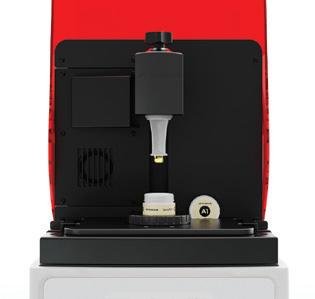
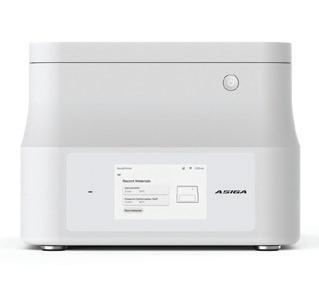
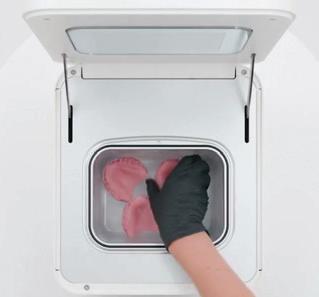
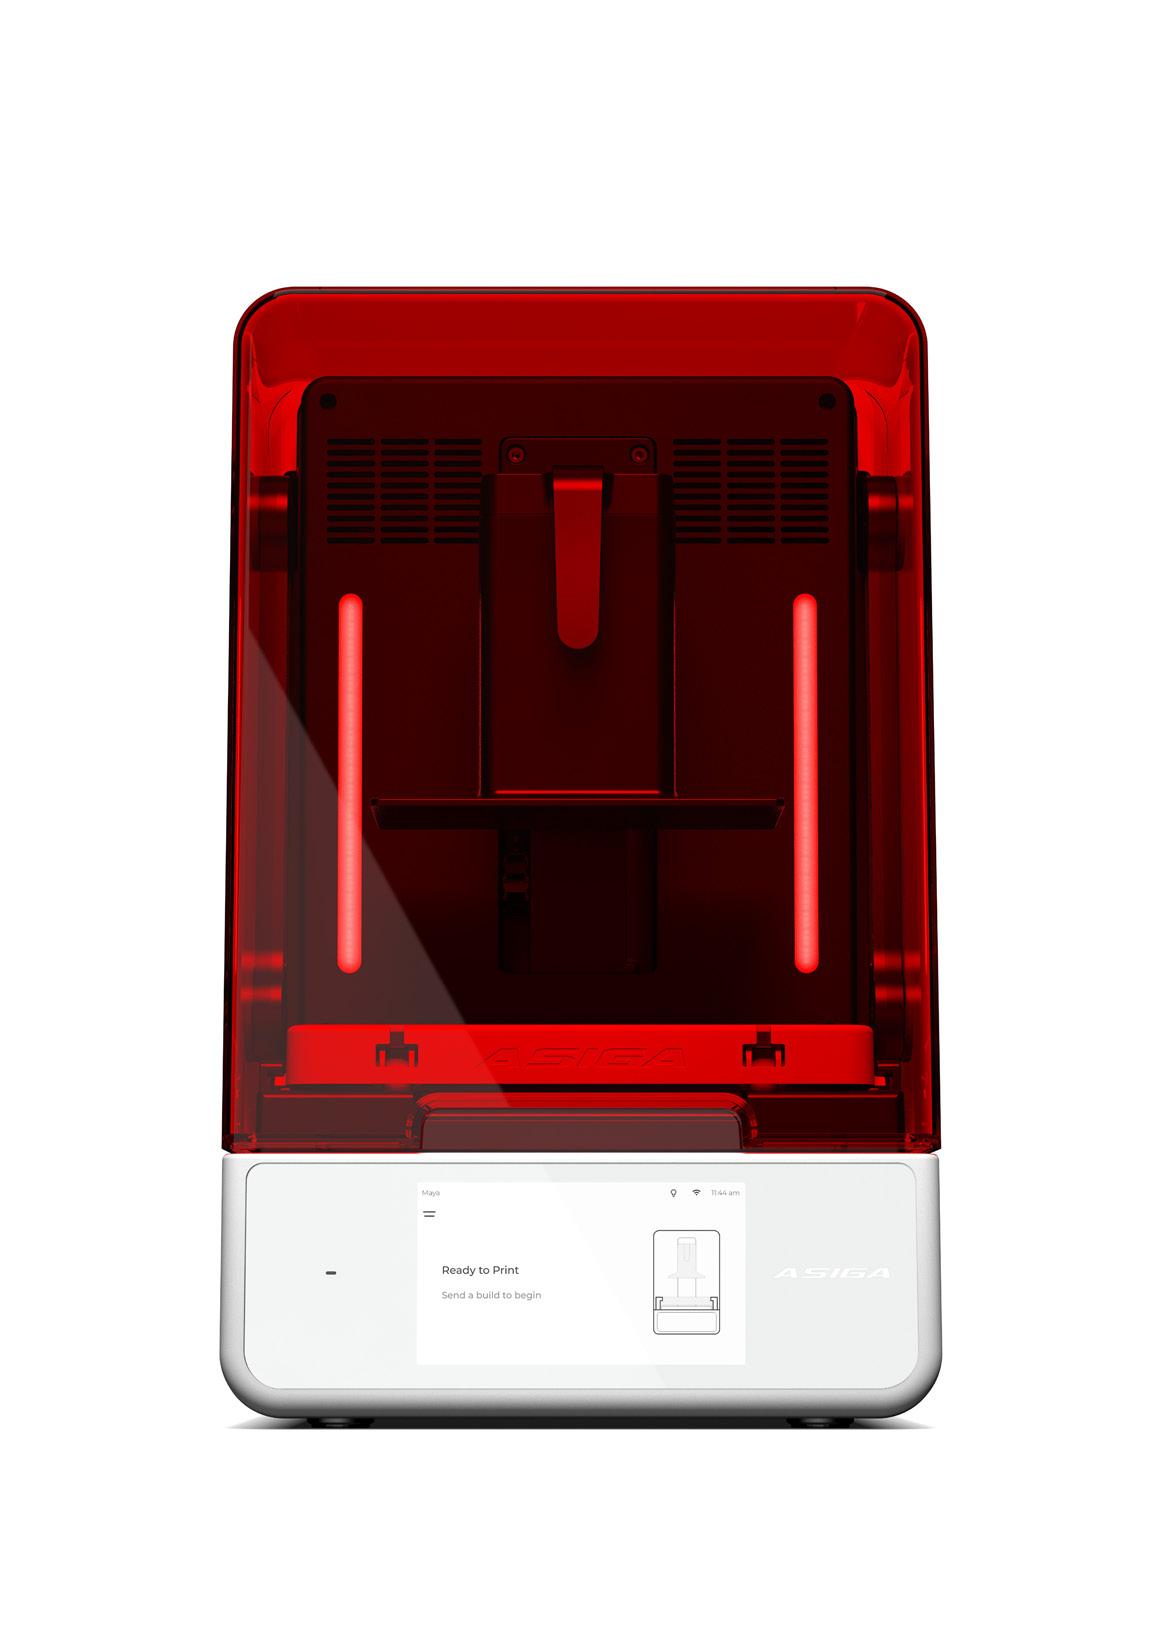
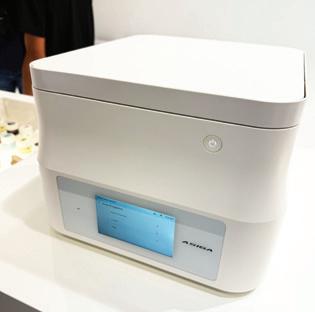
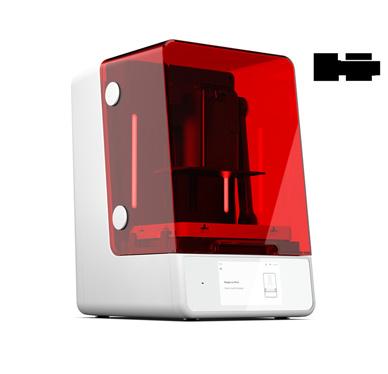
ASIGA Cure
Addressing every issue that frustrates 3D printing aficionados, the new Asiga Cure™ incorporates a range of key technologies that deliver a predictable, consistent and efficient light cure to your 3D printed parts. Already winning awards, Asiga Cure features a Glass vacuum chamber; Intelligent Dose Curing; An internal radiometer array that monitors the number of photons available in the chamber, delivering an accurate curing dose every time; Heating to 80 degrees Celsius; Gas connectivity (e.g. Nitrogen) for when you need it featuring zero gas waste; Touchless entry; and Smart user interface. Cure any resin
from any manufacturer with the onboard material profile library or with fully customisable settings.
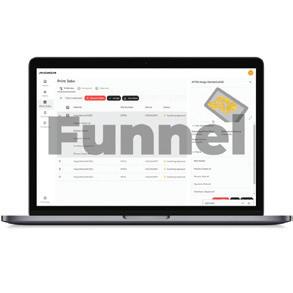
Asiga Funnel
New Asiga Funnel™ is automated 3D print setup and production management software. It features automatic part recognition, grouping, print setup and transfer to your Asiga 3D printer. Connect Asiga Funnel to your design service or drag & drop files for hassle-free 3D print management.
Asiga Genira
Asiga Genira™ is an automated dental model builder. Upload intraoral scans and voila! Ready-to-print dental models have never been so easy.
For more information, visit asiga.com
Figure 1. Asiga PrintPods.
Figure 2. Asiga PrintPods.
Figure 3. Asiga Funnel.
Figure 4. Asiga Cure.
Figure 5. Asiga Cure.
Figure 6. Asiga Genira.
IDS 2025 delivers and then some
By Terry Whitty
Nothing can prepare you for a first time visit to the IDS. I was told things like “it will blow you away” and “your eyes will fall out of your head” and the like; I should have listened.
I wrote those words 20 years ago as the opening to my first review in eLABORATE of IDS - the International Dental Show - and it’s the exactly the same now. The only difference is I’m the one telling people this and observing their reaction.
Without a doubt, it’s still the biggest and best dental show on the planet and for the 2025 edition, the attendance was up 15% on 2023. It’s still not quite back to the preCOVID record attendance of 2019, but over 135,000 visitors from 156 countries sees it well on its way. IDS 2025 also had more than 2,000 exhibitors, representing over 60 nations and it seemed that the floor area (180,000 square metres) and the number of halls was ever-increasing.
It’s getting harder and harder for me to get around to see everything and everyone because of this continual growth in size, or I maybe I’m just a bit slower on my feet or both. After 20 years of IDS, you certainly have a lot to do and a lot of friends and colleagues to see from all over the world. And that’s before you even start digesting just what is new.
So what is that you ask?
Artificial Intelligence
Artificial Intelligence or AI was one of the biggest talking points at IDS Cologne this year and it’s clear it’s not just a buzzword anymore—it’s changing the game in dental technology. From smart scanners to AI-assisted design tools, the tech on display showed just how fast things are moving. Systems that can analyse scans, suggest treatment options and even design crowns or dentures with minimal input, were everywhere. It’s not
just about speed—it’s about accuracy, consistency and freeing up time for the more creative, human side of dental work.
For technicians, this shift is already making a difference. AI is taking over the more repetitive parts of the job, like initial design stages, so technicians can focus on fine-tuning aesthetics and function. It’s also helping spot errors before they become costly remakes and it’s making high-quality results more achievable, even in busier labs or low-resource settings.
That said, it’s not all plug-and-play. Teams will still need training and there are real questions around data privacy and oversight. But the potential is huge. IDS 2025 didn’t just show us what’s next— it showed us what’s already here. AI in dentistry is no longer a future trend; it’s part of today’s toolkit. The good news? There’s absolutely no need to panic in my opinion. If anything, AI is shaping up to be an incredibly useful partner in the lab, not a replacement for skilled professionals.
What AI does best is take care of the repetitive, time-consuming tasks—like generating initial designs, spotting anomalies in scans, or optimising workflows. That frees up technicians to focus on what they do best: the artistry, the problemsolving and the patient-specific nuances that no machine can fully replicate. It’s not about removing the human touch—it’s about supporting it with smarter tools.
That said, not everything labelled “AI” at IDS truly was AI. Some companies were clearly jumping on the buzzword bandwagon, promoting what were essentially well-built, rules-based programs as artificial intelligence. These systems might be clever, but they’re not learning or adapting in the way true AI does. So, it’s important to stay curious but also critical.
Real AI is here, it’s growing fast and when implemented properly, it’s going to make our work faster, more consistent and even more creative—not less. In fact, if you delve into it, you may just find a
new lease of life for yourself. I always say when I was a kid at school, AI was a pocket calculator and that was shunned by every parent; now the evolution of the pocket calculator being the personal computer is used in one way or another by everyone.
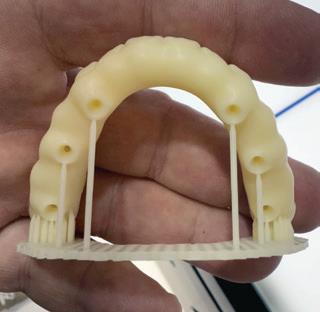
3D printing
The other big thing that you cannot miss at IDS is how much 3D printing has infiltrated the dental market. Everywhere I turned, there was a new 3D printer brand I hadn’t heard of spruiking theirs is the best, the fastest, most flexible, cheapest, etc. I’m sure some will be gone by IDS 2027 as the market can’t support so many wannabes, but some will remain and become household names. Of course all the big names where there like Asiga, Heygears, Sprint Ray, Shining 3D and Ackuretta to name a few and all had new machines and materials.
Of note, Asiga launched some amazing hardware and software. Asiga Cure is the new curing unit with 360 degree curing (no more turning over), a vacuum pump and gas connection and with more technology built into a curing unit ever. This will become the industry standard of curing units.
ASIGA have also previewed their new concept called PrintPods, which I have to say was one of the best things I saw at IDS. It’s a great, innovative way to print single restorations with your existing Asiga Max or Asiga Max 2. Rather than buying a large bottle of expensive resin and pouring it into a tray to print from, PrintPods are small, 30 gram bottles of resin with a built-in build platform. Each bottle has sufficient resin for 5 crowns and is aimed more at clinicians looking to print restorations chairside than labs. It’s all the buzz online so Google it for more info or attend the launch at DDDT25www.dentaltechnology.com.au.
ASIGA also released some great software including AI scan-to-model software called Genira and print management software called Funnel.
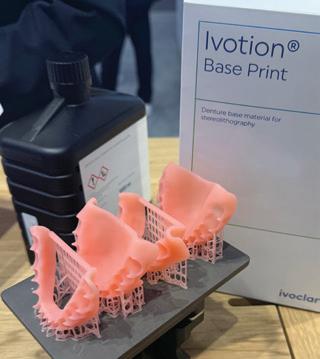
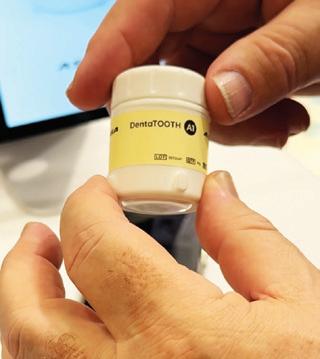
There were so many companies selling resins for 3D printing with an emphasis on resins for the next big thing of course, Denture Printing. It was interesting to see different takes on how we will print dentures. Stratasys have their polyjet matrix printing, 3D systems have a similar technology and Myerson were also showing their latest offering too. Print the teeth and the base all in one go - it works but you have to be the judge to sift through the marketing hype. For example, after printing the Stratasys material, it goes through about 8 hours of postprocessing... hmmm, they don't tell you this sort of thing up front so be mindful when exploring these technologies. It was interesting to see Ivoclar entering the professional resin for denture bases, probably to compete with Lucitone (Dentsply Sirona), the market leader. Denture print resins are an area to keep an eye on, especially after seeing the amazing “all-in-one” multi material printing from Heygears. This is another print the teeth
and the base all in one go concept but from a finished product perspective, it is next level. They wouldn’t say how it was done but it was amazing nonetheless, so we will have to just wait and see. They also had a new technology that reduces the supports needed for printing that is available now and it works by pumping air between the workpiece and the release film so there is less of a suction effect. They call it the Pulse Releasing Module or PRM, check it out!
Milling
There was a plethora of milling machines at IDS and the established players were there showing their latest. DG Shape, Amann Girrbach, Zirkonzahn, Ivoclar, VHF, etc were all there as were lots of start-ups battling for a piece of the action. Nothing really new and amazing to be honest – evolution rather than revolution – with lots of improved machines that do more, do it better and do it faster and as I said, lots of new brands battling on how low in price they can go.
If I had to pick a favourite, I thought imes-icore had an interesting system
called CORiTEC Mythos, which was basically an injection type 3D printer and a mill all-in-one. The idea is the light cured resin is laid down in a crude shape, cured and the mill refines the shape. I did see it with my own eyes in operation and even though it seems crude at the moment, it does drum up lot of possibilities and I’m sure it will be refined over time. Is it the future? Who knows but I did thing it was a very cool idea. Again, Google it and watch the videos.
Besides all the 3D print, CAD/CAM and AI circus there are of course all the technologies one could want under one very large roof. If you want saw blades, there is a stand dedicated to just that. If you want model trimmers, dust extractors, lab benches, you name it, it’s here. It all makes you tired but it’s a ton of fun and at the end of the day, you can go to the local brew house for a schnitzel with sauerkraut and a cold Kölsch beer or 6.
IDS is bigger and better than ever and you must go at least one time in your dental lifetime. IDS 2027 is on March 16-20, 2027. Visit www.ids-cologne.de
Minimally invasive treatment using the new Prettau® Skin® protocol
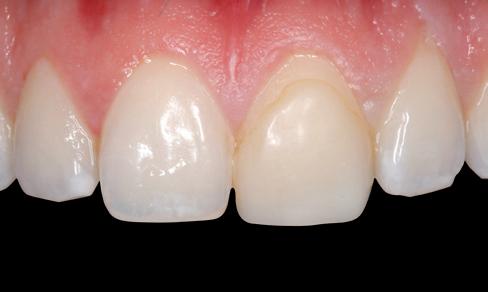
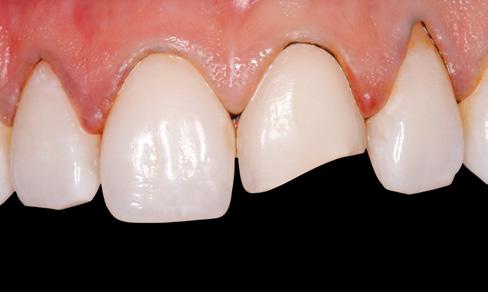
Case report of a 27-year-old patient requiring a minimally invasive restoration in tooth 21 and aesthetic adjustment of tooth 11
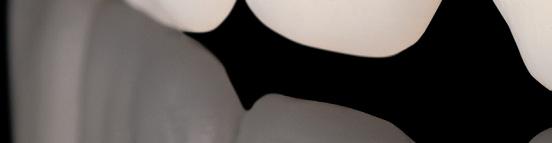
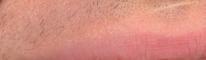
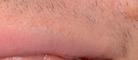
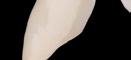
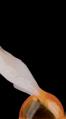
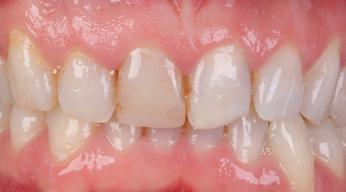
A27-year-old patient lost the incisal part of tooth 21 at the age of 11 due to a sport accident. The missing part was replaced with a resin filling, which over time was subject to discolouration and replaced with a lithium disilicate veneer applied without tooth preparation. The veneer showed a too dark colour and a too high translucency. For this reason, the patient was never totally satisfied with the restoration. In addition, gingival recession exposed the transition between the veneer margin and the tooth over time. For these reasons, nine years later, the patient presented to the dentist requesting a new aesthetic solution for his anterior tooth (Figures 1,2). The primary goal for the techno-clinical team was to change the existing function as little as possible and/or to achieve “non-invasiveness” and a “functionally ideal situation”. In addition, the two central incisors needed to be adapted symmetrically, both in shape and colour, matching the shade of the patient’s natural teeth.
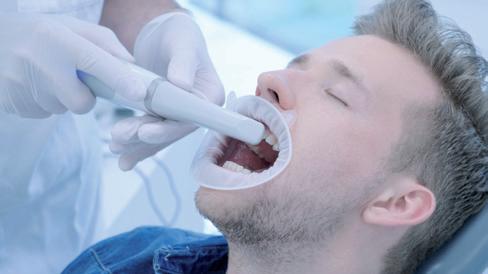
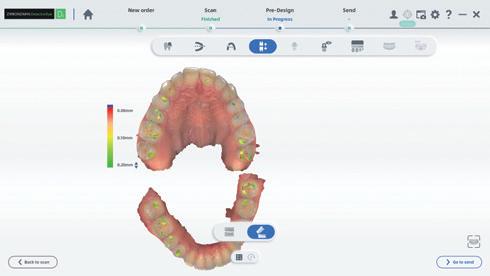
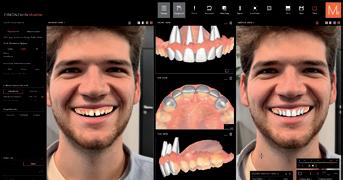
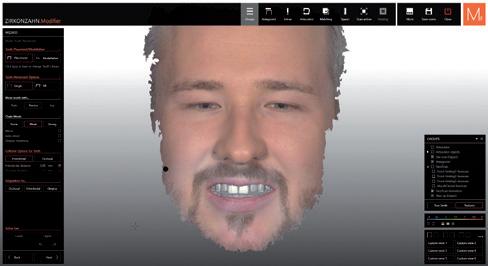
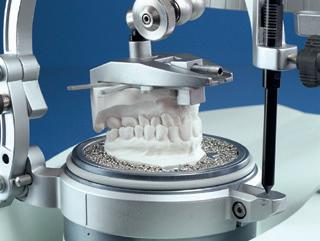
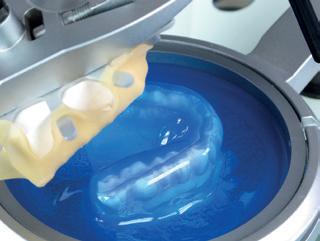
During the first appointment with the patient, the dentist carried out dental, periodontal and radiological diagnostic assessments and documented the situation acquiring patient photos, 3D facial scans, X-ray data, video of the patient speaking as well as intraoral scans (Figures 3-4).
In addition, patient-specific occlusal information was accurately recorded by means of the PlaneSystem® (MDT Udo Plaster, Germany). The acquired data were used not only for documentation purposes, but also to produce a mock-up in the dental laboratory (Figure 5).
The mock-up had great didactic, diagnostic and clinical significance: it played an important role in the communication between the dentist, dental technician as well as patient and allowed for a predictable assessment of aesthetics and function by simulating the expected final result. During the mock-up design phase, a virtual block-out model was created to determine the correct insertion direction of the mock-up. In this phase, diagnostic aspects regarding the gingival situation could also be included.
Figure 1.
Figure 3.
Figure 4.
Figure 2.
INDIVIDUAL MOCK-UP
A COST-EFFECTIVE, NON-INVASIVE AND EFFICIENT METHOD TO PREVIEW THE FINAL RESTORATION – MADE WITH MULTISTRATUM ® FLEXIBLE RESIN
Ultra-thin mock-up made 100 % digitally with Zirkonzahn workflow and produced with Multistratum ® Flexible: a particularly flexible resin with natural colour gradient and high durability, ideal for long-term provisionals and prototypes, from single crowns to full arches. The optimum flexibility of the material reduces the risk of fracture and compensates for possible slightly diverging insertion directions.
If a local or more extensive gingivoplasty or gingivectomy was necessary, this could be integrated into the mock-up, which could also be designed as temporary cemented prosthetics.
In the present case, teeth 12 and 22 were included in the mockup design to improve stabilisation in the patient’s mouth.
The dentist removed the existing lithium disilicate veneer from tooth 21 and the tooth was minimally reduced in buccal and interdental areas in order to avoid a stronger shaping of the central incisors, but especially to make the axis and the tooth shape symmetrical.
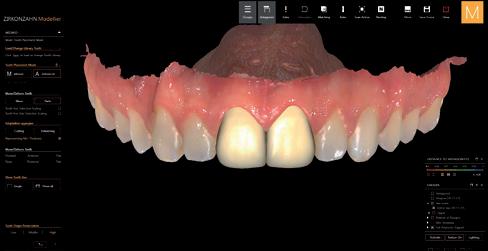
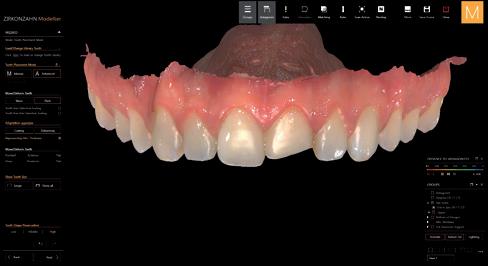
Subsequently, an intraoral scan of the actual situation was acquired and sent to the dental laboratory. The two veneers for teeth 21 and 11 were then designed (Figures 6-7), functionally checked with the PS1 virtual articulator and milled.
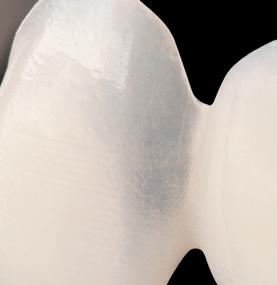
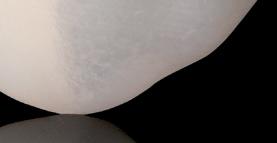
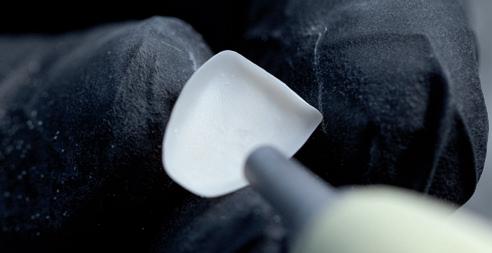
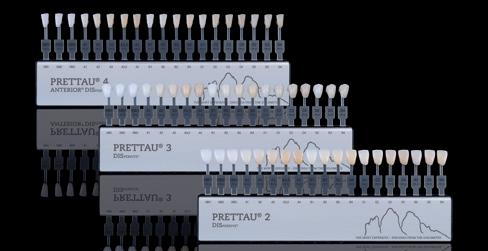
In a previous phase at the dental clinic, using the specially developed Zirkonzahn Shade Guide Prettau ® Line (Figure 8) – composed of monolithic zirconia sample teeth reproducing the final restoration result – Prettau 4 Anterior® Dispersive® zirconia was selected as the most suitable material for the restoration.
The material, characterised by particularly high translucency, is already provided with a natural colour gradient.
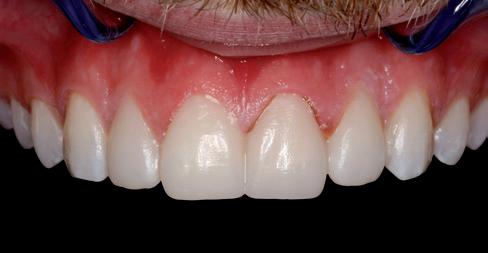
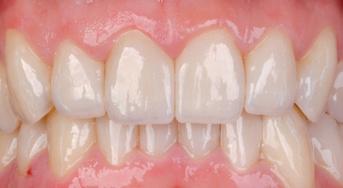
However, for an even more individual aesthetic result, the veneers were manually characterised with stains and minimally veneered with Fresco Enamel Fluo Ceramics.
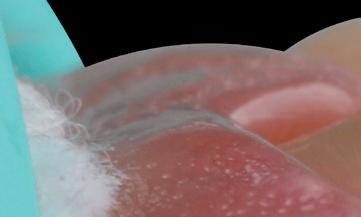
Both try-in and final cementation steps were extremely demanding procedures: no major forces had to be applied to the veneers to avoid the risk of (invisible) cracks or fissures on the surface, which would lead to fractures at later times. During tryin, aesthetic, mechanical and functional aspects were controlled according to a checklist, using different materials (water-soluble try-in paste, glycerine, GC Fit Checker, occlusion foil and Shimstock foil). Finally, veneer preparation as well as adhesive cementation was carefully carried out using the proven technical and clinical Prettau Skin® protocol developed by Zirkonzahn (the working protocol provides tested parameters from cleaning and isolation of the working area, tooth and veneer preparation, bonding preparation and application to curing (Figures 9-10).
Cementation was performed according to the Zirkonzahn tested procedure using Estecem II paste (based on Zirkonzahn research and studies, Estecem II cement by Tokuyama Dental Deutschland GmbH is currently used for this working protocol. Regardless of which cementation paste is used, it is crucial that MDP is included at least in the primer to ensure a chemical bond to zirconia).
International courses on Prettau Skin are available, where dental technicians and dentists are taught the complete workflow using the correct parameters, focusing on both clinical and technical procedures.
For more information, visit www.zirkonzahn.com.
Figure 5.
Figure 7.
Figure 9.
Figure 6.
Figure 8.
Figure 10.
PRETTAU® SKIN®
PRETTAU ® 3 DISPERSIVE ® : ZIRCONIA WITH COLOUR, TRANSLUCENCY AND FLEXURAL STRENGTH GRADIENTS
ULTRA-THIN ZIRCONIA VENEERS MADE OF PRETTAU ® 3 DISPERSIVE ® ZIRCONIA
Restoration made for a young patient suffering from caries, missing restoration of teeth 46 – 47 and different composite fi llings.
The planned treatment consisted of minimally invasive preparation of tooth enamel and tooth restoration with Prettau® Skin® zirconia veneers with a minimum wall thickness of 0.2 mm. Based on the patient-specifi c model articulation and on the selection of a digital Monsons Sphere with Ø 240 mm, the areas to be prepared in the occlusal region were highlighted and a preparation guide for the upper jaw was created.
After determining the centric relationship, it turned out that, due to the new occlusal height, the canine 23 needed a palatal support surface to optimise function. Therefore, a vestibular and a palatal veneer were designed to avoid overly invasive preparation of the natural tooth. During cementation, the vestibular veneer was applied first, followed by the palatal one, using the “Sandwich technique”.
Dr. Francisco García Torres – Mexico Zirkonzahn Education Center Brunico – South Tyrol, Italy
ONLINE CPD CENTRE
Answer the questions online at www.dentalcommunity.com.au
To retrieve your FREE Dental Community Login, Call (02) 9929 1900 or email joseph@dentist.com.au
Question 1. What is a key feature of the monolithic denture approach described in the article?
a. The denture base and teeth are printed separately and later joined.
b. The prosthesis is printed as a single unit combining teeth and base.
c. The denture is manufactured using only milling techniques.
d. The teeth are made of porcelain while the base is 3D printed.
Question 2. Which 3D printer and resin were used for fabricating the monolithic denture?
a. Formlabs Form 3 with NextDent Denture 3D+ resin.
b. SprintRay Pro with Keystone KeyPrint resin.
c. Asiga MAX UV with Detax FreePRINT Temp resin.
d. Anycubic Photon with Elegoo resin.
Question 3. What was the primary purpose of cutting back the anterior teeth on the printed denture?
a. To make room for porcelain inlays.
b. To allow space for mechanical attachments.
c. To prepare for enamel layering using composite.
d. To reduce occlusal height.
Question 4. Which material was used to seal the composite build-up on the denture?
a. Denture acrylic
b. Optiglaze from GC
c. Flowable resin cement
d. Bis-acryl varnish
Question 5. According to the article, what is a potential benefit of using a simplified workflow without enamel cutback?
a. Better retention of the denture.
b. Stronger mechanical properties.
c. Reduced overall production time.
d. Improved compatibility with metal frameworks.
INSTRUCTIONS:
Question 6. What is the main challenge in using a single material for all types of dental restorations?
a. Lack of available materials.
b. High cost of manufacturing.
c. Balancing strength, masking and translucency.
d. Incompatibility with digital systems.
Question 7. Why is monolithic fabrication often preferred in implantsupported restorations?
a. It allows for quicker tooth whitening.
b. It enables color changes after cementation.
c. It maximizes stability and minimizes fracture risk.
d. It is easier to combine with resin materials.
Question 8. What distinguishes VITA YZ MULTI TRANSLUCENT from other zirconia materials?
a. It requires no sintering process.
b. It combines 2 yttria-stabilised zirconia formulas for gradient properties.
c. It can be used for removable dentures only.
d. It contains no yttrium oxide.
Question 9. In the patient case described, what was the main complaint of the 67-year-old woman?
a. She disliked the shape of her incisors.
b. Her lower teeth were too translucent.
c. She was uncomfortable with her removable denture.
d. She had frequent allergic reactions to dental materials.
Question 10. How was the final high-gloss finish of the overdenture achieved?
a. By applying dental wax and heating.
b. Using porcelain glaze and hand-polishing.
c. With VITA AKZENT LC GLACE SPRAY and polishing with VITA Polish Cera.
d. By painting with enamel paints and UV curing.
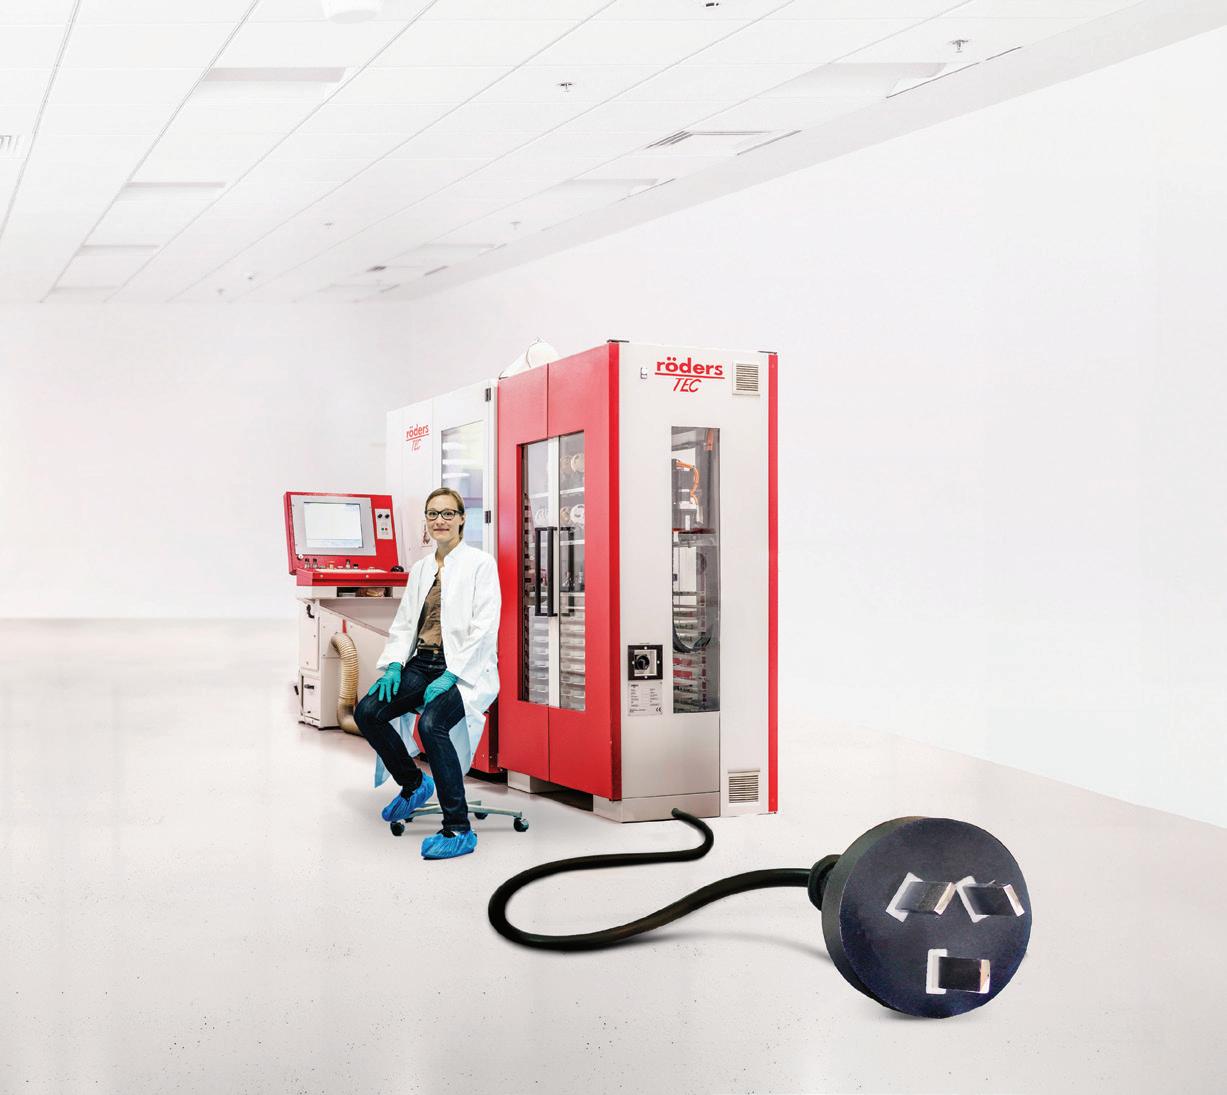
that easily plug into your business. State-of-the-art services
Whether you need assistance with complex cases or during busy periods, just Plug in Dentmill, our purpose-built milling centre based right here in Melbourne. Using the latest CAD/CAM technology and Australia’s only Röder’s High-Speed Dental Milling Machines, Dentmill can seamlessly manufacture a variety of top-end quality dental products for your lab.
and learn more
Titanium Zirconia substructures
Cobalt chrome 3D resin printing Glass ceramics PMMA materials
Scan
on how to plug in Dentmill
prosthetic | techniques
Characterising digital dentures
By Terry Whitty
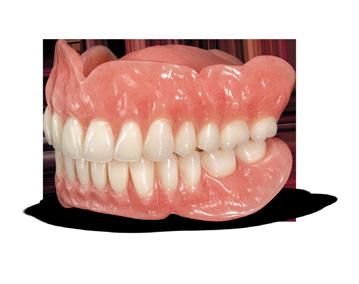
Digital dentures are just starting to nudge into the mainstream, with more and more people looking at this solution as a real alternative to conventional manufacturing. It’s true that according to the latest statistics, only about 5% of the world’s dentures are digitally manufactured, but it has to be expected in the next 5 years this will change dramatically. The introduction of new materials and more acceptance by mainstream manufacturers, together with the rapid decline of skilled technicians, being catalysts.
Digital dentures can be milled, printed or a hybrid of both and pre-manufactured “carded” teeth can also be integrated to enhance aesthetics. Clinically, it’s largely the same, but new digital workflows can improve the process without cutting corners, enhancing the whole clinical experience and reducing chair time.
We all want the patient to have the best outcome but sometimes this is not a reality for many reasons, mostly economics. You can’t have champagne on beer money, however there is no reason you cannot have a functionally correct and aesthetically pleasing outcome with digital dentures. Don’t also assume digital dentures are a “cheap” alternative, this is far from the case, though some digital dentures can have real economic benefits that ultimately can be passed onto the patient.
Milled dentures use the materials we are already familiar with, namely PMMA and composite resins, so they can look very similar aesthetically to handmade dentures if made well. Hence, most people don’t have issues with milled dentures. Sure the equipment may be an investment, but you will get great results.
Printing dentures, unfortunately and unfairly, in my opinion, have had stigma attached to them. Two of the biggest arguments against digitally printed dentures are strength and aesthetics. Strength may have been an issue in days gone by but now with the introduction of generation-3 materials and the correct understanding of post processing techniques, strength is not really an issue.
A correctly printed denture in the mouth will stand up to the day-to-day forces of mastication without issue. Will they bounce on a tiled bathroom floor? Maybe not, but they should have as good a chance as a conventional denture and lets face it, if it’s a disaster, it’s far easier to print a new denture from an archived file than to make a conventional denture from scratch. As far as aesthetics is concerned, if you fully print a denture, don’t expect it to look like a high end handmade denture. It can look very good and better in fact than a poorly made conventional denture with budget off-the-shelf teeth.
There are ways to make printed dentures look even better if you are so inclined, so lets look at the ways we can do this.
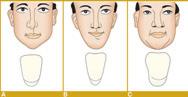
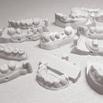
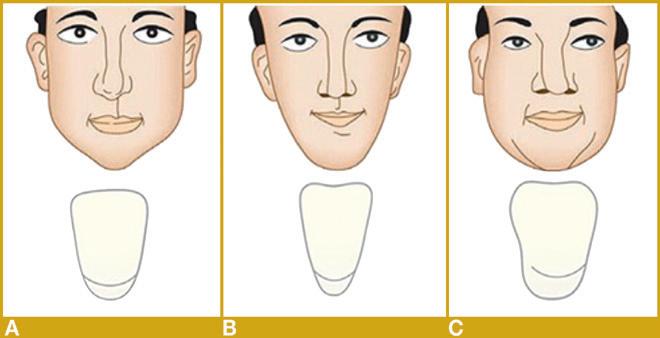
Figure 1. Face shape meets tooth shape or at least it’s somewhere to start. Other things affect tooth shape including gender and ethnicity.
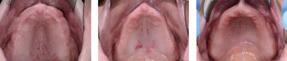
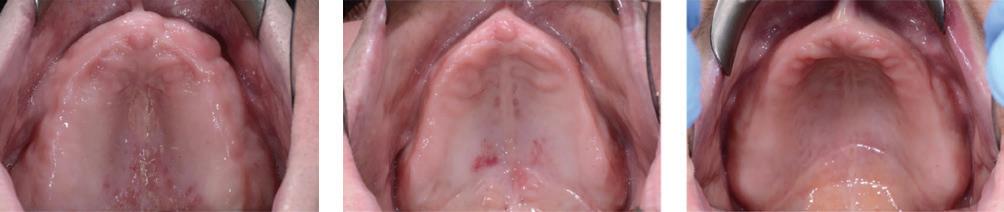
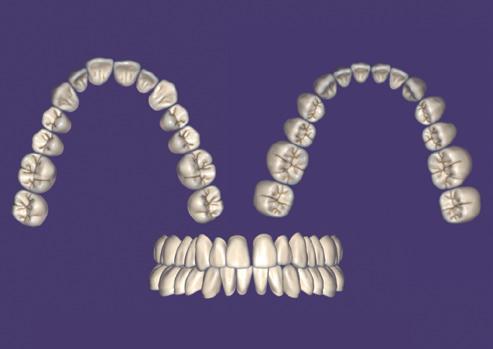
Figure 2. Some people also evaluate the ridge shape to get an idea of the tooth shape required.
There are two main things you can characterise on a digital denture - the teeth and the base.
1. Shape and size
Selecting the correct shape and size of teeth is a very important aspect when designing dentures, especially in CAD software. In the design stage, you’re presented with unlimited choices of teeth libraries, sizes and moulds. If we look back to our learning days, we’re all familiar with the three main classes of tooth shapesSquare, Tapering and Ovoid. This may seem a little outdated but these fundamental groups are still rel evant as a starting point. It was also thought that the face shape helped us decide the shape of tooth, again being in the three groups and this remains true to a certain point as is the shape of the upper edentulous ridge.
Tooth shape is very important, especially as we have the ability to adjust the shapes of individual teeth in software, so it’s good to be mindful of designing with the right tooth shape and size.
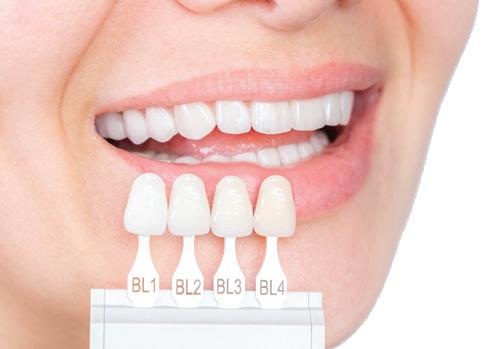
2.Shade
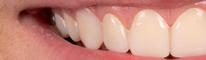
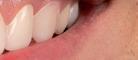
hade is a very contentious issue. I’m sure we would all like to design dentures that look natural and age or complexion matching. Unfortunately, nowadays white is youthful so lots of patients want this. Interestingly, VITA shade A3, which we all know is the average shade colour of natural teeth, is not white at all but somewhat reddish brown. Of course, we have to try and convince patients of this. It’s not so easy; even harder now since the introduction of bleach shades! Wherever possible, try and go for a natural shade; if not, just give the patient what they want as it saves headaches later.
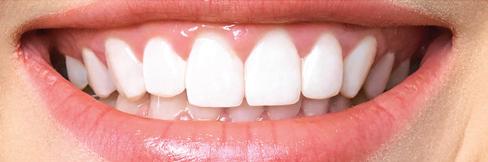
Figure 4. Bleach shades! A headache or a help - it’s your choice.
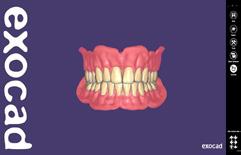
Figure 6. There is a lot of characterisation you can do with tooth arrangement, this is just a subtle example in exocad.
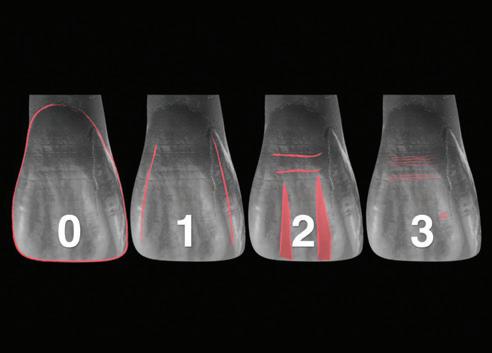
Figure 7. Outline silhouette, Primary, Secondary and Tertiary anatomy of the tooth.
Figure 5. Some love the look of a white youthful smile, but it can look unrealistic.
Figure 3. Tooth size is very important for planning dentures.
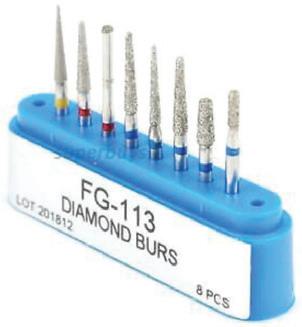
Figure 8. Diamond burs.
Figure 9. Ready to trim anatomy.
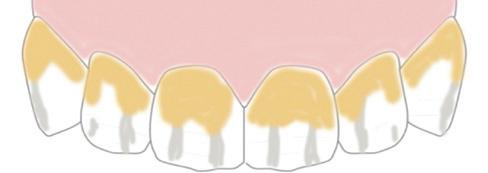
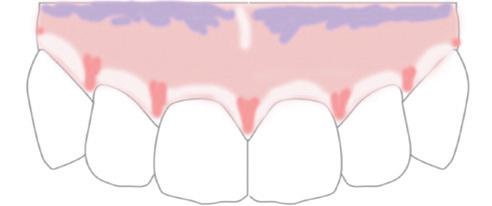
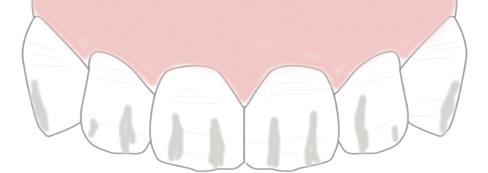
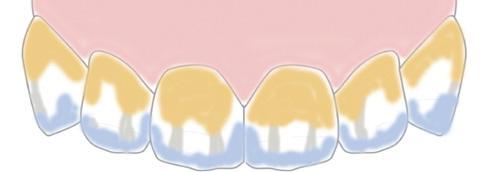
Figure 11. The cervical areas can be darkened because naturally, as you reach the CEJ, the enamel thins and more of the darker dentine comes through... remember to use the colour sparingly. You can use one of the “Plus” stains.
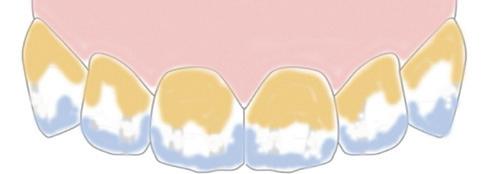
Figure 13. White can be added as well to break up the colour.
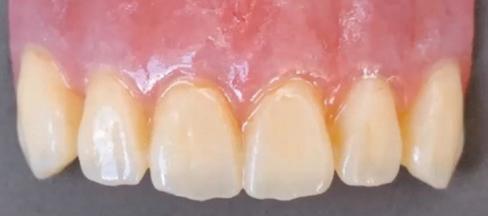
15. Results.
17. Above the gingiva using a white and ivory.
Figure 10. Trimming of anatomy guide.
Figure 12. Adding blue, violet and grey to the incisor to give an illusion of translucency.
Figure 14. You can add effects like cracks and calcification areas.
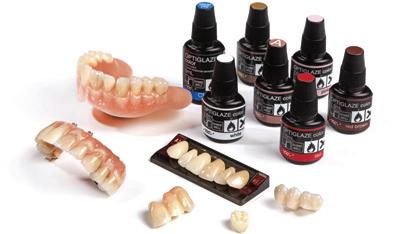
Figure 16. GC Optiglaze can be used on the teeth and the base of the denture.
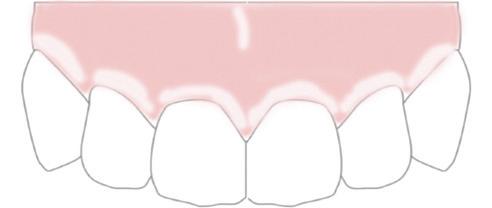
18. Red for interdental papilla.
Figure 20. Adding effects such as capillary lines.
Figure
Figure
Figure 19. Purple and lavender.
Figure
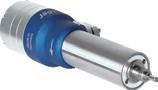
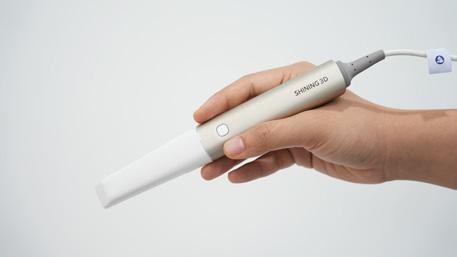
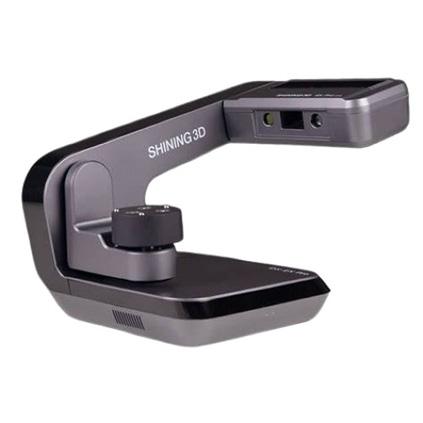
The New ELITE Intra Oral
The New ELITE Intra Oral
The New ELITE Intra Oral
Scanner from Shining 3D uses patented Intra Oral
The New ELITE Intra Oral
Scanner from Shining 3D uses patented Intra Oral
Photogrammetry Technology to be the most accurate scanner available.
Scanner from Shining 3D uses patented Intra Oral
Scanner from Shining 3D uses patented Intra Oral
• Edentulous Scanning for Dentures !
• Partial Denture Scanning
• Impression Scanning
• Edentulous Scanning for Dentures !
• Partial Denture Scanning
• Duplicate Denture Scanning
• Impression Scanning
• Scan All On X Cases Accurately
• Duplicate Denture Scanning
• Suitable for all Intra Oral Scanning
• Scan All On X Cases Accurately
• Now Mac or Windows Compatible
• Suitable for all Intra Oral Scanning
• Now Mac or Windows Compatible
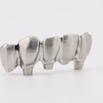
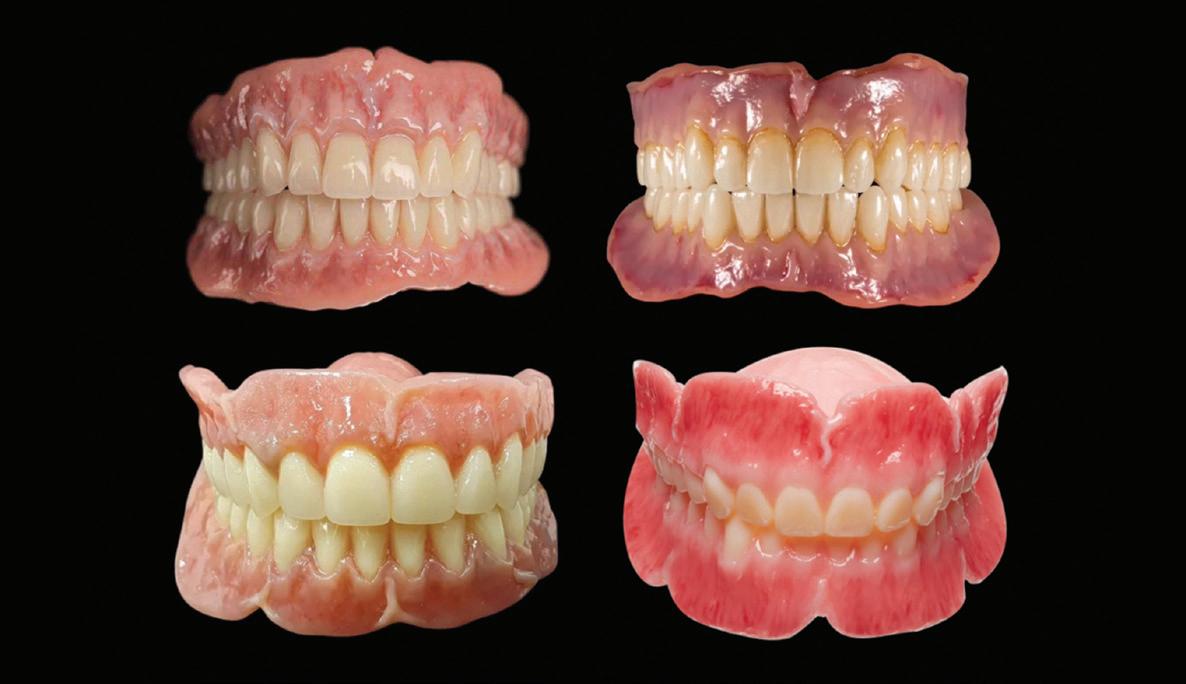
21. Four dentures with four completely different staining techniques. None are wrong as its often all about personal preference and matching the patients needs.
3. Arrangement
Straight teeth look great, however, we all know it’s not really the norm to have perfectly straight teeth. There are many ways we can change the arrangement of teeth to make them look natural but still amazing. Don’t be afraid to try it, again as long as the patient agrees. It’s amazing what a little tweak to twist a tooth can do or if you’re really adventurous, you can add a lot of character to a setup by custom tooth arrangements.
4. Texture
Often denture teeth will come with very little texture, especially if printed. This can lead to a lifeless look as the light affects are not optimised without an uneven surface. Don’t be afraid to get your diamond bur out and add some texture. Anterior teeth, for example, have primary anatomy; secondary anatomylarge grooves dividing the lobes and some large horizontal grooves; and tertiary anatomy - small horizontal grooves over the surface of the teeth. There are some good articles online about this, so you may like to study these and start texturising. This is even more important before using staining and effects.
U5. Staining and effects
sing a product like GC’s Optiglaze, you can easily and quickly start to make printed denture teeth “pop”. In fact, you can use Optiglaze on milled out carded teeth too! Some advice - a little goes a long way and less is more. Refer to Figures 9-20 for a general guide on staining teeth. This is not definitive, just a starting reference and those of you with the Leonardo Da Vinci gene will do a great job at characterising with Optiglaze. Of course, there are many brands of stain on the market but Optiglaze is a great place to start and it’s so easy to use.
Denture bases
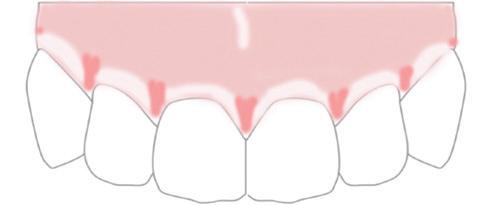
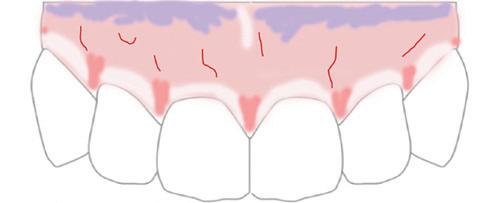
Again, denture bases are a contentious area as everyone has their own idea of what a base should look like. Incidentally, it’s a very sore point that printed bases don’t have the colour of heat cured PMMA bases. The truth is, there is a plethora of shades of 3D printed denture bases and one to suit everybody if you just go looking. Remember vulcanite? Nobody complained about that denture base material and it was totally the wrong colour! Mostly you don’t need to stain and characterise bases, however for
challenging cases and really high smile lines, Optiglaze can do a great job of camouflaging the base plate of the denture to give it some sort of like-like presence.
With planning and forethought, digital dentures can look highly aesthetic. Remember to always keep a perspective of what you’re trying to do: is it a temporary denture, an immediate denture or something planned to be more long term. Then you will be able to adapt and choose the correct digital manufacturing process to suit the need. Don’t be afraid to jump in, digital is here to say!
About the author
Terence Whitty is a well-known dental technology key opinion leader and lectures nationally and internationally on a variety of dental technology and material science subjects. He is the founder and owner of Fabdent, a busy dental laboratory in Sydney specialising in high tech manufacturing. Using the latest advances in intra- and extra-oral scanning, CAD/CAM, milling, grinding and 3D printing, most specialties are covered including ortho, fixed and removable prosthetics, computerised implant planning and guidance, TMD, sleep appliances and paediatrics.
Figure
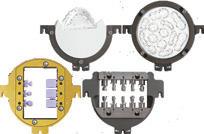
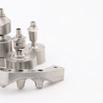
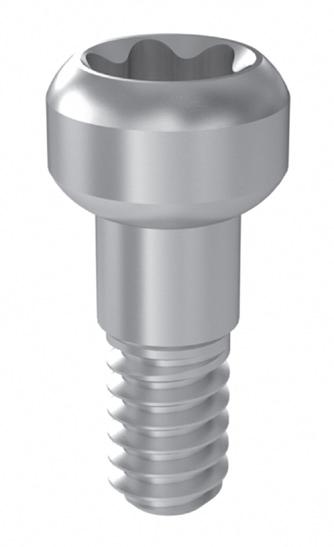
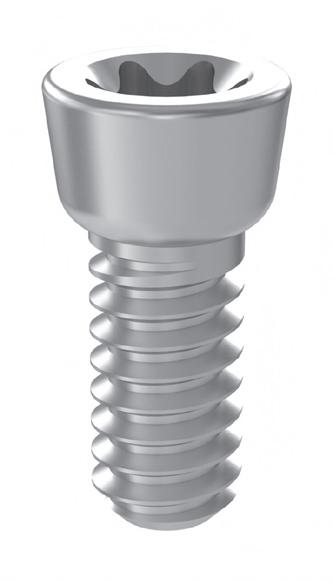
Next Generation Implant Screws - PMMA or Resin direct to MUA
Powerball is specifically designed for screwing PMMA and printed resin direct to the multiunit abutment. The Powerball screw has a 2.6mm screw head with parallel sides and a unique radius on the screw head, optimised to distribute stress through the polymer.
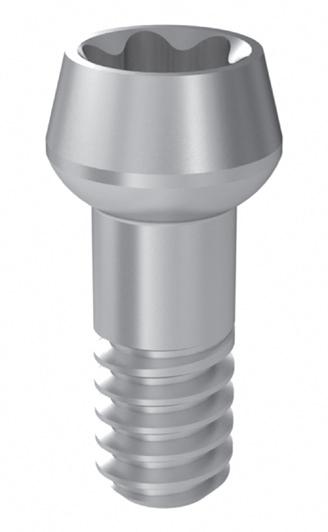
Speedball™ Vortex™
Speedball is specifically designed for screwing PMMA and printed resin direct to the multi-unit abutment. The Speedball screw has a 2.6mm screw head with wine glass sides and a unique radius on the screw head. It has been designed to work with all screws from M1.4 through to M2.0.
Vortex, aka LA VIS screw, is specifically designed for screwing PMMA and printed resin direct to the multi-unit abutment. The Vortex screw has a 2.2mm screw head with tapering sides and a unique radius on the screw head. It is optimised to distribute stress through the polymer.
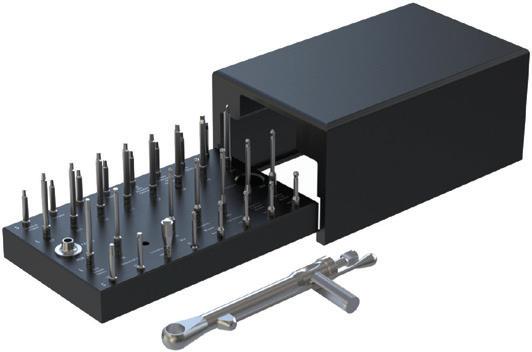
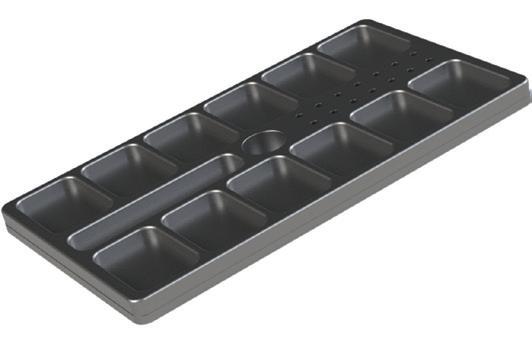
Anodised to Aerospace
Dimensions: 85mm x 150mm Weight: 165g
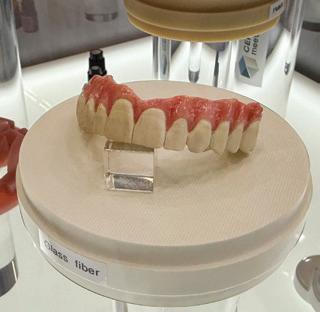
Zirconia for every occasion: Load capacity and aesthetics exactly where you need them!
By Lukas Wichnalek, Norbert Wichnalek, Arbnor Saraci and Patricia Strimb, Highfield.Design, Augsburg, Germany with Dr Bayer, Augsburg, Germany
Is it truly possible for one single material to fulfill all user requirements? That’s a good question, because treatments such as fixed, wide-span and implant-supported restorations, for example, present completely different challenges in the different restoration regions. In terms of material, it is a balancing act between strength, masking and natural translucency. Dental technicians often wish to combine two materials into one in the hope of solving conflicting requirements in the same restoration or treatment.
OThe situation up to now
f course, it is possible to introduce another material to the tertiary framework during the veneering process. This gives the bridge structure the robustness it needs, while also meeting the aesthetic requirements. However, it is also clear that this type of individualisation on implants that are rigidly anchored in the bone involves an increased risk of chipping and fractures. For this reason, at least the static and dynamic functional areas need to be fabricated homogenously from a single monolithic cast.
TThe search for a multi-functional material
he ideal material would have to fulfill several requirements:
Abutments, for example, would need to have a high degree of flexural strength to withstand the unbuffered masticatory forces of the rigidly anchored implants. At the same time, metal abutments also need to be masked.
Monolithic fabrication offers the advantage of maximum stability, thereby minimising the risk of fractures and chipping. However, aesthetics should not be neglected in favour of sheer strength. This is especially true with monolithic restorations, where the fundamental shade accuracy of the material is essential in combination with an integrated shade and translucency gradient from cervical to incisal or occlusal.
It’s time to face these challenges head on, although it is hard to imagine that this is even possible. But one thing is clear: Whoever succeeds can do anything!
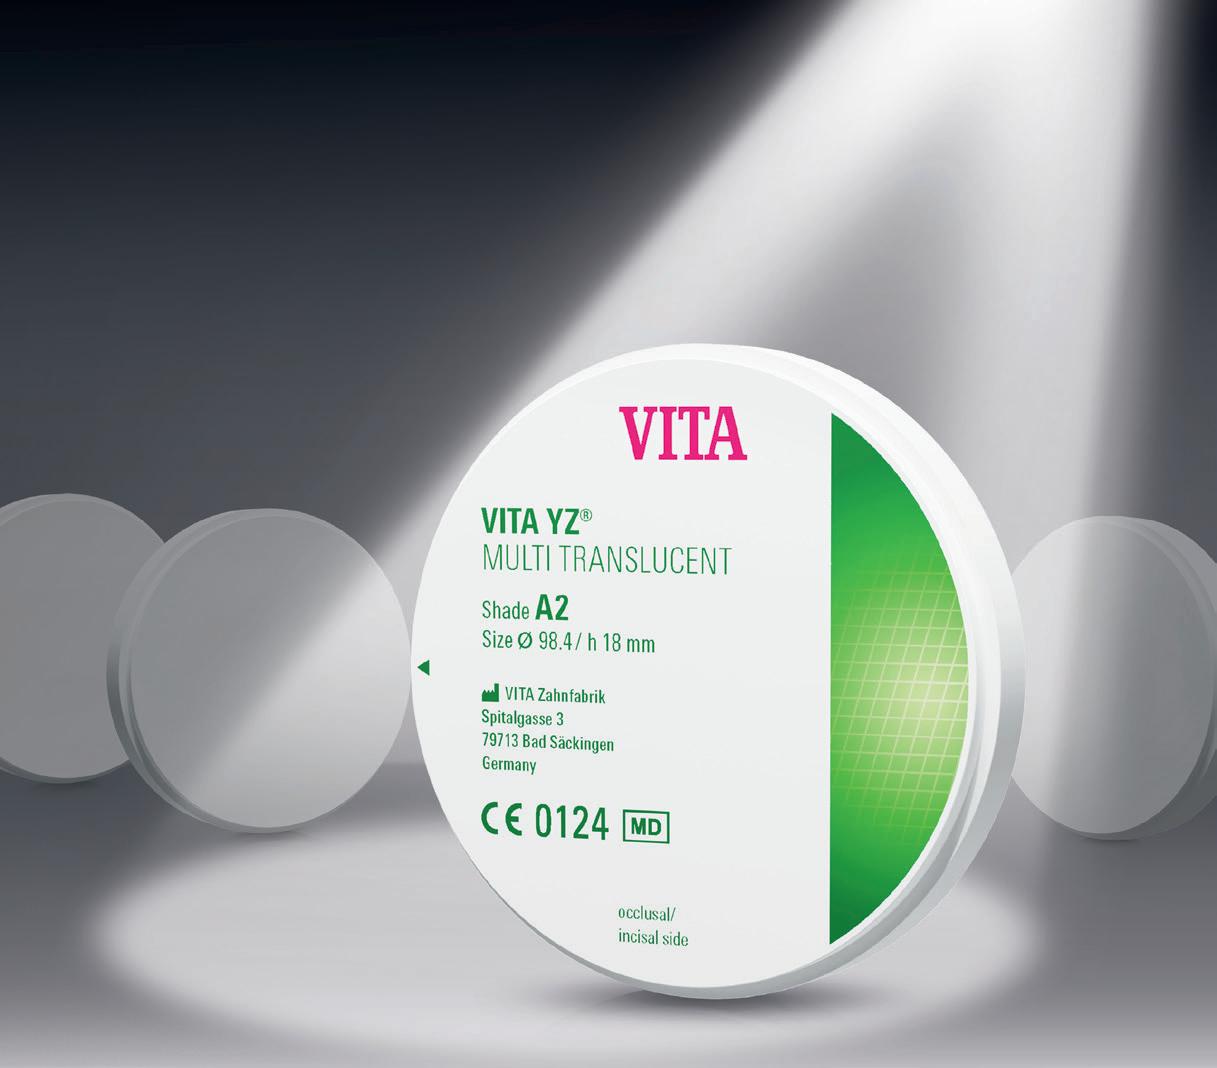
Two formulas, one material
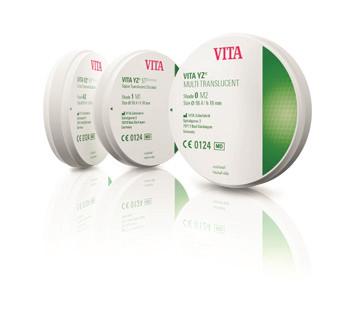
The latest generation of zirconia, VITA YZ MULTI TRANSLUCENT, combines the best of two proven material formulas: the more opaque and rigid 4 mol% (cervical) and the more translucent and less rigid 5 mol% (incisal) yttrium oxide-stabilised tetragonal zirconia.
These two material formulas blend seamlessly into one another, providing not only a natural, continuous translucency gradient from the neck to the incisal area, but also a flexural strength that satisfies the region-specific requirements. In other words: In the dentine and cervical areas, where the forces acting on crowns and bridges are the highest, VITA YZ MULTI TRANSLUCENT offers flexural strength values of up to 1200 MPa and higher opacity to mask discoloured dentine or metallic abutments. Moving toward the incisal area, a natural translucency gradually comes to the fore. The result is a true multi-functional material created from two material formulas.
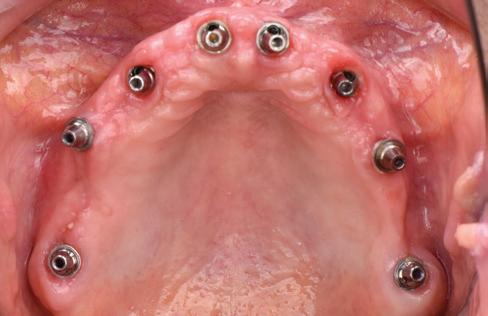
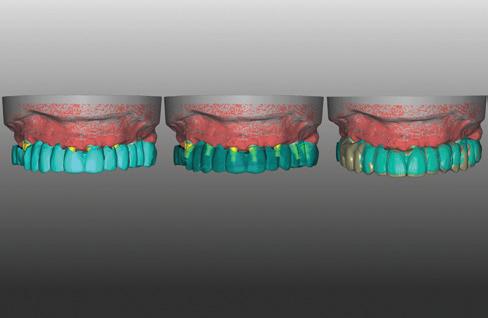
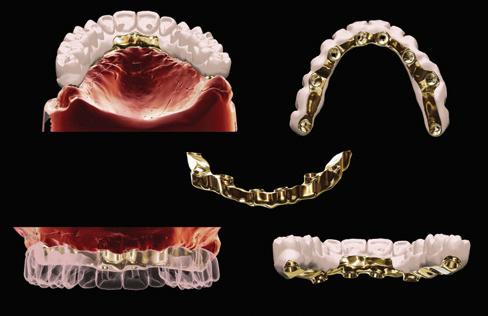
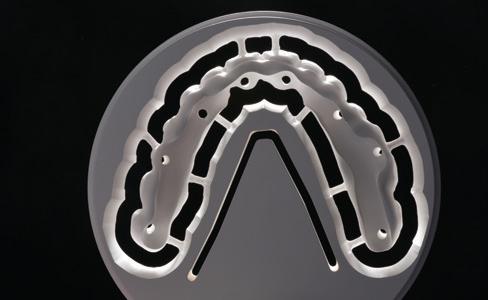
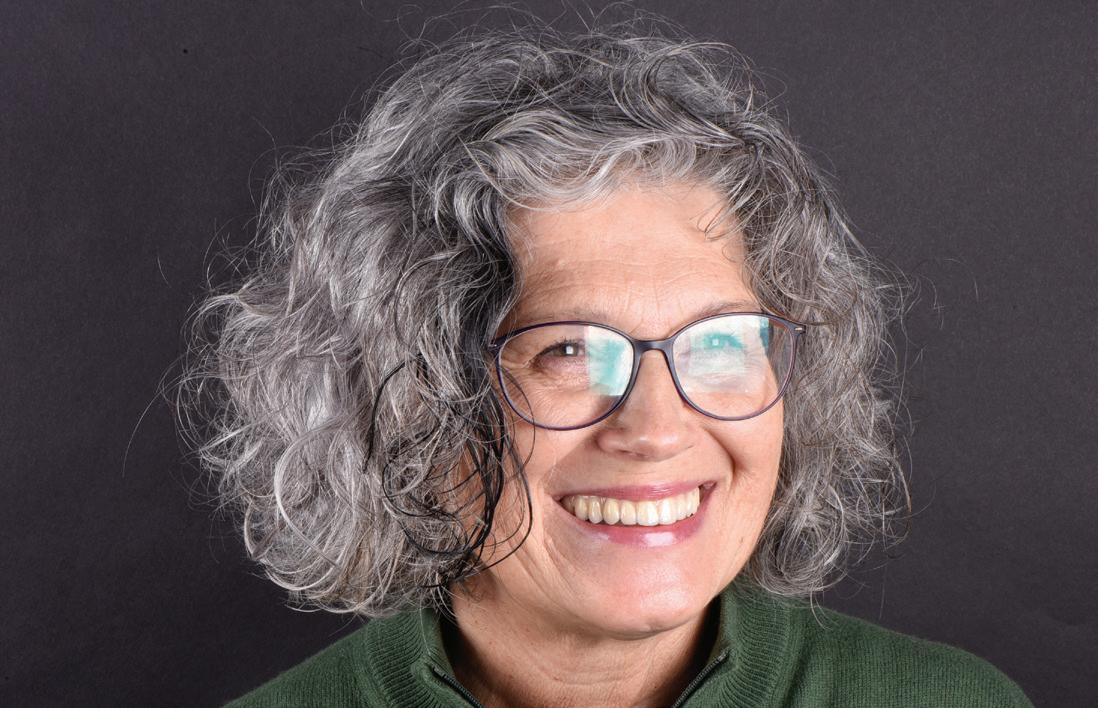
Patient case with implantsupported restoration (Figures 1-2)
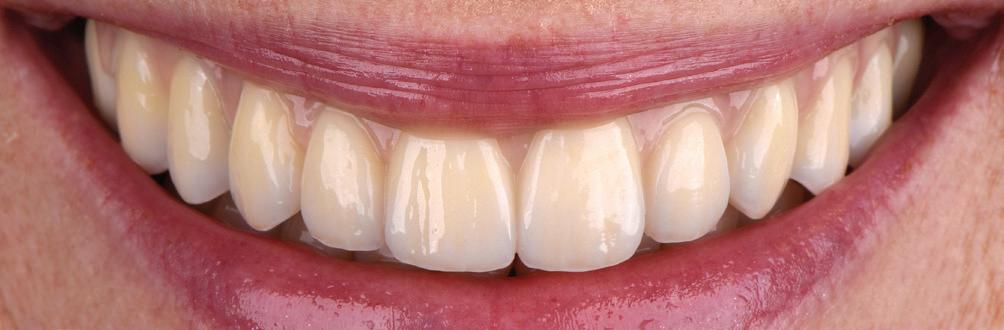
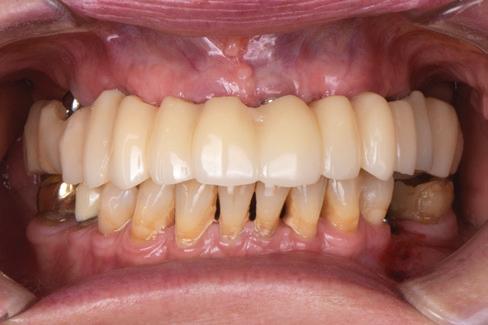
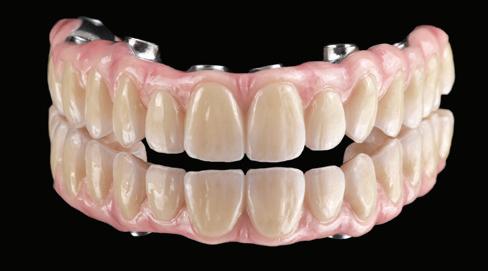
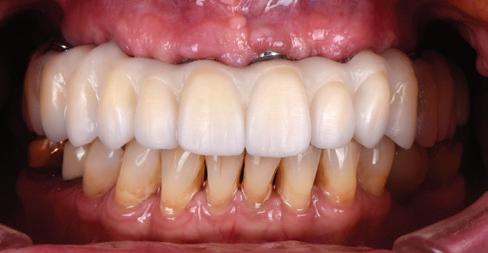
A67-year-old female patient visited the practice because she wanted to have a fixed restoration in her edentulous maxilla. She was not comfortable with the hold or the comfort of her current removable full denture. She did not like the appearance of her lower jaw and wanted the gap in region 35 to be closed. As part of the overall restoration, eight implants were to be placed in her upper jaw and one implant in region 35 in order to provide fixed restorations in these areas. The next step was to have the front teeth in the lower jaw cosmetically treated with veneers and the side teeth stabilised with crowns. The following article focuses solely on the fixed restoration in the upper jaw that was placed first.
Figure 1. Initial situation with the integrated implant-supported temporary restoration in the upper jaw.
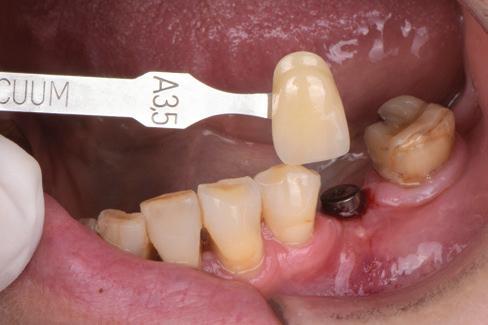
Figure 2. After determination of the tooth shade, the decision was made to make the upper jaw lighter.
Immediate-loading fixed implants (Figures 3-10)
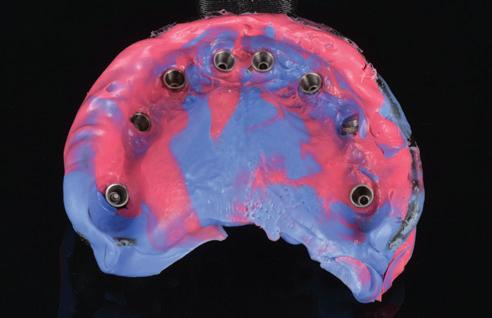
After placement of the eight implants (SIC invent AG, Switzerland) in the upper jaw and immediate-loading with a fixed long-term temporary restoration, the permanent denture was to be made after a healing period of four months. The aesthetics, occlusion, function and phonetics in the biodynamic environment of the mouth were also to be tested in advance with an implantsupported mock-up on the final bar. An open tray impression was taken of the situation in order to fabricate a basis for working
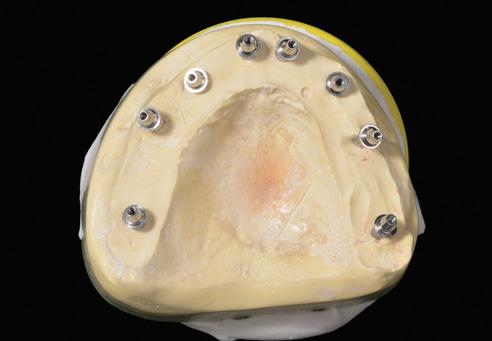
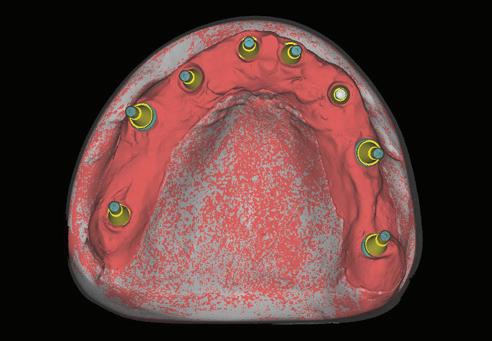
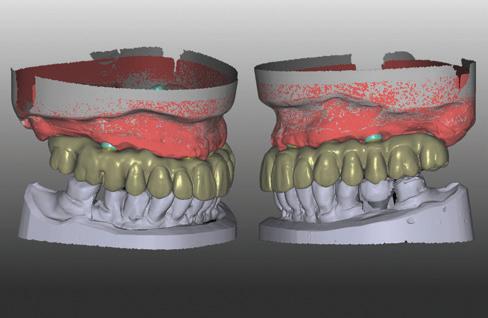
with impression posts screwed on. After the master model was fabricated, the SIC Multi-Unit Abutment System with angled abutments was used as a primary framework for the respective prosthetic insertion. The situation was scanned (Medit T710, Medit, South Korea) and the dentures were designed in one cast in the exocad software. The Highfield.Design tooth database served as the template here. The data set was then transferred to the B4D iBar module of the Blenderfordental software (Blenderfordental, Australia) and split into a bar construction and an overdenture there.
Figure 3. Situation after the 8 implants in the upper jaw had healed.
Figure 5. The completed master model without gingival mask with implant analogs.
Figure 7. The overall design was carried out using the Highfield.Design tooth database.
Figure 4. Open tray impression for fabricating the master model.
Figure 6. The virtual design model in the exocad software.
Figure 8. The final overall design in articulation in the exocad software.
subtractively manufactured from a
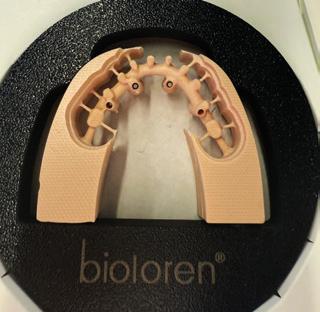
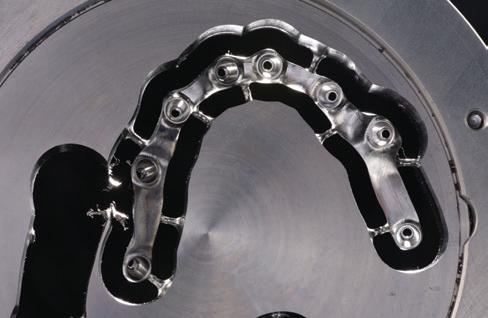
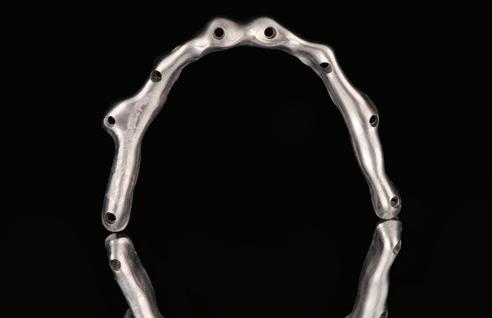
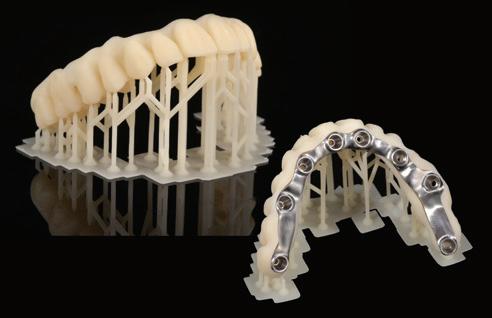
Bar construction and temporary restoration (Figures 11-15)
The final titanium bar construction could then be subtractively milled from the Starbond Ti5 Disc blank (S&S Scheftner, Germany) using the imes-icore CORiTEC 350i PRO milling unit. At the same time, the implant-supported mock-up made of GR-21 Try-in Resin in shade A2 (pro3dure medical, Germany) was additively manufactured with the ELEGOO Saturn 2 printer
ceramic | TECHNIQUES
12. The titanium bar, cut out of the disc and finished.
Figure 14-15. The bar and implant-supported 3D-printed mockup fit together seamlessly.
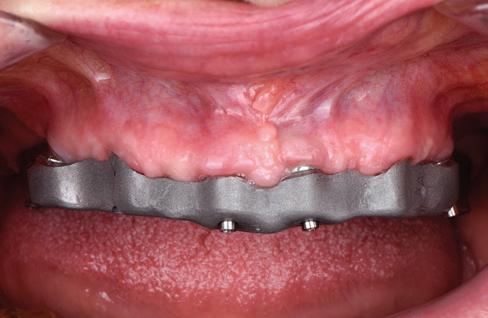
(Elegoo, China). Both fit together according to the key-lock principle. After the two prosthetic components had been prepared, the bonding surfaces were conditioned with VITA VM LC PRIMER, bonded to each other using the cold polymer VITA VM CC A2 and integrated for three days and the function, occlusion, aesthetics and phonetics were tested as planned in a biodynamic environment. After receiving positive feedback from the practice, work could begin on producing the permanent overdenture from VITA YZ MULTI TRANSLUCENT.
Figure 9. In the B4D iBar module of the Blenderfordental software, the bar and mock-up were split.
Figure 11. The final bar was
titanium blank.
Figure 13. The final titanium bar during the clinical try-in in the patient’s mouth.
Figure 10. The two designs before being imported into the respective CAM software.
Figure
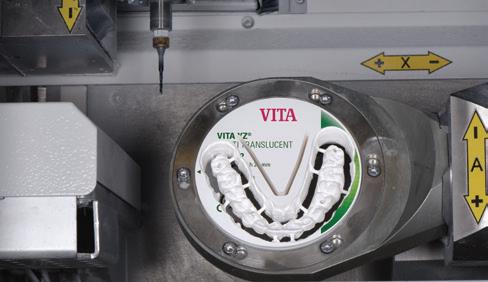
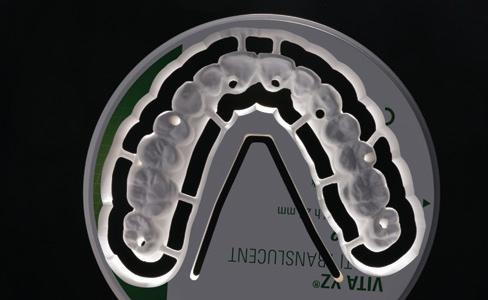
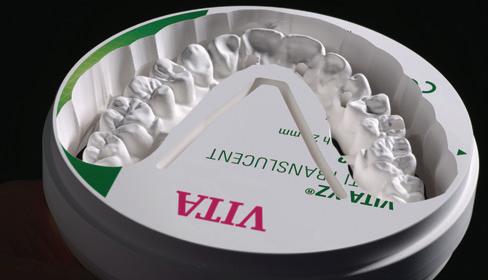
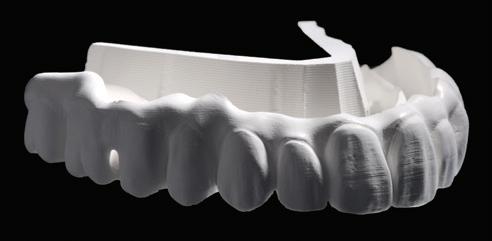
Milling, infiltration and sintering (Figures 16-23)
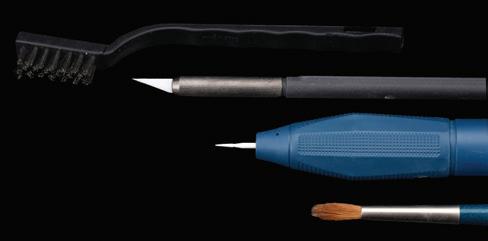
The milling task for the CAD/CAM-supported fabrication of the permanent overdenture made of VITA YZ MULTI TRANSLUCENT A2 was started. After the subtractive workflow process, the restoration was cut out of the disc, except for the lingual
support region. The final details of the micromorphology and the texture were then incorporated during the chalk stage. All that was needed here was a zirconia milling cutter, a zirconia scalpel, a stainless steel wire brush and a paint brush. The work was carried out under a lamp to create contrasts with the play of light and shadow, allowing the progress of the work to be checked.
Figure 17. The precision of the micromorphology directly after the milling process.
Figure 19. The zirconia VITA YZ MULTI TRANSLUCENT offers absolutely precise and stable marginal areas.
Figure 16. The permanent overdenture was made of the zirconia VITA YZ MULTI TRANSLUCENT.
Figure 18. The positioning of the screw channels in the occlusal view.
Figure 20. The texture was developed in the chalk stage.
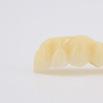
Figure 22. Overdenture teeth already finalised after sintering.
Figure 21.Chalk stage before infiltration and sintering.
Figure 23. Result after removing the lingual support structure.
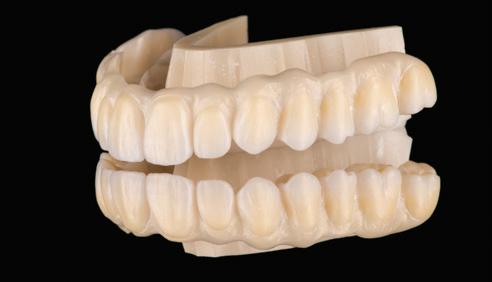
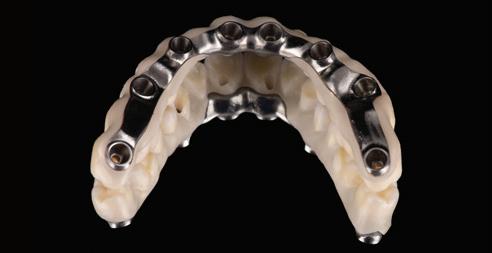
Gingival individualisation and finishing
After sintering, the mucogingival areas were reproduced with the universal veneering ceramic VITA LUMEX AC, with only three different gingiva materials required to visually simulate the patient’s anatomy. The papilla areas were given their natural appearance using VITA LUMEX AC GINGIVA rosewood, while GINGIVA nectarine was used for the alveolar and cervical regions. The remaining areas were completed with GINGIVA light rose. After the first firing, the entire veneering area was given an homogeneous coating of translucent ENAMEL Clear to give the underlying model preparations a deep, three-dimensional effect.
Implemented
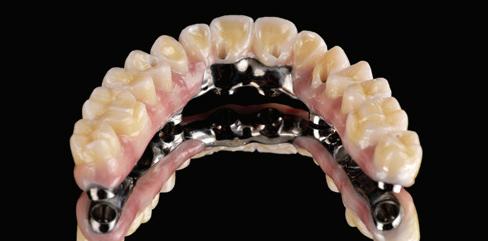
aesthetics (Figures 24-30)
As all the basic aesthetic requirements for simulating natural enamel had already been implemented in the zirconia blank, only minimal characterisations were carried out in the tooth area. The VITA AKZENT Plus staining system was used to characterise cervical and occlusal depths with BODY STAINS 03 (orange) and incisal areas with EFFECT STAINS 12 (gray-blue). The overdenture was finished with an homogeneous application of VITA
as well as a high-gloss
a cotton buff and VITA Polish Cera. After transfer, the additive mock-up was removed from the permanent bar. This was followed by conditioning the bar and the overdenture through sandblasting, plasma treatment and the universal VITA VM LC PRIMER. Finally, the two prosthetic components were connected using the composite cement VITA ADIVA F-CEM A2 Universal.
AKZENT LC GLACE SPRAY,
polish with
Figure 25. The overdenture and titanium bar during the clinical try-in.
Figure 27. The successful occlusal morphology without any characterisation after sintering.
Figure 24. The permanent overdenture also fit precisely on the titanium bar.
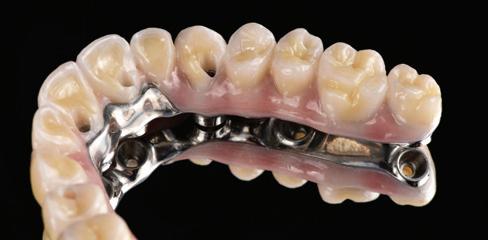
Figure 26. Lingual view of the completed implant-supported work.
Figure 28. The monolithic tooth material appeared lifelike in the aesthetic zone.
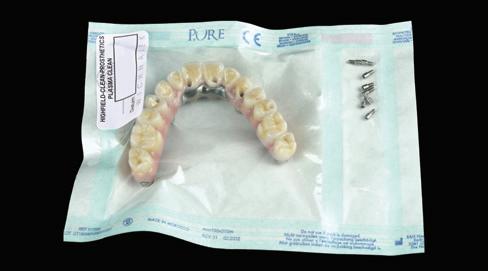
Figure 29. The restoration was sent to the practice in a plasmasterilised and shrink-wrapped package.
Figure 30. In situ before the screw channels were closed.
ceramic | TECHNIQUES
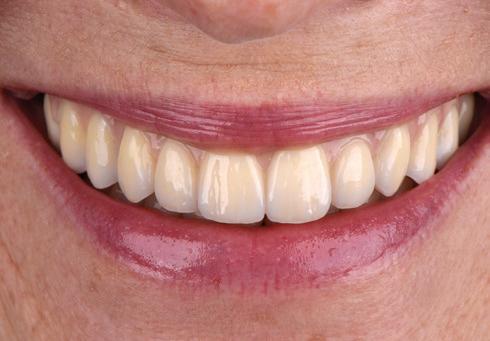
Integration and conclusion (Figures 31-33)
After the work was screwed in and the screw channels were sealed with Teflon tape and composite, the result was a highly aesthetic restoration that immediately put a natural smile on the patient’s face.
VITA YZ MULTI TRANSLUCENT proved to be an inventive zirconia made from two different proven material formulas that merge seamlessly into one another.
The zirconia provided reliable masking directly on the secondary metal framework and was more robust, and then developed its full aesthetics with increasing translucency towards the incisal area. In the case described, no individualisation or characterisation of the teeth was necessary to achieve highly aesthetic results and to meet the patient’s expectations.
VA material balancing act
ITA YZ MULTI TRANSLUCENT simulates the tooth substance so naturally and true to colour with the VITA shade standard in combination with the integrated shade gradient that users can concentrate fully on morphology and texture during dental reconstructions. Of course, this is not the first time that zirconia formulas have been combined to create a winning product. However, it had not yet been possible to achieve such a balanced and optimised combination of opaque flexural strength and natural translucency. Two completely contradictory properties have been balanced with maximum benefits through the harmonious interplay of the two zirconia formulas. VITA YZ MULTI TRANSLUCENT achieves an innovative balancing act that makes the desire for a single material for all indications a reality.
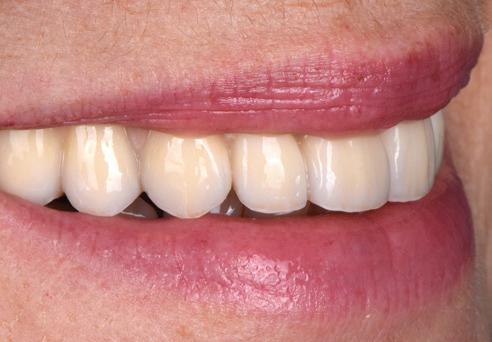
Figure 33. Lateral view of the highly aesthetic monolithic restoration.
Figure 32. The lip line and dental arch of the upper jaw harmonised with each other.
Figure 31. The patient was overjoyed with her new smile.
Challenge the Ordinary.
VITA YZ ® MULTI TRANSLUCENT
VITA YZ® ST Multicolor
VITA YZ ® MULTI TRANSLUCENT
The premium zirconia.
The premium zirconia.
Super Translucent Zirconia.
Perfect esthetics with multi-gradient technology
• Perfect esthetics with multi-gradient technology
A high-strength and vers atile solution for a wide range of indications
• High strength (1200 MPa) for precise processing and predictable results
• A high-strength and vers atile solution for a wide range of indications
• Fascinating esthetics and high shade reliability thanks to the VITA Shade Formula
A multi-performance material for reliable results
• A multi-performance material for reliable results
• Speed sintering in under 60 minutes
2025 improvements to
By Peter Herring, Adv Dip Dent Tech, ACCDP
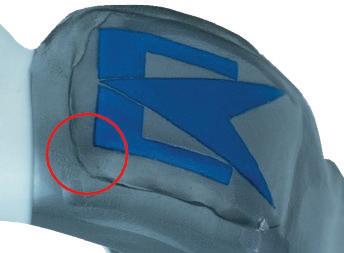
Erkodent’s Playsafe Triple and Triple Light prelaminated materials, combined with a proprietary manufacturing method, are the first individually made sports mouthguards to carry CE marking as custom personal protective equipment.
Designed for adults and professional athletes with stable dentition who
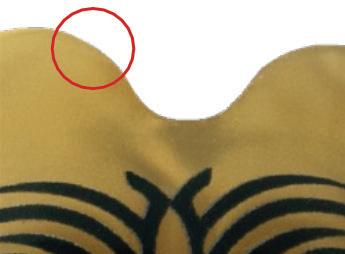
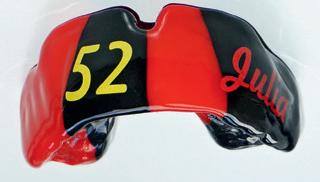
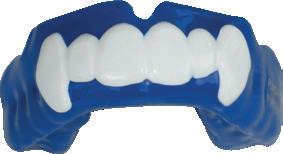
Transparent on the outside:
The colour of the sports mouthguard extends right to the edge.
New Playsafe Triple
Transparent on the inside: The sports mouthguard has a transparent edge after finishing.
participate in sports with a high risk of heavy facial impacts, Playsafe Triple and Playsafe Triple Light are also ideal for athletes requiring enhanced protection due to compromised dentition—such as prominent anterior teeth, implants or other vulnerabilities.
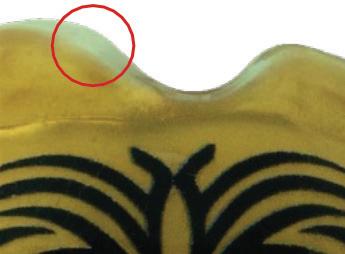
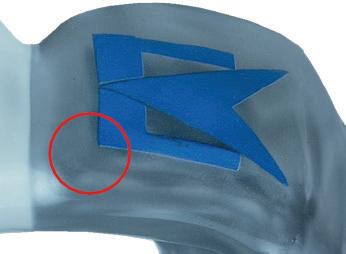
The latest version of the Playsafe Triple features a transparent outer layer for improved aesthetics, as shown below...
Transparent on the outside: Visible edges of the Playsafe 4u label are completely avoidable.
Transparent on the inside: Visible edges of the Playsafe 4u label cannot be completely avoided.
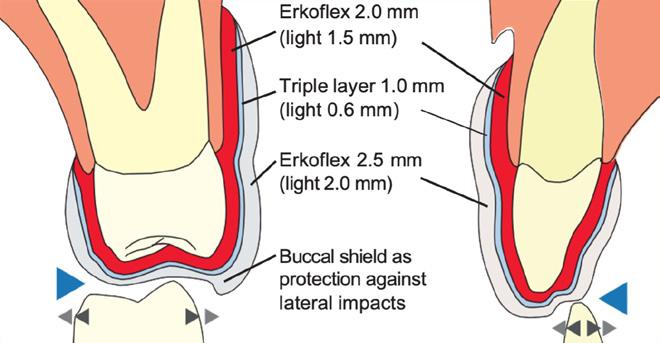
The Playsafe triple includes the first molar. The occlusal opening is 3-4 mm at the central incisals.
The Playsafe triple sports mouthguard is only fabricated for the upper jaw. It covers as much as possible of the vestibular surfaces and features an abreviated palatal design finishing approximately 1mm past the gingival margins of this area.
1. The occlusion is preset using the Erkoform/Occluform combination.
Playsafe Triple – Key Benefits
2. The occlusal platform is then created in the same forming as the single 3 layered foil.
• Protective performance equivalent to customlaminated triple-layered mouthguards.
• Production time reduced to match that of a single-layer mouthguard.
• Minimal variability in workmanship due to standardised manufacturing.
• Integrated optimal occlusal scheme for improved comfort and function.
• Reduced bulk, particularly in the palatal region.
• CE-accredited materials and proprietary production method.
3. The resulting form has a comfortable flat bite plane with buccal shields to assist with lateral impacts and to aid in location of the mandible.
About the author
Peter Herring is a dental technician, prosthetist and a regular contributor to eLABORATE. He is the Australasian and Indonesian distributor for Erkodent products and spends his time between offices in Perth and Bali. He also operates a busy Australian lab dedicated to thermoformed appliances. He can be contacted at pjh@erkodent.com.au or for general enquires, call Freecall 1800-242-634.