
cyclinguk.org/shift Creating cycling communities Resource Pack
CORE Activities
Shift Modules
BIKE READY Opportunity
LEARN Capability RIDE Motivation
Accessory Purchase Adaptive Cycle Training
Led Rides
Bike Hire & Loans Cycle Ride Leader Training Short Journey Workshops
Bike Try Out Essential Cycle Skills Training
Community Event Roadside Repair Training
Dr Bike
Security Bike Marking
SUPPORT Resources
Accessory Advice
Knowledge Guides
Commuting Finding the Right Route Getting Back Home Getting Out the Door Getting Ride Ready
Hills, Wind & Weather
Night Riding
Road Positioning & the Highway Code
Setbacks & Challenges
Signs & Street Markings
Planning & Delivering Sessions
Bike Security Advice Shift & Behaviour Change
Basic Maintenance Repair
Buying a Bike Advice Worksheets & Games
Ready to Ride Advice
Fitting a Helmet
Journey Planning*
Learning to Ride*
M Check
Returning to Ride*
Weather
*activity session
2
BIKE READY – Accessory Purchase
Outcomes
• To assess your participant needs according to the activities you will be running.
• To obtain 2 or 3 quotes from shops (include a local bike shop if available).
• To have a budget for accessories.
(Note: Total percentage of accessories not to exceed 30% of the total grant).
• Build an inventory of organisational assets of accessories for participants.
Information
Consider…
Individual accessories:
• Helmet
• Hi-vis
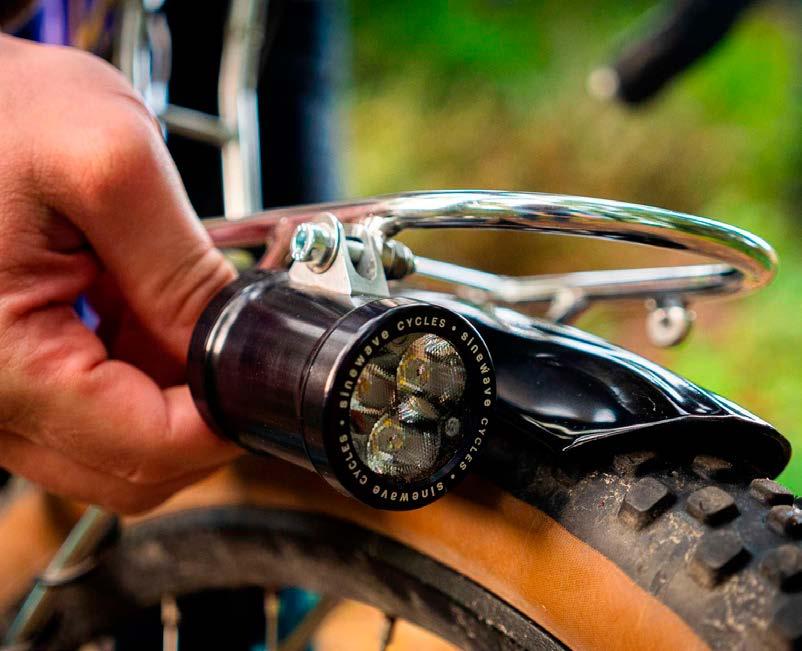
• Lights and reflectors
• Bell
• Bottle cage and water bottle
• Locks
Consider…
Where and what you buy:
Consider…
Accessories that can be shared:
• Pump (Presta and Schrader compatible)
• Pannier(s) and bike rack(s)
• First Aid kit
• Tools and puncture repair kit
• Inner tube(s)
Costings
• Track (floor) pump £10
• Hand pump £5
• Chain oil £3
• Repair kit & tyre levers £7
• Spare inner tube £2.50
• Multi tool £4
• Pannier bags £10
• Front light £6
• Rear light £6
• Hi vis vest £5
Shopping around at local suppliers and online to get a good deal but also for availability sustainability of items and ability to reuse throughout the project (e.g. rechargeable lights).
Helpful links
Sustrans – bike accessories and clothing advice
Cycling UK – light test
Cycling UK – floor pumps test
Cycling UK – puncture repair kits
• Bike lock £10
• Helmet £15
• Pannier rack £13
• Bike bell £4
• First Aid kit £10
• Aldi value pack £14.99
(Two lights, cable lock, pump, bottle and cage) limited availability
3
BIKE READY – Bike Hire & Loans
Outcomes
• To securely hire or loan a bike or e-bike to promote cycling.
• To give an individual an opportunity to trial a bike over a defined period.
• To ensure the bike hire/loan activity is integrated into the Shift programme.
• To provide bikes to enable short journeys.
Information
For organisations who currently do not offer bike hire/loan, here are some points that you may wish to consider:
(For organisations who currently undertake bike hire/loans, please follow your existing process)
1. Have an online expression of interest form to gather information before the bike is hired out to:
• Identify the correct style of bike for the hirer.
• Identify the correct size of biker for the hirer.
• To ensure that the hirers details are recorded within the organisations GDPR statement.
2. Have a competent individual to hand the bike over to:
• The seat is the correct height for the hirer.
• The bikes tyres are inflated.
• The hirer knows how to operate the bike.
• The helmet is fitted correctly.
• A hire/loan form is correctly filled out and the date correctly stored.
3. Have a competent individual or agreement with the local bikes shop/mechanic to check the bike over upon its return:
• A check list for each bike.
• A record of the bike’s history/maintenance record.
• The bike is ready to go for the next hirer.
Materials needed
• Bikes
• Hire form
• An online expression of interest form (Microsoft forms etc)
• Helmets
• Accessories
• Bike tools/work stand
Costings
• Hire from £free
• An online expression of interest form (Microsoft forms etc)
• Bikes
• Helmets
• Accessories – see Accessory Purchase advice
• Insurance
• Storage
• Maintenance
• Bike tools/work stand
• Staff hire
Helpful links
Cycling UK – data gathering advice
Cycle Association resources – hire
4
BIKE READY – Bike Try Out
Outcomes
• Experience the different bike types to establish the most suitable for their journeys.
• Identify which size is the most appropriate and comfortable.
• Enjoy the added whoomph and benefits an e-bike can offer!
Information
Where possible bikes should come from bike shops, hire fleets or community bike libraries and will include a mix of sizes and types such as folding, hybrids, road bikes, mountain bikes, e-bikes and where possible adapted bikes.
It is also recommended to have ‘experts’ from the shop or fleet hire company on hand to discuss peoples needs and advise on the most appropriate bikes.
It is advisable to clearly mark out/ direct people to the area where they can cycle, to keep pedestrians and cyclists separate and safe. Where possible make a one directional course for people to follow – use cones to make gates, slaloms
Helpful links
and boxes to encourage people to experience and practice, steering, braking and stopping the bikes.
Materials needed
• Suitable outdoor space, allowing participants to come along, see, hold and ride a selection of bikes.


• A traffic free space large enough for people to cycle around – park, large car park or school playground for example.
• A range of bikes including where possible e-bikes –look for local hire fleets from community e-bike/bike loan schemes, invite local bike shops & hire shops.

• Helmets for participants to borrow.
• Bike rack or shelter for bikes between use.
Costings
• Venue hire costs £10–£30/hour.
• Fleet hire – price dependant on nature of organisation providing bikes and travel distance.
• Negotiate on costs and highlight the benefit to the organisation of potential future sales or loans.
• Staff hire.
The session
2–4 hours Outdoors Depends on event capacity
Contact local bike shops, bike libraries and other local bike hire organisations for further information. Alternatively contact your local Cycling UK bothy or Rural Connections Development Officer for information.
Cycling UK – Scottish Bothies
Cycling UK – Rural Connections
5
BIKE READY – Community Event
Outcomes
• Partnerships created between organisations and individuals in the community.
• A better understanding of safe cycling/bike maintenance/types of bikes etc.
• Enhanced visibility in community for host organisation.
• Signpost to Shift resources for cycling locally.
Information
Community events can come in many shapes and sizes, please consider the following:
Target audience
Think about who your event aims to support. Is it an event for a specific demographic – such as adults only, families, local businesses, development trusts or community groups?
Is the activity pre-registered or drop-in?
Location
Consider…
What space is required for the type of event you wish to host. If people ride bikes at the event, make sure there’s a safe, appropriately sized space for this. If you are hosting an outdoor event in a public space, you may need to book this with the council. If it’s planned for indoors or on private property, you will need to organise venue hire and budget for this (details of costings below). Consider a contingency plan for weather if planned outdoors?
Promotion Consider…
Putting posters/flyers in local businesses, contacting the local newspaper, posting on social media.
Resources
Consider…
How do you staff the event?
How many people do you need?
How many attendees do you expect?
Who is going to deliver the activities and is there a separate cost involved?
When Consider…
Time of day?
Evening, weekend or weekday?
Avoiding conflicting events in the community at the same time.
Getting there
Consider…
How people will get to the venue?
Is there safe storage for bikes?
Do you require the attendees to bring a bike?
Materials needed
Participants can take notes either using pen and paper or on their mobile.
This activity can take part indoors or outdoors, in person or virtually. See ride information worksheet:
Planning and Delivering sessions
Costings
• Venue/site hire
• Staff costs
• Equipment costs
• Any hired in activities
• Promotion
• Insurance
• Demo bike hire
Note: Community event cost not to exceed 30% of the total grant value
The session
2–6 hours Indoors/ outdoors Depends on event capacity
6
BIKE READY – Dr Bike
Outcomes
• To identify if participants bikes are safe and ride worthy.
• To make minor repairs and adjustments which will make the bike safe and ride worthy.
• Bigger repairs or issues to be identified and flagged to bike owner.
• Participants should feel confident that their bike is safe to ride or know what repairs are needed before they can safely ride their bikes.
Information
Dr Bike Event – standalone or as part of a bigger event
10–20 minutes per bike for basic checks and adjustments although duration will depend on bike condition and mechanics time.
Full bike check to identify any issues.
Minor repairs and adjustments carried out.
Major repairs reported to owner.
Event duration 2–6 hours.
Materials needed
• Trained bike mechanic with certification appropriate to activity – hourly/day rate.
• Gazebo/covered area/inside space in case of bad weather, table and bike stand (bike mechanic may supply).
• Depending on numbers, a sign up sheet or waiting list can be useful.
• Space for mechanic to work with easy access to vehicle and/ or tools.
• See Ride Information Worksheet Planning and Delivering sessions
Costings
• Bike mechanic – rate circa £35–70/hour
• Venue/site hire
• Promotion
The session
10–20 minutes per bike, 2–6 hours per event
Helpful links
Indoors/ outdoors
Dependent on session duration, average of 4 per hour
Cycling UK – Dr Bike are bringing bikes back to life
Sustrans – register for resources
Cycling UK – Scotland Cycle Repair Scheme
Approach your local bike mechanic or search for one online (via a search engine or facebook for example)
7
BIKE READY – Security Bike Marking
Outcomes
• An opportunity for participants to have their bike security marked.
• An introduction on how to secure a bike and reduce theft.
• To liaise with the local police community officers who might be able to deliver the session (where available).
Information
BikeRegister is the UK’s national cycle database and the leading online bicycle identification and registration initiative aiming to reduce cycle theft, identify stolen bikes and assist in owner recovery. BikeRegister is used by every UK Police Force. For local Police Force contact CommunityEngagementTeam@scotland.pnn.police.uk
Exploration
Activity: Tagging bikes using BikeRegister kits
• Liaise with the local partnership officer – Police Scotland (see weblink in helpful links).
• Works better as part of a wider event. Check for local events that promote health or active travel.
• Choose a venue undercover if possible.
• Familiarise yourself with the kit and the procedure.
• Resources – 2 volunteers.
Helpful Links
BikeRegister
Scottish Police
Police Scotland Facebook
Sustrans – bike security advice

Costings
If the local police are delivering the bike marking session then it’s usually free. If the session is delivered by the organisation then here are some costs to consider:
Individual:
• Basic label kit from £13
• Permanent Marking kit from £20
• UV Kit plus microdots from £30
Bulk – for bike marking sessions
• BikeRegister QR code marking kit 100–199 c£3.30 per
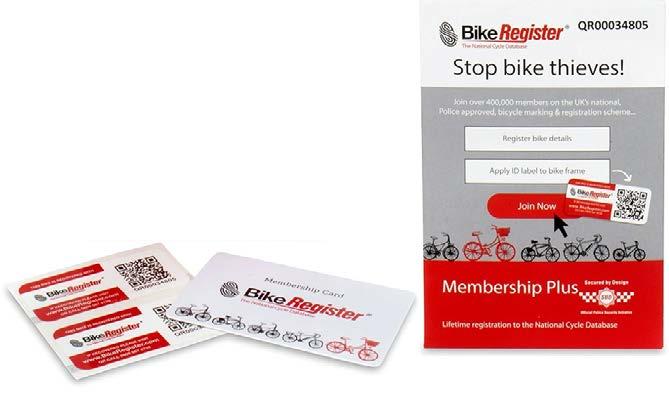
• BikeRegister permanent marking kit 100–199 c£4.40 per
• Venue hire (if required)
The session
It only takes 5-10 minutes to tag a bike but participants may have to queue up.
Limited by the number of security tags available.
Indoors/outdoors Dependent on number of kits available
8
• Promotion – Consider social media, posters in public places and cycling/active travel/ climate change groups. N S E W
BIKE READY – Accessory Advice
Outcomes
• Identifying the essential accessories for short journeys.
• Identifying the essential accessories for commuting.
Information
Short journey
Consider the destination:
• Do I need to carry anything?
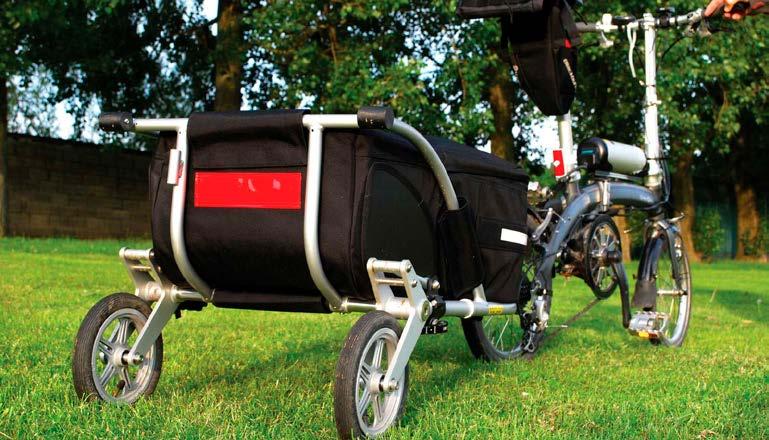
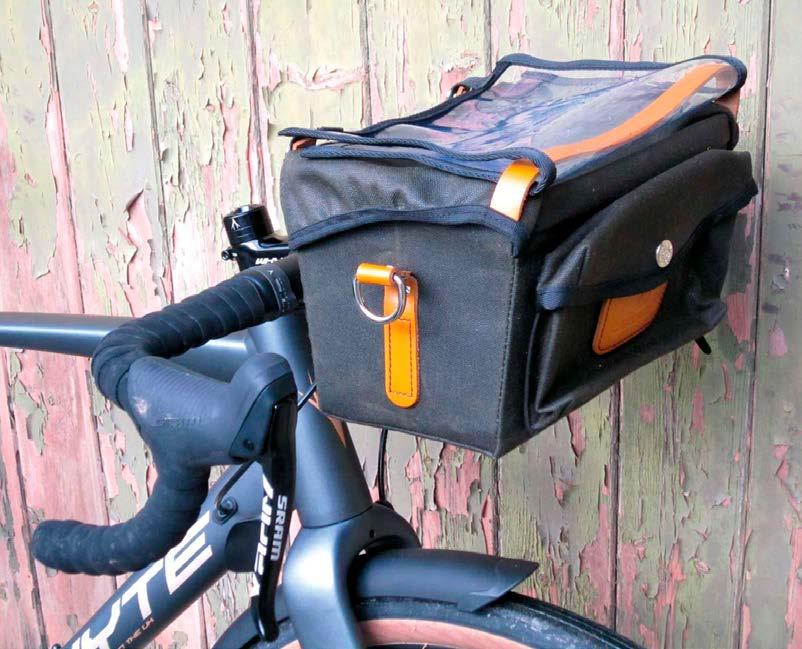
• Racks and panniers
• Backpack
• Trailer
• Carrier
• Water bottle
• Kick stand
Where will I leave my bike?
• Lock options
What happens if I have a mechanical issue?
• Fully charged mobile phone
• Inner tube and tyre levers and pump
(Note: can walk home if within walking distance so might not be required)
Route conditions
• Bell
• Hi-vis
• Mudguards
• Bike trouser clips
• Lights and reflectors (essential between sunset and sunrise but also can be useful as daytime running lights)
Commuting or longer journey
Consider the destination:
• Do I need to carry anything?
• Racks and panniers (room for change of clothes)
• Backpack (room for change of clothes)
• Trailer
• Carrier
• Water bottle
• Kick stand
Where will I leave my bike?
• Lock
• Storage
What happens if I have a mechanical issue?
• Fully charged mobile phone
• Inner tube and tyre levers and pump
• Puncture repair Kit
• Multi-tool
• Route planning app or map
Route conditions
• Bell
• Hi-vis
• Mudguards
• Bike trouser clips
• Lights and reflectors (essential between sunset and sunrise but also can be useful as daytime running lights)
Other questions to consider…
• Will it fit my bike?
• How much does it cost?
• Do I really need it?
Exercise
Make a list of your accessories you choose to take on your ride. Order them from the most to least important. Have a discussion about your choices.
Helpful Links
Materials needed
• Participants can take notes either using pen and paper or on their mobile.
• This activity can take part indoors or outdoors, in person or virtually.
The session
30–40 minutes Indoors/outdoors Up to 10 people
Cycling UK – what equipment do you need to cycle to work

Cycling UK – shopping by cycle
Cycling UK – top tips for cycling in the dark
Cycling UK – stop your bike from being stolen
Cycling Weekly – cycling essentials
9
Exploration N S E W
BIKE READY – Bike Security Advice 1/2
Outcomes
• Identify good practice to secure a bike at home.
• Identify good practice to secure a bike away from home.
• To reduce the risk of bike theft.
• Enhance the chance of recovery following theft.
Information
Discussion 1
Securing and storing your bike at home
Consider good and bad practice for securing and storing bikes in each of the following:
• Sheds and garages
• Shared storage or communal area
• Inside the home
• Multiple bike storage
Potential topics for discussion:
• Locks
• Security lighting
• Foot traffic
• Accessibility
• Alarms
• Trackers
• CCTV
• Neighbourhood watch
• Recording serial numbers
• Battery removal
• Insurance
Discussion 2
Securing and storing your bike while away from home
Consider good and bad practice for securing bikes away from home:
Leaving a bike unattended while:
• Going to the shop
• Commuting
• Visiting friends and family
• Countryside/remote areas
Potential items for discussion:
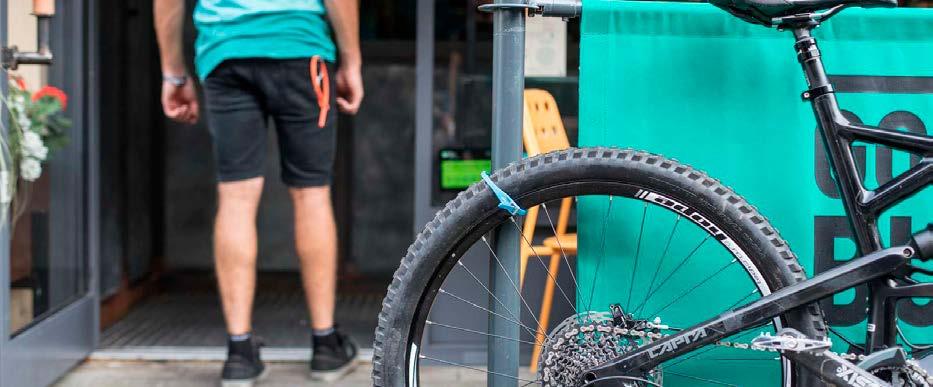
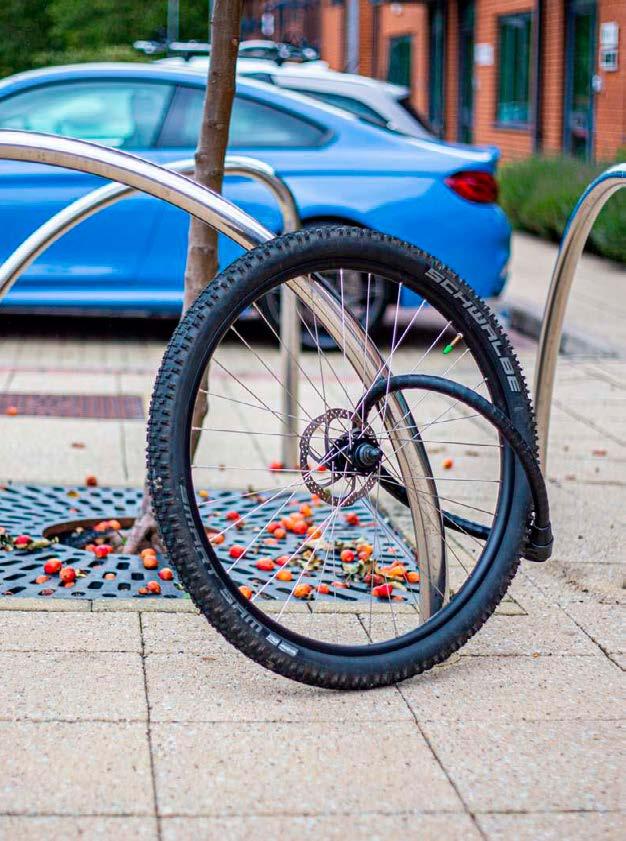
• Locks and location
• Remove any item that can’t be locked, this could include panniers, water bottles, pumps, battery (E-bike), computers/GPS, seat post or front wheel if they as quick release.
• Street furniture
• Bike shelters
• CCTV
• GPS trackers
• Street lighting
Bike locks are the single biggest deterrent to the opportunistic thief, unfortunately even the best lock will not stop the professional thief, but one lock is always better than no lock at all.
There are three main types of locks D-lock (U-locks), cable/combination locks and chain locks, there are several locks but these are less well known and include folding, ground anchors. With a selection of these locks show your participants how to fit the various locks correctly, whilst the bike is free standing and using street furniture. Then allow them to practice.
TOP TIP – lock your bike up no matter how short a period of time you are going to leave it unattended. Even if the bike is visible from where you are going to be, remember that a person riding is faster than another running.
Suggested demo activity on a ride:
In a location where there is access to street furniture or bike racks, divide into small groups and get them to secure their bike with what accessories they have.
10
BIKE READY – Bike Security Advice 2/2
Enhance the chance of recovery following a theft
Every bike sold in the UK has a unique serial number stamped or etched on the frame. Always take note of this number, frame size, make, model, and keep this information in a safe place. Keep an up-to-date photograph of your bike. Many of us have our bikes for years and over time parts are added and replaced including tyres, handlebar tape, saddles, bottle cages etc, also include dents and scratches. These changes and imperfections also make your bike unique and more readily identifiable.
A recent addition to the market is GPS bike trackers. Some of these devices include an audit-able alarm system.
Security marking and labelling also enhance the chance of bike recovery. Registering your bike with an independent register which is accessible to the police 24/7 is also beneficial.
Lastly should the worst happen, bikes can be insured individually or added to your house contents insurance, this won’t help to get your pride and joy back but it will lessen the upset and inconvenience. Make sure to read the small print to comply with the terms and conditions this could mean that you need to use a particular standard of lock or store the bike at a certain location overnight.
BikeRegister is the UK’s national cycle database and the leading online bicycle identification and registration initiative aiming to reduce cycle theft, identify stolen bikes and assist in owner recovery. BikeRegister is used by every UK Police Force.


Costings
• Participants can take notes either using pen and paper or on their mobile.
• This activity can take part indoors or outdoors, in person or virtually.
11
30–40 minutes Indoors/outdoors Up to 10 people
The session
D-lock
Chain lock
Combination/wire lock
Materials needed •
(£10–£70+) •
(£10–£100+) •
(£5–£50+)
N S E W
Exploration
BIKE READY Support Resources – Buying a Bike Advice 1/2
Outcomes
• Identify an appropriate type of bike.
• Setting a budget.
Exploration
Activity 1
Identify an appropriate type of bike
As a group discuss:
• Individual cycling needs
• What type of bike both e-bike and traditional
Discuss the pros and cons of:
• Town (also known as Low Step or Dutch style)
• Mountain
• Road/Touring/Gravel
• Hybrid
• Tricycle
• Cargo
• Tandem
• Hand
• Choosing where to purchase.
• Ways to pay for the bike.
Information
Cycling UK – which bike should I buy?
It is important to identify the intended use and select the type/s of bike that would meet that need. Do not underestimate the advice that can be received from your local bike shop, remind participants that they should ask plenty of questions concerning their chosen style of bike, as this is going to be the beginning of a long-lasting relationship. It is important to get it right the first time.
Exercise – prompting questions:
• Describe the first bike you ever owned?
• What was great about it?
• How is the bike that you own now is different from your first bike?
• Why did you buy the bike you now have?
Activity
2
Setting a budget
As a group discuss:
Starting budget for purchasing a bike. A bike can be purchased from around £200 from a bike shop which will come fully assembled and set up to ride.
Bikes that require self assembly can be cheaper however they require a certain level of skills and experience to set up correctly. For lower budgets, the second hand market could offer some bargains. As with all second hand purchases it’s on a buyer beware basis.
Many community groups throughout Scotland have Community Bike Projects/Sheds, some of these sell reconditioned bicycles back to their own communities. This is a great way to reduce your carbon footprint, help the environment and spend a little less.


12
BIKE READY Support Resources – Buying a Bike Advice 2/2
Activity 3
Choosing where to purchase
As a group discuss:
Pros and cons of where and how bikes can be purchased. Consider the following:
Local bike shop
Pros
• Expert advice
• Opportunity to try bike
• Possible discounts and service plans available
• Support local business
Cons
• Could be the most expensive option
• Limited choice of models and/or sizes
Direct from manufacturer
Pros
• Usually full range of models.
• Return option if poor fit
• Can be cheaper compared to LBS
Cons
• Test ride may not be available
• Fewer online dealers to choose from
• Some home assembly required
• After sales support could be limited
Online (new)
Pros
• Large selection of brands
• Some discounts are available for last season models
Cons
• No test rides available
• Some home assembly required
• After sales support could be limited
Online (used) Pros
• Can be the cheapest way to purchase a bike
• Low carbon footprint
Cons
• No warranty
• Test ride might not be possible if not local
• Shipping costs
• Online fraud
Note: always be aware of deals that seem too good to be true online.
Chain stores
Pros
• Lower cost bikes
• Can be found in locations that don’t have a LBS
• Easy to return
Cons
• Test ride might not be available
• Pre-sales and after sales support could be varied
Bike Recycling Centres
Pros
• Can be the cheapest way to purchase a bike
• Low carbon footprint
Cons
• Limited selection of models and sizes
For information – ways to pay for a bike
• Cash
• Credit Card
• Finance
• Cycling to Work Schemes
• Grants/loans e.g. Energy Saving Trust or Cycling Scotland
Cycling UK – access bikes
• Participants can take notes either using pen and paper or on their mobile.
• This activity can take part indoors or outdoors, in person or virtually.
• Prompt cards with images of different bikes and scenarios.
Materials needed The
Helpful Links
Cycling UK – buy a second-hand bike
Cycling UK – choose the right bike size
Sustrans – buying the right bike for you
Bike Radar – which kind of bike you should buy
13
session
30–40 minutes Indoors/outdoors Up to 10 people
Exploration N S E W
BIKE READY Support Resources – Ready to Ride Bike Advice
Outcomes
• Confident in doing basic safety checks (M check etc).
• Knowledgeable about basic tools and how to use them.
• Able to identify common mechanical issues.
• Understanding of basic bike, accessories and clothing preparation for short journeys.
Information
Advice
Topics to cover:
Cycling UK – before you set off

M Check:
Cycling UK – M Check – what to do before setting off
How to adjust your saddle and handlebar height
Adjust your stem and tighten your headset
How to check and adjust brakes (non disc)
Correct height for bike seat and handlebars
Basic tools and how to use them:
Cycling UK – simple bike maintenance guides
Things to consider before undertaking a short journey:
• Is the bike easily accessible?
• Are your accessories stored together and easily accessible?
• Is any additional clothing required easily accessible?
Getting ‘ride ready’
The thought process for someone to make a short journey by bike
Mental and physical preparation ‘lone wolf’
I have a bike My bike is ready to go
Bike maintenance or servicing M check? Easily accessed?
Water bottle? helmet? charged phone?
I’ll need room for my shopping
It’s a short journey
It’s a commute or longer journey
I know which route to go for my journey
I need to find the best route for my journey
Mixed transport commute? Route planner
Where will I leave my bike Do I need to dress for the weather?
Am I taking children? Is it a longer journey?
Backpack? panniers? trailer? Secure indoor? locked outside? Cold weather? wet weather? Helmets? carrier? trailer? own bikes? Change of clothes? repair kit? cycle clothing? Change of clothes?
Helpful Links
Cycling UK – bike maintenance before you set off
Cycling UK – how to perform an M check
Cycling UK – downloadable maintenance guides
14
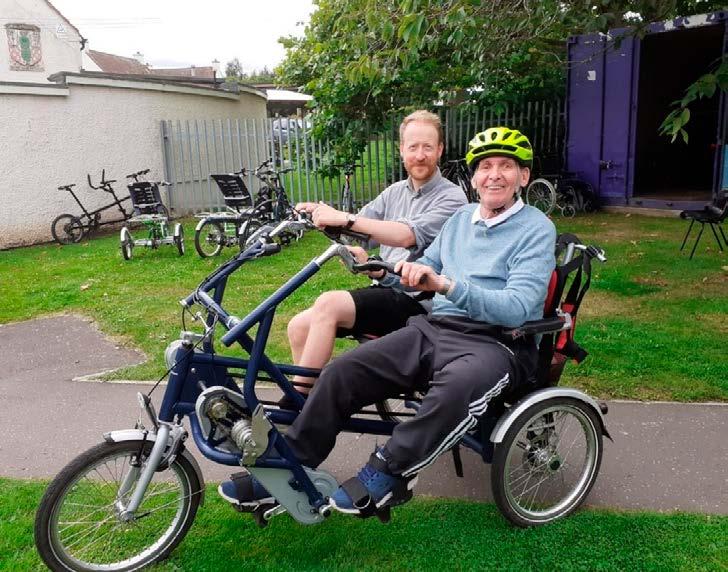
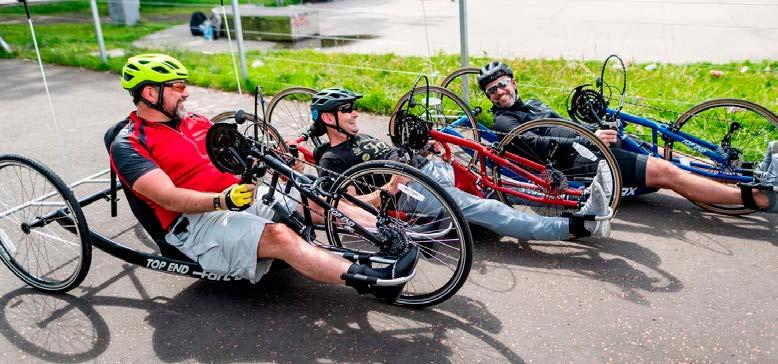
LEARN Core Activity – Adaptive Cycle Training
Outcomes
• Explore accessible options for active travel for those unable to use standard bikes.
• Training to support users of adaptive bikes.
• Awareness and overcoming the barriers to active travel associated with adaptive bikes.
Information
This information is for organisations that already have adaptive bikes or access to adaptive bikes
Adaptive bike training for organisations
Training courses can be found via Cycling Scotland or other bodies such as Scottish Disability sport. Please contact them for further information.
• Adaptive bike led rides
• Route planning session for adapted bikes
• Hire adaptive bikes
• Adaptive cycle training
Cycling Activity Leader
Provider – Cycling Scotland cyclinghub.scot
Cost – £500 (tbc)
Course is designed to:
Provide guidance to participants on how to introduce cycling activities for those with additional support needs.
Be delivered in traffic free environments.
Note: It is not a substitute for CRL which is required to lead rides on open roads. There are mixed bike courses available through Cycling Scotland.
Adaptive bikes are not provided and a suitable ratio of bikes to participants is required.
Around 5 trainers in Scotland are able to provide the training to organisations.
Helpful links
Cycling UK – guide to adaptive cycles
Sustrans – overcoming the barriers of cycling with a disability
West Lothian Bike Library
Handcycling Association UK
Costings
Hire of adaptive bikes and training.
Materials needed
• Adaptive bikes – organisations need to source their own
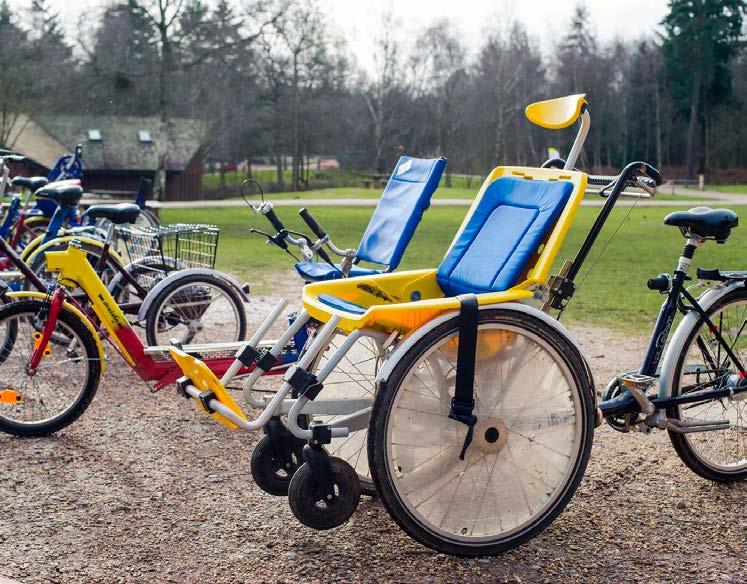
• Adaptive bikes
• Space suitable for adaptive bikes
15
LEARN Core Activity – Cycle Ride Leader Training
Outcomes
• Certification to take people on led rides, both on roads and on recognised cycle paths.
• A Cycle Ride Leader will be able to take people on short led rides to support short journeys.
Information
What to expect
The Cycle Ride Leader (CRL) is a leadership course covering the skills necessary to lead group cycle rides, both on roads and on recognised cycle paths.

These group rides are often aimed at novice or inexperienced riders – people who want to become more physically active or who are interested in exploring their local area by bike.

What skills do I need?
You should be a confident rider with good communication skills.
How long does it take?
This is a one-day course (8 hours). The day comprises both theory and practical elements.
Helpful links
Cycling Scotland – Ride Leader

Costings
If you are applying for a CRL you will need to budget for the cost of this course, this varies, depending on the venue/tutor, but is usually between £50–80 per person.
If you are part of a group or organisation, for £500 you can book your own bespoke course for a group of 5–8 people, at your own venue, on a date that suits you. You will need to add venue cost to your application.
The course is delivered by Cycling Scotland.
Materials needed
• Bike in roadworthy condition
• Suitable cycle clothing
The session
1 day course (8 hours)
5–8 people
Access to various road conditions and pathways – finding quieter and accessible route choices. Venue for indoor theory element.
16
LEARN Core Activity – Essential Cycle Skills Training
Outcomes
Take a group or individual’s riding skills to the next level helping riders make more short journeys.
Information
What to expect
Essential Cycling Skills (ECS) is a personal proficiency award and usually delivered by Cycling Scotland. Local tutors and some organisations can offer the same programme.
Pre Course skills: You don’t need any specific skills other than the desire to be more confident on your bike.
What will I need You will need access to a bike in working order and clothes appropriate for the weather. Some centres may be able to provide a bike for you –please contact them to find out.
1. Absolute beginners
This session is for people who have always wanted to cycle,but never had the chance. Instructors will help develop balance on two wheels before introducing pedalling. The module lasts roughly 1 hour.
2. Introduction to on-road
This session is for anyone who enjoys cycling on paths but is nervous about going on road. Instructors will introduce you to on-road cycling in a range of quiet locations and simple road layouts. The module lasts roughly 2.5 hours.


3. Advanced on-road
This session is for people preparing to ride on busier roads. Instructors will cover more complex junctions, route planning, and provide tips on roadside repairs. This module lasts roughly 2.5 hours.
4. Family
This session is for families who wish to cycle together with more confidence – it is designed to provide parents/ guardians with the skills and confidence to cycle together safely as a group and the whole family is encouraged to attend. The module lasts 2.5 hours and is tailored to meet the needs of the family. Cycling Scotland often offers this session for free.

Costings
Average cost for a session is £75.
Materials needed
A bike and a helmet.
The session
Most ECS sessions are 2.5hrs
Outdoors 6–12 depending on local resource capacity
Helpful links
Cycling Scotland – Ride Leader
Cycling Scotland – ECS Quick Guide
17
LEARN Core Activity – Roadside Repair Training
Outcomes
• Diagnose the fault/problem.
• Carry out the repair/fix, safely.
• Bike maintenance.
Information
Overview
There are mechanics, shops and organisations that offer basic bike repair maintenance courses. These skills can be useful in helping a person remove some of the barriers for making short journeys by bike.
A basic course could last 2-3 hours or be carried out over a couple 2-hour sessions to suit participants schedule.
In most cases there is no real experience needed to learn basic repair skills, just a willingness to get your hands dirty and give it a try.
Possible contacts for a mechanic to do this training can be found on the Scotland Cycle Repair Scheme web map or by contacting a local bike recycle centre, cycle hub or bike library.
This training is not intended to provide someone with enough skills to teach others but is useful, like first aid, for anyone leading in a led ride.
Option 1
Basic bike maintenance & repair
Suggested topics to cover in Basic Roadside repair
1. Puncture and tyre cut repair
2. Brakes
3. Gears
4. Snapped chain (may be more advanced)
Note: Hydraulic brakes are unlikely to be covered
Option 2
Practical on the road repair
Practice basic roadside repairs while on a ride

If your mechanic is willing you could ask that part of the training take place on a practice led ride to try some of the skills in a practical situation. If your mechanic is not available to be part of a practice led ride, ask them to relate the basic roadside repair training to being on a ride and getting back home in case of a breakdown.
Other session topics – prevention
Preparation and prevention before a ride is the best way to minimise roadside repairs
Ways to prevent problems
1. Puncture – check tyre pressure, check tyre for excessive wear, bulges, seated correctly. Consider alternatives to inner tubes.
2. Brakes – how to check pad life (both disc and rim), check rim brake pads are tight, visual check of cables or brake hose.
3. Gears – check for frayed or corroded cables, checking mechs aren’t bent, checking dropouts aren’t bent.
4. General – encourage frequent servicing, bike cleaning, M checks.
Costings
Training Sessions c.£150
The type of equipment needed for the course is listed below but should be provided by the course provider:
• Disposable gloves
• Bike stand
• Bike tools
• Inner tube
• Glue less patches
• Multi tool
• Tyre levers
• Mini pump
• A demo bike
• Tyre boots
The session
2.5–3 hours. Could be spit into two sessions.
Helpful links
Assuming the org has no tools or work stands, some indicative costs are listed below:
• Basic tool kit from £20
• Work stand from £25
• Inner tube from £2.50
• Glue less patches from £3
• Tyre boot from £5
• Multi tool from £4
• Tyre levers from £3
• Mini pump £5
Sufficient space for bike workstands and a safe route for practice.
Small groups of around 6 with working in pairs being useful.
Materials needed
Cycling UK – roadside repairs
Cyclist – roadside repairs
Cycling UK – Scotland Cycle Repair Scheme
Note: The mechanic running the course will often provide the equipment needed. If the course is being held in-house then please ensure enough space for 2–4 bike stands.
18
LEARN Support Resources – Basic Maintenance Repair
Outcomes
• How to fix a puncture.
• How to do simple brake adjustment.
• How to adjust the seat.
• How to clean a bike and oil a chain.

Information
Costings
• Track (floor) pump from £10
• Hand pump from £5
• Chain Oil from £3
• Repair kit & Tyre levers from £7
The session
Materials needed
• Glue less patches from £3
• Spare inner tube from £2.50
• Multi tool from £4
Add up to 30 mins per repair/ maintenance activity
Basic bike maintenance knowledge required
See each section for specific tools.
Cycling UK – guide to simple maintenance
How to fix a puncture
Cycling UK – fixing a puncture
Modern puncture-resistant tyres are fantastic but, if you cycle for any length of time, one day you will have a puncture. Practising to change an inner tube at home will pay dividends when you find yourself having to do it for real at the side of the road. (Oh,and when you do fix a punctured tyre, don’t forget to look for and remove whatever caused the puncture in the first place – otherwise it’ll just pop the replacement inner tube, too!).
Basic tools required
• Spare new inner tube
• Tyre levers
• Puncture repair kit – incl glueless patches
• Disposable gloves
• Bike pump
Tubeless tyre set ups are becoming more common but remain far less common than the traditional tubed set up. There are specific tubeless repair kits, however an inner tube can always be inserted as a fix if all else fails.
Inflate tyres to the correct pressure
Possibly the simplest aspect of bike maintenance is having your tyres inflated to the right pressure. What is the right pressure?
You can find the correct pressure written on the sidewall of your tyres. You’ll notice the tyre manufacture has a recommended range rather than one absolute pressure. That’s so you can adjust the tyre pressures according to the conditions. If you’re going somewhere that might be damp and slippy, don’t inflate your tyres up too hard. If it’s dry and you want to ride as efficiently as possible fill them up.
How to do simple brake adjustment
Cycling UK – brake adjustment
Basic tools required
• Multi tool
• Vice grips
Cycling UK – gear & brake adjustment
At some point it’s likely you’ll have to adjust your gears and brakes. Over time, cables will stretch and brake blocks or pads will wear down, resulting in reduced braking capacity. Disc brakes are becoming increasingly common but require a level of expertise in adjusting and repairing. Consider taking your bike to a qualified mechanic or seek out suitable training.
How to adjust the seat
Cycling UK – making your bike more comfortable
How to clean a bike and oil a chain
Cycling UK – how to clean your bike
Similar to an M check before setting off, it is useful to get into the habit of checking the bike at the end of the ride. This should include using a rag to quickly clean the chain and check tyres for any debris or punctures and check the brakes. Then you are ready to ride for your next short journey.
Oiling a chain
Although water-repelling sprays do act as a lubricant, it’s also important to use a dedicated bike lube or grease. Bike lubes come in a range of options but the most popular are wet, dry, and ceramic. Wet lube isn’t easily washed off but does tend to attract road grime; dry lube is great for the summer, but can be washed away by repeated exposure to rain; and ceramic lube is almost a halfway house that works well but does cost a bit more. Pop a dab of lube anywhere on your bike that you spot a pivot point or moving part. The last and most important job is to re-lube your now superclean chain. Before applying lube, make sure the chain is nice and dry. Now understand that it’s the rollers, pins and inner faceplates of the chain do all the work, so make sure the lube gets onto them. Slowly and methodically work you way along the entire length of the chain, directing the lube exactly where you want it. Once you’ve treated the whole chain, run it through a rag to remove excess lube and use your gear levers to go up and down the gears, checking everything is operating smoothly.
19
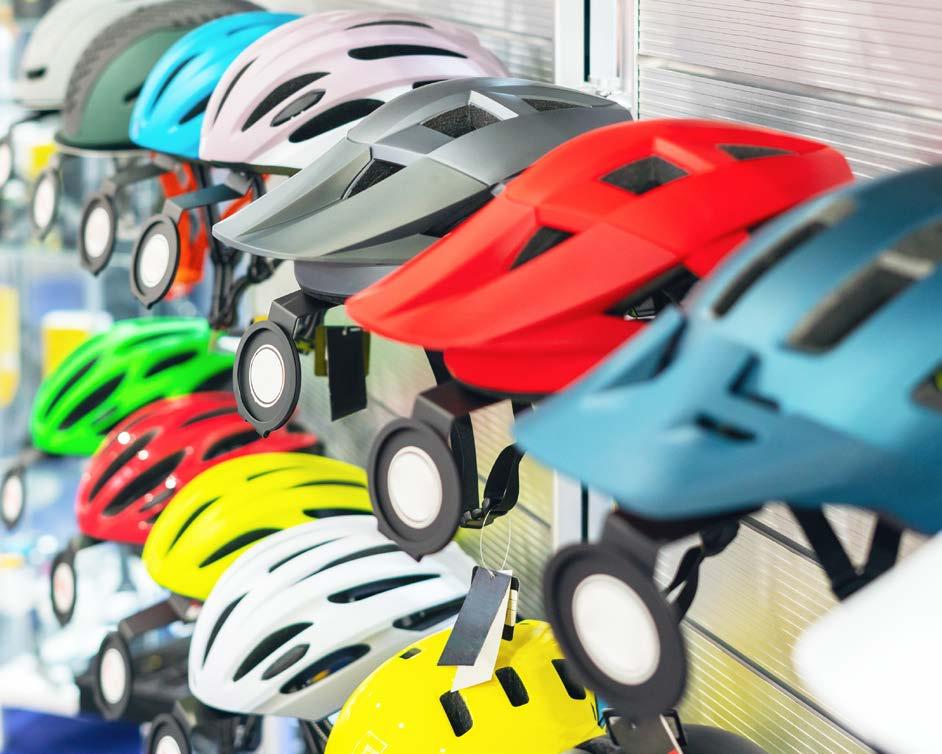
LEARN Support Resources – Fitting a Helmet
Outcomes
• Understand the importance of having a correctly fitted cycle helmet.
• Learn how to fit a cycle helmet correctly.
• Understand the safety features of a bike helmet.
• Understand when and why it will be necessary to replace a cycle helmet.
Information
Fitting a cycle helmet:
Sustrans – fitting a helmet
Cycling Scotland – fitting a helmet (video)
Exploration
1. Introductory presentation covering the importance of having a correctly fitted bike helmet and the safety features of bike helmets. (see links) A properly fitted helmet is important to make the best use of the helmet’s safety features.
2. Demonstrate how to choose and fit a bike helmet. Participants to copy step-by-step.
3. All clips undone and straps loosened off and participants allowed to refit their bike helmets. Repeat as necessary.
NOTE: A helmet that has been dropped or damaged should be replaced and it is often recommended that your helmet should be replaced every 3–5 years.
Helpful links
Sustrans – fitting a helmet
Cycling Scotland – fitting a helmet (video)
Halfords – fitting a helmet
Materials needed
Variety of helmets to demonstrate.
Costings
Bike helmets £20 and up.
20
N S E W
The session 20 minutes Beginner upwards
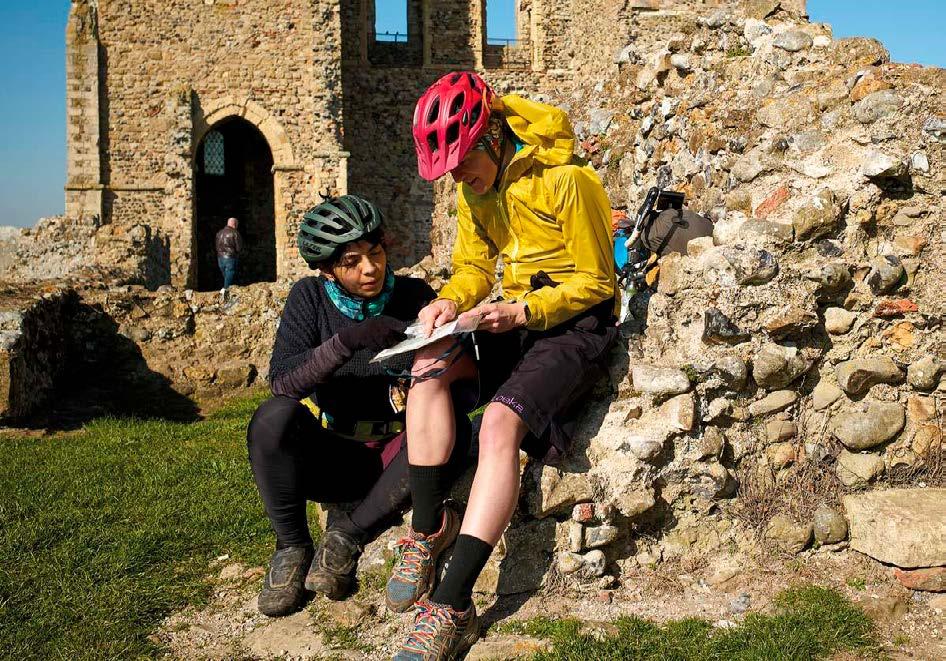
LEARN Support Resources – Journey Planning 1/2
Outcomes
• An understanding of the difference between a bike route and a walking or car route.
• Highlight locations and destinations for short journeys.
• Make a plan for cycling locally.
• Become familiar with route planning with maps.
Exploration
Activity 1 – Maps
Begin with a brief introduction on the purpose of the session and what you hope to explore in the session in terms of outcomes. Ask for any feedback from the group of what they would like to learn in the session.
Exercise 1
Divide your groups of 3 or 4 people depending on how many maps or materials you have available.
As a group look at the map of their local area and mark out a 2–5 mile radius to include short journeys (e.g. shop, school, community centre). The radius might be larger for a more rural or remote area.
Get participants to pinpoint where they live or want to start their journey.
Get participants to pinpoint one or two destinations where exploration they would like to cycle locally.
Exercise 2:
Information
There are a variety of tools that can be used to plan a bike journey. Local knowledge of roads and pathways is the best starting point. Further afield routes can be sourced through printed maps from organisations like Sustrans and Spokes.


Cycling UK – journey planner
• Maps of local area including a 2–5 mile radius from where people live (printed or hand drawn).
• Coloured markers or highlighters. Find The Right Route Worksheet
Explore the route they would use to make the journey by car. Explore the route they would use to make the journey by walking.
Bike journeys may not always be exactly the same route as a car journey. It could be a hybrid of roads, paths and walking routes.
Explore possible routes by bike. Mark out their cycle route with highlighters or markers.

Discussion:
What might be some concerns about making that journey by bike?
What could be done to overcome those concerns?
What are some of the advantages for making that journey?
Things to consider:
What do I need to make that short journey?
When will I give it a try?
Added activity:
Get people out with their bikes to walk/bike their route to see what it is like.
30 mins
Indoors/outdoors
No limit –groupings of 3 or 4 people for activity
21
N S E W
Materials needed The session
LEARN Support Resources – Journey Planning 2/2
Activity 2 – Apps
Prepare for the session with links on a computer to route planning programmes. Also load one or two route apps on a mobile phone. If anyone has a bike computer you can demonstrate another tool for route planning.
Exercise 1:
Open up the journey planner offered on the Cycling UK website.

Play around with different Start and Finish locations for short journeys. Try the routes in the three different speeds offered by the journey planner.
Discussion:
Are there differences between the three different speed routes?
Which route feels more comfortable for each person?
Are there alternative routes?
Exercise 2:
Go through the same process with the apps and see what the routes are like.
Discussion:
What are some advantages/disadvantages of using a phone app?
What is your preference for route planning – printed map or phone app or both?
Things to consider:
Printed maps can be bulky and impractical while out on a bike, especially in bad weather.

With phone apps remember to think about battery drain while using an app.
Activity 3 – Go left, go right?
Sometimes taking the path of least resistance is an option for your journey. Initially if you are not confident in crossing traffic, the option is to keep to a route that takes you on continued left hand turns all the way. A circular route may add a bit more time to your journey but will help with your confidence.
Exercise 1:
Have a look at a map and see if it is possible to make a comfortable journey without crossing traffic.
Activity 4 – Combined transport
There is no rule that says the whole journey needs to be by bike. Drive to the park and ride and then cycle into the town or city centre? Use public transport if they take bikes for part of the journey? You can be creative in mixing up the forms of transportation to get comfortable with making longer journeys. Look at possible longer routes on a map using a combination of car, bus (if they take bikes) and train.
Activity 5 – Ask a cyclist
When in doubt ask another cyclist about easy and safe routes.
Helpful links
Cycling UK – journey planner

Sustrans – maps
Spokes (The Lothian Cycling Campaign) – maps
Cycling UK – route planning for your cycle to work

22
Exploration N S E W
LEARN Support Resources – Learning to Ride
Outcomes
• Progression from a complete beginner to a cyclist with basic skills.
• Participants feel more confident and relaxed with their balance on a bike.
Exploration
Example activity:
• Remove pedals from participant’s bike.
Information
Note: This advice is for beginners, if participants are returning to cycling after an extended break then please watch this Cycling UK video
• Ask participant to sit on saddle and push off with both feet at the same time. Let them glide for 10–20m with their feet raised and then ask them to push off with both feet again. Repeat until they are comfortable with this exercise. Don’t let them push with one foot at a time because this won’t help them get used to the feeling of having both feet off the ground, as you do when cycling.
• Once the participant feels comfortable with this, you can reattach the pedals and begin teaching them how to push off on their right foot. Participants will likely struggle to find the pedal with their left foot at first – and will wobble and then stop – but they will eventually manage exploration it. Continue until participant is comfortable reaching the pedals with both feet. Remind them that they are more stable when pedalling.
• Once they are comfortable with this, place 2 or 3 cones in a straight line about 40m long. Ask the participant to ride between them until they feel comfortable and able to do this in a straight line. They can get off and push to turn their bike at first if they feel more comfortable.
• Slowly encourage them to turn between each stretch, reminding them it is alright to put their feet down if they need to. Once they’ve mastered cycling in a straight line and turning, they will feel much more confident. This activity could take up to 2 hours depending on progression and energy level of the participant. It is important participants progress at their own pace. The tutor should demonstrate each of these manoeuvres before the participant goes ahead.
• Stopping under control
• Environment: traffic free, flat, gentle slope, smooth
• Bike, clothing, helmet check
• Getting on and off the bike – using brakes, getting on from the left
• Setting off
• Stopping under control – using brakes, then feet
• Gliding/coasting
• Cornering
• Putting it together with a skills course
Next steps:
• Adding pedals
• Pedaling
• Using gears to match speed
Materials needed
Bikes for participant and tutor, tools for removing pedals, cones and chalk for marking activity areas, camera to record participant (the latter is optional – it is useful for showing the participant areas to improve but you must remember to ask permission to record them first and discard the recordings after the session).
wikiHow – how to take the pedals off a bike
Location:
A paved/tarmac and flat area is essential (e.g. school playground or car park). Alternatively a flat dry grassy area could work equally as well.
Costings
• Marker cones from £12 for a dozen
• Pavement chalk from £6 for 24
• Pedal wrench/adjustable spanner/8mm allen key from £6
The session
Up to 2 hours (depending on age and ability of rider – shorter sessions are best for less confident riders and riders with additional needs).
Helpful links
Outdoors
Participant numbers –maximum 4 per session. Ideally, aim for each session to be 1:1, especially with less confident riders.
Cycling UK – advice for beginners
Cycling Scotland – choosing road positioning
Cycling UK – teaching an adult to ride a bike

23
N S E W
LEARN Support Resources – M Check
Outcomes
• Participants can perform a methodical check of all the key parts of their bike.

• Participants can identify any faults or risks associated with their bike.

• Participants can feel confident that their bike is in good working order before riding.
Information
Participants can follow one of the online guides/ videos provided below, or follow instruction by a cycle trainer or mechanic at an organised activity or event. Performing an M check, once experienced, will only take a few minutes however in order for participants to build their knowledge and competence allow 15–30 minutes.
Exploration
An organised activity could consist of:
• Guiding the participants through an M check step by step, use correct terminology of bike parts and their purpose.
• Encourage questions & use a ‘point to the part’ activity to gauge understanding.
• Allow the participants time to perform their own M check only giving direction where needed or asked.
Materials needed
• A bike and area big enough for participants to spread out and move around their bikes (e.g. a park, car park or hall).
• Access to a device if following a video guide.
• Printouts – see Cycling UK Guide 1 (link below).
• A bike pump and multi-tool to make minor adjustments.


Costings
• This activity can easily be delivered at no cost.
• Bike pumps (from around £5) and multi-tool’s from £5 can be purchased online, in supermarkets/’bargain’ shops and in Bike shops
The session
15– 20 mins
This activity can be performed individually or as a group
Helpful links
Cycling UK – what to check before setting off Sustrans – M Check for your bike in 11 steps
Cycling UK – before you set off

24
N S E W
LEARN Support Resources – Returning to Ride
Outcomes
• Refresh bike handling skills to safely and confidently ride a bike.

• Have up to date knowledge of the highway code and how to ride on the road.
• Awareness of journey planning.
Information
If you have the confidence and capability to shadow one to one with someone, cyclinguk.org/teachingadults has some helpful guidance.
For more in-depth development consider a local cycle trainer or cycle ride leader (try your local cycling club) might be willing to support these sessions.
A series of 2–3 one hour workshops over the course of a few weeks, each focusing on one of the outcomes to develop participant’s skills and knowledge over time.
Programme possibilities
Where possible include time and space for participants to ride and practice their cycling skills at the end of each workshop to put their learnings into practice.
Allow participants to test their bike handling skills and practice cornering, braking, gearing, signalling and observation (particularly behind). Ideally making this space available at each session for people to practice and develop. As confidence and skills improve and knowledge of the highway code/on road cycling has been shared. Where appropriate see if a local cycle ride leader would be prepared to offer a short local led ride. Alternatively encourage people to buddy up with a friend or family member, agree on a realistic ride or cycling goal you want to achieve and a date by which you want to achieve it.
Plan what you need and how you think you can work towards your goal – small weekly goals to build on your progress work well. Use quiet residential areas or car parks to practice skills such as steering, braking, gearing, looking over your shoulders and indicating. Plan a short ride together (you can visit or walk sections of the route you are unsure about), think about the day and time of day. Consider road or surface type and keep the distance manageable. Cycling should be fun so keep this in mind when planning your route – is there a local farm shop, cafe or heritage site for example that will make your ride more enjoyable? Remember to take some water and it is ok to stop and get off if you are not feeling safe or need a break.
*NB Any cycle training should only be directed by certified instructors*
Alternatively a series of worksheets could be offered covering information linking to the outcomes listed.
These could be given out or discussed in a group environment to allow people to ask questions and offer learnings from their own experiences. A ‘quiz’ could be used to test knowledge following each session/worksheet.
Refer to Shift’s support activity worksheets for M check, learn to ride and journey planning for additional support on this activity.
Materials needed
• Safe, quiet area for practicing cycling skills such as a playground, park or car park. (avoid areas which may be impacted by school runs or rush hours).
• Space to carry out M checks and an area to lay out cones.
• Quiet roads and junctions to practice on road skills.
• Information or worksheets for participants to work through and test knowledge.
Costings
(Cost for tutor with CS certification to run the session). If running practical sessions there may be venue costs (£10–£30).
Helpful links
Cycling UK – riding advice for beginners
Cycling UK – teaching an adult to ride a bike

Cycling UK – 10 ways to get started on your bike
Cycling Scotland – adult training resources
Cycling UK – ensure drivers see you when cycling Gov.uk – highway code
Cycling Scotland – essential cycling skills
25
The session 60 mins Outdoors Ratio 1:4
LEARN Support Resources – Weather
Outcomes
• How to prepare for different types of weather.
• Choosing appropriate accessories and clothing for different types of weather.
• Ability to adjust riding style to match conditions.
Information
Things to Consider
Please note cycling in adverse weather should be aligned to your skills and confidence in dealing with varied conditions.
Preparation for riding:
• Check weather
• Adjust clothing to match conditions
• Adjust accessories to match conditions
• Consider mudguards
• Consider lights for visibility
Keeping out the elements: What to wear: Dress for the conditions ‘There’s no such thing as the wrong weather, just the wrong clothes,’ so the old cycling adage goes and, most of the time, that’s quite true. Weather can change quickly so discover the art of layering your clothes so you can cool down or warm up quickly. What to cycle in when it is cold or in the heat of summer can be a bit trickier.
• Head: A thin fleece hat to go under your helmet.
• Hands: Specific cycling gloves are great, other gloves like ski gloves work too, just watch they are not too chunky.
• Feet: Socks that don’t hold water and not having your shoes too tight help to keep your feet warm. You can get specific over-shoes to insulate and keep spray off.
• Body: Lots of thin layers is the key, letting you tweak your temperature easily to stop you getting too hot or too cold.
Helpful links
Cycling UK – how to survive cycling in the rain
Cycling UK – tips for cycling in the rain, wet and leaves

• Visibility: Contrast to your environment is the key, colours you don’t see in your habitat are best. Change what you wear to suit the conditions, for example bright yellow on a sunny day might not provide enough contrast.
• Sun and glare: Sunglasses are a good option to reduce glare and a peaked cap under your helmet. Also consider protection from the sun.
On the road:
Route choice
Consider how your route might need to be adapted in relation to wind, standing water, ice or snow, wind breaks and shade. It can be helpful to map out your route before setting off.
Rain
Avoid potholes filled with water as they may be deeper than expected. Also slippy drain covers. Plan ahead and anticipate standing water particularly on busy roads.
Plan ahead and anticipate for cornering and braking. Reduce speed well before cornering.
Be mindful of debris in wet weather.
Bike tyres in general have a good amount of grip in the wet. In really wet conditions adjust your speed.
Wind
Cross winds – anticipate exposed sections en route. Try to adopt a relaxed grip on the handlebars to work with the wind rather than fighting it.
Be mindful that panniers can be affected by strong winds. Be prepared to adjust route depending on prevailing winds. Consider riding in a less upright position and dropping into an easier gear.
Fog and poor visibility
Consider lights, reflective clothing and possibly additional reflective bands on arms and legs.
Snow and ice
Cycling in snow can be fun but you need to proceed with caution, keep speeds down, brake gently and early. Ice can be tricky to spot, if it’s near freezing proceed with care.
26
Led Rides
Outcomes
• A progressive series of led rides.
• Taking groups and individuals out on rides progressing towards solo travel by bike.
• Participants become familiar with routes for cycling locally.
• 5–6 led rides completed.
Information
Led rides could include the following:
• 1–2–1 sessions
• Small group rides
• Learner led/shadowed rides
Example sessions programme might include:
1 Introductory traffic free ride/social ride
• Welcome
• Safe cycle checks (‘M check’)
• Kit check
• Traffic free skills check
• Short traffic free ride
2 Progressive ride with introduction to traffic
• Safe cycle check (‘M check’)
• Kit review
• Skills review
• Progressive ride with introduction to journeying in quiet traffic
Introduction
Welcome & Introductions with participants
• An introduction of why you are there and who is going to be leading the activities.
• A bit of feedback from participants on what they are expecting.
• Familiarisation with the facilities – toilets, refreshments, health and safety etc.
3 Led rides for local journeys, shops and work
• Safe cycle check (‘M check’)
• Route planning
• Route examples
• Led ride to the shops/work
4 Shadowed ride for local journeys, shops or work
• Putting it all together learner led shadowed ride to shops/work
• This could be further enhanced by 1–2–1 shadowed commutes
Alternative activities
Be prepared with alternative activities and discussions in case of inclement weather. (See Worksheets)
Ride leaders must have:
• First Aid
• Insurance
• Appropriate valid Ride Leader certification
Note: Led rides must conform to the leaders level of certification.
Materials needed
• Leader’s kit
• Group kit
• First Aid kit
• Risk assessment prior to activity*
• Emergency contact list*
• Fully charged mobile phone*
• Bank card/money*
• Sign in/sign out sheet*
• Late back procedure*
• Consent forms*
• Route sheet*
*These are standard practice for ride leaders
Note: Depending on the location of the ride, more leader kit may be required
• Ride leader time
• Volunteer time
• Bike hire
• Insurance
Cycling UK Affiliate Group Membership
– £85 Benefits include:
• Organiser’s Liability Insurance
• Online support resources
27
The session
Costings Cycling UK – Ride Leader’s toolkit Cycle Ride Leader – Training – Our Programmes – Cycling Scotland Helpful links
45–60 mins Outdoors Leader/rider Ratio of 1:8
Short Journey Workshop – Commuting
Outcomes
• An understanding of route planning for commuting.
• Basic knowledge of what equipment will help with commuting.
• Information on what a business can do to support bike commuters.
• A plan of action for commuting.
Exploration
Activity 1 – Basics
Route planning for your cycle to work webinar (33 mins) which was first presented during Cycling UK’s Bikeweek 2021.
View here
Questions for discussion:
• Will you have breakfast before you go or when you arrive at work?
• How fast do you want to cycle?
Will you need to freshen up when you arrive?
• Which bike will you be riding? View the second video on What equipment do you need to cycle to work? (webinar – 41 mins) from Cycling UK’s Bikeweek 2021.
View here
Questions for discussion:
Have look at the Commuting
Recommended Items worksheet
• Have a discussion about why one item is more important to you than another.
• What items would you add to your list?
Introduction
Welcome & Introductions with participants
• An introduction of why you are there and who is going to be leading the activities.
• A bit of feedback from participants on what they are expecting.
• Familiarisation with the facilities – toilets, refreshments, health and safety etc.
Inspiration
Materials needed
Activity 2 – Route planning
Route Planning Worksheet
Activity 3 – Workplace
planning
For your bike journey think about clothing you need to ride for the journey and for the destination. If it is a short journey you will probably be fine travelling in the clothing that you work in. Panniers come in handy for a change of clothes, shoes and rain gear.
Some considerations for your employer to support cycling to work:
• Cycle parking for staff?
• Changing facilities?
• Cycle maps or information resources?
• Promote cycling activities?
• Provide cycling training/ support?
• Cycle to work scheme?
• Bicycle mileage allowance?
• An active travel plan?
Find out more
• Access to a screen for viewing information video
Route Planning Worksheet
Cycling UK – cycling to work
Cycling UK – guide to cycling to work
Cycling UK – how to; become a cycle-friendly employer
Cycling UK – how to; plan a cycle route to work
Cycling UK – how to; cycle to work (or school) with confidence
28
N S E W
links
Helpful
The session 45–60 mins Indoors/outdoors No limit
Short Journey Workshop – Finding the Right Route 1/2
Outcomes
• Understanding the difference between a bike route and a walking or car route.
• Highlight locations and destinations for short journeys.
• Make a plan for cycling locally.
• Become familiar with route planning with maps.
Introduction
Welcome & Introductions with participants
• An introduction of why you are there and who is going to be leading the activities.
• A bit of feedback from participants on what they are expecting.
• Familiarisation with the facilities – toilets, refreshments, health and safety etc.
Materials needed
• Maps of local area including a 2–3 mile radius from where people live (printed or hand drawn –see links on previous page).
• Coloured markers or highlighters.
The session
Activity 1 – Maps
Begin with a brief introduction on the purpose of the session and what you hope to explore in the session in terms of outcomes. Ask for any feedback from the group of what they would like to learn in the session.
Exercise 1
• Divide into groups of 3 or 4 people depending on how many maps or materials you have available.
• As each group to look at their map of their local area and mark out a 2–3 mile radius to include short journeys (e.g. shop, school, community centre). The radius might be larger for a more rural or remote area.
• Get participants to pinpoint where they live or want to start their journey.
• Get participants to pinpoint one or two destinations for where they would like to cycle locally.

Route Planning Worksheet
Exercise 2:
• Think about the route they would use to make the journey by car.

• Think the route they would use to make the journey by walking.
• Bike journeys may not always be exactly the same route as a car journey. It could be a hybrid of roads, paths and walking routes.
• Think about possible routes by bike.
• Mark out possible cycle routes with highlighters or makers.
Discussion:
• What might be some concerns about making the journey by bike?
• What could be done to overcome those concerns?
• What are some of the advantages for making that journey?
• What do I need to make that short journey?
• Lots of other resources are available from Cycling UK to support people in making short journeys.

30 mins Indoors/outdoors
No limit –dependant on access to apps
Inspiration
When will I give it a try?
Get people out with their bikes to walk/bike their route to see what it is like.
29
N S E W
Exploration
Short Journey Workshop – Finding the Right Route 2/2
Activity 2 – Apps
Prepare for the session with links on a computer to route planning programmes. Also load one or two route apps on a mobile phone. If anyone has a bike computer you can demonstrate another tool for route planning.


Exercise 1:
• Open up the journey planner offered through the Cycling UK website.

• Play around with different Start and Finish locations for short journeys. Try the routes in the three different speeds.

Discussion:
• Are there differences between the three different speed routes?
• Which route feels more comfortable for each person?
• Are there alternative routes?
Exercise 2:
Go through the same process with the apps and see what the routes are like.
Discussion:
• What are some advantages/ disadvantages of using a phone app?
• What is your preference for route planning – printed map or phone app or both?
Things to consider:
• Printed maps can be bulky and impractical while out on a bike, especially in bad weather.

• With phone apps remember to think about battery drain while using an app.
Activity 3 – Go left, go right?
Sometimes taking the path of least resistance is an option for your journey. Initially if you are not confident in crossing traffic, the option is to keep to a route that takes you making left hand turns all the way. A circular route may add a bit more to your journey but will help with your confidence.
Exercise:
Have a look at a map and see if it is possible to make a comfortable journey without crossing traffic.
Activity 4 – Combined transport
There is no rule that says the whole journey needs to just be by bike. Drive to a Park and Ride and then cycle into the town or city centre? Use public transport if they take bikes for part of the journey? You can be creative in mixing up the forms of transportation to get comfortable with making longer journeys.
Look at possible longer routes on a map using a combination of car, bus (if they take bikes) and train.
Inspiration
When in doubt ask another cyclist or local cyclist group about easy and safe routes.
Helpful links
Cycling UK – journey planner
Sustrans – maps
OpenStreetMap
OS Maps
30
Exploration N S E W
Short Journey Workshop – Getting Back Home
Outcomes
• Basic repair knowledge for a bike while on a short journey to just get home.
• Understanding of what is needed for an essential toolkit.
• Build confidence to reduce barriers to short rides.
Information
Organise an hour long workshop to cover the basic repairs below. A bike mechanic can deliver the sessions or you can approach some of your volunteers that have the appropriate skills and experience. Consider the venue and the set of tools you have when deciding the number of participants and encourage them to bring their own tools. You can suggest they watch the relevant video beforehand, follow the link in the Helpful Links section. Recommend them to download the ‘Bike Maintenance Guides’ on their mobile phone.
Cycling UK – simple bike maintenance guides

Introduction
Welcome & introductions with participants
• An introduction of why you are there and who is going to be leading the activities.
• A bit of feedback from participants on what they are expecting.
• Familiarisation with the facilities – toilets, refreshments, health and safety etc.
Suggested agenda:
1. Introduce the repair and the tools that will be used.
2. When on the road, demonstrate how to carry out the repair.
3. Help participants as they work on their bikes at their own pace.
4. At the end share their experiences.
Session 1:
Bike maintenance on the road – basic toolkit/ Repair a puncture.
Session 2:
Bike maintenance on the road – brake adjustment.
Session 3:
Bike maintenance on the road – gear adjustment repairs.
Session 4:
Bike maintenance on the road – broken chain repairs.
If there is sufficient time to do so, consider going on a short ride to identify an appropriate and safe place to practice roadside repairs.
Top tips – things to consider
• Before carrying out any repair, find a safe spot to examine and repair your bike.
• Carry a cloth or something similar to lay your tools and any small parts on. This can save the potential frustration of looking for an important tool or part at the roadside.
• Weather can be a factor in roadside repairs, particularly windchill or rain. Look for a sheltered spot.
• Always carry a fully charged mobile phone. If all else fails you can call someone for help.
• Remember the repair should only be sufficient to get yourself home. More substantial repairs can be made at home. Cable ties and duct tape are your friend :)
A selection of videos showing basic on the road repairs including: M check, Essential tools, Repairing a puncture, Adjusting your gears and brakes, repairing a broken chain. Cycling UK – roadside repairs

• Simple bike maintenance guides designed to be downloaded on the mobile phone and used for reference when travelling.
Materials
• Instructor: Bike tools, spare inner tube, bike.
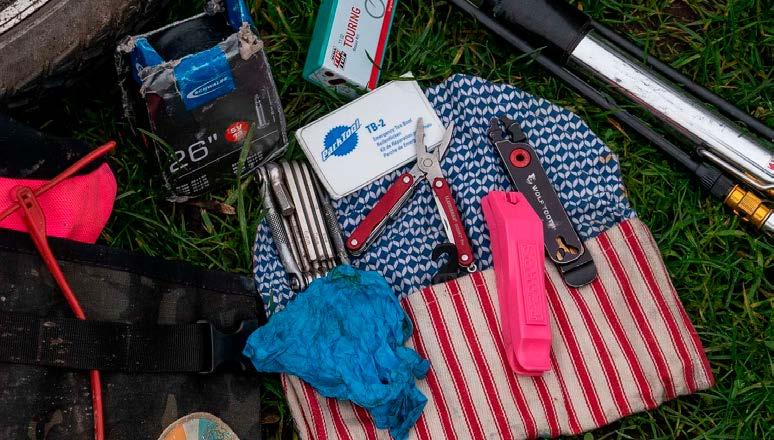
• Participants: Essential tools for each participant.
• Bike pump, spare inner tube, tyre levers, multi-tool (including Phillips & flathead screwdriver 3,4,5,6,8, hex wrenches), adjustable spanner, chain tool for removing chain links, self-adhesive patches, small vice grips, disposable gloves, cable ties, duct tape.
45–60 mins Indoors/outdoors Dependant on session leader and materials available
Helpful links
Cycling UK – roadside repairs
31
needed The session
N S E W
Exploration
Short Journey Workshop – Getting Out the Door 1/2
Outcomes
• A better understanding on what motivates us to cycle.
• Some exercises to develop a plan for making short journeys.
• Acknowledging the achievements and successes for making short journeys by bike.
Information
Motivation for cycling:
Health
Cycling UK – how cycling can improve your mental health
Cycling UK – health and cycling
Cycling UK – why cycling is beneficial for women
Money saving
Bike £396pa
Tram £625pa
Bus £848pa
Train £1320pa
Car £3727pa
Cycling UK – how much money can you save cycling
Cyclescheme – how much money does cycling save you
Introduction
Welcome & Introductions with participants
• An introduction of why you are there and who is going to be leading the activities.
• A bit of feedback from participants on what they are expecting.
• Familiarisation with the facilities – toilets, refreshments, health and safety etc.
Materials needed
• Enough printed worksheets for each participant
• Pencils or pens
• Dice for 20 minute neighbourhood game
The session
Environment
A bicycle commuter who rides 8km to work, four days a week, avoids 3220km of driving a year, the equivalent of 380L of gasoline saved and 750kg of CO2 emissions avoided.
ECF – quantifying CO2 savings of cycling
ECF – economic benefits of cycling
Sustrans – how does walking and cycling benefit the environment
Support local business
20 minute neighbourhood:
Sustrans – what is a 20 minute neighbourhood
Create a Travel Time Map
Have a go at the 20 minute neighbourhood game here This can be a starting point for discussing short journeys.
These sessions can be more self directed and involve looking up resources and viewing links
Indoors/outdoors No limit –dependant on access to apps
32
271g
per passenger/ km
(includes
21g CO2 per passenger/ km travelled (includes
101 CO2 per passenger/ km travelled 22g CO2 per passenger/ km travelled
CO2
travelled
42g for production)
5g for production+16g food on average EU diet)
Short Journey Workshop – Getting Out the Door 2/2
Exploration
Quicker short journeys
There are some short journeys that could be quicker and easier than by car or local transport. Some cycling routes may create a short cut to your destination. In built up areas with congested traffic, cycling may provide a quicker and more direct route to work.


Freedom of cycling/solitude
Cycling UK – solo riding
A Different Perspective From the Bike
Seeing other people cycling
Spokes did a survey in 2019 where ‘Encouraged by others or seeing others cycling’ ranked in the top three with it also being the highest ranking main factor for cycling.
Spokes UK – inspiring stories

Spot the Cyclist Bingo Worksheet
Setbacks
Print out the Setbacks Cutout Worksheet
Cut out the selection of circular scenarios and place them face down on the middle of the table with the group sitting around. You can add your own scenarios as well. One at a time get someone to draw a scenario.
Get them to read it out and ask them how they would overcome this setback. Open it for discussion with the whole group. Continue with each person going around the table drawing a scenario.
Things to consider in the conversation: Draw on each person’s own experience for overcoming setbacks. Think about preventions or alternative solutions for each setback.
Acknowledge that some setbacks take longer to overcome.
Goal setting
Print out enough worksheets ‘Setting Goals for Cycling Locally’ for each person in the group.
Short Journey Goals Worksheet
Briefly go over the possible destinations that a person could make locally by bike. Get them to suggest any additional journeys that aren’t on the list.
Give the group 15 minutes to work through the questions on the worksheet and see if they can come up with 3 destinations.
(Even a single destination is a good start for someone new or returning to cycling.)
At this stage save the Journeys per week/ month column for after the discussion.
Go round the table and get each person to share one of their destinations, what will help and hinder them and have a discussion on what might help them feel more confident with their journey.
After you have had a chance for everyone to share one destination, get the group to finish filling out any missing bits and make a plan for how many journeys they think they would like to try in a week or month.
Inspiration
Accomplishments
Give each participant a weekly and monthly accomplishment worksheet.
Accomplishments Worksheet
Get them to take their worksheet home and fill it in as they continue to make short journeys. Find a time when they can share their accomplishments with the rest of the group. This is a good opportunity to celebrate everyone’s achievements.
Shift up, Shift Down game
33
N S E W
Short Journey Workshop – Getting Ride Ready 1/2
Outcomes
• An understanding of what might be essential equipment.
• An understanding of preparing for the ride and/or preparing for the destination.
• Basics for having everything ready to go with bike and gear.
Information
Bike ready?
Once your bike is serviced and road worthy it is important that it is easily accessible for when you want to make that short journey. It is also good to have any accessories handy and ready to go depending on the purpose of your journey.

Introduction
Welcome & Introductions with participants
• An introduction of why you are there and who is going to be leading the activities.
• A bit of feedback from participants on what they are expecting.
• Familiarisation with the facilities – toilets, refreshments, health and safety etc.
Continued on page 2
Materials needed
• Cycling UK – maintenance before you set off
• Cycling UK – maintenance essential tools

Cycling UK – simple bike maintenance guides
The session
Here is a quick demonstration of an M check to make sure your bike is safe before you set off. It only takes a few minutes but good practice each time before you set off.
Cycling UK – M check demonstration video Lights?
If you are travelling by bike between sunset and sunrise you are required to have proper lighting. There are also basic requirements for reflectors on your bike. Check this link for more about lighting regulations and positioning of your bike lights and reflectors
Cycling UK – lighting regulations
When purchasing bike lights have a think about what type of light will work best for you ie. rechargeable? batteries?
Locks?
Lock your bike up – Keep your bike safe by locking it in a secure location at home. How to stop your bike from being stolen has advice on keeping your bike safe at home.
Repair kit?
If it is a short journey you probably won’t be needing an extensive tool kit. In the worst case scenario you can always walk your bike home or ring someone to pick you up. So first essential piece of kit is a charged phone!
If it is something like a puncture which you can repair yourself you will need a puncture repair kit that includes two tyre levers. However your first thought should be to replace the inner tube to get riding again as soon as possible. The punctured inner tube can be removed and fixed at home later. There are lots of online guides to repairing a puncture.
Basic tools?
A saddlebag with tools, spares and cash. A few choice tools and a spare inner tube will help you cope with common mid-ride problems. A multi-tool with a range of bits should let you adjust most mechanical components; a chain tool will help you put a broken chain back together; and of course you’ll need some tyre levers, puncture repair kit/spare inner tube and mini-pump. We think it’s handy to have some emergency cash and a card too.
These sessions can be more self directed and involve looking up resources and viewing video links
Indoors/outdoors
No limit – dependant on access to apps
34
Short Journey Workshop – Getting Ride Ready 2/2
Information
Gear?
Continued from page 1
Exploration
Have a think about where you are going on your journey. Have a think about where you are headed on your journey and whether you need to carry any belongings with you or whether you need to carry items on the return journey. A backpack is simple enough to carry and saves you from installing a rack for panniers on your bike. It’s handy to have a backpack with some kind of reflective panels.
There are lots of cheap mudguard solutions to stop water spray, some are really quick to add/remove just using or rings/velcro.
Backpack?
Pros
• Convenience for carrying around – multiuse
• No attachments or pannier needed
Cons
• Back strain
• Can feel restricted or off balance heavy loads can add to saddle rub, sweaty on your back.
Panniers?
Pros
• Can carry more stuff
• Bike takes the weight of the load not your shoulders
• Can be more balanced with two
Cons
• Probably need extra equipment like a rack
• Bag not as adaptable as a backpack for carrying

• Question of leaving the bag on the bike or off when stopping

• May distribute weight unevenly so the bike may handle differently
Clothing
Consider the following items; helmet, waterproofs, gloves, snood/buff/ neck gaiter, layering where items can be added (e.g. windproof layer) or removed. Dress for the destination or for the ride?
• Ask group to bring in their one item of kit that they swear by and discuss it with the group, look at other similar solutions.
• Plan out a route, split up the group and choose a section of the ride. Get the teams to chat through how it would change and how you would manage it in: Scorching day, Fog, Heavy Rain, Cold/windy.
Group challenge/activity
• Split into teams, plan for a local journey to a place of interest or work. Set budget for each. Money no object, pound stretcher, not cycling kit (adapted from other sports/hobbies). 10 min research then sell your ideas to the rest of the team in a 1 min Dragons Den.
• Ride out, visit local ride challenge points, busy areas, as a group look at how you would manage them, discuss other route options, how times of day might change the scenarios.
Helpful links
Cycling UK – bike maintenance before you set off


Cycling UK – how to perform an M check
Cycling UK – simple bike maintenance guides


35
N S E W
Short Journey Workshop – Hills, Wind & Weather 1/2
Outcomes
• Awareness of the dangers and risks associated with cycling in difficult conditions.
• Ability to make suitable choices of gear and route for conditions.
• Confidence to cycle in varying conditions.
Information
This session can be delivered more as an information session rather than an activity. (Could be done prior to a ride, attached to another workshop or as a stand alone session)
Topics to cover:
Hills
Choosing appropriate gearing and route options: Consider the following: Consider the gearing on your bike and whether it’s suitable for steeper hills.
Anticipate the terrain ahead when approaching an incline. If it’s a shallow incline you might want to shift into easier gears as you go. For steeper inclines consider shifting into an easier gear before the incline commences. Once the terrain flattens out you can return to the gear used prior to the incline. Note – walking the steepest part of any hill is always an option, just remember that pushing a bike up a steep hill is hard work and takes time. (Always a good opportunity for a water break)
E-bikes are great for tackling hills, even in harder gears. Remember that hill climbs are more of a drain on the battery, so adjust settings accordingly.
Introduction
Welcome & Introductions with participants
• An introduction of why you are there and who is going to be leading the activities.
• A bit of feedback from participants on what they are expecting.
• Familiarisation with the facilities – toilets, refreshments, health and safety etc.
Downhill
Consider your speed and braking on downhill riding. Look ahead for any obstacles, potholes or gravel. Look ahead to adjust speed and braking in preparation for any turns.
As pedalling gets easier shift back into a harder gear to help with control and speed. Avoid hard braking on your descent, looking ahead to where you are going.
Wind
Cross winds – anticipate exposed sections en route.
Try to adopt a relaxed grip on the handlebars to work with the wind rather than fighting it. Wear clothing that won’t be affected by the wind (Maybe no umbrellas or ponchos!)
Be mindful that panniers can be affected by strong winds.
Be prepared to adjust route depending on prevailing winds.
Consider riding in a less upright position and dropping into an easier gear.
Weather
Please note cycling in adverse weather should be aligned to your skills and confidence in dealing with varied conditions.

Preparation for riding:
Check weather
Adjust clothing to match conditions
Adjust accessories to match conditions
Consider mudguards
Consider lights for visibility
Keeping out the elements: What to wear: Dress for the conditions ‘There’s no such thing as the wrong weather, just the wrong clothes,’ so the old cycling adage goes and, most of the time, that’s quite true. Weather can change quickly so discover the art of layering your clothes so you can cool down or warm up quickly. What to cycle in when it is cold or in the heat of summer an be a bit trickier.
Head: A thin fleece hat to go under your helmet.
Hands: Specific cycling gloves are great, other gloves like ski gloves work too, just watch they are not too chunky.
The session
Continued on page 2
Feet: Socks that don’t hold water and not having your shoes too tight help to keep your feet warm. You can get specific over-shoes to insulate and keep spray off.
Body: Lots of thin layers is the key, letting you tweak your temperature easily to stop you getting too hot or too cold.
Visibility: Contrast to your environment is the key, colours you don’t see in your habitat are best. Change what you wear to suit the conditions, for example bright yellow on a sunny day might not provide enough contrast.
Sun and glare: Sunglasses are a good option to reduce glare and a peaked cap under your helmet. Also consider protection from the sun.
36
15–30 mins Indoors/ outdoors 6–12
Short Journey Workshop – Hills, Wind & Weather 2/2
Information
On the road
Route choice
Continued from page 1
Consider how your route might need to be adapted in relation to wind, standing water, ice or snow, wind breaks and shade.
It can be helpful to map out your route before setting off.
Rain
Avoid potholes filled with water as they may be deeper than expected. Also slick drain covers.
Plan ahead and anticipate standing water particularly on busy roads.
Plan ahead and anticipate for cornering and braking.
Reduce speed well before cornering.
Be mindful of debris in wet weather.
Bike tyres in general have a good amount of grip in the wet.
In really wet conditions adjust your speed.
Fog and poor visibility
Consider lights, reflective clothing and possibly additional reflective bands on arms and legs.
Snow and ice
Cycling in snow can be fun but you need to proceed with caution, keep speeds down, brake gently and early. Ice can be tricky to spot, if it’s near freezing proceed with care.
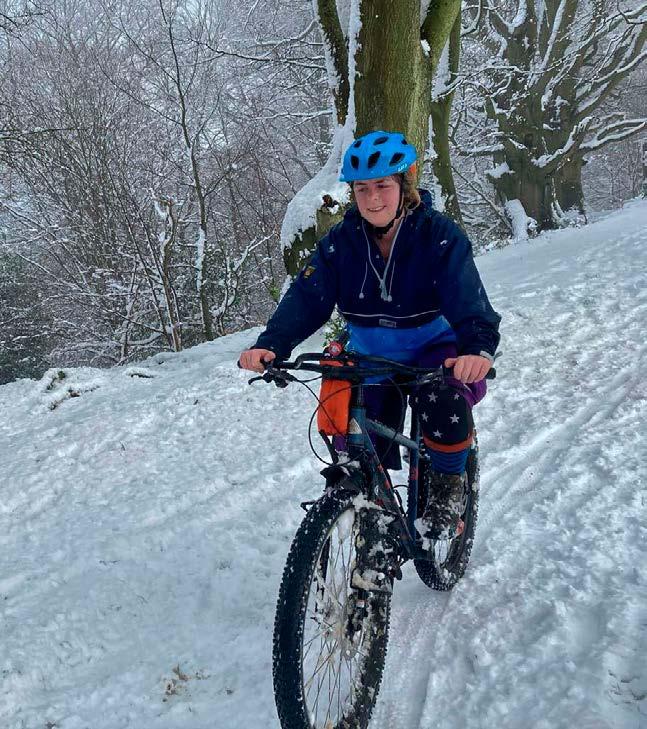
Exploration
Session structure
• Ask participants what kind of conditions would make them unlikely to cycle
• Cover each of the topics above
• Questions
• Discussion and sharing of tips
• Make a plan
Shadowing or small group session for practicing on hills.
Sample weather forecast activity
Using an online weather forecast choose 2 or 3 different scenarios for weather (e.g. Met Office app for regional/local forecasts).
Divide into smaller groups of 3 or 4 and have participants list what preparations they would need to make for their weather scenario.
After 10 minutes get each group to share their list with the whole group.
Helpful links
Cycling Weekly – using bike gears efficiently
Cycling Uphill – cycling uphill techniques
Sustrans – cycling and bad weather
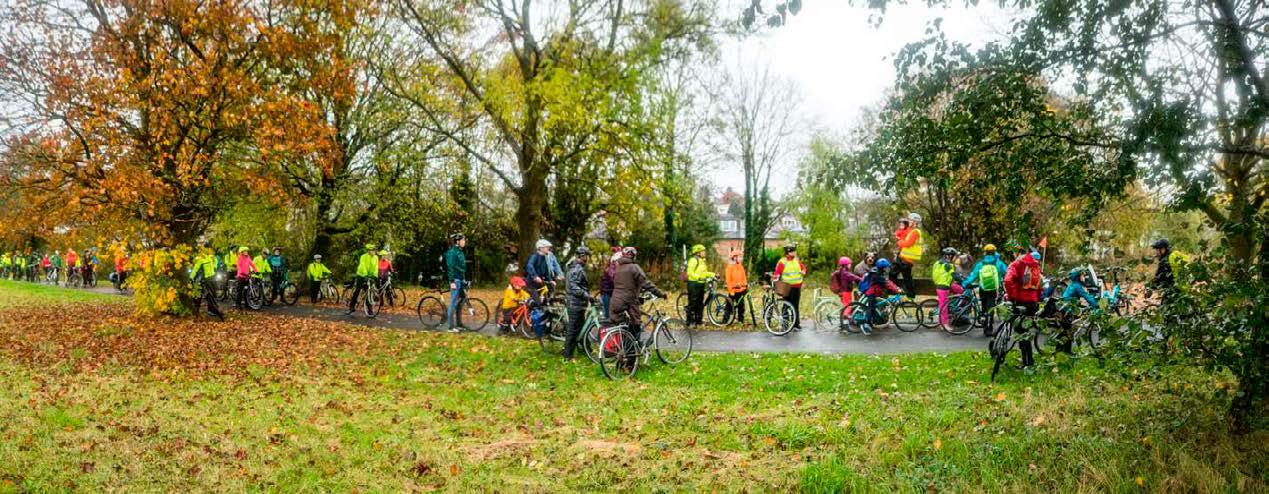
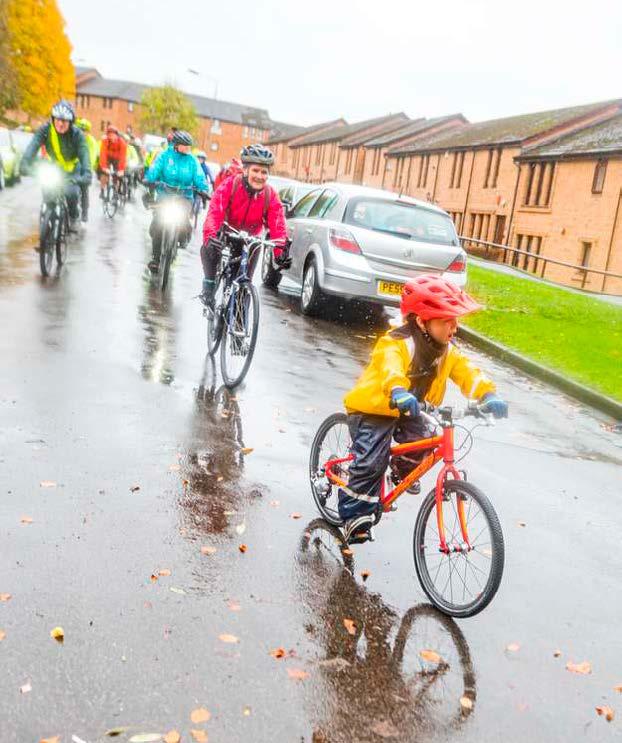
Cyclescheme – how to cycle in the wind
Cyclist – cycling in the rain
Cyclescheme – cycle in ice and snow
Note: All cycling in any extreme weather can be very dangerous and participants should be advised not to cycle if they feel unsafe.
GCN – gearing for beginners
37
N S E W
Short Journey Workshop – Night Riding
Outcomes
• Build confidence for riding after sunset.
• A better understanding of what is required by law for lights and reflectors.
• A better understanding of the differences between riding during the day and at night.
Introduction
Welcome & Introductions with participants
• An introduction of why you are there and who is going to be leading the activities.
• A bit of feedback from participants on what they are expecting.
• Familiarisation with the facilities – toilets, refreshments, health and safety etc.
Activity 1
Accessories
Bring different types/styles of lights and reflectors both front and rear.
Excerpt from the Highway Code – Rule 60
Discuss the different types of lights and their respective pros and cons e.g. positioning, rechargeable etc.
Cycling UK – lighting regulations

Accessories for night riding
Bring a few items of clothing that would be used for night rides e.g. reflective clothing.
What Extra to Carry
It’s worth having a back-up light in case you run flat or the ride takes longer than expected. Add some reflective kit, simple bands on moving parts of the body like ankles can help, also help other users to recognise you as a cyclist rather than a motorbike which would be expected to be traveling faster.
Spare clothes. It’s often colder at night, if you have to stop its good to have something warm to put on, lots of thin layers over one chunky coat. You probably have some sports kit that would do the job.
Activity 2
Route Planning
Use a flipchart or similar.
Ask the following:
What would you do differently when riding at night?
Route choice: on vs off road/traffic free: Traffic free is great if there is good infrastructure, however some of these routes can be isolated and remote after dark, worth thinking about how routes change.
There are lots of great back routes in town, worth scouting in daylight and thinking how it would be later on, sometimes bolder main routes are a better bet.
Exercise
Either using printed or hand-drawn maps, get participants to mark out a daytime route. Ask participants to consider what they would do differently with route choice at night. This activity can be done with the entire group with one map or individually. Get the group to list their challenges about riding solo at night.
This is a good opportunity for more experienced riders to share their advice.
In Case of Emergency (ICE)
Regardless of any bike journey it’s worth setting up ICE so if something does happen, someone has your back. This could be as simple as having your trusted ICE contact on your phone homepage, or being in the habit of telling a friend when to expect you back and where you are heading. The main thing is that there is a reliable action set up to make sure you are okay and they know what to do if you don’t show up.
Materials needed
• Selection of lights, reflectors and reflective clothing
• Maps or materials to draw maps
• Flipchart and markers
• Some means to view an online video (access to mobile reception or wifi)
Inspiration
Individuals can try some of the map routes at night to explore the differences between daytime and night time riding. Some may want to explore those routes with another person. The journey can be very short, its aim is to provide an after dark experience for them.
Helpful links
Cycling UK – safety regulations
Bike Radar – cycling at night
Cycling UK – night riding blog
38
Exploration N S E W
The session 45–60 mins Indoors/outdoors 6–12
Short Journey Workshop – Road Positioning & the Highway Code

Outcomes
• An understanding of good road positioning.
• A knowledge of different road positions for varying situations.
• An understanding of what road positioning is supported by the Highway Code.
Introduction
Welcome & Introductions with participants
• An introduction of why you are there and who is going to be leading the activities.
• A bit of feedback from participants on what they are expecting.
• Familiarisation with the facilities – toilets, refreshments, health and safety etc.
Materials needed
• Access to a screen for viewing information videos
• High visibility vests
• Mobile phone
Who can deliver it? Ideally a Cycle Ride Leader or Cycle Trainer.
The activity could be followed by a led ride.
Activity 1
Watch the road-position video in helpful links and recommend participants to watch it before attending.
Activity
2
Identify and risk assess a quiet area to meet up to practice road junctions.
Carry out an M Check
Demonstrate and give opportunities to participants to practice basic road positioning, passing side roads on the left, turning right from a major to a minor road, turning left from a major to a minor road, turning left from a minor to a major road and turning right from a minor to a major. Give positive feedback and promote a safe and supportive learning environment. After practicing each individual manoeuvre, you can set up a circuit that incorporates most of them.
Demonstrate and give opportunities for participants to practice primary and secondary road positioning in various settings e.g. narrow roads, parked cars and build-outs. At the end, share the participants’ experience. To reinforce learning outcomes you could discuss with participants safe positioning in different scenarios.
Note: This journey can be very short, it’s aim is to provide a road positioning experience for the group, follow the same procedures you would for a standard led ride.
You can use Cycling UK posters in helpful links to discuss changes to the Highway Code.
Helpful links
Cycling UK – importance of road positioning
Cycling UK – 5 top tips for staying safe on your bike

Cycling UK – 5 major Highway Code changes
Cycling UK – Highway Code downloadable resources

Cycling UK – 5 posters communicating Highway Code changes
Cycling UK – road position video
Cycling UK – safer journey video
Cycling UK – Highway Code video
Highway Code – rules for cyclists
39
Exploration N S E W
session 45–60 mins Indoors/outdoors 6–12
The
Short Journey Workshop – Setbacks & Challenges
Outcomes
• Identify, acknowledge and anticipate setbacks that might hinder short journeys by bike.


• Discuss ways to overcome those setbacks.
Information
Without a doubt the freedom of cycling for short journeys results in a great feeling along with health and economic benefits. It is an important break from using the car and creates a wonderful sense of independence for those who may not have easy access to a car or public transport.
However, there will be moments when using your bike for short journeys when something will challenge your abilities or set you back a bit.
There will be moments where you might think ‘am I the only one cycling here?’
Although every individual will have their own strategies for coping with setbacks and challenges, here are a few exercises and resources to build up a resilience to things that might become barriers to cycling more often.
Worksheets:
Setbacks Cutout
Comparison of car, walk and bike ready
Support Group Worksheet
Shift up, Shift Down game
Activity 2
Setbacks draw
The more you cycle the more chance there will be of some kind of setback that may discourage you from cycling or affect your confidence.
Participant numbers per table – 2–6.
Cut out the 12 setback discs from the printed worksheet. There are additional blank ones if you would like to add any of your own.
Place them face down in the middle of a table with everyone seated around.
Get someone to draw one of the setback examples from the middle, read it aloud.
Ask them if that has happened to them and if so how did they deal with it. If it hasn’t been their experience, how would they deal with it. Limit each answer to 1 minute.
Open the question up to the whole group.
Go round so each person has had a chance. If someone doesn’t have any experience or examples, that’s okay, see if there are any suggestions from the rest of the group. Play as many rounds as you wish.
Inspiration
Challenges Timeline Worksheet
• Printed worksheets with setback examples
• Shift up, shift down game, dice & markers
Materials needed The session
20–30 mins Indoors/outdoors Small table groups of 2–6
40
N S E W
Exploration
Short Journey Workshop – Signs & Street Markings
Outcomes
• Be able to identify and understand various road and wayfinding signs.
• Be able to understand some road markings for cyclists.


Information
Link to highway code with reference to pages for bike signage and road markings – see helpful links.
Print sign reference worksheet and info.
Activity 1
Distribute the road signs and street markings worksheet with no text.
See how many signs people can identify. Use the text worksheet to compare answers.
Option 2 – With a printed road signs and street markings worksheet, cut out the different signs and text descriptions and give small groups 1 minute to match the image with the text.


Activity 2
Have a discussion about signs or street markings that aren’t on the worksheet. Are there any that participants have questions about. What have been participant experiences of good or bad signage?
Activity 3
Distribute sign bingo worksheet and assign as a challenge for next week or until group meets again.
Road Signs and Street Markings info Worksheet with no text
Road Signs and Street Markings info Worksheet with text
Road Signs and Street Marking Bingo sheet
Helpful Links
Know your traffic signs
Cyclescheme – reading road signs

Cycling UK – reading cycling signs
Materials needed

41 Printed worksheets and info.
Exploration N S E W
The session 30–45 mins Indoors/outdoors 6–12
RIDE Support Resources – Planning & Delivering Sessions
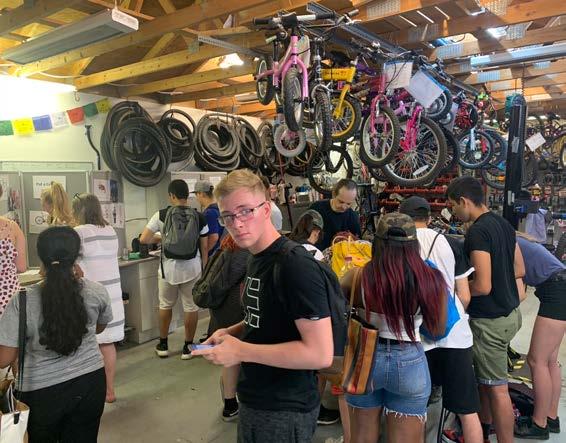
Outcomes
Information
Some things to consider when running any activity, workshop or event
• Who is it for?
• What is happening?
• Where will it take place?
• When will it take place?
• Why would someone come to this event?
• What do people need to bring?
• How do they get there?
Here is another way to frame the different components of any activity:
Preparation
Planning is always important to have everything ready for the activity. Consider where it will take place, what resources you will need to run the activity and who will be responsible for leadership.
Anticipation
Now that you have an activity, a date and place booked and a group of people interested, how will you build on the anticipation of the participants?
Think about things like
• Pre event promotion
• Updates and info on what to expect
• Where it is and how to get there
• Wayfinding and signage so that people know they are in the right place.
Orientation:
Now that everyone has arrived there are a few simple things that can make participants feel welcome and involved.
Think about things like:
• Welcoming
• Introductions (if small enough group people can introduce themselves)
• An introduction of why you are there and who is going to be leading the activities
• A bit of feedback from participants on what they are expecting
• Familiarisation with the facilities – toilets, refreshments, health and safety etc.
Information
• What are you planning to do?
• How are you going to do it?
Exploration
The hands on activities where people can experience and learn.
Inspiration
Now that everyone has had a good experience, where do they go from here with their new learnings?
Evaluation
Getting feedback, either formal or informal about how the event went and ideas for the next time is always helpful.
It may helpful to create a timeline in lead up to the activity to put in place a plan of action for promotion and preparation for the activity.
For example
1–2 months before:
• Book venue, plan activity, allocate resource people and volunteers, budget.
1 month before:
• Advertise with posters or fliers or through social media if activity is limited by numbers set up a registration process press releases to local papers if applicable risk assessment if applicable.
2 weeks before:
• Do a teaser or reminder through social media make sure all resources and venue are confirmed.
1 week before:
• Check registration/interest numbers and further promote if needed.
Day before:
• Make sure venue and resources are ready.
• Preparation of any hospitality.
• Signage.
Day of:
• Allow plenty of time for set up and check of any equipment being used for the activity.
• Evaluation.
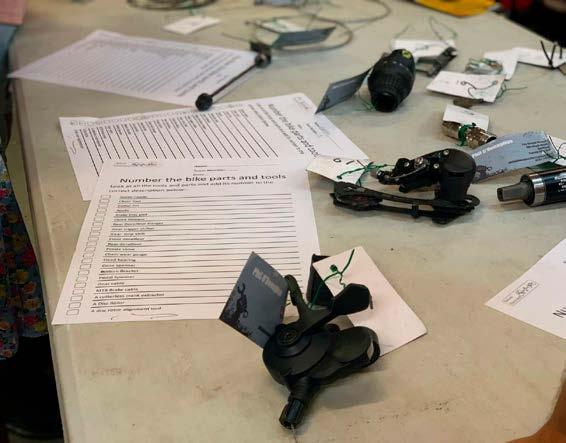
42
Event plan template – separate word document from your DO.
planning an activity
Materials needed A simple overview for
or event.
RIDE Support Resources – SHIFT & Behaviour Change
Shift and Behaviour Change
The primary goal of the Shift programme is to get people making more short journeys by bike.
These journeys may be as simple as a trip to the local shop, visiting a friend or maybe the school run (not always so simple!). Or there may be a goal to use their bike for commuting or in their work environment.
Whether big or small in aspiration we have built the Shift programme around a particular model for behaviour change and how people make decisions, enact on those decisions and are supported in those decisions to change the way they make those short journeys by bike.
COM-B Behaviour Change
We have built the Shift programme on the COM-B model. The B standing for Behaviour and the C, O and M are the things that influence our behaviour and ultimately our behaviour change.
C – Capability
O – Opportunity
M – Motivation
We have linked each of these three to the three modules for Shift.
Opportunity – Bike Ready
Capability – Learn
Motivation – Ride
The following three sheets look at these elements and their connection to our Shift programme.
Physical & Psychological Capability - learn -
Need to have the capability to cycle independently (physical ability).
Need to have the confidence to cycle in their local community (self-efficacy).
Physical & Social Opportunity - bike readySupport worker/social support within their network to undertake short journeys by bike. These journeys need to have benefit/enablement to the individual’s life.
More short journeys done by bike
Automatic & Reflective
Motivation
- ride -
Intention to make short journeys by bike. Clear motivator for the individual (finance, environment, health, time)
Establish routine and habit and be able to set a plan and evaluate behaviour.
43
RIDE Support Resources – Opportunity – Bike Ready

Information
Inspiration
A froggy tale
Physical & Social Opportunity
Opportunity – bike ready
The person needs to have the opportunity to cycle independently. To do so they would need:
• Access to a bike
-
bike
readySupport worker/social support within their network to undertake short journeys by bike.
These journeys need to have benefit/enablement to the individual’s life.
• Support within their network to undertake their journeys
In helping people to make short journeys by bike an essential element of that journey is physical and social support.
What could this support look like?
• Access to a bike.
• To make sure a bike they own is roadworthy.
• Options for borrowing or hiring.
• Exploring e-bikes if there are physical or geographical barriers.

• Access to adapted cycles.
• Access to cargo bike if for business purposes.

• Advice and consistent support from other people to make those journeys.
• A way to mark and ‘celebrate’ those short journeys and accomplishments.
There is a story about a frog that comes from the First Nation plains community in North America. It is the story of how a tiny mouse sets out on a journey of transformation from being a mouse to an eagle. All along the way on her journey she is given guidance and tools to make her journey by various animals. One of the key characters in the story is a wise frog who gives the mouse a new name called ‘jumping mouse’ and the frog is there to guide jumping mouse on her journey and give her encouragement, advice and a sense of vision during her quest.
44
RIDE Support Resources – Capability – Learn
Information
Physical & Psychological
Capability
- learn -
Need to have the capability to cycle independently (physical ability)
Need to have the confidence to cycle in their local community (self-efficacy)
Capability – learn
The person needs to have the capability to cycle independently. To do so they would need:
• Physical capability – know how to ride a bike
• Confidence to cycle in their local community
For someone who is new to cycling or returning to cycling there needs to be the physical and psychological capability to cycle for short journeys by bike.

What are some of these capabilities?
• Able to cycle independently or with an adapted/tandem bike.

• Feel confident to cycle for those shorter journeys.
• Have knowledge of how to maintain their bike and keep it running for short journeys.

• Knowledge of the best and most comfortable routes to make short journeys.
Inspiration
A froggy tale 2
There is a familiar story of two frogs that fall into a bucket of milk and get stuck there. After struggling for a bit one of the frogs says ‘I can’t do this. I never learned to swim as a kid and it’s too late for me to learn now. I don’t have the right kind of webbed feet, I can’t make it’ and sadly sank to the bottom. The other frog kept going and going and swims with all its might. Eventually with all the churning the milk slowly starts to turn to cream and the cream slowly starts to turn to butter until the frog has created a lovely pat of butter and hops onto it and then hops out of the bucket.
45
RIDE Support Resources – Motivation – Ride
Information
Automatic & Reflective
Motivation
- ride -
Intention to make short journeys by bike.
Clear motivator for the individual (finance, environment, health, time).
Establish routine and habit and be able to set a plan and evaluate behaviour.
Motivation – ride
The person needs to have the opportunity to cycle independently. To do so they would need:


• The intention or desire to cycle for short journeys.
• A clear motivator to cycle (financial savings, for the environment, for health).
• Able to establish a routine and habit and able to set a plan and evaluate outcomes.
Whatever the motivation might be, there will be some instigating factor that will get a person onto their bike and encourage them to make those short journeys. The key will be finding those motivating factors and making the most of them.

What could be some of those motivating factors?
• Financial incentive.
• Desire to get healthy or physically fit.
• Seeing other people out cycling.
• Concern about impact of driving a car on the environment.
• To simplify their short journeys.
• As a family or small group activity.
• To enjoy the outdoors.
• To shop local or support local business.
• Could lead to a social ride or activity at their destination.
Inspiration
A froggy tale 3
Finally there is the story of a frog that is stuck in a deep wagon wheel rut. A frog friend comes along and says ‘why don’t you kick and hop really high and get yourself out of danger’s way?’. But the frog in the wagon rut says, ‘No it’s way too difficult and too much effort and I’m quite comfortable in this spot so I think I’ll just stay here.’ Later in the day the frog friend sees the frog that was stuck in the wagon rut hopping along the road. ‘What happened?’ said the frog friend. The stuck frog replied ‘A horse and wagon came along and I had to get out!’
46
Worksheet & Games Index
RIDE Motivation
Worksheets & Games
20 Minute Neighbourhood
Commuting – Accessories Worksheet

Find the Right Route – Route Planning Worksheet
Find the Right Route – Map Worksheet
Getting out the Door – Short Journey Goals Worksheet
Getting out the Door – Getting Ride Ready Worksheet


Getting out the Door – A Different Perspective Worksheet
Getting out the Door – Weekly Accomplishments Worksheet
SUPPORT Resources
Getting out the Door – Monthly Accomplishments Worksheet
Setbacks & Challenges – Cutout Worksheet
Shift up, Shift Down Game Worksheet
20 Minute Neighbourhood Game Worksheet
Signs and Street Markings – Road Signs no Text Worksheet
Signs and Street Markings – Road Signs With Text Worksheet
Signs and Street Markings – Bingo Worksheet
Spot the Cyclist Bingo Worksheet
Accomplishments 1 Bingo Worksheet
Accomplishments 2 Bingo Worksheet
My Cycling Circle Worksheet
Challenges Timeline Worksheet
47
RIDE Support Resources – 20 Minute Neighbourhoods
Make short journeys easier with 20 minute neighbourhoods
The concept of the 20 minute neighbourhood is gaining popularity as a way to encourage people to walk and cycle instead of using a car for short journeys. Our policy and campaigns manager for Scotland, Jim Densham, explains why Cycling UK supports this idea.
At Cycling UK, we encourage and support more people to cycle for short journeys – to school, the shops, library, doctor’s surgery, the sports pitch – any of the places we need to get to in our local area.
Many people simply reach for the car keys to make those journeys right now. For example, in Scotland, statistics show that over half (54%) of journeys under 5km (3 miles) and a quarter of journeys under 1km are done by car.
There are numerous reasons why so many short journeys are made by car, but one is the way our neighbourhoods have been planned and developed over the years.
Too often, housing developments don’t have nearby shops or services, and many town centres have suffered with the rise of out-of-town developments.
The concept
The 20 minute neighbourhood concept aims to change planning and transport polices to ensure that more people can access the services within a 10 minute walk or 7 minute cycle from home.
By bringing services closer to where we live, and making roads safer for walking, cycling and wheeling, the aim is that national and local governments in the UK can make the places where we live more attractive, safer, and close-knit, with better air quality, improved health outcomes and reduced carbon emissions.
Cycling UK supports the concept of the 20 minute neighbourhood – making trips to key local services
shorter and safer would be a key way to encouraging more people to cycle regularly.
So far, adoption of the idea by governments in the UK is at a very early stage, although it has been proposed in the Climate Change Plan by the Scottish Government and Newcastle has an action plan which includes the 15 minute city. There’s a need to understand how best to make the concept a reality, whilst remembering that solutions will vary from place to place.
The changes needed to create 20 minute neighbourhoods in Liverpool will be different to the solutions for small towns like Dunbar, Devises or Dolgellau.
Making the shift
The 20 minute neighbourhood concept fits well with our project work in communities across the UK as we help people get more active.
Our Shift project, which runs in Scotland, does just that, by supporting community groups which want to help people to cycle for short journeys.
Giving people what they need to grow in confidence and cycling capability is a big step to ensuring they can move away from using their car for short journeys.
But in many places we need that behaviour change work to be matched with changes to the physical environment of neighbourhoods.
Those neighbourhoods need safe cycling routes, quieter streets and services within reach.
That’s why the 20 minute neighbourhood concept needs to be widely adopted, and not just in our urban areas, this should be the goal for rural towns and villages too. Until this happens, life could remain frustrating if you want to walk or cycle more but the places you need to travel to on a daily basis are too distant.
I’m relatively lucky, where I live in the Southside of Glasgow as within a 10 minute walk I can get to shops
and supermarket, a pharmacy, a café, the barber, the primary school and greenspace.
I can access even more places, such as my Dr’s surgery, if I jump on my bike and go a bit further.
Not everyone is so fortunate but it’s worth taking some time to think about and identify what’s in your 20 minute neighbourhood and within reach on foot or by bike. Doing so may help you realise that some places aren’t as far away as you thought and encourage you to drive less for local journeys, get more active and reduce your personal carbon footprint.
You’ll also be prepared when your local council seeks opinions about local services, developing neighbourhoods and local roads. Creating 20 minute neighbourhoods will take time and involve change to people’s lives.
It won’t be quick or easy to bring together the services people rely on within these 20 minute zones. However, local and national government can start now by creating cycle lanes, improving pavements and slowing traffic speeds in built up areas.
More information on 20 minute neighbourhoods Sustrans – what is a 20 minute neighbourhood?
Town and Country Planning Association – The 20 minute neighbourhood includes a guide for planners
Love your local – a personal take on creating a 20 minute neighbourhood in East Lothian, by Cycling UK’s head of development in Scotland, Suzanne Forup
Place Based Carbon Calculator – a blog explaining a carbon calculator which includes data on 15 minute neighbourhoods in England
Plan Melbourne – 20 minute neighbourhoods –an example from Australia
Written by Jim Densham
WORKSHEETS & GAMES INDEX 48
Information

WORKSHEETS & GAMES INDEX 49
Panniers Pannier rack Tyre levers Pump Lock Puncture repair kit Inner tube Lights Oil Multi-tool Vinyl gloves 1 1 6 6 2 2 7 7 3 3 8 8 4 4 9 9 5 5 10 11 10 11
RIDE Support Resources – Commuting Recommended Items
RIDE Support Resources – Route Planning
Explore the best and most comfortable routes for cycling locally
Materials needed
• Map of local area that includes a 5 to 10 mile radius around where you live
- Printed online map
- Hand drawn map
- Sustrans route map
- OS map
• Coloured markers or highlighters
Activity
Colour 1
Mark out the short journeys that you make by car or public transport.
Colour 2
Mark out the short journeys that you have made by bike.
Colour 3
Mark out the short journeys that you would like to make by bike in the next month.
Colour 3
Mark out the short journeys that you would hope you will be making 6 months from now by bike.
Make a list of things that will help you make those short journeys by bike:
Make a list of any obstacles to those short journeys:
How might you be able to overcome those obstacles?
Remember the journeys might just be a short run to the local post office, shop or school. Set your goals so that they are achievable over time.
To plan longer journeys and routes:
Cycling UK – route planner
Traveltime – 20 minute neighbourhood exploration
WORKSHEETS & GAMES INDEX 50
RIDE Support Resources – Find the Right Route


A short journey to a Community Hall
A car journey route to the Community Hall
A walking route to the Community Hall
A bike journey route to the Community Hall following the car route
A bike journey route to the Community Hall with shorter alternative routes
WORKSHEETS & GAMES INDEX 51
ycle & walk ath/s eps
RIDE Support Resources – Getting out the Door
Possible short journeys
Local shop/errands
Work School run
Library
Visiting friends/relatives
Social group
Fitness/sport group
Grocery shopping
Other shopping
After school group
Childcare drop off/pick up
Deliveries
To or from public transport
Other ..................................................................
Other .................................................................. Other Other
Short journey (choose your top three from the list)
Estimated distance or time
Short Journey Goals
What will hinder you from making this journey?
What will help you make this journey?
Journeys per week/ month goal
Journeys per week/ month achieved
WORKSHEETS & GAMES INDEX 52
RIDE Support Resources – Getting out the Door: Getting Ride Ready
The thought process for someone to make a short journey by bike
Mental and physical preparation
‘lone wolf’
Water bottle? helmet? charged phone?
I’ll need room for my shopping
Backpack? panniers? trailer?
Where will I leave my bike
Secure indoor? locked outside?
It’s a short journey
I have a bike My bike is ready to go
Bike maintenance or servicing? M check?
It’s a commute or longer journey
I know which route to go for my journey
Do I need to dress for the weather?
I need to find the best route for my journey
Mixed transport commute? Route planner
Easily accessed?
Change of clothes?
Am I taking children?
Is it a longer journey?
Cold weather? wet weather? Helmets? carrier? trailer? own bikes? Change of clothes? repair kit? cycle clothing?
WORKSHEETS & GAMES INDEX 53
RIDE Support Resources – Getting out the Door: A Different Perspective From the Bike


To explore seeing the world around us from the perspective of riding a bike
Riding a bike puts a person in the open air and at a sightline level that is different from walking or sitting in a car of bike. The pace of the journey also gives an opportunity to see and hear different things around you in the environment. Here are a few exercises to help appreciate a different perspective.

Exercise 1 – sounds
• As you are cycling along start listening for sounds that you wouldn’t normally hear if you were doing your journey by car or public transport.

• Name five sounds that you can hear.
• Listen for bird songs. See if you can identify 5 different ones.
Exercise 2 – colours
• Riding a bike slows down the pace of your travel.
• Make a note of five colours or patterns you see from cycling along.
• How many shades of each colour can you see?
Exercise 3 – wildlife
• See if you can see five different types or wildlife.
• If you are in a more urban area see if you can identify five different types of bird.
Exercise 4 – a new Level
• Looking around at bike level. Find five things that you have never noticed before if you weren’t riding a bike.
WORKSHEETS & GAMES INDEX 54
RIDE Support Resources – Getting out the Door: Short Journey Weekly Accomplishments 1/2
In the bike wheels below list your journeys and learnings
WORKSHEETS & GAMES INDEX 55
Week 1 Week 4 Week 2 Week 5 Week 3 Week 6
RIDE Support Resources – Getting out the Door: Short Journey Monthly Accomplishments
In the bike wheels below list your journeys and learnings
WORKSHEETS & GAMES INDEX 56
Month 1 Month 4 Month 2 Month 5 Month 3 Month 6
RIDE Support Resources – Setbacks Cutout
My bike was stolen
I tried to make a local journey using maps and got totally lost
I tried to make a local journey using a route planning app and got totally lost
I had a fall or near miss
An angry motorist shouted at me and blared their horn
I got totally soaked in the rain
The wind on my return journey made my cycle home a real slog
My route took you a lot longer to my destination than I thought it would
I went to get my bike out for a short journey and the tyre was flat
I didn’t feel safe cycling on my last journey
My chain broke I just couldn’t make it up a steep hill
WORKSHEETS & GAMES INDEX 57
RIDE Support Resources –Shift up, Shift Down! (Snakes and Ladders)
Participant numbers: 2–4
Materials needed: A print out of the game – works best at A3 or larger. Playing pieces. Single dice.
The game can be a good ice breaker or starting point to talk about things that set us back on cycling locally and things that encourage us. Use different scenarios to discuss how someone would overcome those obstacles.
NOTE: Green cycle path goes up, red path goes down Encourage participants to come up with their own examples of what encourages them and what challenges them.
WORKSHEETS & GAMES INDEX
97 84 77 64 57 44 37 24 17 4 96 85 76 65 56 45 36 25 16 95 86 75 66 55 46 35 26 15 6 94 87 74 67 54 47 34 27 14 7 93 88 73 68 53 48 33 28 13 8 92 89 72 69 52 49 32 29 12 9 91 90 71 70 51 50 31 30 11 10 98 83 78 63 58 43 38 23 18 3 99 82 81 79 80 62 61 59 60 42 41 39 40 22 21 19 20 2 so sorry your bike got nicked chain broke or fell off route finder got you totally confused rain and wet roads slowed you down angry motorist shouted at you fo rgot your bike lock you had a bit of a ‘w obble ’ headwind and hills slowed you down pat on the back, you completed your Shift programme! excellent, you learned how to repair your own bike ventured out into busier traffic found a route with quieter road s and c y cle paths you took pa r t in an essential cycle skills course learned how to do an M check you inspired someone else to c y cle good job flat tyre , you par ticipated in 4 led/route finding rides good work, you made a short journey by bike every week round of applause you commuted to work by bike made a short journey in the dark with proper lighting used your panniers to carr y your groceries well done, you made a plan for short journeys by bike 5
RIDE Support Resources – 20 minute Neighbourhood Game
punctureahaveYou kitrepairawithout TURNAMISS
of a ‘wobble’ MOVE BACK 1 SPACE
lostgotYou youron way destinationyourto AMISS TURN
Completed the school run Had a bit
Three shortjourneysonein week! MOVE AHEADSPACES3
You were able to use your hand signals MOVE AHEAD 2 SPACES
Youmadeitupthathill MOVEAHEAD 3SPACES
Youmappedout yourshortjourney MOVEAHEAD 3SPACES
ebikeanrodeYoufor journeyyourMOVE AHEADSPACES3 combinedYousuccessfully cycling andpublictransport foryourjourney MOVEAHEAD 4SPACES MOVE AHEAD 3 SPACES Forgot your bike lock MOVE BACK 2 SPACES
You’ve reacheda connectingcyclepath MOVE AHEAD3 SPACES
• Play with 1 or 2 dice
• See how long it takes to get to your destination
‘20 minute neighbourhoods’ are places that are designed so residents can meet their day-to-day needs within a 20 minute walk from their home; through access to safe walking and cycling routes, or by public transport.
climatexchange.org WORKSHEETS & GAMES INDEX
hill
the
of you
BACK 1 SPACE
a SHIFT activity MOVE AHEAD 4
That
got
better
MOVE
You attended
SPACES andWind rainandno MOVEwaterproofs BACK2SPACES completedYou your essential cycle skills course MOVE AHEAD SPACES4
YoucycledthroughthewintertimeMOVEAHEAD 4 SPACES
Feelinggreataboutyour journey! MOVEAHEAD 2SPACES
RIDE Support Resources – Signs and Street Markings


Some basic signage and road markings. How many can you identify/guess?
WORKSHEETS & GAMES INDEX 60
RIDE Support Resources – Signs and Street Markings
Some basic signage and road markings. How many can you identify/guess?
Pedal cycle lane on road at junction ahead or (where “lane” is varied to “track”) cycle track crossing road at junction ahead.
Parking place for pedal cycles.
With-flow bus lane ahead that can also be used by pedal cycles and taxis. Hours of operation may be shown.
End of cycle lane, track or route.
Road marking indicating the end of a cycle lane, track or route.
Pedal cyclists to dismount at end of, or break in, a cycle lane, track or route.
Route for pedal cycles only.
Road markings for an advisory pedal cycle lane. Other vehicles should not use this part of the carriageway unless it is unavoidable.
No through road except for pedal cycles.
Shared route for pedal cycles and pedestrians only.
Riding of pedal cycles prohibited.
Direction of a numbered route for pedal cycles forming part of a national cycle network.
Reminder to pedestrians to look out for pedal cycles approaching from the right.
Riding of pedal cycles prohibited.
A Toucan crossing is used by both pedestrians and cyclists. Near-side signals include red and green pedal cycle symbols, together with a call button for use by both pedestrians and cyclists.
Number route for pedal cycles forming part of a national cycle network.
Separated track and path for pedal cycles and pedestrians.
Sign showing the direction and distances (in miles) to destinations along a named cycle route forming part of the National Cycle Network.
WORKSHEETS & GAMES INDEX 61
RIDE Support Resources – Signs and Street Markings: Street Bingo
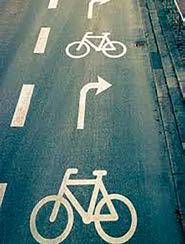


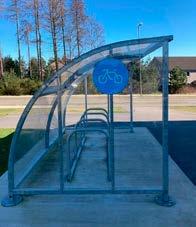
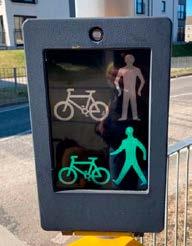
On your journey find the same or similar sign/marking and fill in your spot. See if you can get a strip horizontally or vertically. Go for a full house!

WORKSHEETS & GAMES INDEX 62
RIDE Support Resources – Spot the Cyclist Bingo
See if you can get a strip horizontally or vertically. Go for a full house! This exercise is to help become more aware of how many people are out cycling just like you
A cyclist wearing a helmet
A cyclist not wearing a helmet
A cyclist wearing a trouser clip
A cyclist on a road bike
A cyclist on a mountain bike
A cyclist on an e-bike
A cyclist on a cargo bike
A bike with panniers
A bike with front and back lights
A cyclist on a folding bike
A cyclist on a recumbent bike
A cyclist on an adapted cycle
A child on a bike
A group ride
A cyclist on a B road
A cyclist on a quiet road
A cyclist in the rain
A cyclist in full lycra cycling gear
A cyclist on a tow/canal path
Cyclists on a tandem bike
A cyclist in the snow
A cyclist with groceries
6 bikes in one bike rack
A locked up bike
WORKSHEETS & GAMES INDEX 63
RIDE Support Resources – Bike Bingo – Accomplishments Part 1
See if you can get a strip horizontally or vertically. Go for a full house! This exercise is to help mark achievements in cycling locally
Rode my bike in the rain
Managed to cycle all the way up that hill
Secured my bike with a lock
Fitted my helmet properly
Shared a social media bike story/photo
Waved at another cyclist
Rode my bike five times in a week
Rode with a friend or family member
Pumped up my tyres
Rode my bike twice in a week
Safely stopped at a junction
Biked to the shop
Cycled on a bike path/lane
Cycled somewhere I’ve never ridden before
Rode on a quiet street/road
Biked to visit a friend
Crossed a junction
Watched a bike skill video/webinar
Performed a bike safety check (M check)
Safely passed a parked car
Rode in a primary position on a road
Practiced my hand signals
Looked all around for traffic or hazards
Cycled 1–2 miles
WORKSHEETS & GAMES INDEX 64
RIDE Support Resources – Bike Bingo – Accomplishments Part 2
See if you can get a strip horizontally or vertically. Go for a full house! This exercise is to help mark achievements in cycling locally
Rode my bike through the winter
Took my bike on public transport
Registered my bike with a security marking kit
Cycled with a trailer
Adjusted my brakes
Completed 5 round trip cycle commutes
Took a cycle ride leader training course
Successfully carried out an on the road repair
Joined a cycle club/group
Cycled on a busy road
Transported something on my bike
Cycled on a road with a speed limit higher than 20
Repaired a flat tyre
Rode to and from work
Recorded my journey on an app
Cycled around a roundabout
Cycled on a National Cycle Network (NCN) path
Cycled 5 miles
Cycled an adaptive bike
Rode an e-bike in the dark
Adjusted my seat properly
Rode an e-bike
Used a cargo bike
Cleaned and oiled my chain
WORKSHEETS & GAMES INDEX 65
RIDE Support Resources – Motivation: My Cycling Circle
Who is part of your growing cycling circle for support and company?
What make them special as part of your cycling circle?
me
WORKSHEETS & GAMES INDEX 66
Challenges Timeline
Want to learn or return to cycling
No short journeys by bike
Not physically fit enough or able
Had a mechanical breakdown
Had a ‘wobble’ or near miss
Am I the only one cycling?
Beaten by the wind and weather
Negative experience with a motor vehicle
What changed?
Health or physical ability issues
Regular journeys by bike
Ready to encourage friends/family to cycle
Share your knowledge and learning!
WORKSHEETS & GAMES INDEX 67 Find a buddy or cycle group Practice a traffic route at quieter times Find a quiet path or traffic free route Plan your route and programme in a break Practice short journeys in different conditions Source proper accessories, adapt your route for night Practice your route on a non work day Explore other types of bikes Ride out with a friend or find a cycling course Practice on a quieter route Explore alternative route in windy weather Find a cycling group or club Learn some basic bike maintenance skills Try joining a group ride for some supported cycling Ready to venture out into busy traffic Ready to venture out on my own Ready to try a longer journey
to venture out with a friend/ group
to learn or return to cycling
to ride in adverse conditions/ terrain
to ride any time of day/night
to try a commute
of
Ready
Want
Ready
Ready
Ready
Point
reflection
What changed? Point of reflection
What changed? Point of reflection
Point of
What changed? Point of reflection What changed?
reflection
of
What changed? Point
reflection
Point of
What changed?
reflection
Ready to encourage others to cycle
Enrol in a cycle ride leader programme
cyclinguk.org/shift

