2 minute read
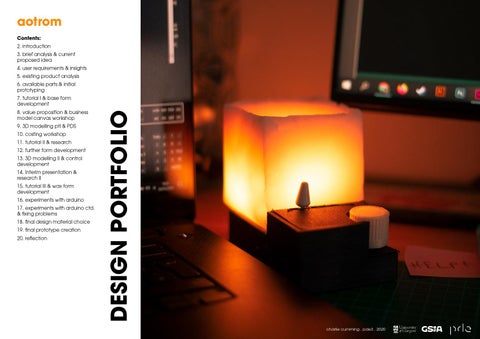
final prototype creation


Due to unforseen circumstances, my final prototype had to be made outside of the GSA workshops and facilities. This meant that I did not have access to the materials and processes that I would have used for the final model. Therefore, I tried to stay as close to the origional design as i could whilst substituting the following items: • Base plate: Instead of cast aluminium, I used
FDM 3D printed PLA, and due to this increased the wall thickness to reduce the cracking that had occurred in prior PLA prototypes. The wall still cracked so I used a soldering iron and extra
Advertisement
PLA fillament to ‘weld’ it back together, finishing with sandpaper and photoshop. • Rotary Encoder Knob: Again, instead of cast aluminium I used FDM 3D printed PLA, however this time i modified a part that i had printed for an earlier prototype using a soldering iron to melt the plastic and create a different shaped hole.
This saved time printing as well as my dwindling fillament supply. • Fader top: Instead of using a customised premade part I used the top of a pickup selector from a guitar, as it had the same mounting. This was due to many failed 3d prints of this part. • Top plate: Line bent aluminium was replaced by a cardboard piece, held together with hot glue. • Wax mould: Instead of a 3D printed mould casting onto the top plate, I used a waxed paper mould, as casting onto the cardboard toplate would have saturated the material and made it lose structure. • Surface finish: As PLA cannot be anodised, I sanded away excess filament and gave the piece three coats of black spray paint. It really needed a top clear coat and primer, however I did not have this to hand. Learning from previous prototypes, I melted the wax slowly using a bain-marie to give a even distrobution of heat then cast a small amount of wax on the bottom of the mould first. This was in order to seal the wires and neopixel in place before pouring the rest of the wax.