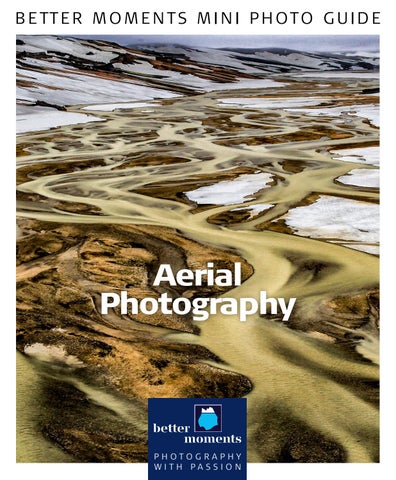
B E TT E R M O M E N T S M I N I P H O T O G U I D E
Aerial Photography
PHOTOGRAPHY WITH PASSION
Better Moments CEO and founder: Christian Nørgaard Graphic design: Håkan Andersson
First flight of Wilbur and Orville Wright. The photograph shows the first powered, controlled, sustained flight.
Text editor: Laura Graf All images and text in this catalog are under International Copyright Legislation. However, Better Moment’s guests and potential customers may download the catalog for private use, but not for any commercial use. Any violation of the International Copyright Legislation will be reported to the International Court of Justice of International Copyright Legislation Photo of mr Nørgaard by David Trud All photos, except noted, by Christian Nørgaard.
Orville Wright is at the controls of the machine, lying prone on the lower wing with hips in the cradle which operated the wing-warping mechanism. Wilbur Wright running alongside to balance the machine, has just released his hold on the forward upright of the right wing. The starting rail, the wing-rest, a coil box, and other items needed for flight preparation are visible behind the machine. MEDIUM: 1 negative: glass, dry plate; 5 × 7 in. Forms part of: Glass negatives from the Papers of Wilbur and Orville Wright, United States Library of Congress.
PHOTOGRAPHY WITH PASSION
Aerial Photography The first flightless creatures, that left terra firma behind and took off in a hot-air balloon in order to fly like the birds, were a sheep and a goose on 19th September 1783. More than a hundred years later, in December 1903, the Wright brothers, Orville and Wilbur, made the first more or less controlled flight with an aircraft. However, Leonardo da Vinci already designed a helicopter in 1493 – 450 years before the first helicopter would actually take off. So what have a sheep, a goose, the Wright brothers, and Leonardo da Vinci to do with aerial photography? Nothing, and yet everything. Without these inventors and adventurers, we wouldn’t be able to indulge in our passion for aerial photography today. This issue of Photography with Passion – Aerial Photography is an introduction to aerial photography and shall serve as a small 101 guide with the most important trips and tricks so that you are prepared when you take to the thin air with your camera. Christian Nørgaard
AIRPL ANE VERSUS HELICO PTER
Before you take off on your adventure in the thin air, you have to decide, which mode of transport suits your needs. Here are a few things you should consider: Benefits of photographing from a plane
■ An aircraft can cover a large
area within a short time, and you can, therefore, photograph many locations.
■ You can – relatively easy – lean out of the plane’s windows. But only if air and wind speed allows you to do so of course.
■ Some airplanes – but not all – are able to fly at low speed, so you have time to compose and frame your images.
■ Normally, there are quite many
providers that offer scenic flights, which may be cheaper than an actual flight for aerial photography.
■ When it comes to the price,
flying by airplane is considerably cheaper than going by helicopter.
■ The open part of the window
can be narrow and placed low, so it is cumbersome and sometimes almost impossible to work.
■ Not all pilots understand your
needs or have a feeling for flying very precisely in relation to your location and your framing.
■ Not all airplanes have the option of opening windows, so you can easily be in a situation where there is only space for one person at a time to photograph.
PHOTO BY PETER DE VINK
■ Some airplanes have low wings
Disadvantages of photographing from airplanes
■ There can be turbulence which
that can make photography difficult. Make sure to choose a plane with high wings.
■ There is no tradition of flying
with open doors, so it is rare that you can get a pilot to take the doors off. Besides all this, it is still a great and cheap way to explore a location from another perspective.
makes your photography / framing very challenging.
■ Not all planes can fly slowly
– or stand still in the air like a helicopter – so you're limited in your photography and most often have to fly over or circle over the same location many times.
HIGH WINGS
LOW WINGS
AIRPL ANE VERSUS HELICO PTER
Advantages of a helicopter
■ The optimal setup for an aerial
photography session is definitely to photograph from a helicopter with open doors. This gives you a nice clear view of the scenery and you can shoot from almost every angle.
■ You can cover multiple locations in a short time as the helicopter
can easily hover over your location so you can shoot your images relatively quickly before continuing to the next photography stop.
■ In areas/countries with a
tradition for aerial photography, the helicopter pilots usually have a good understanding for your needs and desires - they may even guide you to new and unknown locations.
The optimal setup for helicopter photography: Flying with open doors.
■ Most helicopters have enough
space for you and up to four friends – so for five persons in total – to photograph with open doors. It makes the experience very unique – but remember that one person should be in charge of guiding the pilot. Too many cooks spoil the broth.
■ You can fly very low in areas
where there are no mountains or strong winds to create unique images from unusual angles. Disadvantages of a helicopter
■ It's difficult to come up with
some drawbacks - well, if I had to, that would be the price.
PHOTOG RAPHY IN THE TH IN AIR
■ When you are in the air to
shoot, do not get distracted by the scenery and ‘waste’ your time enjoying the view. You can do that another time – here and now you shall spend all your time to photograph. Every minute and second counts and there is no guarantee this opportunity will arise again.
middle ground, and background. Instead, you either have a strong foreground or an abstract and artistic landscape beneath you.
■ Vary your photography. Shoot
the big and often overwhelming landscape and use the sky according to the weather. Lightly cloudy weather with padded clouds is ideal. If there is blue sky you should focus on the landscape ■ The basic compositional rules that apply in the air are almost the and use the blue sky as a frame. same as on the ground. However, ■ Don't underestimate the you must be very careful with landscape that is right beneath the four corners of your frame you! Colorful rivers, treetops, earth as they actually are what makes formations and sand dunes can your frame. In aerial photography, look amazing when photographed you most often do not have the from above. In other words - look classic composition of foreground, out and look down.
â– You may have animals below
you, for instance birds. They are very photogenic and if you catch them over a dark background, you will be happy when you get home and browse through your images. Talking about animals, if you want to photograph exotic animals from the air, pretty much the same tips and tricks apply. However, I am not a big fan of stressing animals out by flying over them. Animals like birds can be better seen over a dark background.
B E AWARE ...
■ First of all, although I probably
quite violently. And do not lean don’t need to stress this, don't fall your lens or camera against, for out of the helicopter! Neither open example, the window glass – keep it away from anything the doors yourself and without permission, in other words – stay that may move. where you are – only birds can fly. ■ While shooting, keep an eye on ■ You will notice that there is a lot the landing gear, the wings or the rotor above you, as they easily of movement both in an airplane appear in your frame. and a helicopter.
■ These movements will affect
your image quality and result in blurry images if you don’t know how to handle them. It is crucial to keep your upper body relaxed as it will help to balance out the motion and your camera will be more steady. Do not lean against the door frame as it tends to vibrate
■ If you have more than
one camera as well as other equipment, you have to be organized to make sure you can reach it easily. Do not place it on the floor because it will slide across the cabin floor. Don’t put it on the seat either as it may fall down.
■ In summer, regardless of where
you are (more or less), you can fly with open doors as it won’t get very cold. If it's a bit cool, you can easily dress up in warm clothes. Winter and autumn will most often be super cold and windy. Therefore, do not plan your flight with open doors, but rather with photography through the open windows.
■ Motion sickness – it may sound
■ Regardless of whether you
choose to photograph from a helicopter or an airplane, you should make the most of the time you get up in the air. Do lots of research and share your ambitions with the pilot so you know whether your plans are realistic in relation to your budget – time in the air is expensive.
■ Arrive at the airfield well in
advance to ensure you have time silly, but getting sick in a helicopter to talk with the pilot. This is or small airplane is not unusual. the opportunity to ask all your Tablets against motion sickness questions and the pilot can also are therefore recommended. brief you about unforeseen events and issues that may occur and that you would like to be aware of before taking off.
PHOTOGRAPHY WITH PASSION BETTER MOMENTS APS Allerød Stationsvej 4 | DK-3450 Allerød | Denmark Tel.: +45 31578747 | E-mail: info@better-moments.com
STAY IN TOUCH
WE ARE PROUD TO PARTNER WITH