
14 minute read
Suspension: Best practice for popular repairs


All strut repairs must heed best practise, as well as prioritising technician safety and the time taken. Consider also that a suspension geometry check is required afterwards.
Getting it right: McPherson strut dampers
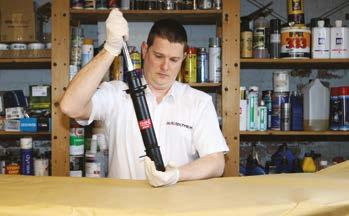
Investigating the best practice for popular repairs, Rob Marshall looks at how dampers are separated from springs in the quickest and safest manner.
Whether you are tasked with replacing a broken spring, or a leaking damper, you might need to dismount the combined strut, dismantle the unit and replace the relevant parts. While we do not wish to duplicate our earlier feature on this topic, https://autotechnician.co.uk/strutting-your-stuff, it is worth re-emphasising that springs and dampers must be replaced in axle pairs. As a guide, KYB states that dampers must be replaced every 50,000 miles, due to internal wear.
As this procedure must prioritise technician safety, repair quality and the time taken, we have assembled the following tips to help you achieve these goals...
1. Do your research: Many models with adaptive suspension operate via the dampers. Verify that disconnecting any electrical cabling does not require a special procedure. 4. Self-locking nuts are an obvious example of fittings that should not be reused. When sourcing replacements, be aware that high tensile bolts can be identified by markings on their heads.
2. Order the correct part: be certain that you fit like-for-like dampers not anything that will bolt on. For example, gas-filled dampers are superior to those filled solely by oil but they look identical on the outside.
3. Establish which fixings require replacement and ask your supplier which ones are included with any parts order. You might have to order smaller
components separately.
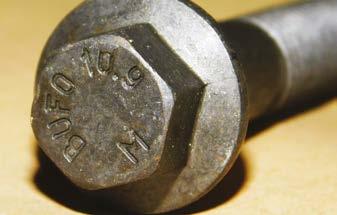
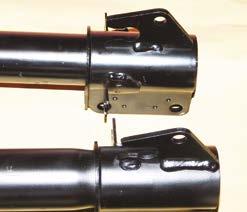

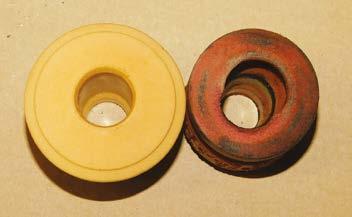
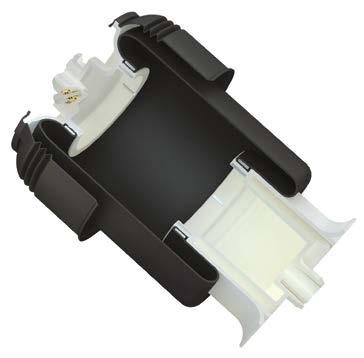
5. Strut rod gaiters and spring assisters (bump 6. Try to avoid cutting costs on cheap dampers. Even stops) should be replaced whenever new dampers if they look identical, their internals can differ are fitted. In most cases, you should identify this significantly. The difference in welding quality on and order them separately, if required. this OE-quality KYB damper (bottom), compared to a cheap alternative, is obvious.
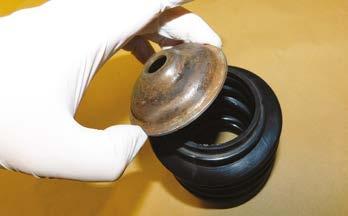
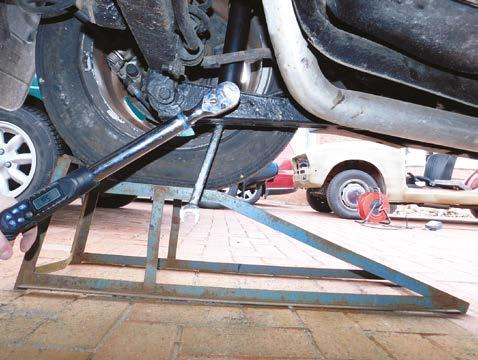
7. Do not forget the top-mount, either. Apart from general degradation, many units include a bearing so that the strut can move with the steering. If handed, check any identifiers (or alignment markings) match, as pictured. 10. The centre nut/bolt must not be undone on the car; doing so can cause serious damage and risks injury. Some technicians prefer to 'crack' the nut before removing the strut from the car. wheel arch support it, so it does not damage other components. Additionally, ensure that you do not pull the driveshaft from the gearbox, or tear its gaiters. check for any signs of weakness, especially light corrosion and areas where protective paint is missing. Consider advising both axle sets of springs be replaced, if you are unsure of their integrity.

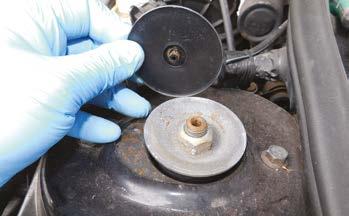
8. This top-mount appeared to be in good order when removed from the car. Yet, when dismounted from the strut, the rubber broke-up.
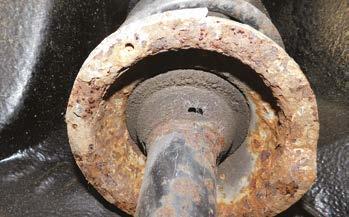
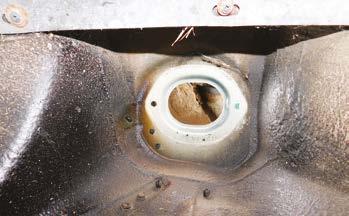
As the technician had not ordered a replacement beforehand, the repair took longer than it should have done. of mole grips, to stop the rod from rotating, damages the polished surface and will tear the internal rubber seal, courting fluid leaks. This does not matter if you subsequently replace the damper. mounting position for corrosion. While heavy 'rot' will require attention, if you find light surface rust, suggest treating the area with a converter and anti-rust wax as an upsell. spring is prodigious and the strut must be treated with respect. You will require a goodquality set of spring compressors, such as the Sealey R229 pictured. The consequences of not doing so can be seen here: www.facebook.com/ watch/?t=25&v=2507852629476695
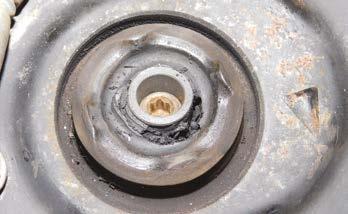
9. With the car supported adequately, check if any extra parts are required. Corroded seat pans are extremely dangerous, so do not risk refitting parts that are likely to fail and, when they do, risk
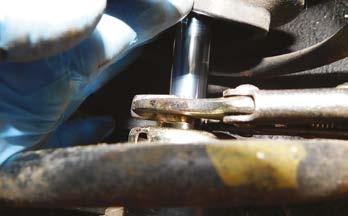
11. Be wary that gripping the piston rod with a set the driver losing control.

12. As you may have to separate hydraulic hoses and electrical leads from the strut body, check their positions and ensure that the replacement damper possesses the relevant mounting bracket in the same positions. Some designs are
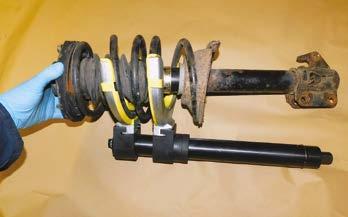
13. As you extract the strut assembly from the

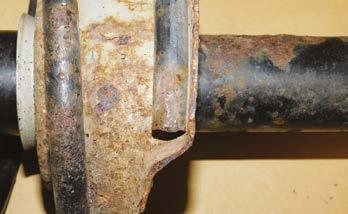
14. With the strut removed from the car, check the handed, for example.
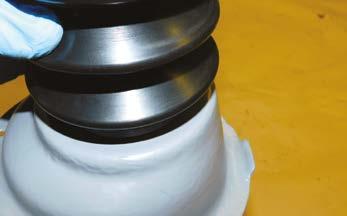
15. If you are unfamiliar with the make/model, check the position of the spring ends before dismantling, so you reassemble the spring/damper
16. While cracked and broken springs are obvious,
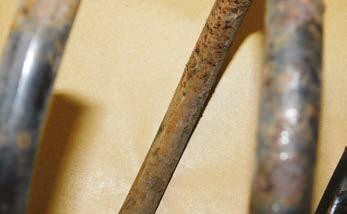
17. The energy contained within a compressed
assembly correctly later.

18. Safety, therefore, must be your priority. Pictured, is the hand-operated 8011MEK free-standing coil spring compressor, which includes a safety cage and cable, essential to protect the operator should a compressed coil spring break-free.
19. For convenience and speed, this 9005 coil spring compressor is pneumatic, powered by your airline. It includes the same safety features as the 8011MEK, both of which are sold by Butts of Bawtry. 22. Lift-out the old damper from the spring and dismantle it, to establish how various internal parts are located within the gaiter. This includes extra washers and the spring assister. to show how the ancillary parts are fitted, study the removed part. This picture shows the spring assister's position within the piston gaiter. be aligned are in their correct positions, as you fit the still-compressed spring (carefully) over the fully-extended damper. 20. While mounting the compressor is crucial for safety, note that the plastic yokes not only prevent slippage but they also prevent the spring's paint from being damaged. it upright and exercise the damper piston by depressing and pulling the rod several times across its entire working range. This purges the oil of air bubbles.

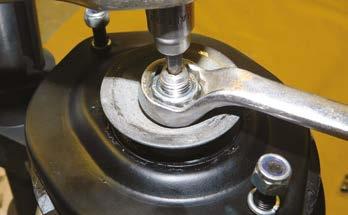
21. Only when the spring has been compressed so that all pressure has been relieved from the top-mount, should you attempt to unscrew the

23. Note that you may have to transfer certain non- 24. Spring assisters deteriorate over time and the wearable parts from the old damper, such as this old parts should not be swapped over to the mounting washer, but clean it first to avoid any new damper. As mentioned earlier, you might grit contaminating the piston rod. need to order them separately. Degradation is
25. As most dampers do not come with diagrams
26. Before assembling an oil-filled damper, hold centre nut and remove the top mount. not as obvious as that pictured.
27. For optimum piston damper seal life, which guards against leaks, the piston rod must be kept clean and dry throughout its working life.
Therefore, ensure that both ends of the gaiter
28. Ensure that any particular parts that need to are located correctly.


29. When fitting the top mount, ensure that you 30. Remove the tension from the spring, slowly and follow the torque value reference. As the locknut carefully, ensuring that the spring ends mount is usually of a self-locking design (such as Nyloc), in their correct respective places and that, if use a new replacement and discard the old one. necessary, the top mount is in the right position, so it locates into the car's inner wing.

31. When refitting the strut assembly, heed the torque settings of all parts, including the top mount and bottom fixings. Note the advice on replacement nuts and bolts detailed earlier.
32. If the damper is fitted with a bottom bush, tighten the bottom nut and bolt with the weight of the car on the affected roadwheel. Otherwise, the bush is placed under excessive and unnecessary torsional strain in its normal position.
Air Suspension
Understandably, working on air springs is a very different proposition to the conventional strut. Not being considerate about best practice can, at the very least, reduce the lifespan of the system. You could even damage the parts while fitting, killing the job's profitability at a stroke. Just as KYB recommends a 50,000 miles replacement interval on conventional dampers, Arnott Europe recommends a 6-10 year renewal cycle for air springs, due to the flexible material's natural degradation with time. Should the owner ignore small leaks, the compressor works overtime to compensate, which also curtails its life expectancy.
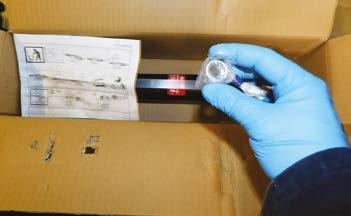
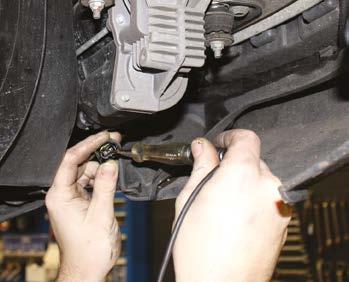
Continued...
WORKSHOP TIP: HYDRACTIVE III SYSTEMS
While not the most common vehicles, your workshop may see examples of Citroën's C5 (and the rarer C6), fitted with the final version of the company's oleopneumatic suspension, Hydractive III, or III+. We have heard of workshop errors resulting in the system's hydraulic fluid (LDS) reservoir splitting its seam, as the car is lowered onto its wheels. The suspension must have its maximum ride height selected, before the body is raised. This will ensure that the vehicle's weight is supported by the pressurised suspension, as the ramp is lowered. If the maximum height is not selected before the car is raised, post-repair, the suspension will sink to its bump stops, forcing fluid back into the reservoir at high pressure.

Staying On Track With Steering and Suspension from febi
febi can supply you with the parts you need!
With over 11,000 references, febi’s comprehensive coverage of the automotive aftermarket delivers where it counts.
SOLUTIONS
MADE IN GERMANY www.febi.com

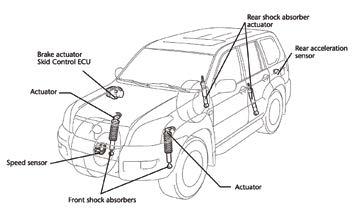
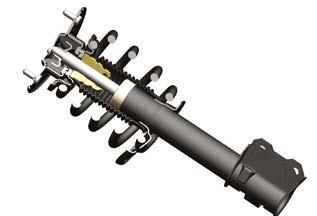
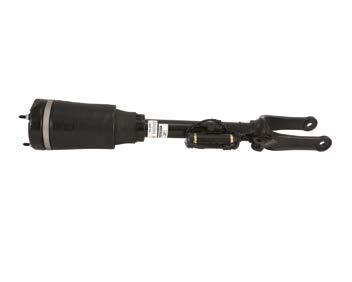
33. Even in the absence of a fault warning light, verify that the ride-height is level on all air-sprung wheels. Check also that any self-levelling function operates, by loading the vehicle and assessing the suspension's reaction. 36. Compressor replacement tends to be straightforward but avoid straining any pipes and connectors. Replace the relay as well, which is often a warranty condition. Should it be faulty, the compressor will either not function, or will run nonstop. 39. This strut incorporates both an air spring and a damper. Should the damper fail, hydraulic oil can leak into the air spring assembly, reducing its lifespan, dictating replacement of the entire strut. As with conventional springs and dampers, you should replace air springs in axle pairs.

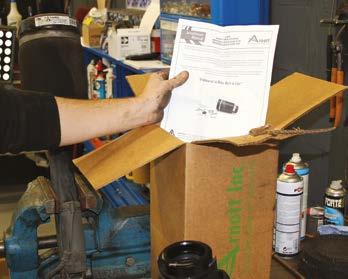
34. Any fascia warning message represents a fault code within the suspension ECU. Once noted and reset, restart the engine and verify that the compressor activates. Take the car for a drive to see if the fault reappears. 40. Exact removal and replacement procedures differ between makes and models, which is why Arnott's website lists instructions for most popular vehicles: www.arnottmanuals.com. Before fitting the new parts, ensure that all the connections are clean.
35. Should the compressor fail to start, check the basics, such as fuses and electrical wiring. The compressor that inflates the springs must not work


37. Spray a soapy solution onto the air springs and 38. Should you identify leaking springs (or if they are look for escaping air bubbles at every height setting. aged 6+ years), depressurise the system, disconnect Faulty height correctors can overextend the spring, the pneumatic connections and remove the units weakening the flexible material. from the car. The removed parts are still valuable
continually but intermittently. core for remanufacturing purposes.

41. Never allow the car's weight to rest on a new uninflated spring, because the spring might not seat properly and tear. With the wheel dangling, check the inflated spring for leaks and that air pressure is maintained at the selected heights.
ADVERTORIAL
Air springs – a deeper look
WHY BUYING A QUALITY PRODUCT DOES MAKE A DIFFERENCE
How do air springs work?
An air spring consists of a compartment that is filled with pressurised air and a rolling piston which is connected to the axle of the vehicle or integrated on the suspension strut.
The rubber sleeve is safely secured between the two components with high-grade steel crimping rings for durable, airtight construction. Together they form the ‘active area’ for the pressurised air. The ECU uses several inputs (e.g. height sensors, vehicle speed, acceleration sensor) to calculate whether the air spring should inflate or deflate air to obtain the predetermined ride height.
Outer elastomeric layer
First layer cords Intermediate elastomeric layer
Second layer of cords Inner elastomeric layer

Although an air spring is a wear and tear part, it can cope with high and low temperatures and has a high resistance to the constant abrasion of dirt and road debris. Arnott uses elastomer from respectable OEM manufacturers including Continental ContiTech, Vibracoustic and Goodyear. The sleeve construction is made with high quality elastomer material and consists of a 5-layer multi-ply design to provide a long-lasting structural integrity:
• Outer elastomeric layer • Cord layer • Intermediate elastomeric layer • Cord layer • Inner elastomeric layer.
Air spring characteristics
A conventional coil spring has a linear spring rate. This means that the same compression force is needed to compress it during the complete stroke. It can be tuned to progressive behaviour by changing the distance between the turns and/or varying in the thickness of the steel.
An air spring behaves differently. The force that is required to compress an air spring increases exponentially through the stroke. This means more force is needed to compress the air spring near the end of the stroke, resulting in an overall comfortable driving experience. The spring behaviour can be adapted to a more comfortable or sportier ride by changing the angle of the rolling piston. This is one of the reasons that a passenger car’s sport (air) suspension system usually features a different air spring than the standard (air) suspension for the same model.
Advantages
Air spring systems automatically level the vehicle, so the spring travel stays identical. This is very convenient when heavy cargo is transported in the boot. By comparison, a coil spring system is less comfortable, can be unstable and is more likely to ‘bottom out’ on rough roads or uneven surfaces (e.g. potholes).
By reducing the air inside the air spring, the ride height lowers at high speeds. This brings the vehicle closer to the ground decreasing the drag coefficient und thus reduces fuel consumption.
An inherent benefit of an air spring is that it naturally isolates the passengers from road harshness, resulting in a smooth and comfortable ride. Most car owners describe this as the biggest advantage of driving a vehicle with (factory) air suspension.
Engineered to ride, built to last
During the development and testing phase of a new air spring, Arnott thoroughly investigates the original construction and design and looks for possible engineering or quality flaws. If present, the design is adapted and improved to eliminate those. Arnott’s designs often enable easier or failsafe installations. After the development stage is finished, the product undergoes extensive road-testing (>3000 miles), durability testing, and burst testing to prove it meets the highest standards.
Although some cheap aftermarket air springs might look identical to the original part at first sight, the differences can be quite substantial. Making concessions – such as using inferior rubber, lower grade parts and /or consolidation in piston design – can result in lower burst pressure, difficult fitment, impaired damping comfort and more NVH (noise, vibration, and harshness).


