11 minute read
Braking system

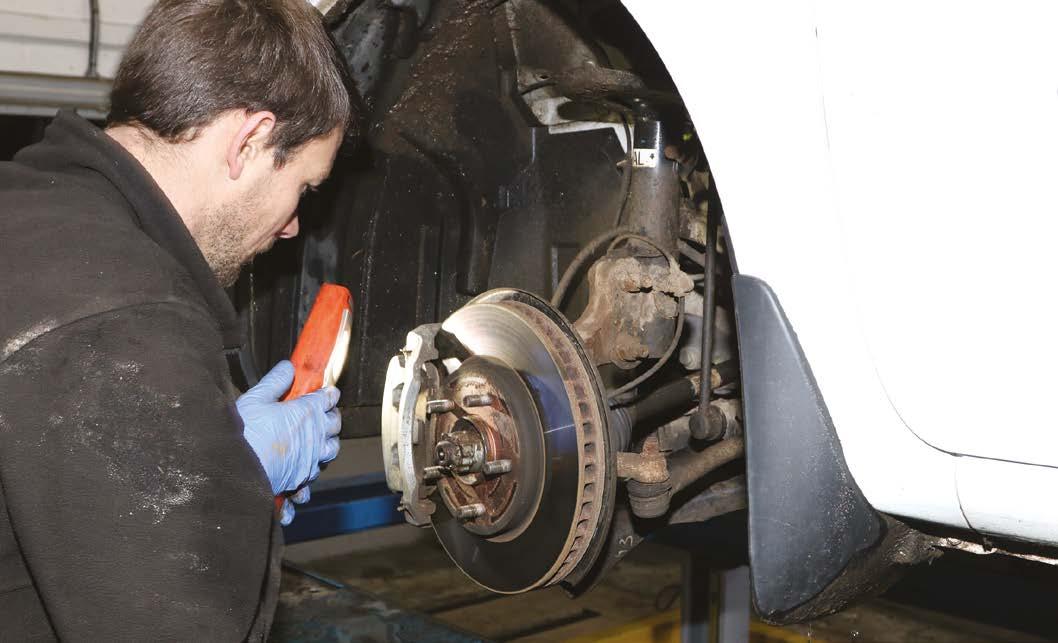
Even if you are replacing the components, inspecting removed parts will give clues about the health of the entire system
Check brake
Advertisement
Technicians are instructed to inspect various parts of the braking system but are often provided with precious little information thereafter, leading Rob Marshall to question quality parts manufacturers about checks that should be performed
In the quest for greater sales, you would have thought that parts manufacturers would prefer you to replace braking components blindly, rather than checking and refitting them, if found to be serviceable. Surprisingly, this is not the case. One reason is that a little extra time spent examining certain braking parts can identify issues with other parts of the system. While resultant extra work can boost revenue, it has the important role of enhancing vehicle reliability and proving to your customers that you are looking after not just their safety but also their financial interests.
The Pads
As AT detailed last year, (https://autotechnician.co.uk/ brakes-past-present-and-future/) the science behind brake friction material is quite awesome. Yet, technicians should not feel overwhelmed, when inspecting removed pads. As Comline attests, checking that the remaining friction material has not fallen below the required specifications, using a digital calliper set, is important. Yet, look also for trends in wear patterns, by comparing the remaining friction material between the inner and outer pads, as well as those on the opposing axle side. LKQ Euro Car Parts advises that, on discovering uneven wear, technicians should recommend a full brake inspection to the customer.
TMD Friction advocates inspecting the friction surfaces closely. Missing lumps, cracks between the backplate/friction material and additional crazing on the pad surface from heatrelated damage may point to binding. Should you suspect overheating, smell the surface to detect the pungent stench of burnt linings but avoid inhaling the dust.
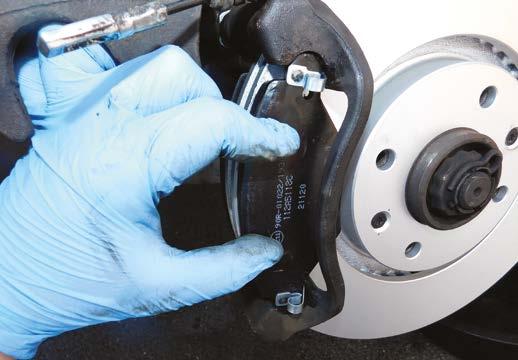
ZF reminds us that brake hardware issues are the chief causes of premature brake pad wear and so looking for lack of lubrication and corrosion between the calliper and pad mating surfaces are worthwhile starting points for your investigations. Delphi explains that, should you find that the outer pad is worn more than the inboard one on a sliding calliper application, the fixed mounting hardware (including the sliding pins) are likely to be responsible. Should the inner pad exhibit more wear, the calliper piston(s) might be seized. Other parts of the hydraulic system can also be to blame, however.
JURID adds that seized sliders can cause the friction lining to adopt a tapered wear shape, which can also cause squeal and judder. Delphi adds that poor instalment can also be responsible. Therefore, check that the calliper pins move freely and their rubber gaiters are intact. Excessive wear within the calliper can also cause the top edge of the pad to overlap the outer disc edge but Delphi Technologies adds that this condition can result from installing incompatible pads, or discs. The company, therefore, reminds technicians about the importance of purchasing and fitting correct OE quality parts.
Obviously, when removing pads, you will also dismount the anti-noise hardware, including springs and shims. As excessive noise is such a common customer complaint, both Comline and ZF agree that it is prudent to change the fitting accessories at the same time as the pads. Interestingly, ZF reports that pad return springs can lose half of their tension within 1-2 years, resulting in sticking pads, uneven wear and undesirable sounds. For more information on diagnosing brake noise, check out our previous advice on the topic: https://autotechnician.
co.uk/tag/brake-noise/

The Discs
Usually, brake discs are not replaced at every pad change. Whether they should be renewed, or not, depends greatly on the technicians' assessment of their condition, putting aside any pressures that may be exerted (rightly or wrongly) by management to replace discs, regardless. Yet, a degree of common sense should be applied. In some cases, the labour rate of carrying out disc checks might be close to the replacement costs.
Comline reports that obvious cracks and pits on the braking surface of one disc condemn the axle set as scrap. Additional visual checks include verifying that a friction surface is free from marks, lines and grooves, with an absence of 'bluing', a tell-tale sign of overheating. TMD Friction and Comline agree that a brake disc should not possess a significant wear lip on its edge but a measuring calliper (or brake disc micrometre) will determine the thickness. Measurements are taken from eight different points on disc circumference and compared against the manufacturer's specifications, provided on the disc side (as seen below left), or in the specification literature. Delphi states that the general maximum allowable thickness variation is ~ 0.015mm. Measuring runout properly, which is a popular cause of brake judder, requires a DTI gauge and the result is, again, compared against the maker's figures. Should they not be available, TMD Friction advises that, generally, this should not exceed 0.07mm for the discs and 0.01mm for the hub.
Brake drums and shoes
While it is true that the rear brakes perform relatively little foot brake retardation, the drums should be dismounted at least once annually. The cast iron drum itself is fairly robust, although worn shoes will score the friction surface. TMD Friction advises that, should you discover uneven lining wear, the drum may have worn oval. Additionally, verify that the automatic adjusters are unseized. Any retaining springs and mounting pins should be neither loose, nor corroded, and look for a lack of correct lubrication on the shoe edge mounting areas, which can encourage corrosion. If fitted, check that the hand brake cables are in good order and move freely. Also, if thus equipped,

ensure that the wheel bearings are undamaged and not worn excessively (by identifying roughness and noise) and that any sensor rings are not contaminated with excessive levels of dirt, or rust. Should you consult technical documentation, especially if you are deciphering the correct positions of the leading and trailing shoes, TMD Friction adds that the left-hand rear brake is always depicted in the literature.
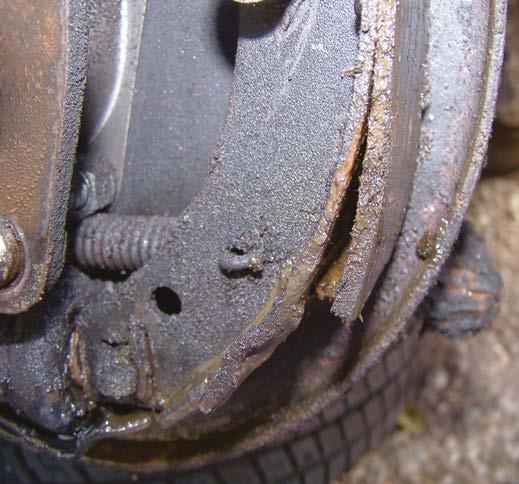
Comline recommends that, even if the linings have not worn to their minimum depths, you should look for cracking, or separation of the friction material from the metal backing, as pictured. Trailers and caravans, incidentally, are especially prone to the linings separating at these points.
Hydraulics
Clearly, wheel cylinders should be checked for leaks, while the drum is removed. Yet, TMD Friction says that you do not have to dismount the shoes to do so; simply pull back the dust boot with a finger, or a blunt tool. As the dust boots are not designed to retain fluid, any trace of wetness indicates damage afflicting either the internal rubber seal, or cylinder wall. Therefore, the whole assembly (and that on the opposing side) should be renewed before a serious leak results that contaminates the linings and prejudices brake safety. As wheel cylinders are relatively inexpensive, most garages simply remove and replace those fitted to modern vehicles, rather than spending time honing the bores and replacing the seals.
Fluid leaks beneath the car are fairly unusual but tend to be obvious. While metal pipes and unions are inspected for excessive corrosion at MOT Test time, rubber flexi hoses are checked for perishing. Yet, they can collapse internally, allowing fluid to pass one way under pressure but, when the brake pedal is released, the hose acts as a one-way valve, keeping the affected brake(s) applied. Should slackening a bleed nipple free a binding brake, suspect the brake hose for internal degradation, despite appearing to be in satisfactory order on the outside.
Detecting master cylinder leaks is not always easy but Jurid advises that a master cylinder leak test is a quick process. It involves attaching a pressure gauge to the closest brake calliper brake pipe, before pressurising the system via the master cylinder reservoir to 50 BAR for 45 seconds. Should the pressure drop by more than 4 BAR, the master cylinder requires further investigation. For some systems, where such pressures are too high, the test can be performed at 10BAR but check for longer pedal travel in addition to a pressure reduction.
Fluid tests


While black fluid indicates a clear problem, it is not easy for technicians to check visually for water content. Brake fluid's moisture-absorbing nature means that an analysis should be performed at every annual service. Jurid reports that conductivity testers (such as that pictured) estimate the water content and are not especially accurate, because they can fail new fluid and pass contaminated fluid. Jurid elaborates that this may be because brake fluid conductivity varies between manufacturers and even batches. TMD Friction agrees that not all brake fluid testers are the same. It finds that a brake fluid tester, which does not heat the fluid, is likely to give misleading, or even dangerous, results. Therefore, using a tool that boils the fluid is the only sure way of testing brake fluid water content accurately.
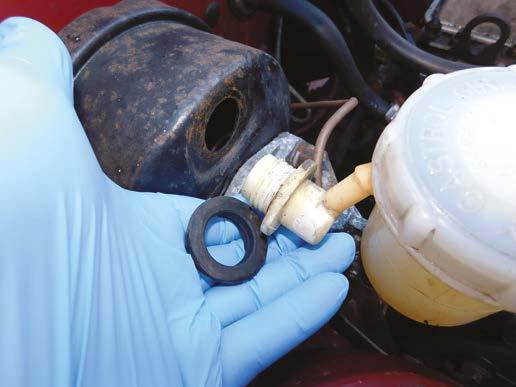
Brake servo and its non-return valve
The non-return valve is installed between the brake servo and intake manifold, or the vacuum pump. When the engine is switched off, the valve closes to maintain vacuum, thus storing a degree of brake-assisting energy until the engine is restarted. Should this one-way valve stick open, the system will experience rapid vacuum loss. Should it jam shut, no vacuum will be generated. Either way, the driver will have to depress
the brake pedal with considerably more force than intended, the safety consequences of which are obvious.
To test it, TMD Friction recommends that you connect a handheld vacuum tester to the engine side of the non-return valve, either by disconnecting any small vacuum pipes present, or by teeing into the main vacuum pipe from the engine/ vacuum pump. Start the engine and leave it idling until the tester's gauge achieves a steady vacuum reading. Switch the engine off and check that the vacuum is maintained for five minutes. If it succeeds, prise the non-return valve from the servo and connect the vacuum tester to the servo side of the valve and repeat the test procedure.
Should the valve fail either test, a reason may be internal oil contamination. Replacing it is the only option. Yet, it is possible that the servo may have suffered, too. TMD Friction advises that the valve also prevents oil and fuel fumes from entering the servo, to protect its diaphragm. A quick test can be performed with a known working valve fitted. With the engine switched off, press the footbrake repeatedly, to exhaust any residual vacuum from the system, until the pedal feels firm. While still applying firm pressure to the pedal, restart the engine. Should the pedal sink slightly as the engine fires, a vacuum is being generated. If the pedal does not move, the power assistance is insufficient and the servo is likely to be at fault.
Despite the ease of this test, TMD Friction still recommends that you conduct further checks to confirm that the system holds vacuum for an adequate period. With the non-return valve removed, connect the vacuum tester to the servo and, using a hand pump, ensure that the vacuum generated can be held for five minutes. A reduction in negative pressure indicates a failed servo but, before you condemn the expensive unit, check that the one-way valve's rubber grommet has not perished.
Rear and park brakes
Obviously, rear brakes are not as hard-working as those on the front. Jurid reports that, generally, the rear axle handles 30% of the foot braking effort but, if the back brakes' performances are below par, the front axle brakes will have their workload increased by up to 20%, causing increased wear and, potentially, more noise.
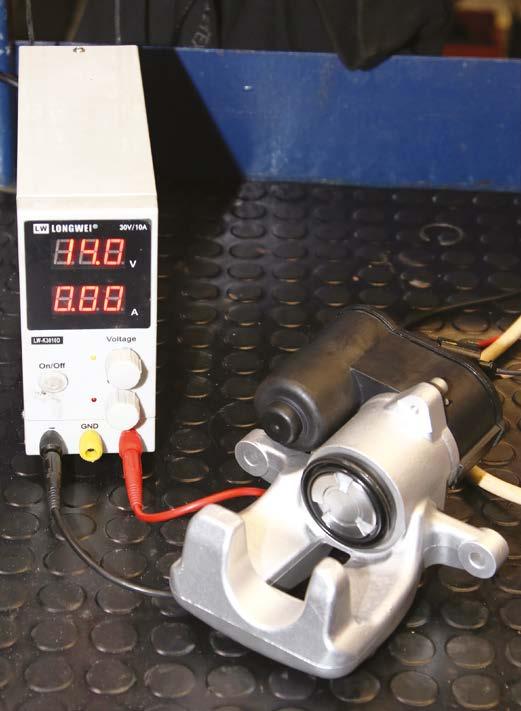
Rear disc brakes' greater exposure to moisture makes them more vulnerable to corrosion-related seizure, which explains why some electric cars (such as Volkswagen's ID.4) employ drums, instead. Although stuck callipers can be diagnosed and freed using the same methods as those used on the front, the situation is complicated by the park brake mechanism. The 'feel' from the manual park brake lever will provide a clue about the mechanism's health. A very stiff action, or excessive/ insufficient reserve travel, are typical clues that all is not well. The technician will then need to identify whether the cables, or callipers are to blame.
Problems with Electric Park Brakes (EPB) tend to manifest themselves with an illuminated fascia warning lamp, at which point EOBD diagnostic intervention forms part of the faultfinding process. While we shall look into EPBs within a separate feature, TMD Friction reports that stripped nylon gears within the EPB actuator is the most common fault it has experienced.