DIMENSIONING Together with creating section views, we can create dimensions, since most likely these will be the views where the dimensions are going to be created. Before undertaking the automatic placement of dimensions, there should be a strategy about how the graphs can tackle simpler dimensions such as dimensions of rectangular objects or dimension strings that are between grid lines or other curve-based objects. When the dimensioning becomes more complex, such as dimensions from Family Instance to Family Instance or non-standard reference lines within the family, the dimensions may need to be cleaned or manipulated after their original creation to ensure quality. For example, if there is a small distance between multiple objects that are being dimensioned, the dimension values can overlap and the dimension values will need to be adjusted so the leader is pointing back to the narrow dimension line. These types of issues can be less apparent or more apparent from project to project, but it should be a critical part of the discussion when deciding what should be automatically dimensioned and to what extent the automation versus the users should be involved.
CREATING SHEETS AND CENTERING VIEWS ON SHEETS
Figure 7: Create sheets and center views on sheets
Now we have an opportunity to create sheets and place the 3D views that we’ve created as their main content.
PRODUCT FOCUS
Revit MEP
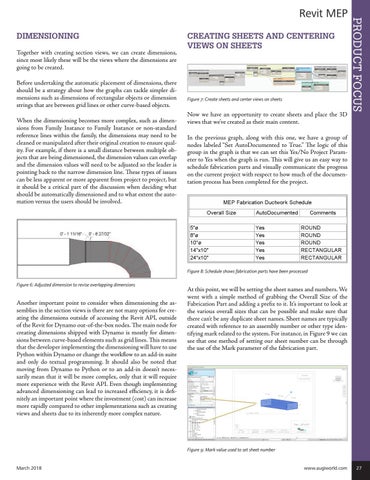
In the previous graph, along with this one, we have a group of nodes labeled “Set AutoDocumented to True.” The logic of this group in the graph is that we can set this Yes/No Project Parameter to Yes when the graph is run. This will give us an easy way to schedule fabrication parts and visually communicate the progress on the current project with respect to how much of the documentation process has been completed for the project.
Figure 8: Schedule shows fabrication parts have been processed Figure 6: Adjusted dimension to revise overlapping dimensions
Another important point to consider when dimensioning the assemblies in the section views is there are not many options for creating the dimensions outside of accessing the Revit API, outside of the Revit for Dynamo out-of-the-box nodes. The main node for creating dimensions shipped with Dynamo is mostly for dimensions between curve-based elements such as grid lines. This means that the developer implementing the dimensioning will have to use Python within Dynamo or change the workflow to an add-in suite and only do textual programming. It should also be noted that moving from Dynamo to Python or to an add-in doesn’t necessarily mean that it will be more complex, only that it will require more experience with the Revit API. Even though implementing advanced dimensioning can lead to increased efficiency, it is definitely an important point where the investment (cost) can increase more rapidly compared to other implementations such as creating views and sheets due to its inherently more complex nature.
At this point, we will be setting the sheet names and numbers. We went with a simple method of grabbing the Overall Size of the Fabrication Part and adding a prefix to it. It’s important to look at the various overall sizes that can be possible and make sure that there can’t be any duplicate sheet names. Sheet names are typically created with reference to an assembly number or other type identifying mark related to the system. For instance, in Figure 9 we can see that one method of setting our sheet number can be through the use of the Mark parameter of the fabrication part.
Figure 9: Mark value used to set sheet number
March 2018
www.augiworld.com 27