With all of the parameters in place, a schedule can be created. Go to the View tab of the ribbon and select Schedules, then Schedule/ Quantities tool.
The Filters tab can be used to filter out certain fixtures. For this example, set Filter by: to (none).
In the New Schedule dialog, select Lighting Fixtures as the category. It is also a good time to type over the given name with all caps or change the name as needed. Then click OK.
The Formatting tab can be used to give the schedule headings different names than the parameters they report. In the example below, the parameters of Schd-Fixture Number will fall under a column named FIXTURE No#.
The Sorting/Grouping tab is used to sort the data. Since The fixture number is the first column, sort ascending by Fixture Number. Also uncheck the Itemize every instance check box at the bottom of the Sorting/Grouping tab.
Autodesk
Revit MEP
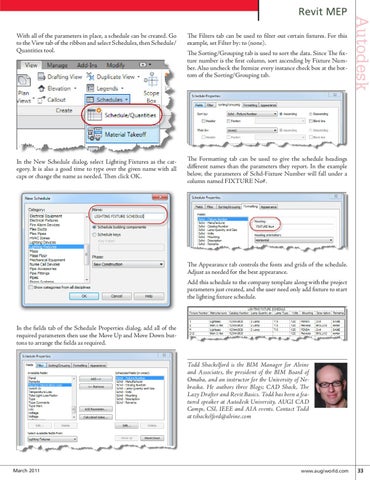
The Appearance tab controls the fonts and grids of the schedule. Adjust as needed for the best appearance. Add this schedule to the company template along with the project parameters just created, and the user need only add fixture to start the lighting fixture schedule.
In the fields tab of the Schedule Properties dialog, add all of the required parameters then use the Move Up and Move Down buttons to arrange the fields as required. Todd Shackelford is the BIM Manager for Alvine and Associates, the president of the BIM Board of Omaha, and an instructor for the University of Nebraska. He authors three Blogs; CAD Shack, The Lazy Drafter and Revit Basics. Todd has been a featured speaker at Autodesk University, AUGI CAD Camps, CSI, IEEE and AIA events. Contact Todd at tshackelford@alvine.com
March 2011
www.augiworld.com 33