feature focus
Cross-Discipline
by: Gabe Cottam
Visibility / Graphic Overrides for Revit Links
➲
W
orking as a BIM manager provides the opportunity to peer inside a wide variety of Autodesk® Revit® models from across all disciplines. What one sees while perusing often amazes and inspires. The creativity with which counterparts at other firms have tackled challenges in their own models can give you the strength and hope needed to push ahead with your own puzzles. What one sees while perusing also often shocks and horrifies. What were they thinking?! Who in their right mind would use {insert unintended category} to model a {insert intended category}? That’s crazy!
What this means for those of us tasked with placing another firm’s model into our own (AND getting it to show up as they intended within each of our own views) is often an ordeal. Every now and then it can also become a bit of a cat-andmouse game as one tries to find in which category that thing was originally created in the linked model. These issues are amplified by working with a diverse range of companies and disciplines. Each group, at its own level of Revit adoption and learning and each with its own company-specific needs, is trying to meet within the limitations of the software. Here I will discuss the essentials of visibility graphic overrides for Revit links, how to get your linked file to show you what you want to see, and some tips for chasing down those elusive elements so you can tweak them or turn them off altogether.
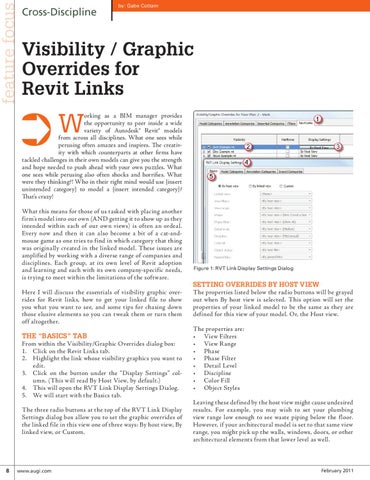
The “Basics” Tab From within the Visibility/Graphic Overrides dialog box: 1. Click on the Revit Links tab. 2. Highlight the link whose visibility graphics you want to edit. 3. Click on the button under the “Display Settings” column. (This will read By Host View, by default.) 4. This will open the RVT Link Display Settings Dialog. 5. We will start with the Basics tab. The three radio buttons at the top of the RVT Link Display Settings dialog box allow you to set the graphic overrides of the linked file in this view one of three ways: By host view, By linked view, or Custom.
8
www.augi.com
Figure 1: RVT Link Display Settings Dialog
Setting overrides By Host View The properties listed below the radio buttons will be grayed out when By host view is selected. This option will set the properties of your linked model to be the same as they are defined for this view of your model. Or, the Host view. The properties are: • View Filters • View Range • Phase • Phase Filter • Detail Level • Discipline • Color Fill • Object Styles Leaving these defined by the host view might cause undesired results. For example, you may wish to set your plumbing view range low enough to see waste piping below the f loor. However, if your architectural model is set to that same view range, you might pick up the walls, windows, doors, or other architectural elements from that lower level as well.
February 2011