ogic has a clever L trick up its sleeve. It offers a default amount of empty slots for auxiliary sends and inserts, and every time you fill one it automatically creates a new slot (up to a max of 10) waiting for your next creative flash of inspiration. Apart from these single ‘spares’ you’re never losing screen space to unnecessary, unused slots. It keeps the mixer view compact and neat. However it is global — if you need five inserts on one track that’s how many you end up with on all tracks.
sometimes you don’t want to view all of them at mixdown. Here’s an example: you’ve got 12 tracks of MIDI for your drums (kick, snare, etc...) but you’ve since rendered them down to audio files for mixing (yes, yes... converting MIDI to audio — we’ll get to that later!). Those MIDI drum tracks are now redundant, but you don’t want to delete them. Believe me, you shouldn’t dump anything that’s still being used in a project, even if you’ve converted it to something else. Because you never know when you’ll need it again. Still, when you switch to the Mixer view to start mixing down your song, you’ve got these 12 MIDI tracks taking up valuable screen space and getting in the way. What you do is set these MIDI tracks to ‘Hide’, choose ‘OK’ and the tracks vanish! Don’t worry, they haven’t been deleted — just ‘hidden’. This leaves only the tracks you want to work with visible in the Mixer. The same approach is used for seeing different plug-ins, inserts and sends for the individual tracks. Check out the examples at the bottom of the previous page. Look at how Cubase deals with it and you’ll see that a large section of the channel strips can be switched between which parameters you want to view and use — or simply the ‘look’ you prefer. A drop-down box lets you choose. You can also use the icons on the left to view these parameters across all the channels, rather than just one. Pro Tools approaches this without icons. You use the Menu bar to select the features you want visible in each window. Apple’s Logic is the same using a drop-down menu to choose what is visible on each channel strip. However, it’s only a global function affecting all the tracks. Sonar does it slightly differently again. You can choose to fill the channel strip with all the different parameters (or leave areas blank, which most engineers will just find weird) and there are drop-down boxes to open the various sections for each — the frequency band for the EQ or which Effects Send, for example.
Missing the Buss With some larger analogue mixing consoles (rather than digital desks) you could be wiring up different physical outputs and assigning parts of the desk via buttons and DIP-switches to send signals all over the place, which meant that your signal path went to a separate electronic circuit board with its own buss or ‘buss-bar’. In the virtual world it doesn’t happen and with the larger digital consoles it’s usually just a different nano-cpu transistor thingy on a circuit board the size of a 10 cent piece. Still, like a lot of things, terms such as buss and sub-group have migrated into DAWs and digital mixers.
Mix Advantages We know it’s easy to tweak all these parameters — EQ, effects, yada yada — in the Arrange window using the channel strip or the Track Inspectors. So what makes the Mixer View so special? Those of us who have used hardware consoles for years can’t imagine mixing down a song in any other way, but if you’re new to music and recording, and DAWs are your introduction to both, then it’s maybe not so obvious. The Mixer View gives you a better visual interpretation of your project — it’s easier to see what’s happening in the mix at a glance. The volume and pan relationships between the channels is the bedrock of a good mix and can be seen more readily via the Mix window as opposed to one by one via the Arrange window. It’s a better, friendlier environment for adjusting Send levels and Inserts too. The Mixer View is also brilliant for ‘grouping’ or ‘sub-grouping’ tracks together — an important part of mixing. You create these groups and assign tracks to them. Groups This is touching on a much-misunderstood area of mixing, because there’s different terminology often used for the same process. An ‘output’, a ‘group’ and a ‘buss’ are all created the same way, but get their names from the various purpose they have. How did this happen? Again, it’s all about signal paths. To make things easier to explain we’ll say that your DAW soundcard has only one main stereo output — for now. This means that whatever you do, no matter how clever and tricky you get with your mixing, ultimately the signal path will end at that stereo output and will be input into some kind of amplifier, speakers or headphones.
Therefore this is a ‘Main Output’ and controlled by a pair of linked faders on your mixer. All the channels (to begin with) go to this stereo output which is also, by the way, a ‘buss’ in its own right. What’s a Group? Let’s say in your project you’ve got 12 drum tracks. The drummer played louder and louder as the recording session went on. What you have to do is slowly reduce the fader levels of the drums to compensate throughout the song, but grabbing all 12 faders at the same time isn’t simple (and we haven’t explained automation yet). What you can do is create a Group output, call it ‘Drums’ and change the drum tracks’ signal path away from the default stereo output and to the Drums stereo group instead. Now you’re controlling all 12 channels with just the two Group faders and you can also, if you want, insert an effect like a compressor over the top which would compress all the drums. The Drum group’s output goes to the stereo output, instead of the drum tracks individually being routed there. You can do this with any or all of your tracks. You can create a Group for your vocals, perhaps all your guitars... there are plenty of reasons you might want to collectively change the volume of several tracks at once. However, the ability to insert effects over groups will become more important and very useful as you learn more about it. Buss Definition What about a ‘buss’? A buss is almost the same thing except usually it’s an alternative hardware output for your tracks. A way of re-routing a signal somewhere different from your main stereo output for a special reason. Most DAWs achieve this by creating a Group in exactly the way described above, but having the output of the Group not being the stereo output, but some other hardware option. Why would you do this?
Save As Project files for the various DAWs are very small, unless you’ve got a setting in your Preferences to automatically copy all your audio data to a new location. You’re not going to cause too many hard drive space problems using the Save As command to create different versions of your project. So for example you could delete all your MIDI tracks and save the project as ‘My Song Audio Only’ if you’re confident they’re completely redundant, rather than setting the MIDI channels to ‘Hide’ in the mixer. In a crisis, you can get them back again by reloading the original project. ProTools takes the idea further with “Playlists” and other DAWs are now offering ways to save different versions without creating another whole new project. But if you’re not sure how these work, the Save As option is always a safe bet.
The small, but vital difference between creating Groups for drums and vocals for your mixing purposes and the ‘buss’ type of Group is that the latter doesn’t go into a final mix down. It’s a completely separate, individual signal path that goes to another output. You might send your drums to an output buss that has an expensive hardware compressor attached. You’ll process your drum
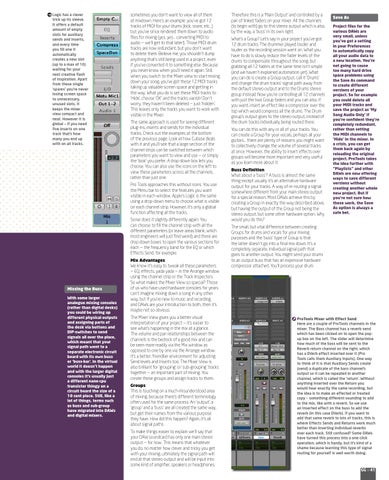
roTools Mixer with Effect Send P Here are a couple of ProTools channels in the mixer. The Bass channel has a reverb send which has been clicked on to open the popup box on the left. The slider will determine how much of the bass will be sent to the Reverb return channel on the right, which has a DVerb effect inserted over it (Pro Tools calls them Auxiliary Inputs). One way to think of it is that Auxiliary Sends create (send) a duplicate of the bass channel’s output so it can be repeated in another channel, which is called the ‘return’. Without anything Inserted over the Return you would hear exactly the same recording, but the idea is to make an effected or treated copy — something different-sounding to add to the mix, like with a reverb. So we use an Inserted effect on the buss to add the reverb (in this case DVerb). If you want to add that same reverb to lots of tracks, this is where Effects Sends and Returns work much better than inserting individual reverbs over each track. Still confused? Some DAWs have turned this process into a one-click operation, which is handy, but it’s kind of a shame because learning this type of signal routing for yourself is well worth doing.
GG :: 41